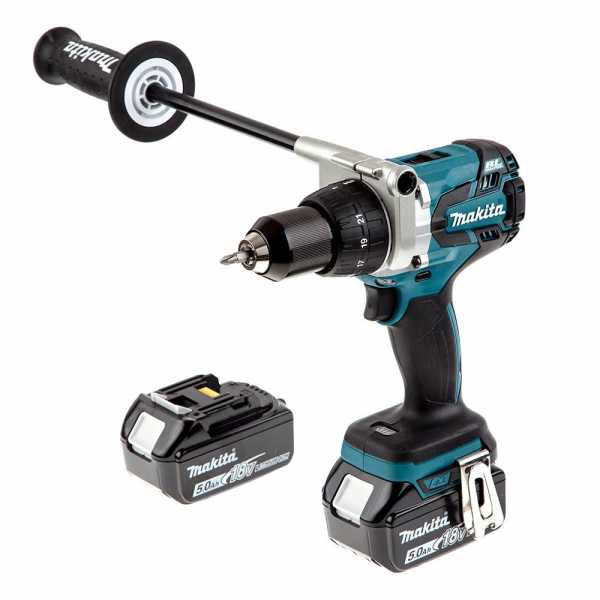
How to remove a threaded chuck
Let's consider how to remove the chuck from a screwdriver, in which the cylinder is attached to the spindle using a thread.
The scheme is as follows:
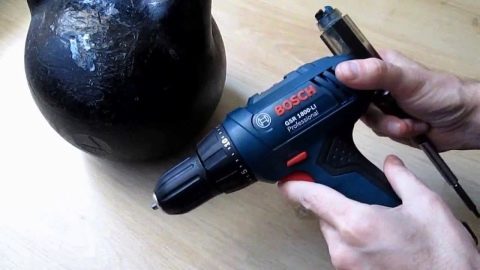
- unscrew the threaded fastener using the L-shaped hexagon;
- insert a key (usually 10 mm) with a short part into the cylinder and securely fix with cams;
- at low speeds turn on and then turn off the screwdriver; in this case, the free part of the hexagon must hit the support.
As a result, the threaded fixation will loosen and the clamping cylinder can be easily removed from the spindle.
If the mount is very strong and all three methods do not work, then the instrument must be disassembled.
How to remove the sleeve in this case is described above.
Situations requiring the disassembly of a drill or screwdriver arise when preventive work is neglected - the planned removal and cleaning of the "clamp".
It is also recommended to rest the instrument at least every 15 minutes.
Then the repair can be postponed, and you can protect yourself from unnecessary difficulties with removing the clamping device.
Cartridge Removal Examples
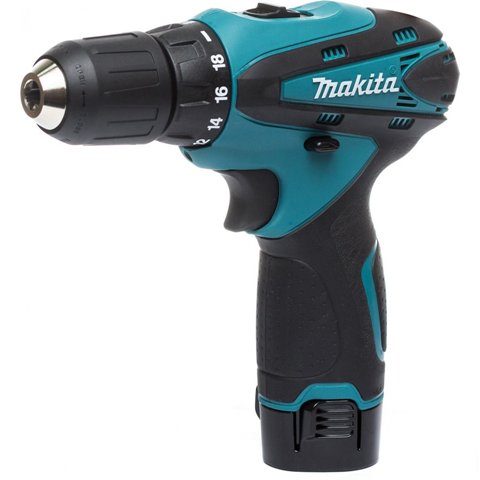
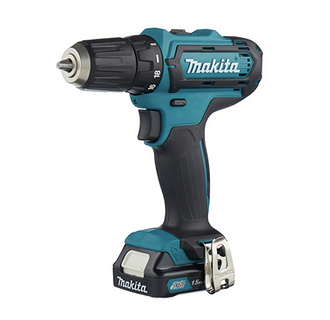
Owners of Makita screwdrivers are usually faced with the need to remove a chuck that uses a threaded retention with a secondary screw fastening.
In such cases, it is necessary:
- unscrew the screw;
- activate the shaft stop button;
- wrap the screwdriver body with a thick cloth and fix it in a vice;
- clamp the hex key in the cams;
- hit the key with a hammer and unscrew the cylinder.
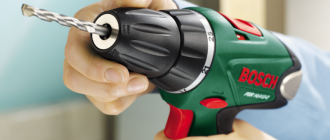
Bosh tools are also most often equipped with a locking screw.
To remove the chuck, it is not always necessary to clamp the screwdriver body in a vice.
In many cases, it is enough to put it on a table or other support, press the stopper button, remove the cartridge lock and the cylinder itself.
With models of other manufacturers, you need to do one of the described methods.
The sequence of actions in these cases is the same:
- we determine the fastening method;
- according to the diagram, we remove the part.
Types of cartridges
More details about the types.
Clamping devices of screwdrivers are divided into:
quick-clamping:
- single-seat;
- double-clutch;
- self-tightening;
- key.
The first two types are similar.
The main difference lies in the fact that self-clamping models fix the products automatically.
If the tool has a lock, single-cylinder cylinders can be used.
In the absence of a blocker, you will have to use a two-clutch type.
Elements with one sleeve can be clamped with one hand.
The other type requires both hands.
The quick and self-clamping models are mainly designed for modern tools.
For example, for pneumatic screwdrivers.
Models with automatic clamping are convenient for those who have to quickly and often change different attachments.
Key options are less convenient, but more reliable. They grip better and are more shock resistant.
If the cylinder will be used in an intensive mode, it is recommended to choose a screwdriver with a key.
Types of cartridges
Industrial companies have mastered several types of cartridges used for their screwdrivers, some are interchangeable, others are strictly individual. Each species has a number of advantages, but none is devoid of disadvantages. This is probably why a single universal type of product has not yet been developed that would satisfy the desires of consumers and the capabilities of manufacturers.
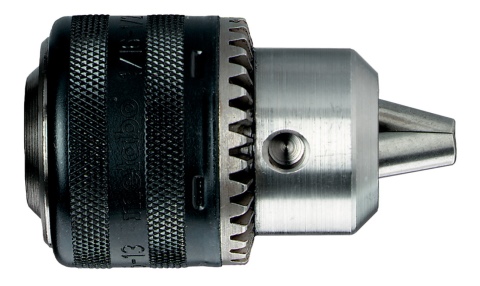
The keyless chuck is distinguished by its simplicity of design: a steel sleeve with a grooved surface is installed on the steel spindle for ease of holding it by hand. To tighten, you do not need a special key that requires constant attention. This is one of the most reliable and durable types of cartridge, but it also becomes unusable over time with active use. Round shank drills become more and more difficult to tighten as they begin to turn.Over time, the jaws that hold the drill will trigger. It is better to simply replace the product.
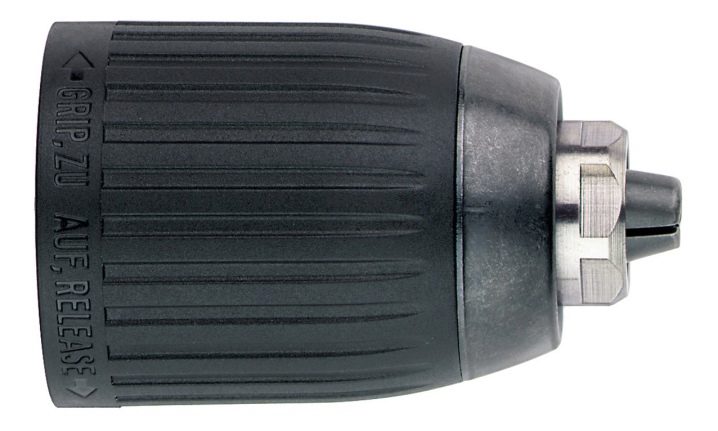
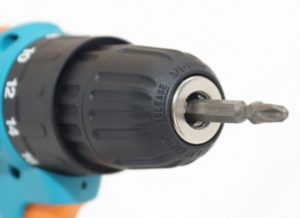
The self-locking chuck also does not require a special key. This is one of the most technically advanced cartridges. It does not require the use of muscle strength to tighten it. A slight turn of the movable coupling is sufficient. Some screwdriver models use single sleeve chucks. Others have two swivel couplings. This type of chuck is most convenient for frequent changes of working attachments, for example, when drilling alternates with screwing screws and you have to quickly rearrange the drill and bit. The main body parts of this chuck are made of tool steel, and the outer parts are plastic.

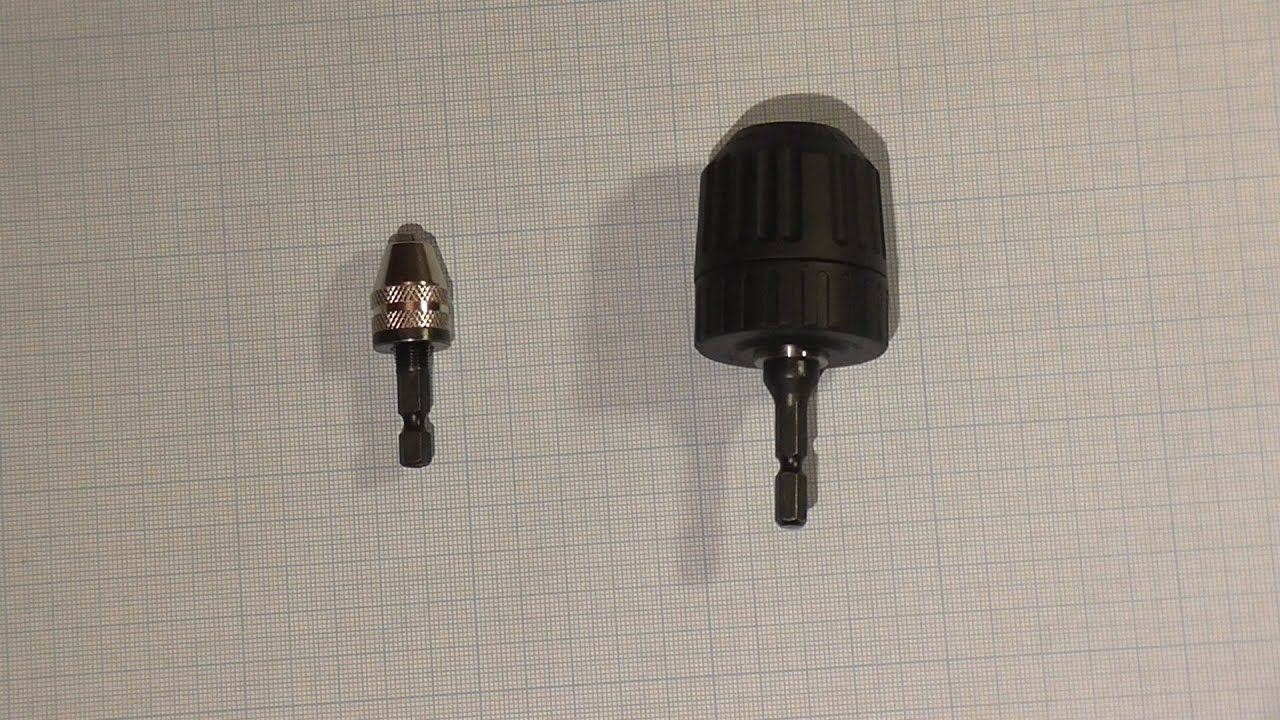
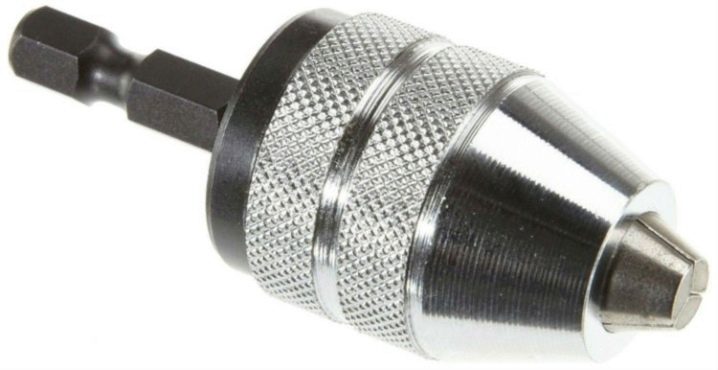
Chuck with hex shank (hexagon). As the name implies, the shank of this product has a hexagonal shape. This chuck also does not require a special key. This type of knot is widespread on mini-drills and for special engraving machines used in jewelry making and bone carving. Also, special collet chucks are used for mini-drills and drills. With the help of such micro-tools, holes are drilled for mounting electronic boards.

Seat
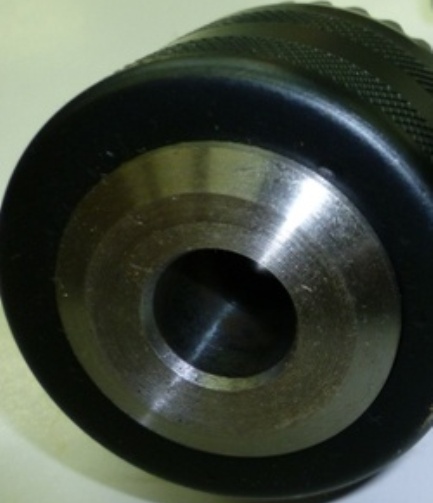
It can be threaded or tapered. Most modern models use a threaded connection. However, sometimes it is also tapered - mainly on drills with a chuck for a maximum shank of 16 mm.
The thread can be metric, but in most cases on modern drills, it goes in inch. Manufacturers always write directly on the chuck what thread it has, if, of course, it is threaded.
Inch thread comes in the following sizes:

The most common are 3/8 and 1/2. These two fits can be used on chucks with a maximum clamping shank of 10 and 13 mm. The 1/2 fit is rare, but it is also found on chucks with a clamp up to 16 mm. 1/4 is a fit on cartridges up to 6.5 mm, and 5/8 is again up to 16.
Metric thread is available only M12. Suitable for chucks with clamping up to 10, 13 and 16 mm.
The tapered seat may be designated B12, B16 and B18. The numbers indicate the diameter in millimeters. They are used on chucks with clamping up to 10, 13 and 16 mm. And with the latter diameter most often.
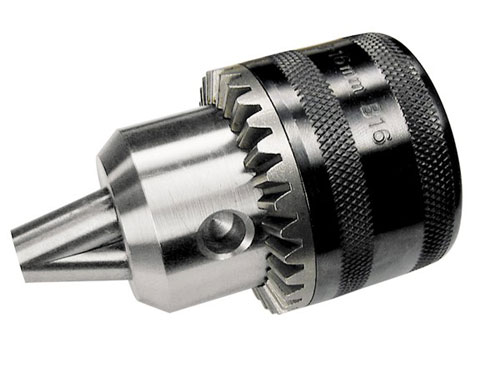
That's all I wanted to say about the dimensions of the drill chucks. Hope I helped you figure this out. I finish the article on this - see you soon!
Keyless and keyless
There are several types of drill chuck. There is a thread, there is a cone, which are simply pushed on, and not twisted. Let's consider them in more detail so as not to be mistaken when choosing.
Threaded chuck
.
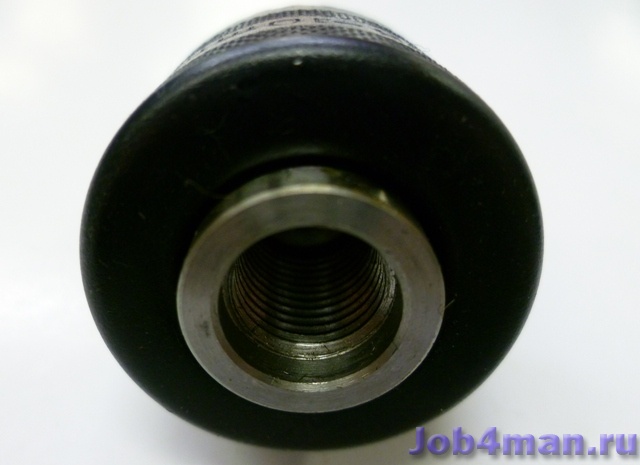
On thread
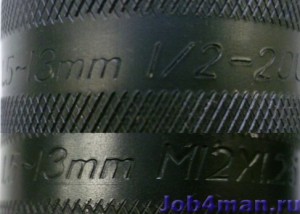
different types
Choose the right one, the cartridges are not interchangeable, if there is a marking on the M12 * 1.25 cartridge, then take this one. If M12 * 1/2 - 20 UNF - then only this. If the inscription is erased, you will have to remove the cartridge from the drill, take it with you to the store.
How to remove it
?
To do this, twist the cartridge counterclockwise. Sometimes the cartridge is additionally fastened with a screw, which is located in the center of it,

Chuck on cone
.
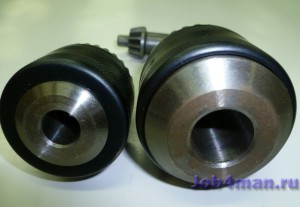
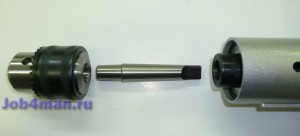
There are cartridges with a key, there are quick-release
(in the first photo).
The advantages of quick clamping include the fact that it is convenient to quickly change drills,. The disadvantage is that sometimes the drills can turn, especially if the shank is cylindrical (round), and not hex, especially when the drill for metal is of large diameter. The load is great, but you cannot tighten it with your hand, which cannot be said about the “classic” cartridges, which are wrapped with a key. In my opinion, this is much more reliable. The only drawback is that you can lose the key, for this it is logical to screw it onto the drill cable with electrical tape so that it is always in its place.
There are 1/4 '' hex shank chucks that can grip drills from 0.6mm.
The keyless chuck at an affordable price is the main advantage of our store, which sells only reliable and practical devices, which are covered by a three-year quality guarantee.
The main types of chucks for a drill
By design, drill clamps are divided into two main types:
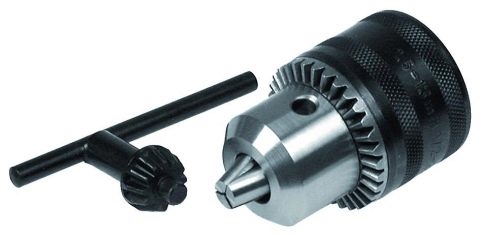
- a gear-girth chuck, in which the tool shank is clamped using a special key;
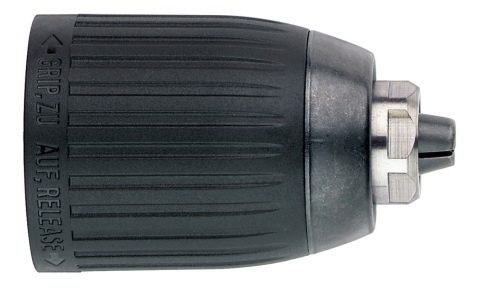
- keyless chuck for a drill (BZP), in which the clamping sleeve is actuated by means of its manual rotation.
Varieties of drill chucks
Clamping jaw chucks, installed on modern drills, allow you to reliably fix tools with a shank diameter in the range of 1–25 mm. Devices of this type are practically devoid of disadvantages, the most significant of which is their rather high cost.
The most popular type of clamping device installed on modern models of drills is the keyless chuck (BZP). To fix the tool in the BZP category chuck, just a few seconds are enough, and there is no need to use a special wrench. Clamping of the tool shank is carried out by manual rotation of the adjusting sleeve, on the outer surface of which a corrugation is applied, which facilitates the implementation of this procedure. In order to regulate the mechanical stress created on the tool shank, a special locking device is provided in this type of clamp.
To fix the drill, hold the lower sleeve with one hand and tighten the upper sleeve clockwise with the other.
The most significant disadvantages of the BZP include the fact that in cases where the elements of its mechanism wear out, it does not securely fix the shanks of large-diameter drills. This leads to the turning of the tool during operation.
Compared to clamping devices of the BZP category, gear chucks for equipping a drill provide reliable fixation of the tool in any situation. Users who often work with electric drills prefer this type of chuck. The only significant drawback of such devices is that the key with which they are activated is quite easy to lose. Meanwhile, the occurrence of such a problem can be easily avoided if, immediately after purchasing the drill, fix the key on the device wire using insulating tape or ordinary rope.
The diameter of the shank of the accessory clamped in the mini-chuck depends on the caliber of the collet
The chuck for mini-drills, installed on compact drilling devices, is also very popular. The latter are actively used by jewelers. The mini chuck belongs to the category of keyless chucks for a screwdriver or light drill. This small chuck, made primarily of brass, is used to hold tools with shank diameters in the range of 0.1–4.5 mm.
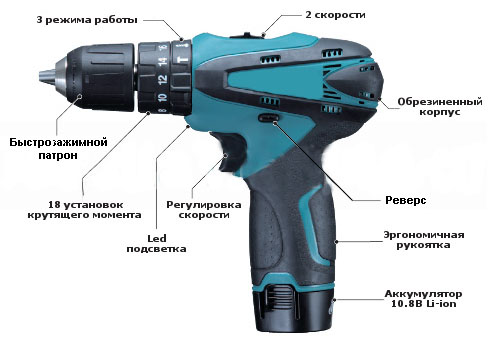
How to adjust RPM and effort
The rotation speed is changed by a switch, which is located on the screwdriver body. High speed is used for large bolts and self-tapping screws, and for drilling, if this function is present.
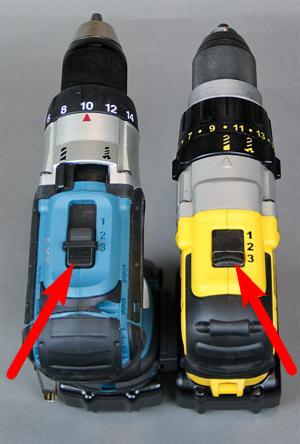
Speed shifter
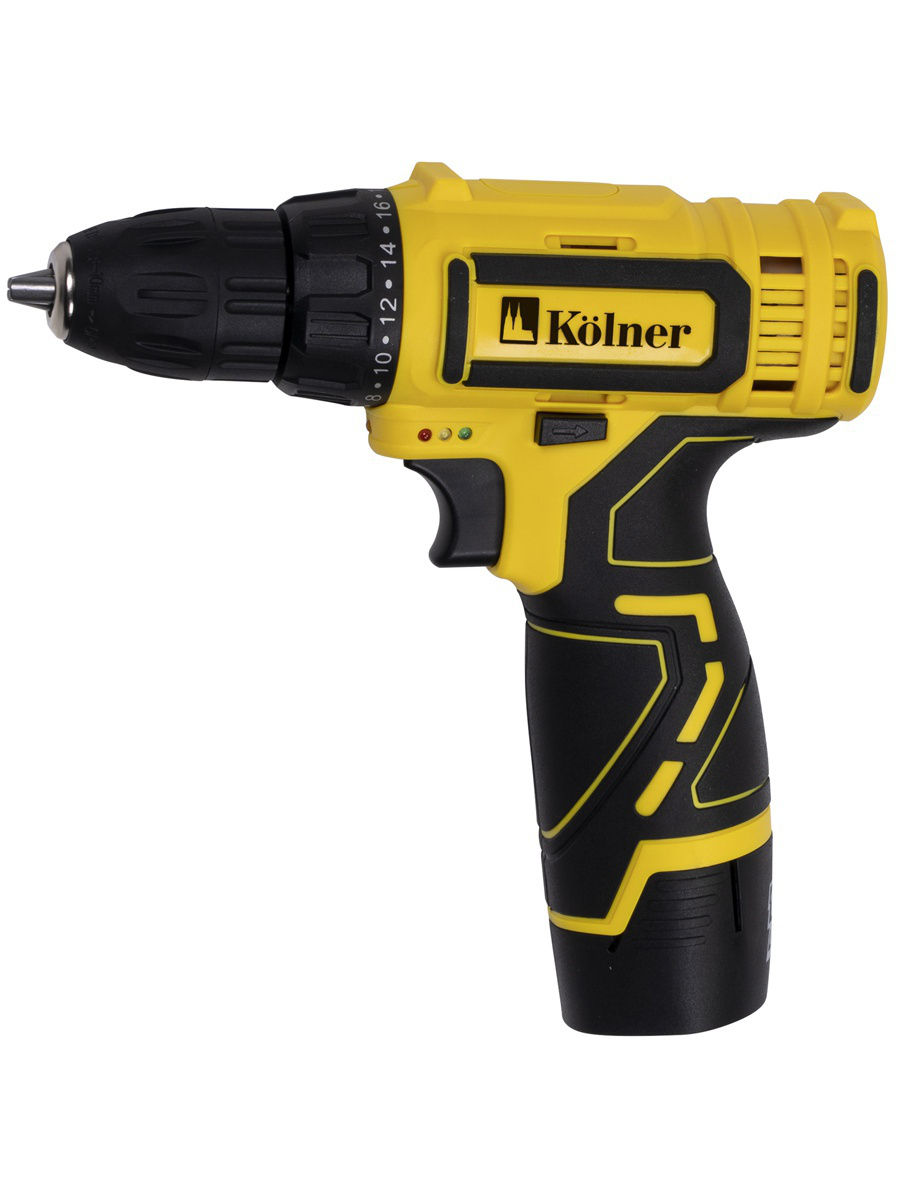
Many models have a force limiting clutch. Its presence in a power tool can be identified by a rotating ring with numbers. Some users do not understand the meaning of the clutch and do not touch it. Using a ratchet, you can adjust the screw-in depth of the self-tapping screw. In too soft material, the head of the fastener is easily recessed and can go through. When using small fasteners, very high torques can destroy them. The ratchet prevents cutting of the slot at the self-tapping screws and the wear of the screwdriver bits.To determine the desired value on the adjusting ring, make several passes, starting from the minimum. The maximum torque is used for the drilling mode. But only if there is such a function.
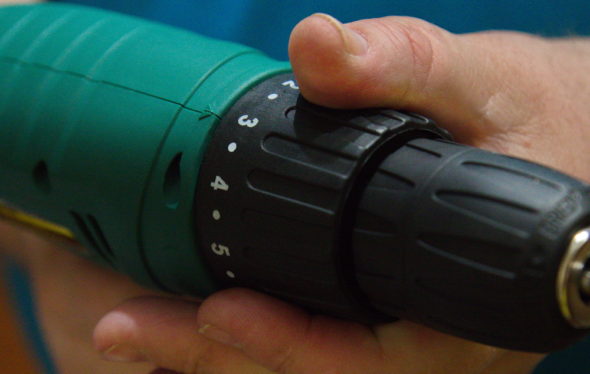
Force limiting clutch
The start button also controls the rotation speed, but not more than the one set by the switch. Let's say you put the switch on the first speed, which is declared up to 800 rpm. When the trigger is pulled to the maximum, the speed will not rise higher. And the torque in the maximum mode will be low, that is, you will not be able to tighten large self-tapping screws and drill. And if you set the switch to maximum speed, you can drill and the RPM will be much higher.
Adjust speed, torque and reverse when the tool is off.
Design features
The main types of chuck for household drills are as follows:
- keyless or BZP, convenient to use, allowing you to easily and quickly change the tool, but the strength and durability are not too high; nevertheless, drills with keyless chucks (with one or two couplings) are deservedly popular;
- gear-girth, requiring the use of a special key.
There are also other variants, such as SDS + and SDS-max from Bosch. But it is not worth dwelling on this issue in detail, since the type of chuck by the method of clamping the drill does not affect the method of attaching the chuck to the spindle of the drill.
Fastening the chuck to the spindle of the electric drill
Actually, there are two ways of fastening:
- conical mating;
- threaded connection.
You can find out the type of fastening by marking:
- inscriptions B10, B12, B18, etc. characterize the parameters of the Morse taper, the special shape of the mating surfaces (in total, there are 9 standard sizes from B7 to B45); before this designation, the range of drill shank diameters is marked, for example, 1−6 B10;
- type designations 1-15 M13 × 1.3; characterizing the parameters of the metric thread (diameter of the shanks of the drills, the diameter of the thread and its pitch);
- abbreviations UNF (full marking is similar in structure to metric thread marking, for example, 2-13 mm ½ - UNF, where ½ denotes the thread diameter in inches, and the number 20 characterizes the number of threads in a length of one inch), which indicates fastening using an inch thread ; this type of connection is typical for imported tools.
Putting on a new cartridge + (Video)
After the cartridge has been dismantled, it must be replaced with a new one. To do this, follow these steps:
1) For threaded chuck:
- the new cartridge is screwed onto the screw shaft in the clockwise direction;
- the screw is tightened in the counterclockwise direction of rotation.
It is recommended to lubricate the threaded connections before installing the drum.
2) For taper connection:
- fix the drill in a vice;
- push the chuck onto the shaft;
- using a hammer and mallet, install the part in place.
So, to remove the cartridge from any drill, you need to know the procedure and be able to distinguish the design features of the connections. The only drawback of all these procedures is the need to replace the cartridge with a new one, because worn out parts can no longer be repaired.
Possible problems
The chuck of the screwdriver remains the most vulnerable part of it, this is due to the constant manipulations necessary to change the working tool. This main drawback of the site is caused by the very logic of its existence. It is impossible to avoid periodic replacement of the chuck during intensive use of the screwdriver. During the operation of the tool, the unit constantly experiences stress, which is difficult to combine with the mobility of its individual parts.
Chuck malfunctions are easy to spot. The first signal will be the frequent cranking of the drill, at first with a small diameter, and then more and more.Over time, in the process of work, bits may begin to jump out. In some cases, the centering is disturbed and the drill actively "hits", this phenomenon is not only unpleasant, but also quite dangerous, as it causes the drill to break. At high revs, a splinter of it can cause serious injury.
An improperly clamped bit can cause increased material consumption due to unintentional deterioration and can also cause injury when screwing in the screw.
When choosing a new cartridge instead of a worn one, you need to pay attention to the factory marking
How to choose a chuck for a screwdriver, see the video below.
How to disassemble a screwdriver chuck
Disassembly of the cartridge is sometimes required.
To perform this operation, you need to remove the plug at the base.
It is enough to pry the plastic part with a knife.
Metal can be knocked out with a heavy object by hitting the base of the clamping sleeve.
The process is as follows:
- take a large bolt and insert it into the cylinder, after which it is slightly centered with a small clamp of the cams; in this case, the bolt head protrudes a couple of centimeters above the sleeve;
- they hit the bolt with a hammer.
After that, the most interesting part remains - the disassembly of the cylinder itself.
It is necessary to divide it into its component parts - sleeve, base, washer, bearing and nut.
The design may be slightly different, but in general the part consists of these elements.
In rare cases, it is impossible to disassemble the cylinder without damage and the possibility of reassembling it back in the same form.
But if the design assumes such a possibility, then you can use the following method.
Instructions on how to disassemble the cartridge in the simplest and most effective way - using a puncher:
- some adapter is inserted into the puncher; the role of the latter can be played, for example, by a broken drill with a diameter of 10-12 mm;
- a cartridge is put on the adapter with the back side - the one that is opposite to the cams;
- remove the cams and push the cylinder against a hard surface, but always through a shock-absorbing buffer (rubber, foam, etc.);
- turn on the hammer drill in percussion mode.
Thanks to vibration, we disassemble the cartridge in a matter of seconds.
As a result of manipulations, the sleeve flies off the cylinder, exposing other details.
After cleaning, the elements can be easily reassembled.
It is important not to confuse the cams in places - although they are similar, during the operation of the tool, the parts rub in and require correct assembly
Some complex designs require sawing the sleeve.
After maintenance or repair work, the halves are collected using a handicraft "tire".
But in most cases, this method - using a hammer drill or hammer drill - works.
Solving cartridge problems
It is not necessary to change the problem mechanism to a new one.
Repair will help in many cases.
Let's consider the main problems associated with cartridges and ways to solve them.
One of the most common problems is device jamming.
Over time, the cams no longer fully compress.
You can use one of the following ways:
- hold the cylinder in your hand and hit it sharply one or more times against a hard object (preferably a wooden one); this method also works with tight clamps;
- clamp the body in a vice, and the cartridge with a gas wrench; after that, rest the tool on the table and turn on the screwdriver;
- try to lubricate the element thoroughly; this is quite common with Bosh products.
A common cause of tight clamping is sawdust and other small debris trapped inside the mechanism.
If the cartridge is supposedly jammed due to sawdust, the part can be held over the fire or dried with a construction hairdryer.
After that, the cartridge must be thoroughly lubricated.
It also happens that the element is scrolled and then it is much more difficult to remove the cartridge.
The reasons for this may lie in the problems of various parts of the instrument.
If the cartridge is to blame, then, probably, there are worn teeth on the fixing sleeve.
To solve the problem, you can remove the coupling and drill holes in the place of the licked teeth.
After that, screws must be screwed into them and their protruding parts must be removed with pliers.
Then the dismantled element is returned to its place and the operation of the mechanism is tested.
Incomplete cam output, or one or two of them, is another common problem.
If it is in this sense that the keyless chuck or key mechanism is jammed, then the reason lies either in the worn teeth on the cams, or in the lapped threads on the nuts that clamp the three components.
To understand what the matter is, you need to disassemble the cylinder.
After disassembling, you can see the nut, which consists of a couple of parts.
The most common problem is this detail.
Worn threads will cause the jaws to slip when clamping.
The result is incorrect centering of the elements.
The solution to the problem is to change the nut or cams for new ones.
This is not always possible.
In this case, you will have to buy a new cartridge.
In some situations, when solving problems, the cylinder will not unscrew.
Others require disassembly of the device.
There are also situations requiring a complete replacement of the mechanism.
But almost always the problem can be solved without replacing the entire screwdriver.
2 Installing and replacing the cartridge
Installing a chuck for a screwdriver, even if it is homemade, and not a quick-clamping one, is not such a difficult procedure, and it is quite possible to remove the chuck from the screwdriver or insert it back at home without any problems.
The option for carrying it out directly depends on what type of fastening the part you have chosen has. He might be:
- threaded;
- through the fixing screw;
- through the Morse cone.
In the event that your part has a threaded mount, it will be enough to screw it onto the shaft. With this type of fastening such as a Morse taper, it is enough to put the part on the shaft, it will securely snap onto it.
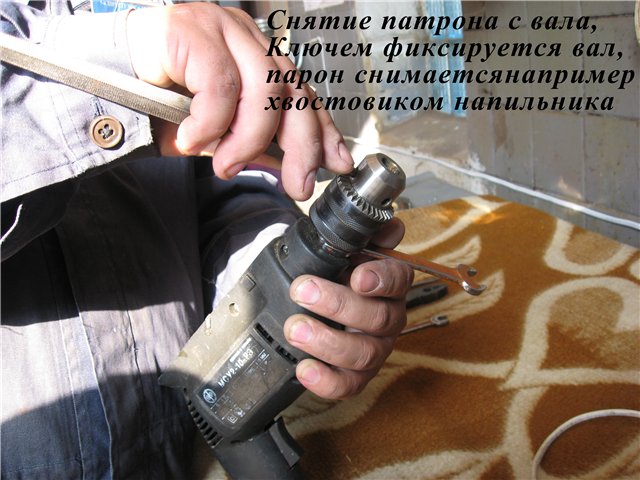
The process of removing the chuck from the drill
In order for this procedure to be easy, you need to turn off the power supply of the screwdriver in advance, fix the part on the shaft and check its performance by installing a drill suitable for the marking of the tool you have chosen. Charging should be 100%.
With proper fixation of the equipment, its easy idling will be ensured without extraneous noise.
Moreover, for some reason, practically no manufacturer writes anything about it on their device, so the owner of a screwdriver often only has to guess how to do it correctly. And it is not always necessary to disassemble the equipment for this.
In most cases, you can solve the issue in this way:
- Disconnect the power supply unit of the device.
- Check if the nozzle is removed.
- Clamp the end of a 10 mm short key in the chuck.
- Turn on the power supply again, start the device, let it hit a hard surface with a cartridge once, turn off the device.
- Unscrew the chuck freely with a wrench.
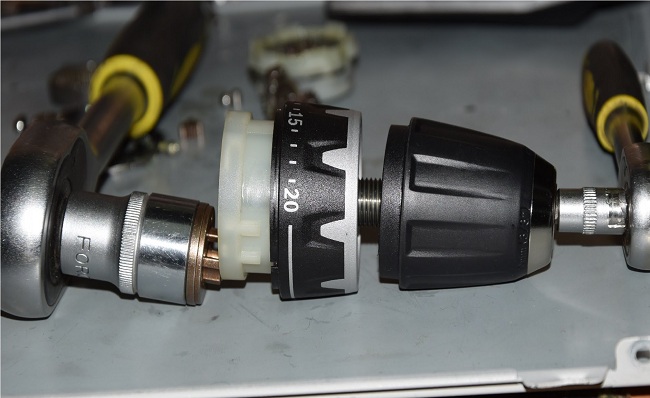
It looks like a disassembled screwdriver chuck
If this technique did not help you to change the part, you can use the move developed for this case by the masters. Here follows:
- Disconnect the power supply.
- Open the inner jaws of the part.
- Unscrew the left-hand internal screw clockwise.
- Clamp the hexagon directly into the chuck.
- Unscrew the chuck clockwise with this wrench.
If this measure does not work, in order to change the part, it is recommended to turn off the power supply of the equipment and hit the hex wrench itself with a hammer.
Please note: if these methods do not give the desired effect, it is recommended to take the product to the master. It is possible that you did not come across an original component, but, for example, a homemade one
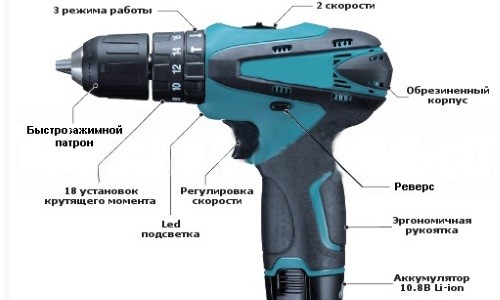
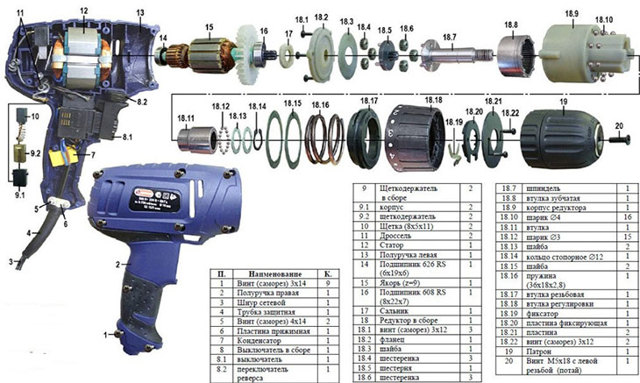
Diagram of a screwdriver with a keyless chuck
In this case, further work with him may result in a banal breakdown of the device. Do not try to disassemble it yourself, especially if the charger is included.
In order to remove the chuck as easily as possible, it is very important not to load the drill and, if possible, leave the tool at rest after every 15 minutes of work. Such measures will prevent deformation of the part and ensure its simplest possible dismantling.
Please note: if in the course of work your grinding attachment or bit breaks, you also need to transfer the tool to the master.
2.2 How to choose new components for equipment?
The choice of a new screwdriver part must be done taking into account the peculiarities of working with the device and the power that the charger gives, in your case. General recommendations in this case are as follows:
If the bits have to be changed quite often and quickly, it is still better to focus on the keyless chuck. It can be pulled out of the structure many times as easy as usual, which will significantly speed up the work.
The key chuck should be chosen if the diameter of the drill you are using is large enough.
When choosing a cone, you should be guided by the parameters for each product, defined by GOST 9953-82. According to it, all products on the market belong to one of the standard sizes from B7 to B45
Please note: the larger the part, the higher the number it will have.
If you choose a foreign-made product for yourself, the marking on it will be 2-13 mm ½-20 UNF. 2-13. It is shown in inches
In the event that you do not understand such designations, be sure to contact a consultant for help.
Whatever device you need, remember, you can always contact the consultants in the matter of collecting it. They will help you determine the best part available and install it directly on the screwdriver shaft.
Tool features
The popularity of this power tool is due to a number of its advantages, the main of which is its versatility. You can screw in (unscrew) screws, screws, self-tapping screws, using a wide range of different bits. You can, by inserting a drill, drill a hole both in a wooden product and in metal. There are other attachments that expand the range of application of the screwdriver. The next advantage of the tool is mobility. Having a removable battery, this electrical device can be used where it is impossible to turn on a conventional electric drill due to the lack of an electrical network.
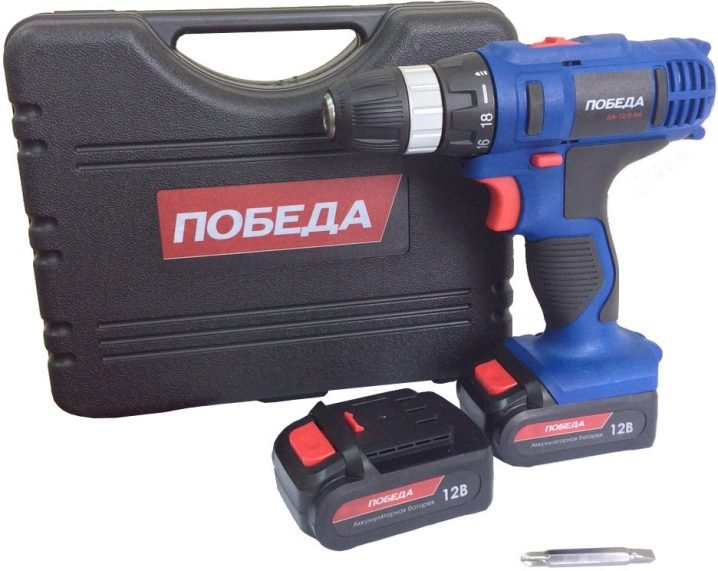
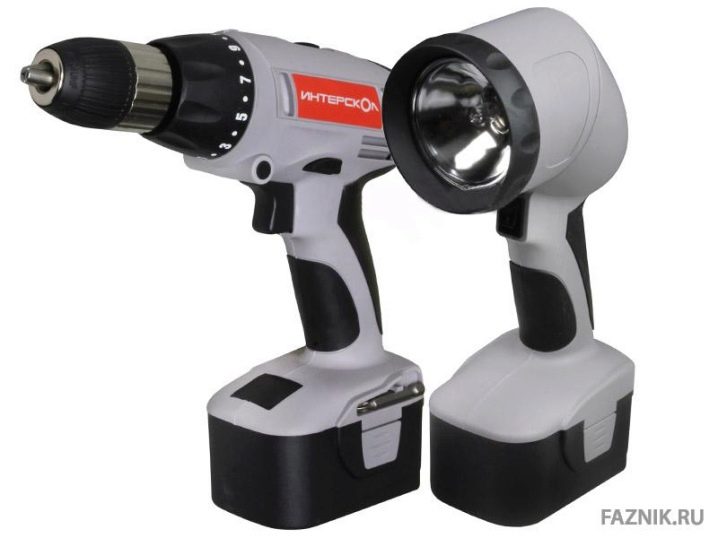
In specialized auto repair shops and enterprises, pneumatic screwdrivers are often used. A feature of this option is the drive from a compressed air stream. For the tool to function properly, a compressed gas cylinder or compressor is required, which will supply air through a hose. The advantage of this product is its high productivity. If during a work shift you need to constantly tighten and unscrew many screws and nuts, a pneumatic screwdriver is indispensable.
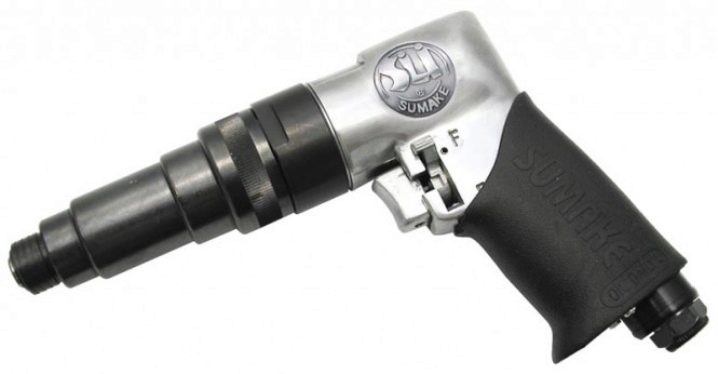
The more common household appliance with a replaceable battery, whose performance is limited by the electrical capacity of the battery, is, of course, not intended for the industrial scale of the work performed.
