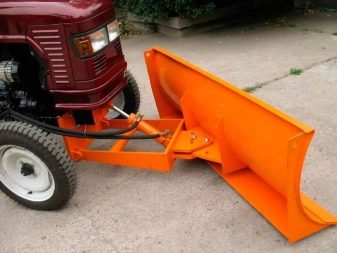
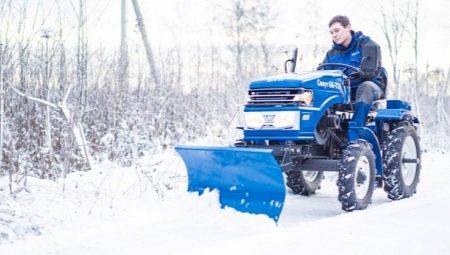
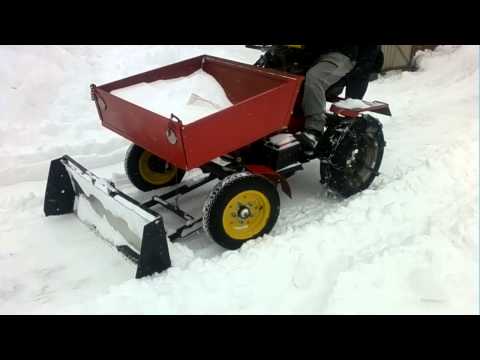
Homemade dumps
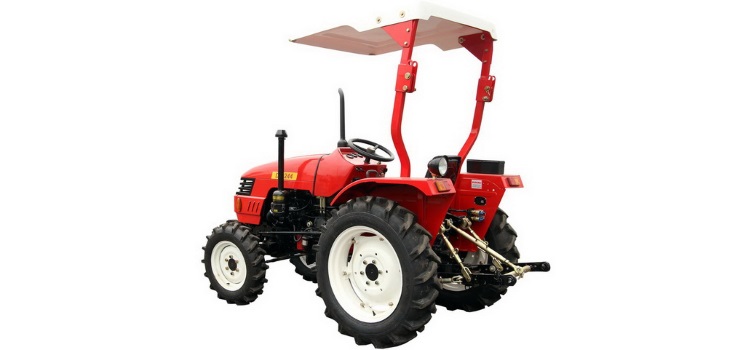
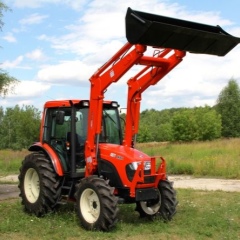
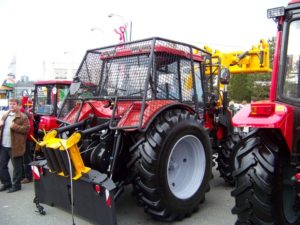
Now many people prefer to live in their own houses, and accordingly the adjacent territory occupies a large area. To work on a personal plot, motor-cultivators, walk-behind tractors and mini-tractors are purchased.
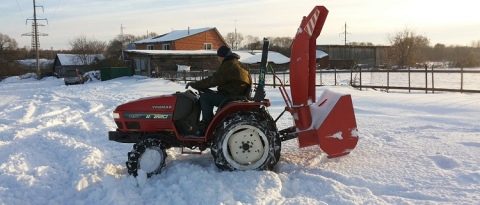
In winter, snow removal turns into a competition to win who. And owners with motorized equipment prefer to remove snow with its help. Attachments for a walk-behind tractor are not cheap, so craftsmen prefer to make it on their own.
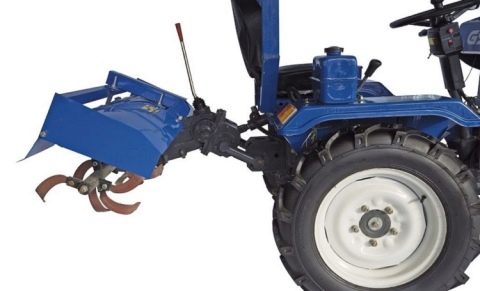
The domestic-made Neva walk-behind tractor is widespread. It has standard attachment points and rubber wheels that are adapted for driving on loose snow. Most of the homemade dumps were made for the Neva.
On the Internet you can find many descriptions and drawings of a shovel for a walk-behind tractor with your own hands. But before manufacturing, you should familiarize yourself with the characteristics of the dumps. Product composition:
- executive (working) body;
- swing mechanism;
- mounting bracket.
Rotation angles:
- to the right by 30 °;
- to the left by 30 °;
- directly.
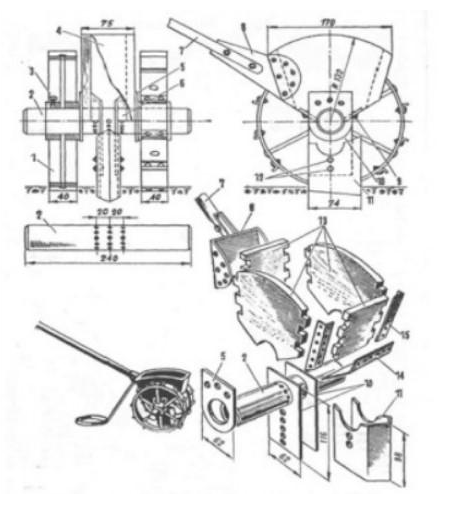
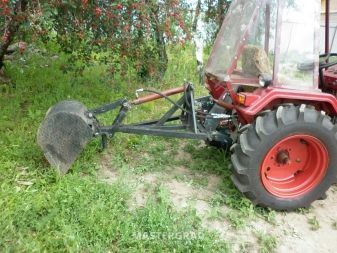
Blade from a cylinder
One of the materials at hand for making a dump is a gas cylinder. Its height is slightly more than a meter, and the recommended width of the shovel is 1000 mm. Manufacturing works proceed in the following sequence:
- Bleed off excess pressure from the cylinder, if any.
- Cut off both sides of the lid so that the width is equal to one meter.
- Cut the resulting pipe lengthwise into two halves
- Using a welding machine, connect these two halves so that the height of the blade is about 700 mm.
- The mounting bracket is manufactured as follows. Cut a kerchief out of thick metal. Drill several holes in it to turn the shovel in different directions. Weld a piece of pipe to the kerchief.
- Weld the resulting device to the shovel at the height of the bracket on the walk-behind tractor.
- Installation is done with a thick finger.
The width of the rubber web is 100-150 mm. Drill holes in the blade with an electric drill to secure the rubber. To securely fix the canvas, a metal strip of 900x100x3 mm is needed. Drill holes in the strip and in the canvas, having previously marked on the blade. Secure with bolts.

Blade made of sheet steel
Some craftsmen prefer to use new material, rather than used elements. So you can make a homemade moldboard shovel from steel sheet 3 mm thick. To strengthen the structure, take strip steel with a thickness of at least 5 mm.
The material is cut according to the drawings. The blade of the shovel itself has four parts: frontal, lower and two lateral. The welded structure needs reinforcement. For this, elements cut from the five are welded in the vertical direction.
Next, a swivel mechanism is made. It is an ear with a hole for an axle. The ear is welded to the corner, which is attached to the blade. The axis is fixed at one end of the pipe, and with the other end it is fixed on the walk-behind tractor. The required angle of rotation is fixed with a pin (dowel).
As you can see, to carry out the work you will need:
- working material;
- grinder with discs;
- electric drill with drills;
- bolts with nuts;
- welding machine with electrodes;
- spanners;
- round or shaped pipe.
If you have certain skills, the job is straightforward.And the resulting structure can be used not only in winter, but also in summer. Level the site after construction works, level the area for the children's sandbox and much more. Which design to choose is up to you.
It is interesting: We study the description and characteristics of the Kirovets tractors of the K-9000 series in all details
For the needs of public utilities
It is worth clarifying that mini-tractors are rarely used in construction and housing and communal services. Technique simply does not have enough power to perform some types of work. For example, dismantling asphalt pavements or laying utility lines in frozen soil.
However, if the work does not require large tractive effort or large-sized equipment cannot cope with the tasks set, mini-tractors are taken to work.
Among the attachments used in construction and housing and communal services, the following units can be distinguished:

When performing work, it is necessary to select attachments in accordance with the tractive effort of the tractor. If unsuitable devices are used, damage to the hydraulic system and the engine of the equipment is possible.
Homemade cabin for a mini tractor with your own hands. Required components for the manufacture of the cabin
Working on your own land is useful and pleasant. Throughout its history, mankind has accumulated many technical developments to help the agricultural sector. The more complex ones (machines, tractors, combines, etc.) have long since been put into mass production at factories. But many adaptations can be made by yourself at home. An example is a self-assembled cabin for a mini tractor.
It is known that a lightweight version of a minitractor without a cab is the most popular production option. You can also buy a comfortable separate cab on the market. But, with minimal expenditure of resources, you can make a cabin for a mini tractor with your own hands, and for any known models: DTZ, T-25 (Russia), Xingtai, Jimna, Dong Feng (China).
The self-made cab is similar in design and quality to the industrial version. To manufacture it, the following elements are required:
- steel corners for the frame;
- a sheet of steel on the roof;
- window;
- doors;
- glass.
A number of smaller details will also be required:
- locks;
- steel curtains;
- wipers;
- wiring;
- lights (front and rear);
- electrical appliances;
- rear view mirrors.
Depending on what requirements are set to improve driver comfort, the following can be used:
- thermal insulation materials;
- inner foam sheathing;
- insulation (usually made of leatherette);
- fan;
- auto oven, etc.
Making a cabin for a mini tractor with your own hands is a process carried out in certain conditions. All work is recommended to be carried out in a closed workshop. As the main tools you will need:
- machines for drilling, grinding and turning works;
- welding machine;
- tools for applying paint and varnish.
To make the cab manufacturing process fast and efficient, it is advisable to use drawings or photographs of finished samples at all stages of work.
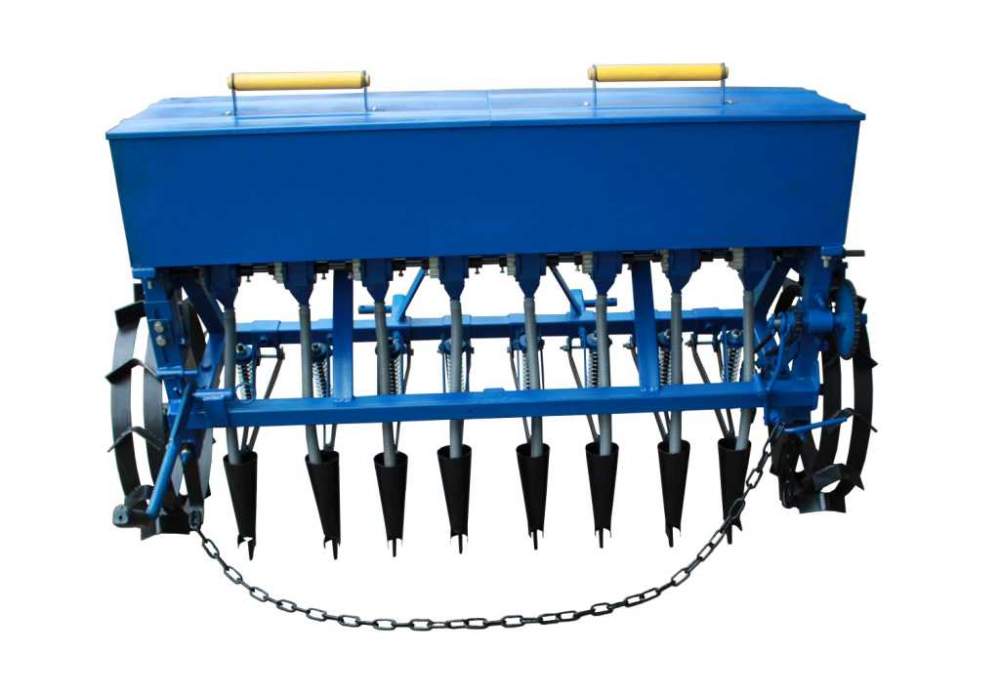
Design features and general scheme of seeders for mini tractors
The seeders consist of:
- a frame carrying fasteners for coupling a seeder with a mini tractor;
- containers with planting material;
- a device for feeding seeds or root crops - evenly selects them from containers and feeds them into the seed tube;
- openers (most often disc-type), which cut soil layers to incorporate a particular crop at the optimum depth;
- tools that bury planted elements with earth and level the soil.
As a standard, the principle of operation of any seeder on a mini tractor looks like this:
- openers or support wheels cut future beds, the furrow depth of which can be set by the user;
- seeds fall into the groove, and in combined models - also fertilizers;
- the bed is covered with earth by one of the openers or the rear drum.If the seeder contains a special bar, the soil is leveled and will take its original shape.
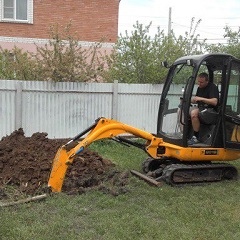
Attachments for construction sites and municipal needs
In construction work and public services using a mini tractor, several types of attachments are used, which can be attached to the front or rear of the body. For example, a front-mounted oval shovel can be used to remove debris at a construction site, and to clear snow from roads and sidewalks. The rear-mounted shovel and ripper are used for leveling unpaved areas, raking snow and sand drifts, and clearing icy areas. The cost of such equipment depends on the model and complexity, prices vary between 10,000 and 40,000 rubles.
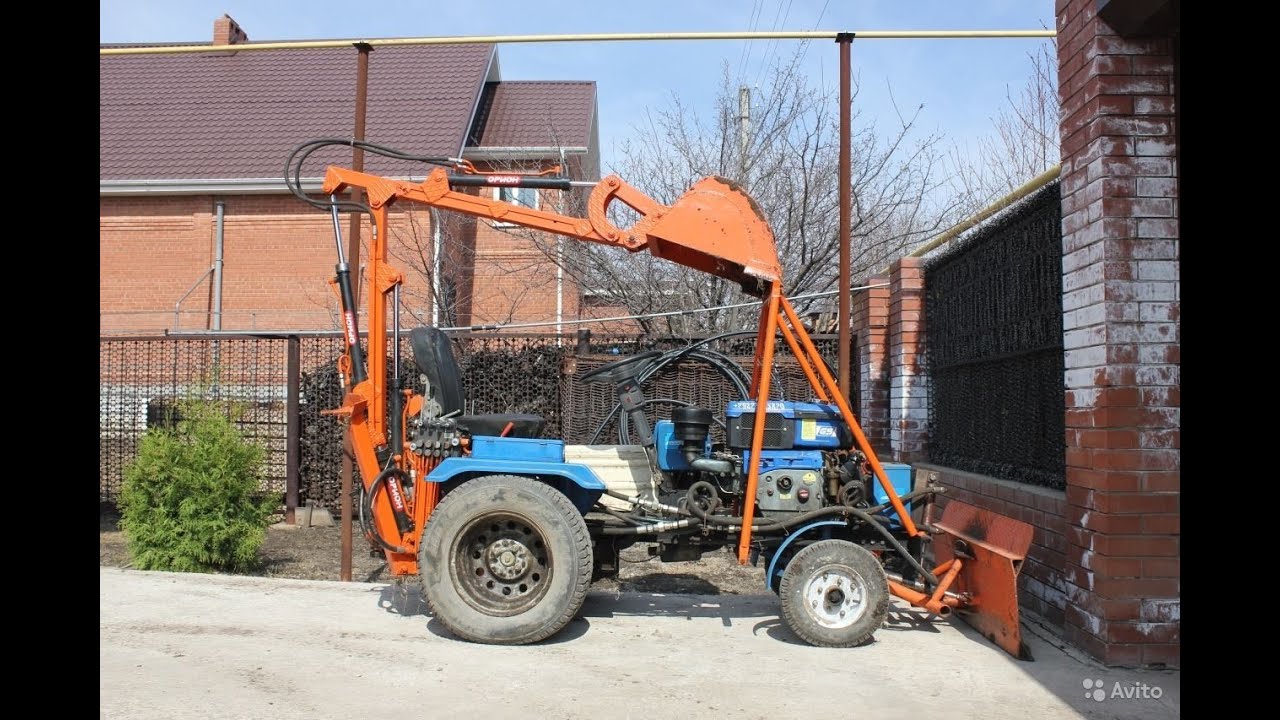
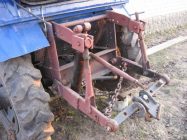
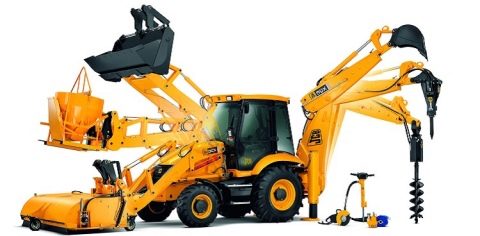
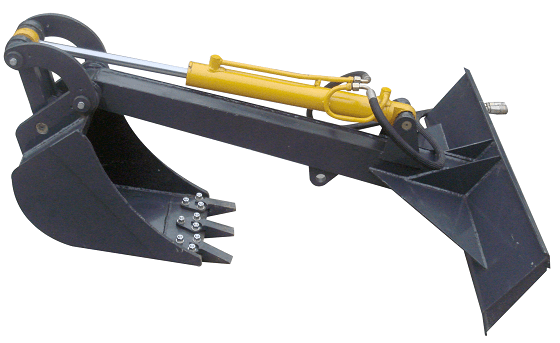
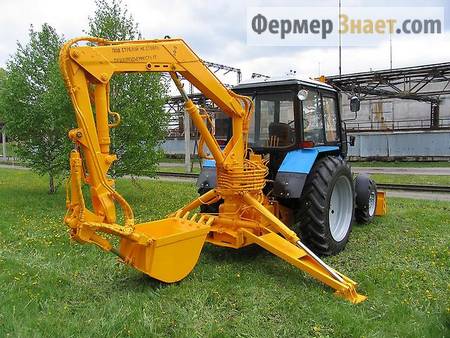
For digging trenches for communications and foundations, mounted excavators are produced. This equipment is equipped with a sophisticated hydraulic power-assisted lever control system. Models differ in bucket volume and mechanics and, accordingly, prices that start at 90,000 rubles.
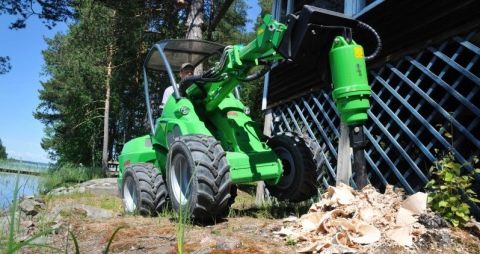
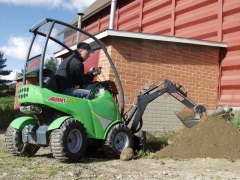

Mounted excavator
It is interesting: Lakenfelder chickens - description of the breed, photos, productivity, keeping and feeding
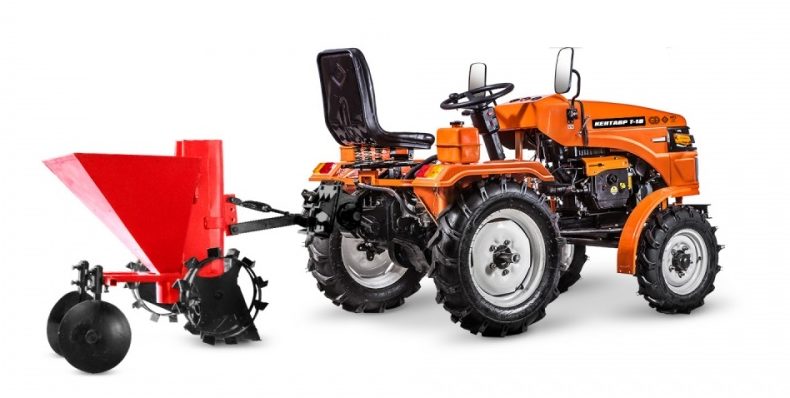
Homemade seeder for mini tractor
Consider two options for homemade seeders. The first option is not difficult, therefore it will not be difficult to make a canopy.
Grain seeder manufacturing:
- Disc blanks are connected to the axle. Three disks are enough;
- The seed nest is made from one disc. Twelve holes are drilled in it. You can take a wooden box for the nest;
- Above is a granary for planting material;
- The sowing unit is made of a wooden block, it is covered with a special varnish to protect it from moisture. This part works on two bearings;
- The wheels are adapted to the seeder. Suitable from a bike;
- U-shaped supporting frame with dimensions 525 * 115 mm;
- The hopper is bolted in place.
The self-made seeder moves, the seeding unit is driven by a stretched bicycle chain. The seeds are fed into the cells, then into the output funnel. This homemade hitch is suitable for all mini-units.
The seeder for a precision seeding mini tractor can also be made independently.
You must first prepare the following materials:
- Box;
- A pair of wheels with diameters of 20 centimeters;
- Bearings and brackets (two each);
- Sowing roller;
- Handles with bracket.
 The scheme of manufacturing a seeder of this type:
- Box for seeds. Slats or wooden blanks with a thickness of 1.5 centimeters or more are fastened. The part will last longer if covered with steel or metal plates;
- Rounded grooves are cut out on the wooden box for the seeding roller;
- Fastening elements are installed on the box;
- Rubberized strips are fixed on inclined bottoms;
- Holes are drilled in the hubs;
- The coulter is made of sheet steel and is secured with brackets. It is better to make several holes to allow readjustment of the opener;
- The bracket is used to connect the rear box to the unit.
Types and differences
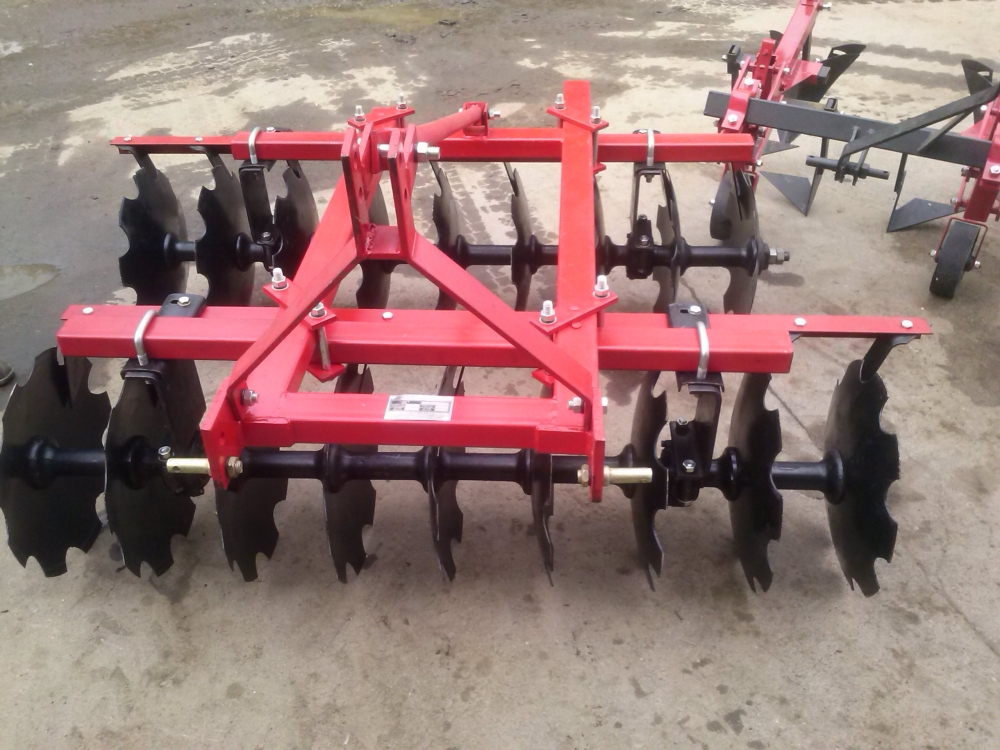
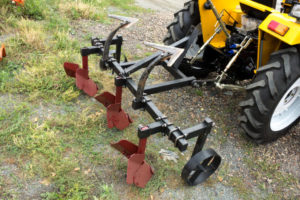
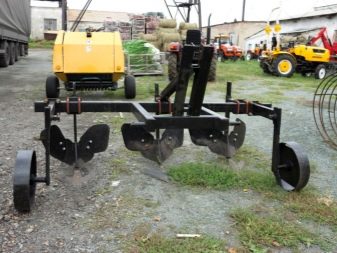
In total, several groups of agricultural aggregates can be distinguished. They differ in the types of agronomic measures. So, the group of attachments for soil processing includes plows, harrows, cultivators, rotary tillers. The main purpose of the first type of aggregates is deep plowing and turning over of soil layers. Usually such operations are carried out after harvest. Objectives - embedding of post-residues that turn into organic fertilizer in the soil, loosening the soil, mixing the upper horizons. Harrows are used in different types. They are disc, needle, tooth. The main purposes are the removal and crushing of residues, weeds, loosening of a small layer of soil, protection of moisture. On light clean soils, plowing is often replaced by harrowing.This allows you to reduce the load on the soil, reduce the cost of subsequent processing. The final step in any cultivation is cultivation. This is a surface tillage aimed at combating weeds, improving aeration and protecting the soil from drying out. With the help of cultivation, you can level the soil, crush large lumps.
Sowing and planting work is performed using other units - seeders. They differ into several main types, depending on the purpose:
- cereals - for cereals;
- corn, beetroot - often a separate group;
- vegetable planters.
Their purpose is very clear - embedding seed material in the soil. However, seeders are also used for post-sowing treatment: fertilization for sowing, root top dressing. Such agrotechnical measures are most often in demand in relation to winter crops.

Harvesting units are the next large group of attachments. These include reapers and harvesting machines (used in relation to root crops). All of them are also divided into types and types. So, there are grain headers, legumes, corn. Modern units have a customization option. Therefore, they can be adapted to different crops by adjusting the height of the mower.
Even having a very small summer cottage or vegetable garden, sometimes it is simply impossible to do without mechanical assistance in the form of a walk-behind tractor or a mini tractor. This unit will be able to optimize many processes for maintaining the site, and attachments, which are widely available on the modern market, can significantly expand the scope of its application. This article is devoted to an overview and principles for choosing attachments that will help you mechanize many agricultural jobs.
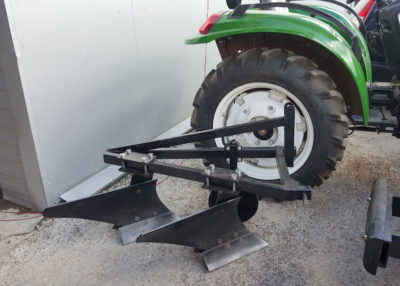
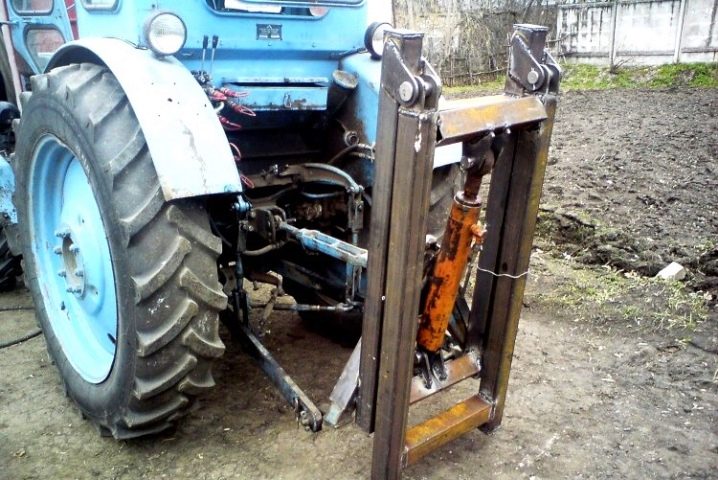
Features of the three-point linkage system
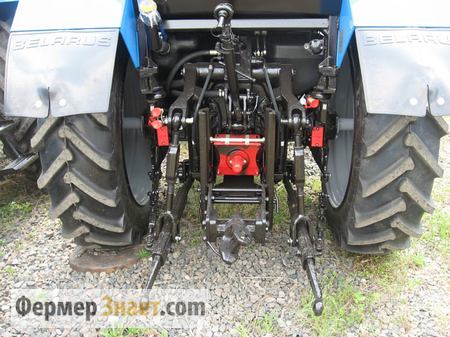
 The three-point linkage for the tractor is a separate mechanical unit that is mounted on its hydraulic system at the rear of the cab. It allows you to expand the possible working options for using the tractor, as it helps to effectively use and quickly change wide-coverage mounted executive devices. The system is a special unit that includes two longitudinal and one central link.
With the help of the central link, the working force of rotation of the power take-off shaft (PTO) is transmitted and the working angles of the executive equipment are adjusted. But this attachment to a tractor assumes the use of only those units that, during operation, move along a strictly specified trajectory with a small tolerance of oscillations to the sides. Agricultural equipment that does not meet these parameters requires its own mounting option. This can be clarified by examining the accompanying documentation that is attached to any agricultural mechanism.
Even having a very small summer cottage or vegetable garden, sometimes it is simply impossible to do without mechanical assistance in the form of a walk-behind tractor or a mini tractor. This unit will be able to optimize many processes for maintaining the site, and attachments, which are widely available on the modern market, can significantly expand the scope of its application. This article is devoted to an overview and principles for choosing attachments that will help you mechanize many agricultural jobs.
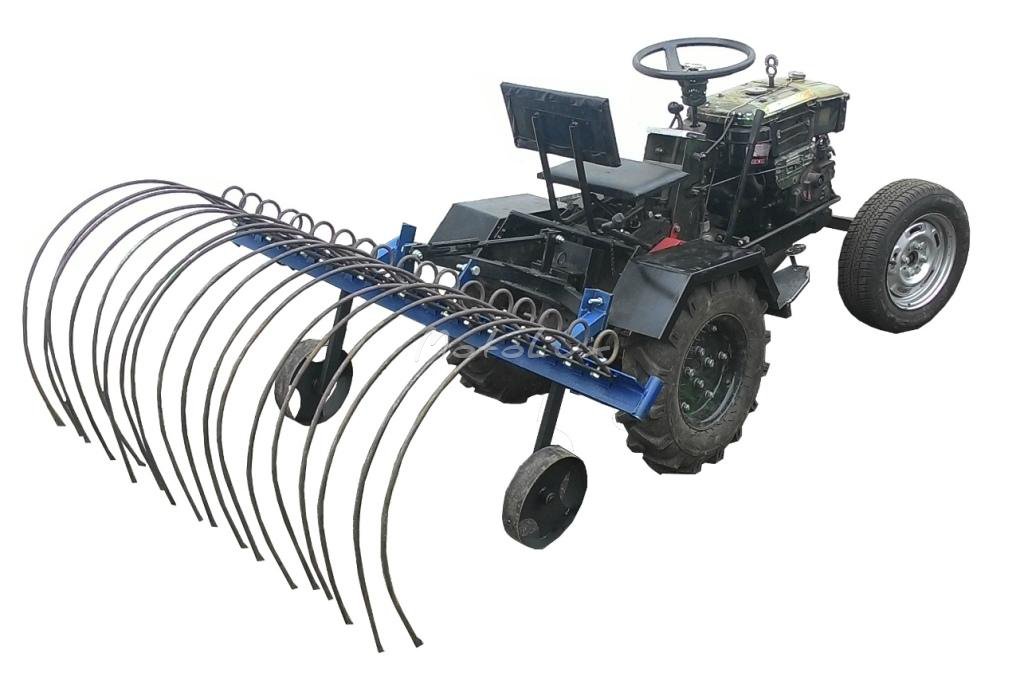
Progress
1st stage - production of teeth for impellers
Depending on the dimensions of the future structure, the height of the mini-tractor itself, for this we need up to 600 mm of wire with a thickness of 0.5-0.7 cm (for each element).
The number of steel rods is calculated based on the impeller circumference. They should be spaced every 10 cm and carry another extra tooth.
2nd stage - fastening to the base disc elements
The easiest way to do this is with bolts.The discs themselves can be made from 4 mm steel in diameter, which is suitable for you specifically;
3rd stage - aggregation of wheels on a rake
We take bearings and hubs (from the old VAZ). It is advisable to take tapered bearings, which will give greater tightness to this working unit.
7th stage
Drawbar installation - 3 cm in diameter of the pipe between the posts.
The scheme of the described design is quite common. The equipment, which is obtained in the course of all simple actions, is in no way inferior to factory counterparts and is adapted to any hay harvesting work of any volume.
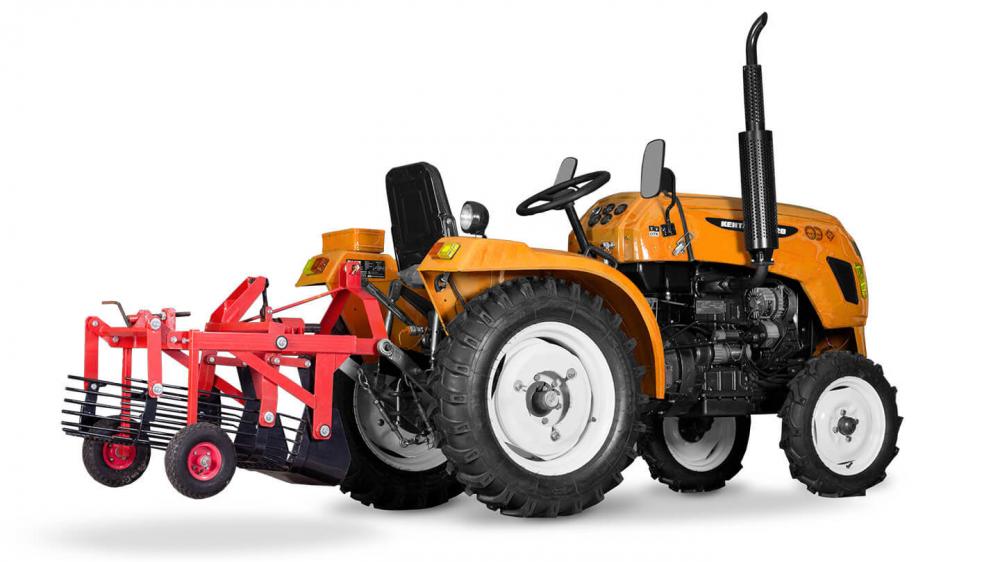
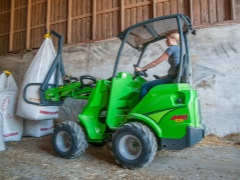
Attachments for a mini tractor
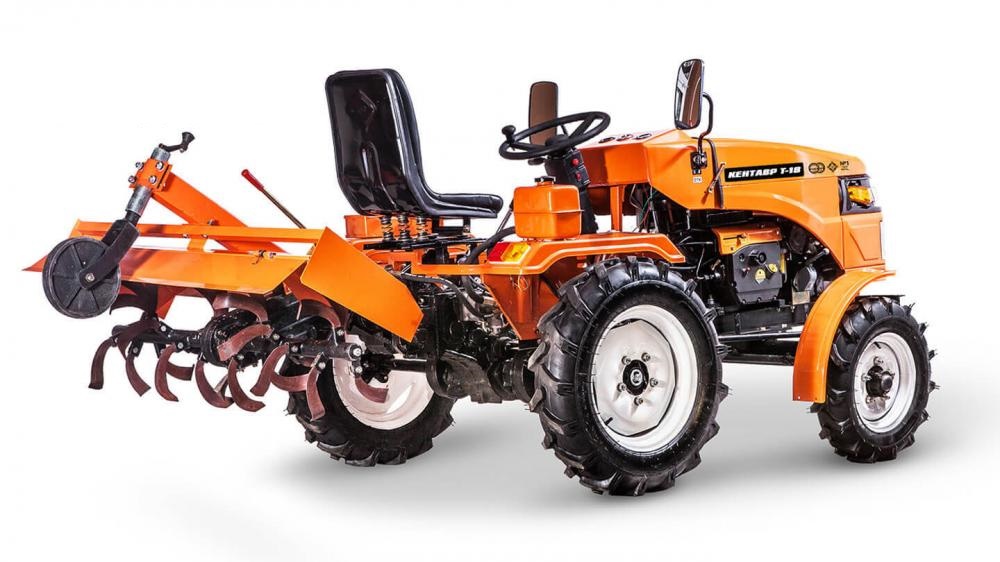
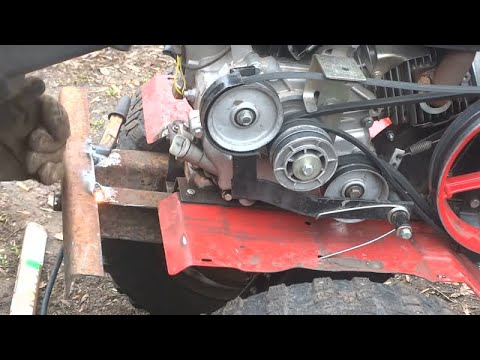
The cultivator is a common attachment that is installed on mini tractors and allows you to cultivate the land. With the help of the cultivator, you can dig up the beds, loosen and harrow the grown crops. Certain modifications of such cultivators make it possible to simplify the application of fertilizers, which greatly simplifies the processing of the garden, allowing the use of one such attachment for various agricultural operations.

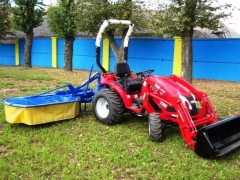
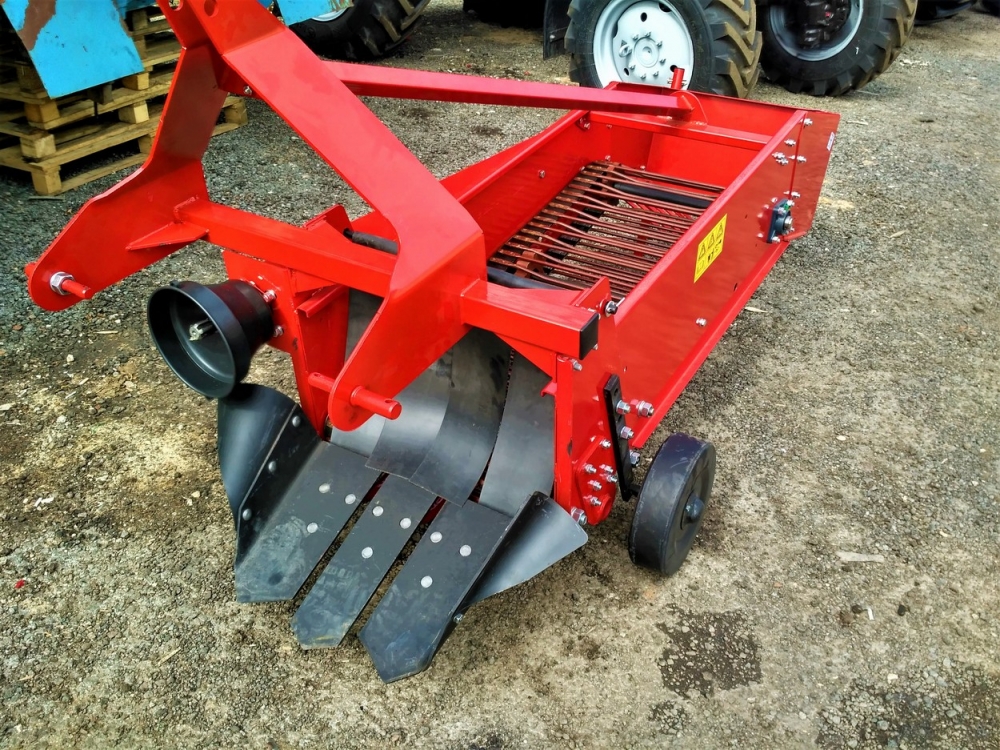
In the event that you need to plant potatoes on a large area, we recommend using equipment such as a potato planter, which can be easily mounted on a mini tractor, allowing you to quickly and efficiently sow a large area. At the same time, such a potato planter plows the ground to the required depth, forming even rows, which subsequently simplifies planting care.
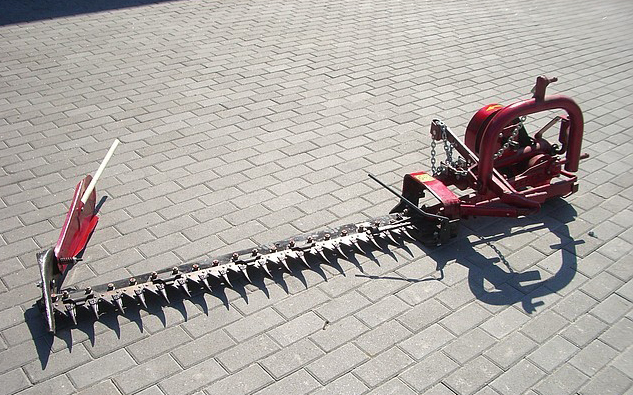
Also, quite often with a mini tractor, lawn mowers of a chain or rotary type are used, which allow not only mowing weeds and various bushes, but also provide competent care for the lawn and lawn. One of the advantages of using such a mounted lawn mower is that there is no damage to the surface, the grass after such treatment quickly spreads out, and the lawn acquires an attractive appearance.