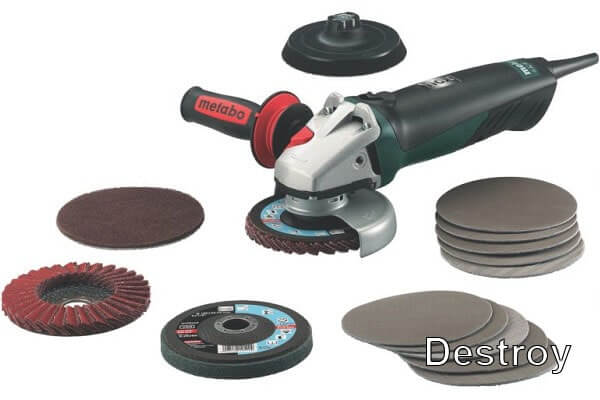
Angle grinder
An angle grinder or grinder is often adapted for cutting strobes, although it was not originally intended for this. In domestic conditions, a cut-off disk is used for cutting a stone, however, the amount of dust not only interferes with full-fledged chipping, but also clogs the tool, which leads to breakage. Nevertheless, there are nozzles for angle grinders for slitting.
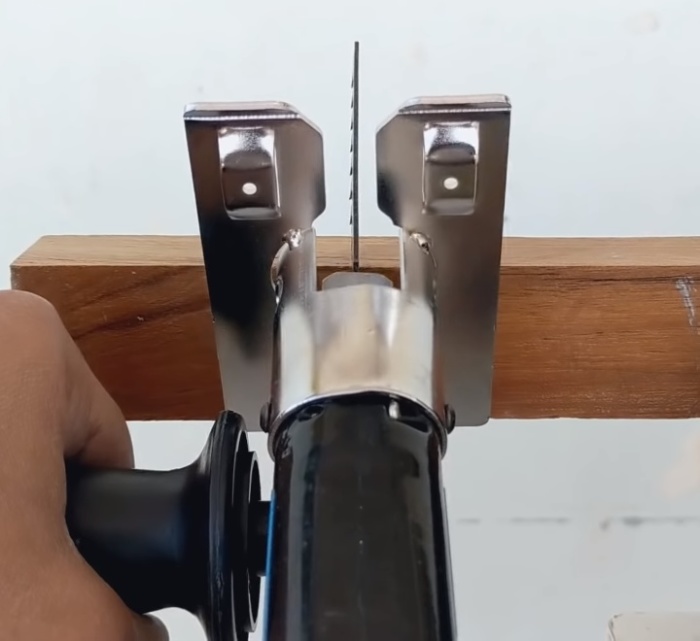
The length of the mounting shaft allows you to install two cutting discs at once, but such a "modernization" is a gross violation of safety regulations. How is it possible?
The design of two discs must be strictly perpendicular, therefore, the second cutting disc is attached using standard nuts. The first disc is installed as standard, the fixing nut protrudes as a spacer sleeve. The second disc is fixed in an inverted position. The distance between them is regulated by a spacer washer.
The second point is the equipment of a protective casing that insulates the cutting part of the tool, except for the one immersed in the wall. A dust collector and dust extraction are required. The casing is made according to the scheme from a sheet of iron 0.2-0.4 cm thick by welding.
However, even after equipping the grinder attachment for chipping, according to all the rules, you need to remember that the tool is not designed for such work: you should take breaks, check if the grinder is overheating, and be prepared for the fact that the strobe will have to "bring to mind" for a long time ...
Grinding walls with a grinder
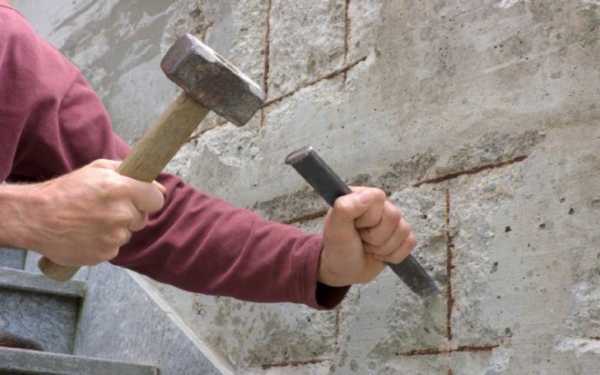
You can make grooves with a grinder with a regular disc on concrete, when you need to make one or two grooves for wiring. Some simply punch the gates with a puncher using a drill and a spatula. When you build a house, you have to do a lot of chasing, you can't do everything with one puncher, you need to take care of safety. In the process of working with a grinder, the disks throw out fine gravel, sometimes they break themselves, the fragments fly out at high speed. Fragments of the metal disc can cause serious injury and even death.
The concrete discs and the grinder's protective cover are designed for cutting individual fragments. Manufacturers do not make convenient and safe attachments for long-term chasing, this tool has a different purpose. Users modify the factory designs themselves; a metal plate is welded to the protective casing from the open side. It turns out a cover that covers the disc on both sides. A rectangular lower platform is cut out of sheet metal with a grinder, and a slot is made in it to rotate the disk. From one end of the platform, a casing is attached to the hinge, on the other, a bracket with a screw is installed to fix the set cutting depth of the strobes for electrical wiring.
In order to change the depth of the slot, you need to unscrew the bolt on the bracket, raise or lower the grinder, it easily moves upward, rotating downward around the hinge on the platform. In this case, the level of the cutting disc relative to the platform changes, as far as the disc protrudes, this will be the depth. Insert the screw into one of the selected holes and tighten it securely. The holes on the bracket that regulate the depth can be positioned with a certain step, after 1 cm. Sometimes they make certain depth values of 1 cm, 3 cm, 5 cm, deeper for wiring is not required. A lot of cable can be laid in a groove 2-3 cm wide and 5 cm deep, such sections are rarely found in wiring circuits. Excessive depth will complicate the work of the hammer drill and slow down the whole process.
The main disadvantage of this design is one disc, you will have to cut the lines twice on each section of the walls. The design of the grinders does not allow you to install two discs, even if you manage to fix a washer between them, the power of the electric motor will not withstand such a load. Better not to risk it and use one disc.
From the above information, we can conclude that the best tool is an industrial wall chaser. Provides safety, high speed of strobe laying, good quality. Optimal use cases:
- rent a wall chaser,
- buy, sell via the Internet at the end of the work, this will justify the costs,
- if there is a need to keep it for yourself.
Use a homemade grinder attachment when there are no other options.
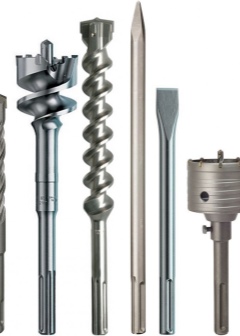
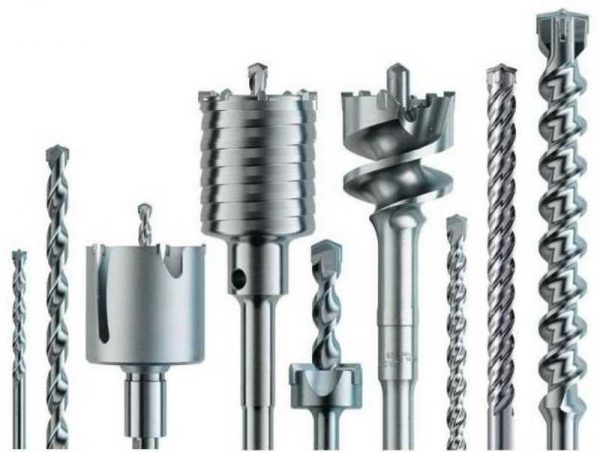
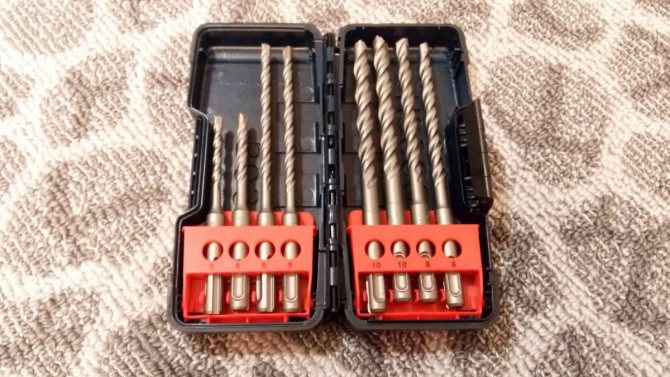
Rotary hammer bits
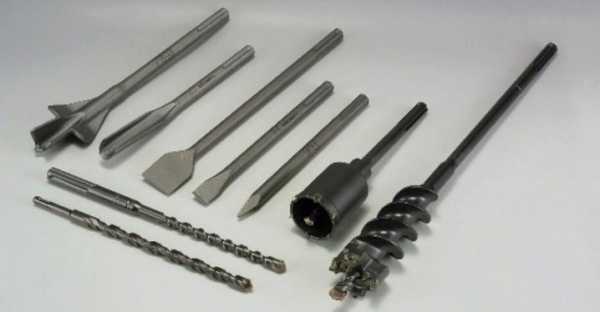
There are several types of hammer drill bits. They are suitable for a variety of jobs. All nozzles are divided into the following types:
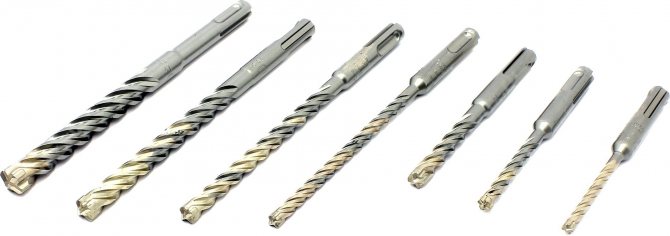
- Boers. The most common type of attachments. It is designed for drilling holes in various materials (concrete, brick, stone). The diameter and length of the nozzle are selected depending on the needs.
- Chisel. This species is divided into three subcategories:
- chisel, which is designed to remove tiles, plaster and other surface materials;
- lance chisel. The main purpose is chasing and punching holes in various materials;
- The channel chisel is designed to create grooves in the surface. Most often used for wiring.
- Drill bit. Without it, it is almost impossible to lay electrical wiring. With its help, holes are made for sockets and switches, junction boxes. There are devices of various diameters on the market.
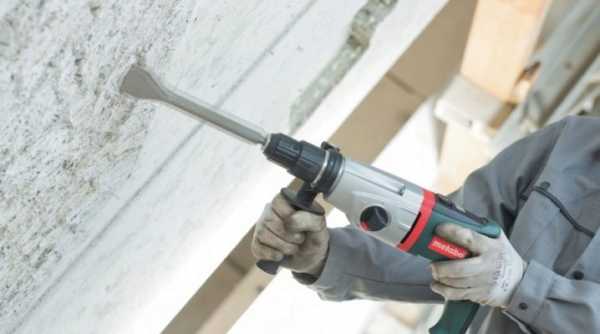
Rotary hammer chisel
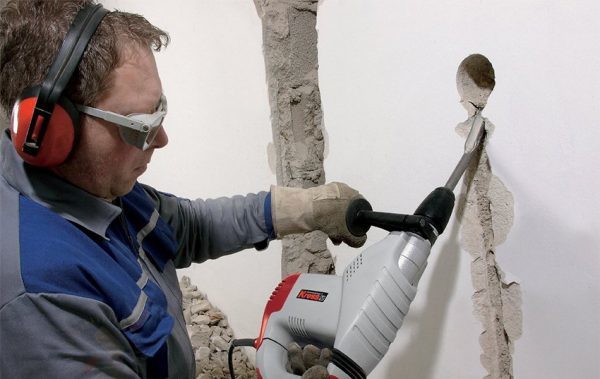
It looks like a conventional drill (chisel). First of all, chisels are used for chiselling concrete walls. But most often it is used to remove a layer of plaster, tiles and similar surface materials. The chisel is not hardened at the end, so it should be sharpened. It is often used in wiring and door installations.
Chisel sizes are different. He is chosen, depending on the work required. They are divided into the following subspecies:


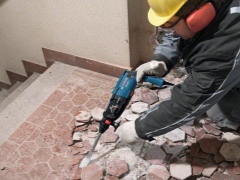

- augers are used when drilling to great depths;
- spiral - with their help they make deep holes that have a large diameter;
- shallow ones are used for punching small holes; the service life is much longer than the rest.
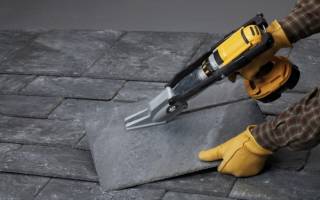
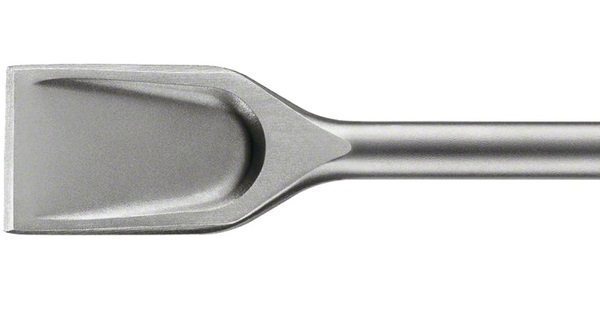
Rotary hammer blades
A hammer drill with a shovel looks like a real jackhammer. It has a semicircular shape and various sizes. It is an alternative to the wall chaser, but much cheaper. This makes the work more difficult.
Bouchard
This species has a narrow direction of use. It looks like a hammer, with cones on the striking sides. They are used to apply incisions that help the solution better adhere to the surface. It also removes excess concrete, old paint, dirt and build-up.
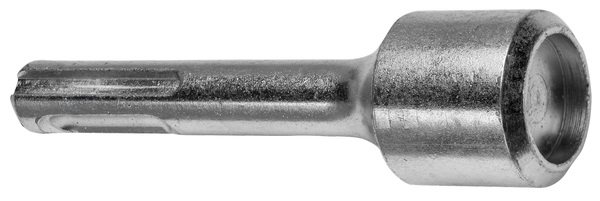
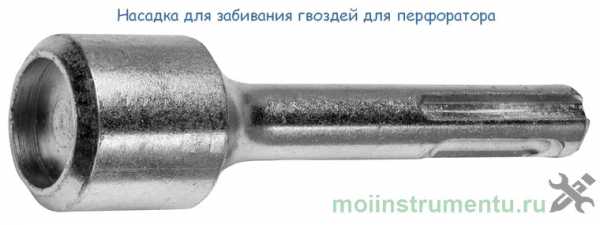
Punch for a hammer drill
It looks like a cone or pyramid with a sharp end. Used for punching holes in walls of various materials or removing old building materials. For example, a hole is made for a pipe. The tool is also suitable for work on reinforced concrete.
It is poorly suited for working with electrical wiring. It leaves ragged edges. Which in the future must be covered up.
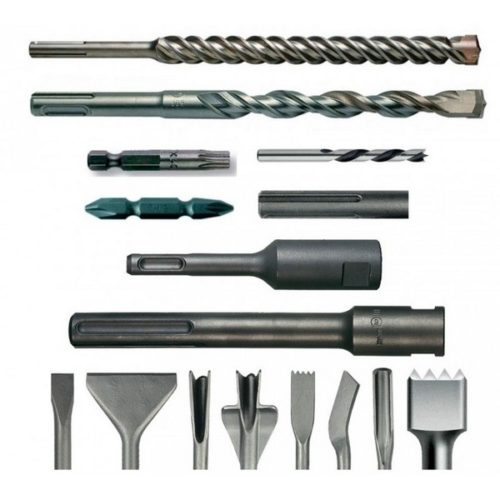
Sds attachments
Shanks are the part of the drill or drill that is held in the chuck of the hammer drill.
They are divided into several types. One of them is sds attachments, which, in turn, are divided into five categories:
- SDS;
- SDS-top;
- SDS-quick;
- SDS-plus;
- SDS-max.
SDS has 4 slots, two of them are open and two are closed.
Closed slots secure the shank in the chuck, while open slots ensure correct positioning of the bit.
Rotary hammer bits
Perforator nozzles are distinguished by their purpose and the method of attachment in the chuck.
By purpose, the attachments are divided into tools for:
- drilling (drills);
- drilling (drills, bits);
- chiselling (chisels, peaks).
Rock drill accessories: drilling, drilling and chiselling
Shank type
The main criterion for choosing a tooling is the type of its shank. The type that fits the selected hammer drill is indicated in its instructions.
The most common shanks today are SDS-plus and SDS-max.
Table: types of shanks for rock drills
| Shank type | Diameter, mm | Application |
| SDS-plus shank | 10,0 | Most rock drills are small to medium power. There are many different cutting tools and attachments available for the SDS-plus shank. |
| SDS-max shank | 18,0 | Professional equipment and high power rotary hammers. |
Auger drills
In the efficiency of auger drills, the angle of inclination of the working groove plays a role. Such drills are used for making holes of great depth, they provide effective dust extraction and are designed for intensive work. The greater the angle of inclination of the groove, the greater the drilling speed and productivity. The use of drills with a centering spike is effective, they keep the drilling direction more evenly and reduce the stress on hands and tools.
Rotary hammer drill with centering pin holds direction well
Chisels
There are three types of hammer drill chisels:
- chisel;
- lance chisel;
- channel chisel.
This difference is determined by the type of work performed. Plaster is destroyed with an ordinary chisel, tiles are dismantled, etc. With a lance chisel they cut holes in concrete elements of building structures. A channel chisel is used to form straight, even channels in concrete surfaces. This type of work occurs when installing electrical networks or water supply.


From left to right: chisel wide, narrow, channel, pike
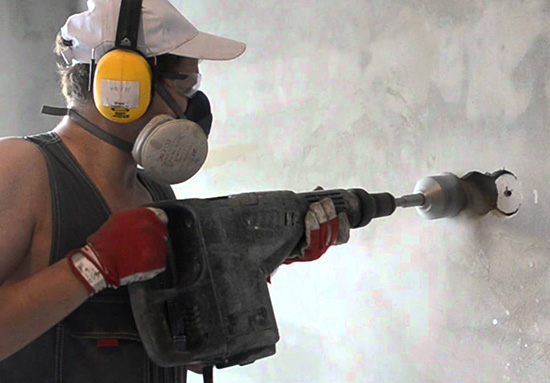
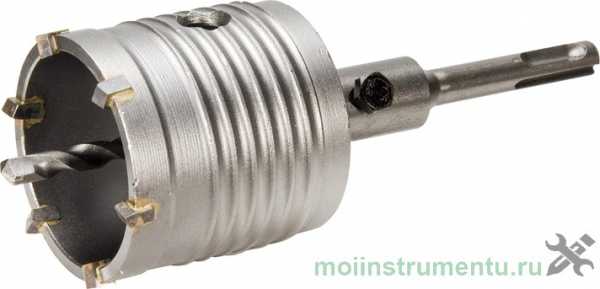
Drill bits
Such a piece of equipment as a drill bit is indispensable when performing work on the installation of electrical, hydraulic and thermal communications. The crown allows you to drill large-diameter holes in the walls for the installation of pipes or cables.
Using a drill bit in the wall, you can drill a niche for a socket
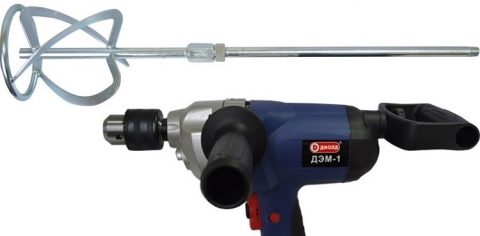
Mixer attachment
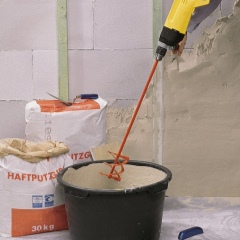
Also, the perforator can be used as a mixer for the preparation of building mixes. To do this, you need a mixer attachment.
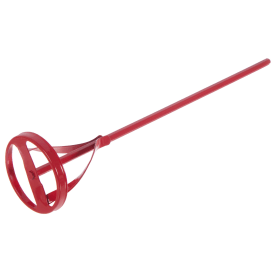
The mixer attachment for the rotary hammer mixes building mixtures
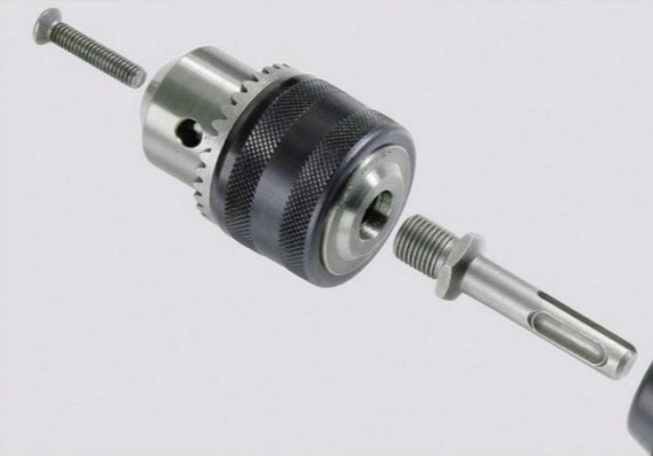
If the bit has an SDS-plus shank, it fits directly into the chuck. The hex beater must be clamped in the SDS-plus shank chuck and the chuck is already inserted into the hammer drill. The power of the hammer drill is not inferior to an electric drill, and even surpasses it, so it will not be difficult to prepare any construction mixture.
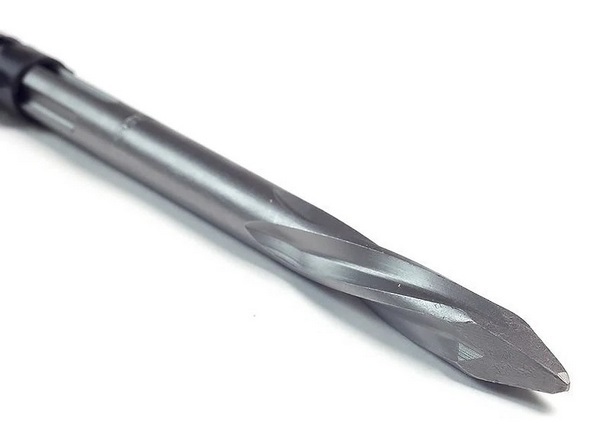
Self sharpening drill
When using a carbide-tipped drill (drill), it wears out from impacts and friction. At the same time, the soldering does not have time to develop its resource before the drill breaks. This is especially noticeable on a large diameter tool. This leads to a decrease in work productivity and unnecessary costs of consumables. Therefore, it makes sense to sharpen the drills yourself. To do this, you need to use a sharpening machine (emery).
When sharpening the drill yourself, it is important to maintain the original corners made at the factory. Their values are: 30 degrees - front edge, 60 degrees - back
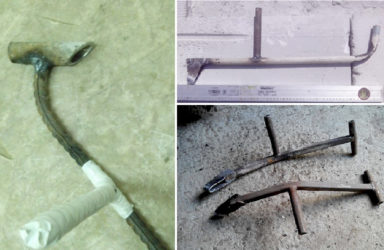
For greater accuracy of sharpening, a device is made from a corner, which fixes the drill in the desired position when sharpening it.
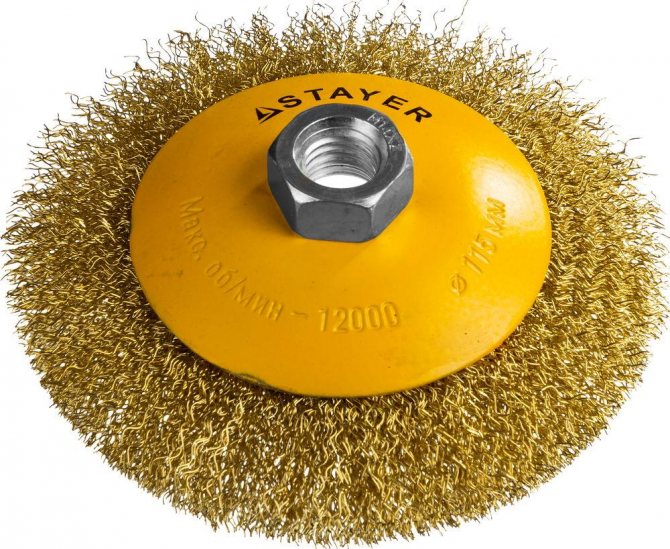
Grinder attachments
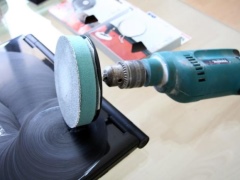
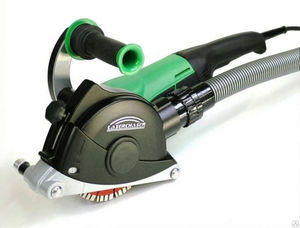 Considering that the construction of a furrow cutter is similar to a grinder, the craftsmen have learned how to make wall chasers from a grinder with their own hands. These mechanisms cut concrete walls without dust, for this they adapt a vacuum cleaner. Arranging a groove in a concrete wall is difficult. Powerful machines are used for this operation.At home, this is not possible, so craftsmen use a grinding machine and a diamond wheel to cut concrete. In order to reduce the dustiness of the room during operation, they install a homemade nozzle connected to a vacuum cleaner.
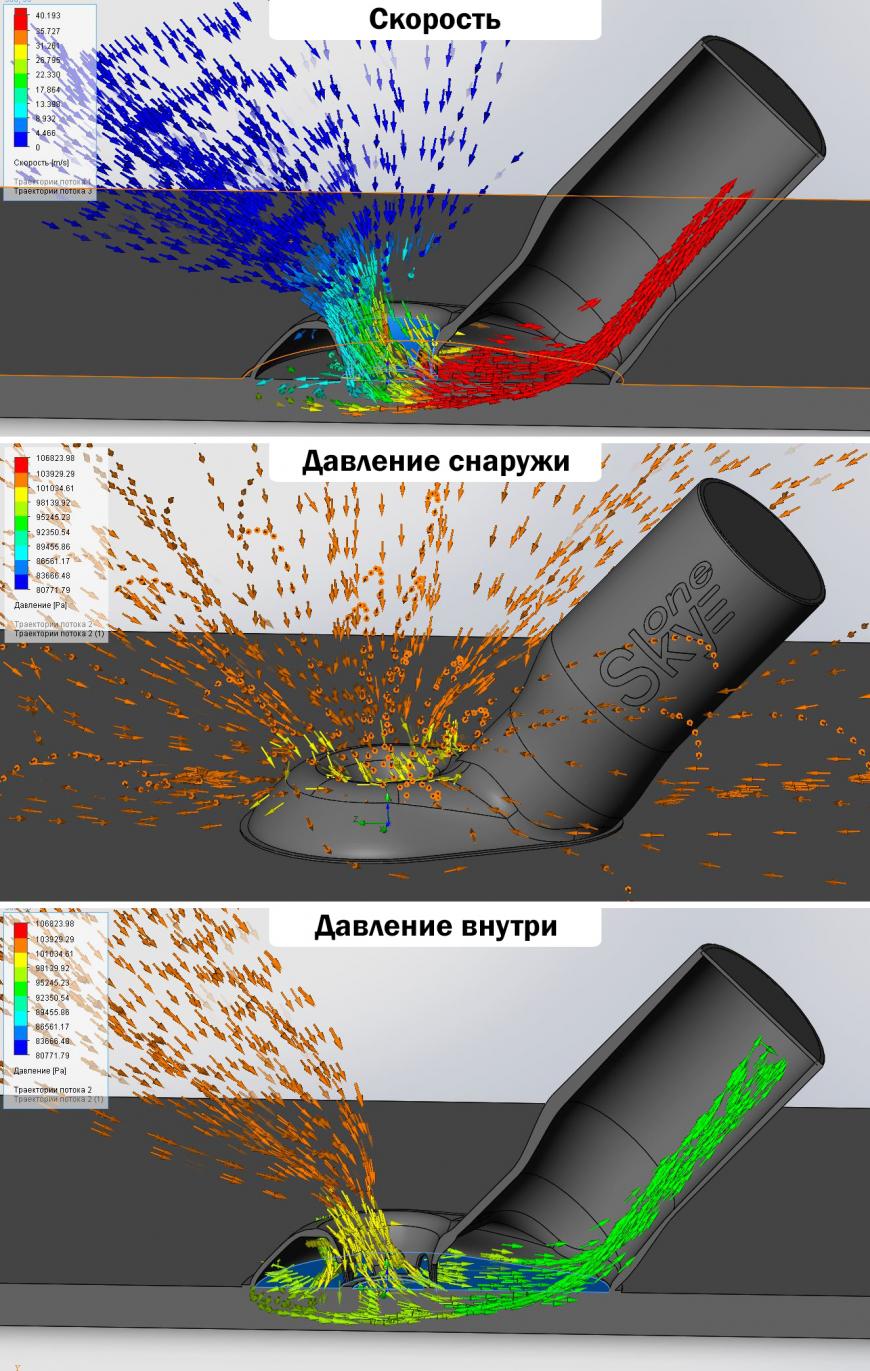
 The design of the nozzle is simple. A piece of sewer pipe with a diameter of 60 and a length of 500 millimeters is attached with construction tape to the lower part of the grinder's body. On the upper wall of the pipe end, make a cut with a width of 20 mm for the entry of the cutting tool. During operation, the circle rotates counterclockwise, then all dust and concrete fragments fall into the pipe, where they are captured by the air stream and fed into the vacuum cleaner's drive.
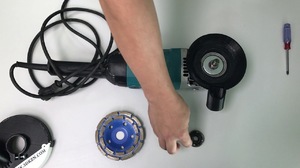
The LBM machine is intended mainly for grinding the surface of the material and cutting metal, therefore, a cutting tool in the form of a thin disk is used. To chisel the walls, you need a grinder with two discs. Installing two discs is easy. To do this, you need to buy a clamping nut in the store. Then a diamond disc and a special nut are installed on the machine's seat, on which the second diamond wheel sits and is strengthened with the purchased nut. The created mechanism can be safely called a wall chaser.
Homemade protective casing
 Safety when working on homemade equipment cannot be neglected. All grinders have high revs, which can cause the circle to break and injure the worker. Therefore, you need to ensure that the mechanism has a protective cover. The efficiency of the work largely depends on the power of the machine and the density of the material being processed. Many different problems arise that determine the optimal performance for selecting a diamond wheel, especially when choosing a cutting tool for high cutting performance.
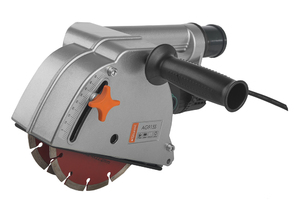
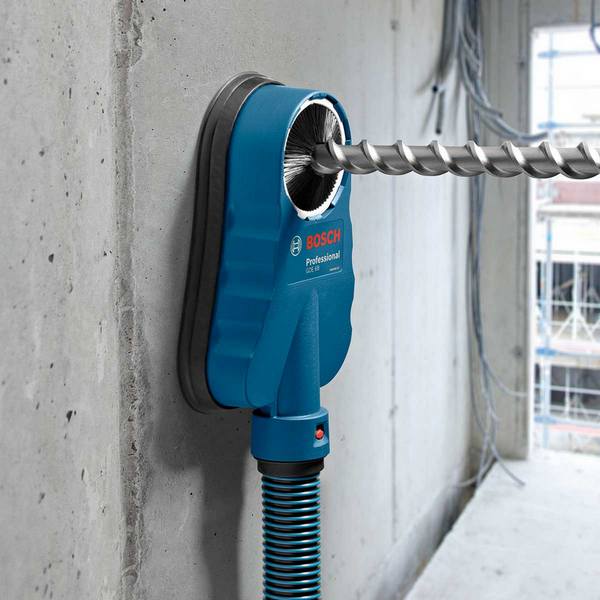
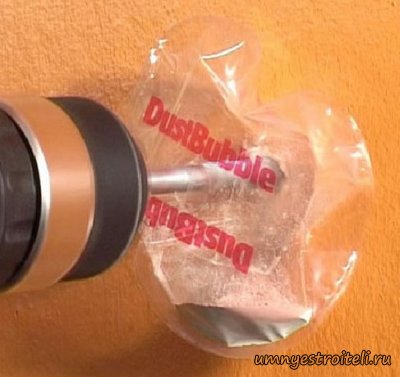
 In order to reliably protect oneself from the effects of dust and damage when the cutting tool breaks, experienced specialists suggest making a closed casing with a branch pipe for a grinder for slitting walls. The homemade design is simple. A standard casing was taken as the idea, a platform, a side cheek, a branch pipe and a cutting depth regulator were added. Drawings for the product are made in the form of sketches in the course of work, taking into account the availability of the necessary materials. Manufacturing process:

- The platform is made of 2 mm thick sheet steel. Base size 250x90 mm. A window is cut along the centerline for the exit of the cutting wheel.
- A hinge for adjusting the cutting depth is welded on one end of the base, on the other a bracket with a slot for fixing.
- The jaws are made of two millimeters thick steel sheet. Semicircular shape, covering two thirds of the cutting tool.
- The width of the casing is 40 millimeters. At one end, a hinge axis is welded, on the other - an M6 hairpin with a wing for fixing.
- The outer cheek has a branch pipe for a vacuum cleaner hose and a clamp for attaching to the neck of the grinder.
Aerated concrete furrower
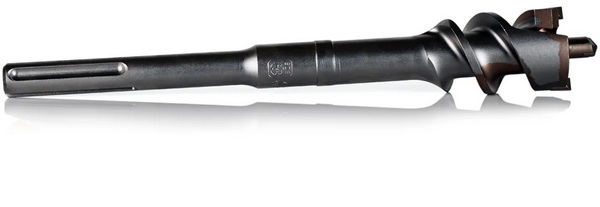
 Aerated concrete, in comparison with concrete, is easier to cut, so you can adapt any power tool that is in your home workshop: drill, perforator, hand circular. The idea is as follows. Buy a keyway cutter for metal, install it in a puncher and mill a groove according to the marking. For ease of performing the operation, you need to make a simple nozzle from wood. To do this, you will need two slats 300x50x30 mm, two wooden pieces measuring 300x150x20 mm.
The technological process of making the device:
- Make a sled. To do this, attach two prepared strips with screws to the base, in which a hole is cut for the cutter to exit.
- Attach the bracket perpendicularly to the base from the board to stop and fix the power tool.
- Make a plank carriage with a hole for the punch neck.
- Before work, set the size of the cutting depth by placing wooden shims under the carriage and the base.
Makita 6013BR
Such a drill mixer performs in our light class.Its weight is only 2.9 kg, which is fully explained by the presence of a not very powerful economical motor, which consumes only 620 watts. However, one should not think that this is not enough. The gearbox, enclosed in a metal case, significantly reduces the speed and transfers all the energy to the spindle in the form of a solid torque (70 Nm). At idle speed, 550 rpm is available to us - what is needed for mixing building mixtures.
True, the spindle speed is not regulated by switches, it all depends on the operation of the "start" button and the skill of the operator. Fortunately, this key is very responsive and functional. The Japanese developers did not waste time on trifles and made it impressive in size; it is not necessary to take off the mittens to prepare a portion of the solution. Surely many builders would also like to have a retainer for the latter in the on position.
For me personally, this is not so important - I rarely stop buttons, I prefer to have maximum control over the tool
The Makita 6013BR drill is quite compact (34 cm long with the rear handle), but despite its good drilling makings (powerful chuck for cylindrical shanks, reverse with rocker switch), its T-shaped layout is more focused on mixing. The main handle is shifted to the gearbox, which does not make it possible to rest against the drilling axis, if you need to make additional efforts, you have to connect the second hand. At the back of the body there is a D-shaped handle, which rotates 360 °, another, straight, screwed in from the top
In short, finding a comfortable grip for the mixer will not be difficult, which is very important. As we all know: "Convenience at work is the second productivity"
This is an excellent mixer for moderately difficult jobs. The unit rightfully belongs to the class of professional tools, besides, it has good versatility - it can be easily used for complex drilling with heavy loads, for screwing / unscrewing persistent self-tapping screws. At one time, we paid $ 350 for this mixer. If there is an opportunity to spend such funds for a home workshop, it will fit perfectly. At the construction site, the Makita 6013BR will definitely work out its price.
Choosing the right product
Rock drill mixers have two main parts: a shank and a working whisk. The size of the tip will vary depending on the type of media to be mixed and the scope of work to be done. Manufacturers always describe in the accompanying materials which mixtures can be mixed. As with other products, it is useful to give preference to products from well-known companies. Even the multiple difference in comparison with unknown brands is fully justified by the high quality of the products.
Much attention should be paid to the selection of whisks according to the shank format. Traditionally, they have a cylindrical or hexagonal configuration.
Also in some cases M14 and SDL-Plus connectors are used. The choice is determined by which connector is provided by the manufacturers of the punch. Bosch Corporation, for example, equips its products with SDL-Plus connectors.
Most often, you can simply tell the sellers which device the mixer is purchased for. They will be able to offer the optimal attachment. The basket of a regular whisk is from 10 to 11 cm with a diameter of 8-15 cm. If the hammer drill is very powerful or you have to mix a lot of solutions, it is better to choose a larger basket. As for the length of the mixer, the choice is simple - you need to focus on the height of the container where the solution will be mixed.


Construction mixer attachments: shapes and sizes
An attachment for an electric construction mixer is a bar with a whisk at one end for mixing and a shank at the other end for attaching the attachment to the drive. After you have decided on the composition of the mixture to be mixed, you can choose the shape of the whisk.And the standard of the bit shank must match your power tool.
Types of shanks for mixer nozzles
Now on sale there are a large number of mixer attachments with shanks of various shapes:
- Regular hexagon, size 8, 9 or 10 mm. Such attachments are intended for use in a power tool having a conventional jaw chuck.
- Hexagon socket (8, 10 or 12 mm) with groove for spring fixing in HEX chucks (can also be used in power tools with a conventional chuck).
- Thread M12, M14 and 21X1.5. Attachments with such shanks can only be used in highly specialized mixers.
- Shanks designed to fit in SDS-plus chucks (can also be used in a simple rock drill).
Sizes and shapes of whisk nozzles for mixer
Mixing attachments are produced:
- Standard lengths 400 and 600 mm (for some extensions 400 mm are provided - total length up to 1 m).
- The diameter of the whisk (part intended for stirring) is from 80 to 220 mm.
The shape of the whisk is chosen depending on the mixture to be mixed. The main forms of corollas:
Spiral. Such corollas are subdivided into right-handed, in which the spiral is twisted clockwise, and left-handed, in which the spiral is twisted counterclockwise. Right-side beaters in the process of mixing raise the solution from the bottom up and are designed for heavy or thick mixtures (concrete, sand and gravel, bituminous). Left-handed spirals, on the contrary, while stirring, capture the mixture from above and lower it down. They are intended for mixing various paints and varnishes, various flowable mixtures and liquid fillers, since they do not splash when using them.
On a note! If the construction mixer is equipped with a reverse system that rotates the whisk both clockwise and counterclockwise, then only one nozzle (right-handed or left-handed) can be used for different mix compositions.
Corollas with straight blades. Stirring occurs only in the horizontal plane, which prevents air from being entrained and entering the mixture. Suitable for mixing various gypsum-based compositions (air ingress is highly undesirable), mixtures for self-leveling floors and the like.
Screw-shaped beaters (the screw is usually made of plastic). Mainly used for light liquid mixture compositions. Sometimes two screws are installed on the axle: the lower one, which lifts the components up, and the upper one, which prevents the mixture from splashing.
Important! In the technical description, manufacturers indicate which type of mixture a particular whisk is intended for mixing, as well as the maximum recommended amount of solution for which it is designed. Depending on the size, materials and purpose, the price for these accessories is in the range of 100 ÷ 1100 rubles
Depending on the size, materials and purpose, the price for these accessories is in the range of 100 ÷ 1100 rubles.
Cable installation and installation of sockets
Cables can be installed in the wall in several ways - with or without corrugation. In the first case, a special corrugated pipe is placed in the groove, several wires are pulled into it and brought to the junction with the elements. In the second case, the cables are mounted simply in a gutter, fixing with plaster, putty or plaster.
It is best to mount sockets in one frame in blocks; sockets for telephone, Internet, cable TV can also be connected there. Holes for socket outlets, switches and other elements are made with a perforator (in percussion mode) with special diamond bits of the required diameter. Then the elements are mounted according to the instructions, everything is closed up neatly.
How to close the grooves before finishing:
- The furrows and areas around the elements are thoroughly cleaned with a vacuum cleaner or a broom, removing all dust.
- Then everything is carefully primed, the soil dries up.
- The groove or recess is moistened with water, after which it is sealed with plaster, stucco or polyurethane foam.
Slitting concrete is not as difficult a task as it might seem at first glance. But each stage of work requires attention, strict adherence to technology and the use of suitable materials and tools. Only in this case, you can be sure of the reliability and safety of communications.
The design and principle of operation of the wall chaser
Wall chasers are used to cut channels in solid walls made of brick and concrete, not only for laying electrical wiring, strobes are made for various communications:
- ducts for the exhaust ventilation system,
- water supply pipes,
- sewer pipes,
- coaxial cables for television, the Internet and telephone lines are also very often hidden in the walls.
Protection is provided by a special nozzle with a casing over the discs; one of the most important elements of its design is the lower platform. It is pressed against the surface to be treated and drawn in the direction of the grooving line. The level of the platform in relation to the protruding discs is adjustable, thus the cutting depth is set.
There are different models on sale, a good tool with dust suction elements costs around $ 1000, so before wondering where to buy and how to choose a wall chaser.
Think about whether you need it at all, finish building or repairing, expensive equipment will lie collecting dust. When you do professional construction, interior decoration, electrical wiring and equipment installation. Definitely buy quality products from well-known Japanese and European manufacturers:
- Prorab,
- Sparky,
- Bosch,
- Makita,
- Hitachi.
There are other companies that make good tools, but these are the most famous, whose products have already shown their capabilities.
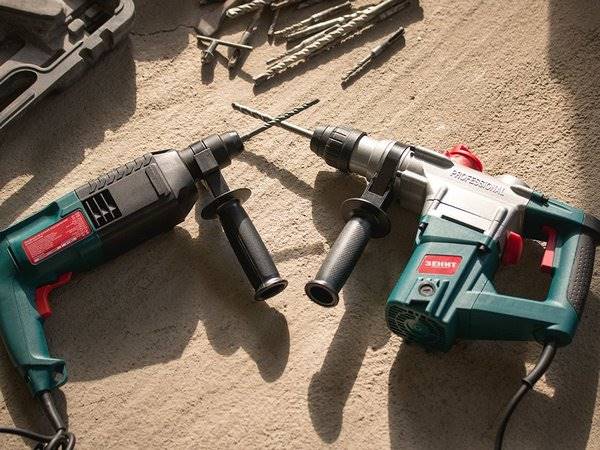
Drill and drill: what's the difference?
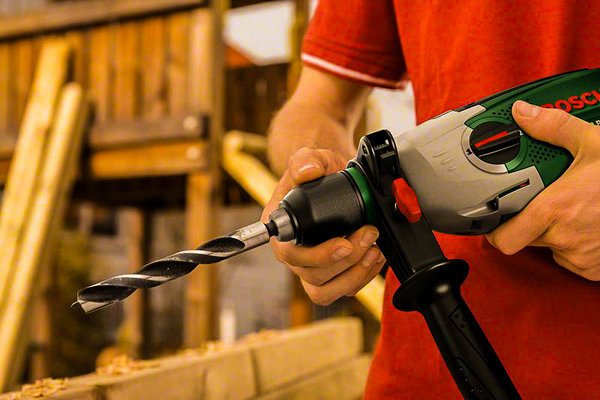
There are two main types of equipment for a hammer drill. Drills are used in perforator drills. They make a hole with sharply sharpened ribs arranged in a spiral.
Drills of various diameters are used to punch through stronger foundations. In contrast to simple rotary movements of the drill, this equipment also performs percussive and vibration movements.
Drills are not suitable for use in a drill nest, and have their own design features:
- there is a landing shank at the end of the tooling,
- fastening grooves that fit only the socket of the hammer drill,
- screw rod.
The latter feature allows the nozzle not only to make holes, but at the same time to remove the resulting debris outside. The strength characteristics of the drill are added by a victory or diamond tip.