Rating of the best models and their features
Depending on performance and cost, the following are the best models of potato diggers that join walk-behind tractors.
"Neva"

The unit is ideal for use in vegetable gardens, as it is designed for the processing of small areas. It has a relatively low weight (34 kg) with a width of 36 cm and a grip depth of about 20 cm. With an average movement of a walk-behind tractor of 2 km per hour, the productivity is 0.2 hectares per hour.
| Advantages | disadvantages |
| Availability of additional wheels | Missing deep-planted potatoes |
| Relatively low cost of 8-9 thousand rubles. | Not used on hard soils |
| Affordable maintenance (no problem buying parts) | |
| It can be used in the presence of weeds on the field, which does not affect the quality of harvesting |
"KKM-1"
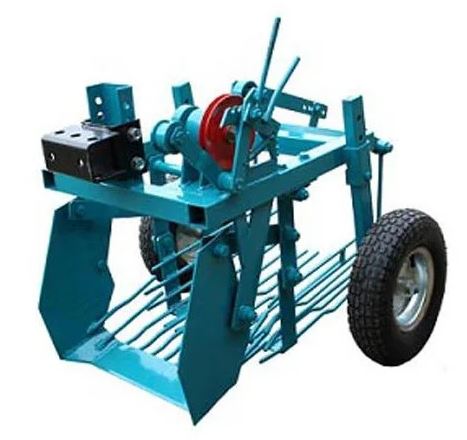
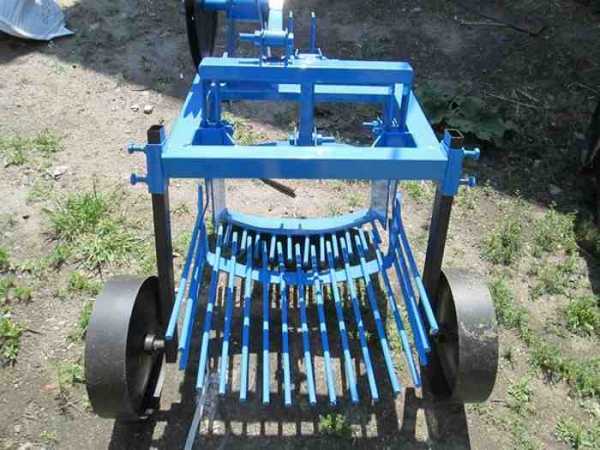
The potato digger is a screening type, which is equipped with powerful wheels, which significantly reduces the load on the walk-behind tractor. The soil is gripped at a depth of about 20 cm. The working width is 37 cm with a machine weight of 40 kg.
| Advantages | disadvantages |
| The ability to harvest onions, beets and carrots without damaging the tubers | Only used on light to medium soils |
| Relatively low cost (up to 12,000 rubles) | |
| Ease of operation | |
| Suitable for most motoblocks, has a convenient removable mount |
"KT-51"
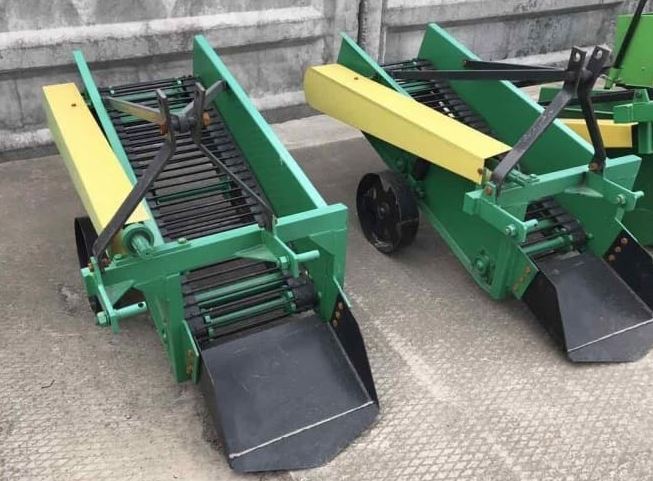
Designed for connection to medium motoblocks that have a keyed power take-off shaft. The conveyor-type device has a weight of about 50 kg with a width of the processed strip of 45 cm. The depth is manually adjustable (maximum - 30 cm).
| Advantages | disadvantages |
| Made of high strength metal | Quite high cost - about 28,000 rubles. |
| Has a long service life | Not used for hard and waterlogged soils |
| Root crops are not damaged during harvesting | |
| There is a possibility of manual control by means of |
"KVM-3"
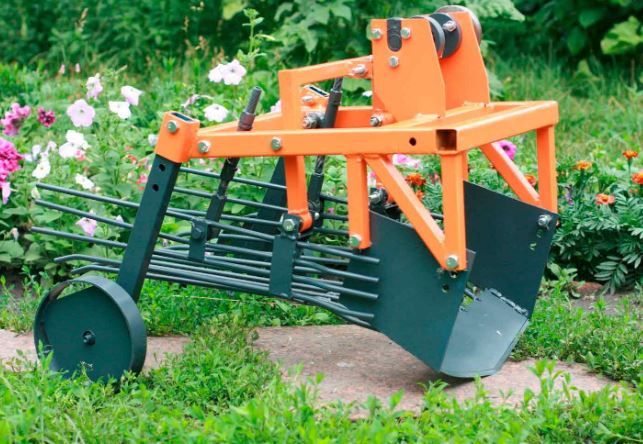
Vibration type potato digger is intended for use in hard and loamy soils. It has an additional knife, with the help of which the soil layer in which the potatoes are located is trimmed. At a relatively low price, this model fell in love with gardeners for the speed and quality of the work done.
| Advantages | disadvantages |
| The cost is about 8000 rubles | Sometimes root vegetables spoil when hit by knives |
| High performance and the ability to use on any soil | |
| Ease of use |
"Soyuzmash KKBS reinforced"

The most primitive, but no less popular version of potato diggers. The unit is a small plow, from which the beams of the rods radiate. The plow is buried 20 cm in the soil, loosens it and brings the potatoes to the surface, where it lingers in the twigs, cleared of the soil and laid out on the surface.
| Advantages | disadvantages |
| Affordable price - about 1000 r | No mount included |
| Strong, but more suitable for black soil | Only processes 1 strip at a time |
Drum Potato Digger
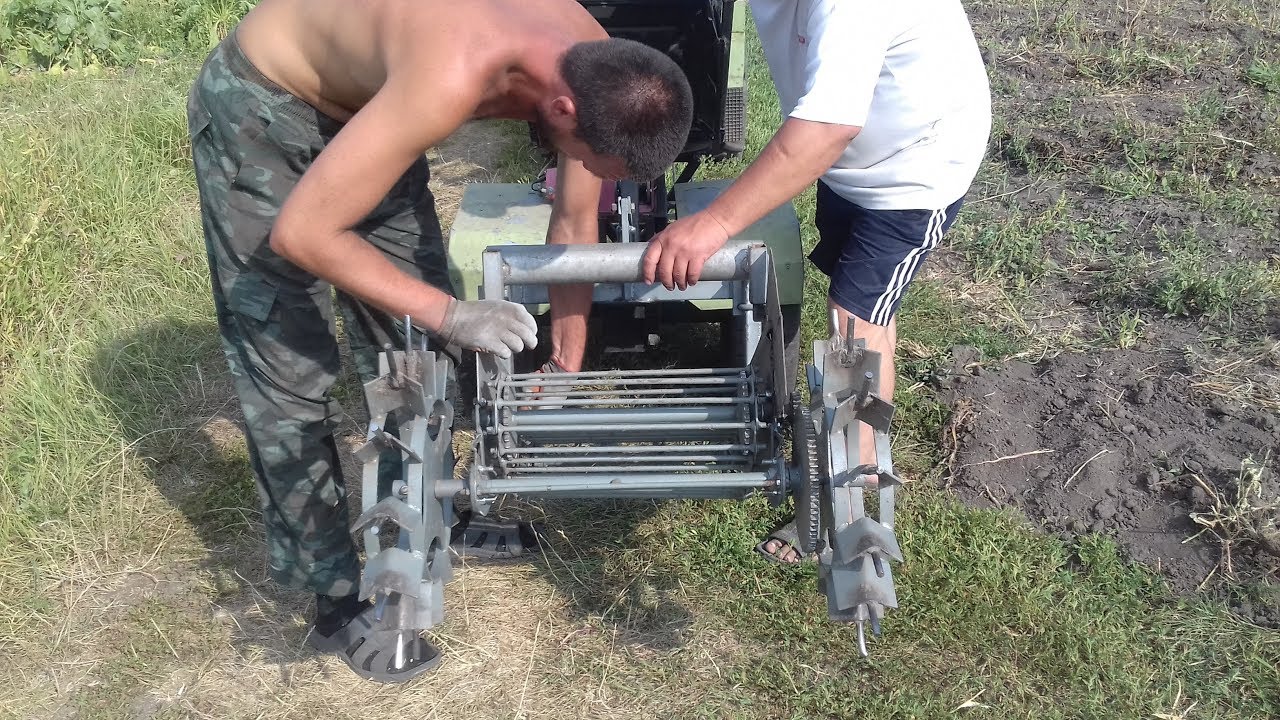
The potato digger, equipped with a drum, is used when processing fields using a mini-tractor. The drum was named "squirrel wheel". This design allows you to clear the potato tubers from soil due to the rotation of the trellis structure. But those who used it note that the potato skins are damaged in the drum.
Homemade drums are rare, as making them is not easy.The drum is connected to the PTO shaft through gear drives, chains and a reducer using a direct drive hitch. The knife is hinged to the frame.
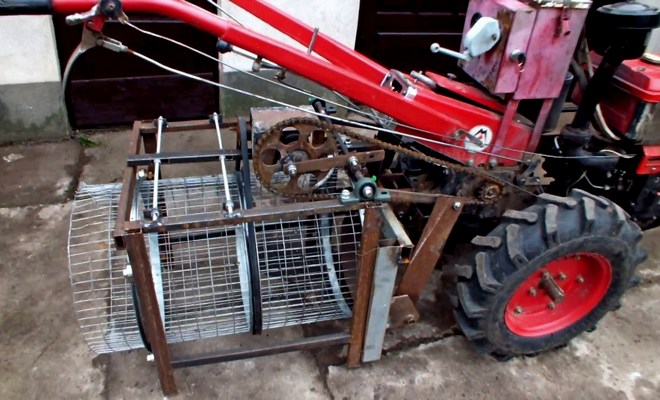
Then the structure is welded to the discs and fixed on 2 axles. The drum is mounted on bent discs. Experienced craftsmen use bicycle wheel rims to design. The shaft rotates on bearings and drives the drum itself. The soil, cut with a knife, enters the drum along with the tubers. The soil is poured out through the grid cells, and the potatoes move to the edge and fall onto the arable land.
Views
Depending on the design features, there are drum-type diggers, fan-type, rotary diggers, mechanisms with a cardan drive, with a power take-off shaft and gearboxes.
According to the principle of operation, potato diggers are divided into three types:
- roaring;
- simple;
- conveyor.
Rumbling or vibrating
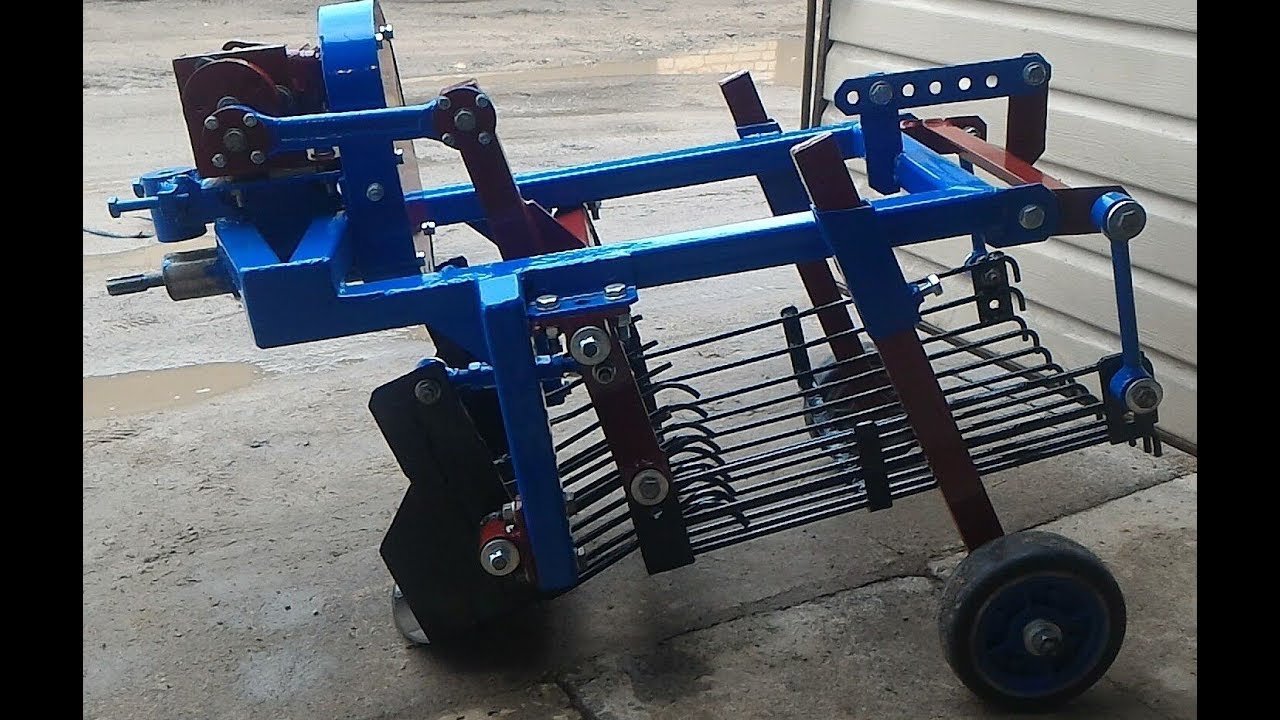
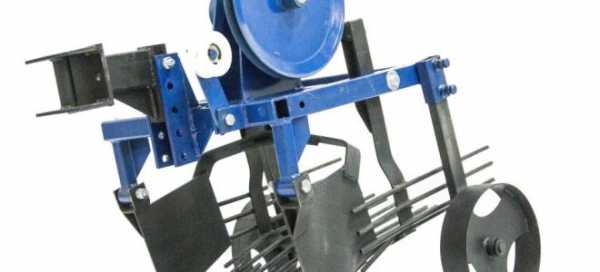
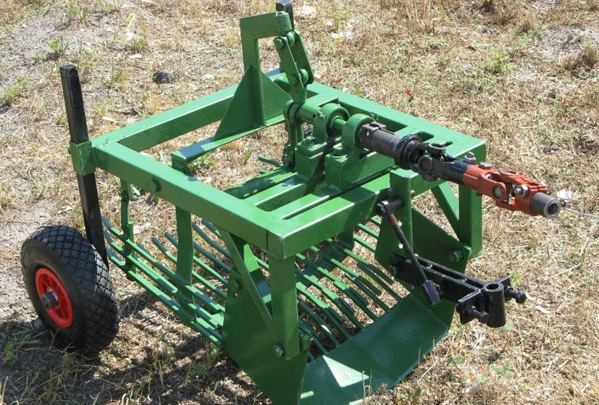
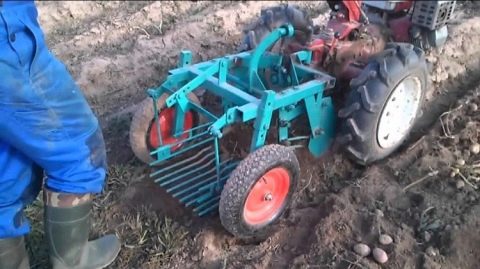
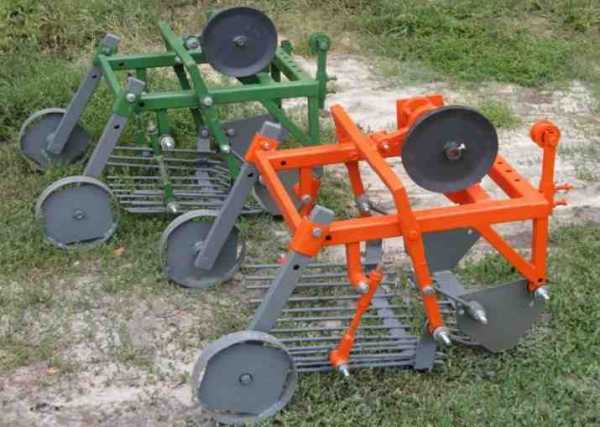
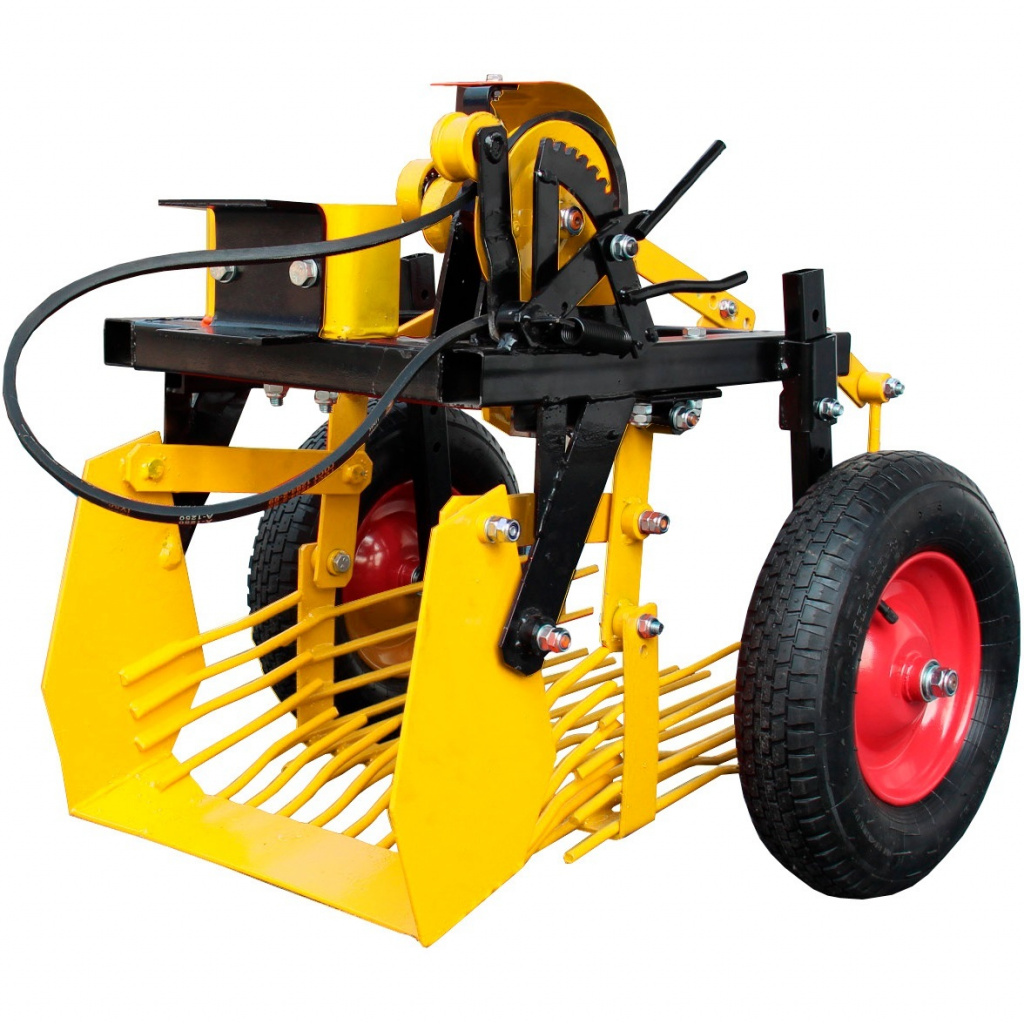
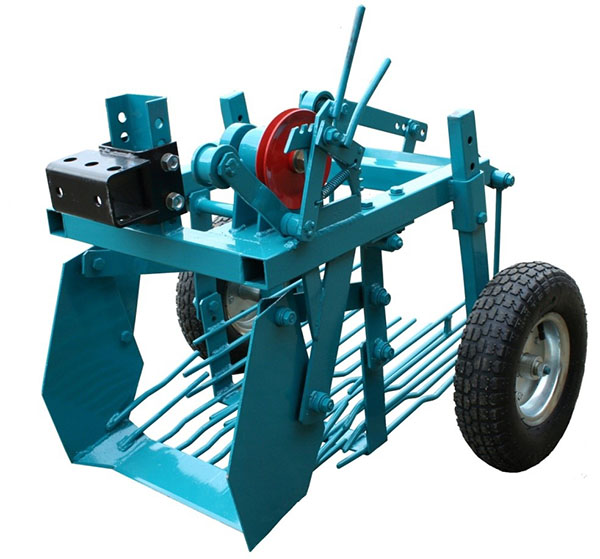
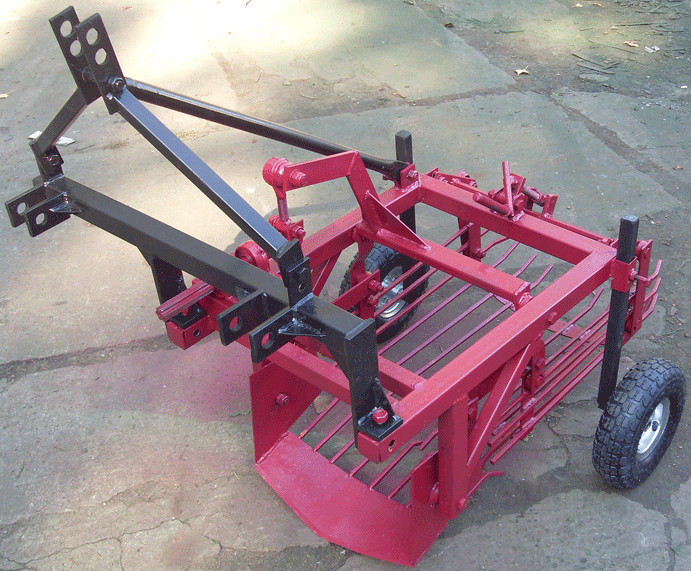
The vibratory digger is considered the most effective in comparison with all other types of equipment. It consists of a special grid table as well as a drive and a share. The principle of operation is quite simple: one of the main elements of a potato digger is flat bread, which goes deep into the ground and, together with the potatoes, picks up the upper layers of the earth, which are transferred to the table grate. After that, under the influence of a slight vibration, the excess earth begins to flake off and "go" through the cracks back into the ground, and the roots themselves, already peeled, fall out from the back of the unit.
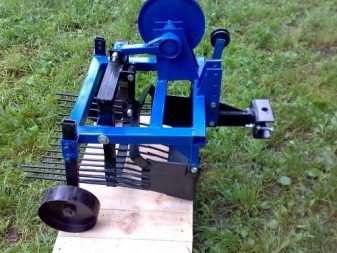
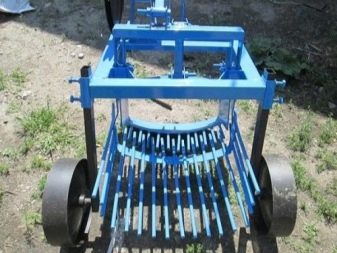
This system allows you to collect up to 98% of all tubers from the ground. The mower knives are buried 21-25 cm in the ground and grasp a layer of soil 35-40 cm wide, thanks to this mechanism, a fairly significant area of plantings can be processed at once. The screen type model successfully copes even with heavy soils, after digging, absolutely all the tubers remain lying on the ground, so the farmer does not have to dig into the clods and look for the tubers remaining there.
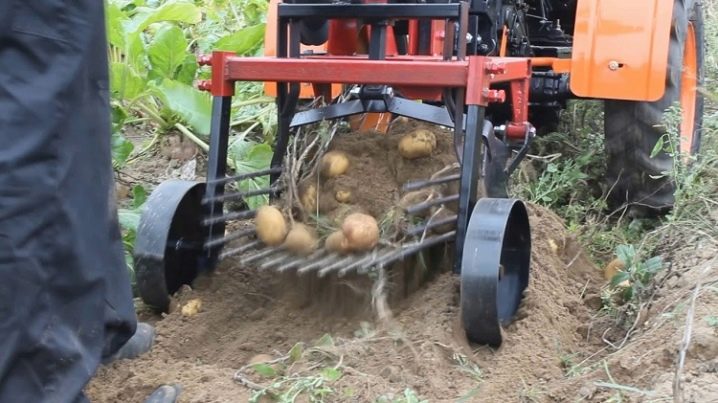
However, there were some drawbacks. The cost of such a digger is very high, in addition, it is unprofitable to use it in small areas, since the cost of purchasing it and fuel consumption simply will not pay off. Also, vibration is often transmitted from the mower to the walk-behind tractor, and from there to the operator, which can cause some discomfort for the operator.
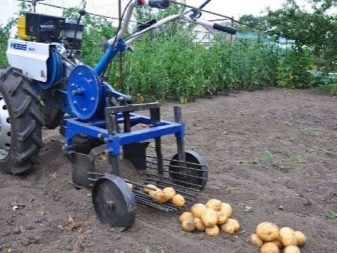
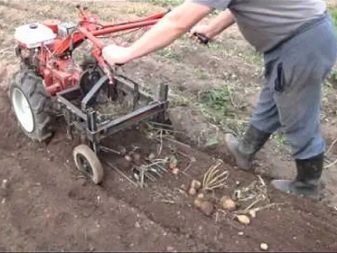
Simple or lancet
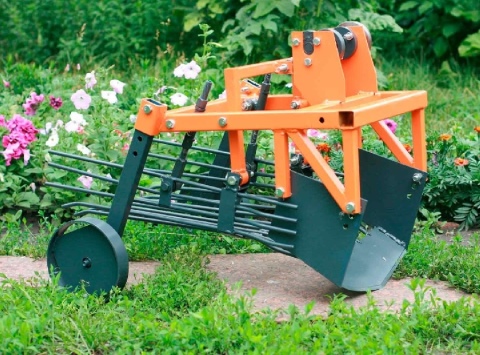
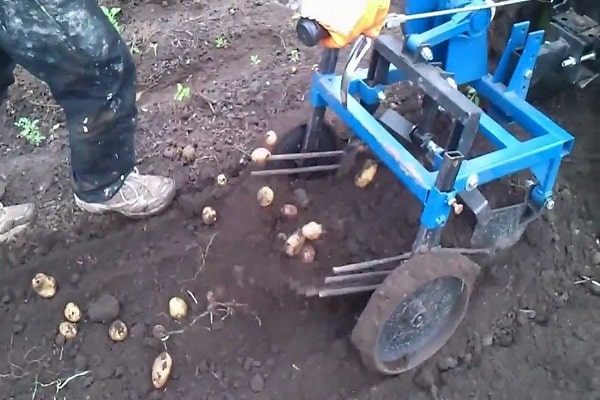
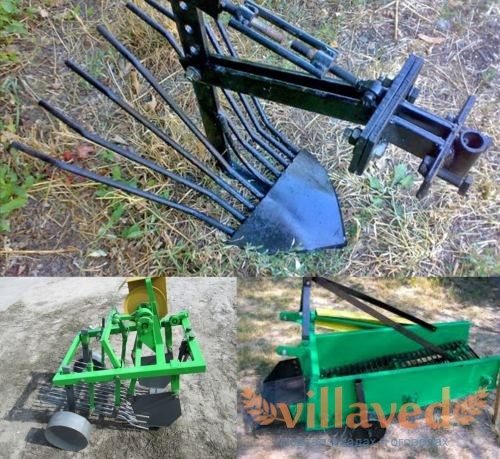
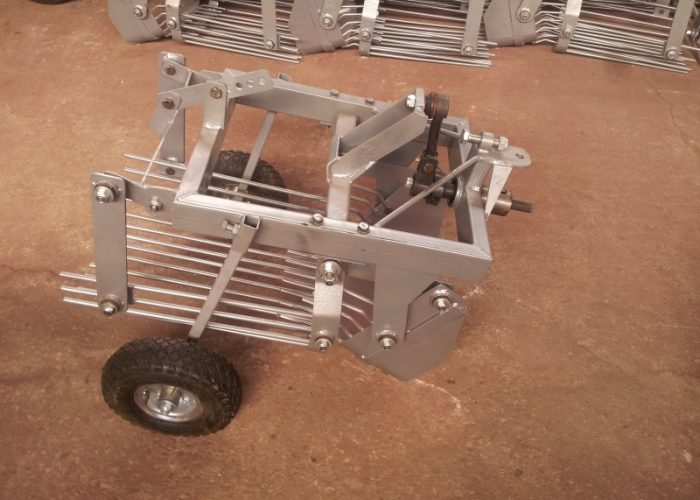
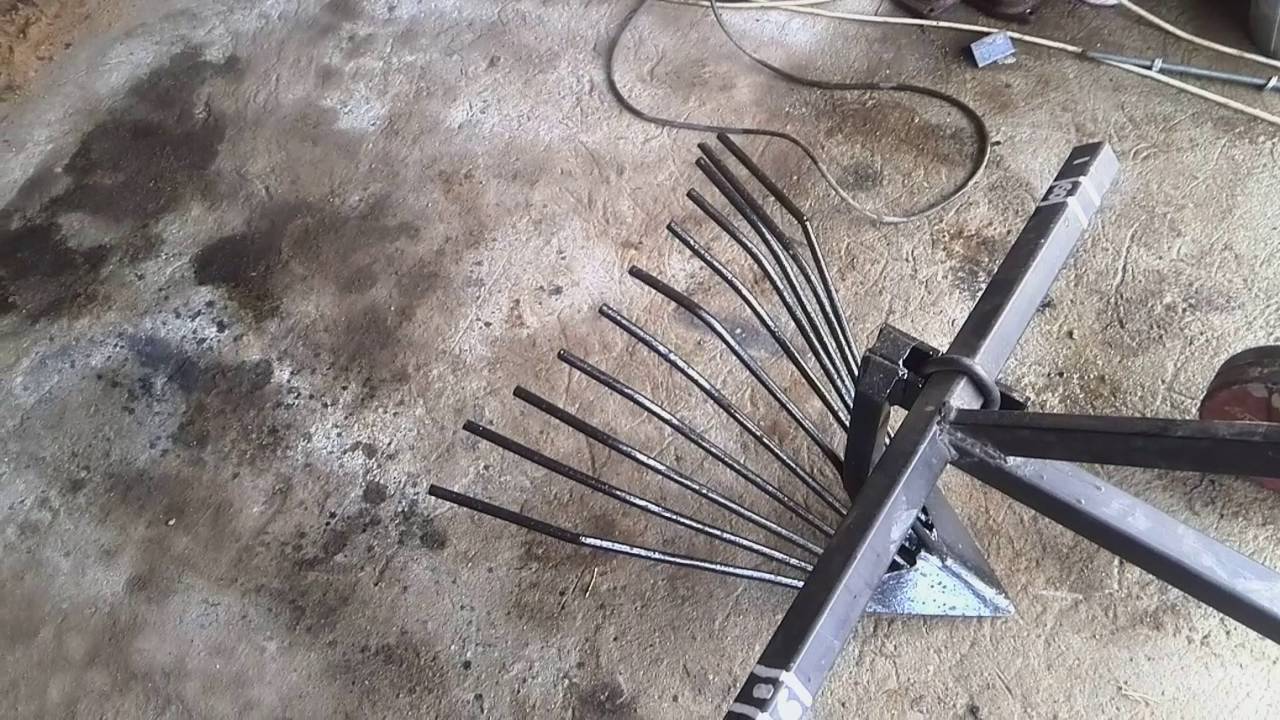
The simplest version of the potato digger is considered to be a universal lancet. It is a mechanism that visually resembles a shovel, to which rods are attached. Due to the sharpened edge, the device undermines the soil in the aisles, and the potatoes fall on the teeth of the device. After that, all unnecessary soil crumbles, and the potatoes are thrown onto the surface of the sown area.
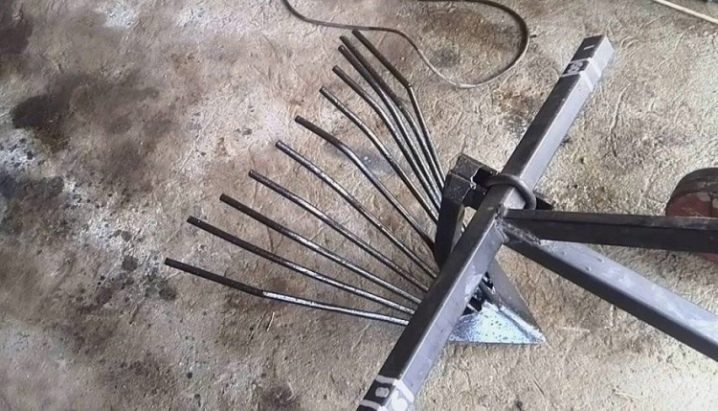
This scheme has many advantages:
- the device is universal, therefore it can be mounted to a wide variety of modifications of walk-behind tractors;
- the digger can be used even with low-power walk-behind tractors;
- several varieties of universal devices are presented on the modern market, which allows the farmer to choose the best option based on the structure and moisture of the soil, as well as the depth of placement of potatoes;
- increased speed and performance of the unit, by connecting such a digger to a walk-behind tractor, it can even be turned on to second or third gear;
- a universal modification is relatively inexpensive and therefore available to most of Russian summer residents and owners of household plots.
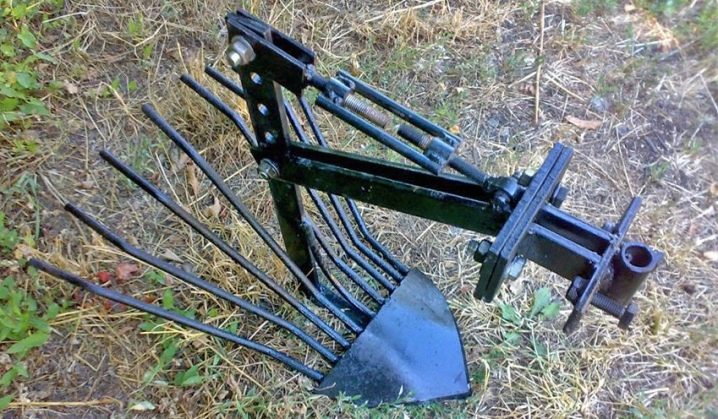
The universal model also has its drawbacks:
- the digger is buried no more than 15 cm into the ground, and its width does not exceed 20 cm;
- after harvesting, at least 15-20% of all potatoes remain in the ground;
- the sharp edges of the shovel often cut the tubers during their digging, however, with the manual method of assembly, this figure is much higher;
- the crop can only be harvested in rows - before you start digging out the potatoes, you must definitely dig up the previous row.
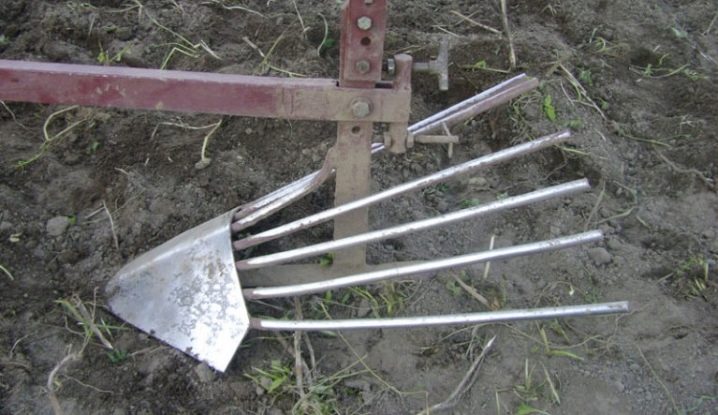
Conveyor
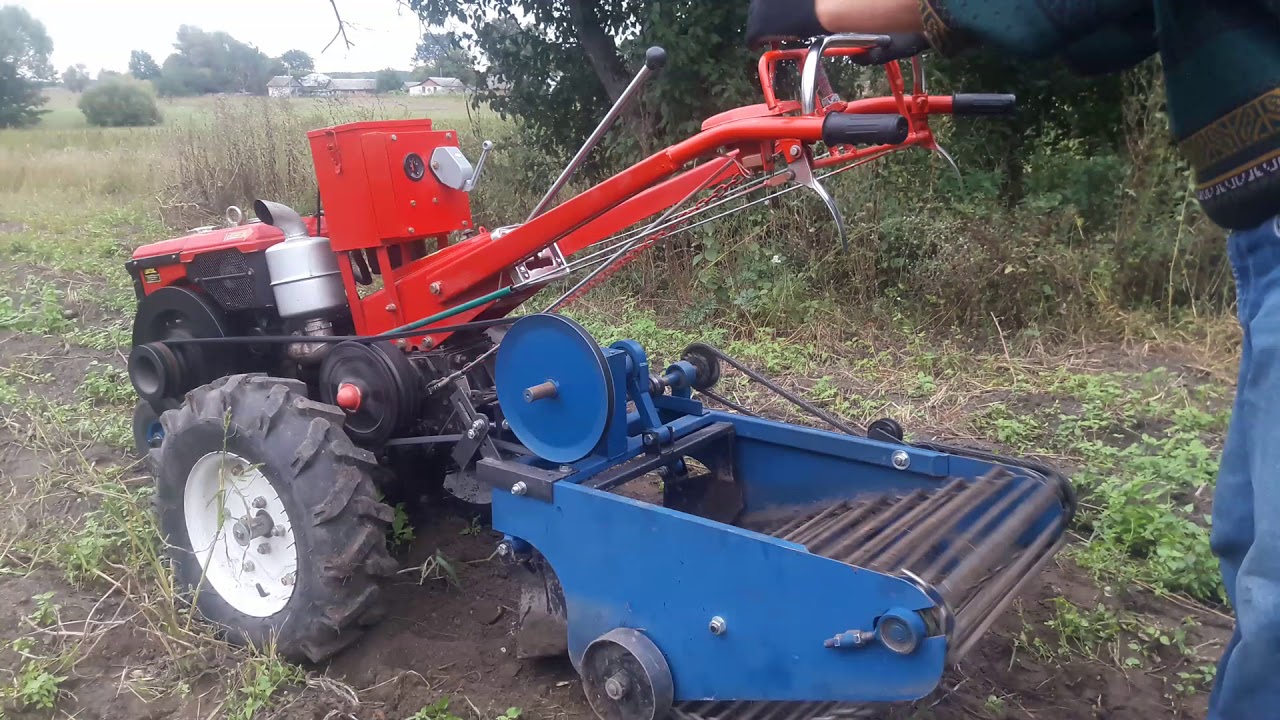
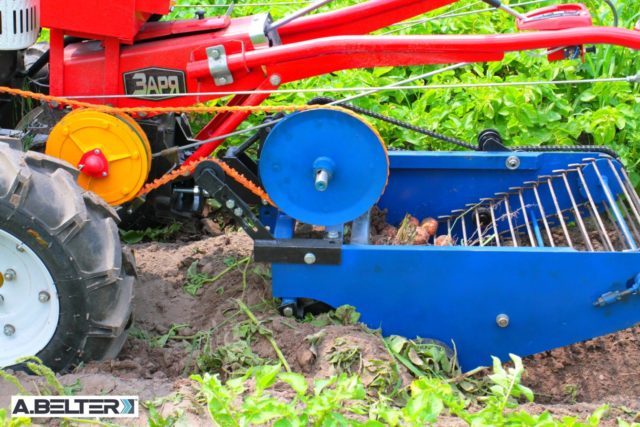
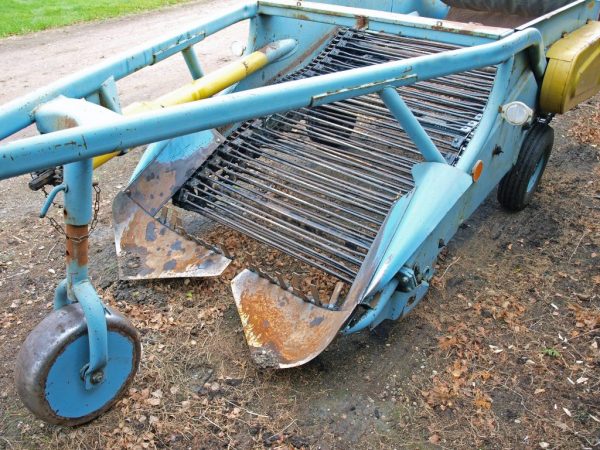
Potato digger designed for heavy draft motoblocks. The only drawback of such equipment is its very high cost. The unit with a belt mechanism is a bit like a vibrating type of devices, however, instead of a special table, there is a moving belt. During the operation of the unit, the tubers move along it and undergo a complete cleaning of soil residues. This model is optimal for large farms that grow large quantities of root crops for commercial purposes. The harvest with such a digger can be collected quite quickly, even on a large sown area.
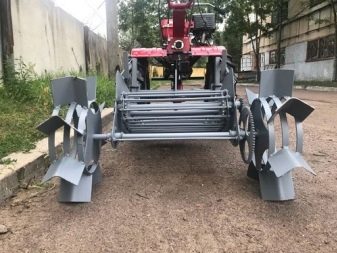
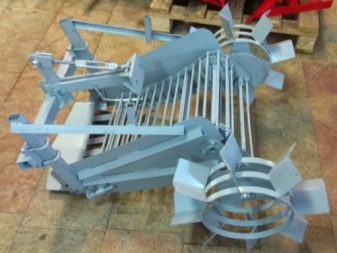
Design features and types
Before you make a potato digger for a walk-behind tractor with your own hands, you need to study the device, design features and prepare the tools and materials necessary for work. The principle of operation for all models is the same: the teeth of the mechanism pierce the ground and rake out the earthen lump along with the root crops. In this case, the crop can be collected in a bunker or remain in the garden. It will depend on the constructive solution of the model. Potato diggers are:
- fan (lancet);
- vibrating (roaring);
- conveyor.
Experienced craftsmen show their engineering ingenuity and independently create multifunctional units that are used for planting root crops, and for hilling, and for harvesting.
Optimum metal thickness
The hinged structure is assembled from metal parts. The thickness of the sheet steel should be selected taking into account the expected load: the more it is, the thicker the material should be. Experts recommend using sheets with a thickness of at least 8 mm.
Digger Wheels
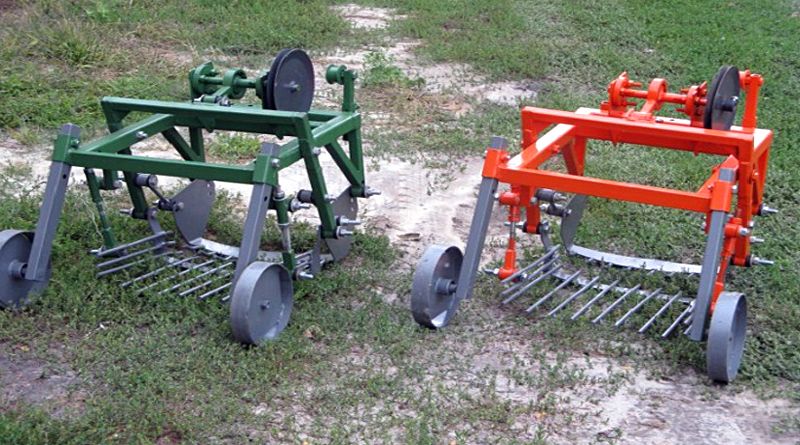
The design is equipped with movable wheels. When making a digger in a home workshop, they can be borrowed from an old garden wheelbarrow. Wide tires make it easier to move around the beds. The best option is those equipped with an axle. Racks are attached to the axis, in which locking holes are made.
Alternatively, you can use metal. They will make the structure heavier, which will improve the performance of the rally on hard soils. Rubber ones will move worse on wet ground, rubber ones will show themselves better in such a situation, but with a tractor tread.
Connection methods
All elements of the unit are connected by contact welding (electric or gas), as well as using classic fasteners (bolts, nuts). Moreover, the advantage of the bolted connection is that, if necessary, the unit can be disassembled and assembled.
How to install and configure?
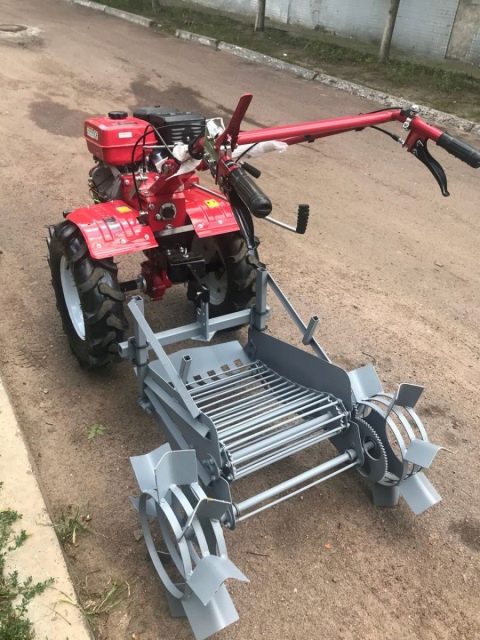
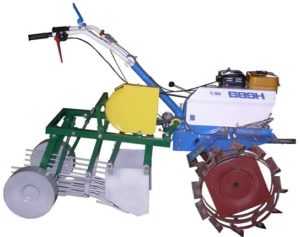
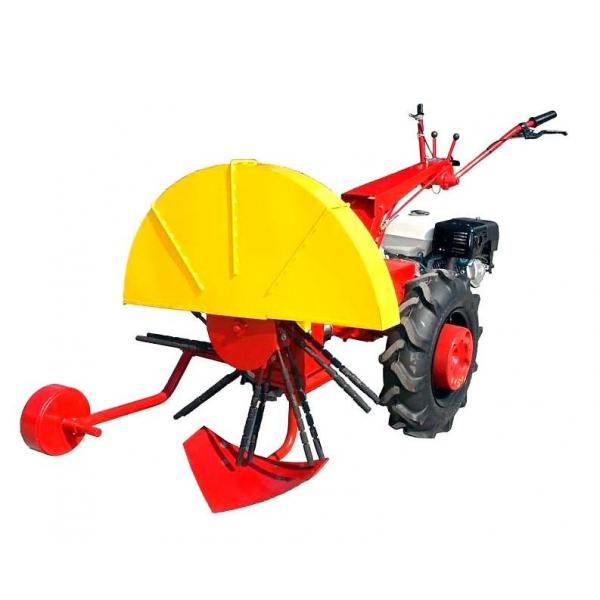
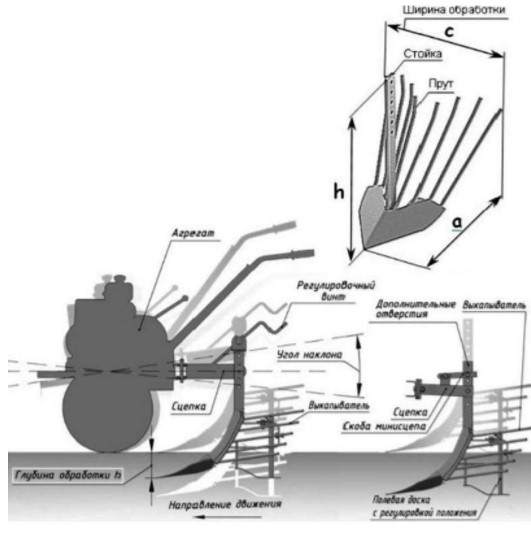
To attach the potato digger to the walk-behind tractor, use a hitch, which includes the front part - it is attached to the tractor, a device for adjusting the incline of attack, as well as a bracket for fasteners. The hitch is divided into two elements. The right one remains on the digger, and the second is fixed to the tractor, both parts are connected with special bolts. A long center screw is used to adjust the mechanism. How you set it up will determine the depth of digging the earth when the device is operating.

After starting the engine, the potato digger immediately starts to work, however, it often happens that the hitch begins to enter the ground at the wrong angle, the reason is the wrong setting of the mechanism. If the situation is not corrected, the walk-behind tractor will begin to slip or the belt will simply slip off the pulleys. As a result, the conveyor of the mechanism will become clogged with earth, and it will be impossible to continue working.

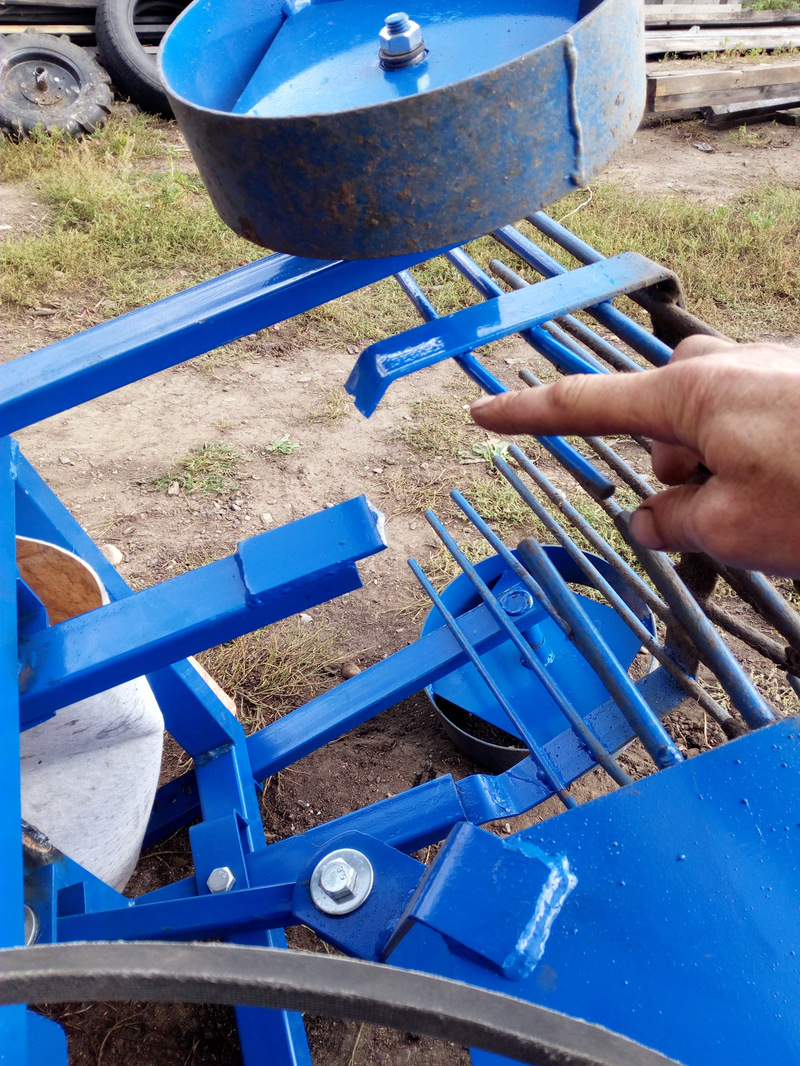
In this case, adjust the settings; for this, carefully rotate the angle of attack screw so as to decrease it. In addition, on the trailed unit, you need to select the optimal position for the holes, thanks to such actions, you can set the desired immersion depth in the ground.
In order for the digger to interact correctly with the walk-behind tractor, all the bolts on the trailed unit should be adjusted, in this case the units will be located on the same axis, and the device itself will move evenly along the surface and will not start to go too deep into the ground.
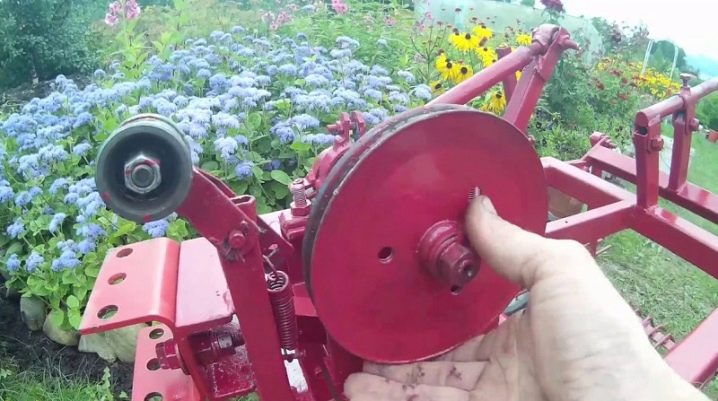
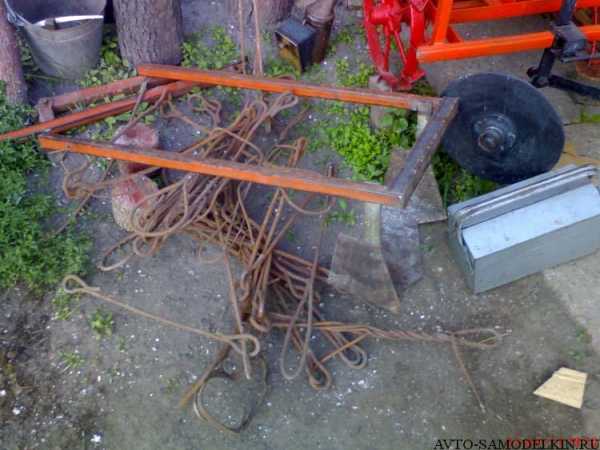
Many craftsmen prefer to make a potato digger with their own hands - such equipment is much cheaper, and it works quite well. Having the most minimal skills in working with metal objects, as well as diagrams and drawings, the excavator can be built in just a few hours. The manufacture of a mechanism usually begins with the manufacture of a welded frame, for this you need a square pipe made of metal, it is sawn into 4 segments of the selected length, a rectangle is welded from them, then a jumper is made from the remains.
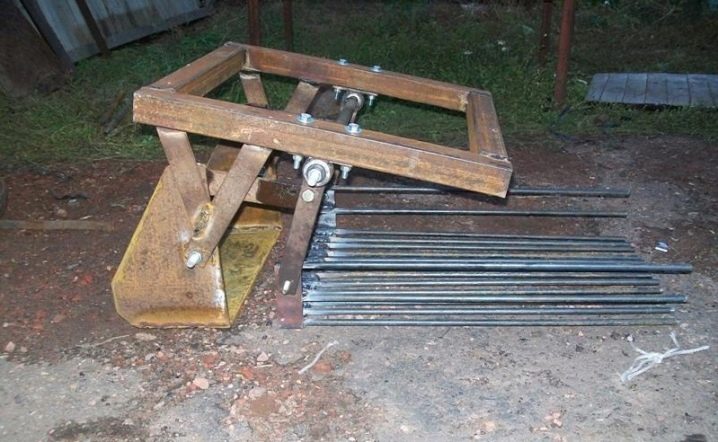
At the next stage, it is necessary to make vertical posts, usually they are cut from metal squares, and then welded to a steel frame, the posts are fixed together with iron rods, usually their diameter is 0.5 cm.The cutting part of the device, which will be directly responsible for cutting the ground, made from steel sheet 5 mm thick or from an old circular saw, in both cases such a potato digger will work very well. At the same time, the sharpening must be rounded, thanks to this it will not be able to go too deep into the ground and will minimize the likelihood of damage to the tubers themselves.
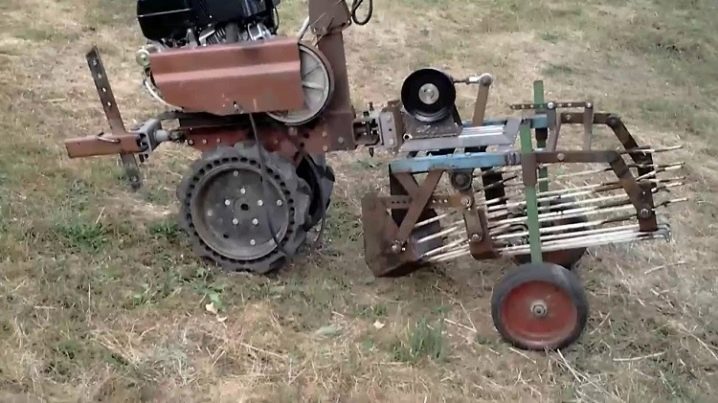
Homemade construction, as a rule, is supplemented with movable wheels, usually borrowed from an old garden cart, it is best to pay attention to devices with wide tires - they will make moving along the beds easier. It is optimal if the wheels are equipped with an axle to which the racks with selected holes will be attached
If you do not have suitable wheels, you can use metal ones.

If you are going to work with wet soils, then it would be correct to give preference to rubber wheels, but with a tractor tread. Keep in mind that normal rubber wheels will move much worse in wet ground. All elements are connected to each other using resistance welding, as well as using traditional fasteners - nuts and bolts. The first option is more practical and durable, but the models made according to the second principle can be disassembled and reassembled if necessary. It is not difficult to assemble a digger, while the cost of the finished product will be minimal.

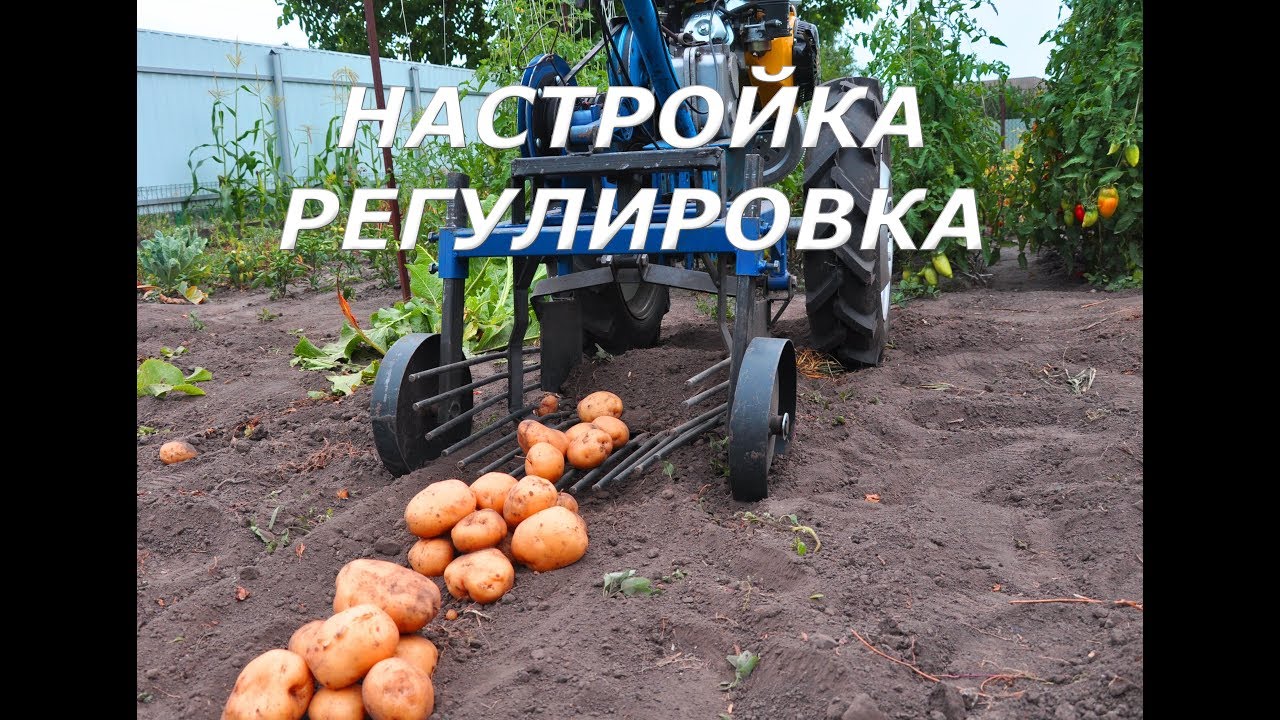
For information on how to set up and adjust a potato digger with a walk-behind tractor, see the video below.
How to set up a potato digger on a walk-behind tractor
Before you start harvesting with new equipment for your walk-behind tractor, you need to set it up correctly.
When digging potatoes, the most important goal is not to damage the roots.
Therefore, pay special attention to plow adjustment.
How to set up a potato digger?
- Locate the bolts that are located between the plow shank and the lock.
- Loosen the adjusting bolts.
- Move the plow by adjusting the distance it goes into the soil. It will be enough to set 30 cm, this is the approximate distance of one shovel bayonet; if the depth is shallower, there will be a risk of root damage.
- Tighten the bolts.
- The next step is to adjust the angle of inclination of the field board. To do this, twist the screw handle until the board stops in the ground, and then in the opposite direction.
- Stop when the back rises 2-5 centimeters above the ground.
Yuri Leskov's roaring potato digger: drawings, photos and video
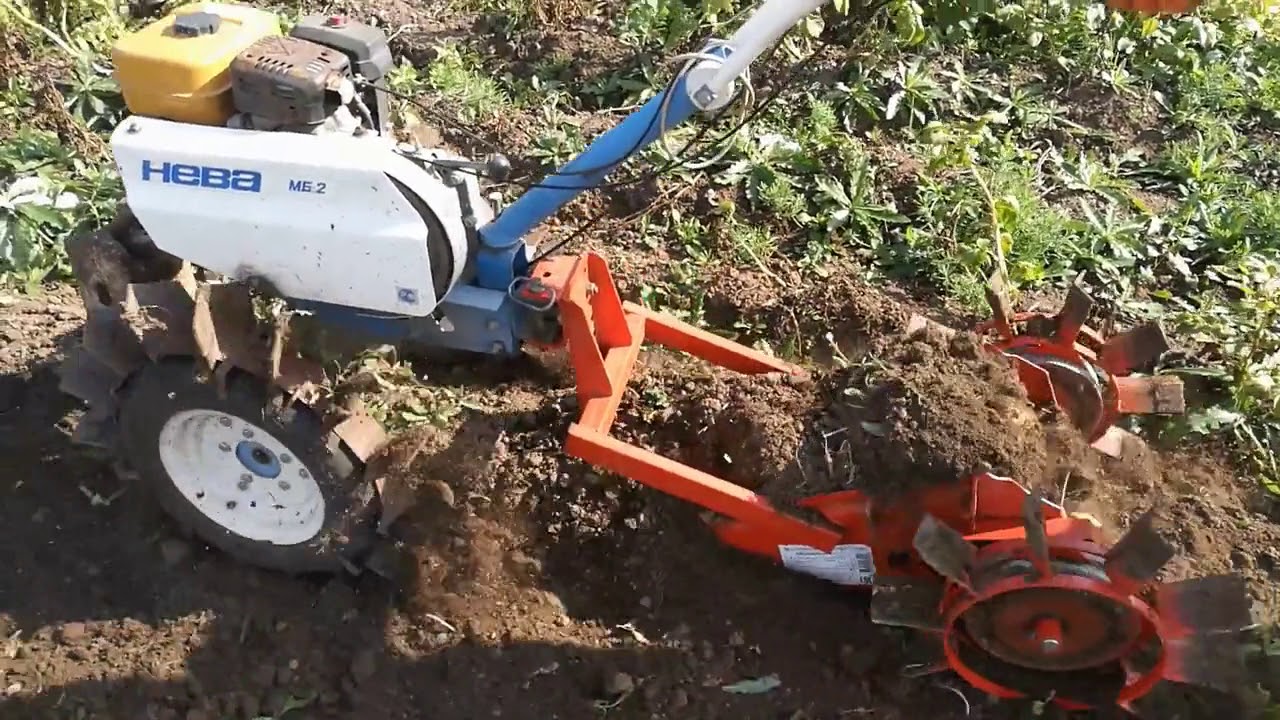
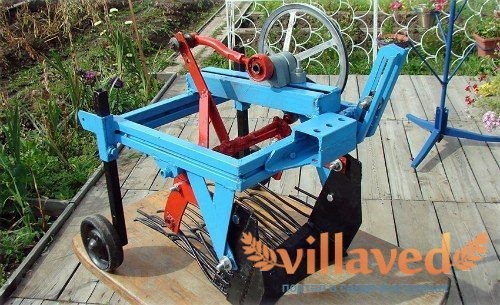
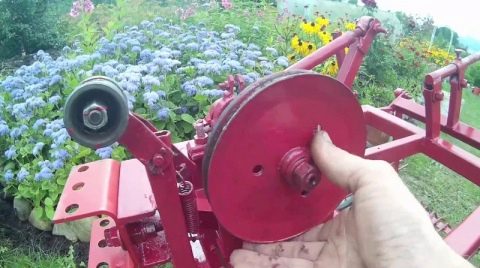
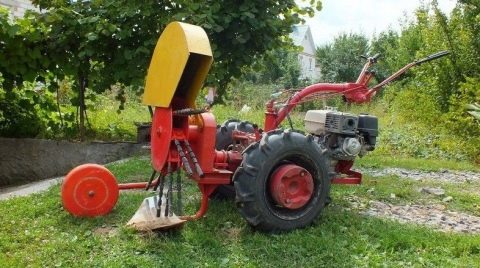
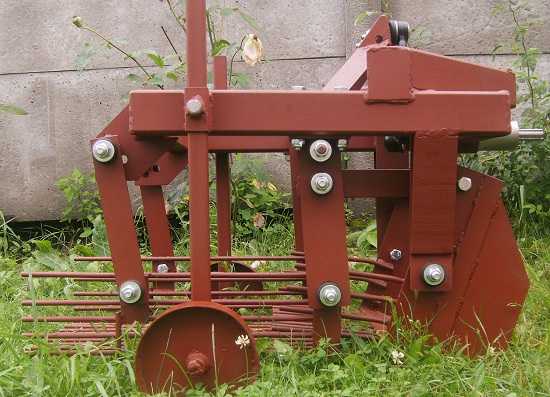
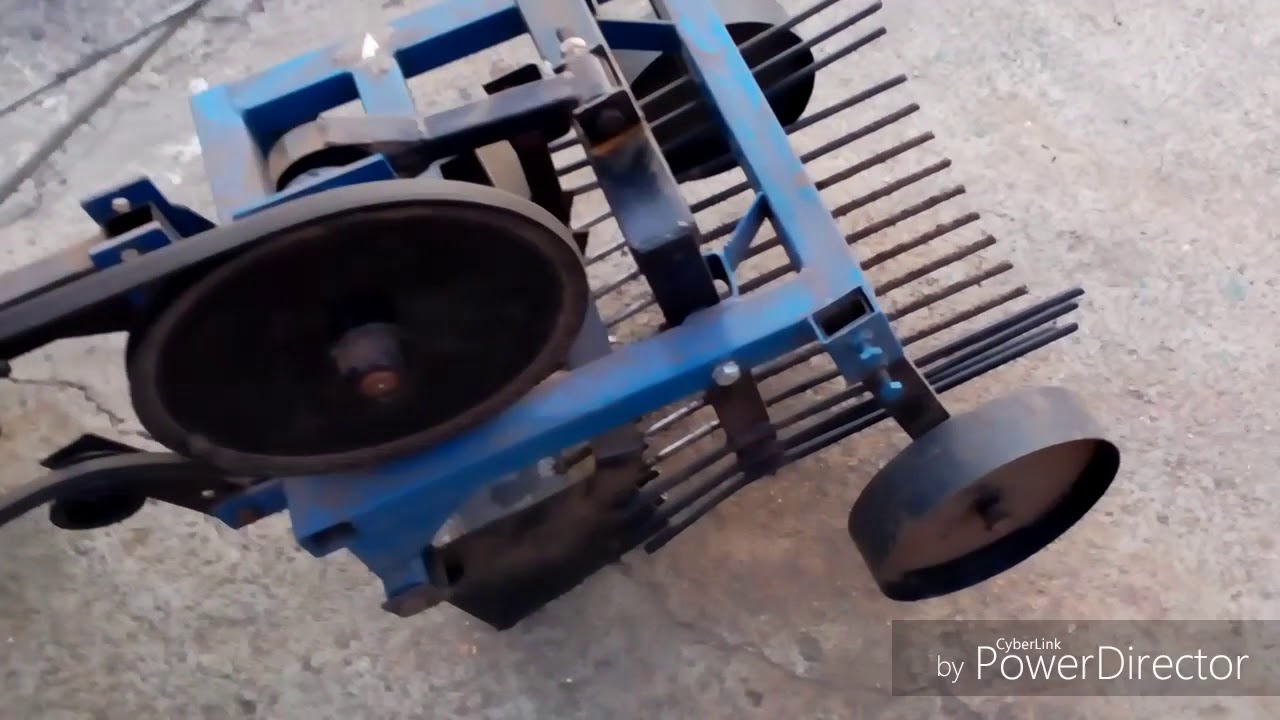
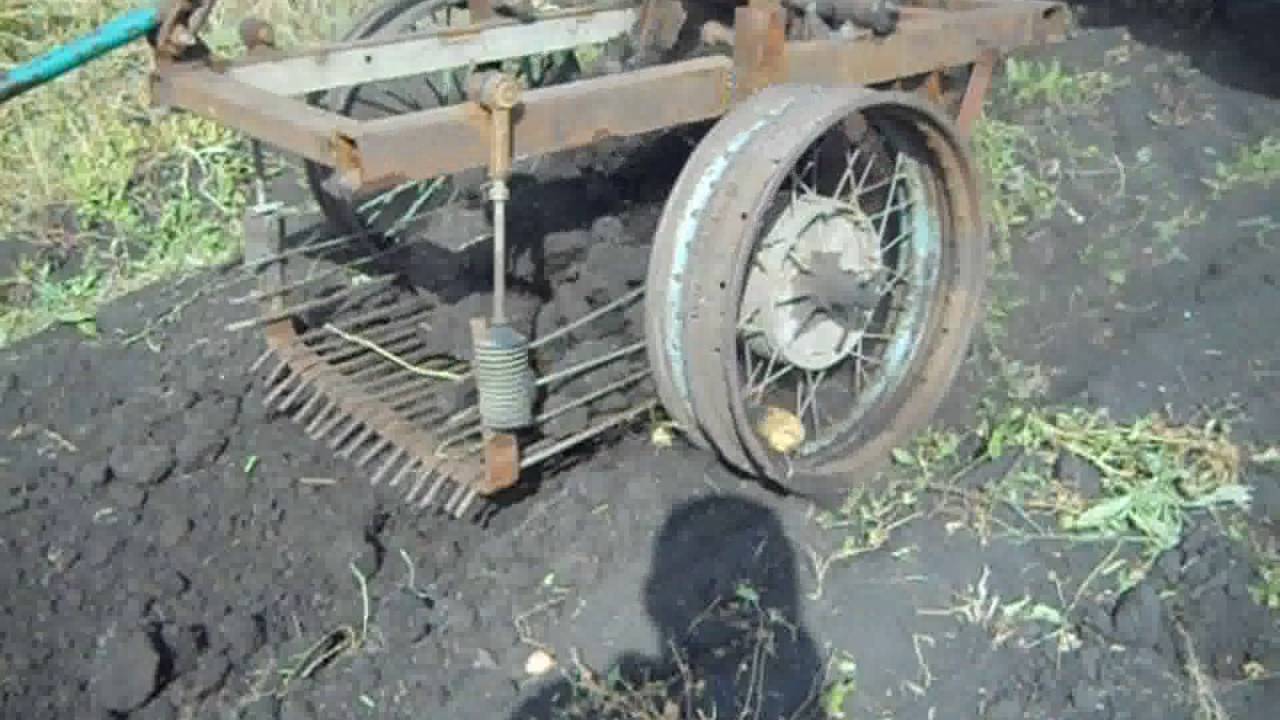
The potato digger, made for the Neva walk-behind tractor by a skilled designer, shown in the picture, is a metal frame with wheels installed on it, which can be adjusted in height.Working movable part: a pulley connected to a rod (taken from a car) through an eccentric. Further, the working part of the structure goes to the share through additional rods. The ploughshare has teeth made from steel wire and a knife made from a steel saw.

The video shows the process of creating an interesting unit. You can also download the drawings and use them to create your own digger for harvesting potatoes.
How to huddle potatoes with a walk-behind tractor
Hilling potatoes is an important process for the development of tubers. If you do not heap the bushes with earth, then the roots will grow, and the potatoes will be small and deformed. Under the thickness of the earth, the fruits will be protected from pests, in addition, in the process, the land is cleared of weeds in parallel. Carrying out such work requires considerable physical effort, and if the site is large, then it is time-consuming.
The processing of potatoes with a walk-behind tractor has a number of advantages over manual hilling. In this case, the rules for cultivating the soil in a mechanized way are mandatory. It is necessary to sprinkle potatoes with a walk-behind tractor after rain, when the earth absorbs moisture. Ridges of dry soil can be detrimental, and wet soil will produce viscous lumps.
For work, you will need a lister or disc homemade potato hiller. If you equip the hiller with an adjusting mechanism, then it will be possible to adjust the tool to the row spacing by changing the position of the wings. Disc hillers, simple in design, are popular.
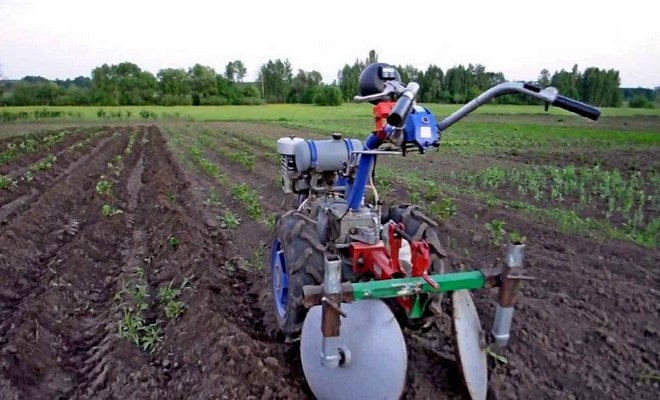
A hinged disc device with a attachment to a motor cultivator can have 1 pair of discs or several pairs (the number depends on the power of the machine). Concave discs are the main structural element, they are made from a sheet of steel 2 mm thick and fastened together at an angle. The discs rotate by sliding in the bushings.
Before starting work with a walk-behind tractor, it is necessary to adjust the angle of inclination and the depth of the touchdown. The potatoes are spilled at low speed, moving the walk-behind tractor and the trailer row by row. Experienced farmers recommend that the first hilling be carried out when sprouts appear. The potato will produce underground shoots and the bush will be powerful, with large tubers. When the bushes grow up to 30-40 cm, they spud the potatoes a second time. If the soil on the site is heavy, dense, then loosening can be done again.
Dear farmers, do you use such a useful device for motor cultivators as a potato digger? Share the secrets of making it yourself.
DIY potato digger
To carry out work on large areas, it is better to buy agricultural machinery from a manufacturing plant. For digging potatoes on small plots of land, you can make a potato digger with your own hands.
A homemade potato digger for the Neva walk-behind tractor should be easily aggregated with it, be efficient in operation and be suitable for the type of cultivated soil.
For the manufacture of a simple fan-type model, special materials, complex drawings and measurements are not needed. The base of the device can be made from an ordinary old shovel, rods - from fittings or garden pitchfork teeth.
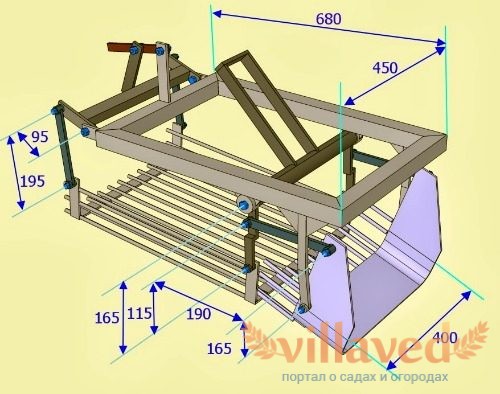
In order to make a vibration-type potato digger for the Neva walk-behind tractor on your own, you need competent drawings with all structural elements, scrap materials, auxiliary tools and equipment.
To work, you need the following:
- welding machine;
- Bulgarian;
- drill, drill;
- scissors for metal;
- hammer;
- spanners.
This homemade potato digger consists of the following main parts:
- frame;
- hanging part;
- wheels and stars;
- thrust.
The potato digger for the Neva walk-behind tractor, the drawings of which will not be available, will not be installed to the unit, the device will be ineffective in operation.
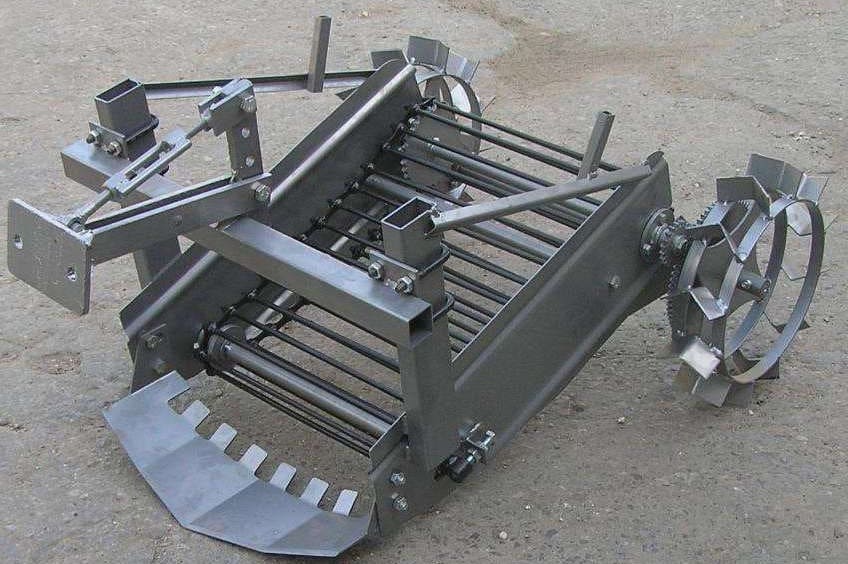
A vibration-type attachment can be made using step-by-step instructions:
- Take a workpiece or a square shaped tube 40x40 mm 4 m long, cut it into sections of 80 and 120 cm.
- Weld them in the form of a rectangle. The sides should be perpendicular to each other (90 °).
- At a distance of 1/4 of the frame length, jumpers are welded for mounting vertical adjusting rods.
- From the side of the jumpers, at a distance of 5 cm from the edge of the frame, attach a metal square with a side of 50 cm, then after 20 cm a second square with a side of 40 cm is attached, after 40 cm a profile of 30 cm is welded.Connect them with a strip of metal sheet.
- Ralo should be made of 0.3 mm metal. According to the drawing, 2 blades are cut out with metal scissors and the plow is welded.
- All elements are fixed with a fastening rod, while it is necessary to tap the center of the blades with a hammer for the volume of the structure and the convenience of grabbing the soil.
- The lattice is made of reinforcement with a diameter of 10 mm and a length of 120 cm. Welded every 5 cm.
- Axles are installed in specially prepared holes, they are connected to the frame, wheels are installed.
Homemade potato digger is ready. Do you use potato diggers to harvest root crops in your area?
Selection options

Potato diggers differ in the following parameters:
- Dimensions - the greater the length and width of the working mechanism, the greater the productivity of the potato digger. Narrow attachments are more suitable for single beds in the household, while wider counterparts with a grab are used for harvesting potatoes from more than a hectare of land.
- The method of cleaning potatoes from soil - this factor is taken into account, depending on the characteristics of the soil of the region where it is planned to use the potato digger. If loose black soil is easy to push, then loamy and sandy soils need additional cleaning.
- The principle of operation - taking into account this indicator, the productivity of the device is determined.
- The presence / absence of additional wheels - large units must have an additional support point, otherwise it will be difficult for the walk-behind tractor to perform its main work.
- Mounting methods - the best option is the screw method of attaching the potato digger to the walk-behind tractor. This allows the device to be disconnected at any time. Some models are attached exclusively by welding.
Many farmers also pay attention to the brand and price. These two indicators are not key, but largely determine the productivity of the unit.
How to dig potatoes with a walk-behind tractor
When choosing a walk-behind tractor for a personal subsidiary farm, preference should be given to those models that are designed for operation with additional equipment of different types. And the trailed units themselves (plow, hiller, potato digger, mower) can be made in a home workshop.
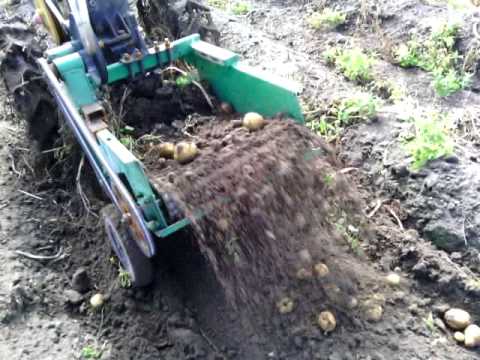
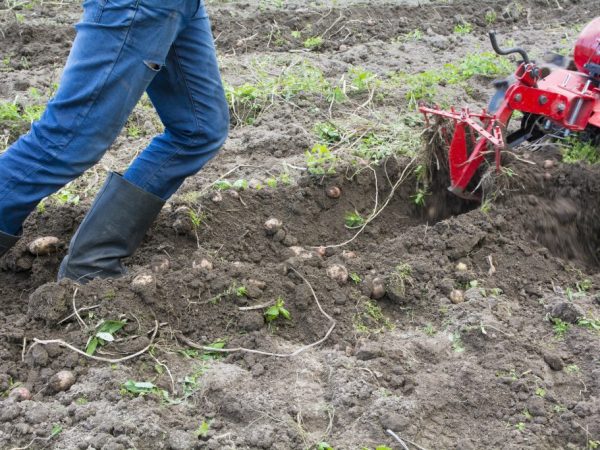
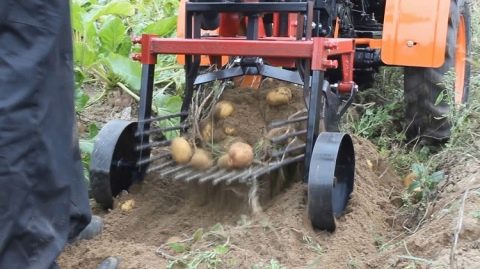
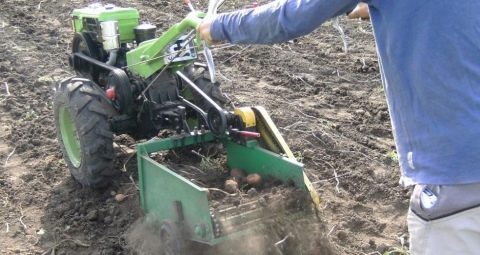
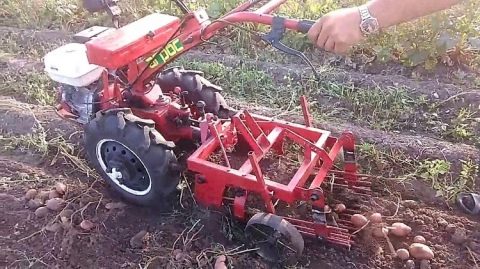
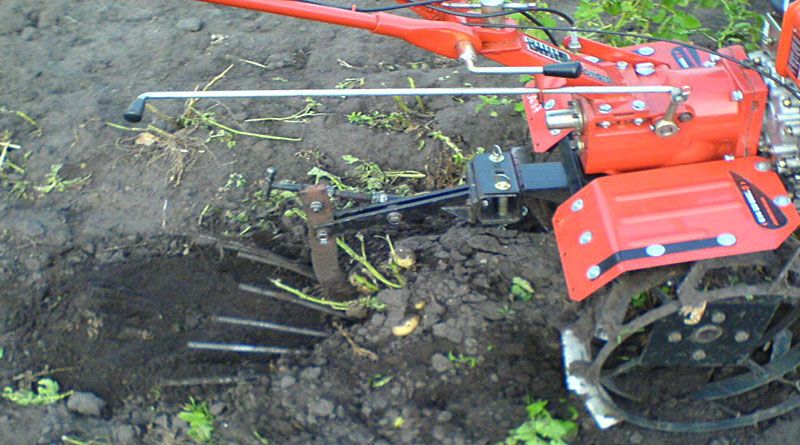
Harvesting potatoes with a walk-behind tractor is carried out not only in large areas, a mechanized assistant will be in demand at the summer cottage. You just need to equip it with attachments (purchased or made yourself). The principle of operation for all units is similar. The ploughshare plunges into the garden bed, raises the layer of earth along with the roots, leaving them on the surface. A person can only collect the uprooted potatoes in bags.
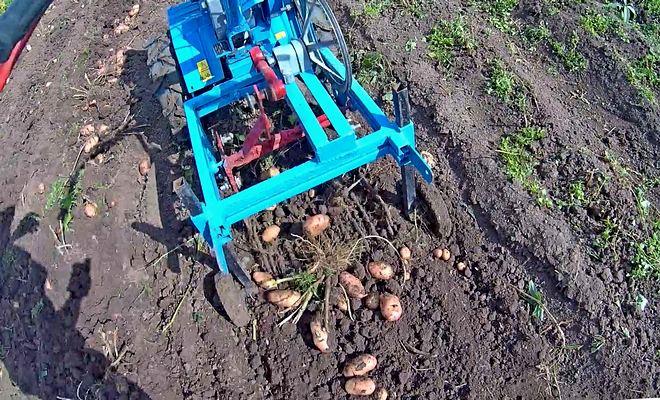
When choosing a walk-behind tractor, take into account the power of the unit and the type of soil on which it will be applied. With the help of an average power walk-behind tractor, you can harvest from 20 acres of land in an hour. For harvesting from a large potato plot, a walk-behind tractor with a capacity of more than 5 liters is suitable. with., for smaller areas, you can choose a lighter unit with less power.
In addition, weeding of potatoes with a walk-behind tractor and hilling can be mechanized.
Design features
As soon as the spring sowing season, as well as the work on digging the ground and applying fertilizers, ends, an equally troublesome period of complex crop care begins.But even with the onset of autumn, the life of a farmer does not become easier - after all, he is faced with the difficult task of harvesting. Especially a lot of time and effort is spent on harvesting potatoes.

Of course, you can dig up root crops manually, but it is quite difficult to cope with this alone, in most cases you have to attract assistants, whose services must be paid for. If the potatoes are grown for sale, then such an expense item can seriously curtail the profit received, or even completely negate all long efforts to grow root crops.

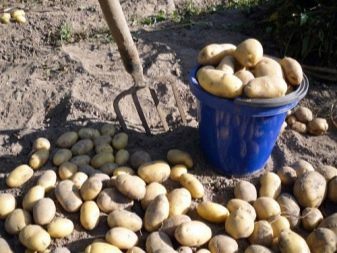
In addition, manual work takes a long period, which is highly undesirable. It is in this case that a potato digger can become the optimal solution; this device was invented quite a long time ago.


Materials and solutions for insoles
The arrow (fan) homemade potato digger for the walk-behind tractor is made according to the drawings. The basis of such a digger is a frame, the details of which are carefully calculated and welded. All measurements and parameters of each part of the suspension part, wheels and stars, traction are entered into the drawing. A master with experience with power tools and complex equipment will be able to do this. For the manufacture of parts you will need:
- welding machine, drill, grinder;
- hardware, wrenches, drills;
- hammer;
- scissors for metal.

Experts recommend using in work:
- Steel sheets not thinner than 7 mm. Plates are needed for making a share. Often, for this purpose, they take a used circular saw blade.
- Channel No. 8, square section profile pipe for uprights.
- Corners 63x40 mm for the frame.
- For rods of a pitched board, fittings no thicker than 10 mm are suitable. Steel strips will do.
- The vibrator drive is made of a pipe and an eccentric. The pulley is driven by a belt drive.
DIY vibrating digger
Practical experience shared by farmers shows that when using a vibrating potato digger, 95% of the potato crop is harvested, and the use of a simple fan yields a harvest of up to 85%. Other vegetables (onions, garlic, beets or carrots) can be harvested with the vibrating digger if they are grown in large areas.
A do-it-yourself vibrating potato digger for a walk-behind tractor can be made from scrap materials. You can use spare parts from an old car: front hub, rear axle gearbox, propeller shaft.

The frame assembly scheme is described above. Brackets are welded to the frame for installing the gearbox and mechanisms that will reciprocate, that is, create vibration in the unit. During operation, the rotation of the walk-behind tractor shaft is transmitted through the mechanisms (lever and connecting rod) to the vibration table (roar). The rod connected to the crank mechanism makes oscillatory movements. A pivot share is attached to the lower part of the frame and the screen.
Depending on the design solution, the peeled tubers will roll off the vibrating table to the side of the cultivated strip or behind the potato digger.
The area intended for collecting potatoes must be cleaned of tops and weeds before processing, otherwise they will clog under the grate and in the wheel mounts.
Types of potato diggers for a walk-behind tractor
Among the mechanized digging devices used in subsidiary plots, the main types of diggers for collecting potato tubers are derived:
Fan potato digger for walk-behind tractor
The fan potato digger was named differently - "Dolphin", given by manufacturers because of its shape, lancet digger and paw. It is a kind of hilling agent - the difference is in the existing steel rods in a fan-shaped form instead of the characteristic wings.
For a summer cottage, this design has several advantages:
Price. Prices in stores for such devices are quite low and allow a fairly wide range of summer residents to acquire.
Simplicity of design.Simplicity of design is one of the main advantages. Hence the lower price - it is possible to make it even on your own without any special costs.
Versatility
Simple designs allow you to experience fairly high loads when processing potato beds - this is especially important when there is no financial ability or skills to repair more sophisticated or store options.
Effectiveness of work. This design allows you to collect about 80-85% of the crop - a fairly high figure.
Roaring Potato Digger
The roaring potato digger is outwardly similar to the transport species - this is due to the similar shape, with the exception of the presence of a conveyor.
The following elements are distinguished in the design:
- Vibrating barrel.
- Ploughshare.
- Drive unit.
The work of a vibrating potato digger is to remove the top layer of soil together with the potatoes, clean them from the soil mass and move the potato tubers to the other side of the device - the whole procedure is performed by means of the generated vibration.
Among the advantages of this design:
Efficiency
This design allows you to collect up to 98% of the potato crop - this is especially important with a sufficiently large sown area.
Processing of any soil. The design, although more complex in the store versions, allows you to work on any soil - from light to heavy.
Harvesting versatility
Such a potato digger, in addition to potato tubers, allows you to perfectly collect other fruits, for example, carrots and beets.
Transporter potato digger
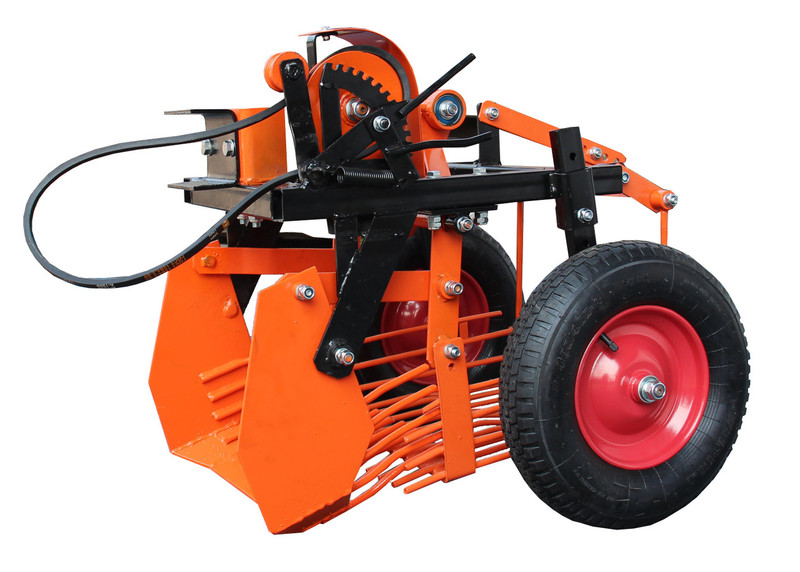
The conveyor potato digger is a more advanced model of a vibration structure, with the replacement of the vibrating table by a belt-lattice conveyor.
The peculiarity of the work of the transport potato digger lies precisely in the operation of the lattice conveyor - the potatoes passing through it are better cleared of soil and practically not damaged (2% of the total loss).
Among the features of the transport potato digger are:
Efficiency
The harvesting efficiency of this model is about 98%, which is undoubtedly important for large volumes of work.
Thorough loosening possible. The design of the unit allows you to thoroughly loosen the soil, while practically not damaging the potato tubers.
Fuel economy
In some designs, there is an economical fuel consumption with practically no loss of performance.
Justifying the price. Despite the high price, like the vibratory potato digger, the investment is justified in a relative period of time.
Drum type potato digger
The drum-type potato digger is an extremely rare version of the assembly unit, used mainly for attaching to mini-tractors and is mostly made home-made.
The principle of operation is based on the rotation of the drum, which collects the soil and grinds it, as a result - a better separation of the soil from the tubers.
One major disadvantage of the drum design preventing growers from going into production is a high percentage of tuber damage with a consequent reduction in storage time.
Transporter potato digger
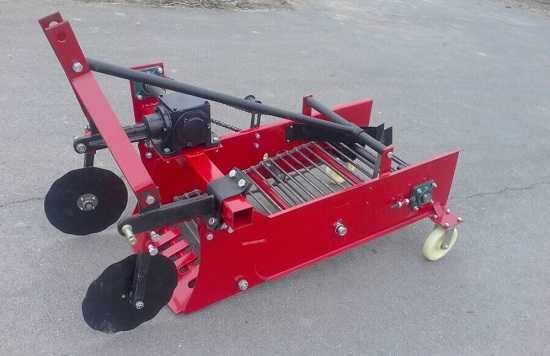
Another modification is a conveyor potato digger. The conveyor unit is installed on medium and heavy walk-behind tractors. Its characteristics are similar to a vibration device. The difference lies in the fact that the potatoes are moved and cleared of adhered soil along the conveyor belt, and are not collected on a vibrating table. This type of digger is more practical than vibratory, but its use is advisable only for heavy soils.
The conveyor belt is often made from rods. But steel mesh is also applicable, there are models with a rubber band on a fabric backing.The movement of the conveyor is carried out when the torque is transmitted from the shaft of the walk-behind tractor through a gearbox, chains, gear drives.
The conveyor potato digger does not damage tubers, is easy to operate, and is aggregated with powerful walk-behind tractors and mini-tractors. Industrial designs have the following technical characteristics:
- overall dimensions - 1140x740x47 mm;
- weight - 36 kg;
- speed - 2 km / h;
- digging depth - 20 cm;
- capture width - 53 cm.
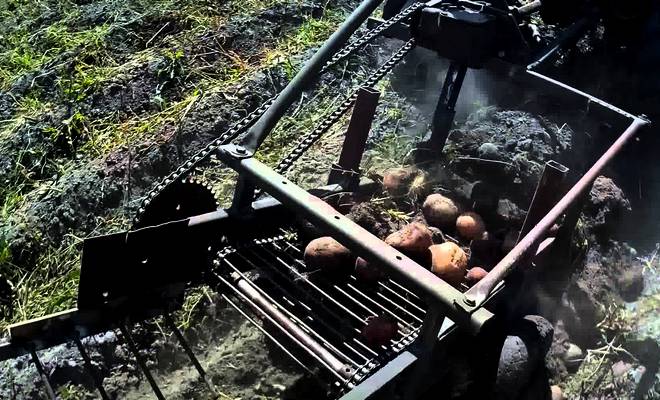
Independent production of a potato-conveyor digger after studying the schemes of operation of factory machines is possible if the master has experience in carrying out such work. Each craftsman can show engineering ingenuity and add his own elements to the design solution in order to improve the finished product. The general assembly instruction looks like this:
- welding of a frame of a steel square profile and corners;
- making a plowshare knife from thick sheet steel;
- installation of shafts for the conveyor belt;
- assembly of the conveyor belt;
- installation of brackets and fasteners for the gearbox and gear transmission;
- installation of a conveyor belt and mechanisms;
- installation of a ploughshare.


