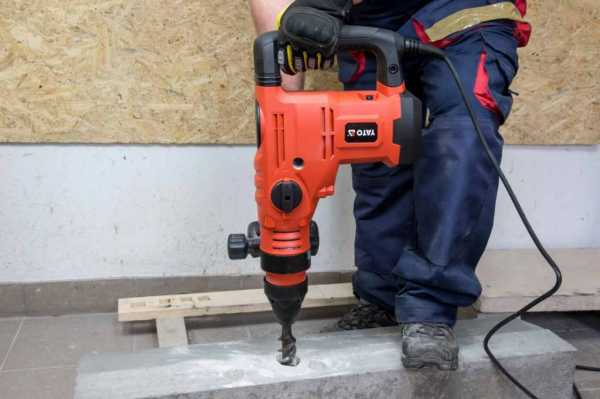
How to work without dust
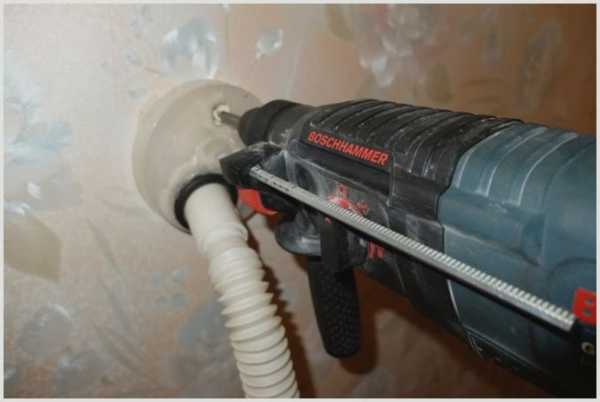
Often you have to drill walls and ceilings with a hammer drill, in which case the spread of dust throughout the room is inevitable. To avoid this, smart builders have come up with several devices:
- Plastic cup. In the center of the bottom, you need to make a hole, and then put the glass on the drill or drill. During operation, all generated dust will fly directly into the cup. After stopping the drill, it is easy to empty it in the trash can or throw it away. This method is suitable for a drill with a length of at least 10 cm. For shorter attachments, you will have to cut the cup.
- Glued package. Before drilling the holes, you need to glue a bag with a hole made in it to the wall. Once drilling has begun, the partner can connect a construction vacuum cleaner to it so that it can remove all the debris.
- Paper envelope. You need to take a piece of paper and bend it vertically almost in half so that a free strip remains on top. Then, at the sides, the sheet is bent vertically to form an envelope. The resulting structure is glued to the wall under the intended hole. During drilling, all debris flies there.
Special plastic bags for collecting dust can be purchased at the store. They are put on the drill, after which the debris is collected in the drill flutes.
How to close up the strobe
Finally, the strobe is done, all the cables are laid in place. It remains only to seal the groove well and with high quality, so that then proceed to the final painting. So, what does the whole process consist of:
- First, the furrow must be cleaned thoroughly. For these purposes, both a construction vacuum cleaner and a dust broom are suitable.
- Then it is necessary to prime the furrow with high quality. To do this, the brush should be abundantly moistened with a primer and the grooves should be repaired without sparing the material.
- Wait until the primer is completely dry.
- Before the final stage of embedding, it is necessary to moisten the furrow with water.
- Proceed directly with sealing with one of the materials - either plastering solution for cables (option - stucco), or polyurethane foam for pipes.
Following these simple tips, you can do wall chipping on your own. The main thing is desires and a little patience!
How to make a dust-free wall strobe
It is no secret that the use of a hammer drill, grinder and wall chaser leads to the appearance of a cloud of dust, which later settles on all surfaces, including your lungs.
The professional tool has a built-in vacuum cleaner that sucks in dust. But there is a drawback - such equipment costs a high price and is not always affordable for ordinary users.
There are a number of more budget-friendly options available to reduce dust:
Wet the surface to be treated with water. This is the easiest way to at least partially curb the dust. The main thing here is not to overdo it, so as not to flood the neighbors.
Application of wet cutting technology and grinder. Its essence is that water is supplied to the place of the slitting through a hose
It is important to watch here so that moisture does not end up on the equipment. The risk of flooding remains as relevant as in the past.
Using a vacuum cleaner
In this case, it is advisable to have an assistant nearby who will substitute the nozzle of the vacuum cleaner to the place where the groove is created. Or connect an ordinary household vacuum cleaner to the grinder through a sewer pipe with a diameter of 50 mm.
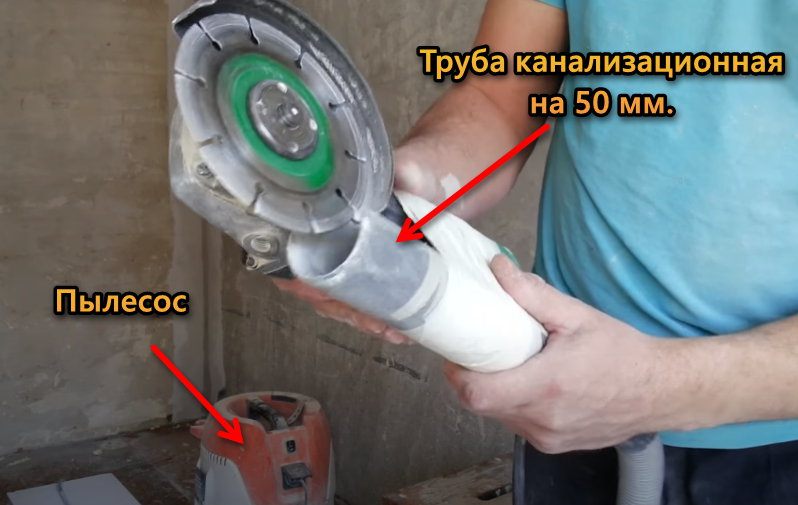
A number of additional methods can be used to reduce dust formation.So, cover the floor with foil, hang a damp cloth at the exit, and put a rug soaked in water at the entrance. Well, nobody canceled the means of protection.
Choosing a tool for chipping walls
The oldest approach is with a hammer and chisel.
This option, however, has one important advantage, which is no cost. You can slash a wall without a power tool, because such devices can be found in every home.
But in the end, you will pay off with a loss of strength, as well as the formation of a large amount of garbage.
Slitting concrete walls for wiring can be done with a chisel and a drill. Although this approach is more effective, it cannot be called the most convenient. Every meter, you will have to drill holes, and then connect them in a single line with a chisel. Initially, you will need to carry out the markup on which you will act. Time and energy costs will be much less here, but you will have to spend a lot of time on work, and there will be much more dust than if you used, for example, a grinder.
What will fit from the arsenal of a home master
More recently, an angle grinder was a rarity for an amateur master. Today the grinder can be found in almost every home. If you have it in stock, then it is perfect for chipping walls. It will be necessary to supplement the equipment with a diamond disc, this will be all the costs, except, of course, time and power. The process will go faster, and the contours of the groove will be even.
A disc designed for making a groove, although it will allow you to work efficiently, with its help, it will be possible to make a groove in only two passes. This lengthens the marking process. Another disadvantage is that you cannot work in the corner with a grinder, and the whole process will be accompanied by a high level of noise, which means that you will have to work quickly, eliminating weekends. It is these disadvantages that quite often make craftsmen refuse to use this power tool. It is rarely used for chipping.
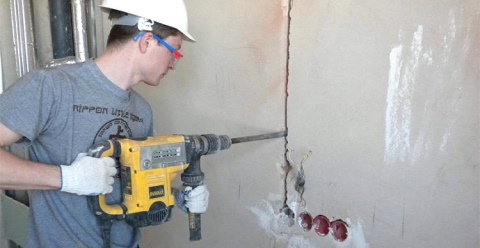
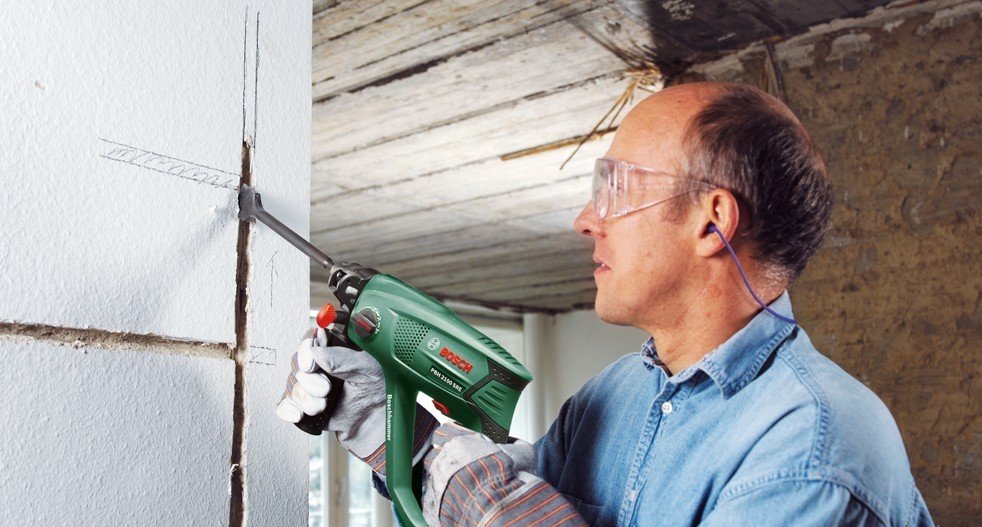
A hammer drill can be used to run one small wire into a new wall. You will have to purchase or use a suitable accessory available. The instrument will need to be used in percussion mode. They need to walk along the marked lines. The downside of this approach is the strobe curve, but the hammer drill is used quite often at home.
When repairing premises, home craftsmen quite often also use a wall chaser. This option is the most effective and allows you to cut through the wall smoothly without generating dust. Not much noise will be generated, and you can additionally connect a vacuum cleaner to the tool, which means that the room will not be so dusty after the process is completed. In general, this wiring tool is the most efficient and safest.
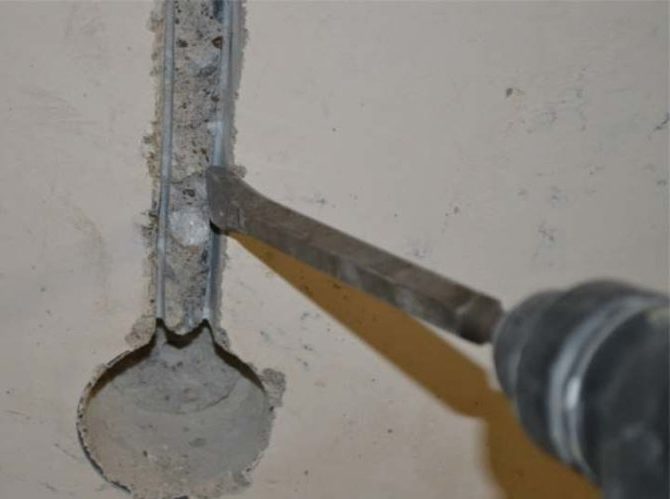
A simple power tool to aid manual labor
If you want to get a good result while saving time, it's best to use an electric drill. But if you work with a concrete surface, this tool will manifest itself as burning drills, so you need to familiarize yourself with some of the nuances before starting the process.
Firstly, you need to make a marking on the surface, and then use a tool with an 8 mm drill. Several holes of a certain depth are made along the line, a step of up to 1 cm must be observed between them. The drill must be located perpendicular to the surface, otherwise it may bend and break. If the groove is to be large enough in width, the holes should be staggered. If it is necessary to carry out the same work in masonry, you need to use the tool at low speed. Stop periodically to cool the drill in water
It is important to exclude the penetration of liquid into the structure. Using a hammer and chisel, the next step is to knock out the gaps.

Professional equipment for fast assembly
The first thing that comes to mind is a wall chaser. It is he who allows you to complete the task with a minimum of effort and time. If you wish, you can put two discs on the instrument at once, thanks to this, the strobe will turn out to be perfectly flat, and the second approach will not be needed.
The circles are covered with a casing, where there is a branch for the vacuum cleaner. It is good if the design provides for the ability to change the distance between the discs and provide the required depth of the future groove. This method has one major drawback, which is the cost of the equipment. If you do not have it, then it will be inappropriate to purchase it for the only repair. An alternative solution would be to rent the device.
Wall slitting technology
Electrical wiring is laid in concrete at the first stage of renovation activities. It is not recommended to grind in a populated room, as the work is very dusty. First you need to remove furniture, office equipment, etc. If this is not possible, cover them with foil or other material to protect them from dust. You will also need a construction vacuum cleaner, with which you will need to remove debris and dust.
Preparing the room and marking the work surface
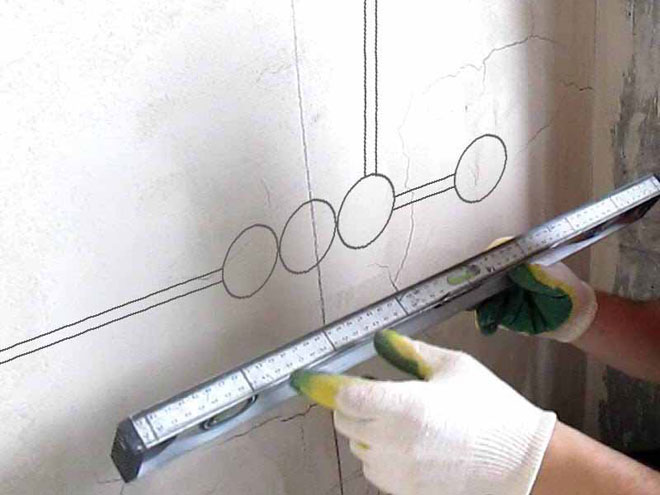
Before starting work, you must check the location plan of the old wiring. If there is no such plan, then with the help of a tester or indicator, you need to detect it and mark how it passes. It is best to de-energize the old wiring, but if this is not possible, then try to lay a new one without crossing it. This is to prevent injury from electric shock.
The new wiring route is marked on the walls. Marking is carried out from junction boxes to all connection points.
Basic rules for gating
During work, protection of hands, eyes and respiratory organs must be ensured. For this, a respirator, durable gloves and goggles are used. It is recommended to carry out the chasing with a rubber mat under your feet.

It is important to observe the following rules:
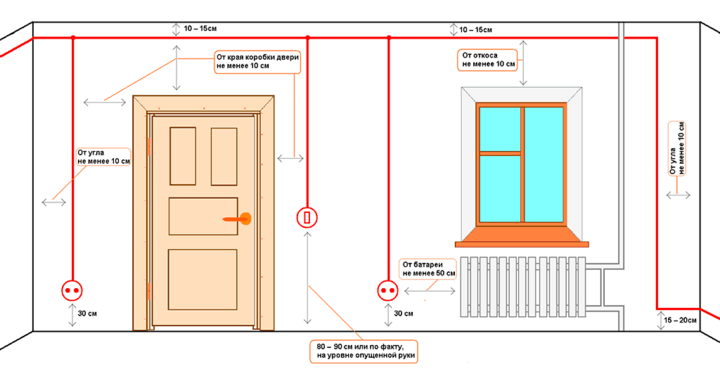
- The grooves are carried out parallel to the main structures of the building in a vertical or horizontal form. An exception is the attic, where the chamfering can be carried out along the base with a slope.
- Horizontal grooves are made at a distance of at least 150 mm from the floors. Vertical grooves are made with an offset of at least 100 mm from door and window openings, as well as corners.
- The distance between the groove groove and the gas pipes must be at least 400 mm.
- It is not recommended to make horizontal grooves in load-bearing walls.
- It is forbidden to use an inter-slab seam instead of a groove groove.
- With a structure thicker than 8 cm, the wiring is laid in a short way, if less - parallel to the construction lines.
Distances, depth, width of the groove
Grooves for electrical wiring are limited in size. The groove width should not exceed 30 mm, the depth - 26 mm. The length of the groove from the distribution unit to the connection point must not exceed 3 m.
To what depth is it forbidden to groove in load-bearing walls
Sometimes it is necessary to perform the chasing along the load-bearing wall. In this case, the groove depth should not exceed 20-30 mm. If you make the groove deeper, then there is a risk of damage to the reinforcement located in the wall. This is not only a violation of the rules, but can also lead to a collapse.
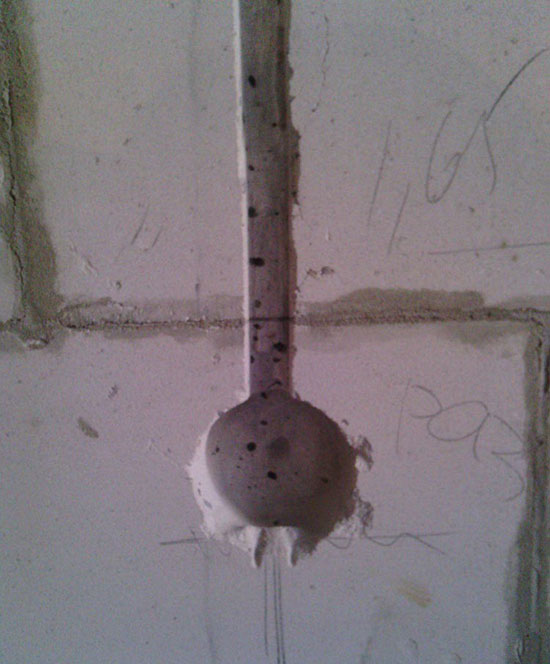
Sockets
The location of the outlets and junction boxes is marked on the wall according to the wiring diagram.
Steps for chasing under sockets:
- A hole with a diameter of 8 mm is drilled in the center of the connection point;
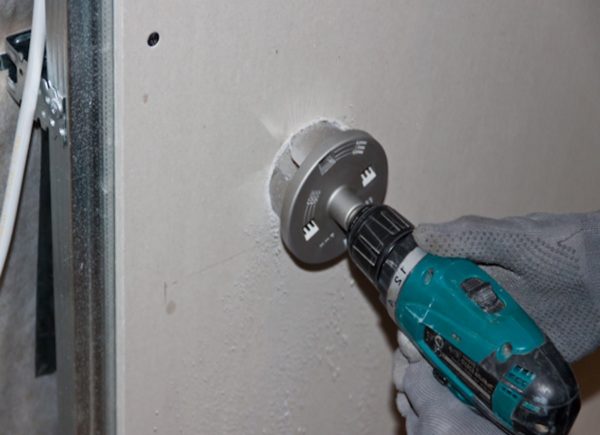
- The contour of the niche for the outlet is outlined using a special nozzle (crown) for a drill;
- Holes are drilled along the line of the entire outlined contour;
- Using a drill with a crown bit, a niche is drilled for the connection point.
Sealing the groove in the wall
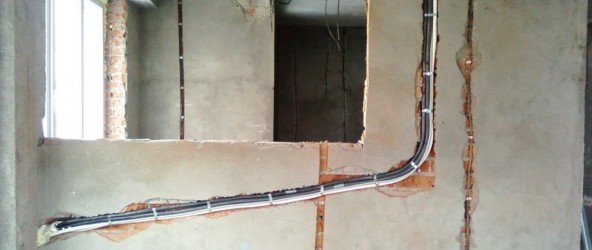
After the electrical wiring is laid in the grooves made, it is necessary to plaster the grooves.
Actions for sealing the groove channels:
- Clean the furrow from dust using a construction vacuum cleaner or an ordinary broom.
- Prime the grooves by applying a generous amount of primer with a brush. Allow the liquid to dry completely.
- Moisten the groove with water and start sealing. The work can be carried out with special plaster, plaster of paris or using polyurethane foam.
The main operating modes of the punch
Perforators operate in several basic modes, switchable by the operator, depending on the work being done.
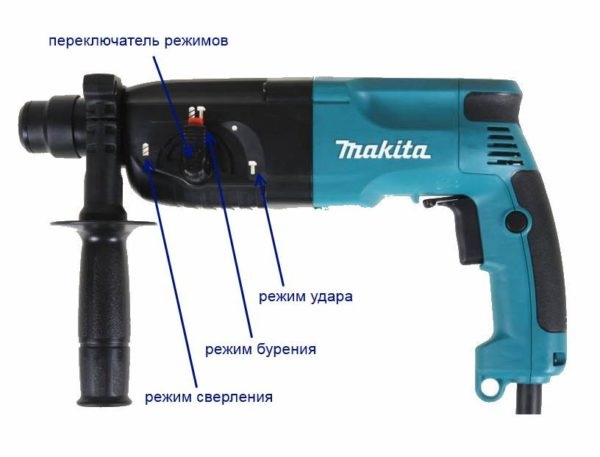
 Rock drill operating modes: drilling, drilling, impact
Drilling
It is performed after switching the regulator to the corresponding mode (drill icon). The overwhelming number of models of rock drills are equipped with the function of a gradual set of revolutions of the working shaft. The speed is controlled with the start button. With a slight pressure, the revolutions from zero smoothly rise higher. When the button is pressed all the way, the revolutions become maximum.
Depending on the material to be drilled, it is recommended to adjust the speed of the drill or drill bit. So, wood products are best drilled at high speeds, metal at low speeds, and concrete or stone at medium speeds.
Most often, the hammer drill is used for drilling stone or concrete. This is due to the fact that the device of the chuck for fastening the drill has a backlash in the longitudinal axis, designed for the percussion drilling function. Therefore, when drilling holes in wood or metal, it is not always possible to achieve the desired accuracy. The drill tip may wiggle slightly.
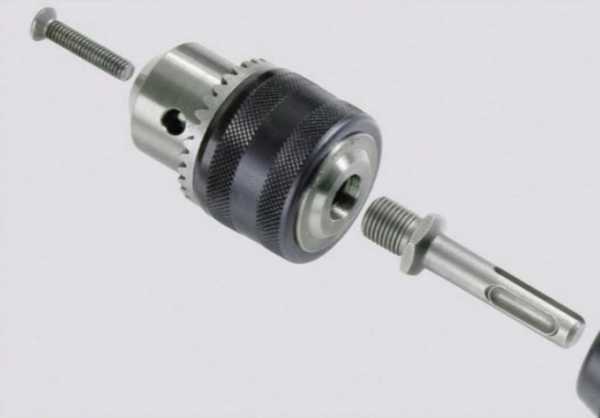
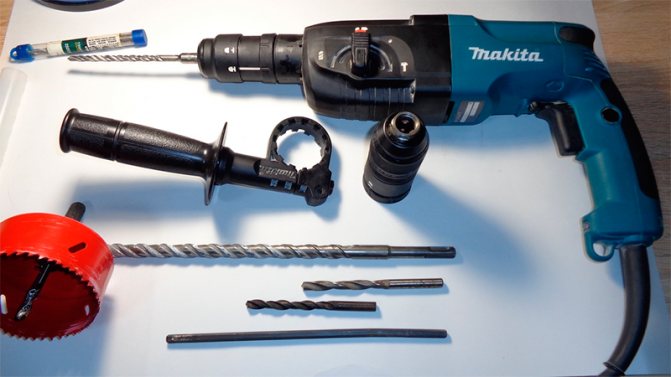
It is recommended to use a chuck with SDS shank for precise drilling of holes. The drill without play is fixed in a chuck, which is inserted into the hammer drill. Jaw chuck included or sold separately. Any holes and materials can be drilled with a replaceable chuck.
Drilling
The drilling mode is turned on by moving the switch register to the middle position (you need to select the drill and hammer icon). Usually indicated by the sign of a drill and a hammer drawn on the body at the same time. Drilling is used for slotting concrete and stone materials. It is possible not only to make holes, but also to lay ducts for routing electrical and other cables in plaster or brick walls.
Since drilling takes many different forms, engineers have developed numerous attachments to suit a variety of conditions. All of them are united by the presence of a special shank, which is combined with the SDS + chuck.
Hit
Impact mode is used for assembly and disassembly work. It is marked with a hammer icon on the mode switch. When working in this mode, there is no rotation of the working shaft. Only the translational movement of the tool takes place.
Reverse
The reverse function allows you to switch the direction of rotation of the chuck in different directions.
 Reverse switch is close at hand
Often, when drilling reinforced concrete structures, the drill rests against the reinforcement and enters a clinch with it. In order to release it, a reverse switch is provided, which makes it possible to turn the drill in the opposite direction and continue drilling, bypassing the reinforcement. Usually the reverse button is located directly next to the start button of the unit.
The reverse mode turns the hammer drill into a screwdriver, with which you can tighten and unscrew bolts, nuts and screws of any size and configuration.
Additional tool features
In addition to the above, the standard set of options in a modern rock drill include:
- a ruler to determine the depth of the hole;
- lever for fixing the operating position of the start button;
- safety clutch - stops the motor when the drill gets jammed.
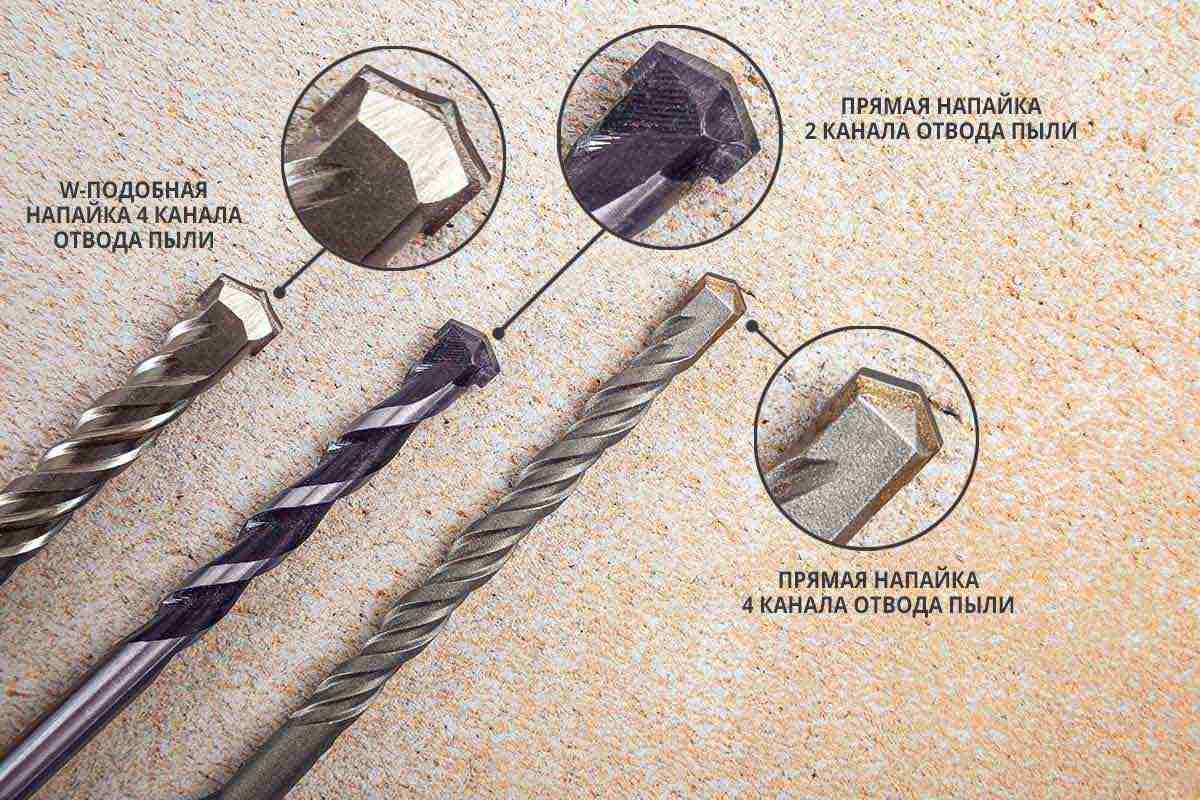
- dust removal - impeller on the engine with a system of dust extraction channels;
- vibration damping - special springs between the body and the power unit;
- electronic regulation of operation and monitoring of the condition of the brushes on the collector of the electric motor.
Do-it-yourself wall chipping - a quick guide
So, before starting work, you need to choose a tool. If it is not possible to use a tool with a vacuum cleaner for chipping, it is necessary to tightly close all the cracks in the room, and cover the remaining furniture and other things with polyethylene. The surface of the walls in the places where the strobes are laid must be cleaned of unnecessary coatings, such as wallpaper, tiles, etc. Surface marking. At this stage, you need to accurately mark the location of future strobes and holes for sockets and switches. To do this, it is convenient to use a laser level, which accurately builds horizontal and vertical planes.
In this case, it is important not to forget about the wiring that is already laid in the walls. In order to find a valid wiring, you can use special devices that detect electromagnetic radiation
After marking, proceed directly to cutting with the selected tool
The process itself is not complicated and was shown in the videos above. After grooving and cleaning the grooves, they proceed to drilling holes for the socket boxes. To do this, use special round bits with carbide inserts. The size of the crown is selected depending on the size of the socket to be installed. As a rule, these are sizes 65 and 80 mm. After completing the cutting and chiselling work, proceed to drilling holes in the strobe for attaching the wiring. For fixing the wires, special dowels are used, which are fixed in the strobe with a step of 30-50 cm. The final stage of work is cleaning the strobes with a brush or vacuum cleaner and priming them. Priming is a necessary procedure, as a layer of primer will bind all dust and promote better adhesion of the grout to the wall. After the cable is laid, the channels are sealed with putty, plaster or plaster.
Compliance with all the rules and regulations will allow you to qualitatively perform wall chasing with your own hands, without the involvement of construction teams and additional expenses, which, together with the quality result obtained, will be a pleasant bonus.
Safety at work
To work safely with a punch, you have to follow some rules. Otherwise, there is a risk of damage to the instrument or serious injury:
- During work, the master must be protected by individual means that protect the organs of sight, hearing and breathing from dust and small fragments. Goggles or protective mask, gloves, hard hat are used.
- Before starting work, it is necessary to check the tool for serviceability. The hammer drill must work without braking and extraneous sounds, and the cord must maintain its integrity.
- If you need to make a long hole, start with a short drill first. Then they move on to longer ones gradually.
- The hammer drill cannot be operated continuously, otherwise it may overheat. Recommended idle and load times are indicated in the technical manual for the tool.
- The shanks of each drill need to be lubricated periodically. It is advisable to do it before each installation of the nozzle, but you can also limit yourself to lubrication every 150-200 operations.
- It is necessary to carry out maintenance of the rock drill from time to time. Its frequency is indicated in the instructions for the device.
- When cutting through hard surfaces, it is recommended to use a liquid cooling system (pour water over the hole).
- Do not grasp the drill bits with your bare hands immediately after stopping them, they can be very hot.To do this, it is better to wait a couple of minutes, or use gloves.
- It is required to timely cool not only the holes, but also the drill. Otherwise, it can quickly change its properties (elasticity, hardness) and fail.
There is a special fluid system to cool the drill and holes in the material. It works by supplying a cooled emulsion or water to the required area. For this, tubes or water couplings are used.
How to make a socket for a socket and a switch
For many newbies, the biggest challenge is creating grooves for sockets and switches. There are several options here.
Crowns
On sale you can find special shorts that have different diameters and allow you to make recesses for boxes and socket outlets.
The device is a piece of pipe with a diameter of 68 to 80 mm, a pin for fastening in a hammer drill and a drill with which the direction is set.

To drill a hole, do the following:
- Decide where the box will go.
- Find the center.
- Make a hole with a punch.
- Assemble the crown and install it in the instrument.
- Insert the pilot drill into the prepared hole.
- Turn on the hammer drill and make a hole.
As soon as the crown enters the hole 2/3 of its depth, you can get it out of the hole.
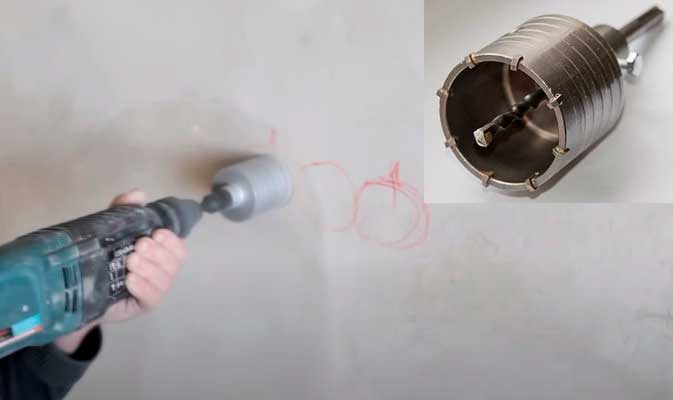
You can use a punch with a drill or a chisel with a hammer to level the hole.
Perforator and crown
There are situations when the crown does not cope with the task, and then you have to look for alternative solutions.
Take the following steps:
- Repeat from the first to the fifth point of the above instructions.
- Turn on the hammer drill and try to go as deep as possible into the surface.
- Remove the crown, insert the drill and use it to make several holes around the perimeter at a distance of 10-15 mm. The more holes there are, the better.
- Reattach the bit to the hammer drill and try again. In this case, everything should go faster, because the resistance of the wall is already lower.
Remember that jolts can occur when drilling the hole, so hold the hammer drill as securely as possible so that it does not break out of your hands.
Rotary hammer without crown
If you don't have a crown at all, use only a hammer drill. Additionally, you will need a chisel and drill.
The algorithm of actions is as follows:
- Mark the future hole with a pencil.
- Make a lot of holes along the contour with a puncher (should be more than 20).
- Knock out the rest of the concrete between the holes. Be prepared for long-term work, because you will have to use a chisel and a hammer.
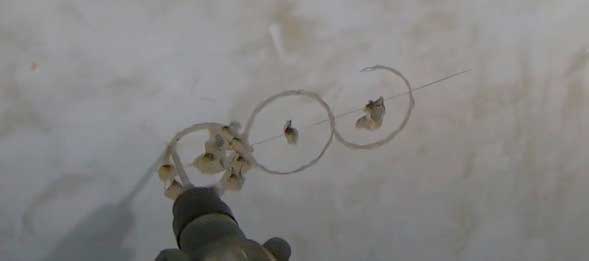
This method is good if you need to make one or two indentations for the box. If the task is to make wiring throughout the apartment or house, it is better to fork out for the purchase of a special crown.
Bulgarian
If none of the above is at hand, use a grinder with a diamond blade.
The algorithm of actions is as follows:
- Draw the outline of the future deepening.
- Prepare the angle grinder for use.
- Put on a respirator and goggles. As a last resort, use a gauze soaked in water. Put a hat or cap on your head.
- Make grooves with a grinder around the perimeter of the future box.
- Use a chisel and hammer to remove the remaining concrete from the center.
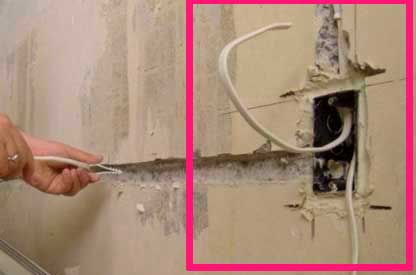
When working with the grinder, be careful and keep it perpendicular to the wall. If this rule is violated, there is a high risk of damage to the disc and the scattering of fragments. Further consequences are difficult to foresee.
Features of drilling different surfaces
With the help of a hammer drill, you can drill various surfaces - metal, concrete, wood, ceramic tiles. Each material has its own subtleties. Only if they are strictly observed, a high-quality result should be expected.
To work with metal, you must use the hardest and most durable attachments. Thin metal plates are the hardest to drill because they can budge.It is recommended to use special devices for fixing to the surface. It is better to put a piece of rubber under the sheet so that scars do not form.
The tree should also be securely fixed. A piece of wood with sandpaper is placed under it. During operation, the perforator itself must be pressed lightly.
To work correctly on concrete, use nozzles with a victorious tip. First, a small depression is made in the material using a conventional drill, and then it is expanded with a victorious nozzle. For the best penetration through concrete, the drills are periodically pulled out and dipped in a jar of water.
When making holes in ceramic tiles, special carbide-tipped nozzles are used, which can reduce the load on the surface. If the coating is already installed, it is better to use a drill that is designed for glass.
Required tools
For the manufacture of strobes, a special or improvised tool is used.
Wall chaser
 A professional tool designed specifically for this type of work. The wall chaser has a pair of parallel cutting discs, like on a grinder.
The discs are covered with a casing with a branch pipe for connection to an industrial vacuum cleaner. The distance between the discs (determines the width of the groove) and the width of the segment protruding from the cover (corresponds to the depth of the furrow) are adjustable.
The groove cutter is the ideal tool: the groove is formed quickly, smoothly and without dust. But it is expensive and has a narrow specialization. Because of this, it is impractical to purchase it for a single use.
In firms that rent out tools, a chasing cutter is also relatively rare. In most cases, you can only get it by hiring a team that is professionally engaged in electrical installation or construction work.
Hammer and chisel
 The easiest and cheapest option for a home craftsman, disadvantages:
- significant labor intensity;
- time consuming;
- The strobe turns out to be uneven.
Due to the low working speed, it is advisable to use this tool only for the formation of short grooves.
Bulgarian
This tool is universal, therefore it is available in almost any household. Accordingly, home craftsmen often gouge the walls with them. The grooves are cut with a grinder - first two along the edges of the groove, and then several between them. The remaining material is knocked out with a chisel or perforator.
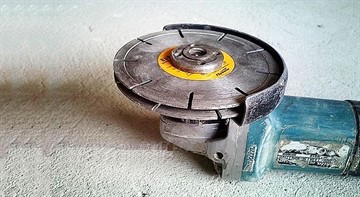 Disadvantages of using a grinder:
- a lot of dust;
- danger of injury: the disc sometimes flies apart, it can also jam if it hits a foreign object or cavity, which causes the tool to be pulled out of the hands.
Advantage: the edges of the groove are smooth, like after a groove cutter.
Hammer drill or hammer drill
The first tool is preferable because it is specifically designed for hammer drilling and therefore has a long resource. A series of closely spaced holes is drilled along the line of the groove with a thick drill, then the jumpers between them are knocked out with a chisel and a hammer.
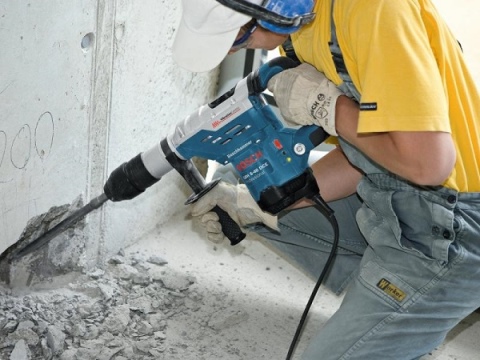
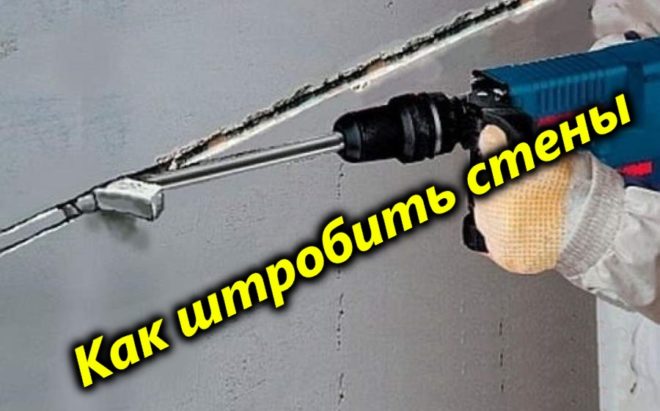
 It is most convenient to work with a hammer drill with the "Chiseling" option. In this mode, the chuck does not rotate, so the tool works like a jackhammer.
Arming him with chisels of different profiles (they are also called "blades for a perforator"), remove the jumpers between the holes and trim the edges of the groove. When chiseling with a perforator, dust does not fly in all directions, like from a grinder, but the strobe is not so even.
Fraser
This tool is used to make grooves in a wooden house. In general, in such buildings, wires are often laid in an open way. With hidden laying, for reasons of fire safety, they have to be placed in fireproof all-metal boxes, which require oversized grooves.
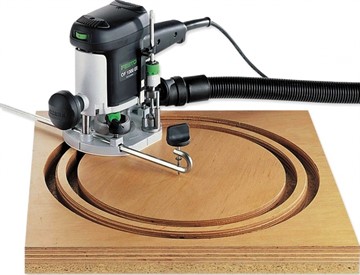 The wall in this place loses its thermal resistance, a cold bridge is formed. Nevertheless, in rare cases, wooden walls are also channeled and the fastest way to do this is with a milling cutter.
If there is no router, and the groove is needed short, you can make it with a chisel and a hammer. If you have enough physical strength and skills, you can chase a wooden wall with a chain saw.
But it will be difficult for a beginner to cope with this tool, therefore it is better to use a less powerful router.
You cannot chisel a wooden wall with a grinder! There is a risk of the disc tightening the compactor placed between the logs or beams.
Manual wall chaser
This tool is used for chipping foam blocks.
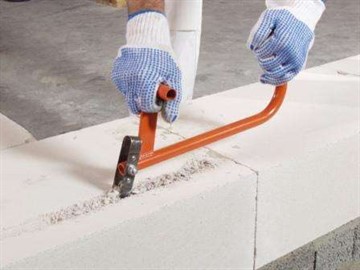 Porous building material is easy to scratch, so the simplest tool is required for this:
- take a steel pipe with a diameter of 20-25 mm and cut it obliquely near the end;
- fold back the short part so that the sharp edge of the cut protrudes sufficiently;
- put a garden hose on the long part of the pipe (this is the handle) for a comfortable grip.
Holding the chaser by the handle, they scratch a furrow in the foam concrete with a sharp edge over and over again, gradually deepening.
Do I need to carry out work before plastering
Until recently, not a single edition of the PUE indicated how it should be correct, first the plaster, and then the wiring, or vice versa. But in a recently updated set of rules, plastering work is mentioned. It, in particular, states that by the beginning of finishing work, all electrical equipment must be installed. It turns out that, according to the standards, it is correct to deal with electrical wiring in front of the plaster.
However, in the opinion of electricians, it is better to start laying the wiring after plastering, and not before. Moreover, in panel-type houses, it is allowed to lay the strobe only in plaster. Another reason for preferring this order of work is the use of water when plastering walls. And if the first thing to do is to carry out an electrician, then it is necessary to protect the connection points of the wires in the socket boxes, which is not always possible to do.
Norms and restrictions for chipping walls for wiring
In addition to the norms already mentioned above, which relate to the location of the strobes, there are a number of restrictions on the strobing of the walls. On load-bearing walls, horizontal grooving is prohibited (more precisely, has strict restrictions), but it is allowed to lay vertical grooves that do not destroy the reinforcement. First of all, this applies to monolithic-panel houses. In such houses, you cannot lay electrical wiring on the floor without a screed. This prohibition also applies to the ceiling. Recesses in horizontal joints and under wall panels inside the room are prohibited. On panels with a monolithic structure, it is allowed to cut grooves only in plaster, so as not to reduce the strength.
