How to make a blueberry harvester
You can assemble a blueberry harvester with your own hands not only from wood, but also from metal and plastic. In order for the manufacturing process to proceed quickly and successfully, it is necessary to prepare consumables, related tools in advance and decide on the design.
Diy blueberry harvester: drawings and tools
You can make a device for harvesting small-caliber berries according to one of the schemes below.
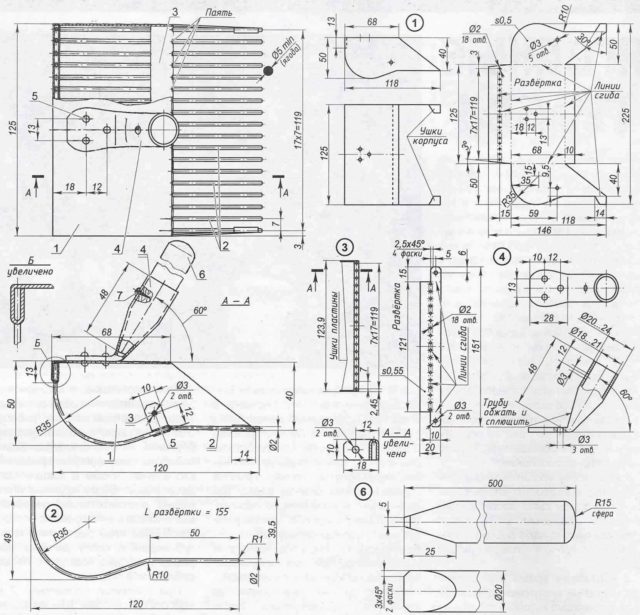


Of the necessary tools you will need:
- jigsaw;
- nippers;
- ruler;
- screwdriver;
- scissors for working with metal;
- drill;
- hammer;
- marker.
Wooden bucket for picking blueberries
A rake for collecting blueberries is made almost from improvised means. It is quite possible to use trims of boards, the thickness of which is several millimeters. First of all, you need to draw a sketch of all the components on paper, where there are 2 side walls, one back, upper and lower parts, a handle, a part with teeth.
Paper patterns are placed on the tree, outlined and cut out. All parts of the device are connected with nails. The blueberry harvester can be equipped with thick wire teeth. To do this, it is enough to bend several long loops and fix them on the bottom of the homemade device.

DIY wooden bucket - a simple device for picking small berries
How to make a blueberry scoop from a sheet of tin or aluminum
The first step is to create a schematic drawing with the specific dimensions of all parts of the fixture. At the stage of manufacturing the body, the metal sheet is cut to exact dimensions. A comb for picking berries is made from the twigs. After that, it is attached to the body on the front side using fasteners - screws.
A steel tube or metal plate is suitable as a handle. It needs to be bent to form a doorknob shape. It is fixed with bolts to the upper part of the body.

The metal harvester is a reliable and durable blueberry picker
DIY blueberry picker from skewers and plywood
The harvester is easy to manufacture, you will need ordinary kebab skewers and a piece of plywood. Outwardly, the device looks like an excavator bucket. 5 elements need to be cut out of plywood, where the side parts have the same dimensions, the top cover, the back wall and the bottom comb. Work is carried out using a jigsaw.
Combs are made from skewers, placing them at the same distance (5 mm) apart... Fasten them with self-tapping screws. A U-shaped handle made of a steel plate or thin tube is mounted on the cover of the device. For 8 hours of work, an amateur manages to collect up to 15 kg of harvest from wild bushes, and without heavily loading the back, and without wasting extra energy. A thick comb strips off fruiting twigs along with foliage and bark, which requires only careful use of a homemade or factory device.
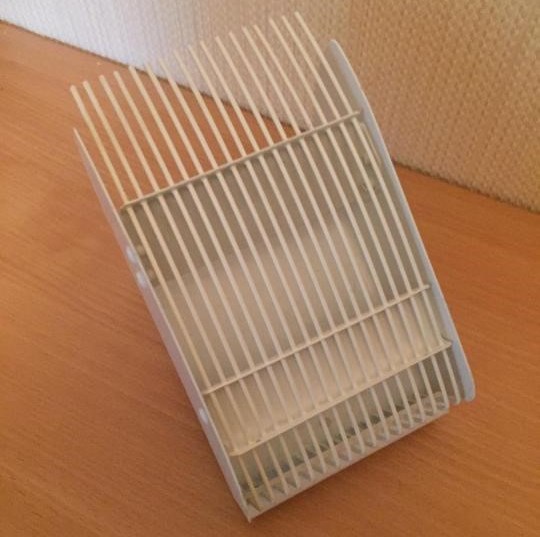
Harvester from available tools - quickly and easily
Blueberry harvester from a plastic bottle
A plastic container with a wide neck will act as a fruit collector. Of the auxiliary elements, you will need a stick, rope and tape. And from the necessary tools, you just need to use a knife (scissors) and a marker.
On the side of the container, draw a window in the form of a flag.The working side will be the part closer to the bottom of the bottle, teeth are drawn on it (English letter w). After that, you need to cut them out with a knife or scissors. Such a blank should be tied to a stick upside down, wrapped with tape.
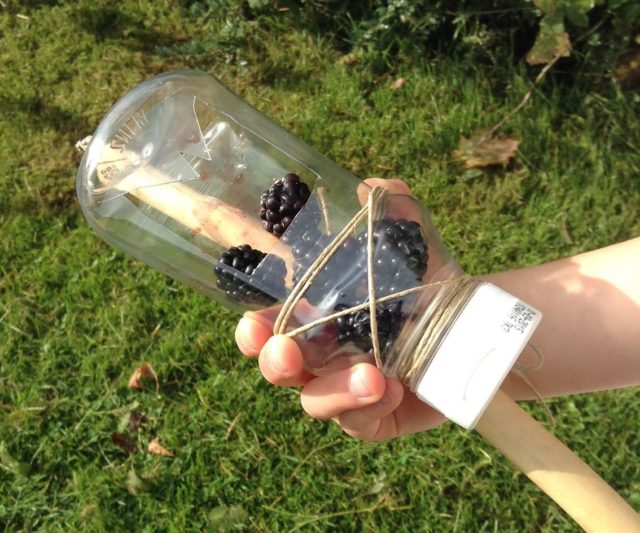
Berry picking is 3 times faster with a simple plastic bottle
Rake types
In order for the work carried out on the site to be as efficient as possible, but with minimal effort, you need to use various types of rakes for their intended purpose. The straight rake is the most versatile type. In this type, the teeth are located perpendicular to the handle, slightly bent inward. They are great:
- for raking leaves;
- loosening the soil;
- leveling the earth after digging;
- extracting the remaining roots.
Among the traditional types, the rake with twisted teeth is distinguished - they better break up piles of earth and fluff the soil well. Homemade wood rakes usually have a wide base with short teeth. Their main purpose is to harvest dry weeds and cut grass. For this species, wood or aluminum cuttings are often made.
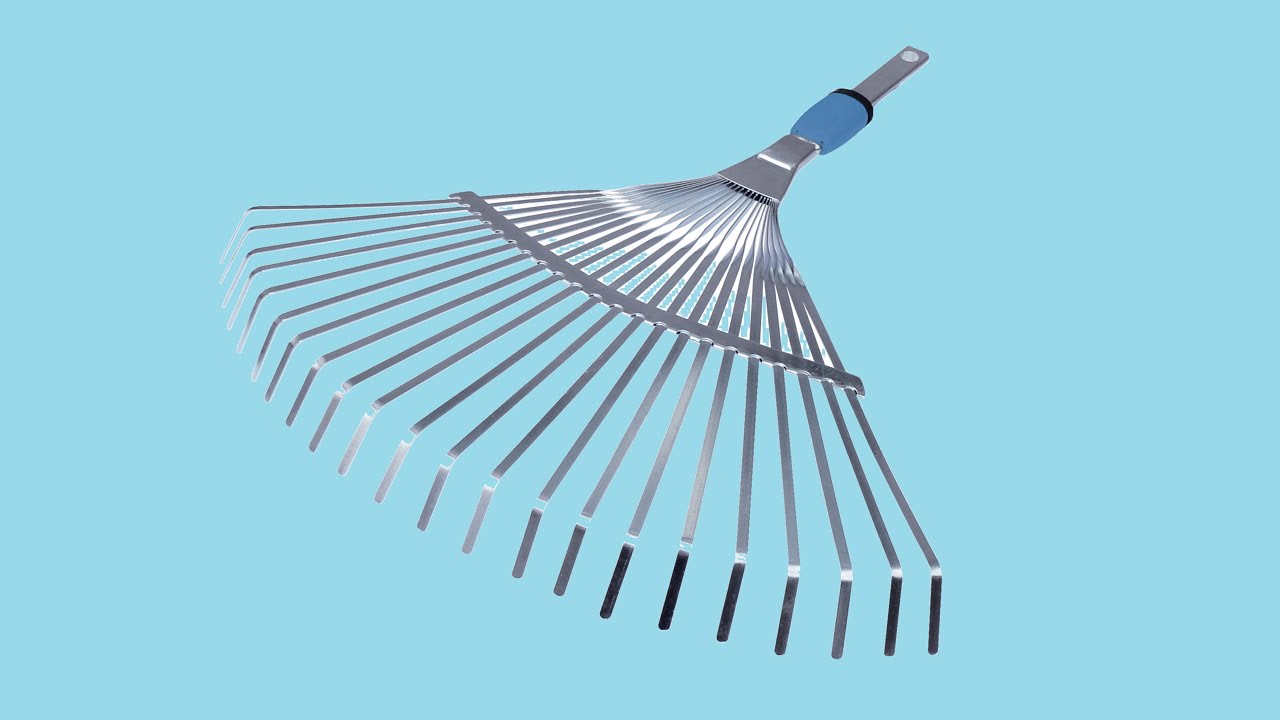
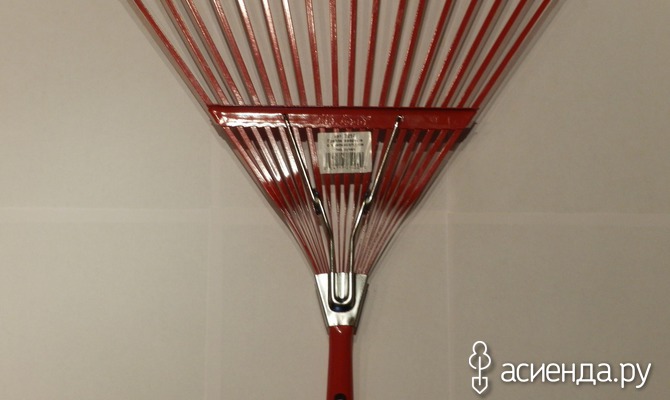
A fan rake consists of a base that resembles an open fan. The teeth are long thin rods bent at the ends. Often such a rake is used:
- for raking leaves and small debris from hard-to-reach places;
- cleaning the lawn before mowing;
- thinning the lawn.
When choosing a fan rake, it is worth considering some design features: in order not to injure young plants, it is better to use an inventory with plastic teeth; for work along fences and in corners, a triangular rake is perfect, etc.
In agriculture, different types of rakes are also distinguished, depending on the characteristics of the device of mechanisms:
- tape;
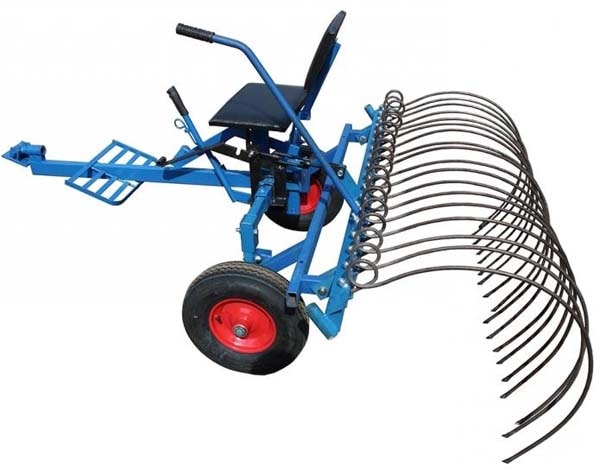
- wheeled rake-tedders (GVK);
- wheel-finger, which also belong to the GVK;
- transverse, etc.
Among the units of the GVK class, experts call the following models the best: GVK-6, GVK-7, GVK-3, GVK "Solnyshko", GVK-2.5KT. In particular, GVK-6 perfectly rakes dried grass, hay and straw into swaths of a certain size, and also tedding swaths so that the grass mass is collected in an air, not twisted swath. The principle of operation of the GVK is that during the movement of the unit, the impellers rotate and with their fingers move the grass to the length of the wheel grip. After all the wheels have passed, the hay moves to the center axis, thus forming a swath. Now many craftsmen make such units with their own hands, adapting to their needs and characteristics of technology, relief, crops grown, etc.
Rake-aerator
The aerator rake can also be attributed to the subspecies of straight lines, but it is always a metal rake, although they have very interesting design features. Made of hardened steel, electroplated or galvanized, their teeth are more of a sickle-shaped blade that cuts through even the roughest ground (and doesn't need sharpening).

Their services are resorted to when even a rake with twisted teeth gives way to unruly ground. Aerators can be either one-sided or double-sided. Double-sided aerators are called milling aerators. These rakes are sometimes equipped with wheels. Serve for cleaning lawns from moss, debris, weeds and leaves. Thanks to the wheels, the knives sink evenly into the ground and thus facilitate the work.

Lawn rakes have a wide, toothed base. They can easily remove large amounts of cut grass. On the "ridge" the teeth are very often located and over the working surface of the "comb" there are special limiter strips, under which the collected grass accumulates.
Types of devices
All rake-tedders are classified according to several criteria, which allows you to find a certain difference between all the assortment on the market.
If we take into account the nature of the creation of rolls from hay, then there are two types of aggregates:
- Cross tedders;
- Side rake.
The difference lies in the performed movements relative to the collected hay and grass.
A significant distinguishing feature is the main working element that the tedders are equipped with.
- Wheel and finger mechanisms. They allow you to collect dry grass, with your own hands set the size of the resulting swaths you need. Such units are lightly depreciated, which contributes to their adaptation even to the most difficult land plots with far from even terrain. The Turkish rake is considered one of the most efficient hay collection tools. The Sun models got their name from the shape of the working tools. Depending on the equipment, the device can have 4 or 5 wheels. With the help of such tedders, the efficiency of harvesting is significantly increased, and the time spent on the work carried out is minimized.
- Drum assembly devices. The unit is based on a pipe of impressive wall thickness. This ensures a high level of structural strength. Drum mechanisms differ in that the raking wheels are located independently of each other.
- Dental mechanisms. These tedders are designed with special tines to help pick up the grass. They rotate in a plane, are located in parallel throughout the structure. In this case, the eccentric rotates around the unit in a constant mode. With this system, the rake changes the angle of inclination of the working teeth.
Depending on the maximum traction, the tedders can be divided into two
- Equine. Their power is insignificant, therefore they are used mainly with the help of a walk-behind tractor;
- Tractor. Here the main device is the tractor, which pulls the rake.
Taking into account the features of equipment, aggregation, there are three types of devices.
It is important to note that there are four types of tedders:
- Rotary;
- Transverse;
- Wheel-finger;
- Wheeled.
Rotary units are the most functional, but that is why they are also the most expensive. If rotary models take the first place, then the second line behind the wheel-finger system. Like rotary devices, they efficiently rake and turn hay. At the same time, the rotary ones are capable of collecting fresh grass with a moisture content of up to 70 percent, and the wheel-finger ones - only dry hay.
Do not forget that spare parts for purchased agricultural machinery must be affordable and of high quality. If parts have to wait several weeks before they are shipped from overseas, this can negatively affect harvest performance. In addition, domestic manufacturers produce decent units, and spare parts for them are easy to find.
Working with a rake will not be difficult. Each assembler model comes with an instruction manual. It details the device of the model, its technical characteristics
Pay your attention to the presented recommendations for use, care and prevention. In the event of a breakdown of the tedder, it is better to contact the service center, since the manufacturer provides a guarantee for its products. And after the expiration of the warranty period, feel free to repair the tedders with your own hands.
This is not difficult
And after the expiration of the warranty period, feel free to repair the tedders with your own hands. This is not difficult.
How to make a do-it-yourself rake on a tractor video
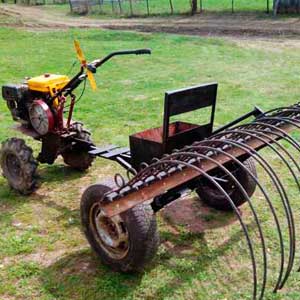
I will tell you about my motor scooter Ant 1984, model 5.403k and what I did with it in the period May 2009 - September 2009. What will be described below is not a completed work, the author fully realized all the jambs and started them a long time ago correction from scratch.
We suggest that you familiarize yourself with How to grow persimmons at home
So, I will not tell you in detail how I got it, I can only say that I bought it from my friend's grandfather for 3 thousand rubles, and in addition I got a second engine lying in the back, and a second differential gear. My grandfather used to ride this scooter when we were not even 5 years old. Having pulled this miracle out of the garage, when it was still in the possession of our grandfather, we realized that the 13 years that Ant spent under a leaky roof, among rabbits and chickens, did not pass without a trace for him.
rake-tedders for the "Sun" type minitractor;
rotary rake.
There are several classifications of harrows. Let's dwell on the most important ones.
According to the depth of processing, they are distinguished:
- heavy harrows - they work the soil with sufficient quality. They penetrate to a depth of 10 cm, break large clods of earth;
- medium - cultivate the soil to a depth of 8 cm;
- light - used for embedding seeds, leveling the surface layer of the soil. They are able to penetrate into the soil to a depth of 6 cm.
By the design of the working elements, the harrows are distinguished:
tooth harrows are the oldest and most common type of harrow. It is made in the form of a lattice of thin metal plates, to which various teeth (straight, curved) are welded. A special modernized version of this type of harrow is spring harrows for a mini tractor;
disc harrows for a mini tractor - universal, can be used on any type of soil, including in the presence of foreign particles, rough stems of plants and stones. Consist of a certain number of curved, serrated discs located at an angle;
combined (loopback) - consist of knives, teeth and levelers (chains or metal rods). Well suited for soil cultivation before sowing.
The type of coupling is distinguished:
- active - harrows, which are connected to the PTO and work independently, without additional attachments;
- combined - which work together with another hitch (for example, seeders).
You can quickly and easily make a homemade harrow using the following algorithm:
- Make a frame. Pipes and metal profiles are suitable as blanks. Do not make the frame too large and massive so as not to overload the mini tractor.
- A shaft is fixed in the center of the frame, which is reinforced by racks. The diameter is selected based on the size of the discs.
- The discs are mounted on the shaft at a slight angle, at a distance of 5-7 cm from each other. The disks must be placed symmetrically. Diameter - at least 25 cm.
- It is also worth making small cuts at the edges of the discs with a grinder to increase work efficiency.
- metal tube (often used with an old motorcycle frame);
- wheel brackets;
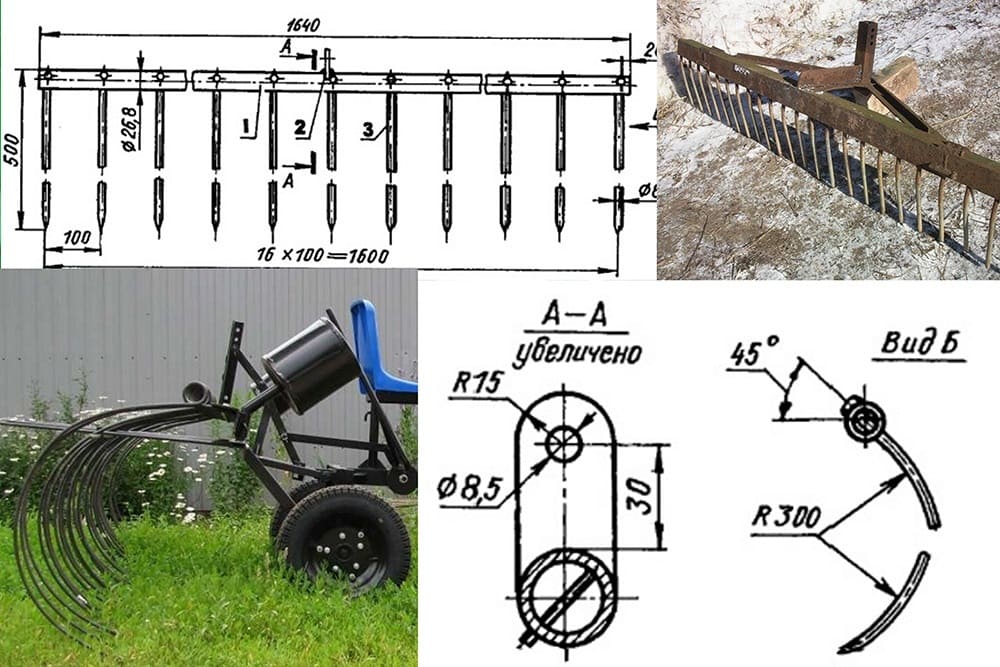
- spring steel wire 4-8 mm thick for raking fingers;
- steel sheets for the manufacture of impeller disks;
- 2 bearings in the hub for each wheel;
- parts for the manufacture of a hitch for attaching a hand-made tedder to the power plant.
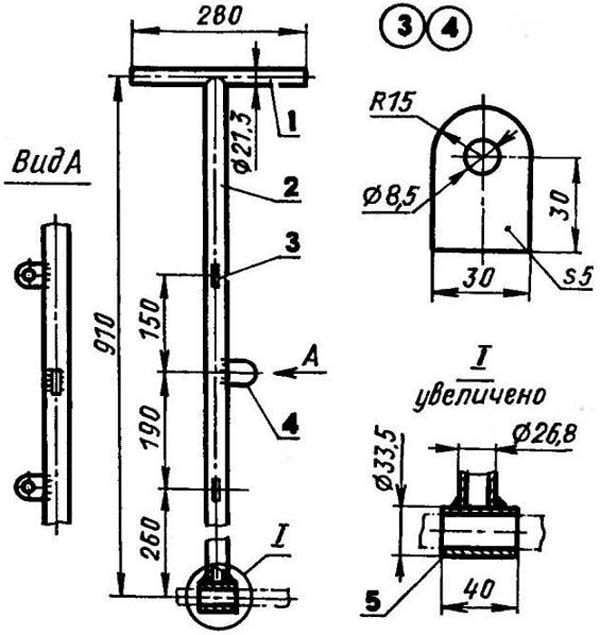
For hubs, it is best to use hubs from Zhiguli, since they have tapered bearings. This will increase the wear resistance and durability of the undercarriage. The illustration above shows the device. It is necessary to be careful when creating the rotor, so that in case of probable breakdown it does not cause the failure of the power plant, and also does not harm the health of the person who controls the equipment.
The best option in the manufacture of the rotor unit would be the use of a rear automobile axle. Correctly assembled tedders make it much easier to pick up and turn dry plant matter, as well as its subsequent baling. The rotary rake is gentle on crops such as alfalfa. Using a tedder rake will minimize losses when harvesting haylage.
DIY making
A fan rake can be done by yourself.For this, the necessary and high-quality material should be prepared.
It is important to firmly and correctly fix all parts of the tool, which will ensure its reliability when the load increases. It is recommended to adhere to the following instructions:
- Make a fan-shaped base. For this you can use stainless steel wire. This material has a high level of strength, is easily cushioned during operation and does not deform. You will need 15 m of wire with a diameter of 0.4 mm. It needs to be cut into pieces 50 cm long. One end of each piece is bent at an angle of 90 degrees using a vice.
- Set a specific distance between the teeth. To do this, you need to stock up on 2 slats (metal) 1.5 mm thick, 5 mm wide and 50 cm long.Using an electric drill, drill 2 holes with a diameter of 5 mm in the rail. Insert the bolt into them and tighten the nut. Now you can insert the fan and fix the rake teeth between the slats on the anvil.
- Connect the fan into a single ring. To do this, it is necessary to have a pipe with a diameter of up to 30 mm. All ends of the wire are inserted into it to a depth of 5-9 cm. Each edge is bent. The result will be a fan-shaped nozzle on one side, and a free rake hole for the handle on the other.
DIY making
The ideal material for making the handle of the tool is pine or oak. Any deciduous tree can also be used. It must be borne in mind that the stalk must be strong and lightweight. Stages of its manufacture:
- Material preparation. As a basis, you can use a handle from a hoe or shovel. On one side, the handle is sharpened in the form of a cone. Prepare a pipe with a diameter 1 mm less than the diameter of the cutting. To do this, you can use a plastic pipe from the heating system (diameter - 25 mm). The length of the plastic pipe is matched to the growth of the owner.
- Treatment. To extend the life of the cutting, it is recommended to cover its surface with a paint and varnish material that has an anti-mosquito property. For this, you can use a stain or a special paint and varnish composition that has the ability to impregnate the material. After the treated surface is completely dry, it is recommended to varnish it.
- Reliable connection. For this, epoxy is used, into which the lower edge of the handle is dipped. Thanks to this, a strong connection of the two working elements is achieved.
If you follow these simple instructions, then the strength of all connections to each other is guaranteed. According to this principle, each owner has the opportunity to make a fan rake with his own hands from improvised materials, which, in terms of quality, functionality and practicality, will not be inferior to the characteristics of a tool made at the factory.
Note! The wood that is used to make the cuttings must first be dried in direct sunlight. Using a planer, you need to remove the excess top layer of wood from the handle
To ensure that the handle is durable and the cutting does not rot, it is recommended to carefully process the surface. To do this, you can use a mechanical processing method or a manual method. The second option requires a lot of physical effort, but the quality of processing will be several orders of magnitude higher.
With the help of a planer, you need to remove the excess top layer of wood from the handle. To ensure that the handle is durable and the cutting does not rot, it is recommended to carefully process the surface. To do this, you can use a mechanical processing method or a manual method. The second option requires a lot of physical effort, but the quality of processing will be several orders of magnitude higher.
A high index of strength and elasticity can be achieved by treating the lower edge of the cutting with epoxy resin. This material acts as a small seal.The seat is carefully lubricated with resin, and the stalk is inserted into it by means of strong, but at the same time, sharp blows (this takes only 5-10 seconds).
It is not recommended to touch the handle for 24 hours so that it is fully fixed. After this period, you can use your own hand-made fan rake. Such a tool will last longer than purchased from a hardware store, and will cost about 3 times cheaper.
Subject to the above features of the choice of fan rakes, the method of their operation, the principles of manufacturing, you can get a tool that will be used for many years to perform a large list of works.
vote
Article Rating


