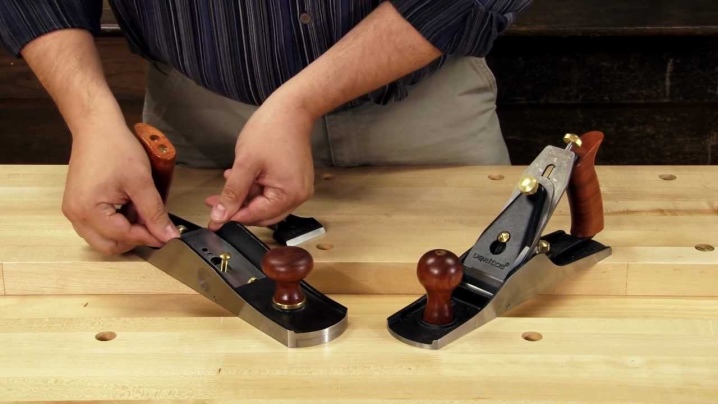
How the blade is installed
Initially, it is necessary to focus on the fact that the knives of the carpentry tools are operated, as a rule, at maximum loads. In this case, we are talking about the maximum shear voltage
One of the key points in this case will be the features of the processed material.
If this parameter is not taken into account, then the stability of the scherhebel knife during operation is directly determined by the dimensions of the passage. This refers to the maximum length of the breaking off parts of the removed chips.
With a decrease in this span and a parallel decrease in the planing depth, the surface of the workpiece to be processed is gradually leveled. At the same time, there is a significant weakening of the shear load on the metal from which the blade is made.

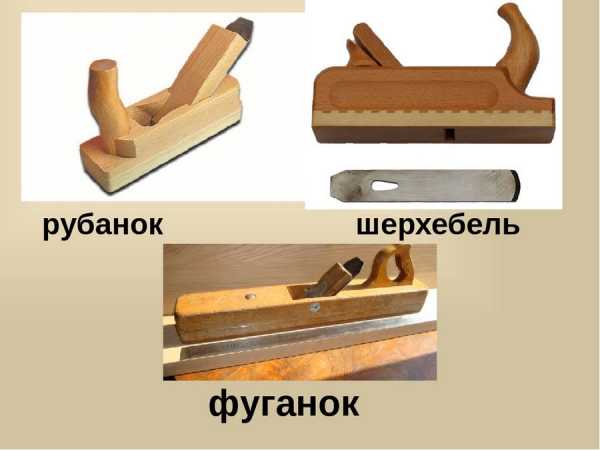
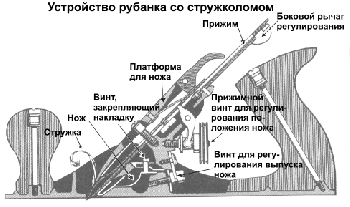
To understand how to properly adjust the scherhebel knife, you should pay attention to some important points. First of all, we are talking about the design features of this element.
It includes support and working parts. In the configuration of the latter, the following are distinguished:
- a chamfer formed on the back side and provides a decrease in the force of cutting the blade into the wood being processed; this is due to the fact that friction of this very rear plane on the surface to be treated is eliminated;
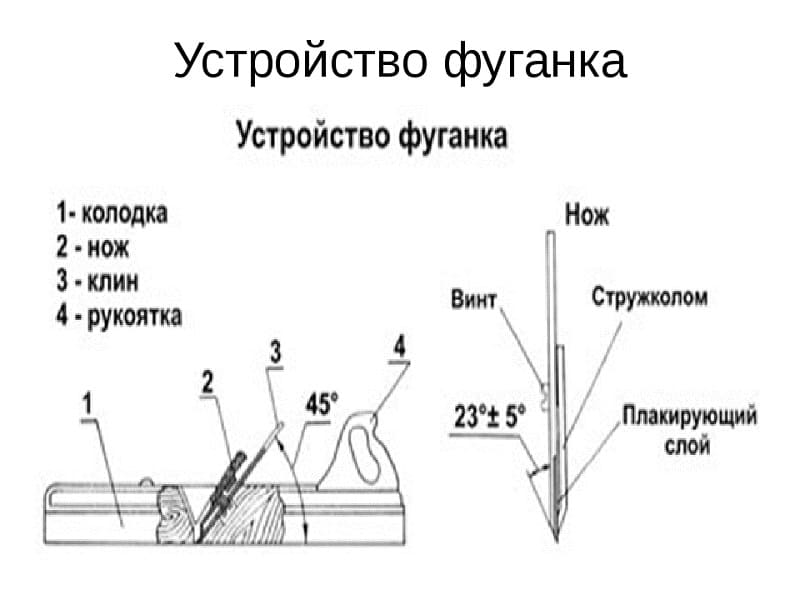
- rake angle - a parameter, as a rule, identical to the inclination of the cutting element to the Scherhebel body;
- back angle;
- working angle - in this case we are talking about the difference between the angles of inclination and chamfer.
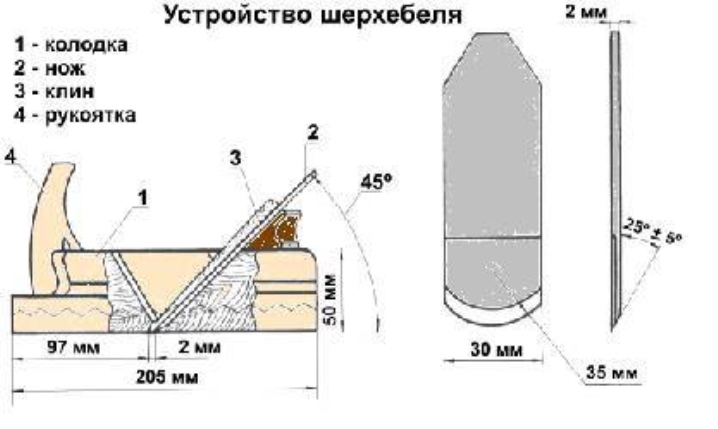
Choosing the optimal value of this angle, you need to pay special attention to several points:
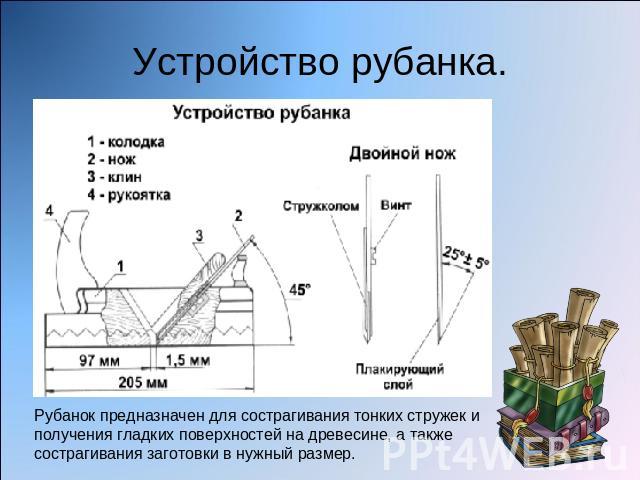
Physical characteristics and individual characteristics of the processed wood. In particular, the point is that the angle increases with increasing material hardness. When working with larch, pine, aspen or linden, it is recommended to position the blade at an angle of 45 degrees (± 5). When processing harder species (oak, hornbeam, pear and others), this parameter is 60 degrees (± 5). If the density of the material is even greater, then the angle is increased to 80 degrees.
Planing type. As a rule, for each type of wood, there is an optimal angle of inclination of the blade and the tool itself in relation to the plane of the workpiece. So, for pine it will be 40–45 degrees. The change in this indicator determines the quality of planing.
However, it is important to take into account that in this case the metal will heat up more intensively, therefore, it will become blunt much faster.
The material from which the knife itself is made and its main characteristics
First of all, attention is focused on the hardness of the steel. Most often, in the production of blades, high-speed grades P12 and P18 are used.
By the way, some craftsmen, when making knives on their own, quite successfully use elements of friction saw discs as blanks.
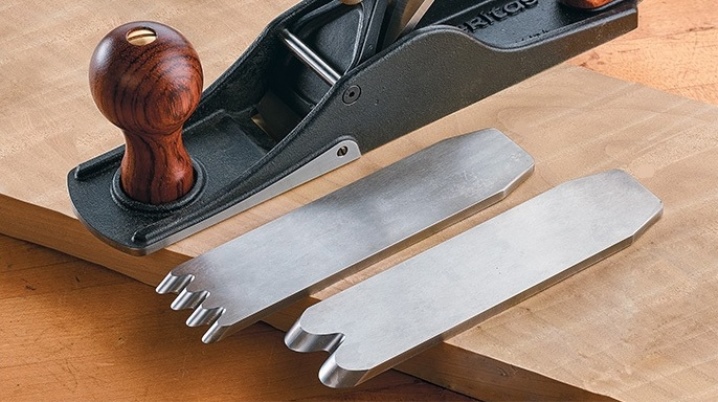
At the preparatory stage, before each use of the tool, its adjustment is carried out taking into account the existing norms and rules. To do this, you need to do the following:
- place the tool so that its sole points up;
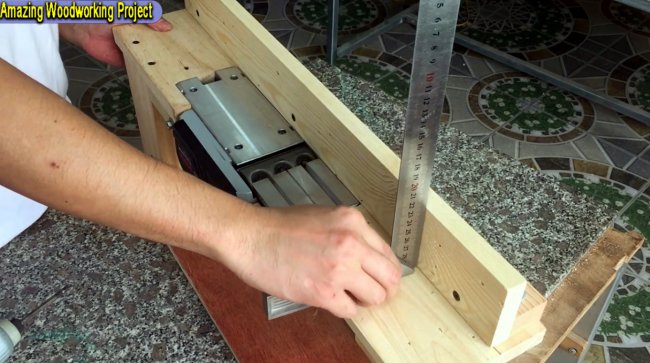
- visually determine how much the edge of the blade protrudes - in a situation with a scherhebel, this value should be 3 millimeters; a ruler can be used to measure the height of the knife;
- make sure that there are no even minor distortions; the blade should be exactly parallel to the sole.


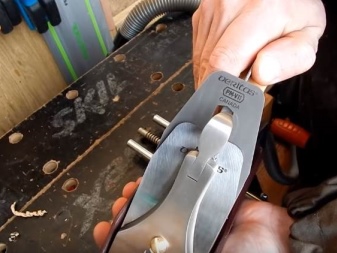

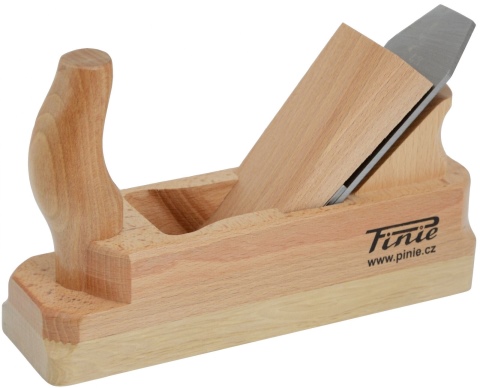
To properly fix the knife in the tool body, it will need to be disassembled.In situations with wood models that have a fixing wedge, the algorithm of actions includes the following points:
- the plow is placed in the left hand, holding it by the block;
- with the other hand, with a hammer or mallet, light blows are applied to the back of the tool until the wedge is completely released;
- the blade is exposed in the appropriate position and wedges;
- with a hammer, the wedge is driven to the end; as a result of such manipulations, the part is held motionless;
- the correct installation of the cutting element is checked.
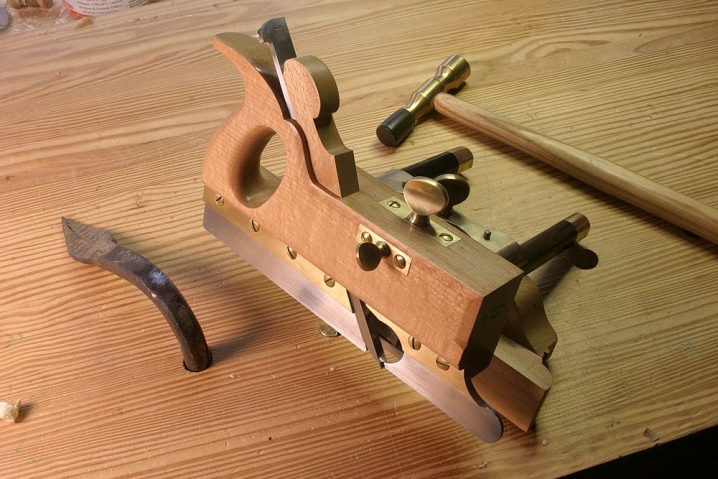
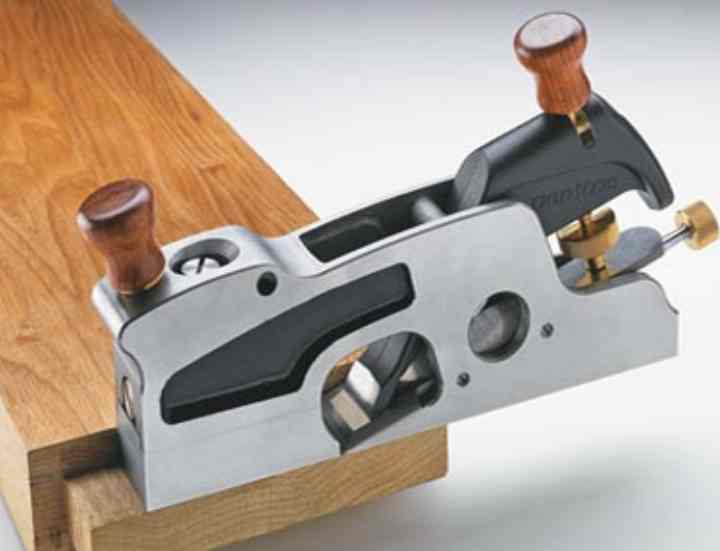
In situations with metal models, the entire procedure described is as simple as possible. As noted above, the blade of such sherhebel is fixed using a screw mechanism. By the way, this unit also serves as a chipbreaker or chipbreaker. This knot prevents chipping of the layers of wood removed during the planing process.
How to install on the machine
Correct mounting of the cutter is necessary to obtain the correct quality and accuracy of processing. Also, installation errors contribute to the rapid wear of the cutting edge.
The tool is installed in the tool holder strictly in the center. To adjust it in height, the turner's arsenal should have metal plates with a thickness of 1 to 4-5 mm. Installing below center will push the part out, which is dangerous for both the tool and the worker. If the cutting edge is too high, it overheats and wears out quickly.
When installing the cutting tool, you need to follow simple rules:
- Wipe down the bearing surface of the tool holder.
- Fix the tool with at least two screws.
- The overhang of the head should not exceed 1.5 times the height of the holder.
- When roughing, an overestimation of the cutting edge by 0.3-1 mm is allowed.
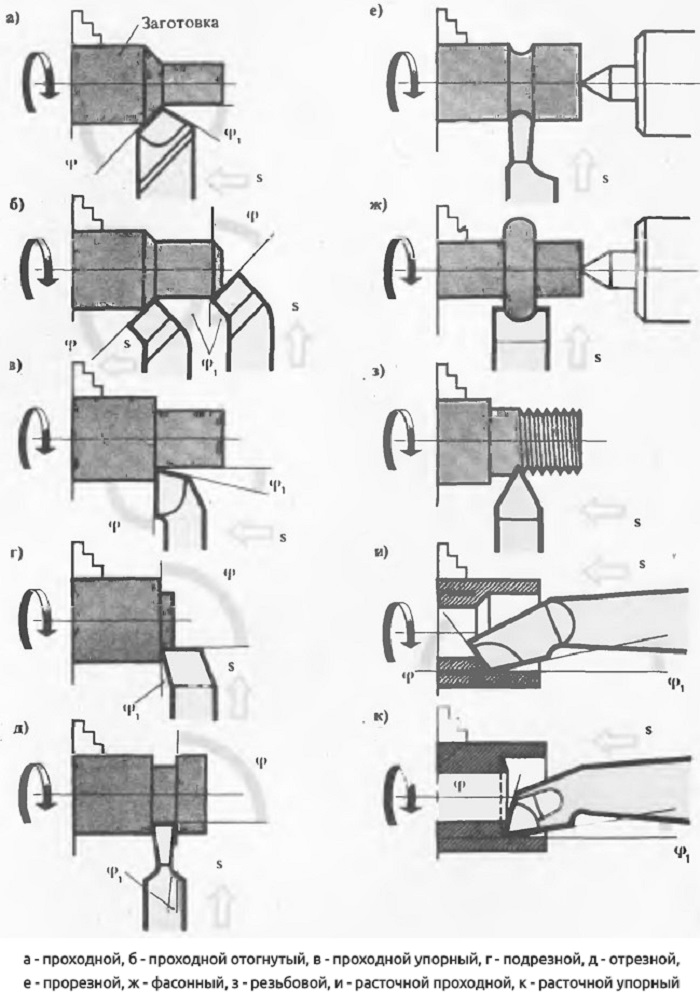
After installing the tool, you need to remove the test chips. If the surface is flat and smooth, the chips do not wrap around the cutter - you can start working.
Important!
More than three spacers are not allowed. They should also not protrude beyond the tool holder.
Sharpening the hand planer knife
The working edge of the knife is an edge with a small radius of curvature. Before you start sharpening, you need to visually check the integrity of the edge: there should be no metal breaks on it. If such defects are present, then the knife will have to be shortened.
To keep the corner radius as low as possible, sharpening should be done in two stages. Initially, the primary sharpening is carried out. To do this, a blunt knife from the side of the chamfer must be brought to the periphery of the grinding wheel and pressed firmly. The number of revolutions of the sharpener should be at the level of 600 - 700 min-1. Otherwise, too much metal removal will result.
It is also important not to overdo it with pressing, because blue-violet hues can form on the steel, which is an unpleasant sign of metal tempering. The hardness of the knife will decrease, and there will be a need for heat treatment to restore the strength characteristics of the material
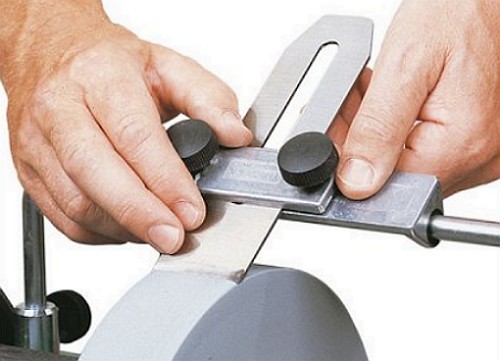 If there is no sharpener, you can do this. Sharpen the knife with a coarse sharpening bar, which must be fixed on a working workbench. Sharpening is performed by circular movements of the chamfer along the surface of the bar. During this work, it is worth moistening the knife from time to time with water or soapy water to clean the sharpened surface and cool the tool.
When you see burrs, then you can proceed to the second stage of sharpening with a finer-grained bar that removes those same burrs. The granularity of the bars looks like this:
- high grain size from 30 to 180 microns. Such bars are made from silicon carbide or corundum.
- average grain size from 7 to 20 microns. Such bars are created from fused corundum or chromium dioxide.
- small grain size from 3 to 5 microns. This material is used for the final sharpening of knives.
At the end of sharpening with a knife blade, you need to hold it over a piece of hard wood. It will permanently remove the burr fragments.
Classification of cutters for metal according to the shape of the heads, design, direction of cutting and accuracy of operations
According to these parameters, there are the following classifications of cutters for metal.
Classification by head shape
According to this parameter, the incisors are divided into 4 types.
-
Straight. The holder and the working head are located either on the same axis, or on two, but parallel.
-
Curved. The holder has a curved shape.
-
Retracted. The bend of the head to the side is visible to the naked eye.
-
Drawn. The width of the head is less than the width of the holder. The head can be pulled to the left or right. There are also symmetrical models.

Image # 3: Classification of incisors by head shape
Classification by design
By design, the cutters are classified into three types.
-
Whole. Such cutters are entirely made of alloy or tool steel (rarely). They are inexpensive, wear out quickly and are not suitable for handling hard materials.
-
Carbide tipped. Such cutters combine high wear resistance and average cost. Solders are usually made of VK8, T5K10 and T5K6 steels.
-
With replaceable carbide inserts. They are more expensive than analogs. As comfortable as possible. The cutting tool does not need to be removed to change inserts.

Image No. 4: classification of turning tools by design
Cutting direction classification
There are left and right incisors.
-
Rights. Such cutters for lathes are used most often and are fed from right to left during the processing of workpieces. If you put your right hand on top of such an incisor, then the cutting edge will be located on the side of the bent thumb.
-
Left. Served from left to right. If you put your left hand on top of such a cutter, then the cutting edge will be located on the side of the bent thumb.
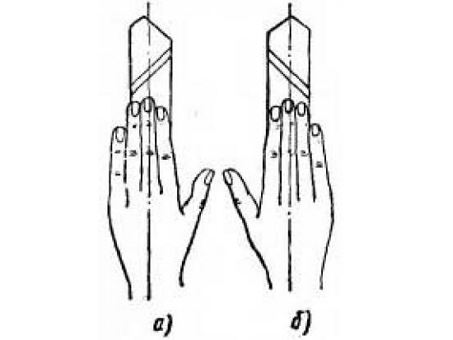
Image No. 5: left (a) and right (b) incisors
Classification by accuracy of operations
On this basis, the following types of incisors are distinguished.
-
Roughing (roughing). Designed for rough processing of workpieces.
-
Medium. The processing accuracy is average.
-
Finishing. The processing precision is at a high level.
-
Special Designed to perform delicate technological operations.
Popular manufacturers
Among the manufacturers of professional metal scissors, the following companies should be distinguished:
1. GROSS - scissors are made of high quality steel, so all products, regardless of cost (620-1500 rubles), are suitable for professional use. Due to the large assortment, you can easily pick up a quality tool for right or left cutting of metal.
"PIRANHA", 250mm, straight cut, steel-CrMo
In all models of this company, without exception, a reliable spring is used, which allows you to quickly and easily return the blade handles to their original position.
2. Kraftool (kraftul) - allow to carry out high-quality cutting of steel up to 0.8 mm thick. The tool jaws are made of forged steel, which perfectly withstands constant stress. Thanks to these design improvements, metal cutting is carried out without burrs, which can significantly reduce time costs.
A distinctive feature of the tools of this company is the use of a two-component handle, which has special projections for the fingers. This design allows you to fully control the process of cutting the metal sheet, eliminating the possibility of handle slippage and injury. The average cost is 780 rubles.
3. STAYER - inexpensive (from 260 to 500 rubles), but high quality professional scissors. With this tool, you can easily cut sheets up to 1 mm thick.Almost all models of this company have a lever mechanism, due to which the cutting force is significantly increased.
Plastic handles and notches on the cutting edges allow for stable and long-lasting work. With STAYER scissors, you can process both ordinary steel sheet and stainless steel, and non-ferrous alloys.
4. Bison is a tool of a domestic manufacturer, distinguished by good quality of cutting surfaces due to hardening by high-frequency currents. The cost is 750 rubles.
The scissors are able to cut flat metal plates up to 0.8 mm thick. It is easy to find on sale both straight products and those intended for curvilinear cutting.
Thanks to the high-quality materials used in their manufacture, "Zubr" will serve for many years without breakdowns and additional adjustments.
5. SPARTA - excellent quality lever model at an affordable price (215 rubles). The cutting surface is made of hardened steel, so the Sparta scissors have excellent load bearing capacity and allow you to work with metal up to 0.8 thick.
The comfortable handle will not allow the hand to slide off during operation, and at the end of cutting, the tool is easily fixed in a compressed position.
6. NVS - professional scissors that are great for curly cutouts. Cost from 1200 to 2000 rubles.
The blade is equipped with micro-teeth that prevent the metal from slipping when cutting. Thanks to the high quality steel used in the manufacture of the cutting surface, it is possible to obtain a perfectly smooth cut.
With the NVS shears, high-quality steel up to 1 mm thick can be cut. Non-ferrous alloys can be machined up to 1.4 mm thick.
7. BESSEY - the model allows you to work with sheet material up to 1.5 mm thick. The increased productivity of the product is achieved due to the linkage, which significantly increases the clamping force of the jaws.
Scissors are great for making curved cuts and cutting metal in a straight line. The cutting edges of the tool are made of hardened steel, which easily withstands high loads when working with metals of increased hardness. They ask for German quality - 2500 rubles.
Conclusion
Video:
Both on the Internet and in a regular store, you should pay attention to the purchase price and not buy too cheap products. Despite the fact that the products of well-known brands are much more expensive, you should give preference to time-tested manufacturers in order to insure yourself as much as possible against the purchase of low-quality hand tools
The device and the principle of operation of the tool
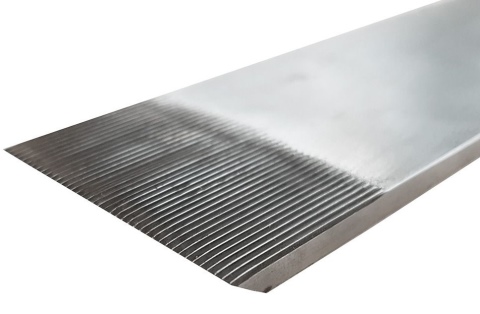
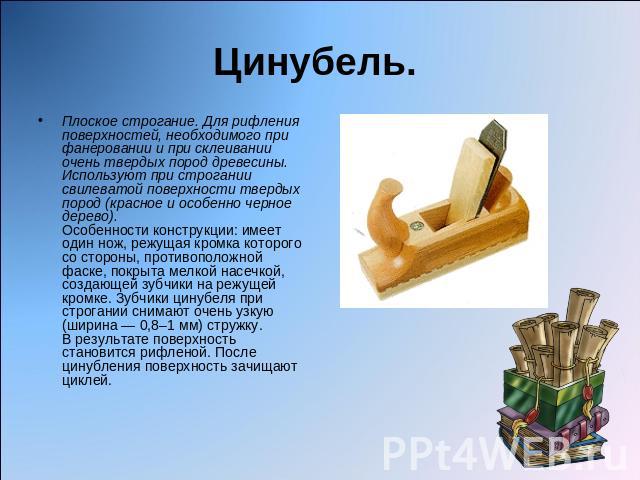
The cutting angle at the Zinubel is close to the perpendicular. The peculiarities of the action of this tool make it possible to use it even for working with especially hard rocks. Curliness will not pose any serious problem. The only Zinubel knife that even works with mahogany and ebony has a unique cutting edge. In the area opposite to the chamfer, it is covered with a medium-sized notch. As a result, the cutting edge appears to be serrated. The tooth pitch can vary greatly:
-
small - 0.75;
-
medium zinubel - 1;
-
large tool - 1.25.
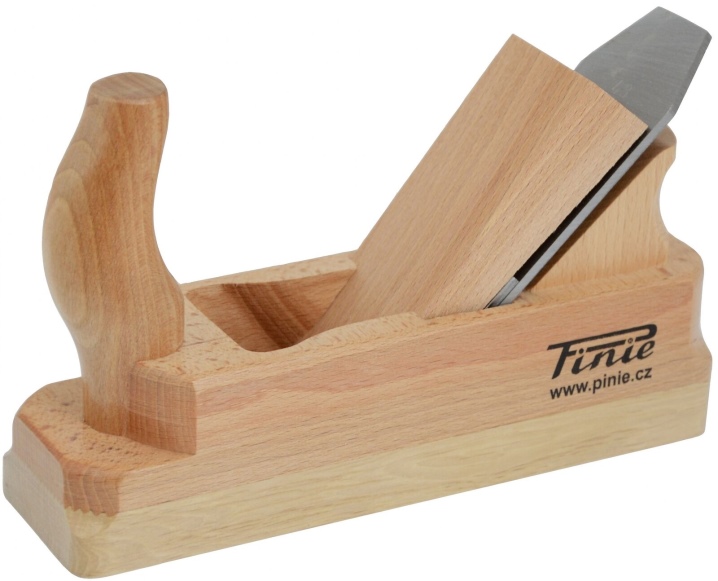
This device is usually referred to as flat planing planes. Experts note that the cut angle for most production models is 80 degrees. When the teeth run over the surface, they remove very narrow (0.8 to 1 mm) chips. Such processing, leading to the appearance of a corrugated surface, rather resembles not planing, but scratching the material.
In order to bring the wooden blank to perfection, after passing it with the cinubel, it is additionally cleaned with a cycle. If you change a special knife in the tool for a standard one, it will be able to replace the grinder. The block at the cinubel is shortened and narrowed.
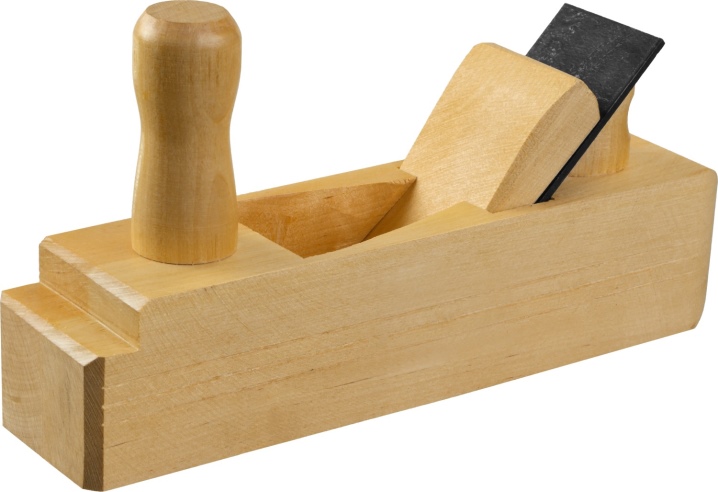
It is believed that the use of a zinubel is as gentle as possible.The combination of the grooved surface with the raised pile increases the traction characteristics. Therefore, gluing becomes much more effective. To use in grinding mode, you need to change the knife on the Zinubel. Instead of the standard tool for this, they put a double blade with a chip breaker on the edge.
The blade is positioned at a 50 degree angle to the sole. In this case, you can:
-
scold badass;
-
remove irregularities;
-
smooth the ends;
-
achieve perfect alignment of straight sections.
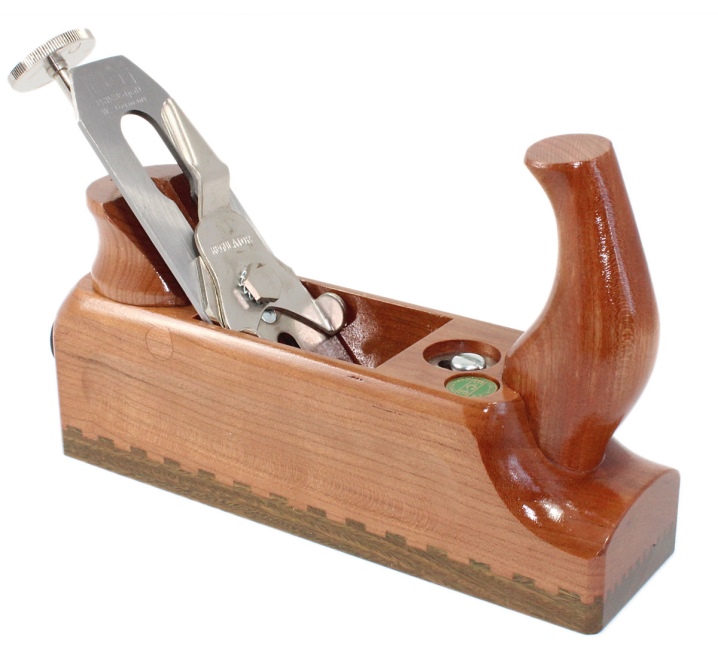
In the next video, you can learn more about this type of tool.
Grinding parts
Grinding the finished part is performed with a sandpaper, which is wrapped around the part and held by hands (Fig. 31, a), or with a sanding block (Fig. 31, 6).

Rice. 31. Grinding a part: a - with sandpaper: b - with a sanding block
Sometimes decorative annular stripes are applied to the surface of the polished part. To do this, take a block of harder wood than the wood of the workpiece, and apply the edge of the block to the part rotating on the machine. The contact surface heats up and burns a little. This leaves circular brown stripes on the part.
Planer adjustment
Take the block of the planer in your left hand so that the thumb
located on top of the back of the shoe, and four toes on the sole near the span.
In your right hand, take the knife by the edges, put it on the base with the chamfer down and slide it
in flight to the sole. The base must be horizontal and the large
the finger supports the knife. Grip - four toes on the sole at the span, large on
knife through the wedge.
Insert the wedge into the taphole and lightly hit it with a mallet. Then
turn the plane with the horn towards you, with the sole upwards so that it is at a distance
25-35 cm from the eyes and at an angle of 35-45 ° to the worker.
Find the position when the sole is in one plane, that is, the front
and the back ribs of the sole merge into one line.
With a light blow with a mallet, knock out the knife by the same size throughout
sole width depending on the required roughness and chip thickness
(0.2-0.5). Reduce the protrusion of the blade above the sole by hitting the back of the shoe with a mallet,
increase - with a blow on a knife or on the front end of the block. Non-parallelism
the blades and soles are straightened with a hammer blow on the right or left edges of the knife. Anchor
knife with a light blow with a mallet on the end of the wedge. The protrusion of the knife blade under the sole is checked
approximately. To do this, turn the block of the planer with the sole upwards and hold it in the hand against
light so that its front part is facing the beholder's face. In this position
pads the blade protrusion is easily visible on the shiny light surface of the sole
in the form of a dark strip or thin even thread.
Correct fit and blade protrusion above the sole can be checked
using a trial planing. If the knife is set obliquely, it will leave on the processed
the surface of the deepening of the corner that protrudes more. In addition, the shavings
will be of unequal thickness across the entire width.

Adjusting the planer: a - checking the release and sharpness of the knife, b - adjustment
release of the knife, c - disassembly with a blow, d - pulling out and installing the knife on
base (bed), e - techniques for securing the knife, e - releasing the knife with a blow on the block,
g - release with a blow on the knife, h - straightening the skew of the knife, and - fastening the knife
With clean planing, the thickness of the layer to be removed is checked against the chips.
If the shavings are soft, like tissue paper, the planer is set correctly.
When setting up a double planer, first of all, it is necessary to install correctly
chipbreaker, which is located from the cutting edge at a distance of 0.5-2 mm, depending on
on the thickness of the removed shavings and the desired roughness of the planing.
The chipbreaker should be screwed on very tightly so that
work, the shavings could not get between him and the knife.
As necessary, it is planted with a small file so that
there was no gap between him and the knife. The outer surface of the chipbreaker must be
smooth (ground on a donkey) so that the chips slide easily over it.
During operation, the knife should not move, rattle and vibrate,
otherwise, it will wrinkle, squeeze the chips, clog it up, and the plane will have to be cleaned often.
To avoid this, the wedge must firmly press the knife to the base, and the surface
the base is made very even so that the knife lies with its entire plane.
An adjusted planer must meet the following requirements:
1. Absolutely tight fit of the lower edge of the knife to the surface
the base (bed) of the plane, which excludes the possibility of vibration of the knife during operation.
2. Very tight fit of the chipbreaker to the upper edge of the knife without
clearances across the entire width, but with a slight undercut to accommodate chipbreaker deflection
when securing it. The front convex edge of the chipbreaker must be ground
to shine.
3. Tight clamping of the knife with a wedge along the entire length of the abutment (protrusion) of the wall
taphole. If the wedge fits well, then with a slight blow of the hammer, it will firmly wedge
the knife is in the block and with the same light blow to the butt end of the block releases it. When
however, you have to hit hard and several times with a mallet on the end of the block, which means that a wedge
is not fitted correctly and the knife is jammed only at the top or bottom, or with only one
sides.
4. The distance from the knife blade to the edge of the flight of the planer with double
knife should be no more than 1.5 mm. With a greater distance, a pentahedral is glued into the sole
insert (saddle).
5. The sole of the planer is cut exactly under the square, a ruler
and under paired rulers so that the sole is in the same plane, and the area in front
span did not have the slightest wear and tear.
6. The wedge is so long that on the upper surface of the knife
there was no gap in which the end of the shavings could fall. In a well-adjusted plane
chips never get stuck.
7. The blade and the chamfer of the knife should be straight with slightly rounded
corners, well sharpened and angled towards the edges without convexity and concavity.
Functions and features
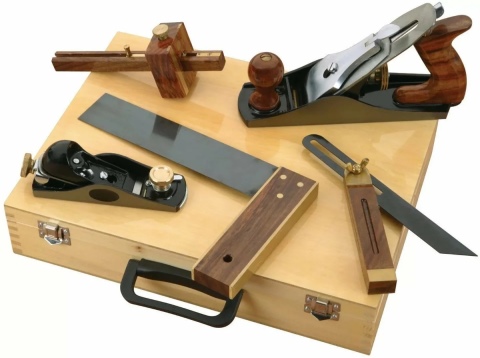
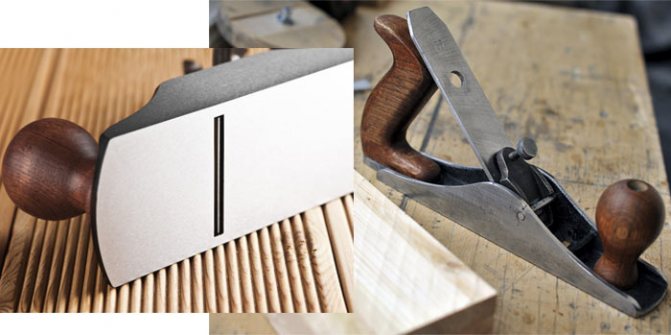
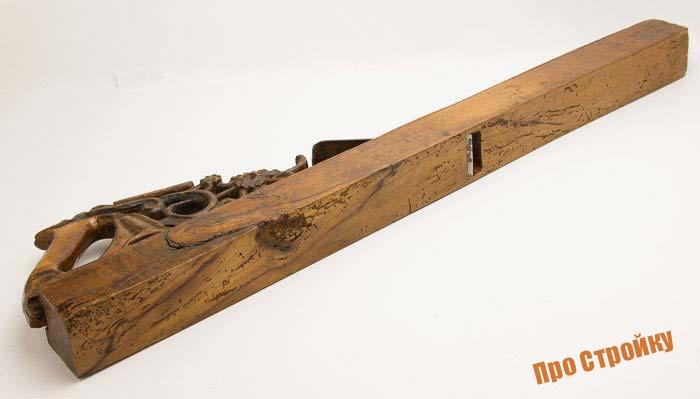
A plane (or plow) is a carpentry tool used to plan wood. The process of work itself is a longitudinal cut of a wooden surface with a knife to give it the desired roughness or shape. In addition, the planing tool is used to adjust the dimensions of parts, cut grooves and extended depressions of various shapes (grooves) in them. Also, with the help of a planer, you can trim chamfers, perform a groove (fold) along the edge of the workpiece, and receive protrusions on the edges of the boards (tongues). In construction, this tool is often used when processing wood for floors or ceilings.
The plane is indispensable for eliminating various defects on the surface of a tree, roughness, distortions and irregularities. When using a high-quality, well-sharpened, correctly selected tool for the task being performed, a smooth, even surface is obtained during the planing process. After finishing the wood with a special plane, the workpiece does not need to be sanded with sandpaper, since the planed surface is easier to apply to varnishing, looks more impressive after the varnish dries and absorbs less moisture.
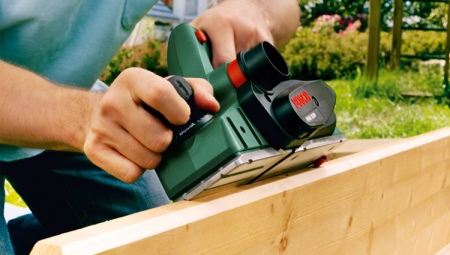
In addition, each type of wood has a unique texture that is better visible on the cut surface, as opposed to the one processed by a grinder. Today, both mechanical (manual) and electrical planers are presented on the market. In shape, both types of instrument may be similar, but in their design they have strong differences.
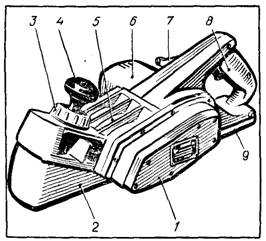
The main difference between electric models is an electric motor that drives a shaft with knives fixed in a special way.In a mechanical plane, the cutting function is performed by a single knife fixed in a wooden or metal base, and the planing process itself occurs due to the force of human hands, which perform alternating longitudinal movement of the tool along the surface of the product. Carpentry craftsmen, whose main task is to quickly complete wood processing, choose an electric tool.

The electric planer is designed to perform large volumes of work in a short time, but this does not always result in a perfectly flat surface.
In addition, the power tool increases safety requirements, since the risk of damage to the limbs from the cutting edge is added to the possibility of electric shock due to failure to follow basic precautions.
The hand plane is chosen by craftsmen who do not like haste and do the work carefully. Compared to a power tool, the hand planer removes finer chips and the finished work looks neater. Plus, it's quiet and lightweight.
It is also important that the cleaning process after work with a hand tool is easier. And the electric plane leaves fine dust in the air, which is harmful to health.
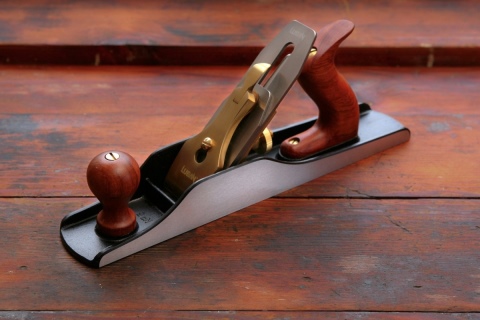
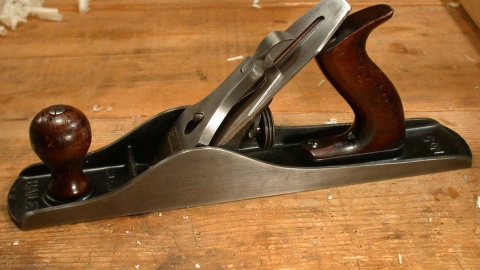
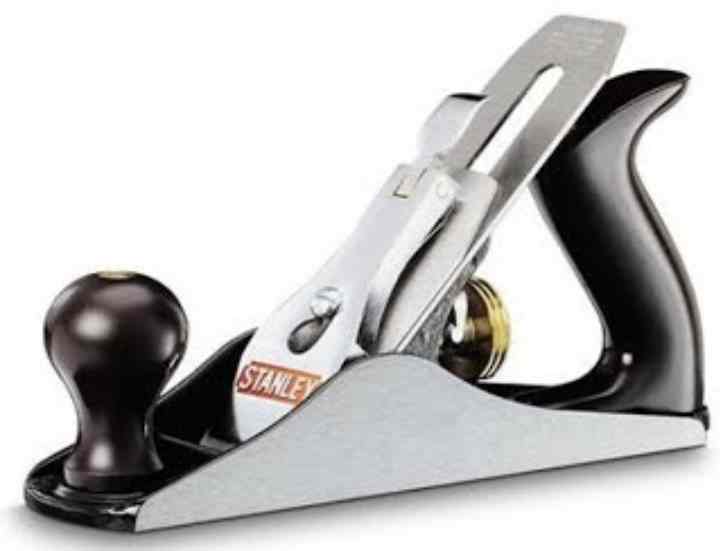
The design of the plane is quite simple in execution, but when choosing it, it is the quality of the components that plays an important role. The tool consists of the following parts:
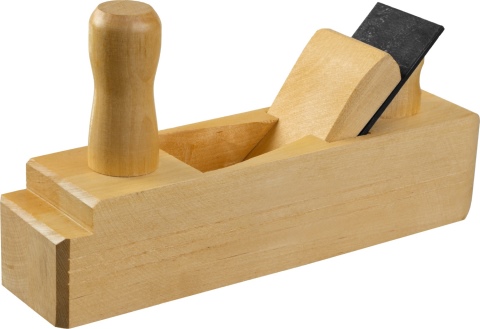
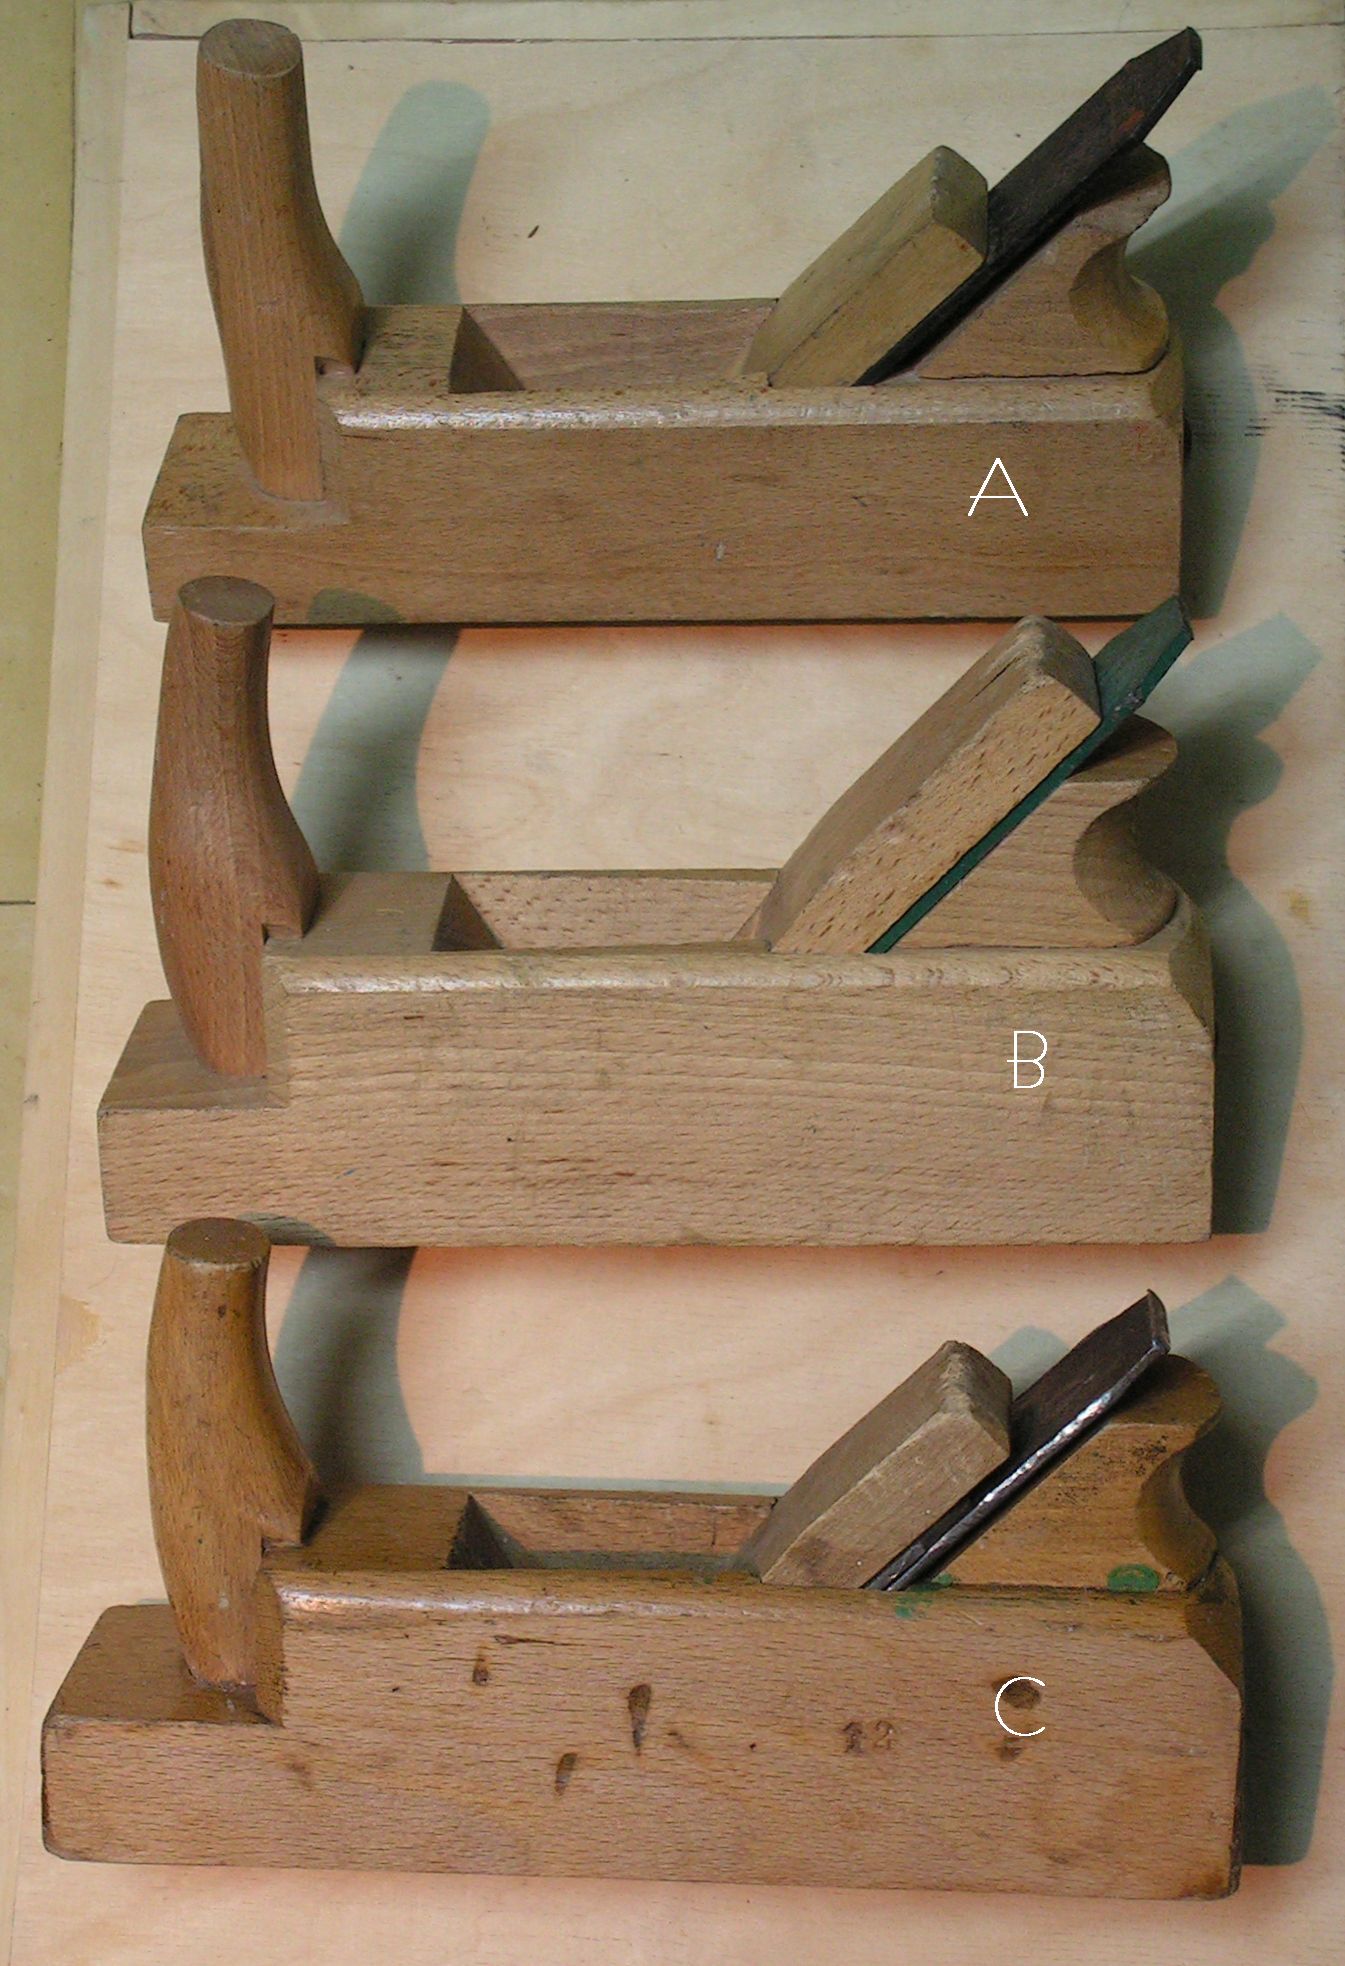
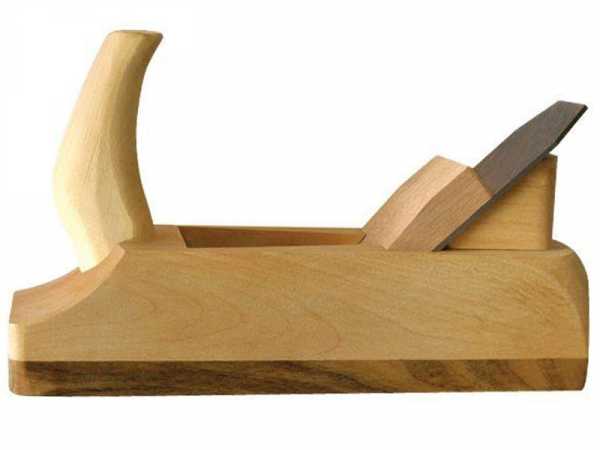
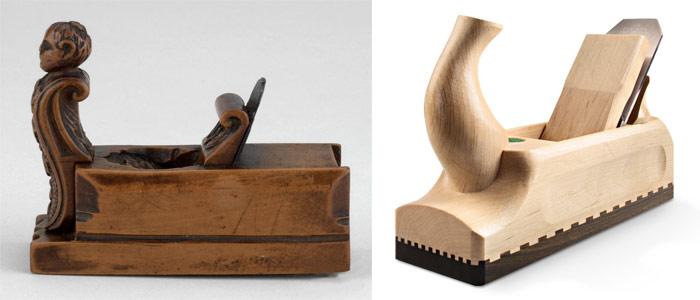
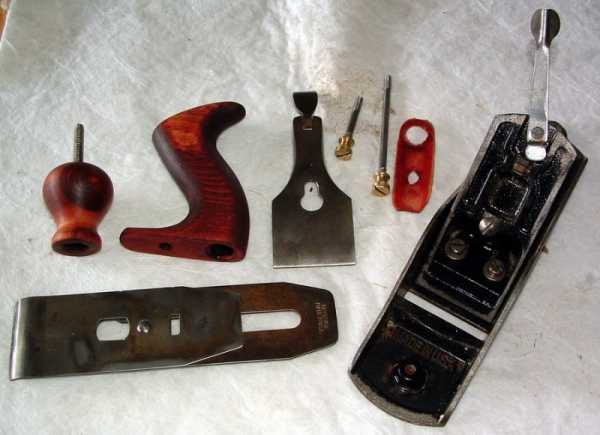
- the body (block) is one of the main elements of the planer. It has a knife slot on which the rest of the parts are fixed. The lower part of the body (working) is called the sole. There are models with a metal sole and a wooden one. In some types of planers, the block has several steps and a special shape. Wooden cases are mainly made of dry strong wood (hornbeam, pear, ash, beech, acacia);
- knives (piece of iron, blade) - the main part for doing the work, the quality of the workpiece depends on it. There are three types of knife. Straight is a regular blade for cutting straight surfaces. Rounded - this is the same knife, but has round edges, due to which there are no grooves. It is used for processing large surfaces, does not allow for unevenness. Curly - helps to achieve a decorative result. In shape, this is an ordinary knife with a grooved end;
- clamp - this part is responsible for fastening the knife to the body, made of different materials;
- chipbreaker - located between the knife and the clamp, designed for a more convenient process of making a workpiece;
- screw - using it, you can adjust the position of the knife in relation to the surface to be treated, thereby adjusting the thickness of the chips to be cut and the width of a single pass;
- frog — incisor tilt adjustment plate;
- two handles for work: the front one for guiding the tool and choosing the thickness of the chips, the back one for moving the planer over the work surface. There are varieties of tools with one handle.
What it is?
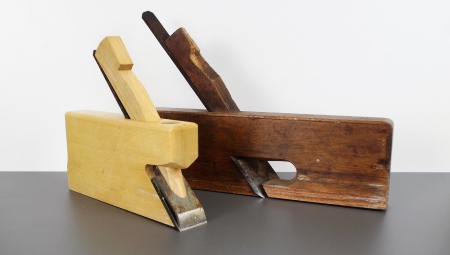
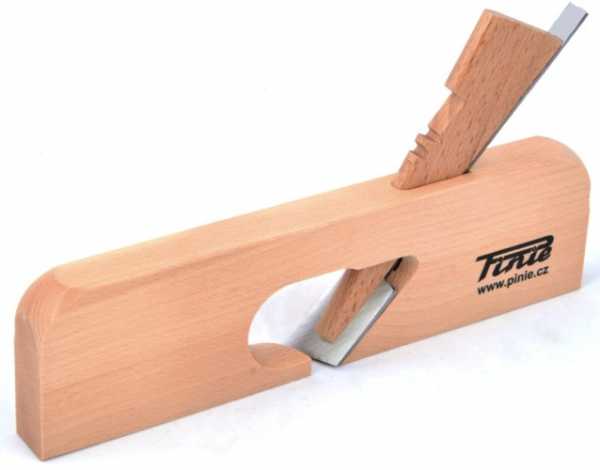
The zenzubel is a kind of hand plane - a tool needed in joinery and carpentry. Unlike the classic device, it is used for curly, not flat planing. An alternative name is sampling. In most cases, a zenzubel is used for the following purposes:
-
cleaning of rectangular sections;
-
choice of quarters on the boards;
-
creation of folds;
-
cleaning and selection of quarters on slats and bars.
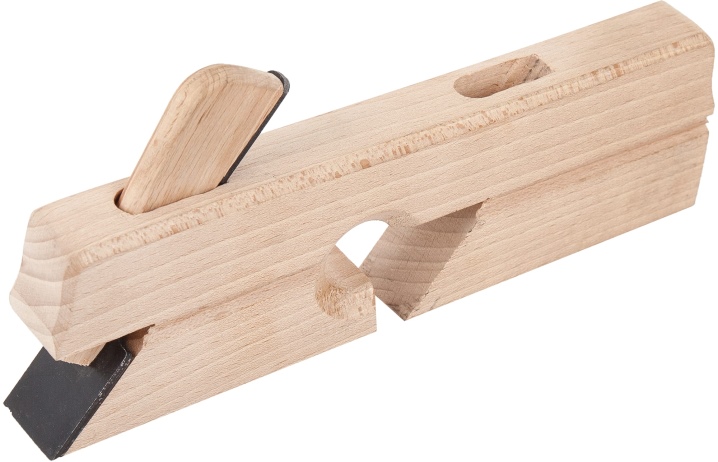
Thanks to the individual design, the cutter or the metal part of the chisel can be set at a 90 ° angle to the block. There is a side hole in the carpentry tool body. Through it, unnecessary chips are removed. The shape of the chisel knives resembles a spatula that pushes and quickly cuts off a wooden layer.

Before starting work with a planer for figured planing, marking lines are drawn on the workpiece using a planer.First, the size of the quarter is noted, after which the zenzubel is taken. The plane is guided neatly along the markings, removing the first shavings to create a small ledge. In the future, you can take more confident and quick action.
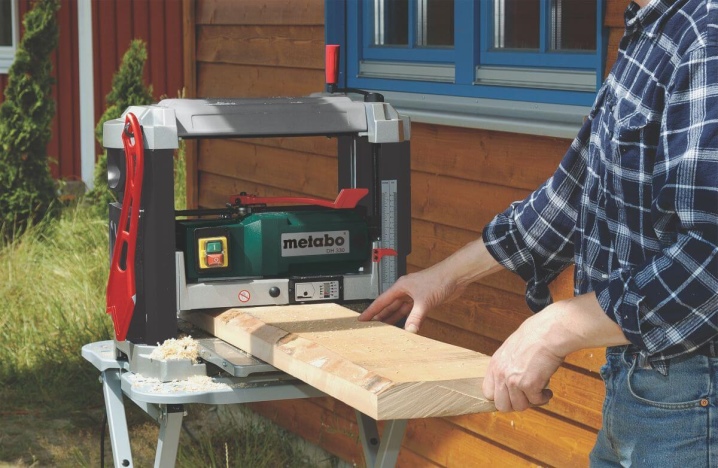
Due to careful use, the chisel is used for finishing, during which it is possible to achieve the necessary roughness of the working surface and adjust the dimensions of the workpiece. A quarter is usually chosen with a falzgebel
The latter is similar in structure to a zenzubel and also belongs to figured planers, but has a number of individual characteristics. These include the stepped outsole.

Operating rules
Turning tools are capable of performing their main function for a long time until the working surface is grinded off. But improper use will shorten the life of the tool. In order to prevent preliminary wear, you need to follow simple operating rules:
- Place in the center.
- The larger the workpiece, the larger the cutter should be.
- Turn on cooling when working in heavy duty.
- Sharpen in a timely manner.
- Periodically refine the working surfaces with a fine-grained pebble without removing the tool from the tool holder.
- Approach the workpiece manually, after touching, turn on automatic feed.
- When stopping the machine, first pull back the tool manually, then turn off the unit.
- Select the correct cutting conditions.
- Do not store the tool in a heap - this will lead to chips and cracks on the cutting edge.
- When working with a cut-off tool, move it as close as possible to the chuck.
Many types of work are performed on a lathe. A separate cutter is provided for each process. It is selected based on the material being processed, cutting conditions, cleanliness and roughness parameters. The tool must be sharpened in a timely manner, the rules of operation and storage must be observed.

