Self-production
A factory or self-made concrete mixer consists of three main components: a bucket in which the solution is mixed, a frame for attaching components and a drive - manual or electric (in some cases, motors from a moped or scooter are used).
In the video, a homemade bucket for combined mixing of the solution is installed on a T-16 tractor:
Mortar bucket
First, you need to think about its size, given that it will load by 30-40%. It is no longer possible, since the solution will splash out and mix poorly.
Secondly, attention should be paid to the shape - it must be pear-shaped. From above, so that water and mortar do not splash out, from below - so that concrete particles do not get clogged into the corners between the wall and the bottom
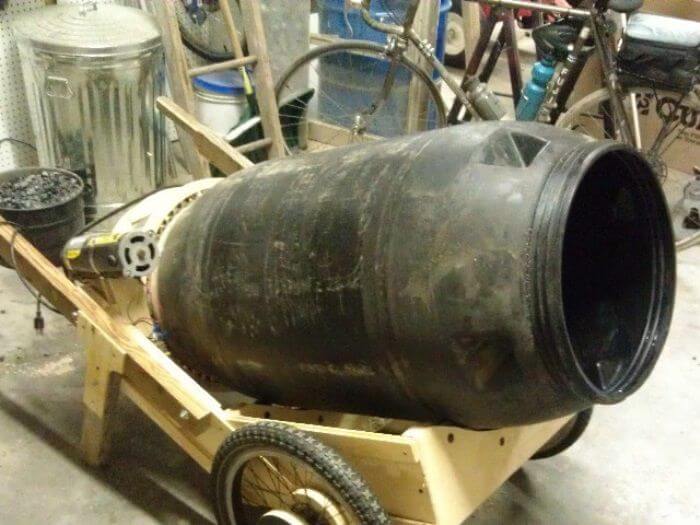
An almost finished bucket is a plastic barrel of the right size - in addition to the fact that it fits in shape, its weight will be an additional plus.
Alternatively, a concrete mixer can be made from a washing machine - if an old Soviet round "washing machine" is lying around in the attic, then a laundry tub is removed from it, which is specially created so that liquid spins inside it. The bottom is strengthened, the top is narrowed and the tank is ready.
If there is nothing suitable, then a pear for a concrete mixer can be made of steel sheet with a cross section of 2-3 mm. For the bottom, a thicker metal should be taken - about 5 mm - the main load from the drive will go to it.
With a diameter of 500 mm and a height of 400, a compact bucket is obtained, in which, nevertheless, 30 liters of solution can be prepared at a time.
The following drawings will tell you more about the design:
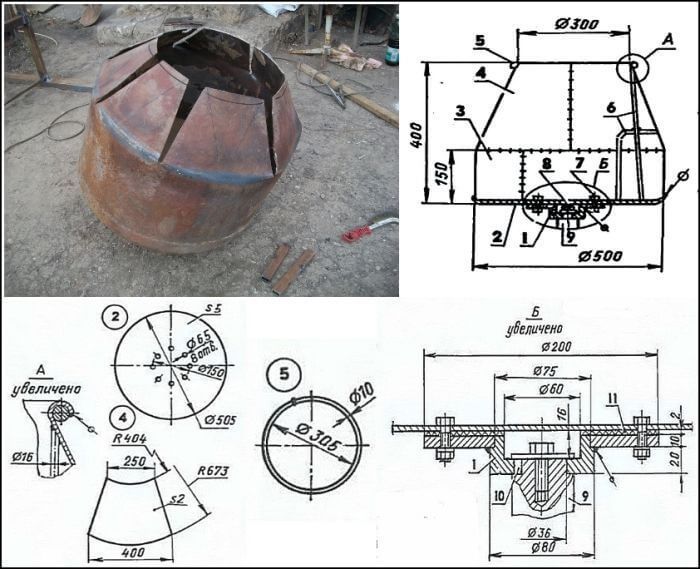
You can make a high-quality pear for a concrete mixer without using blades. In the diagram shown, instead of them, mortar dividers from a 16 mm reinforcing bar are welded into the container, which additionally strengthen the structure. This design is an excellent mixer for wood concrete.
Attachment to the shaft occurs through a hub from the car wheel, which is welded or bolted to the bottom. If there are no car parts in the garage, then the fasteners will have to be made manually according to the drawing.
Carrying frame
There can be a wide variety of variations in its design - there is complete freedom of action, the main rule of its manufacture is that it reliably holds all the components and gives free access for loading and unloading concrete.
The main differences in engineering lie in the method of pouring the finished solution, for which the bucket itself is made movable, or the entire frame is designed in a certain way.
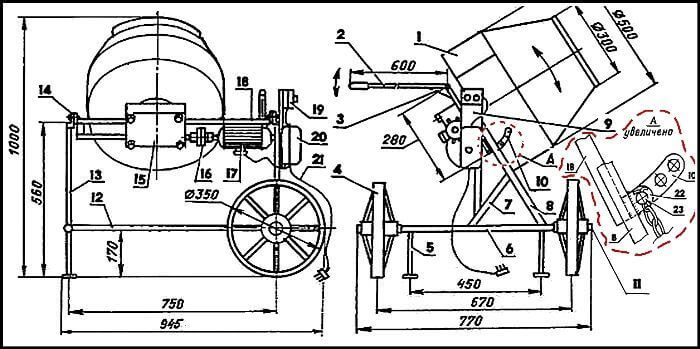
For a bucket made of sheet steel, a tilt frame is optimal. The container itself is connected to the gearbox drive (15), on which the force through the clutch (16) comes from the engine (17).
All of this is attached to a subframe (18) and pivots on a hinge (14). For different types of solutions, the working slope of the bucket can be adjusted, for which an eyelet (22) is welded to the stretcher through which a sector (10) passes, held in the desired position by a pin (23).
At least three main provisions of the sector are needed:
Slope 50% - for heavy mortars.
Slope 30% - for light mixes (eg plaster).
Horizontal position for rinsing the container.
Electric motor and gearbox
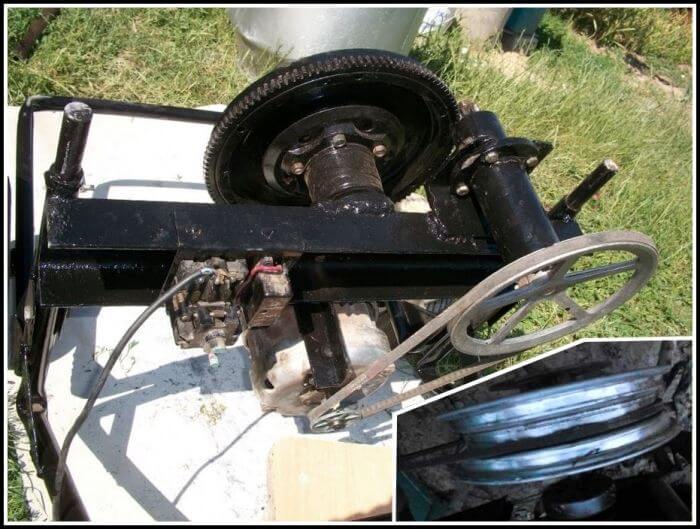
Rarely are these parts bought separately - the easiest way is to use what is at hand. The electric motor will fit from the washing machine, the electrical circuit is from the same place, and the gearboxes are assembled from bicycle wheels, belt or chain drives. The closest thing to the factory design is a flywheel welded to the bottom, which rotates from the "native" Benedix car starter mounted on the shaft.
All calculations are made based on the following considerations:
- Engine power is selected according to the ratio of 20 watts per liter of solution.
- The number of revolutions that the gearbox for the bucket produces should be in the range of 30-50 per minute.A smaller amount will increase the mixing time, and a larger amount will spray the solution or even cause centrifugal forces, due to which mixing will not occur.
Instructions: homemade concrete mixer with a washing machine motor
There are two types of concrete mixers:
- Mechanical. The container is set in motion by force. This is practically the same as stirring concrete in a regular container. How much time and effort will it take you to work with a manual drive? Therefore, it is better to dwell on the following option.
- Electric. The tank is driven by an electric motor.
The manufacturing technology of a concrete mixer is quite simple. But before you get started, think about whether you can connect the motor yourself? If the answer is yes, then have everything you need ready.
Components
- Barrel from an old washing machine with a volume of 200 liters (preferably top-loaded). It is this volume that is sufficient for mixing the optimal amount of concrete for work.
- Electric motor (power 200 W).
- Pulley, drive belt, washer switch.
- To make the base, you need a 50x50 metal corner.
- Wheels. Two wheels can be taken from an old stroller, wheelbarrow, carriage.
- As an axis, you need a strong 4.5 cm metal rod.
- Reducer.
- Armature.
- Metal strip.
- Ball bearings.
- The wire.
- Washers and bolts.
Instruments
- Bulgarian.
- Hacksaw for metal.
- Drill.
- Soldering iron.
- Welding with electrodes.
Why is it profitable to make a concrete mixer from an old washing machine? Because the tank of the machine is quite suitable for mixing the mortar, its drain hole can be closed. The motors of old washing machines are quite durable and reliable.
The complex use of all elements protects the engine from the ingress of foreign objects during operation. This saves you the trouble of doing defense.
Step-by-step execution of work
Before starting work, you can prepare drawings to facilitate the assembly of the structure. One of the drawings is shown below:
Make a frame (base)
This is an important point, since the entire structure will be supported by the frame. The base must be strong and stable.
- From the prepared corners 50x50, cut two pieces of 60 cm and four pieces of 80 cm. The 60 cm segment serves as the basis for the support triangle, 80 cm segments are its edges. Fold and weld the triangles. Place them opposite each other.
- Now weld two 50 cm corners to the edges of the triangles. A stable structure is obtained.
- Two nuts must be welded to the tops of the triangles. The diameter of their hole must be larger than a pipe with a diameter of 30 mm. Then this pipe must be pulled through the holes of the nuts and the ends pressed. The pipe should rotate freely, but not jump out of place.
- Make the top. Take two corners 1.4 m long and three 40 cm long. Place those that are 1.4 meters opposite each other. Place the rest across at an equal distance, like a ladder. Weld the pieces together.
- Weld the bases of the finished structure to the movable pipe. It must be positioned across the pipe in the center.
Frame
Attach the wheels to the base of the frame with reinforcement.
Now the tank is next in line. Remove the activator from the tank and close the drain hole. Install a shaft or axle of a suitable size in place of the activator. From a strip of metal, make homemade blades that will stir the concrete. They can be screwed in additionally with pliers. Weld the blades onto a metal strip and attach to the shaft.
To install a large barrel with your own hands, place it on the ladder of the frame. Make sure that most of it is in contact with the corner. Weld the barrel to the base for a secure fit. In this case, the bottom of the tank should face the tops of the triangles.
Motor connection
The motor is connected to the back of the tank. To do this, drill two holes at the corners.You will also notice holes on the motor housing, attach them to the corners and secure with bolts and nuts.
To prevent the engine from breaking due to bad weather, make a casing from a car camera. Provide holes on the sides to prevent overheating.
It remains to connect the motor to the voltage network and check the operation of the homemade concrete mixer. The convenience of this design is that the ladder tilts like a swing. Therefore, the ready-made solution can be easily poured by tilting the tank.
Knowing how to make a concrete mixer from improvised means, you can save a lot and get your own equipment. Act consistently and everything will work out.
The simplest manual concrete mixer
The diagram shows just the simplest gravity concrete mixer. And even a "dry" solution for a floor screed can be kneaded in it without any problems. It is not difficult to do it yourself, you can even simplify and reduce the cost of the structure. For example, do not poke a hole in a still strong milk can, but use a leaky boil. If someone has the skills of the simplest welding, he will be able to weld a fistula and fix the lid in a special way: thread a piece of pipe (or a stick of the required diameter) into the handle and pull it tightly to the bucket handles with a rope or thick rubber cord.
And then chiseled pins are not required. The boil can be simply welded. If you have to work with aluminum, you will need to weld 2 rods of 6-8 mm each, and attach them to them with a bucket on the bolts. In this case, it will be possible to do without even couplings and bearings - it is enough to cut out U-shaped grooves in the frame racks, and the axis will simply lie in them. As a result, a cheap home-made concrete mixer will, of course, work with jerks and squeaks, but the batch will be of high quality - there is no doubt.
As for the shortcomings, in addition to the squeak and twitching, there is one more: the severity of the rotation and, as a result, the low kneading speed. On average, it takes 5 to 15 minutes to prepare a portion of the solution (depending on the viscosity of the composition). For the mechanism it is, of course, a long time, but in comparison with manual "shovel" kneading, the productivity increases immediately threefold. Therefore, for an independent one-time construction site, such a simple concrete mixer is just the thing.
DIY concrete mixer: drawings and design features during construction + 71 photos
If you have your own house or summer cottage, then you are often faced with the need to carry out construction work of one size or another.
No construction can do without concrete - be it a gazebo, fence, terrace or walkway.
If you have planned several large buildings, then you can place an order for ready-made factory concrete - it will be delivered directly to your site. The construction crew usually does this.
But this option has the following disadvantages:
- high price of concrete mix;
- you will have to purchase concrete of the volume of a concrete mixer, i.e. several cubes. Not every construction site requires this amount of concrete;
- dense residential areas may not allow heavy machinery to pass.
There is another option - to rent a concrete mixer, but with frequent use it will be more expensive than purchasing it.
Due to all of the above, having your own concrete mixer is the best way out. It is quite feasible to make such a necessary unit with your own hands.
A do-it-yourself concrete mixer has the following advantages:
- It will have the shape you want;
- Such a unit has a low cost, since it can be made of material at hand;
- Homemade concrete mixer is easy to maintain and repair;
- She can be proud of her neighbors and acquaintances.
Before making a concrete mixer, it is better to try out the purchased option on your own experience - offer your help to neighbors who have an industrial copy, or use a rental one-time. This will help you understand the principle of its operation and select the appropriate parameters.
Bigger doesn't mean the best option. Such units are very energy intensive. Both small and large containers limit the amount of concrete produced in 1 cycle. As a result, the choice of tank parameters should be approached very responsibly.
To make a concrete mixer with your own hands, you will need a strong cylinder-shaped container, a sturdy frame structure, an overturning mechanism to unload the finished concrete, and a gear motor.
You will need:
- metal barrel, with a capacity of 100 - 200 liters;
- steel corner or profile for the bed;
- two used bearings;
- a piece of metal pipe for the axis and the handle.
From tools you will need a grinder and a welding machine.
- We cut a hole in the barrel in the form of a rectangle, forming a gap along the joint. We weld on the inner surface of the sills from the corner and lay it with rubber for the purpose of sealing.
- The lid will swing outwards, so it is necessary to install strong hinges and a reliable lock. There is no need to weld the existing filler hole, the standard cap is quite reliable.
- Inside, we weld several blades made of sheet steel with a thickness of 2-3 mm for mixing.
- In the center of the side parts, we weld the bearings, fasten the hubs or insert the steel axle.
- We fix the barrel on the bed, weld a handle at one end, like a well. The concrete mixer is ready!
The essence of such a concrete mixer is in a stationary tank and active mixing blades.
This unit has both pros and cons.
The tank is made of a 200 l barrel, on which the walls are welded. The upper part is covered with a grill. A profiled pipe is used for the base. The tank is rigidly attached. The initial components of the solution are loaded from above, the ready-made concrete is discharged thanks to a gate with a rubber gasket.
The mixing shaft is made of an automobile crankshaft, the blades are made of corners and steel sheets welded to them, 3 mm thick. An oil seal is located at the point where the shaft exits to the gearbox.
The engine is used from a crane. Its power is 5.5 kW. Reducer from the same place. The motor has 3 phases and the ability to change the direction of rotation.
A pallet is placed under a working concrete mixer, collecting the water flowing out at the beginning. It is poured back into the concrete mixer.
Mixing options
In the simplest case, "hastily" you can prepare a solution without auxiliary devices. A solution is poured into any container and mixed with an ordinary shovel with the gradual addition of water. In some cases, with a small volume of solution, you can do without a container at all and prepare the mixture on a hard, even surface. This is ineffective, tedious, and poor quality as the mixture dries quickly.
Sometimes they use a drill with a special mixing nozzle and stir the solution in a bucket in a circular motion. In this case, a power tool that is not designed for such loads quickly fails, and the mixture is not completely mixed. Dry voids usually remain in areas near the edges.
Therefore, it is advisable to assemble a simple homemade concrete mixer.
There are three ways to mix concrete mortar:
- Gravitational.
- Vibrating.
- Combined.
Is it worth making a concrete mixer yourself
How easy is it to make a device
Very often, in addition to the question of how to make a concrete mixer yourself at home, the question arises, is it worth making it at all or buying a factory one?
Sometimes the manufacture of such a device will require large expenditures, efforts, time and services of specialists. Therefore, it is possible to start making it not only when there are drawings, but also all the conditions, materials and experience in mechanics and metalworking.
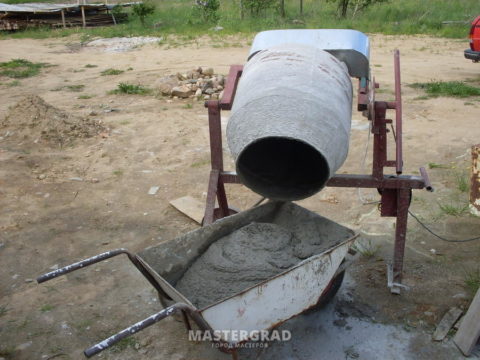 Stationary unit with your own hands
Conditions of creation
All questions about what a stirrer is, how to do it yourself its working model, which skills and abilities will be required, should be decided in advance.
- For example, in the course of work, you will need experience in electric welding. If there is none, or there is no one who could help, then it is better not to get down to business. In the course of manufacturing work, you will need a lot of materials, devices and mechanisms.
- The final price, and in general, the benefit of this enterprise, depends on their availability in free and cheap access. It is good when all the necessary materials and devices can be found in the pantries of your household or, in extreme cases, inexpensively purchase them.
- An experienced mechanic, designer, locksmith or a person with experience in such work should know better how to make a unit with their own hands (drawings, even if they were perfect, cannot help to create a device for preparing concrete by themselves).
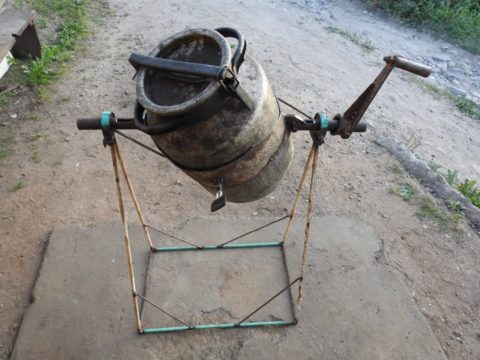 Inexpensive DIY option
Concrete mixer modifications
Everyone can find the drawing today. Despite the fact that they work according to the same principle, designs can differ significantly in several parameters.
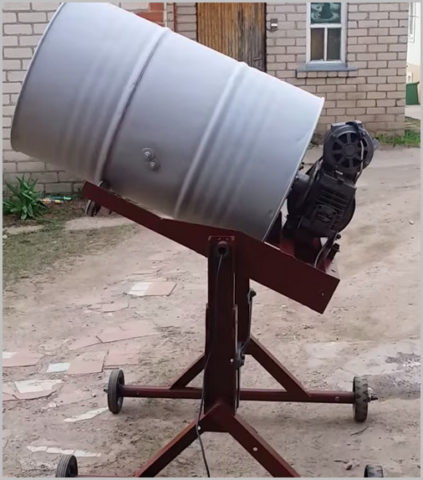 How to make equipment with your own hands?
Drum rotation axis
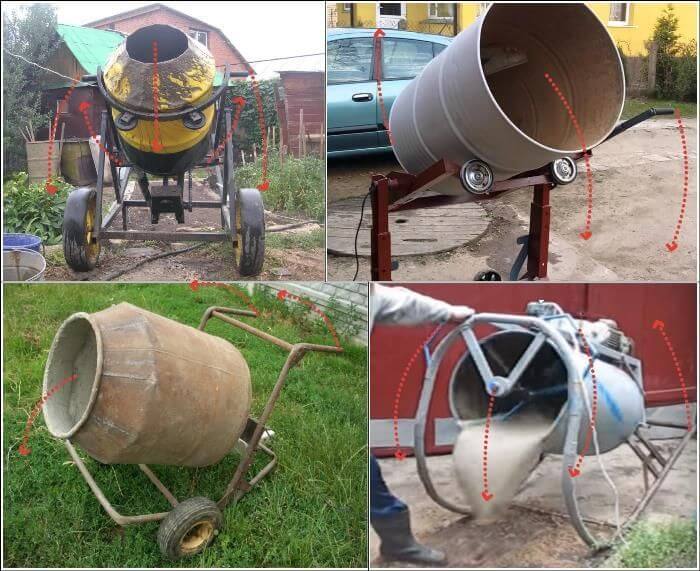
The drum can rotate not only strictly along the horizontal axis, as in the example considered, but also with a different angle of inclination. In this case, the container can have a tilt function to facilitate the release of the material.
The video on how to make a homemade concrete mixer shows what modifications are available for manufacturing and what difficulties have to be overcome during their creation.
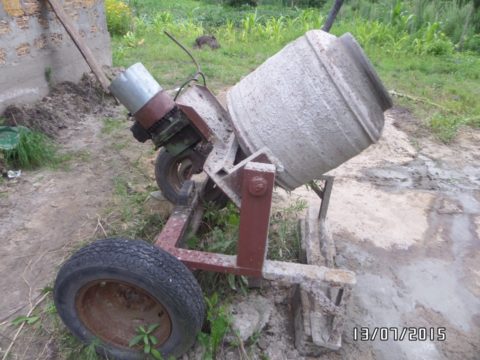 A small do-it-yourself option
Stationary and mobile
Whether a home-made concrete mixer should be stationary or mobile depends on the conditions and characteristics of the work on the construction site. If the work involves moving over a large area, then it is better to give preference to the mobile version.
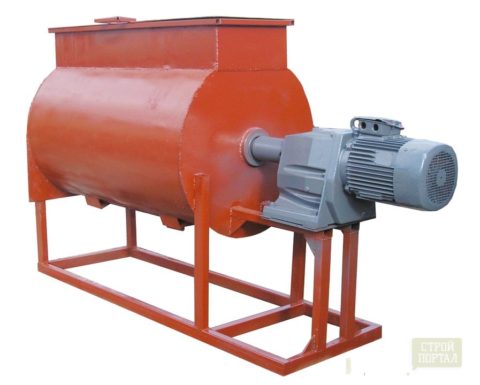 Homemade high performance mixer
By mixing mechanism
Many people want to know how to make a concrete mixer with their own hands (video instruction) in order to speed up the process of making concrete as much as possible. Agitators with a forced stirring mechanism have the maximum production speed. However, such devices are rather complicated to make on their own and, moreover, consume a lot of energy.
Combined mixing principle
In this case, the principle of mixing concrete components by pouring them into the barrel by gravity is used, but to this is also added the breaking of lumps with strong pins or blades welded to the inner surface of the barrel. It takes a long time to prepare the mixture, but the method has a number of undeniable advantages:
- the simplicity of the gravitational method is used, the design is unpretentious in work, rarely fails;
- the shaft, which serves to twist the concrete barrel, does not receive the entire load, therefore, the requirements for engine power are reduced compared to the forced method, while less wear of parts is noted;
- allows you to adjust the mixing of coarse concrete, while the crushed stone will not get stuck in the spaces between the blades.
Mixing the solution in combination can be done manually, if a significant effort is needed, then an electric motor is connected.
The main types of concrete mixers
There are several classifications of the aggregate described in the article at once, according to which it is divided according to one parameter or another. So, according to the principle of their action, concrete mixers are of five varieties.

- Gravitational. They differ in that the drum for mixing the solution rotates under the influence of gravity. Ideal for making tough and hard concrete.
- Forced. A more complicated do-it-yourself concrete mixer to manufacture, where the container does not move, and the blades inside it mix the components of the mixture. Such units are rarely used in private construction.
- Periodic. They are characterized by low power, and therefore need frequent stops.But for private construction, this is a perfectly acceptable option.
- Gear (better known as girth gear).
- Permanent. Such concrete mixers, judging by the name, operate continuously, and therefore are mainly used for large volumes of work.
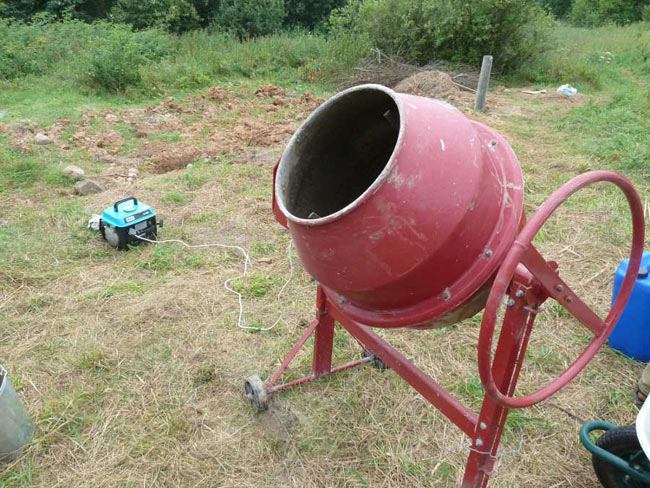
In addition, by the type of concrete produced, the equipment can be of two types
- mortar mixer;
- concrete mixers.
Let's consider each of these options in more detail.
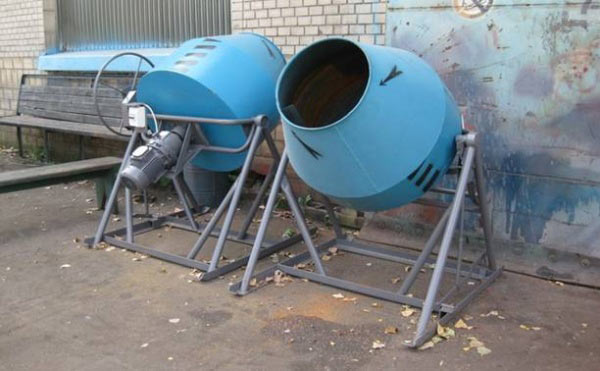
Option number 1. Mortar mixer
Uncomplicated equipment designed for private construction. Designed for mixing components, the size of the fractions of which is more than 2 centimeters. Also, the units can be industrial (if the volume does not exceed 1200 liters) and for private use (over 30 liters).
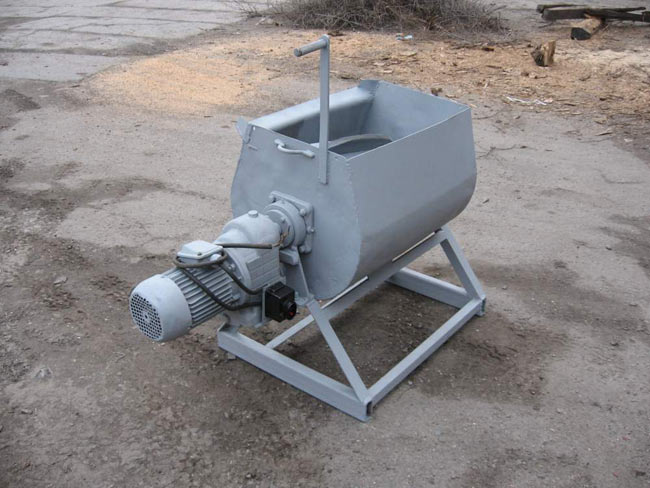
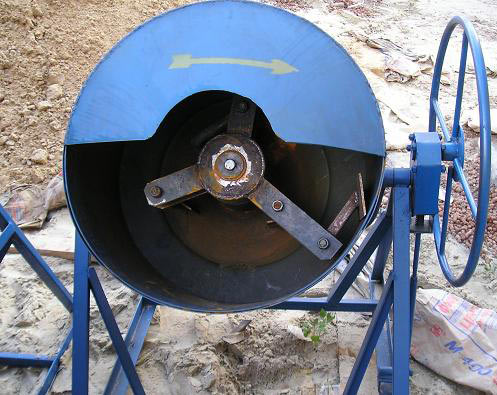
As a rule, all ingredients are forcibly mixed in mortar mixers, for which a horizontal auger is used, which rotates in an immovable container. If the volume of the unit is more than 100 liters, then it must be equipped with dispensers. And if the volume of equipment exceeds 250 liters, then, as a rule, it will include the following elements:
- engine;
- mixing container;
- drive unit;
- a rotating shaft with blades.
Option number 2. Concrete mixers
They are designed for use with components with a fraction size of no more than 7 centimeters. All units of this type are classified in the same way as described in one of the previous sections of the article.
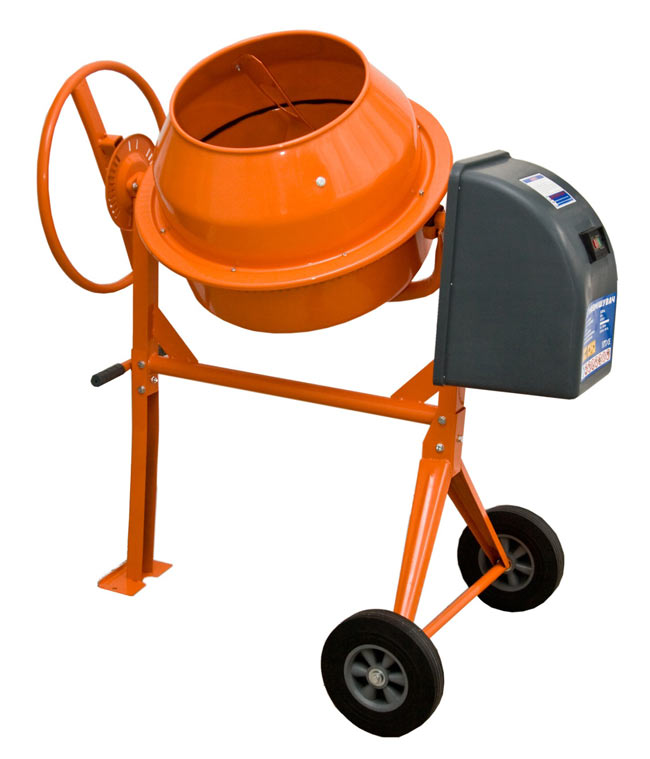
In addition, according to the specifics of the installation, they can be:
- mobile (this includes both concrete mixers with a chassis and units without it);
- stationary (often - for industrial purposes, characterized by increased productivity);
- automobile.
Note also that, depending on the type of drive and power source, all concrete mixers are divided into several more varieties.
- With manual drive. They are characterized by the fact that they are able to transform the muscular efforts of a person into rotation of the kneading organ. The transmission in most cases is chain toothed or belt. Such concrete mixers are not very common, since their volume is insignificant, and they do not facilitate labor very much.
- With a motor drive. A concrete mixer (made by hand, including) of this kind operates on a diesel / gasoline engine.
- With pneumatic and hydraulic drive. The mixing organs in this case move due to the conversion of the energy of compressed air or liquid, which are supplied under high pressure. Such equipment is exclusively for industrial use, since it needs powerful additional devices.
- Electrical. The most popular types of concrete mixers today, not only for industrial, but also for household purposes. The range of such units is quite extensive, and their volume varies from 30 to several thousand liters.
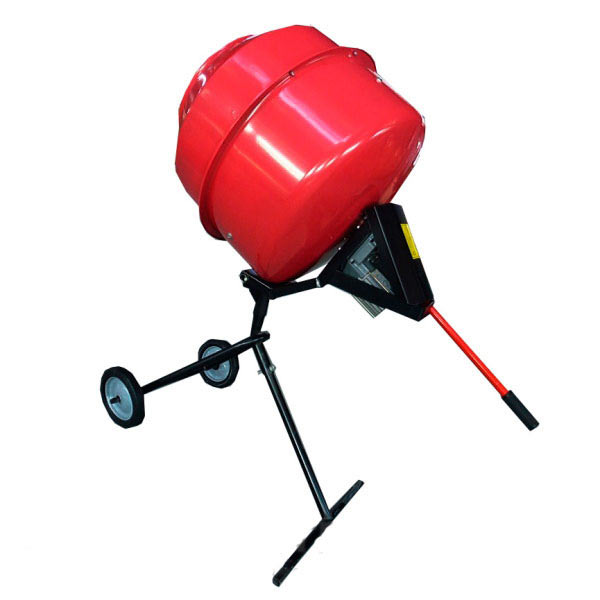
Assembling the electric motor
For the manufacture of a concrete mixer with an electric motor, a single-phase motor is suitable.

If you have engines from old washing machines at home, you can use them as an electric motor for a concrete mixer. The average rotation speed should be 20 - 30 rpm.

A motor from a gasoline motorcycle will work too. It will be convenient because there is no dependence on electricity.

The shaft must rotate through bearings. The solution is used in a maximum of 7 buckets.

Be smart, consider your own preferences, and you will achieve the desired result and usability.

Do-it-yourself electric concrete mixer from a barrel and a washing machine engine
This concrete mixer is gear type. To make this model, you needed:
- a barrel made of galvanized steel for 180 liters (diameter 560 mm, height - 720 mm);
- washing machine motor - 180 W, 1450 rpm;
- flywheel and starter gear from Moskvich 412;
- two pulleys from a washing machine with a diameter of 300 mm and 60 mm;
- garden cart wheels;
- scrap metal for the frame.
Gears, wheels - everything is old, everything was in the garage
This is not new either
First of all, we clean everything from rust, treat it with a rust converter and cover it with soil.
We process details
We cook a frame from pipes, channel. The corners of the frame are reinforced by welding metal plates. Everything has to be tough and reliable. We make the crossbar serious: a barrel of solution will "hang" on it, and everything will vibrate and spin.
The frame is the basis of the structure. The pipes are almost new))
We weld the pins, the seat for the transmission gears. We clean it from rust, treat it with a rust converter, prime it.
Finished frame
We fasten the wheels from the trolley. They with wide treads have justified themselves: it is not difficult to drag the concrete mixer even just across the site.
Attached the wheels
We also cook constructions from pipes for an emphasis and installation of the entire "filling".
Two more triangular designs
We also attach them to the frame.
The second is for greater stability
We begin to assemble the drive. First, we put the large gear on the previously welded pin.
We put the big gear
We install the assembly in the seat - a small gear connected to a wheel for a belt drive.
Large gear transmission
We attach the engine to the plate welded in advance.
We hang the engine
We hang it so that the two wheels of the belt drive are on the same level. It is also necessary to ensure the correct tension of the belt.
Motor installed
It remains to attach the barrel. In it in the center we make a hole for a large pulley, we drill a hole for fasteners. We put it in place.
We make holes in the bottom of the barrel. When installing, do not forget about the sealing gum
This is how she looks on the frame
Another angle
Transfer closer
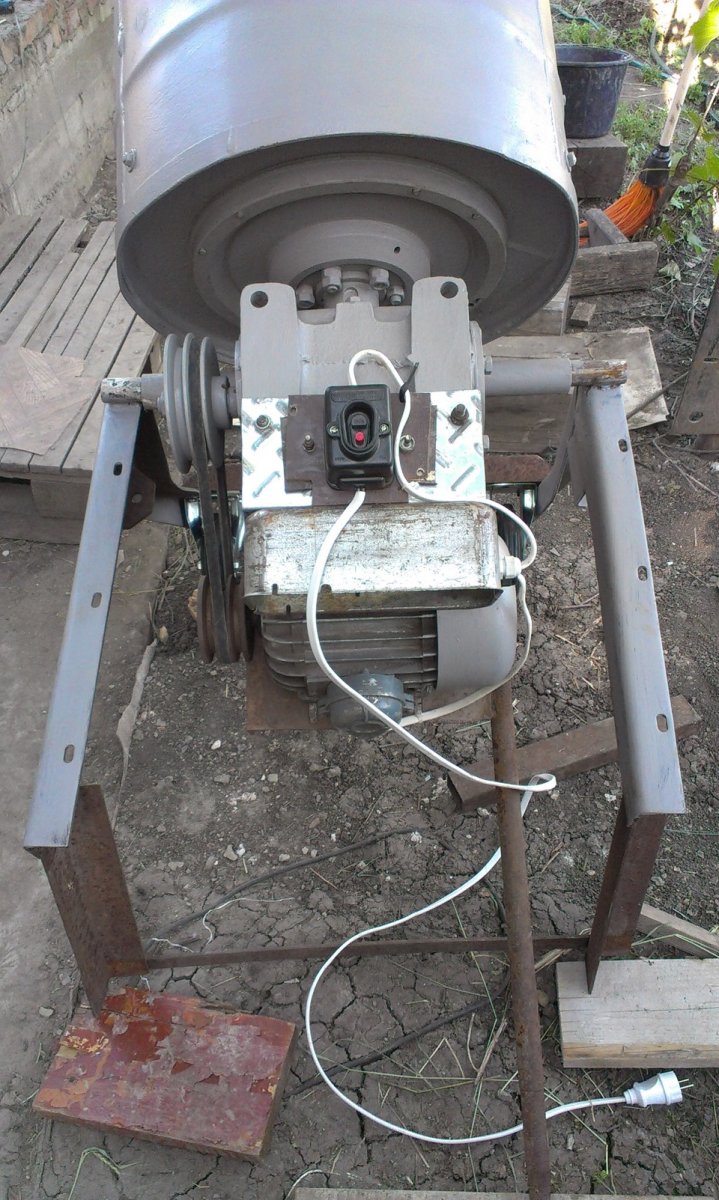
Only the electrical part remains. We connect the cable through a starter with a button.
We connect the cable through a starter with a button
Several photos of the main units. Maybe someone needs to look closer.
Gear and barrel mount
Motor suspension on the plate dampens most of the vibrations
From a different angle
The second transfer option is from a car drive
The barrel is 200 liters, its edges were cut, bent and welded, forming the usual "pear".
They made a "pear" from the barrel
The car rim was bolted to the underbody (with rubber pads). It was selected so that a recess for the belt transmission was formed. The hub was pre-attached to the disk.
For belt drive
Blades were welded inside the barrel for more efficient mixing of the solution.
Blades inside
All this economy was attached to the frame.
The drum and disc for the belt drive were installed on the frame
Where the plate is welded is a place for the engine. We set it so that the belt runs smoothly. Power was supplied through a toggle switch, a timer from the washing machine from which the motor was removed is sequentially turned on.
Back view. Under the sheet of metal the motor
In general, the rotation speed turned out to be 35-40 rpm. Should be enough.
The whole transmission looks like this
Side view
Instructions: homemade concrete mixer with a washing machine motor
There are two types of concrete mixers:
- Mechanical. The container is set in motion by force. This is practically the same as stirring concrete in a regular container. How much time and effort will it take you to work with a manual drive? Therefore, it is better to dwell on the following option.
- Electric. The tank is driven by an electric motor.
The manufacturing technology of a concrete mixer is quite simple. But before you get started, think about whether you can connect the motor yourself? If the answer is yes, then have everything you need ready.
Components
- Barrel from an old washing machine with a volume of 200 liters (preferably top-loaded). It is this volume that is sufficient for mixing the optimal amount of concrete for work.
- Electric motor (power 200 W).
- Pulley, drive belt, washer switch.
- To make the base, you need a 50x50 metal corner.
- Wheels. Two wheels can be taken from an old stroller, wheelbarrow, carriage.
- As an axis, you need a strong 4.5 cm metal rod.
- Reducer.
- Armature.
- Metal strip.
- Ball bearings.
- The wire.
- Washers and bolts.
Instruments
- Bulgarian.
- Hacksaw for metal.
- Drill.
- Soldering iron.
- Welding with electrodes.
Why is it profitable to make a concrete mixer from an old washing machine? Because the tank of the machine is quite suitable for mixing the mortar, its drain hole can be closed. The motors of old washing machines are quite durable and reliable.
The complex use of all elements protects the engine from the ingress of foreign objects during operation. This saves you the trouble of doing defense.
Step-by-step execution of work
Before starting work, you can prepare drawings to facilitate the assembly of the structure. One of the drawings is shown below:
Make a frame (base)
This is an important point, since the entire structure will be supported by the frame. The base must be strong and stable.
- From the prepared corners 50x50, cut two pieces of 60 cm and four pieces of 80 cm. The 60 cm segment serves as the basis for the support triangle, 80 cm segments are its edges. Fold and weld the triangles. Place them opposite each other.
- Now weld two 50 cm corners to the edges of the triangles. A stable structure is obtained.
- Two nuts must be welded to the tops of the triangles. The diameter of their hole must be larger than a pipe with a diameter of 30 mm. Then this pipe must be pulled through the holes of the nuts and the ends pressed. The pipe should rotate freely, but not jump out of place.
- Make the top. Take two corners 1.4 m long and three 40 cm long. Place those that are 1.4 meters opposite each other. Place the rest across at an equal distance, like a ladder. Weld the pieces together.
- Weld the bases of the finished structure to the movable pipe. It must be positioned across the pipe in the center.
Frame
Attach the wheels to the base of the frame with reinforcement.
Now the tank is next in line. Remove the activator from the tank and close the drain hole. Install a shaft or axle of a suitable size in place of the activator. From a strip of metal, make homemade blades that will stir the concrete. They can be screwed in additionally with pliers. Weld the blades onto a metal strip and attach to the shaft.
To install a large barrel with your own hands, place it on the ladder of the frame. Make sure that most of it is in contact with the corner. Weld the barrel to the base for a secure fit. In this case, the bottom of the tank should face the tops of the triangles.
Motor connection
The motor is connected to the back of the tank. To do this, drill two holes at the corners. You will also notice holes on the motor housing, attach them to the corners and secure with bolts and nuts.
To prevent the engine from breaking due to bad weather, make a casing from a car camera. Provide holes on the sides to prevent overheating.
It remains to connect the motor to the voltage network and check the operation of the homemade concrete mixer. The convenience of this design is that the ladder tilts like a swing. Therefore, the ready-made solution can be easily poured by tilting the tank.
Knowing how to make a concrete mixer from improvised means, you can save a lot and get your own equipment. Act consistently and everything will work out.
