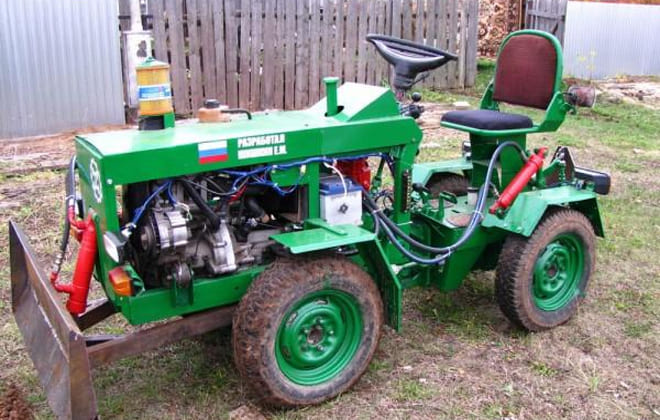
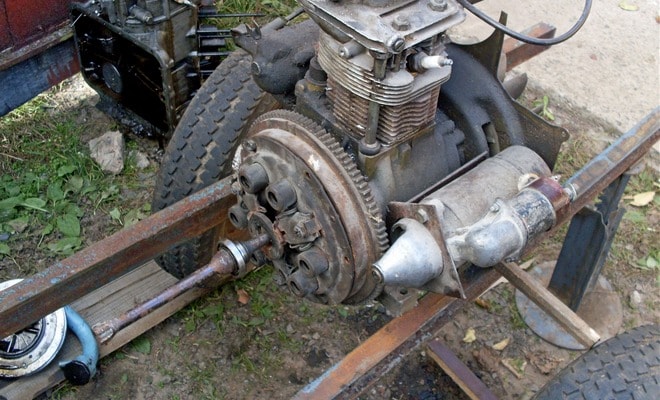
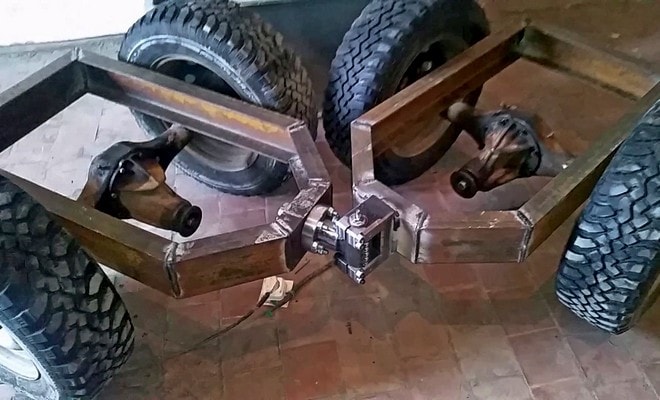
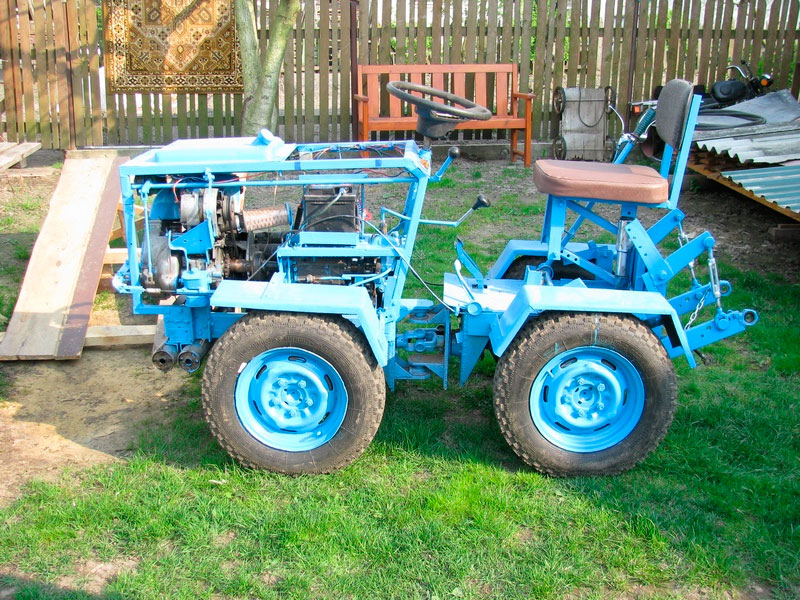
Parameter selection
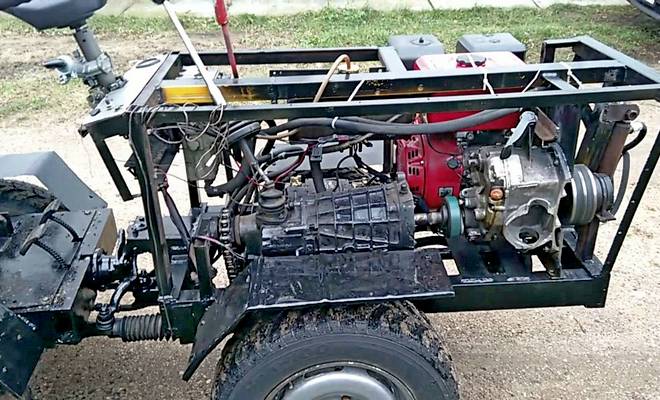
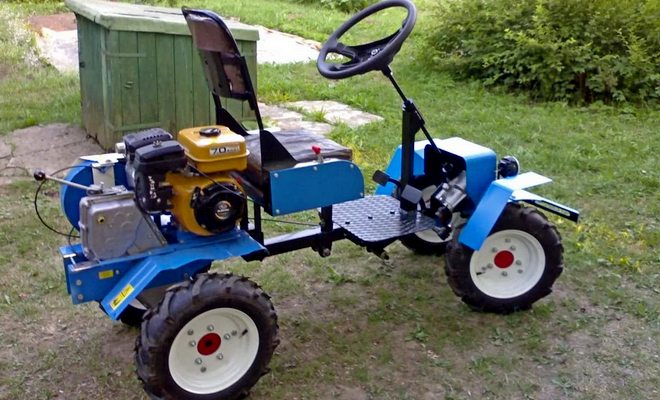
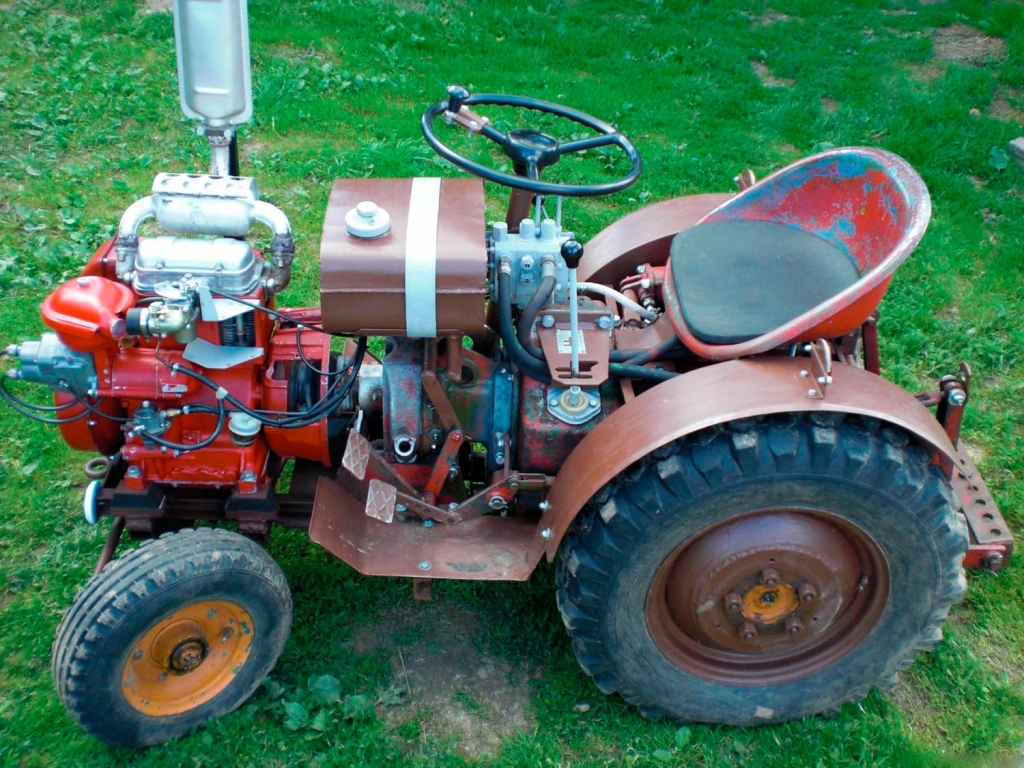
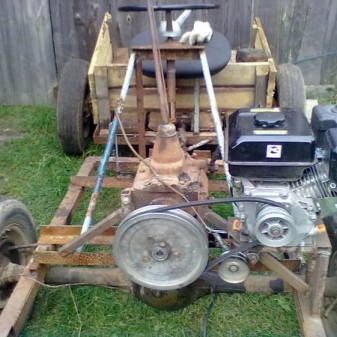
The type of activity for which the technique is intended determines the parameters of the future machine. The dimensions of a homemade minitractor will depend on the track width, the size of the units and transmission elements, and the engine power is related to such characteristics as the severity of the cargo transported, the type of soil, the number of plows used. Therefore, before starting the construction of a tractor for a household with your own hands, you need to decide on the following:
- Dimensions. Maneuverability and the ability to work in small areas depend on them.
- Engine power and type. Diesel engines are more suitable for this technique due to good traction at low rpm. Diesel is 25% more economical than a gasoline engine with the same power. It is more unpretentious and durable.
- The equipment used will depend on the power of the engine, the torque at the driving wheels, the height of the ground clearance. If the equipment will be used in the winter, then it is necessary to provide for the attachment of the blade for clearing snow.
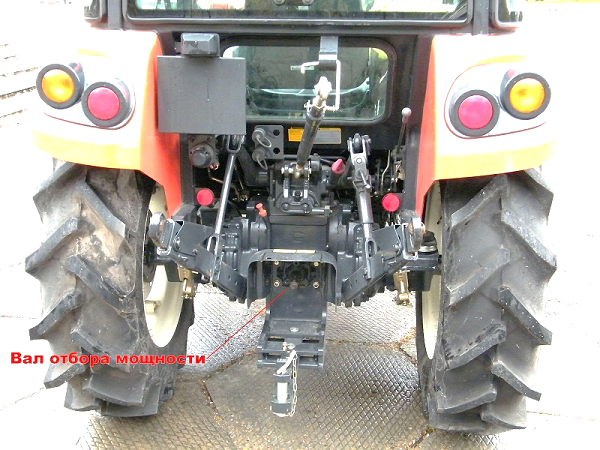
- PTO availability. It is needed to connect a potato digger, a mower, an irrigation system pump.
Shortening a part
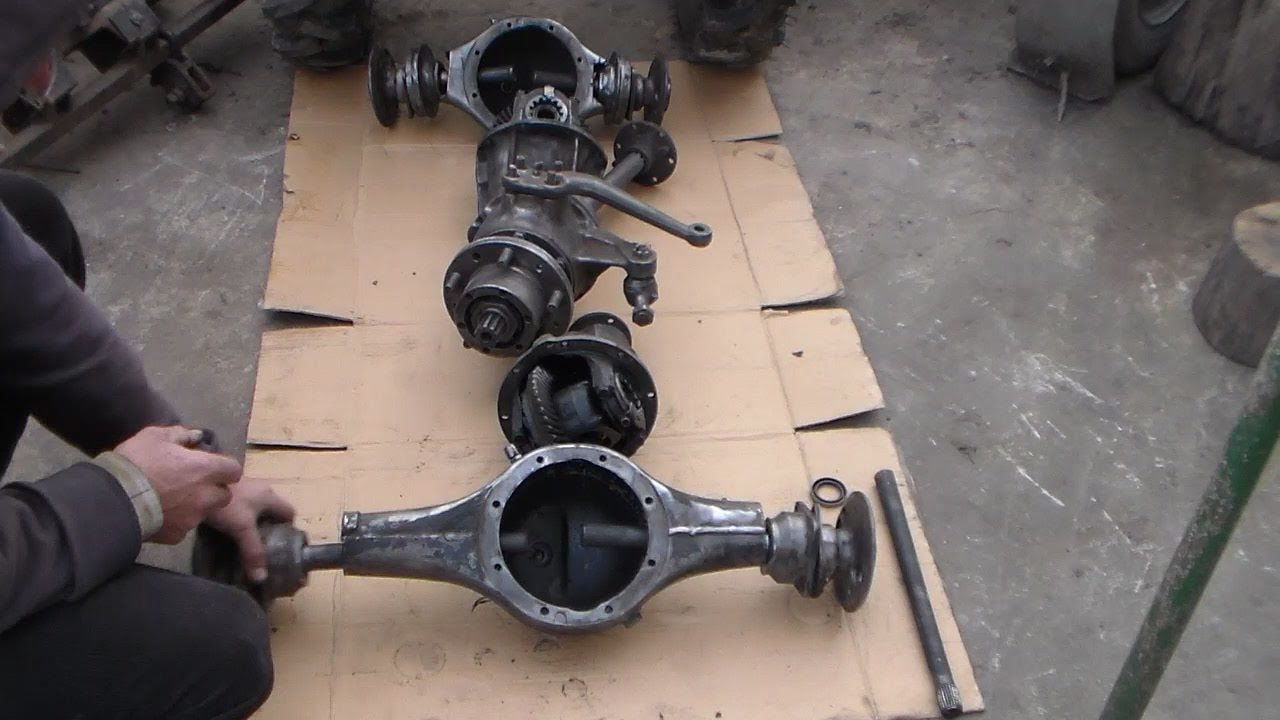
This work begins by cutting off the spring cup. The end flange is removed. As soon as it is released, you need to measure the semiaxis by the value indicated in the drawing. The required part is sawn off with a grinder. It must be left alone for now - and proceed to the next step. The section is provided with a notch, along which a groove is then prepared. A passage is made in the inside of the cup. Next, the semiaxes are joined together. They must be welded strictly according to the applied markings. As soon as the welding is completed, the axle shaft is inserted into the bridge and welded to it, this procedure is repeated with the other axle shaft.
Once again, we emphasize that the thoroughness of measurements is very important. Some DIYers ignore her
As a result, the elements are shortened unevenly. After installing such bridges on a mini-tractor, it turns out to be poorly balanced, loses its stability. Swivel fists and brake complex can be safely removed from the same VAZ car. The rear axles of mini-tractors must be protected from impacts.
The correct operation of the mini-tractor after assembly is also of great importance. Axles can fail quickly if the oil is changed irregularly. It is advisable to use exactly the type of lubricant recommended by the gearbox manufacturer. Having made it yourself or shortening the bridge, you can use it not only in an independently assembled miniature tractor. Such a part is also useful as a replacement for deformed parts on serial devices.
Where to begin?
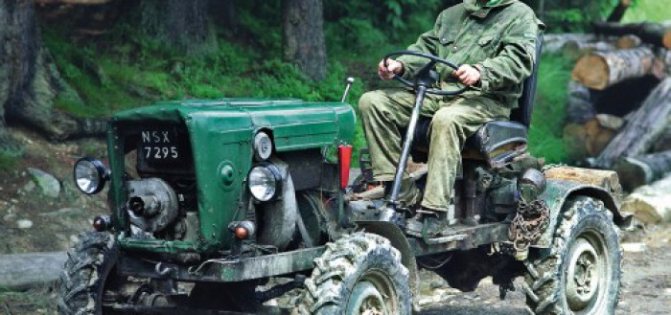
As a rule, the design of any homemade product begins with the creation of a drawing. The diagram will help you accurately calculate all the dimensions, mark the joints, outline the shape and number of parts. Without a drawing, by eye, you are unlikely to be able to do everything correctly and efficiently the first time. Therefore, do not neglect this step.
When working on a drawing of a mini tractor from Zhiguli, consider the following points:
- the front suspension must be reinforced;
- the engine must be placed under the driver's seat;
- be sure to indicate changes in the chassis;
- the motor in a minitractor from Zhiguli must be covered with a casing;
- mark the place where the fuel tank will be located;
- if you create a shortened frame, then the tractor will be compact and economical in fuel consumption;
- if you decide to reduce the frame, then take into account the moment that the bridge will also be displaced.
Further work
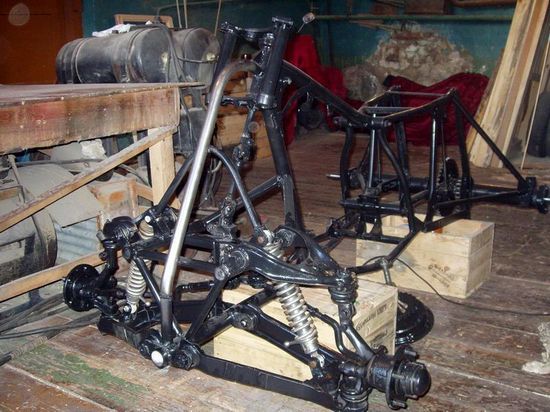
If you continue to work on the further design of the ATV, then the motorcycle (for example, the Ural) must be disassembled and the frame rebuilt. To do this, move the seat posts (pipes) back by 4 centimeters. And to the Ural pendulum you will need to weld the Zhiguli bridge you cut off, and attach it to the frame. And the lower fork of the motorcycle and the rear struts should be cut off immediately behind the saddle strut tubes.
By the way, from the Zhiguli, to create a conceived homemade product, they take not only the rear axle, but also the steering knuckles for the front suspension, the brake system (removing the vacuum amplifier and the handbrake), and forced cooling for the engine is used from the VAZ 2108. The steering wheel comes from a motorcycle, but further design for the steering - a column, levers, bipod - everything from VAZ.
Wheels are special
... They are designed using a base from VAZ wheels, adding powerful tires with treads, like for an all-terrain vehicle. Then the homemade product will be able to overcome the traditional forest or field off-road.
The very process of circumcision
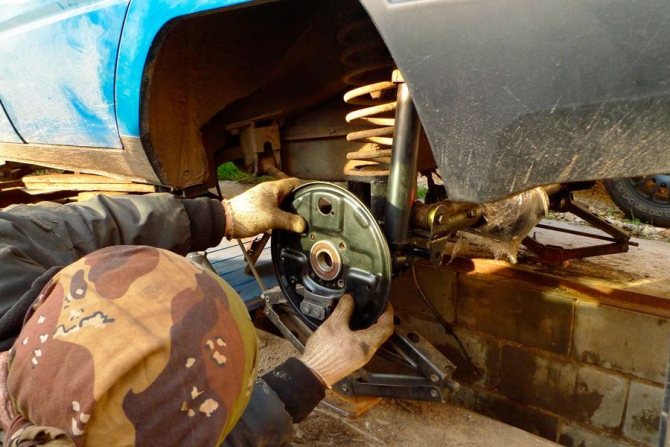
To ensure the compactness of the design and the maneuverability of the future homemade product by reducing the turning radius, it is necessary to shorten the rear axle taken from the Zhiguli. At the beginning of the operation, we cut off the spring cup and take out the end flange.
Part of the removed axle shaft (measure according to the drawing) must be cut off with a grinder and left. At the end of the segment we make a notch where the groove will be made for the "daddy". A hole will be drilled inside the cup. The axle shaft is joined one to one and welded along the markings.
Next step:
one-piece welded axle shaft is driven into the bridge. And welding is performed with a selection of a chamfer for a weld seam. We perform the same operation on the other side.
A warning:
in order for the work to be done efficiently, it is necessary to recall the proverb about "measure seven times" more often. So, measurements must be made exactly, according to the general drawings of the ATV. Because, unequal shortening of the part will lead to further distortions of the entire structure. No, well, your homemade product will certainly go, just not fast and not as far as we would like.
Front and rear axle
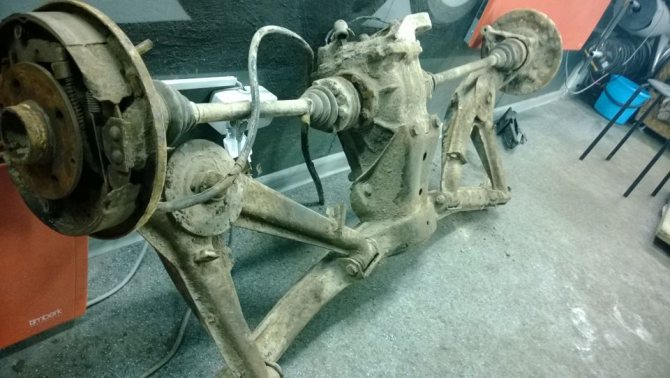
The axles are used to transfer torque from the propeller shaft to the drive wheels. The track width of the mini tractor is 700-1200 mm, so the standard axles from cars do not fit and need to be improved.
For a minitractor, the rear axle reducer must be equipped with a differential.
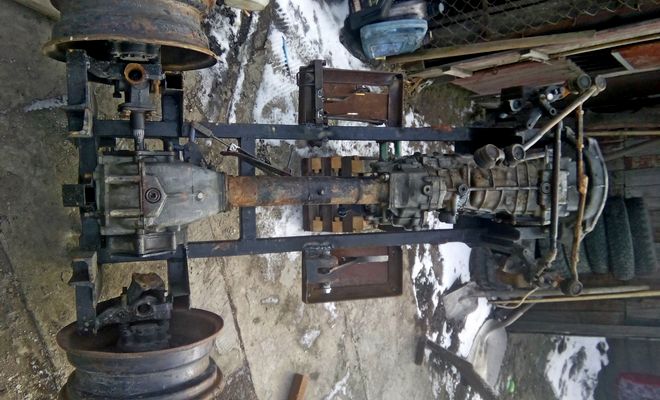
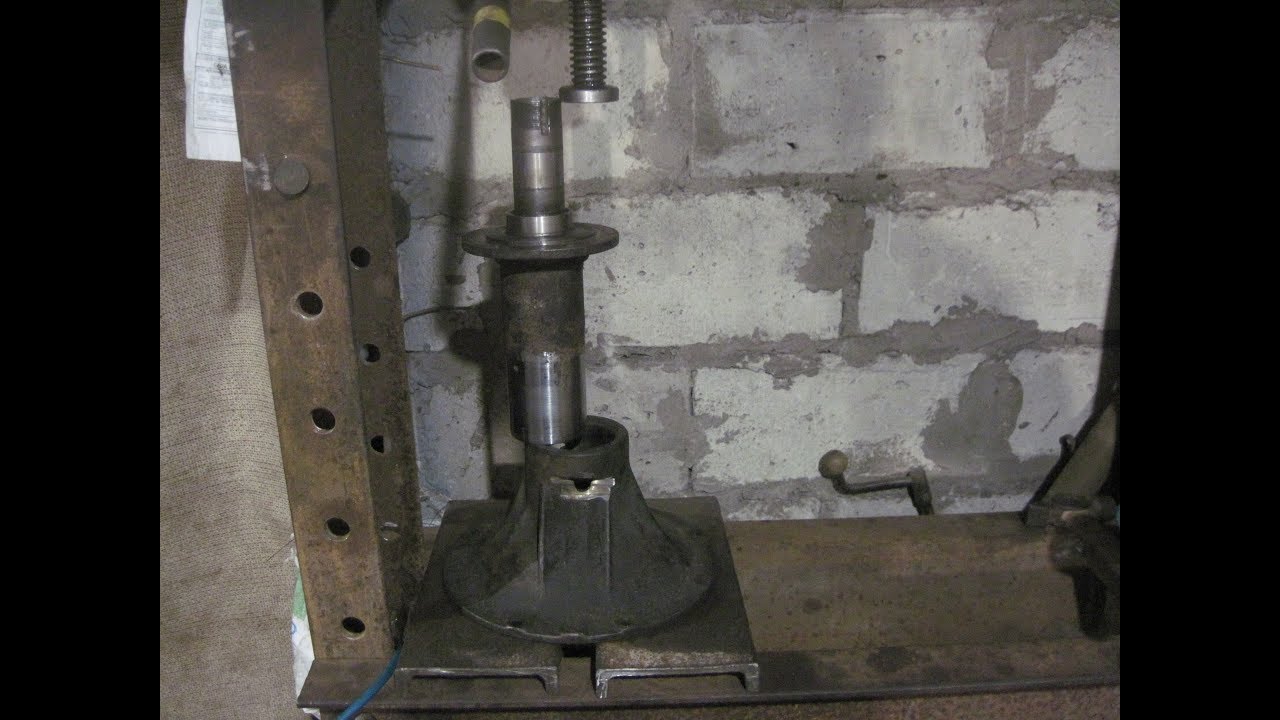
To reduce the track, the rear axle stocking is cut on both sides of the gearbox and reduced by the difference in track gauge. The half-shafts going inside are cut by the same amount. So that the axle shafts can be connected to the flanges, splines are cut on them. Or another approach is used: threads are cut on the half-shafts and on the inside of the flanges, then the half-shafts are screwed into the flange, after which the joints are welded.
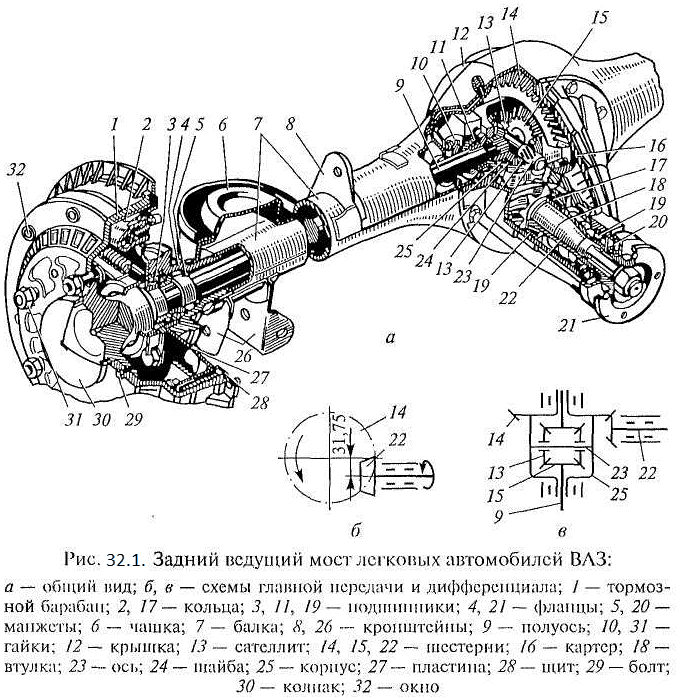
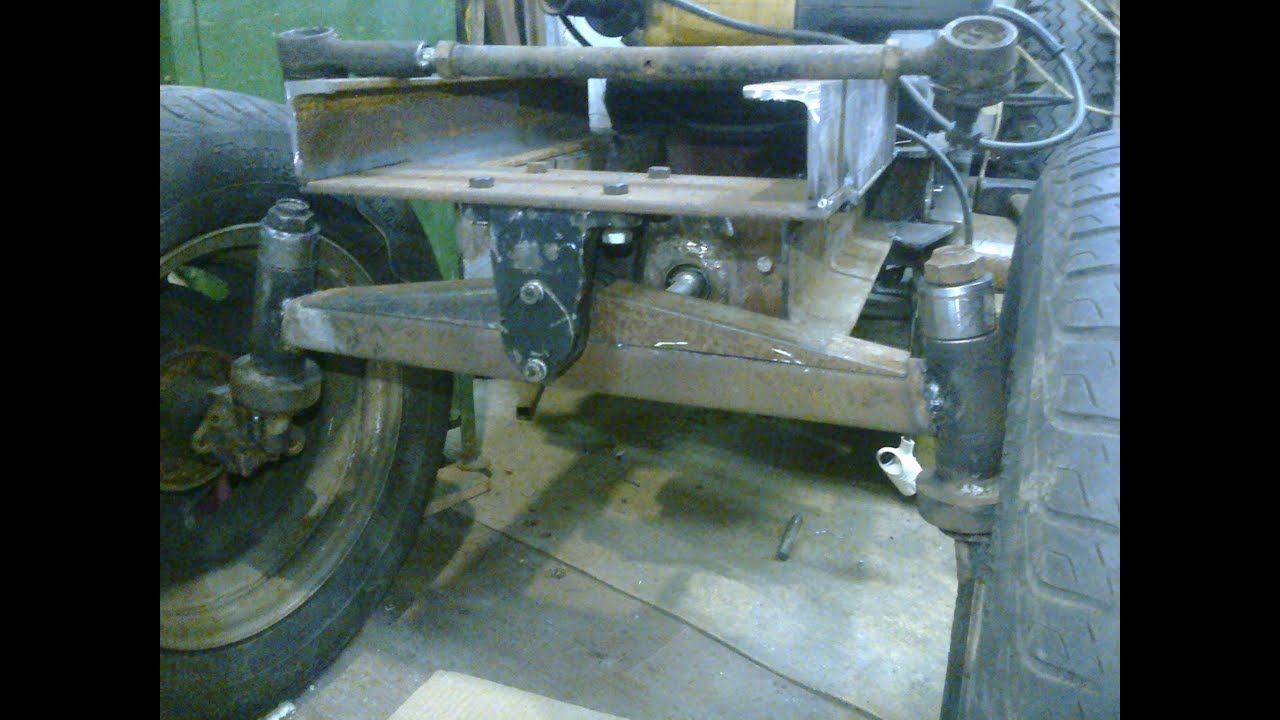
In order to fix the rear axle to the frame, a channel is welded onto the gearbox housing. The bridge must be flexible in relation to the frame. For this, the channel and the frame are not fixed rigidly, but through two tie rods.
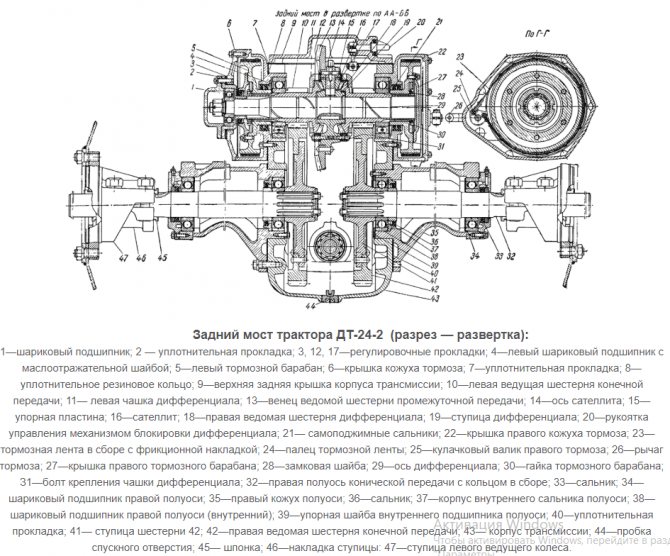
For a rear-wheel drive mini tractor, the front axle is made in the form of a beam. For this you need:
- Prepare a steering fist from a Moskvich or Zhiguli complete with ball bearings.
- Cut four 5mm thick plates. Drill holes in them for ball pins.
- Screw the plates to the ball joints. Then weld these plates together using corners. Two corners for one steering knuckle.
- With the help of a steel pipe with a square cross section of 50x50 mm, we weld it into a general structure.
- The steering knuckles can be located both on the car and be inverted if the steering design requires it.
In order for the front beam to have mobility relative to the frame, it must be installed through the hinge.A gimbal, limited by swinging in one plane, will do.
Features of the manufacture of bridges for a mini tractor
A beam for a mini tractor is one of the main elements of a household machine. The front axle on the mini tractor is the basis for attaching many important mechanisms and wheels. The same function is assigned to the rear axle. When assembling homemade mini tractors, many farmers use parts from old cars as beams. This design turns out to be quite strong and reliable. But in order to make high-quality mechanisms, you need to carefully familiarize yourself with their device, and follow the correct procedure when assembling these structures.
A mini tractor is a type of equipment designed to help a person process the soil faster and better, transport luggage, plant plants, take care of them and perform many other works. Nowadays, modern technology is quite expensive, and not everyone is ready to spend money on its purchase. Therefore, in order to get a mini tractor and save money, many farmers collect mini tractors from old cars.
Making a mini tractor usually involves designing the undercarriage. First of all, the driven and driving axle should be installed. In this case, the rear axle on a mini tractor should be assembled according to the same principle as the front axle. Thus, the farmer does not need to select the gear ratio, which is extremely difficult to do without the necessary experience.
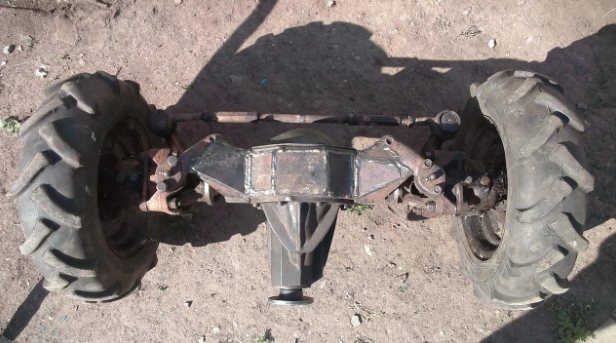
You can make a front axle on a homemade mini tractor from a beam from an old Zhiguli car. In this case, there will be no need to look for and install a gearbox. This element is already included in the basic chassis configuration. For the manufacture of a cross beam for a mini tractor, metal corners or a piece of pipe with a square cross section are suitable.
The drive axle differs from the driven one in that during operation it transmits the engine torque to the wheels. The intermediate link is a cardan transmission. With the help of the driving axle of the minitractor, turns are carried out, the wheels are stabilized, and the pushing forces are transferred from the driving wheels to the vehicle frame.
To make a front axle on a mini tractor with your own hands, you should study its design in more detail.
A homemade front beam for a mini tractor should consist of the following elements:
- strong crossbeam;
- axle bushings;
- sleeves of rotary bearing axles;
- wheel axle shafts;
- roller and ball bearings;
- bolt fasteners.
Do-it-yourself front beam on a mini-tractor is assembled in the following order:
- It is best to use a steel angle or a piece of profiled pipe as a crossbeam. Axle bushings can be made of structural steel;
- For the manufacture of slewing bearings, it is necessary to use a profiled pipe. It will need to be finalized for mounting bearings, and closed with metal covers made of steel grade ST3;
- The front beam assembly, which includes roller bearings and a cylindrical cage, must be welded to the center of the crossbeam;
- Using heavy-duty bolts, the bridge device will need to be attached to the bushings located in the crossbeam of the frame. The backlash of the front axle in relation to the general design of the minitractor depends on how much the bolts are screwed in. Both loose and too rigid tightening of the bolts will adversely affect the convenience in operating the equipment. In this regard, it will be necessary to calculate in advance the optimal backlash of the bolted connection.
The rear axle is manufactured in a similar manner. In the absence of time to assemble beams, ready-made parts can be taken from old domestic cars. For this, VAZ and UAZ cars are suitable.
There will be no problems with the installation of ready-made bridges. The only thing that is required is to cut the bridge. This will allow the use of standard short axle shafts.The rear axle of the mini tractor will also need to be protected from impacts during the operation of the mini tractor. As a protection, you can use a support - a steel angle, which should be laid along the welded seams of a makeshift bridge.
Choosing an engine for a tractor
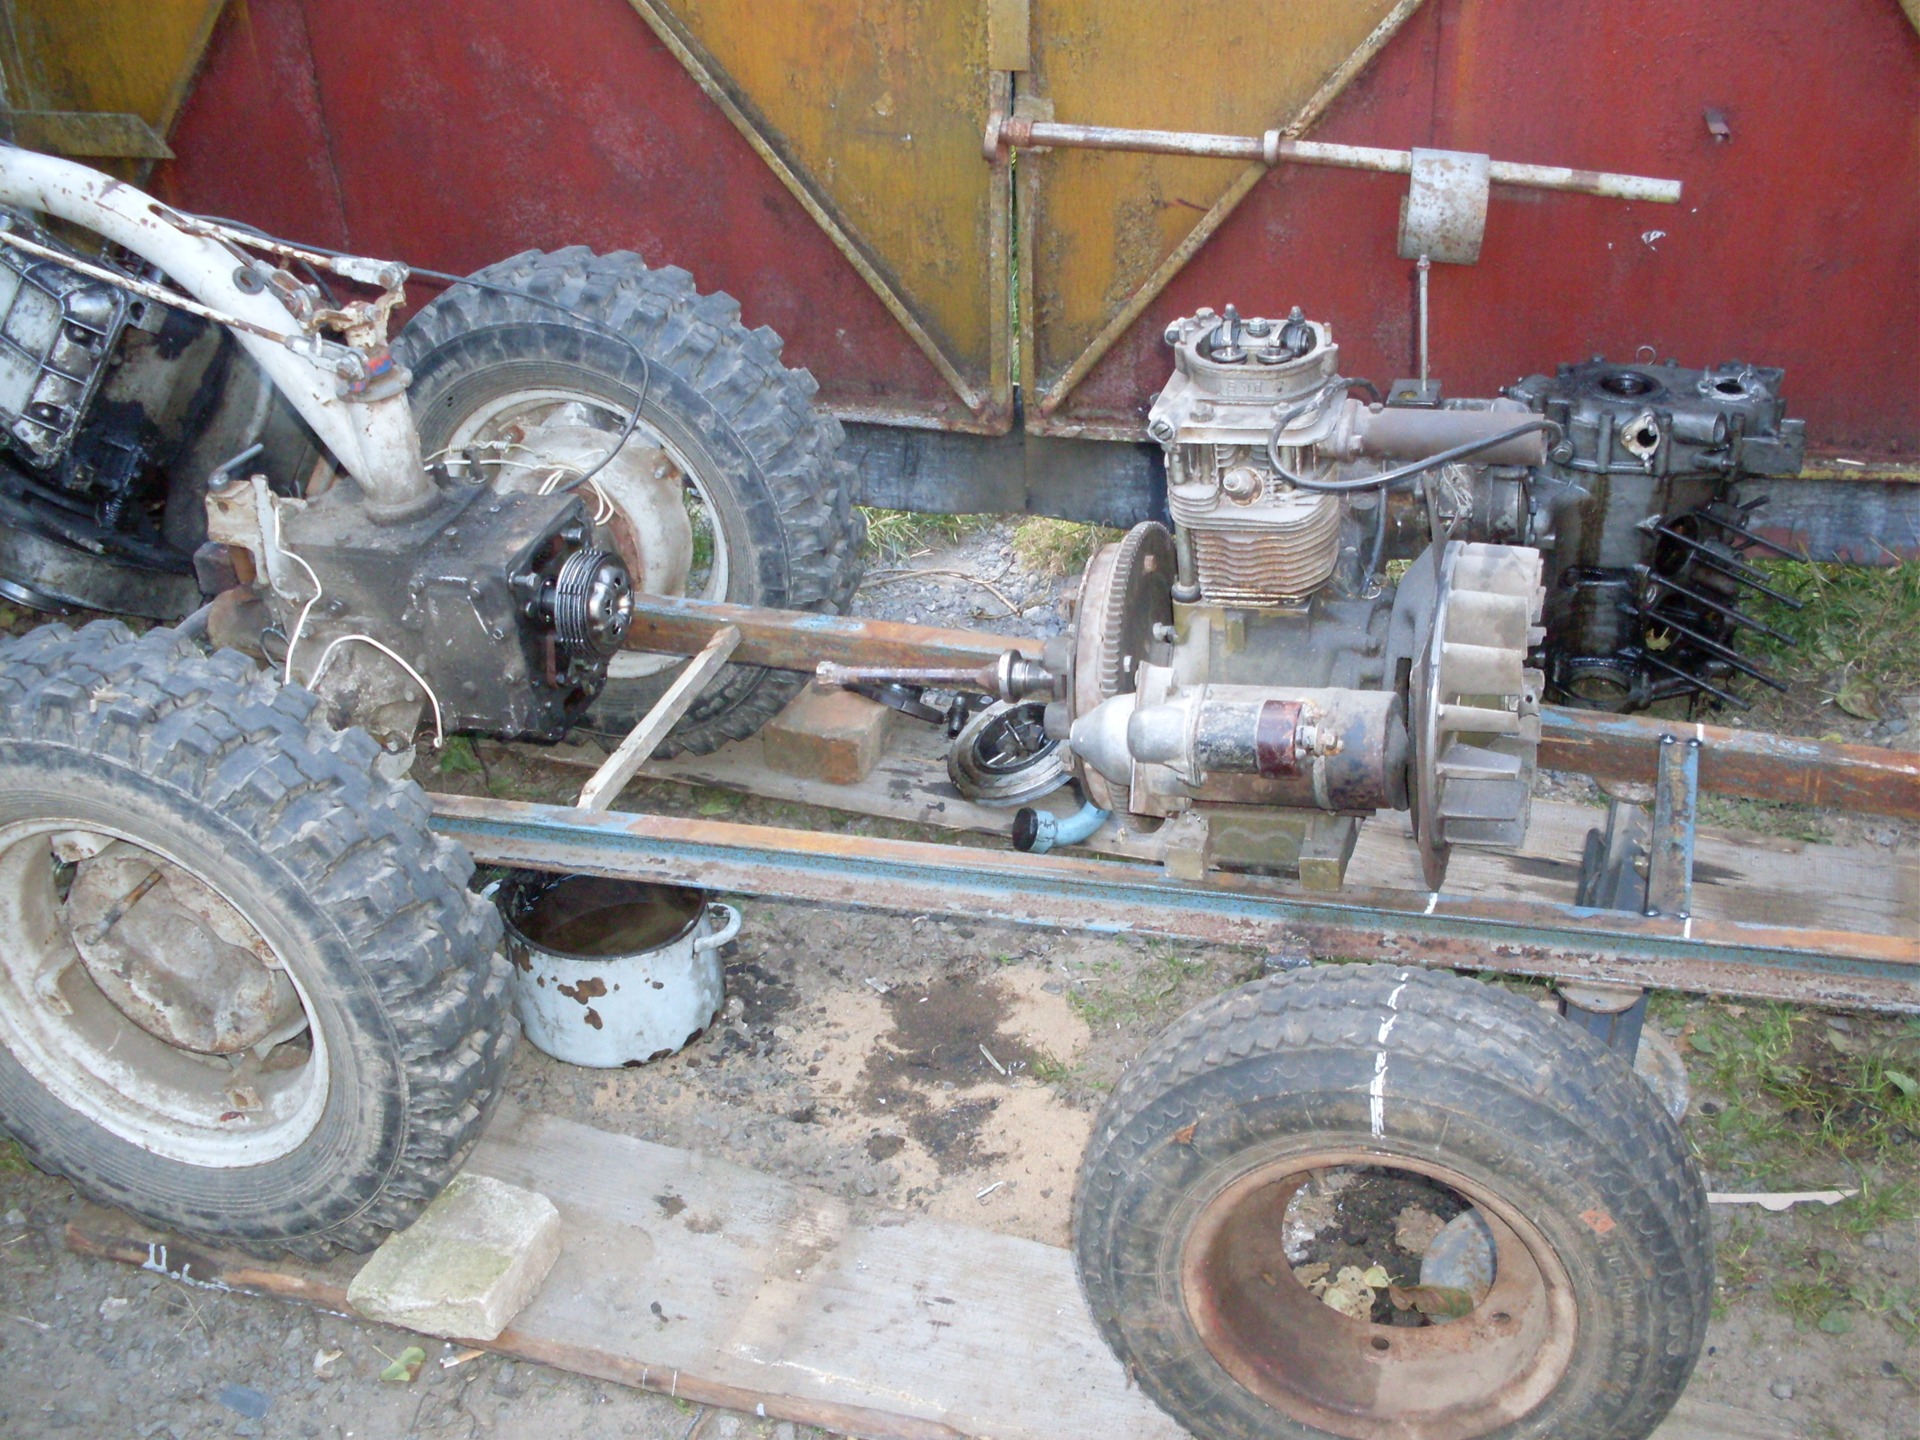
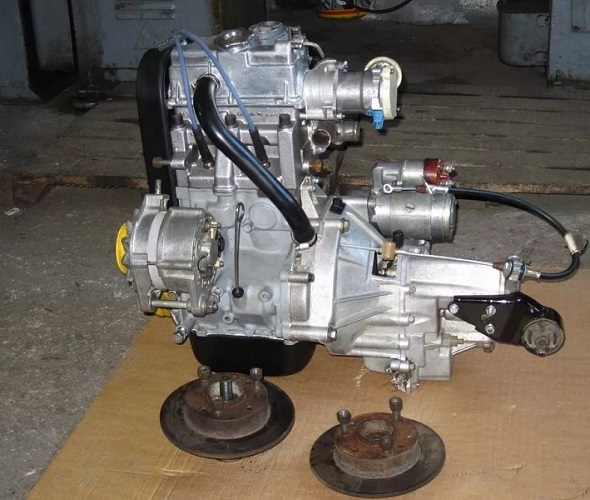
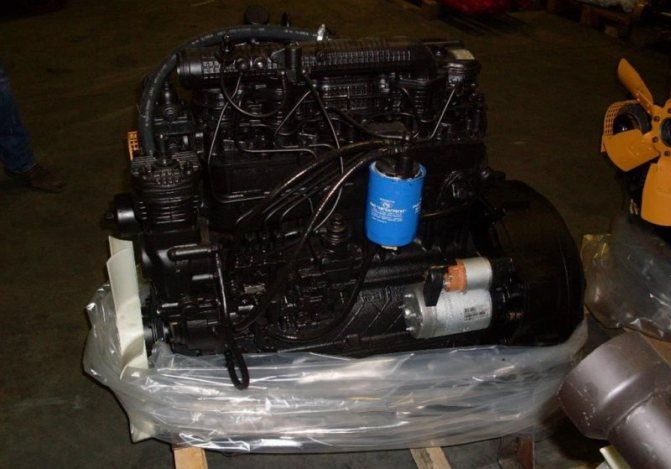
The optimum power of a single-drive vehicle is 5-15 hp. All-wheel drive samples will require 30-40 hp.
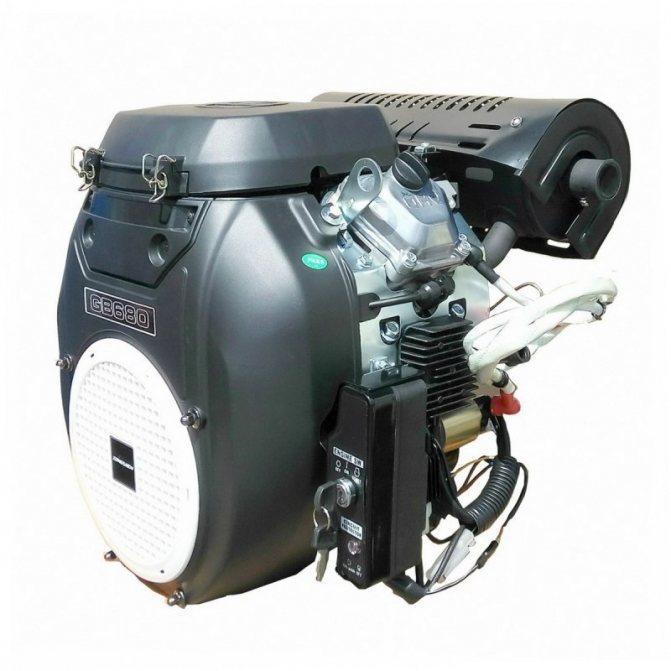
From here it becomes obvious that the first option is enough to be driven by the engine from the walk-behind tractor, while the second will require the selection of a strong unit like those that the following cars have:
- VAZ 2101-2107;
- Lifan 188F.

The disadvantage of such installations is their high fuel consumption. But if we make hydraulics for a home-made tractor, then the loads decrease, and the productivity increases.
True, for the hydraulic system you will have to purchase separately:
- Oil pump;
- Hydraulic motor;
- Distributor;
- Spool for oil withdrawal;
- Swing bush on the front axle.
Preparation for work
Cutting off this rather bulky part must be done in several stages. And the first one is good preparation for the procedure. So, we need the rear axle itself (as a rule, from disassembly - used, but in excellent condition, there it can be taken cheaper).
Further - the tools that we will use to carry out the work: grinder, welding, vice, a standard case with the necessary keys, screwdrivers and other little things. Good instruments for measuring the exact cut length are also important. For the convenience of completing the task - stands on which the part is fixed.Also about the place of work: a dry, well-lit and heated (if you work in the cold season) garage or box is desirable, with the ability to connect welding. Everything seems to be. Oh yes, well, and your ardent desire to produce a homemade product for fun or for practical purposes.

{banner_content}
Tags: we shorten the bridge of the vases for the tractor fractures, we make the tractor fracture.
Comments 33
The shank from the classics on the gearbox is an oil seal which I put in the same place the diameter is smaller from the shank box, too, so I want to do it, no matter how I can not figure it out with the oil seal
This is a photo of a shortening of the bridge on an old tractor, it has already been sold. Then, by the way, I did not even think about it that the oil seal was larger, when driving, the oil did not leak out for some reason, maybe due to the fact that the speed is very small, it did not spray it so much.
then I will try to put it in the same way, maybe it will not be, I think to put a tube on the flange under the diameter of the gland on the sealant, put it will hold no
Try it, I don’t see anything wrong with that. Only if so that debris and dust doesn’t fly in there. If it doesn’t work out, then think about the oil seal. And what doesn’t work with your native shank. Now I’m making a loader and I will put the front short Nivov cardan from bridge to bridge, or is it not 4WD?
all-wheel drive will be so easier from the box to connect the cardan shaft with a shank because of this, this is the only way I want to do it
hi on the box what diameter the pulley should be installed there is 15cm will go like this
The tractor does not need speed, the more the more traction it will be. Basically, they put a 2-stream Neva from the walk-behind tractor, about 30 cm in diameter.
Thanks, clear, but how to put on the slots
On the first tractor I found a pulley with a hole that fit tightly on these splines (but the pulley itself was without splines), but there was a counter bolt on the pulley. I don’t remember exactly, but it seemed like a grinder I machined on the shaft for this bolt and more and more other fasteners did not And so you take the core (one or both sides at once) from the clutch and weld it to the pulley and that's it.
thanks for shopping I'm running around looking for a pulley from a walk-behind tractor
The day before yesterday I was looking in two stores, although there are no spare parts on the shelves, and if you ask about spare parts, they say there are spare parts, and so I was looking for a pulley from a walk-behind tractor, but it was not there, we will continue the search. ...
here we have a lot of spare parts for the walk-behind tractor
The day before yesterday I was looking in two stores, although there are no spare parts on the shelves, and if you ask about spare parts, they say there are spare parts, and so I was looking for a pulley from a walk-behind tractor, but it was not there, we will continue the search. ...
HELLO, what do you think, the Chinese engine from the walk-behind tractor 6 5 hp will do it will pull there is no such engine the cheapest we have 5 tr
The first tractor I rode on a 4-strong engine, but I did not try to clean or plow the snow with it. And so on YouTube there are a lot of people with a 6.5 strong engine. Take the same Soviet walk-behind tractor from which they put the engines on the tractor, there too 6-6.5 horses and they plow nothing and clean the snow.
Well, yes, the prices bite more powerful, let's see
We have a point in the market (I don't take into account stores, it's a little expensive there.), That's how many horses there, so it costs. I want to take a 7 or 9-strong engine. And then we'll see if we can ride in our own.
Once I went through all this. If you sculpt something from something if only cheaper and somehow went, then repairs and alterations will take more time and finances. I know not by hearsay. After several failures, the craftsmen simply abandoned their project or, having gained some experience, radically determined their homemade product. I advise everyone who loves and knows how to tinker with glands to study the transaction itself, since there are a lot of videos on YouTube.
Working with other machines
In order to maximize the cross-country ability, preference is given to working parts not from VAZ, but from UAZ. Regardless of the specific model, the fewer changes to the suspension design are made, the more stable and reliable the mechanism will be. After all, amateur mechanics will not be able to calculate and prepare everything as accurately and clearly as experienced engineers. But it is quite acceptable to assemble a mini-tractor from dissimilar parts. There are known solutions in which the rear axle is taken from the UAZ, and the front axle from the Zaporozhets 968 model, both parts will have to be cut.
Now let's see how to properly shorten the bridge from cars from Ulyanovsk, connected to two wheels back. Due to some design differences, the approach that is used for components from the VAZ is not suitable. After removing the axle shafts, you need to cut the "stocking". A special tube is placed at the incision site to help align. The pipe must be carefully scalded so that it does not fall out.
The half shaft is cut off. The required hole is made in it using a lathe. Having welded on both sides, cut off the excess metal. This completes the manufacture of a homemade bridge. It remains only to put it correctly and fix it. You can make a mini-tractor with your own hands and with a bridge from "Niva"
Importantly, the wheel arrangement of such a vehicle is 4x4. Therefore, it is ideal for working on difficult terrain.
Important: it is worth using, whenever possible, parts from one mechanism. Then the assembly will be noticeably easier.
It is strictly forbidden to use spare parts that are worn out or cracked. But the installation of bridges from "Niva" on the frame of the same car is quite acceptable and even desirable. It will be even better if the transmission and the dispensing mechanism are taken from there. The support structure in front is usually equipped with hubs from the front wheels. This solution allows the bridge to be displaced in two planes at once.
It is quite possible to take bridges from the GAZ-24. But it will be necessary to strengthen the structure. If the car extremely rarely runs into something, because it does not make a track, then for a mini-tractor this is the main mode of operation.
Inattention to such a moment threatens the destruction of the bridge and even other parts of the chassis.
For how easy it is to shorten bridges and cut splines, see the next video.
Let’s block ads! (Why?)
Application area
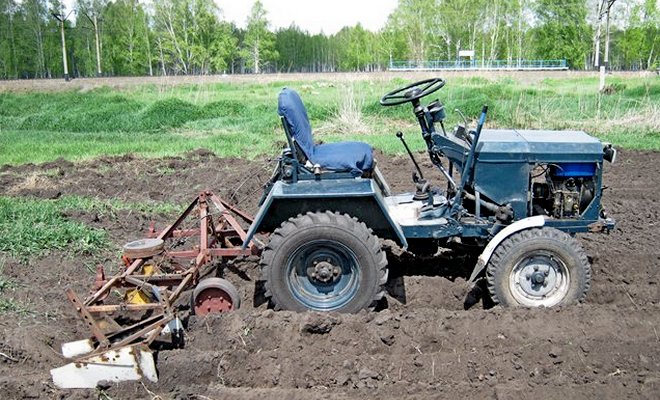
The all-wheel drive mini-tractor, made by hand, has quite good cross-country characteristics, which makes it possible to perform virtually the same scope of work as shop counterparts, such as Uralets, Kubota, Bulat 120, Yanmar, Belarus 132n, Scout.
Of course, the power of a home-made unit may be somewhat weaker, but at the level of domestic use, this fact is almost imperceptible.
Application area
The main area of application of this do-it-yourself unit is agricultural work. This term covers a fairly wide range, including many related works. In other words, a homemade mini tractor is needed for the following purposes:
- plowing of land holdings for the purpose of their further use;
- cultivation of the soil, as well as getting rid of weeds;
- harrowing the soil;
- sowing operations on treated soil;
- planting and digging potatoes.
In principle, this is the main purpose of the mini tractor, for which it is made. But, its application can be significantly expanded if a special connection for additional equipment, mounted and trailed, is provided in its design.
If everything is done correctly, then your homemade product can additionally perform the following work:
- transportation of various goods (transportation of firewood, construction waste, etc.);
- snow removal in the winter season;
- mowing lawns and lawns, and making hay for livestock.
As we can see, the mini-tractor breaking the classic 4x4 with its own hands can significantly facilitate the life of any rural resident, because with the help of this technique it becomes possible to perform all types of work that are required with competent maintenance of subsidiary farming.
The indispensability of a home-made unit is also due to the fact that a minimum of investments and funds are used in its manufacture, which is very important for rural areas. For more information about the work of an all-wheel drive mini tractor, see the video :. For more information about the work of an all-wheel drive mini tractor, see the video:
For more information about the work of an all-wheel drive mini tractor, see the video:
Required materials and tools
To make a three-wheeled trike from a bicycle, you should stock up on the following devices:
- a pair of chains;
- ropes for braking and switching speed of the unit;
- standard bike;
- stainless steel clamps;
- wheels;
- wings;
- a block of brakes;
- a basket for transporting cargo;
- frame made of steel;
- paint and varnish composition.
To create a tricycle with your own hands, you will need a hammer, a grinder, a welding inverter, a drill, and a set of keys. After sketching all the drawings and diagrams, the indicated materials and tools should be prepared in advance. If the plans include the construction of a spacious luggage compartment, additional sheets of plywood and a hacksaw are prepared. If desired, the unit is equipped with a signal bell or horn. Fitting comfort is ensured by installing a new seat or installing a special cover.
How to cut the rear axle of a VAZ for a minitractor?
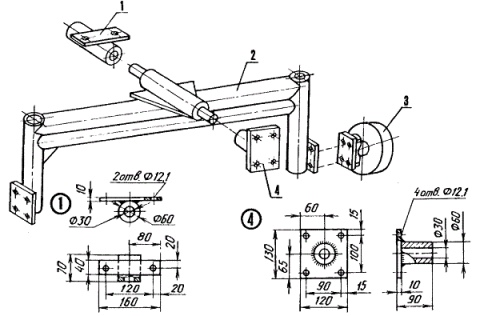
When independently designing a unit from Zhiguli, we are faced with the need to shorten the VAZ bridge for a minitractor. This is a rather responsible and difficult stage of work. To properly shorten, first read the diagram, which shows all the dimensions of the future structure:
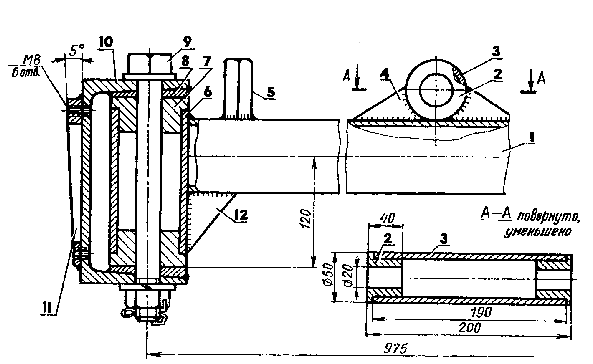
Subsequent work should be performed according to the following algorithm:
- The spring cup is cut off and the end flange is removed.
- A part of the removed axle shaft is cut off, a groove is made from the edge.
- A hole is drilled inside the cup.
- We dock and center the axle shafts, weld them according to the drawings.
- We insert the finished part into the bridge.
- We weld the bridge on both sides.
- Weld seams must be of good quality. At the end of welding, the seams are heated and cooled several times.
- We attach the bridge to the frame using a V-shaped structure.
For clarity, we also suggest that you familiarize yourself with the video, which shows in detail the process of shortening the VAZ bridge:
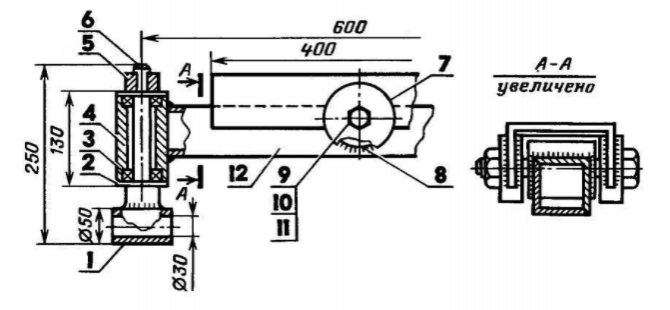
To shorten the front axle, you can use the diagram below:
What drawings will be needed
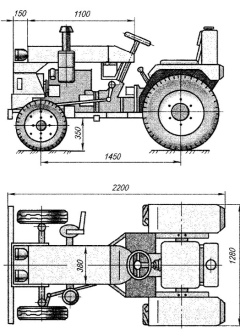
In order to have a clear plan for working on a project for the construction of a mini tractor, you will need its drawing or sketch.They are compiled based on the required parameters and those assembly units that need to be installed.
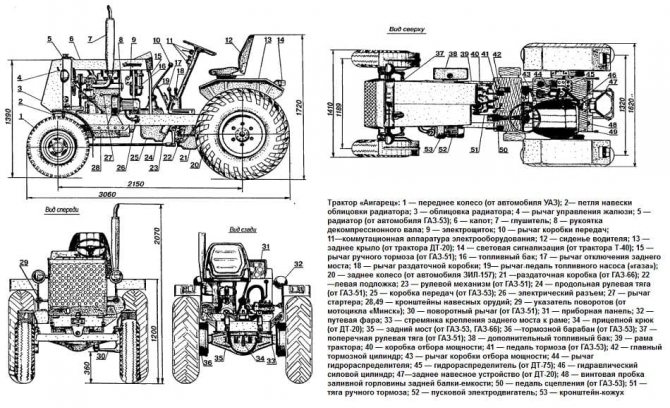
Assembling the tractor at home comes from the assemblies of motorcycles, motoblocks and used cars. Therefore, the drawings are drawn up on the basis of those units that are available.

First, a diagram is drawn on which the engine, gearbox, transfer case, chassis are located. These assembly units are lined up according to their design features and sizes. A kinematic diagram of the transmission of torque from the engine to the driving wheels is drawn up. Then, the design features are displayed on the drawing:
- frame dimensions;
- material;
- attachment points of units, suspension;
- elements reinforcing the structure.
The rest of the drawings are not as important as the frame drawing because they are constantly revised during manufacture.
Design features
A homemade walk-behind tractor is used most often to perform simple but laborious work:
- plowing a land plot;
- hilling plantings;
- mowing grass or tops;
- application of organic fertilizers.
You can upgrade any walk-behind tractor with a ZiD engine or some other, make it on large wheels, with a belt drive.
Often, craftsmen prefer to reassemble such units using old spare parts from such mechanical devices:
- chainsaws of the "Friendship" type;
- motor scooter;
- motorcycle;
- washing machine.
If a person owns a tool, understands the device, then making a walk-behind tractor is not difficult. In terms of material costs, this may cost a minimum amount, while prices for a good unit start at $ 300. If everything is done correctly, a new device, created by one's own hands, can be in no way inferior in reliability and performance to imported models such as the "Cayman" walk-behind tractors.
Often, masters use old units from the Druzhba saw as engines. At the same time, the walk-behind tractor is easy to operate, even a non-professional or a minor can work with it. The power plant is capable of withstanding significant loads without stalling even at low speeds.
This indicator is important for the following work:
- plowing;
- harrowing;
- harvesting.
Tools and materials
A small tractor greatly helps farmers in their work. They can cultivate the land of personal and summer cottages, harvest. The big advantage of the unit is that a wide variety of attachments can be connected to it. A compact mini-unit is good for everyone, only it costs a lot of money. Even Chinese manufacturers have started to raise prices significantly in recent years. Therefore, some craftsmen make small units with their own hands, and these mechanisms are not inferior in quality (sometimes even superior) to factory products.
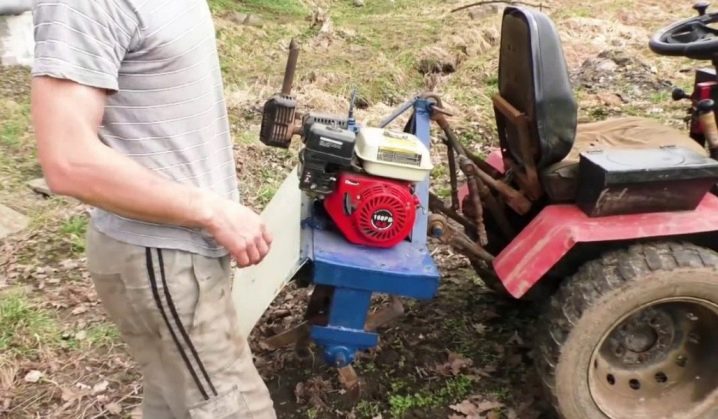
Before starting such work, you should understand how this or that unit works, how it works, what features it has. Such equipment on the farm is needed, as a rule, for 3-4 types of work, therefore, when creating the unit, you can "place accents", for example, strengthen the frame (if it will have an increased load) or put wider wheels if the main work will take place in field.
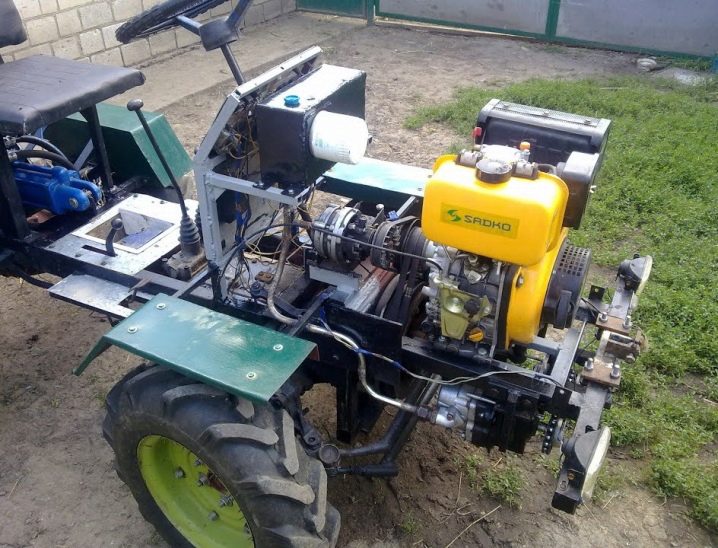
The beam / bridge can be made with additional fasteners, since often the factory counterparts do not have the required strength factor. A homemade tractor can be without a cab, but this is not always justified, especially when working in hot or cold seasons. PTO is a power take-off shaft that makes it possible to operate attachments. Shaft types:
- conjugate,
- autonomous;
- working synchronously.

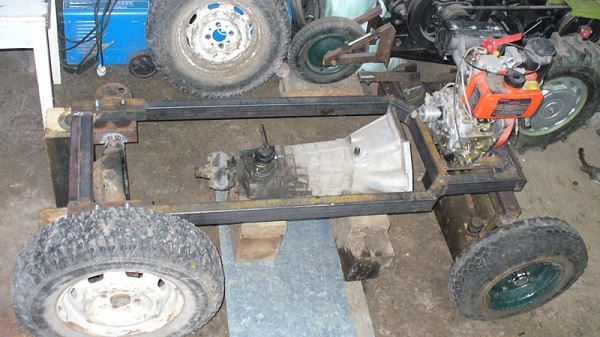
Ramu can be made from corners "6" or pipes with a diameter of 45 mm. In order for the structure to be more stable and durable, metal plates (6 mm thick) are welded at the corners. The checkpoint can be taken from the VAZ
It is important that in its working condition there are at least three forward speeds and one rear speed. Traction can be "borrowed" from a motorcycle
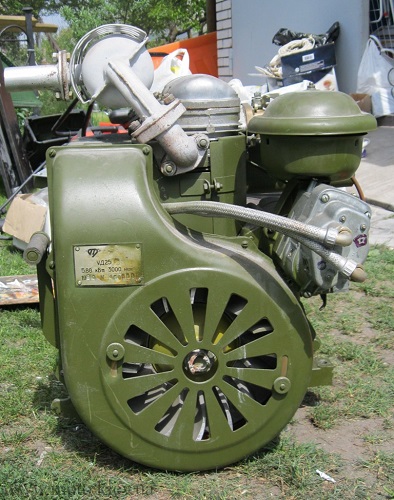
The steering column will fit perfectly from the domestic auto type "Zaporozhets". It is also realistic to make a mini-tractor with different engines - both single-cylinder air-cooled and four-stroke carburetor ones. Such power plants are ideal for creating agricultural machinery.
Benefits from creating a miniature tractor with your own hands:
- low price;
- you can make a unit that will best suit your personal needs.
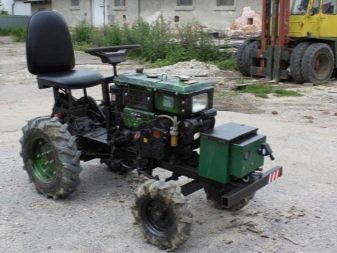

Among the disadvantages are:
- the process of creating a tractor may seem like a laborious affair for those who have worked little with equipment;
- car engines run on gasoline, which is more expensive than diesel fuel;
- it is impossible to drive on federal highways on such equipment, you can get a fine.

Peculiarities
The front beam on a mini-tractor is most often made from a hub and brake discs.
The work of this beam must be consistent with the action:
- pendants;
- lifting apparatus;
- steering column;
- hind wings;
- brake apparatus.
But much more often, instead of self-assembled beams, special bridges from VAZ cars are used.
The advantages of this solution are:
- almost inexhaustible possibilities to customize parts;
- a wide range of available models (you can put any Zhiguli rear axle);
- the choice of the type of undercarriage is entirely at the discretion of the farmer;
- simplification of the subsequent purchase of spare parts;
- cost savings compared to manufacturing from scratch;
- obtaining a reliable and stable machine, even in difficult conditions.
As practice shows, mini-tractors made without drawing up drawings:
- unreliable;
- break down quickly;
- do not have the necessary stability (they can tip over even on a non-steep ascent or descent).
Each change affecting the chassis is necessarily reflected in the diagram. The need to shorten the bridge usually arises when the frame parameters change. This solution can significantly improve the consumer characteristics of the vehicle.
Importantly, energy is additionally saved. It is also noted that shortening a standard bridge improves flotation, and the shorter the bridge, the smaller the radius required to turn.
According to a similar scheme, you can make a bridge, even a leading one, for any mini-tractor. But if you use a beam, then you can refuse to install a gearbox. As a result, the design will be simplified and cheaper. After all, the Zhiguli beam already contains the required gear assembly by default. Crossbeams for miniature tractors are made using steel angles or square tube sections. When creating a driving axle, it must be remembered that it is with it that the motor and the pair of wheels are connected, and that the force generated by the engine is transmitted to them. In order for this bundle to work normally, an intermediate cardan block is provided. The quality of manufacturing of the drive axle depends on:
- cornering;
- stabilization of wheels;
- receiving by the frame of the mini-tractor, created by the driving wheels of the pushing force.
The slewing rings, however, are already made of profiled pipes. Sections of such a profile are being finalized with the expectation of installing bearings. Covers made of CT3 steel are useful for tight closure. The segment where the roller bearings and the cage are located is welded to the center of the crossbeam. Special bolts will allow you to fix the bridge to the bushings of the same beam
It is very important that the bolts are more powerful, otherwise they will not hold the structure - therefore the backlash must be calculated carefully in advance

