Appointment
The adapter to the walk-behind tractor was created for the convenience of processing the garden. If you attach a hinge to it, then you can expand the scope of the device:
- remove hay;
- level the soil surface;
- transport goods;
- harrow the ground;
- clear the area from snow.
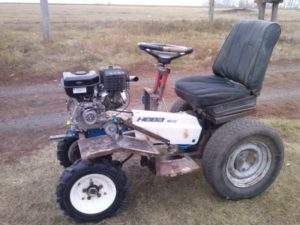
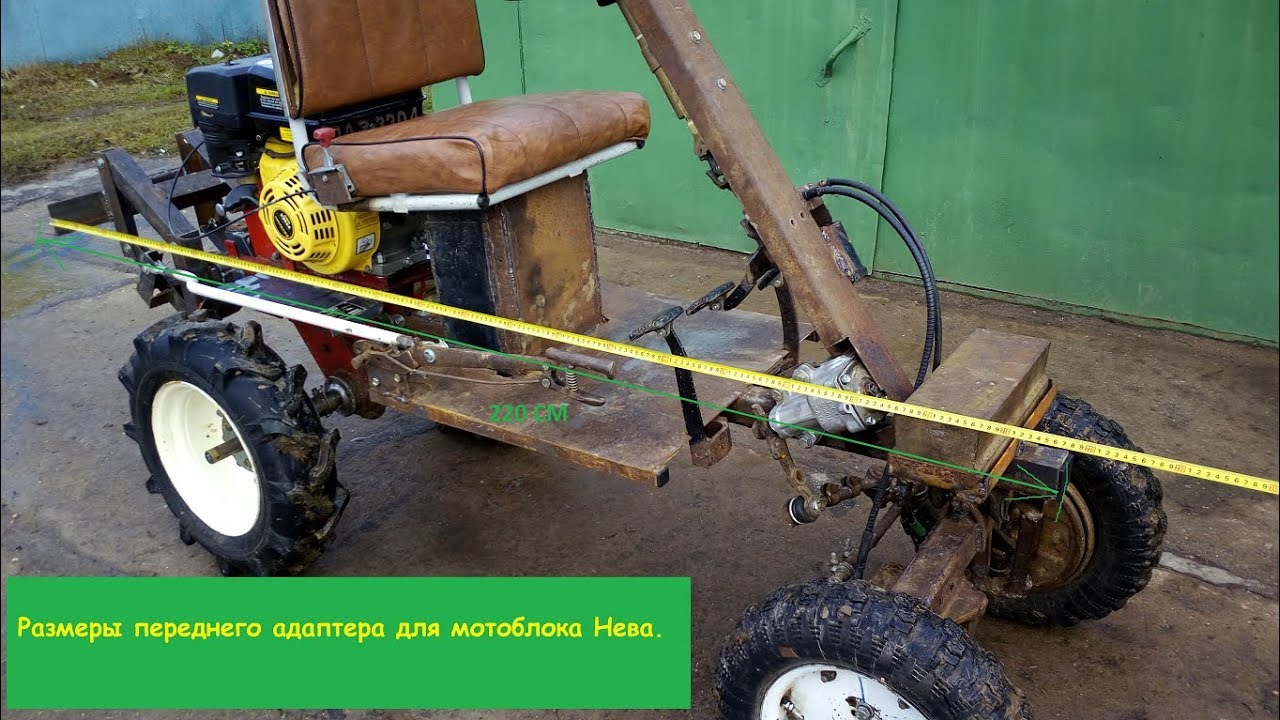
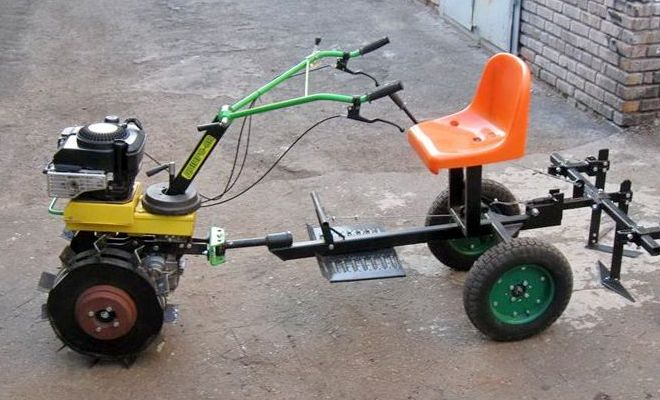
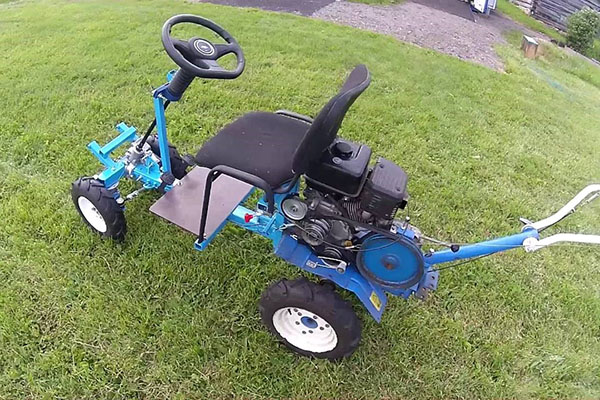
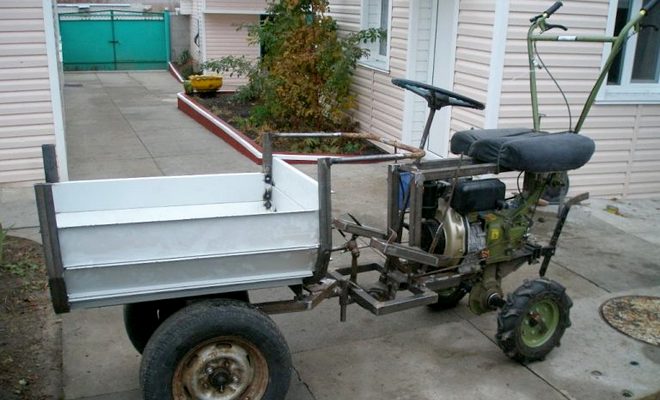
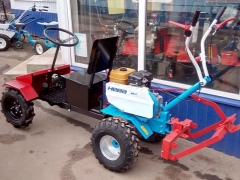
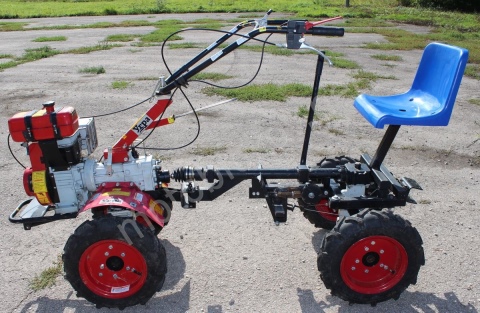
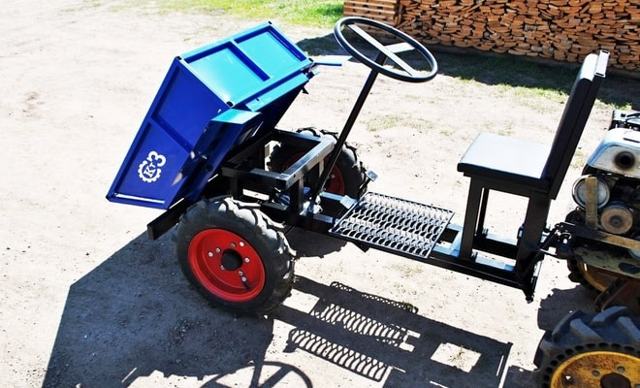
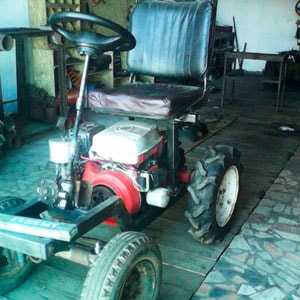
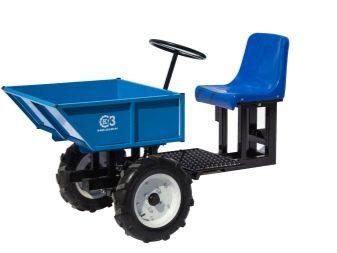
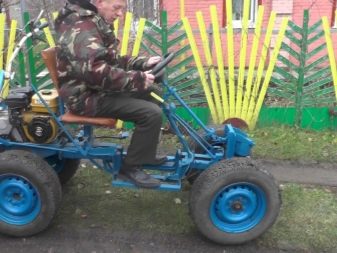
An adapter is a device that is designed to be moved on a motor cultivator. With the help of it, you can operate the machine while sitting in a chair, and at the same time work the soil. The trailer for the Neva motor cultivator is equipped with steering control. It allows you to simplify the use of the walk-behind tractor.
Such a trailer speeds up work in the field. With this design, the speed of the cultivator can be increased from 5 to 10 km / h. Consider the device of the adapter. The adapter for the cultivator consists of:
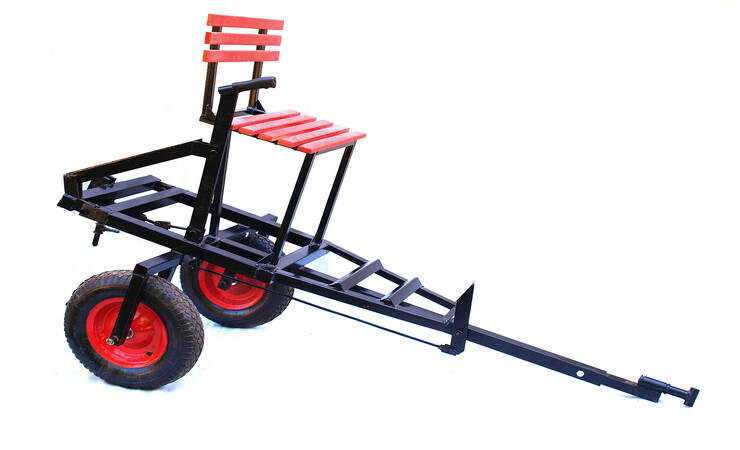
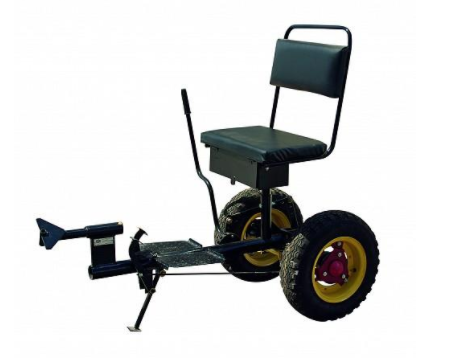
- frames;
- operator's seat;
- two wheels;
- axles;
- coupling mechanism.
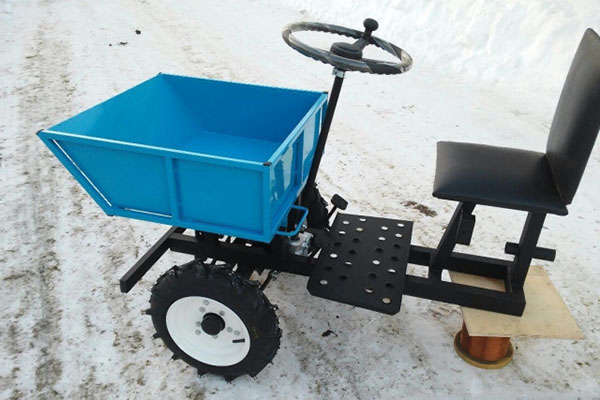
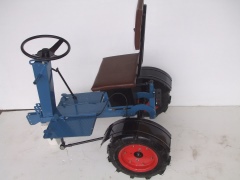
After attaching the adapter, the cultivator looks and works like a mini-tractor. A frame is needed to create an adapter for a front-steering cultivator. The operator's seat is installed on it. The frame is fixed to the chassis.
The seat is fixed to the frame. This makes it easier for the operator to control the cultivator. The wheel system will help move the unit around the site. There are 2 types of wheels: metal (used in the field) and rubber (used for road traffic).
made of steel or cast iron by welding. She attaches the cart to the cultivator. The best is the U-shaped fastening system. With this design, the device will be stable.
Specifications:
- The highest travel speed on a walk-behind tractor with a trailer is 12 km / h.
- The highest carrying capacity is 100 kg.
- The track diameter is 67 cm.
- Dimensions are 130x70x71 cm.
- The weight of the device is 22 kg.
- The warranty period is 5 years.
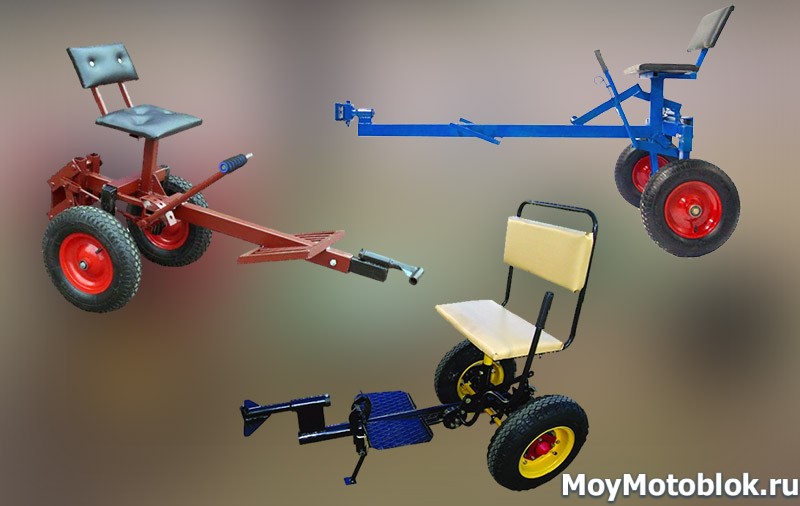
Adapter for motor blocks
Most often, there are two couplings in the adapter - attached additional equipment is attached to one, and the second makes it possible to attach it to the walk-behind tractor. For example, you can connect the following additional elements to the adapter:
- seeder;
- plow;
- hillers;
- harrow and other devices.

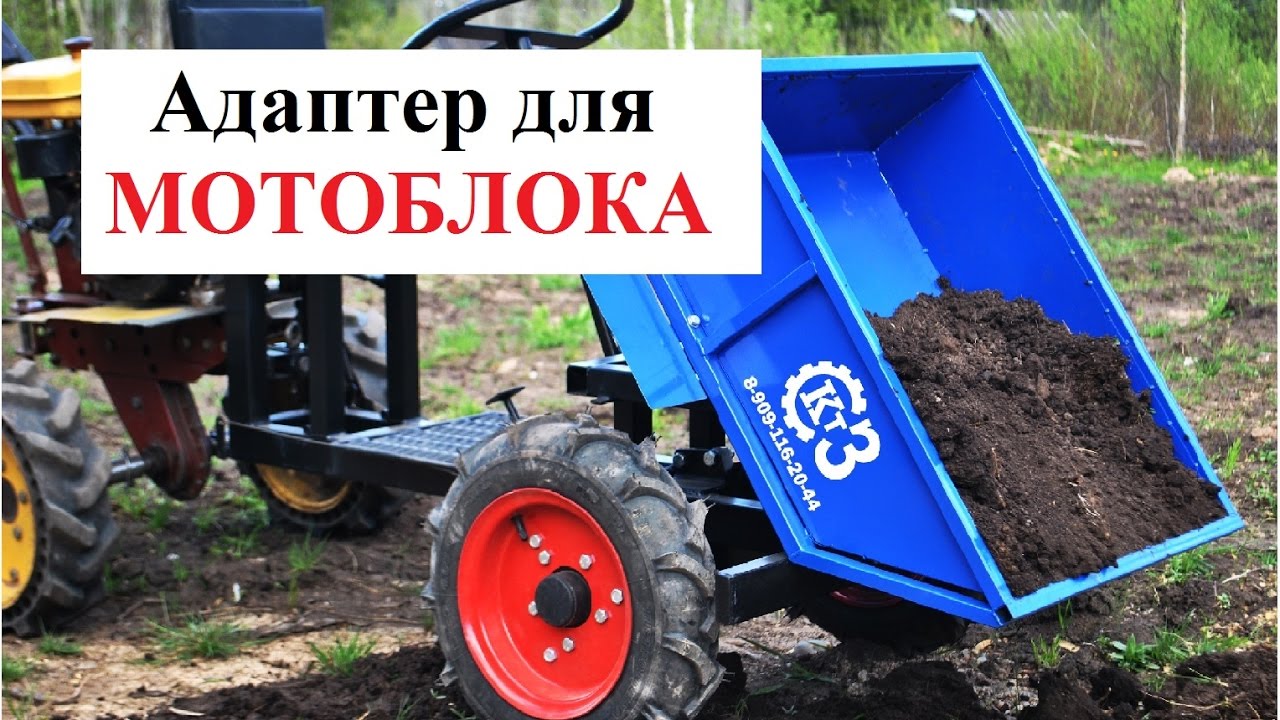
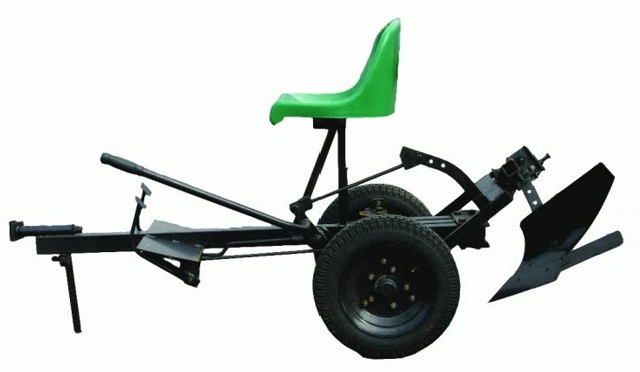

The wheelset and the axle in the adapter are quite strong structures that allow you to operate the walk-behind tractor even on the most difficult areas of the ground, as well as for the transportation of rather heavy loads
It is important to understand that the transportation of goods on public roads on such a unit is prohibited, for this reason they are used only in rural areas. However, despite a certain structural similarity between all adapters, they are endowed with some significant differences.
For example, there are rear steering adapters, all-wheel drive adapters and front assemblies on sale.
We make an adapter to a walk-behind tractor with our own hands
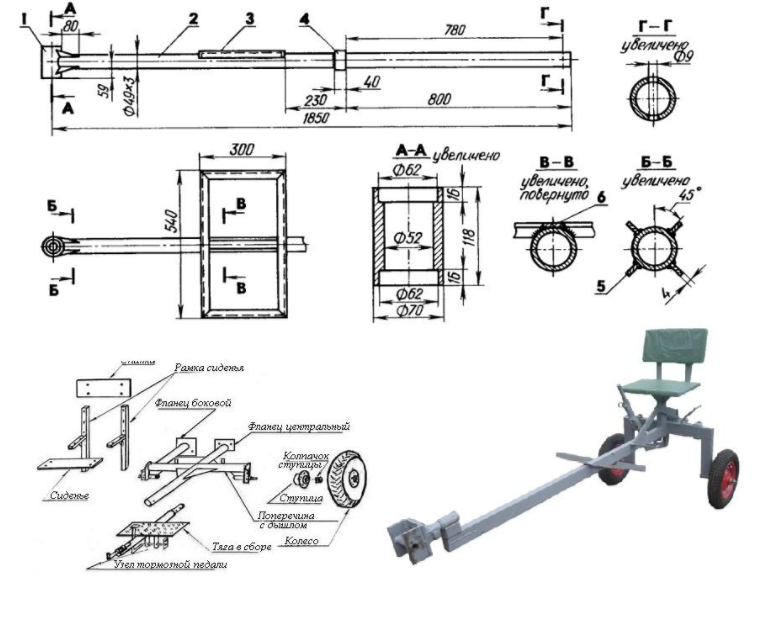
The base of the adapter to the walk-behind tractor is made of a rectangular pipe 170 cm long.Another pipe 50 cm long is welded to it across, to which the racks for fastening the adapter wheels should be attached. The height of these uprights from the top point of the stand to the axis of the adapter wheel is 30 cm. You can adapt wheels from a conventional garden cart, and their inner bushings can be bored on a lathe. Bearings of the correct size are put on the bushings.
Then the braces should be welded to the hubs of the wheels of the adapter and to the central tube. Their length can be different and is determined by the angle that you will need to withstand. This is followed by the calculation and welding of the frame for attachments. The side tubes of this frame are bolted to the wheel struts.The bolts must be of sufficient diameter to withstand various mechanical loads.
A channel (No. 10) is welded across the rear end of the frame for attachments. The rear channel and the side tubes of the frame have the same length of 40 cm, as a result of which the frame has a square shape. Also, a lever with three “knees” with lengths of 30, 50, and 19 cm is welded to the frame. Another 75 cm long lever is mounted on the side of the lever to increase the applied force.
Such an adapter to a walk-behind tractor with its own hands quite confidently rides along the ground when working on virgin soil and on arable land. A special blade for snow removal can be made to it. In front of the adapter there is a coupling unit, which you can also make yourself or buy ready-made.

The only thing you need to pay attention to is that the reliability of both the adapter hitch and the walk-behind tractor itself must be high enough. From above, to the central tube, a metal “leg” is welded to accommodate the seat
That, in fact, is all.
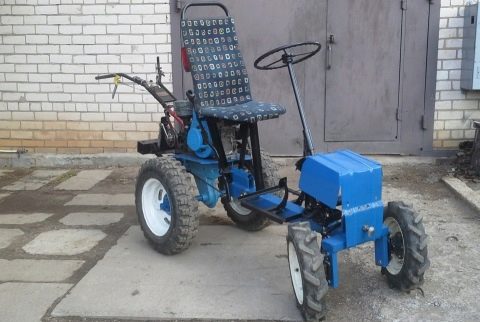
Walk-behind tractor device
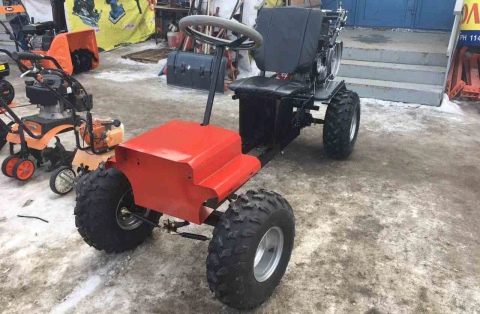
By its design, the 4 × 4 adapter, which is intended for the Neva walk-behind tractor, is a rather simple device. It includes several fundamental parts:
- frame structure, on which other accessories can be installed;
- driver's seat;
- wheelbase including wheel axle;
- the mechanism for connecting the walk-behind tractor, including.
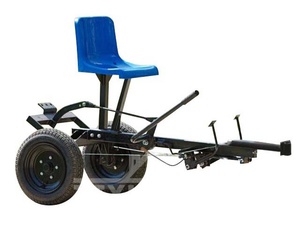 In other words, the adapter is an ordinary cart with a seat that connects to the walk-behind tractor.
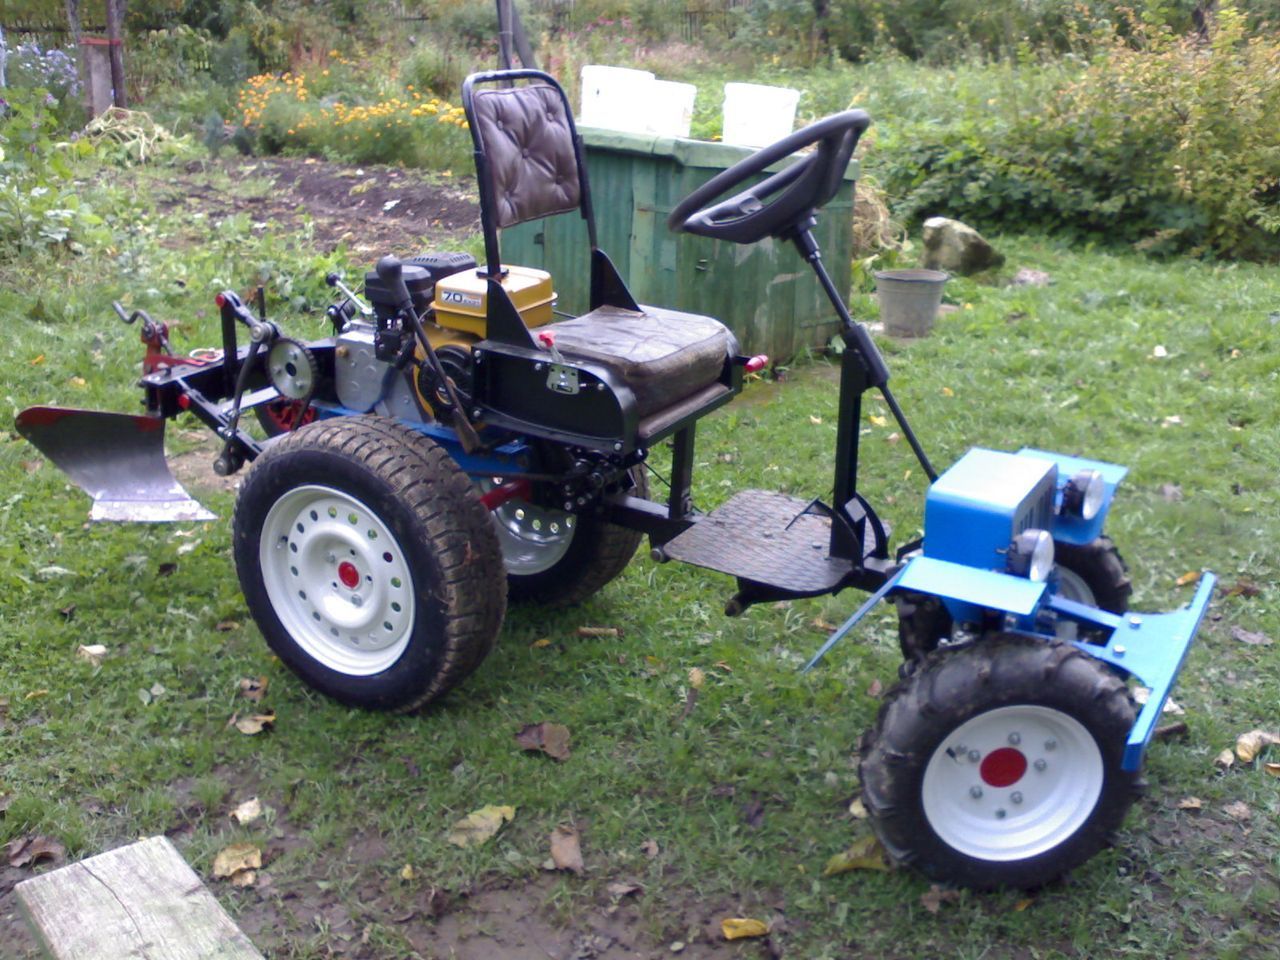
Motoblocks come in different brands and designs. The Russian user knows, for example: Cayman, Foreman, Viking, Crossser, Texas, Patriot and others. After hitching the walk-behind tractor and the adapter, the resulting device in terms of functionality can be compared with a mini-tractor, however, such a comparison is somewhat arbitrary, since the power will remain the same, because the engine still remains alone, and it is from the walk-behind tractor.
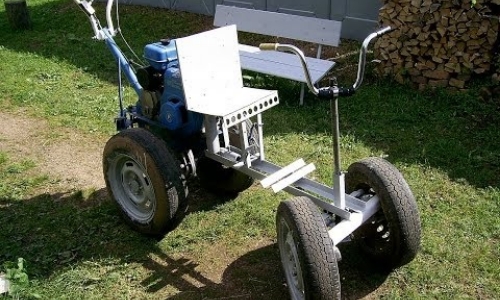
Making a device with a movable joint
This is the simplest device. The adapter itself will be located behind the walk-behind tractor. It is not difficult to make it, but the process requires attention and concentration. The service life of the mechanism depends on the quality of work. This adapter is suitable for heavy motoblocks, for example, "Neva". It has an engine power of over 7 liters. with. and weight from 105 kg. This allows, without skidding, to pull not only the adapter, but also agricultural implements.


For manufacturing, you will need the following materials and tools:
- electric drill with the necessary set of drills;
- DC welding machine and electrodes;
- grinder with a set of cutting and grinding discs;
- hammer, file, square, various hardware;
- sheet metal with a thickness of at least 5 mm;
- several profile pipes of 40 x 50 and 50 x 50 mm;
- round water pipe with thick walls with a diameter of 30-45 mm;
- steel rods with a diameter for a round pipe;
- channel 40 x 50 mm;
- two wheels from Zhiguli or Oka with bearings and hubs;
- driver's seat.
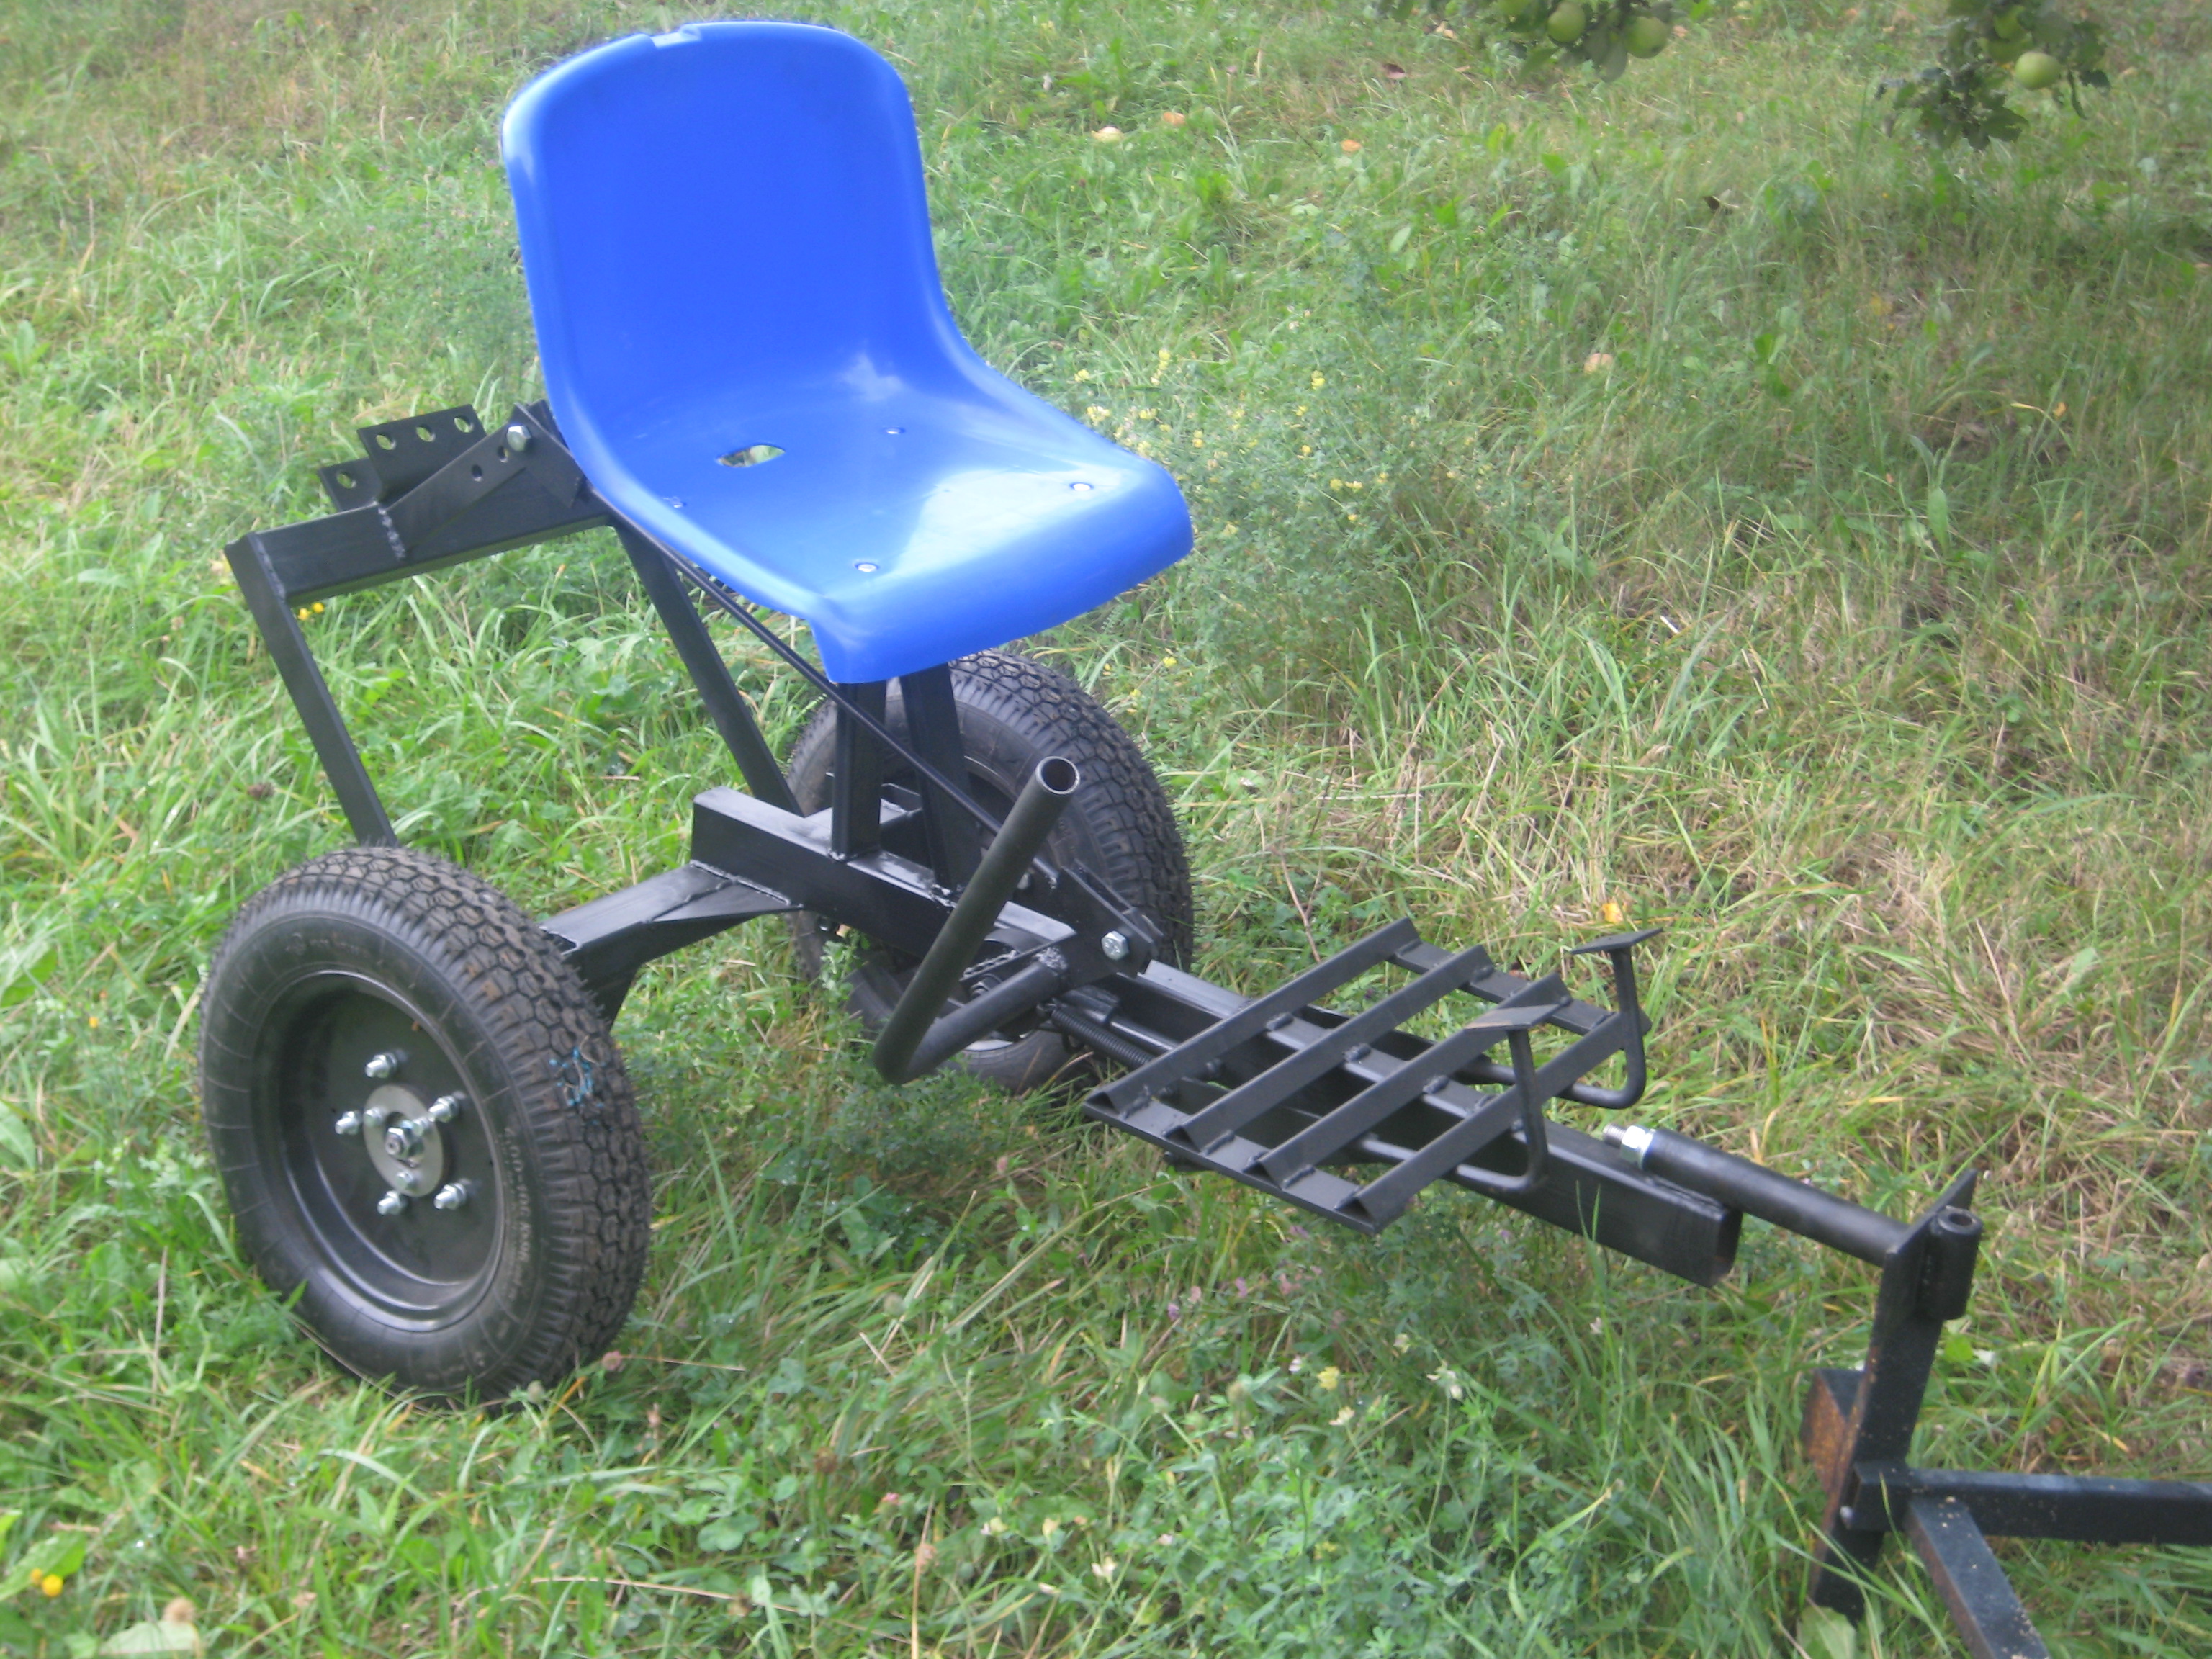
Any size of the adapter can be chosen, but based on the needs of the mini-technician. The frame itself can be made a little higher or lower than the axis of the walk-behind tractor. For the wheels, the optimal suspension is the portal, which provides a decent ground clearance. It is not necessary to install shock absorbers on the adapter - this complicates the design. The easiest way is to take a seat with built-in elastic elements.
Further, go directly to the manufacture of individual units.
- Coupling. This is a welded mechanism, which is a hinge that works in two planes. It is then installed in the base of the adapter frame and bolted to it. It consists of two pieces of 40 x 50 pipes welded together and a piece of round water pipe. A welded tee is inserted into it. The tee itself consists of a rod and part of the same pipe. This is the most critical part, so the welds should be perfect.
- Adapter frame. Here you will need a profile pipe and a channel.They are welded together, strengthened, and then wheel stands are made. Further, the struts are fixed with braces welded to the frame and wheel hubs. Install and secure the wheels.
- Several pieces of pipe are welded to the main frame to install the seat.
- Fixes and adjusts the seat. It is positioned so that when the steering wheel is turned, the operator's back does not come off the back. The controls of the walk-behind tractor do not need to be removed - this is done when the power plant is located behind the driver.
- Install the finished hitch.
- Attached to a walk-behind tractor.
Next, a wheel locking mechanism is made. To do this, use a ready-made brake system from any car and adjust it to the installed wheel hubs.
Preparatory stage of manufacturing the adapter
The adapter has a simple design, but the manufacturing procedure cannot be called simple
Initially, you need to take into account the drawings and dimensions, which will help create a device without flaws.
 You need to acquire the following materials and tools:
- Electric drill;
- Welding;
- Electro-chop;
- File;
- Square;
- A sheet of steel with a thickness of 5 millimeters;
- Several square pipes with a diameter of one inch;
- A set of mounts.
Key structural elements are manufactured as follows:
- Coupling. Frame-mounted and bolted. A coupler is two welded pieces of square pipes and a piece of a water pipe. The latter is inserted into the stem with a welded tee;
- Wheel fixing unit. Two pieces of pipe 10 centimeters long are welded at right angles. The horizontal section is inserted into the fixing pipe and securely fixed with a bolt. An axle and bearings with wheels are attached to the vertical workpiece.
When all the tools are prepared, the main parts are made, the adapter can be assembled.