Content
- 1 Variety selection
- 2 Seed preparation and choice of container for planting
- 3 When to sow pepper
- 4 Soil preparation and sowing seeds
- 5 Seedling picking
- 6 Pepper care on the windowsill
- 7 Variety selection
- 8 Growing seedlings
- 9 Video "Planting sweet pepper seeds for seedlings"
- 10 Disembarkation
- 11 Care
- 12 Why do plants sometimes turn yellow and their leaves fall off?
- 13 Secrets of Successful Growing
- 14 Video "10 mistakes in growing sweet peppers"
- 15 Hello dear readers!
- 16 Best grade pepper on the windowsill
- 17 Seed preparation
- 18 Getting started landing
- 19 Preparing the soil
- 20 Taking care of our pepper
- 21 We are waiting for the harvest
Pepper is a herb that belongs to the nightshade family. The homeland of this culture is the tropical regions of Central America. There are four main types of pepper: Colombian, Peruvian, Mexican, and pubescent. By the content of the bitter substance, sweet (vegetable), spicy (spicy) and semi-sharp varieties are classified. All three species are cultivated at home.
Variety selection
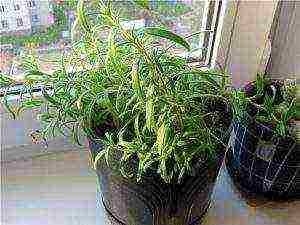
 Low-growing, compact varieties (they are the most persistent and unpretentious) will be ideal for growing peppers on a windowsill. The height of such plants reaches no more than 50 cm. They will perfectly fit into the dimensions of your window. The most popular are:
- Watercolor.
- Martin.
- Treasure Island.
- Dwarf.
- The firstborn of Siberia.
- Gift from Moldova.
These varieties are distinguished by high yields, so they will delight you with their fruits all year round.
Of the hot types of pepper, Astrakhan A-60 and 147, Elephant trunk, Flame are suitable. Suitable for growing on a windowsill and chili. Due to the varied shape and bright color of the pods, it is widely used as an ornamental plant. It turns out that the benefits of it are twofold - it is an excellent seasoning and decoration of the windowsill.
Seed preparation and choice of container for planting
To protect future plants from infections, the planting material must be disinfected. To do this, place it in a 2% manganese solution for 20 minutes. Then rinse the seeds under cool running water.
To improve their germination, soak the seeds in nutrient solutions of Zircon or Epin (growth biostimulants). In the first case, dilute 1 drop of the drug in 300 ml of water, and in the second - 2 drops per 100 ml of water. Soak the seed in the nutrient fluid overnight at room temperature. Then wrap in damp gauze and store in a dark, warm place (at a temperature of +20 ° to +25 ° C) for three days. Dampen the fabric with water from time to time to keep it from drying out. When the seeds hatch, transfer them to the windowsill.
To successfully grow pepper on a windowsill, you need to prepare a suitable container in advance. These can be containers, pots, or wooden boxes. Each plant needs a separate sufficiently wide and deep container (so that the rhizome is spacious and comfortable).
When to sow pepper
You can start planting seeds in the last days of February - early March. When choosing a day for this event, be guided by the weather forecast. If it is warm and sunny a week after sowing, the pepper can slow down its growth. In this case, it is better to keep the planting on the north window for a while. Also, during winter planting, it is required to ensure that the duration of daylight hours is at least 12 hours daily. Therefore, purchase special lighting devices in advance (LED and fluorescent lamps, phytolamps, fluorescent lamps). Choose fluorescent lamps with a normal white spectrum.
Solanaceous crops also germinate well when sown in the last decade of July or in early September. Again, keep a close eye on the weather forecast (so that the pepper planting does not fall on too warm days).
Soil preparation and sowing seeds
For this culture, it is better to use a ready-made soil mixture. It does not contain harmful microorganisms and is enriched with essential trace elements. If you decide to use ordinary garden soil, calcine it first with a saturated manganese solution, and then pour abundantly with warm water. You can also prepare a soil mixture from two parts of sod land, one part of sifted river sand and the same amount of humus. Sod land is best taken from the place where meadow clover grows.
Be sure to add ash to any substrate (for every 10 kg of earth, 2 glasses of ash). Since pepper is extremely sensitive to the level of acidity and the content of salts in the soil, add lime or dolomite flour (16 g of substance per 1 kg of soil).
It is also effective to use special hydrogels that are created for home gardening. Mixing with the soil mixture, this polymer absorbs excess liquid and swells. As a result, it makes the soil looser and more breathable, while preserving its nutrients.
We start sowing seeds. Fill peat pots or another container of your choice with fertile soil. Do not forget about the drainage layer (expanded clay, fine gravel or broken pieces of red brick will do). Make small holes and dip two seeds into them. Fill with earth on top, pour and cover with transparent cling film. This is necessary to create a greenhouse effect. Place the containers in a warm place (the optimum temperature for seed germination is + 25 ° C). If you have grown peppers before, you can dig in peat cups under mature, fruiting plants.
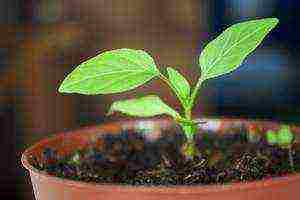
To wait for the first shoots, you need to be patient. The peppers germinate in about 1 to 2 weeks (depending on the variety). If seedlings do not appear on the surface of the soil, increase the length of daylight hours (extend the artificial light from 7 am to 9 pm).
After the sprouts appear, pierce the polyethylene with a knitting needle in several places. When the seedlings begin to grow actively and acquire two or three leaves, remove the covering material.
Seedling picking
 As soon as the seedlings get stronger, start picking (transplanting) young sprouts into a large pot. At the same time, remove weaker plants, and shorten the roots of the remaining ones. So they will grow and branch faster, they will become stronger, they will better braid with an earthen ball. The dive process is carried out as follows:
- pour the soil in the container where you will transplant the seedlings with plenty of water a day;
- make a small indentation in the new pot (in the center of the container);
- an hour or two before the upcoming pick, thoroughly moisten the soil around the sprout;
- carefully remove it without breaking the earthen lump;
- shorten the spine by 1/3;
- place it in the prepared hole so that the central root does not bend, and the leaves rise 2 cm above the ground level;
- compact the soil around the seedling with your fingers;
- water the transplanted plant with warm water (settled tap water or collected rainwater).
In order for the pepper to grow prolific and large, it must be dived and grown in large ceramic bowls or capacious buckets.
Before diving, accustom young seedlings to more severe conditions (take them out into fresh air, gradually increasing the "hardening" time). However, make sure that the plants do not get caught in drafts. The influence of low temperatures (less than +13 ° С) is detrimental to them.
Pepper care on the windowsill
Watering. Moisten the soil as needed. For this purpose, use warm water, the temperature of which is about +30 ° C.Give the pepper a daily extra spraying with a spray bottle. To prevent the plant from overheating during the winter heating period, cover the battery with a damp cloth. Remember to loosen the soil constantly.
Lighting. In addition to artificial lighting, periodically turn the pepper in different directions to the window. Avoid direct exposure to ultraviolet rays.
Temperature. Provide plants with optimal temperature conditions. During the day, the indicators should be +25 ° - + 27 ° С, and at night +10 ° - +15 ° С. In winter, move containers to south-facing windows, and in summer, keep them on the balcony. Beware of sudden changes in temperature.
Top dressing. Caring for peppers on the windowsill also includes regular feeding. Fertilize this crop once every two weeks (immediately after watering). For this, nitrogen fertilizers for indoor flowers are suitable. You can make your own nutrient solution - mix 6 tablespoons of ash and 3 liters of water. Decoctions from clover, plantain, nettle have a good effect.
During the active growing season, pepper may suffer from mineral deficiencies. To prevent this, monitor the condition of its leaves and use fertilizers with a suitable composition in a timely manner:
- If the deciduous crown becomes marbled, the plant lacks magnesium. Add magnesium in sulfate form to the soil.
- If the leaves curl, and a dry edge forms around the edges, the pepper lacks potassium. Add potassium nitrate or potassium sulfate to the top dressing.
- If the lower part of the leaves turns purple, they begin to press against the trunk - there is little phosphorus. Use 16-18% phosphoric acid.
- The matte color of the leaves with a grayish tinge indicates a nitrogen deficiency. In this case, ammonium nitrate will help, which contains about 35% nitrogen.
It is strictly forbidden to use potassium chloride and potassium salt - their composition with an excess of chlorine can destroy the roots of the plant. But an excess of nitrogen is not terrible for him.
Most of the domestic crop varieties are self-pollinating. However, sweet species can be cross-pollinated with peninsular and spicy ones, as a result of which the harvest will be bitter. Therefore, try to keep such plants (for example, bell peppers and chili peppers) on the windowsill at a distance from each other.
 When the first fruits are formed, do not overload the bush - leave no more than 4-5 pieces on it. Harvest ripe vegetables multiple times, once a week, carefully slicing them off with a knife. First, hook it around the stalk, and only then remove the seed-bearing. The fruits are harvested both in biological and technical ripeness. This significantly increases yields (due to a decrease in the number of ovaries and the cost of nutrients for their development).
If you want to collect your own planting material, devote the next 4 days to drying the fruits at a temperature of +25 ° to + 30 ° C. Then cut open the seed plant and select the seeds. Store them in a paper envelope in a dark and warm place. The seeds have a shelf life of 5 years.
Peppers should be replanted once a year. To give a rich harvest, he needs new, fresh soil (after all, he has already taken everything useful from the old one). Transplant the plant carefully, without injuring the rhizome with an earthy clod. After two years, the plant itself needs to be replaced. Pepper is a two-year crop and will readily pass the baton to young and strong relatives.
As you can see, growing sweet and bitter peppers on a windowsill is quite troublesome. However, subject to the rules and recommendations described in the article, even a beginner can cope with this task.
Rate this article:
(voted:
, rating:
out of 5)
♦ Heading: Vegetable garden on the windowsill.
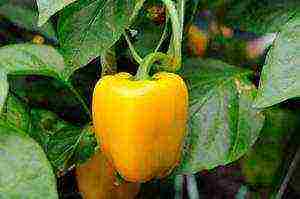
Bell pepper is a favorite vegetable of many. Why? The answer is simple. It earned such popularity with its elastic bright tasty fruits.The vegetable will perfectly fill the body with vitamins during periods of avitaminosis and autumn melancholy, give a special taste to salads and decorate any dish.
You can eat sweet bell peppers all year round, you don't have to wait for summer. Growing culture on a windowsill in your own apartment is pretty easy. The main thing is to follow all the care recommendations. Then even the pests of the vegetable are not scary.
Variety selection
It is best to grow low-growing varieties of bell peppers at home. Firstly, such plants are unpretentious to environmental conditions, and secondly, their short growth is ideal for the size of the window. Tall varieties grow poorly in an apartment.
Some of the best varieties for growing on a windowsill:
- Treasure Island. The first crop can be harvested 100 days after planting. The fruits of the variety are juicy, orange-red in color. They are heart-shaped.
- The firstborn of Siberia. The fruits of the variety can be tasted 113 days after planting. The fruits are red, large and juicy.
- Dwarf. The vegetable has conical red fruits. They appear 110 days after planting the variety.
- Watercolor. The scarlet conical fruits of the variety give off gloss and have a thin peel. Vegetables are small, you can eat them whole.
- Gift from Moldova. Dark red large fruits have a rich, sweet taste. They appear 4 months after disembarkation.
- Martin. A variety with juicy, aromatic red fruits. They are of medium weight and thick walls.
All of these varieties have high yields. Their fruits can be enjoyed all year round..
Growing seedlings
Growing bell peppers takes some effort. Before planting, it is necessary to prepare several containers, because the seedlings, first of all, need a "home". The containers should be wide enough so that the underground part of the plant is free and comfortable. Drainage must be added to each container (pieces of red brick, gravel).
You can plant bell pepper seeds at different periods:
- End of February - beginning of March. Planting seeds during this period will be successful, given the weather conditions. Warm weather a few days after sowing will slow down the growth of the vegetable. During this period, it is better for the plant to be on the window on the north side.
- In winter. Planting a vegetable in the winter months will only be successful in the case of a 12-hour daylight. Therefore, the seedlings need additional lighting, including artificial.
- End of July or beginning of September. During this period, the seeds germinate well. Only too hot days can become a hindrance.
In small containers of peat and humus, filled with fertile soil, it is necessary to plant a couple of seeds. After that, you need to water the ground abundantly and cover the containers with cling film. The pots should be kept in a warm place (from 25 ⁰C). The pots can be dug under mature plants if you already have experience with growing peppers at home.
The appearance of the first shoots occurs a couple of weeks after planting the seeds. If this process is delayed, you can lengthen the daylight hours up to 14 hours using additional light sources.
As soon as the first shoots appear, they will need more air. Therefore, small holes should be made in the film with a thin sharp object. When the first leaves appear, the film can be removed from the containers. Strong, powerful shoots are transplanted into large pots during this period. Weak plants are eliminated.
Video "Planting sweet pepper seeds for seedlings"
In this video, you will see what the process of planting seeds for seedlings looks like using special peat tablets.
Disembarkation
Red bell pepper, or rather its sprouts, need a dive transplant. Why? When the root of the plant is shortened, it begins to actively branch. Subsequently, the root with shoots becomes stronger, actively holding the ground. Bell peppers produce more fruit as a result.
To care for a vegetable correctly, you need to know how to make a pick. This procedure is pretty straightforward:
- The soil into which it is planned to transplant the seedlings must be watered abundantly in advance (24 hours in advance).
- Before diving, you need to make a depression in the center in the soil.
- A couple of hours before the procedure, you need to water the soil well around the sprout.
- Next, you need to take a sprout and raise it with the ground, and then shake it off of the rest of the soil.
- A third of the root should be removed (pinched with nails).
- The sprout must be placed in a prepared hole. In this case, the main root should be straight, and the leaves should be 2 cm above the soil.
- Around the planted sprout, you need to compact the soil with your fingers.
- Pour warm water over the seedling.
Before carrying out the diving procedure, it is necessary to harden the seedlings, accustoming them to harsh weather conditions. For this, the plant should be taken out into the air, gradually increasing its residence time there. Thanks to this procedure, the plant is strengthened, and pests are practically not afraid of it.
In this case, it is imperative to ensure that the small green bell pepper does not fall under drafts, because the low temperature has a bad effect on the vegetable.
Care
Caring for bell peppers is pretty simple. Pests rarely attack indoor plants. The main thing is to adhere to all recommendations: watering, correct temperature and light conditions, and the fight against parasites.
Bulgarian pepper requires watering only as needed. You need to saturate the window vegetable with warm water. It is also worth carrying out daily spraying of the plant. To avoid overheating in winter, cover the battery with a wet cloth. Be sure to loosen the soil.
Even in the cold season, the plant needs 12 hours of daylight. Therefore, it must be turned towards the light on different sides and use artificial fluorescent lamps.
Under no circumstances should direct sunlight be allowed on the plant!
In the warm season, this crop should be grown on the balcony, and in the winter - on the windowsills of the south side. Drafts and sudden changes in temperature are dangerous for the plant, so they should not be allowed.
Why do plants sometimes turn yellow and their leaves fall off?
Seedlings require periodic feeding. It is best to fertilize it after watering it with nitrogen fertilizers for home flowers. You can also fertilize with a solution of nettle, clover or other herbs. The plant does not tolerate a lack of nutrients.
How to grow bell peppers? Leaves are the main indicator of plant health. When signs of disease appear, you need to take suitable feeding:
- If the leaves curl, their edges turn yellow, and then fall off - this is a sure sign of a lack of potassium.
- The leaves have a matte color and become small - the plant requires nitrogen.
- Below the leaves are purple and they stretch upwards - the plants need to be saturated with phosphorus.
- Leaves become marbled - magnesium is required.
The vegetable does not tolerate excess potassium, and a large amount of nitrogen does not harm the plant at all.
If the leaves turn yellow or fall off, pests may be the cause. Therefore, the fight against them must be established.
Bell pepper diseases are usually caused by pests. Most often, the plant is attacked by aphids, Colorado potato beetle, spider mites, slugs, rootworm nematode. These pests either eat the leaves or negatively affect them. As a result, the leaves curl, or turn yellow, or fall off. That is, pests have a bad effect on plants and can lead to their death or a sharp reduction in crop volumes. To combat them, you need to spray the green parts of the plant with special solutions: chemical or of our own production.
Secrets of Successful Growing
Planting and growing vegetables should be carried out in large containers. Only then will the plant be large and give a good harvest.
Most varieties, including yellow peppers, can be pollinated and re-pollinated. Therefore, the best planting of vegetables is at a distance from each other.
When the first fruits appear, you do not need to overload the plant with them. It is worth leaving only 4–5 pieces.
You need to do a pepper transplant once a year. For a good harvest, the plant needs fresh, renewed soil.
You need to carefully transplant the vegetable. Why? In order not to injure the root. Otherwise, the culture may die.
After two years of plant life, it needs to be changed. Why? Because pepper is a biennial plant.
You can grow bell peppers on your windowsill. Why is it most often grown on the window? Because it is the most suitable plant for indoor care. Pests rarely attack indoor peppers, and it's easy to neutralize them. And the vegetable harvest can be harvested all year round.
Video "10 mistakes in growing sweet peppers"
Use the tips in this video to grow good crop seedlings in your home.
Hello dear readers!
So, dear friends, after reading the previous articles, you are probably thinking about planting lemon, dill, parsley or cilantro at home. Maybe some of you have already planted these plants? Then let's talk about the next inhabitant of our windowsill - sweet pepper.
Sweet pepper is very beautiful for its tight fruits, bright, tasty, filled with vitamins. It is him that we lack so much on rainy autumn days, and on harsh winter weekdays, and during the period of spring beriberi.
Do you want to admire the pepper and eat it all year round? In this case, feel free to start landing. pepper on his windowsill, as these plants are ideal for home care and cultivation.
Best grade pepper on the windowsill
Compact, undersized varieties of pepper (they are the most unpretentious and persistent) will be ideal for planting at home. The growth of this plant will reach half a meter and it will perfectly fit into the size of your window. The best varieties:
- Treasure Island. After 90-100 days, the pepper will invite you to taste its juicy orange-red heart-shaped fruits. Their mass reaches up to 60 grams, the thickness of the peel is up to 7 mm.
- The firstborn of Siberia. The crop ripens in 108-113 days from the moment of germination. The fruits are large, up to 100 g (peel thickness up to 6 mm). Bright red in color, these peppers are aromatic and tasty.
- Dwarf. Pepper variety with juicy, red fleshy cone-shaped fruits. Their weight reaches up to 83 grams (walls up to 9 mm). You can harvest the crop after 110 days from the time the sprouts appear.
- Watercolor. Glossy scarlet cone peppers will be ready for your table in 110 days. This pepper on the windowsill has small fruits, "for one bite", their weight reaches 30 grams, with a thin peel up to 2.5 mm.
- Gift from Moldova. Large peppers of a dark red color will delight you with a rich, sweet taste after 124-136 days. The weight of the fruit reaches 90 grams, the thickness of the peel is up to 6 mm.
- Martin. A fragrant variety, the red juicy fruits of which can be used to decorate the table after 130 days. Fruits are large up to 84 grams with thick (up to 5 mm) walls.
These varieties of pepper are distinguished by high yields, they will delight you with their attractive fruits all year round.
Seed preparation
To rid future plants of infections, the seeds should be kept for 20 minutes in a 2% solution of potassium permanganate, then rinsed with cool water. And soak in nutrient solutions of epin or zircon (growth biostimulants):
- Epin. Take 2 drops for 100 ml of water.
- Zircon. Add 1 drop to 300 ml of water.
In the healing solution, the seeds should be kept for about a day at room temperature. Then place them in damp gauze and place them in a dark, warm place.
Keep the pepper seeds there for 3 days at a temperature of + 20 ° C to + 25 ° C. Periodically moisten the cloth with warm water (it must not be allowed to dry out).
As soon as the seeds hatch, you can transfer pepper on the windowsill.
Getting started landing
We need to prepare several containers in advance for growing pepper... Each pepper needs its own house, a separate wide and deep enough pot (so that the rhizome of the plant is spacious and comfortable).
Do not forget about the drainage layer (fine gravel, expanded clay or broken small pieces of red brick will do).
You can plant seeds at one of the most convenient periods for you:
- The last days of February are the beginning of March. It is necessary to find the most suitable time for landing (be guided by the weather forecast). If, a week after planting the seeds, nature decides to pamper us with very warm, sunny weather, the pepper can slow down its growth. In this case, at the beginning of its growth, it is better to keep the pepper at home on the northern window for a while.
- Winter months. When planting seeds in winter, it is necessary to ensure that the daylight hours are 12 hours daily. In addition, light the pepper with fluorescent lamps.
- The plant germinates well when planting seeds in late July or early September. Again, keep an eye on the weather forecast (so there are no too warm days ahead).
Preparing the soil
For peppers, it is better to purchase ready-made soil ("Terra-Vita" or "Ogorodnik"). This soil is already enriched with essential microelements and does not contain harmful microorganisms.
If you decide to use ordinary garden soil, ignite it first with a saturated solution of potassium permanganate, then pour it over with water. Or prepare an enriched soil:
- Sod land 2 parts
- Humus 1 part
- Clean, sifted sand 1 part
Sod land is best taken from the place where meadow clover grows. Ash must be added to any soil (2 glasses of ash for every 10 kg of soil). Peppers are extremely sensitive to soil salt and acidity levels. Add dolomite flour or lime to the soil (take 16 grams of the substance for 1 kg of soil).
You can use special hydrogels. They are made for home gardening. When hydrogels mix with the soil, they swell, absorb excess water and simultaneously loosen the soil, retaining nutrients.
Planting seeds
To wait for the first shoots of pepper on the windowsill, you need to be patient. Peppers germinate after 1-2 weeks.
If the plant stubbornly does not want to germinate, increase the length of daylight hours (extend additional lighting from 7 am to 9 pm).
- Plant two seeds in small peat pots (pre-filled with loose, fertile soil). Pour and cover the pots with cling film. Put them in a warm place at a temperature of + 25 ° C. The pots can be buried under adult, fruiting peppers in a lighted place (if you have already grown peppers before).
- After the first, tender sprouts appear, pierce the film with a knitting needle in several different places. When the peppers start growing confidently and acquire the first two or three leaves, the film can be removed. And start transplanting (picking) one young sprout into a large pot. We remove the weaker plant.
Picking. Transplanting seedlings into a more spacious dwelling (with root shortening). The shortened root begins to branch out and develop more violently.
The rhizome after the pick becomes stronger, wraps around and holds the earthen ball better, and the homemade pepper itself on the windowsill brings more harvest. Dive process:
- fill the soil in the pot where you will transplant the pepper with plenty of water a day;
- before diving, make a depression in the center of the pot in the new ground;
- moisten the soil around the sprout abundantly an hour or two before the operation;
- gently take it and lift it together with an earthen lump, shake it off the ground;
- very carefully shorten the root by about 1/3 (you can pluck it with your nails);
- gently place it in the prepared hole in a new pot so that the central root does not bend, and the leaves are 2 cm above the soil level;
- compact the soil around the seedling with your fingers;
- pour warm water over the transplanted pepper.
In order for the pepper to grow large, fertile, it must be transplanted and grown in small capacious buckets or large ceramic bowls.
Before diving, gradually accustom the young sprout to more severe conditions (gradually take it out into fresh air, increasing the walking time).
But make sure that the small pepper does not fall under drafts and the effect of a low, destructive temperature for it (below + 13 ° C).
Taking care of our pepper
| Operation | Pepper desires | Tips |
| Watering | As needed | Pepper on the windowsill should be watered with settled warm water (water temperature + 30 ° C). Sprinkle the pepper with warm water daily. To prevent the plant from overheating during the winter heating season, cover the battery with a damp cloth. Remember to loosen the soil constantly. |
| Lighting | In winter, daylight hours should be 12 hours | Periodically turn the plant with different sides to the window. Fluorescent lamps will work with the usual white spectrum. Avoid direct sunlight. |
| Temperature | Day + 25 ° - + 27 ° С Night +10 ° - + 15 ° С | In the summer, it is good to keep the pepper on the balcony, in the winter, transfer it to the windows in the south. Beware of drafts and sudden temperature fluctuations. |
| Top dressing | Fertilize once every two weeks after watering | You can feed the peppers on the windowsill with purchased nitrogen fertilizers for indoor flowers. Or make a nutrient solution (3 liters of water and 6 tablespoons of ash). As a top dressing, you can prepare decoctions of nettle, plantain, clover. This is very beneficial for peppers. |
The plant may suffer from a lack of minerals. How to grow peppers in the most favorable conditions? Just monitor the condition of its leaves and apply the necessary fertilizer with a suitable composition in a timely manner:
- the leaves curl, a dry edge appears at the edges - a lack of potassium (add potassium sulfate or potassium nitrate);
- the matte color of the leaves with a grayish tint, the foliage begins to shrink - there is not enough nitrogen (ammonium nitrate, which contains 35% nitrogen, will help);
- the lower part of the leaves acquires a purple color, and the leaves themselves begin to nestle against the trunk and stretch up - there is little phosphorus (phosphoric acid is needed 16-18% percent);
- the deciduous crown acquires a marble color - the pepper on the windowsill lacks magnesium in the diet (magnesium in sulfate form is needed).
You can not use potassium salt, potassium chloride (their composition with an excess of chlorine is harmful to the roots of the pepper). But the excess nitrogen is not terrible for pepper.
We are waiting for the harvest
Most domestic peppers are self-pollinated plants. By the way, they can also be pollinated. Therefore, try to keep different varieties of peppers apart from each other.
When the first fruits appear, do not overload the plant - leave up to 4-5 fruits on it.
Getting our own seeds
For this we select red, ripe fruits. Cut the pepper neatly in the circle of the stalk and very carefully remove the seed-bearing, holding it by the stalk.
We devote the next 4 days to drying the seed crop at a temperature from + 25 ° C to + 30 ° C. And we separate the seeds. Store them in a paper bag in a warm, dark place.
The maximum shelf life of seeds is 5 years.
We transplant the plant
It is necessary to transplant pepper on the windowsill once a year. He wants new, fresh land for a richer harvest (after all, he has already taken everything useful from the old soil). Change the land completely to fresh.
Transplant the plant carefully, being careful not to injure the root system with an earthy clod.
And after two years of the pepper's life, it already needs to be changed. It is a biennial plant and will readily pass the baton to younger, stronger peppers.
I wish you a rich harvest!
See you soon, dear readers!
You can also read on this topic:
Tags: pepper
Culture - sweet pepper
Bell peppers have very good taste and nutritional value, they are also very healthy. Its fruits contain many different useful substances, but fruits are especially rich in vitamin C, which does not disappear even when preserved. What's more, pepper is one of the most loved vegetables all over the world. It is widely used in cooking for preparing salads, decorating various dishes, canning according to various recipes for the winter, and baking on a wire rack. Growing peppers at home, whether in a greenhouse or outdoors, is always more beneficial. After all, when buying beautiful fruits, it is not always possible to find out in what area and in what conditions they were grown, how they were fertilized and treated against pests.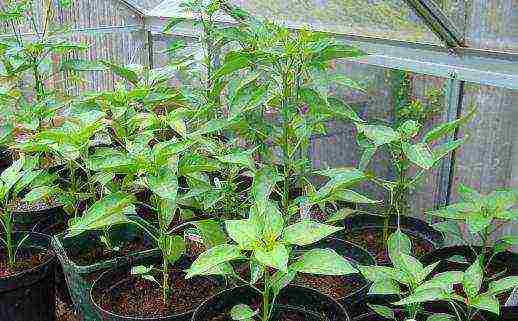
How to grow pepper seedlings
There is nothing difficult in growing seedlings. Growing pepper in a greenhouse or on a loggia is possible throughout the year. In order for plant care not to turn into a complicated and tedious procedure, when buying seeds, you must carefully read the characteristics of this variety. There are species that require the cultivation of sweet peppers in a greenhouse, while others only in the open field. Some varieties are early ripening, and some are late, and each of them needs its own care conditions. After purchasing the seeds, your actions are approximately as follows:
- first, you need to disinfect the seeds in a 1% solution of potassium permanganate for about 30 minutes, then rinse thoroughly under running water;
- to accelerate the growth of seedlings, seed treatment with a growth stimulant is necessary;
- if you want to protect your seedlings from fungus, you can treat them with "Immunofit";
- after you have processed the seeds, sow them in separate beds about 0.6-1.2 cm deep;
- pepper should be germinated at a temperature of + 25 ... + 30 ° C. Seedlings will appear on the 4-5th day after sowing;
- then the temperature can be lowered to + 16 ... + 18 ° С for about 7–8 days so that the plant does not stretch up, and then the temperature can be raised again to + 22 ... + 28 ° С.
 Growing pepper in a greenhouse
The greenhouse can be heated or unheated. For greenhouses that need to keep warm from the sun's rays, it is best to use polycarbonate. It is an excellent heat-insulating material, frost-resistant and can be easily cleaned from street dust. And in the presence of heating, polycarbonate is more convenient than plastic wrap or ordinary glass. The soil for seedlings should be loose, with admixtures of peat. Young plants are planted in a greenhouse 45-50 days old, if there is no heating, then on the 70th day of life. The beds on which the seedlings will be planted are best broken using the Mitlizer method. Such cultivation of pepper in a greenhouse will increase its yield and at the same time increase the area of exposure to sunlight. It is necessary to water the bushes at the root, 2-3 times a week. Growing peppers in a greenhouse is also possible during the winter months if artificial heating is available. It is necessary to monitor the internal temperature, and also add lighting so that the plants do not stretch and bear fruit. In winter, it is imperative to feed the pepper with mineral and organic fertilizers.