Content
- 1 How to choose a dill variety?
- 2 Soil preparation
- 3 Selection of containers
- 4 Preparing seeds for planting
- 5 Dill planting technology
- 6 Dill care on the windowsill
- 7 Growing dill on a windowsill in winter
- 8 Growing conditions and varieties
- 9 Seed preparation and planting
- 10 How to grow good dill (video)
- 11 Greenery care and harvesting
- 12 How to sow and grow dill (video)
- 13 Gallery: growing dill (15 photos)
- 14 Documentation
- 15 The best varieties
- 16 Peculiarities
- 17 Dill growing technology
- 18 How to care for dill
- 19 Costs and Benefits

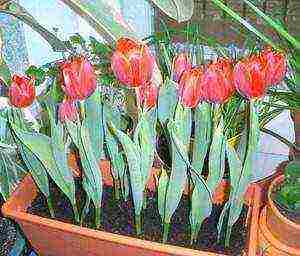
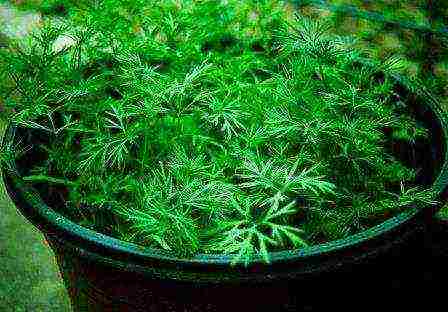
It is convenient when there is always fresh greens at hand - the prepared dishes with it become more aromatic and tastier, so you can often find dill on the windowsill among prudent housewives. At home, this unpretentious plant feels no worse than in the garden, and with good care it gives a lot of lush greenery.
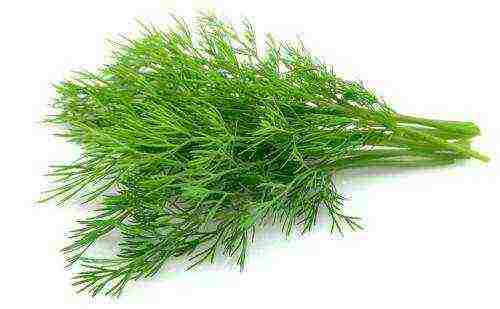
Choosing the right dill variety is the first step to a good harvest
It would seem that even inexperienced gardeners should not have any questions about how to grow dill at home: after all, you just need to sow seeds in a pot with soil and do not forget to water the seedlings, removing the weeds. But in fact, instead of the expected dense thickets of fragrant dill, thin pale blades of grass, practically without aroma, sway sadly in the pot. What's the secret? How to plant dill at home and get greens that are no worse than those that are sold on the market all year round?

For the purpose of growing dill at home, gardeners most often choose the early-ripening variety Gribovsky
To grow dill at home, you will need:
- seeds of a fruitful unpretentious variety of dill;
- soil for indoor plants;
- fertile garden land;
- suitable containers (pots, containers);
- fluorescent lamps;
- complex mineral fertilizers.
Video about growing aromatic dill
For the purpose of growing dill at home, gardeners most often choose the early maturing variety Gribovsky. This variety of dill is not picky about care, resistant to temperature extremes, high yield and disease resistance. Its greenery has a strong aroma. In order for Gribovsky dill to give a good harvest at home, it is enough to sow it in fertile soil and prevent weeds from appearing.
The following varieties are also suitable for growing on a windowsill: early-ripening Grenadier, mid-ripening Richelieu with bluish-green fragrant leaves, late-ripening Kibray with beautiful wide leaves. Gardeners are also cultivated at home and southern varieties, which have a more spicy taste, but are more finicky.

And late bush varieties do not have time to ripen in the beds over the summer.
Since there is no special variety of dill intended for growing on the windowsill, when choosing a seed, the main attention should be paid to the ripening time. It is important not to be mistaken here: although early varieties give green mass in a very short time, they quickly stretch into flower stalks and are worse leafy than late-ripening varieties. And late bush varieties (Gourmet, Salute, Russian size) do not have time to ripen in the beds over the summer, but they are great for growing at home. Such dill on the window forms dense, well-leafy bushes, from the axils of which new shoots are formed.
Instructions on how to grow dill on a windowsill
In the garden, dill can grow on almost any soil, but successful cultivation of dill at home is possible only in a fertile soil mixture, which must be prepared in advance.To do this, in the fall, you should prepare loose garden soil and mix it before sowing with purchased neutral soil for indoor plants. Select a container for crops of a sufficient size so that the dill is not cramped, and do not forget about the drainage layer at the bottom of the container.
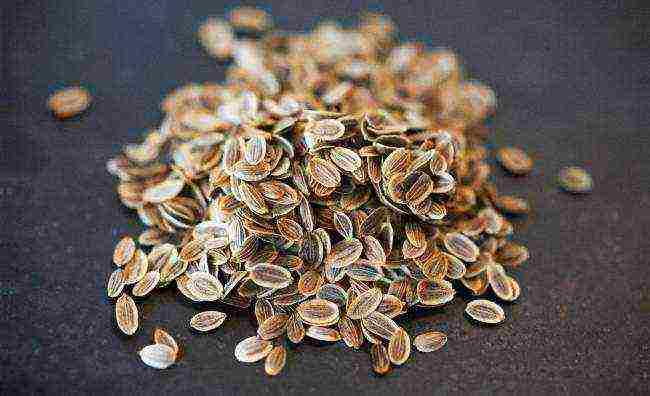
Since dill seeds germinate for a long time due to the high oil content, they must be soaked for 20 hours before sowing in warm water through which oxygen is continuously passing (for example, using a compressor from an aquarium). Another option is to simply place the seeds in warm water for two days and change it to fresh water every six hours.

For best results, you can make grooves a centimeter deep in the ground, spill them with water and lay the prepared seeds on the bottom.
Seeds can be sown directly on the surface of the moistened soil, without grooves and pits, sprinkling with peat mixed with humus on top. Sufficient seeding rate - 0.3 g per 1 square decimeter of soil. For best results, you can make a centimeter deep groove in the ground, spill them with water and place the prepared seeds on the bottom. From above, dill seeds are sprinkled with dry earth from the edges of the grooves, so that a dense crust does not form on the soil surface, which prevents the emergence of seedlings. Cover the container with crops with cellophane and put it in a dark place with a temperature of about +20 degrees for a week.
After cutting, the stems and leaves of dill do not regrow: in order to continuously cut fresh greens, sow seeds on the vacating area of your micro-garden every three weeks.
Growing dill on the windowsill - the secrets of success
Growing dill at home, first of all, you need to remember that this plant is very fond of light. Place the crops on a light windowsill, and in winter, provide additional lighting for the dill by installing fluorescent lamps at a height of 50 cm above the plants. On the windowsill, it is enough to turn on the lamps in the morning for about five hours, but if the boxes with dill are in the back of the room, the supplementary lighting should last at least fifteen hours.
Video about growing dill on a windowsill
Dill care rules at home:
- dill must be watered regularly, especially paying attention to watering during seed germination and when young shoots appear;
- once every two weeks, it is recommended to feed the plantings with complex mineral fertilizer;
- it is best to grow dill at a temperature of +18 degrees, but on a glazed balcony when the temperature drops to +8 degrees, the plants will feel quite comfortable;
- if the temperature in the room is higher than +20 degrees, you need to increase the illumination, otherwise the dill bushes will turn out to be elongated, sluggish and light;
- in the first week, as the shoots seem to appear, it is advisable to lower the temperature in the room at night by opening the window, or to carry out the crops to the glazed balcony so that the dill does not stretch out.

The dill needs to be watered regularly, especially paying attention to watering during seed germination
Growing at home can be more or less hassle depending on what time of year you plant the dill. The easiest way to grow dill on a window is from March to August, since planting without additional lighting forms lush greenery, provided there is fertile land and a light windowsill. In the autumn-winter period, without additional illumination, the plants will stretch and fall, which means that you will have to pay more attention to them, and the costs of growing will increase due to the consumed electricity.
Rate the article:
(19 votes, average: 4.2 out of 5)
It is very convenient to grow fresh greens on the windowsill: the dishes cooked with them become tastier and more aromatic. Dill is often used in salads and seasonings, which is useful in summer and winter.Dill greens are rich in vitamins, trace elements, essential oils that help to heal the body.
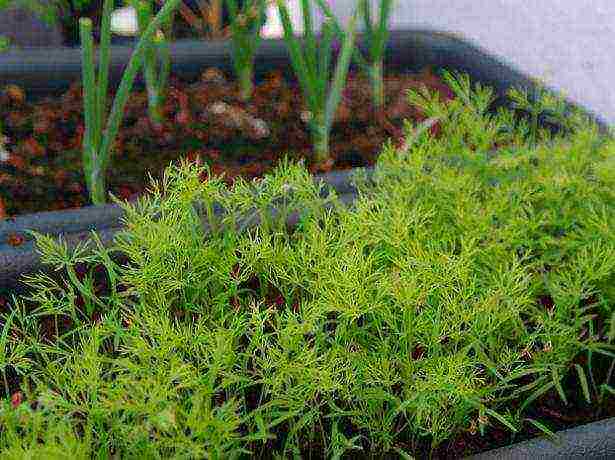
This unpretentious plant grows beautifully on a balcony or windowsill all year round. Growing dill from seeds on a windowsill is a fairly simple process. The main thing is to provide the plants with light and water. Green fluffy dill bushes will delight your eye all year round.
How to choose a dill variety?
At first glance, it is not difficult to grow dill at home: it is enough to sow seeds in any container with soil, water the seedlings and remove weeds as necessary. But in fact, in a pot, instead of thickets of green fragrant dill, pale thin blades of grass often sway alone with little or no aroma.
The secret to getting a good harvest is in choosing the right type of dill. Experienced gardeners at home most often opt for the early ripening variety Gribovsky.
They are attracted by undemanding care, high productivity, resistance to diseases and temperature fluctuations. The cheerful greens of Gribovsky dill with a strong aroma will show off on the windowsill within 1-1.5 months after planting in the ground. To get a good harvest of this variety at home, there is enough fertile land and weed control.
Other varieties are grown on the windowsill: Grenadier (early ripening), Richelieu (mid-ripening with fragrant bluish-green leaves), Kibray (late ripening with wide beautiful leaves). At home, gardeners also cultivate southern varieties with a more spicy taste, which are more finicky.
Late-ripening varieties have their own advantages: they bush more strongly, produce more greenery. They ripen longer, greens grow for a longer time. There will be even more greenery if you sow the seeds of bushy varieties. Its abundance will look great on a windowsill or balcony. Growing dill on a windowsill has not only a utilitarian, but also a decorative function: it perfectly decorates the interior.
There is no special variety of dill intended for growing on the windowsill. When choosing a seed, you should focus on the ripening time.
It is important not to make a mistake here: although the early varieties give green mass very quickly, they are worse leafy and quickly stretch into flower stalks than late-ripening ones. Late varieties of the bush type (Salut, Gourmet, Russian size) do not have time to ripen in the beds over the summer, but they are perfect for growing at home.
On the window, such dill forms well-leafy dense bushes with new shoots emerging from the sinuses. For growing at home, late varieties are ideal.
Soil preparation
In a vegetable garden, dill grows on almost any soil. It is possible to successfully grow it at home only in a fertile soil mixture, which must be prepared in advance.
To do this, in the fall, prepare loose garden soil and mix it with purchased neutral soil intended for indoor plants before sowing. For sowing, it is recommended to select a container of sufficient size so that the dill is not constrained, and do not forget to make a drainage layer at the bottom of the container.
Dill seeds take a long time to germinate due to their high oil content. Before sowing, they must be soaked for 20 hours in warm water, through which oxygen is passed with the help of an aquarium compressor. A more affordable option is to place the seeds in warm water for two days and change it to fresh water every 6 hours.
Selection of containers
For growing dill, you can use wooden or plastic boxes or ordinary flower pots with a volume of 1-2 liters. To ensure the drainage of excess water, holes must be made in them. A drainage layer of any small pebbles, broken brick, expanded clay or pebbles is placed on the bottom of the containers.
After sprinkling it with sand, soil is poured on top. It should be nutritious and neutral.You can mix garden soil with peat and compost, or buy a ready-made special compound.
Preparing seeds for planting
Before sowing dill, you should prepare the seeds. They are soaked in warm water for at least 8 hours, and the water is changed several times. Some growers recommend soaking the seeds even for 24 hours.
After that, dill seeds are soaked for another 3-5 hours for disinfection in a 0.5% solution of pale pink potassium permanganate. The prepared swollen seeds are dried before planting by spreading them on fabrics. Those that did not sink to the bottom during soaking can be thrown away immediately: nothing will grow out of them.
Dill planting technology
Dill seeds can be sown directly on moist soil without making holes or grooves. From above they are sprinkled with peat mixed with humus. For one square decimeter of soil, it is enough to sow 0.3 grams of seeds.
To provide future plants with conditions for comfortable growth, it is recommended to leave a few centimeters between seedlings. The grown plants will not shade each other.
To get the best result, you can make grooves 1 centimeter deep in the ground, spill them with water and place the prepared seeds on the bottom. From above they are sprinkled with dry earth from the edges of the grooves so that a dense crust that prevents the emergence of seedlings does not form on the surface of the soil.
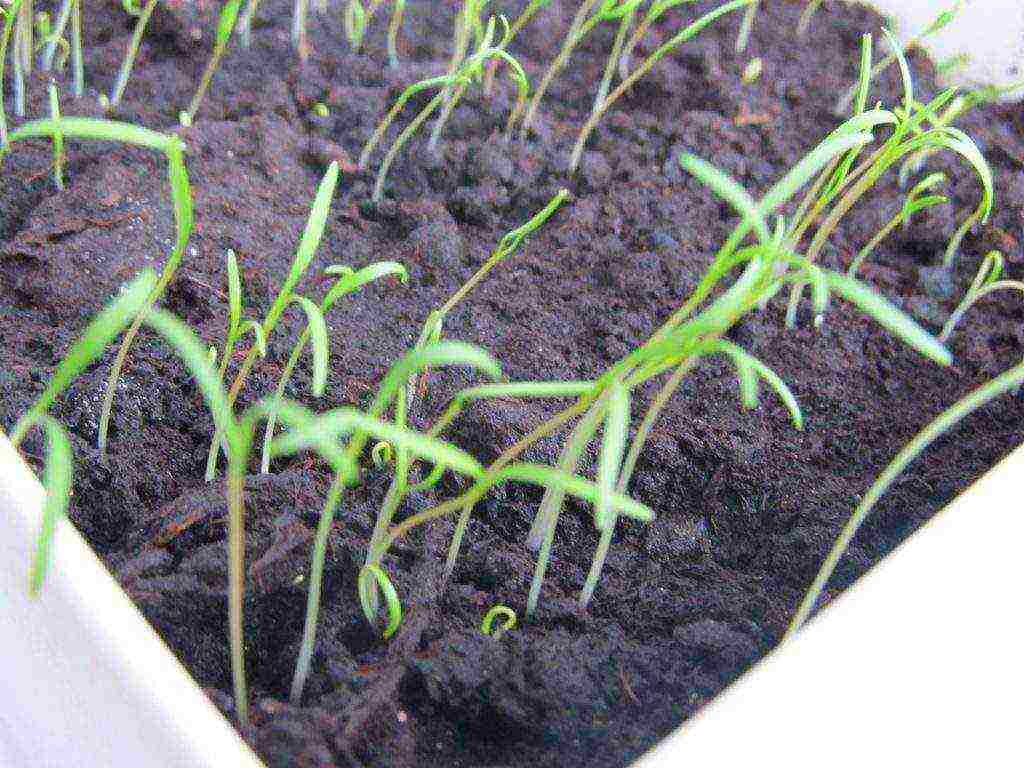
It is recommended to cover the container with crops with cellophane wrap and remove for a week in a dark place with a temperature of about 20 ° C. The first shoots will begin to appear in a week. In 10-12 days, all the seedlings will crawl out of the ground.
Dill care on the windowsill

Basically, caring for dill grown on a windowsill or balcony consists in the timely removal of weeds, watering and spraying.
Temperature and humidity
It is best to grow dill at a temperature of + 18 ° C, but even when the temperature drops to + 8 ° C, for example, on a glassed-in balcony, the plants will feel quite comfortable. If the temperature in the room is above + 20 ° C, it is necessary to increase the illumination so that the dill bushes do not turn out to be light, elongated and lethargic.
In order for the plants to gain strength, and not stretch up, in the first week after the emergence of seedlings at night, it is advisable to lower the temperature in the room by opening the window. To prevent the dill from stretching, you can take out crops to the glazed balcony. Excessive dryness or high humidity have a detrimental effect on dill.
After cutting, the leaves and stems of dill do not grow back. To cut fresh greens continuously, it is recommended to sow seeds on the vacated area of your micro-town every 3 weeks.
Lighting
When growing dill at home, do not forget that this plant is very light-loving. From March to August, it is easiest to grow it on a window: on a light windowsill in fertile soil, plantings form lush greenery and without additional lighting.
Plants grown in the autumn-winter period will stretch and fall without additional illumination. Due to the consumed electricity, the costs of cultivation will increase. During this period, planting will have to pay more attention.
Watering
Dill needs regular watering, which should be given special attention during seed germination and the emergence of young shoots. For irrigation, use clean, settled water.
In moist soil, dill grows well, but there should not be too much water: this will lead to mold on the soil. It is advisable to spray greens in a dry room more often. It is recommended to turn the pots 180 degrees daily so that the dill grows beautifully and does not stretch too much.
Top dressing
Planting once every 2-3 weeks should be fed with a complex mineral fertilizer. Some owners simply practice periodically adding vermicompost. If the dill was sown in fertilized fertile soil, feeding will not be required immediately, but after massive re-planting.
Growing dill on a windowsill in winter
Not every greenery can grow well indoors. Some plants prefer colder months and may even flower at home. Dill loves cool weather, so it's relatively easy to grow it at home. On the windowsill, you can sow it from mid-autumn to early spring.
This process does not require special skills and efforts. Dill sprouts quickly, its leaves are ready for harvest within 6-8 weeks. Do not just forget that in winter, greens must be regularly watered and additionally illuminated.
Excessive dryness or high humidity has a detrimental effect on dill. Powdery mildew affects greens at high humidity. Normally, the air humidity should be in the range of 40-50%. If the windows are cold to the touch, the foliage of the plants can freeze, the greenery can die.
An excess of fertilizer is more negative for dill than a lack of it. At the same time, it should be borne in mind that indoor greenery grows slowly during the winter months. It is not recommended to reduce the amount of fertilizer from mid-October to mid-March. As a top dressing, you can use any liquid fertilizer intended for indoor plants.
After the formation of flower buds, feeding of greens is stopped. Plants can be cut at the base of the stem. After 6-8 weeks, the aromatic greens are ready to harvest. Dill is usually used fresh, so it is harvested periodically to add to dishes.
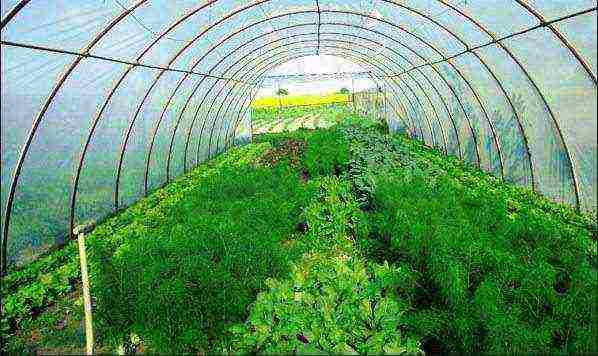
 Not all summer residents know how to grow dill in a greenhouse and in open ground. Meanwhile, many owners of their own plots want to plant such a spice. To harvest a good harvest, you need to know how to grow dill correctly, what kind of soil is best for it and what varieties should be used in the climate of our country.
Growing conditions and varieties
Before growing dill, you should know that such a plant normally tolerates low temperatures and light frosts, since it belongs to cold-resistant crops. Seeds can begin to germinate already at + 3 ° C. But it is important to consider that they require preliminary preparation. Due to it, the concentration of essential oils in the seeds of this plant will decrease. As a result, it will be possible to accelerate their germination.

Having decided to grow dill, you should know that it is one of those plants that need good lighting. Therefore, the planting of the seeds of this plant should not be carried out under branchy trees, next to large shrubs.
When growing dill in the open field or in a greenhouse, it is important to know that a good harvest of greens can be collected only if the soil is easily fertile and not clogged with all kinds of weeds. Dill cultivation is best done in those beds where cucumbers, cabbage and other crops that are fertilized with manure previously grew.
To quickly get a harvest, it is recommended to plant seeds on moisture-consuming soils. It will not be possible to grow this greens on dry soils in large quantities and in a short time. In this case, the stem begins to form earlier in the plants, which reduces the number of individual leaves. As a result, bushes on dry soils are more suitable for obtaining seeds.
It is recommended to prepare the soil for planting, for this it is necessary that the soil is weeded and slightly loosened.Additionally, it is recommended to add ammonium nitrate, superphosphate and potassium chloride to the soil. Planting seeds should be carried out at the rate of 70-80 kg per hectare for light soil and 40-60 kg per hectare for heavy soils.
Growing dill in the greenhouse and in the open field can be carried out using early, common and late-ripening varieties. It is important to take into account that those species that ripen quickly do not differ in the splendor of the bushes, and if you do not harvest on time, then it will lose its presentation. Having decided to plant dill of an early variety, you also need to keep in mind that, unlike conventional types, it will ripen only 10 days earlier.Therefore, if you grow it for yourself, then it is better to stay on traditional varieties. It is also recommended to plant late-maturing species. Then you will have the opportunity to put fresh herbs on the table until September. Late-ripening species are distinguished by an abundance of foliage and weight. They can be sown in late May and early June.

Seed preparation and planting
Agricultural technology provides for the preparation of seeds. It can be produced using bubbling technology. Here you will need to soak the seeds in clean water, which must be constantly saturated with oxygen. For this, many summer residents use a conventional aquarium compressor. The duration of such a procedure should be about 20 hours. It is important to ensure that the water temperature is within + 19 ... + 21 ° С. If during this procedure some of the seeds hatch, then they will need to be planted immediately.
You can also use the classic way. It involves preparing the seed in ordinary water. They are soaked in liquid for 2-3 days. At the same time, it is important to change the water to a new one every 7 hours.
Not everyone knows how to plant dill correctly. It is necessary to moisten the soil before such a procedure. But this should be done only if the disembarkation occurs at the beginning of the season. Some people decide to plant dill before winter. In this case, you can only slightly moisten the grooves of the beds with water. Then the seeds are scattered on the prepared soil and slightly covered with dry earth. The sowing depth should not be too great - no more than 1-2 cm.Do not forget to observe the optimal distance between the beds, which is 20-30 cm.

How to grow good dill (video)
Greenery care and harvesting
When growing dill in a greenhouse or open field, you can start harvesting as early as 30-40 days after planting. After this period, the plants reach 5 cm in height. They already have all the necessary nutritional value. However, you can wait until the bushes reach 15-20 cm in height. It is highly undesirable to delay more with harvesting. The fact is that inflorescences will begin to form on the bushes, and the greens themselves will lose their taste.
When growing dill in the open field or in a greenhouse, do not forget about regular watering. If you do not follow these recommendations, then the greens will turn yellow and wither very quickly.
Top dressing during the period of its cultivation is not required.
Knowing how to properly grow dill can help you harvest a good harvest. At the same time, greens can be collected throughout the season, delighting yourself and your loved ones with fresh spice.
How to sow and grow dill (video)
Gallery: growing dill (15 photos)
Rate the article:
(0 votes, average: 0 out of 5)
In this article, we'll detail how to turn dill growing at home into a profitable business. What seeds to buy and how to properly sow and harvest.
Documentation
To organize the cultivation of dill for greens at home for sale, you need to register an individual entrepreneur and select codes OKVED: 01.13.1. - "Growing vegetables" and 01.1. - "Growing annual crops".
The best varieties
Excellent endurance and performance distinguishes these varieties:
- Gribovsky;
- Further;
- Aurora;
- Lesnogorodsky;
- Bushy;
- Alligator;
- Dill;
- Gourmet.
The most common variety is alligator dill., it ripens early and gives a large harvest. To grow on your plot of 100 square meters, you will need about 200 grams of seeds. The purchase will cost $ 1.5 per sowing.
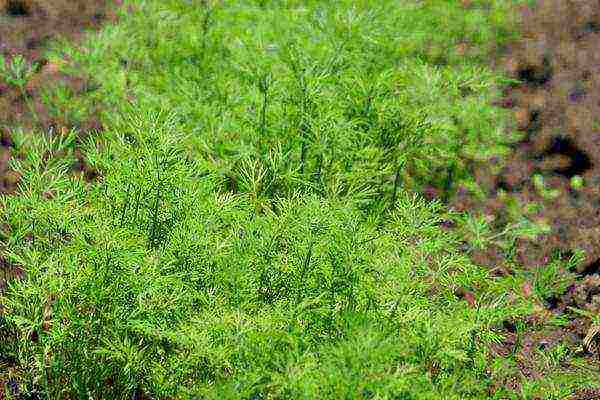
Peculiarities
Growing bush dill does not require special costs and complex care. In work, you should focus on the following features:
- The plant loves light and is resistant to cold and frost (up to -4 degrees). In the apartment, you can organize cultivation on the windowsill throughout the year;
- The soil is needed loose and moist, the culture does not grow well on poor soils;
- The seeds contain an essential oil, which is why the plant sprouts for a long time.Before planting, they must be processed.
Dill growing technology
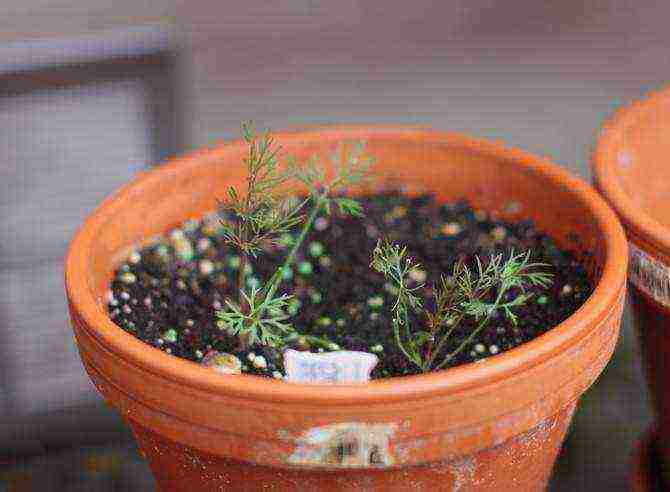
You can grow dill from seeds on the windowsill in your own home; for this, boxes, pots and even plastic bottles are used. They can be placed on the balcony. This method is suitable for growing greens for yourself, it will be too little for sale, and the income will not exceed $ 50-60.
Growing from seeds requires preparation. To speed up germination, the seeds must be allowed to germinate at home and get rid of excess essential oils. We wrap them in cheesecloth moistened with warm water and leave for 4-5 days at a temperature not lower than + 20 ... + 25. The seed is then ready to plant.
Landing in open ground
The ripening time of the culture is 35-45 days, at least two harvests are obtained per season. To get more, start sowing in mid-spring as soon as the snow disappears. Already at a temperature of +3 degrees, the seeds will germinate.
For early sowing, we prepare the beds in the fall. It is necessary to dig them up to a depth of 15-20 cm, add a little humus and mineral fertilizers. In the spring, the soil is leveled and furrows are made 2 cm deep. The distance between the rows is 8-10 cm, per 10 sq. m accounts for about 20 g of seeds. Watering fresh crops is not worth it so that the seeds do not go deeper.
Planting the crop does not stop throughout the season, add new seeds approximately every two weeks to reap the fruits of your labor from June to October.
How to care for dill
Care includes several mandatory measures:
- Loosening once a week;
- One-time feeding with potassium, phosphorus, nitrogen;
- Water twice a day. Do not allow the soil to dry out;
- The optimum temperature is + 15 ... + 20 degrees.
Collection
The first shoots will appear in 20 days, when harvesting, shoots are cut that have reached a height of 10-12 cm. Growing dill in the open field allows you to collect 2-3 kg per square meter. Subject to a three-time harvest per season, we get about 750 kg of greenery from the entire site.
Greens spoil quickly, you need to try to keep the presentation of the product as long as possible. Before cutting, water the beds, place the goods in an impervious container, store at a temperature not exceeding +10 degrees. For storage, you will need to buy 40-50 containers of 15 liters.
Costs and Benefits
The main costs of starting a business and expenses for the season:
- Registration - $ 50-60;
- Seeds - up to $ 5 for three crops;
- Containers (45 pcs.) - $ 190;
- Water - $ 20;
- Fertilizers - $ 30.
All you need is $ 300. The average wholesale price for fresh dill is $ 1-1.2 per kilogram. The revenue for the season will be $ 800-850, and the net profit will be $ 500-550.
In order to grow dill as a business, bring a good income, find reliable distribution channels in advance, otherwise the product will deteriorate in anticipation of buyers.
Related HD videos:
Did you like the article? Share with your friends: