Content
- 1 1 How to grow a crystal from salt - preparation of the tool and material
- 2 2 How to grow a crystal from salt with many facets
- 3 Salt is a member of the crystal family
- 4 Let's talk about how to make a crystal from salt: the necessary consumables and tools
- 5 We continue to work on growing beautiful salt crystals
- 6 Crystals from sea salt: an experience in creating a beautiful exhibit
- 7 The process of creating large salt crystals
- 8 Correcting salt crystals
- 9 Original craft from crystals of table salt
- 10 Solution filtration and crystallization
- 11 How to grow salt crystals at home: materials and equipment
- 12 How to grow salt crystals at home: a sequence of actions
- 13 Precautionary measures
- 14 How to grow salt crystals at home: reasons for failure
- 15 What are crystals
- 16 Security measures
- 17 Basics of action
- 18 Evaporation
- 19 Ready set
- 20 From salt
- 21 Sugar dream
- 22 Vitriol
- 23 Recommendations
- 24 Conclusion
An unusual experiment on growing crystals from salt can be done with children. This process is completely safe, since only salt and water are used and no additional reagents are required. Making such a craft with your own hands is quite simple, but several rules must be taken into account.
1 How to grow a crystal from salt - preparation of the tool and material
Before you start making crafts, prepare the necessary tools and determine the place for the container. The ripening process of the product will take some time, while the dishes cannot be moved or tilted.
- The main component for crystal formation is salt. Use sea salt to get a smooth and transparent surface on your craft. It does not have impurities and small debris like table salt.
- Crystal formation will take place in water. It should also be well cleaned of impurities. It is best to pour in distilled water or boil the liquid and filter.
- The experimentware should not be metal. Since it can oxidize due to the action of brine. The volume of the growing dish is irrelevant and is only limited by the size of the desired crystal.
- Avoid debris and debris in the container. They will prevent salt buildup on the main crystal. Therefore, before the experiment, the dishes should be well rinsed and dried.
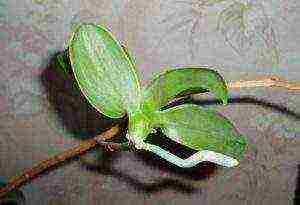
- You can use thread, fluffy wire, dried twigs, or a large piece of salt as a base.
- Additionally you will need: a wooden stirring spoon, a piece of gauze or bandage, paper towels, colorless nail polish, a saucepan and a pencil.

2 How to grow a crystal from salt with many facets
The initial stage of the experiment involves boiling the liquid. Therefore, help the children warm up the liquid so that they do not burn themselves.
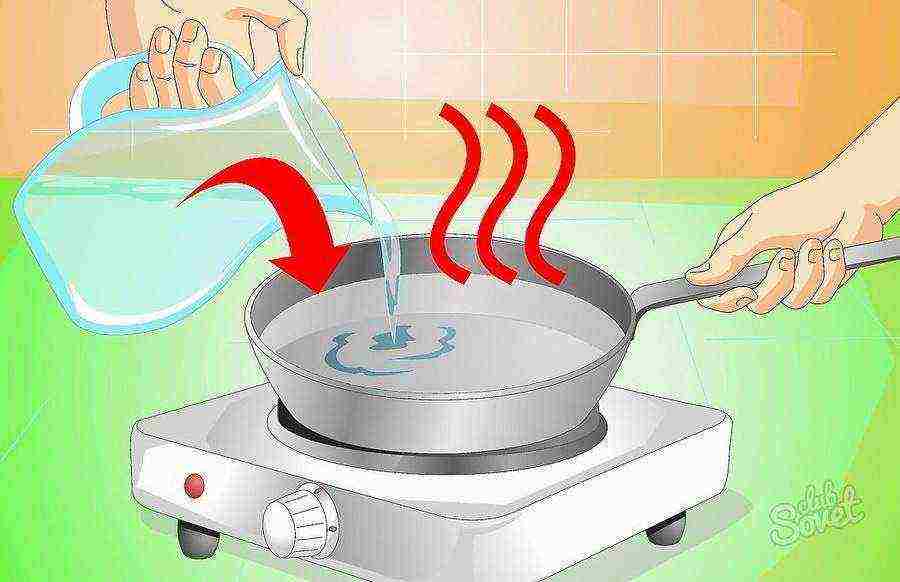
- Prepare 120 ml. purified or distilled water. Pour it into a saucepan, place it on the stove and bring to a boil.
- Decide on the type of salt to form the crystal. So with the help of ordinary table salt, the craft is formed within a few days, sea salt forms a crystal in 1-2 days, and with iodized salt you will have to wait a very long time for the product to grow.
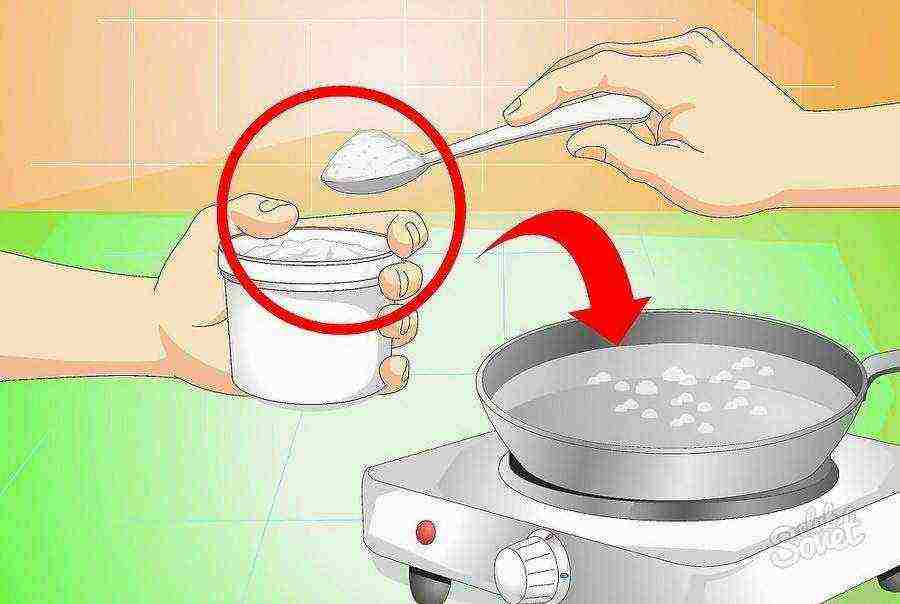
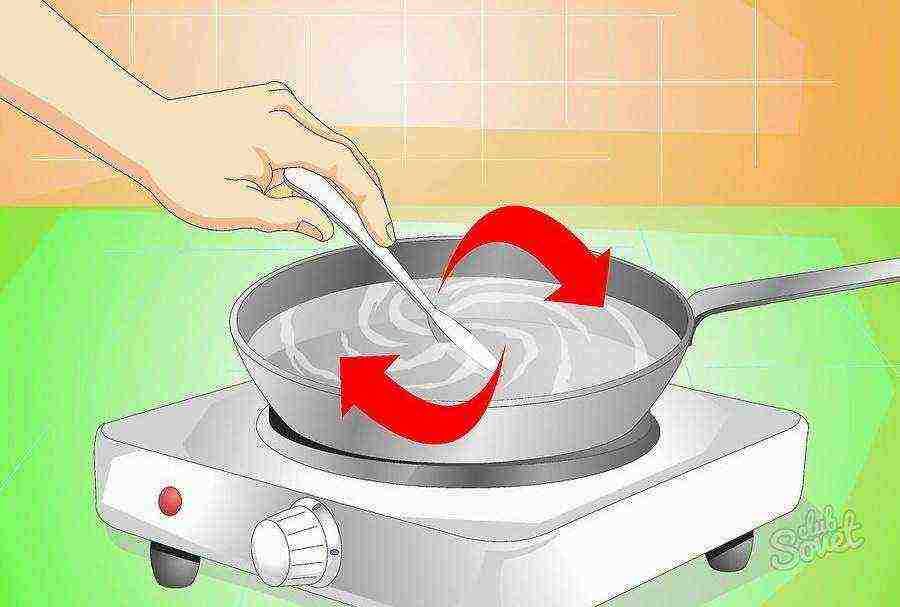
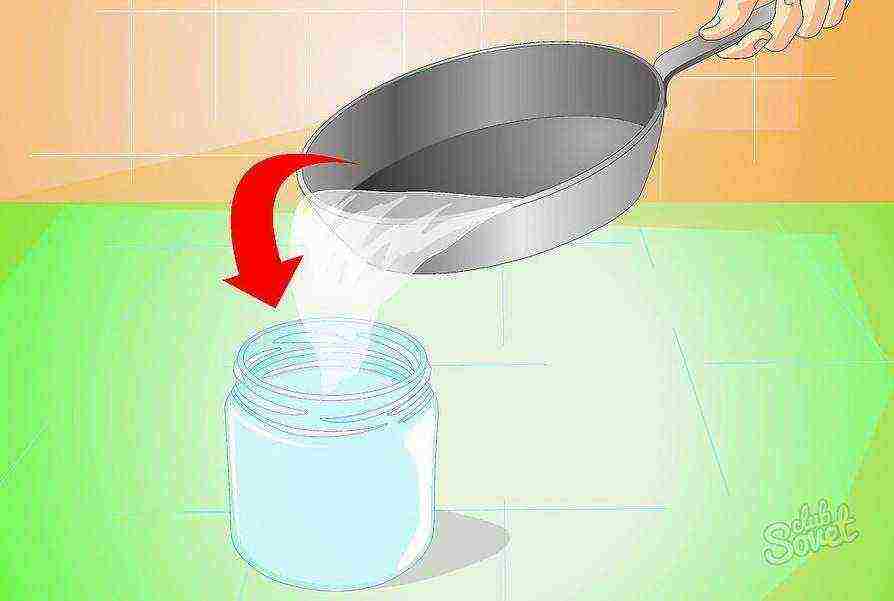
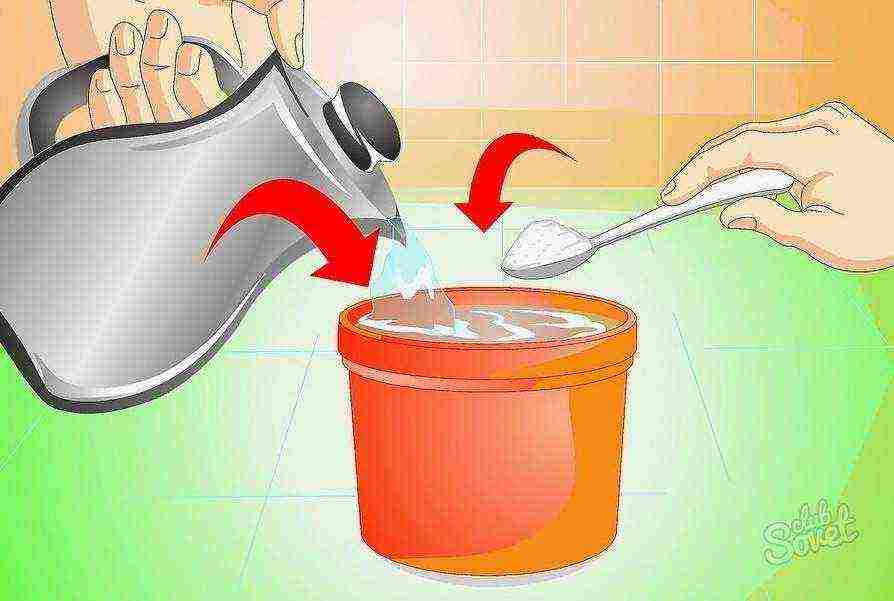
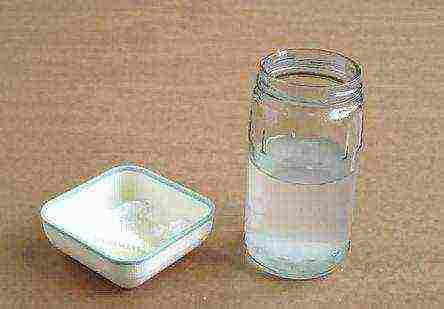
- Prepare a saturated salt solution. You can understand about its readiness by grains that could not dissolve in water. To do this, add salt to warm water and stir the solution thoroughly. First add half a glass of salt. If the water is clear without grains, then add another quarter glass.
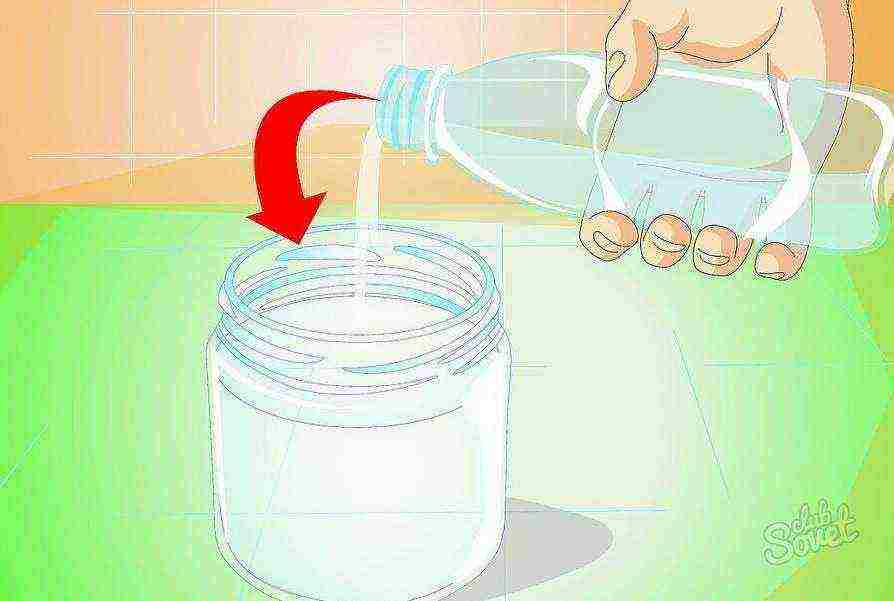
- Pour the solution into a dry and clean container.Make sure that the sediment remains in the pot, otherwise it will fall to the bottom of the jar and reduce the growth of the main crystal.
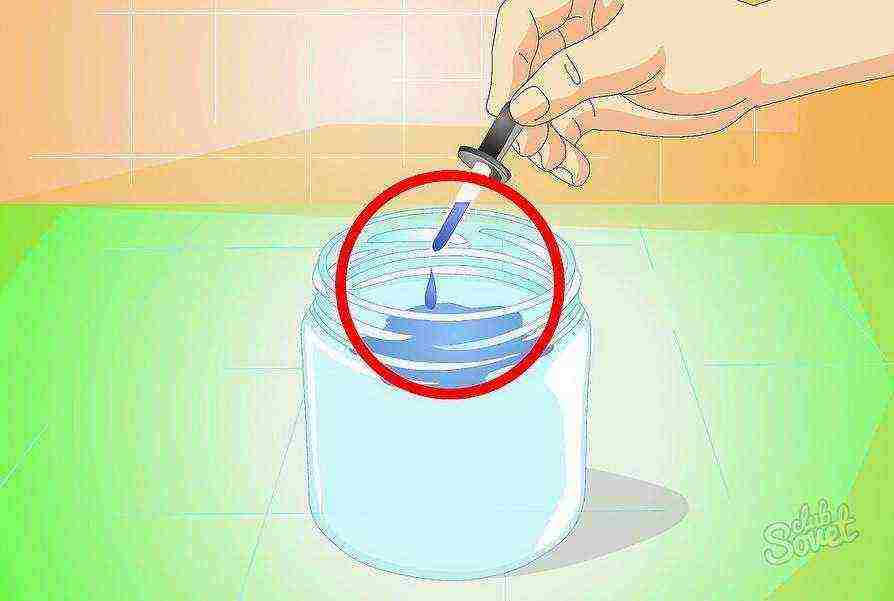
- At this stage, you can add a dye to change the color of the crystal. But do not add too much of it, as in large quantities, the product will make the craft fragile.
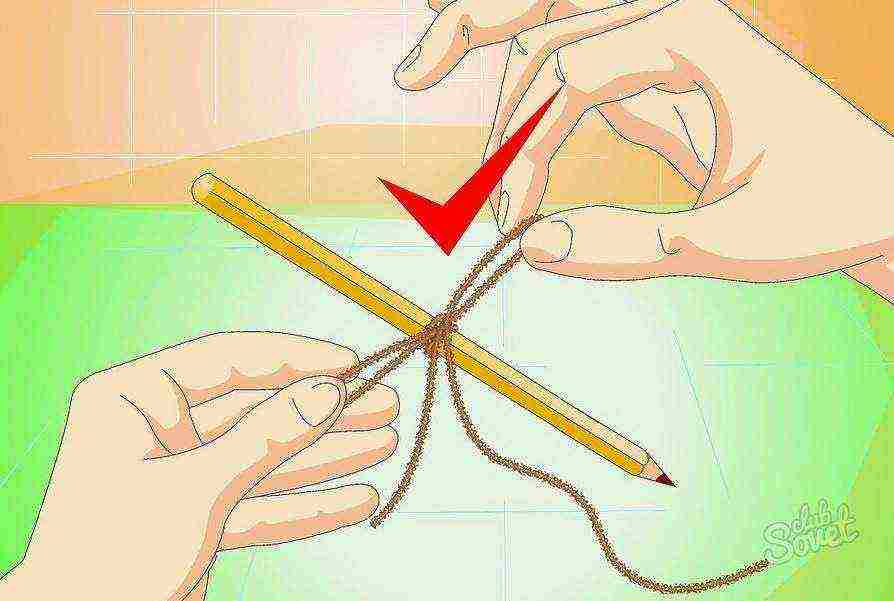
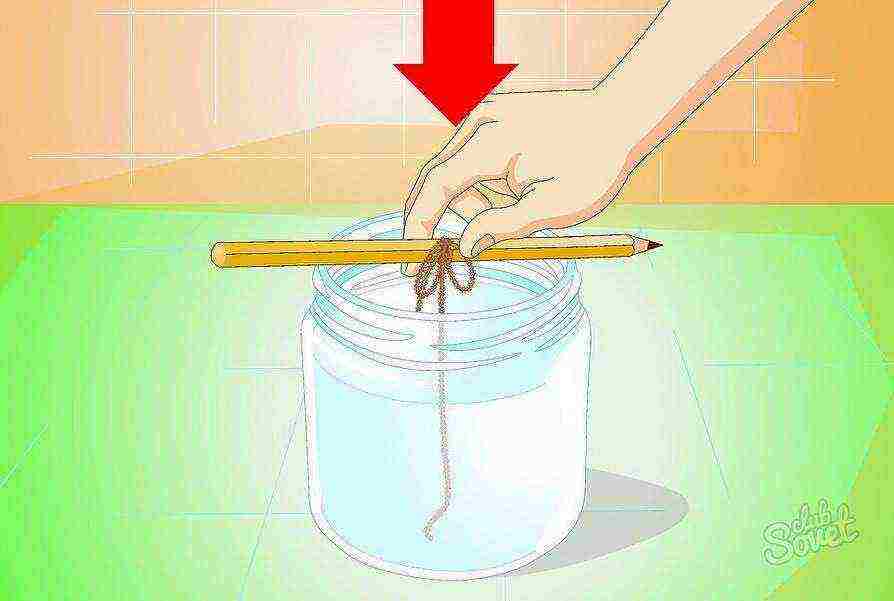
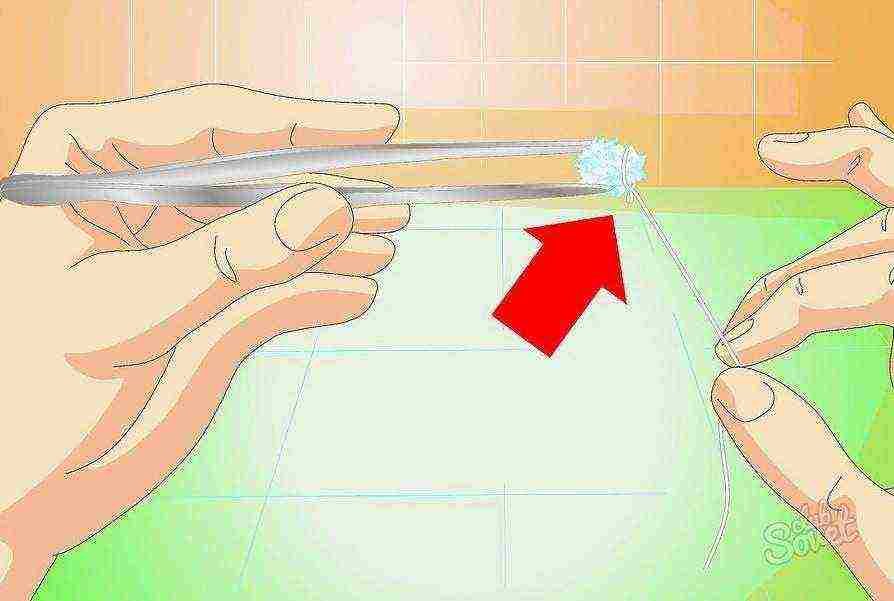
- Prepare the thread for the warp. It is desirable that it be thick with a rough surface. Tie it onto a pencil or long skewer. Their size should be larger than the diameter of the container for growing the crystal and with edges for stability.
- Measure the required length of thread and cut it off. Do not let it touch the bottom of the container.
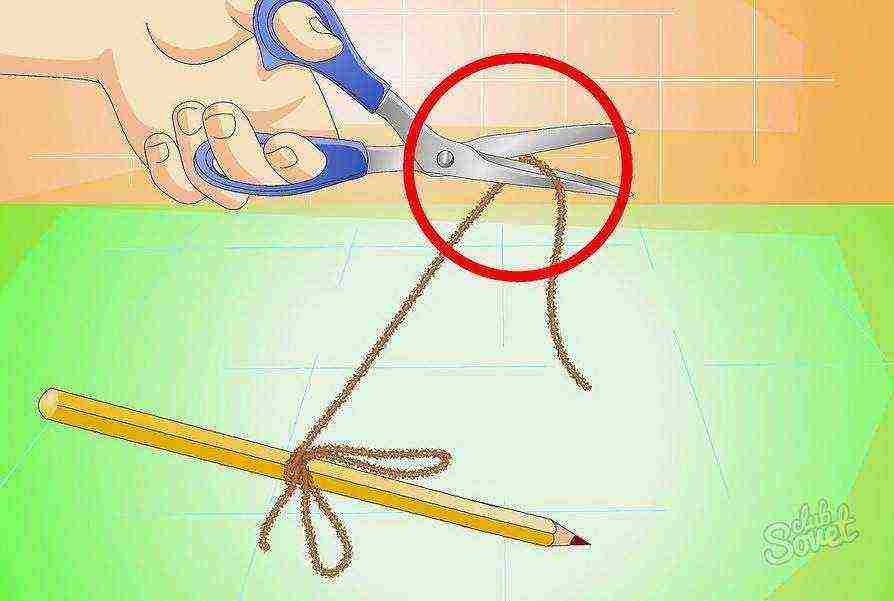
- Place the pencil on top of the container. Make sure that the thread does not stick to the sides of the can.
- Place the container of brine on a flat surface. If you want to grow a crystal with large ramifications, keep the filament liquid in a warm place. Place the container in a cold place to form a crystal with smooth surfaces.

- Now you just have to watch the growth of the crystal.
3 How to grow one large crystal from salt
To obtain a large crystal with smooth edges after the experiment, it is necessary to use a slightly different technology.
- Prepare a concentrated salt solution as in the previous point. Pour it into a container. But for this method of growing the craft, choose a flat and wide container. This way, a large crystal will not be able to connect with the rest, smaller parts.
- Leave the container with the solution for 2 days for small crystals to form. Then pour out the water and choose the most suitable grow piece.
- Tie a small crystal to the fishing line. In this case, it is necessary to use a smooth thread or a thin wire (fishing line) so that salt grains cannot fix on it.
- Re-mix brine. But this time, do not bring the water to a boil, but only warm it up to room temperature.
- Dip the crystal on the fishing line into the prepared container and pour in the saline solution in a thin stream. Attach the line to the surface of the container with a pencil. In this case, the crystal should be located in the center of the container.
- Growing a crystal in this way will take much longer than the previous option. Therefore, prepare a new salt solution every two weeks and be sure to filter it before pouring it into the container.
- When the crystals have grown to the desired size, remove them from the liquid, pat dry and be sure to cover with a thick layer of colorless nail polish. It will prevent the water from evaporating, which will make the craft more durable for a long period.
It is very easy and safe to experiment with growing a crystal from salt at home. But to obtain the desired effect, strictly follow the rules specified in the article and do not forget about the finishing of the product.
The term "crystal" should be understood as a substance in which the smallest particles, atoms, are arranged in a certain order. They form a crystal lattice - a three-dimensionally periodic ordered spatial packing. 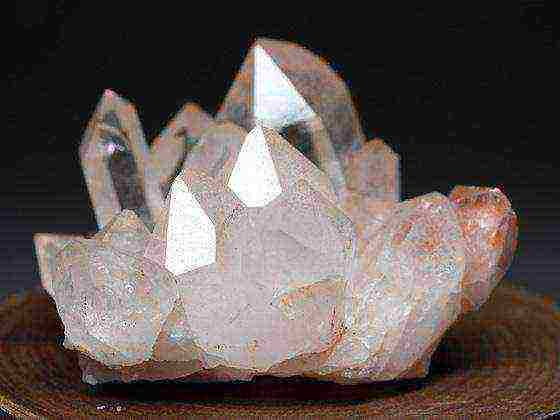 As a result, outwardly crystals have the form of regular symmetric polyhedrons. They can vary greatly in shape and have from four to several hundred faces that intersect at certain angles with each other.
Salt is a member of the crystal family
One of these solids with an ordered symmetric structure is ordinary salt.  It is a food product that occurs naturally in the form of a mineral called halite. A large amount is found in seawater and other saline sources. If you examine the grains of salt with a microscope or magnifier, you will notice that they have flat edges. This means that they are in a crystalline state. In this article, we will show you how to make a salt crystal yourself. In fact, it is not difficult.To understand how the formation of salt crystals occurs, that is, the crystallization process, we suggest that you carry out an interesting experience at home. It is advisable for the child to perform it under the guidance of an adult. Remember that the shape of a salt crystal can be different, including cubic, prismatic, or any other more complex. However, the facets of a rock salt crystal always intersect at right angles.
Let's talk about how to make a crystal from salt: the necessary consumables and tools
Well, let's get to work. What materials and tools will we need to conduct this interesting experience? Of course, table salt, water, transparent glass glasses, a string or thick thread, a wooden spatula. You should also prepare a ballpoint pen or regular pencil. 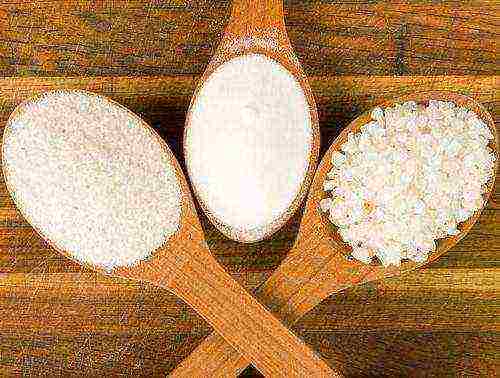 And most importantly, you need to be patient. The fact is that the crystallization process takes time - about three weeks. How to make a crystal from salt? Take good salt, no additives. It is advisable to purchase a product with a purity of at least 98%, otherwise the experiment may fail. If the salt contains a large number of various impurities, then the specimen will turn out to be ugly and will have flaws. We start growing crystals from salt by preparing a highly concentrated solution. Pour warm water (200 ml) into a glass or jar and start adding salt. Do not forget to constantly stir the liquid with a wooden spatula. This is necessary in order for the salt to dissolve well. After the solution is ready (this can be determined by the fact that the added salt has ceased to dissolve in a glass of water with normal stirring), the mixture should be heated. Fill a saucepan with water, put it on fire, heat up the water. Then carefully place a glass of concentrated saline in it and wait until it heats up.
We continue to work on growing beautiful salt crystals
Then we take our glass glass out of the pan and leave it alone. On the shaft of the ballpoint pen (pencil) we fix the thread to which we tie a small crystal of salt. We put the rod on the glass and immerse the string with the "seed" in the solution. It is on this crystal of salt that our beautiful exhibit will grow. That's all, now you just have to wait. We put the glass in a warm place and monitor the crystallization process every day. In no case should you shake, turn over or lift the container with the solution. Gradually the crystal will grow and become large enough. When this happens, you can carefully remove it from the solution. We advise you to dry it with a napkin, but be extremely careful - your specimen is very fragile. Cut off the excess thread and cover the crystal with a colorless varnish to extend its life. Now you know how to get salt crystals at home. We hope you will be able to repeat our simple experience.
Crystals from sea salt: an experience in creating a beautiful exhibit

If you want to grow large, even and beautiful specimens, take a look at the following experiment. To work you will need the following materials and tools:
- transparent glass;
- water;
- sea salt;
- paper;
- napkin;
- wooden spatula;
- a flat pebble of medium size.
The technology of the crystal growing process is as follows. First, pour not too hot water into a glass and start pouring sea salt into it, gradually, one teaspoon at a time. Do not forget to stir with a spatula. Salt must be added to the liquid until it stops dissolving. Now we take a napkin and filter the resulting solution through it. This is done so that the debris does not interfere with the formation of an even and beautiful sample.
The process of creating large salt crystals
How to make a crystal from salt: after filtration, put a small pebble in the solution (you can replace it with a nut) and set it to cool.Remember that the slower our salt liquid cools, the larger the crystals will be. It is advisable to cover the glass with paper and put it in a dark place protected from drafts. After two or three days, you will see how your stone will become overgrown with small crystals. Make sure that the solution completely covers the "seed" at all times. Also, you should weekly clean the liquid from dust and excess crystals that form at the bottom of the glass. As it evaporates, add a highly concentrated saline solution to the container. Keep it clean and not cold (room temperature). In addition, it is necessary to periodically remove the crust that appears on the bottom of the container. After two to three weeks, your crystal will be about 2 to 3 cm long. And in order to get a larger copy, it will take more time - about 6 weeks.
Correcting salt crystals
Remember that you may not get beautiful and even crystals right away. Any business takes practice. We advise you to carefully adjust the crystallization of the samples, removing not very beautiful growths. This can be done with a sharp knife, scraping off excess with it. Also, using petroleum jelly, you can stop the formation of the edges. If necessary, the Vaseline layer can be removed from the sample with acetone. When your crystal has grown to the desired size, you can carefully remove it from the solution. After that, gently wipe the edges with a napkin. You can cover the sample with hairspray: this will make your crystal less fragile, brittle and retain its beautiful appearance for a long time.
Original craft from crystals of table salt
 At home, you can not only grow an ordinary salt crystal, but also make an interesting craft. To do this, you will need the following tools and materials:
- water;
- salt;
- wire;
- threads;
- filter paper;
- bank - 2 pcs.;
- pan;
- wooden spatula.
Let's start the work by dissolving salt in water. We add it to the liquid in small portions, adding the next one only after the final dissolution of the previous one. When the salt stops dissolving, proceed to the next step. We take a saucepan, fill it with water and put the container on the stove over a small fire. We put a jar of saline in it. We follow the heating process. We continue to dissolve the salt, bringing the temperature to 65 degrees. That's it, turn off the gas, but don't take the can out of the pan yet. The fact is that the temperature difference can lead to the fact that the glass container will burst. After the solution has cooled, you can safely remove the jar from the pan.
Solution filtration and crystallization
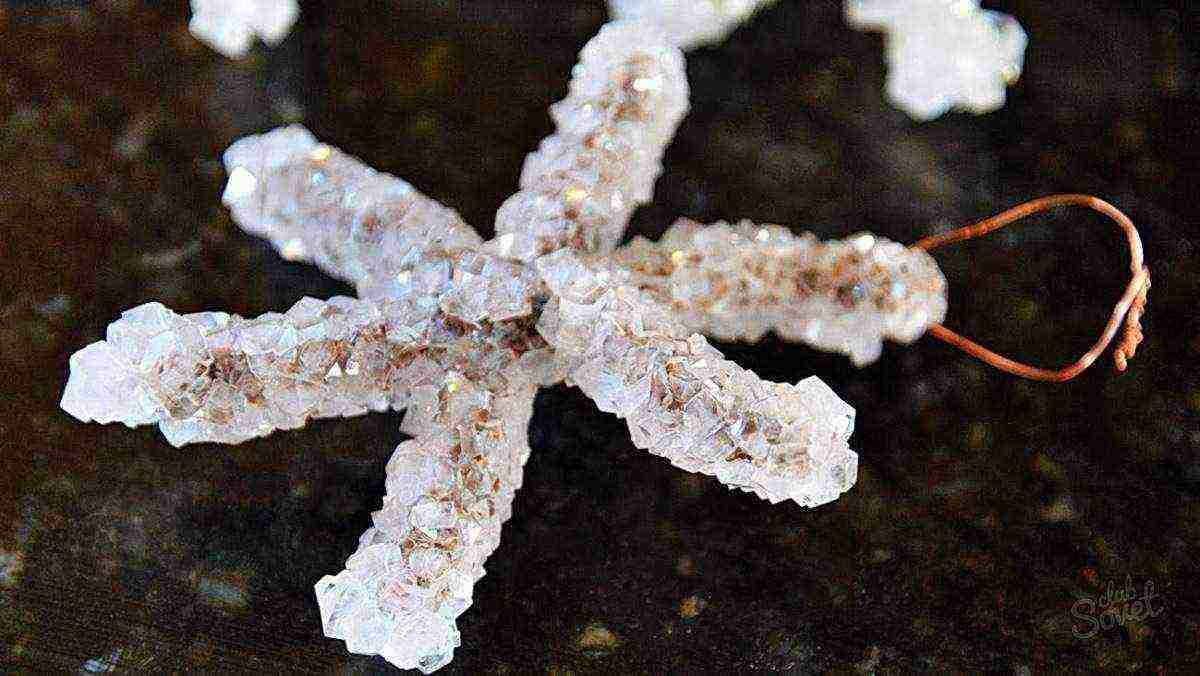
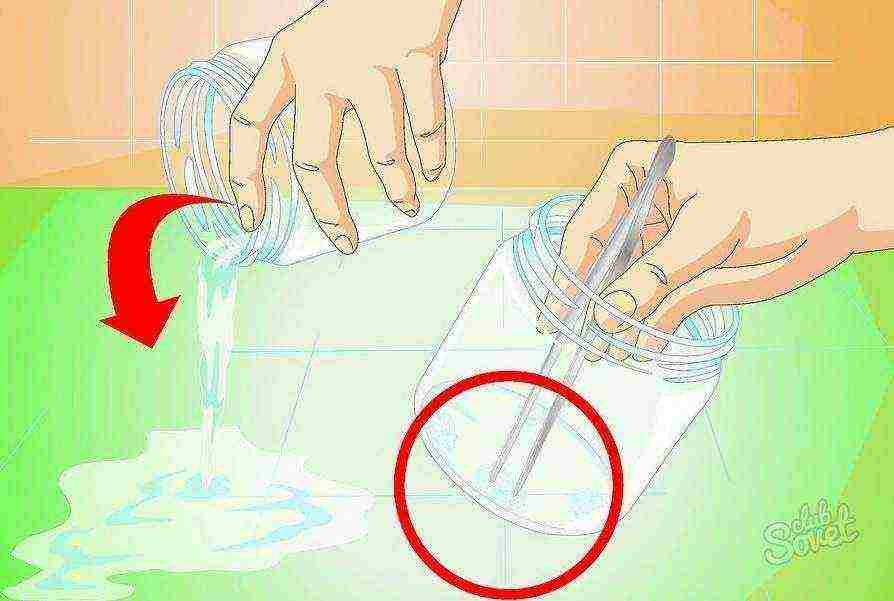
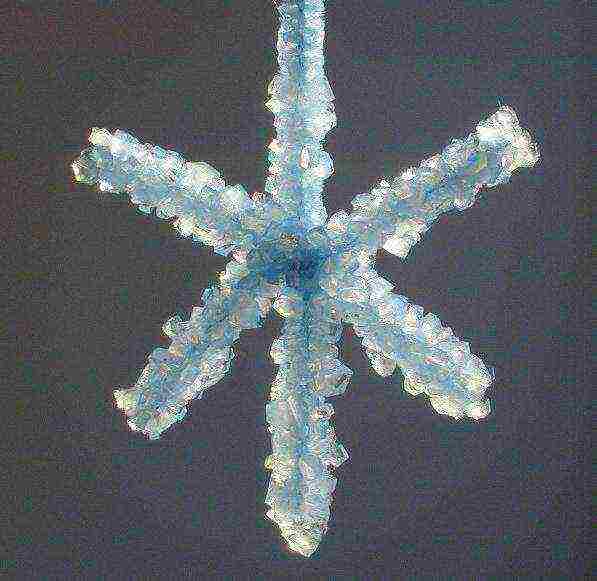
 After that, we proceed to purify the solution from impurities. We take a clean jar and fix filter paper on its neck. Now carefully pour the solution into a new container. All undissolved salt crystals and impurities remain on the filter paper. We get a clean solution. Now we put the jar of liquid in a cool place and make a "seed". We take copper wire and make any animal shape, flower, twig, star from it. We wrap the wire with thread. We place the workpiece in a jar with saline solution, cover the container with a napkin, leaving only a small gap. That's all, you just have to wait for the crystals to grow from salt. After the wire is overgrown, you can get it out of the solution. This must be done very carefully, as salt crystals can break.
Growing salt crystals at home is an opportunity not only to quickly observe how similar phenomena occur in nature with other materials, but also to get an unusual craft as a result.
Moreover, such a process is completely safe and does not require any deep knowledge in chemistry or any reagents, any person in the house has all the objects and substances.
How to grow salt crystals at home: materials and equipment
1. The first and most basic ingredient is salt... For the success of the crystal growing process, it is important that it is as pure as possible. Therefore, it is worth giving preference to sea salt, because there is too much small rubbish in the cookware. It is also not recommended to purchase salt with dyes or other additives.
2. Water, which should also be cleaned as much as possible from impurities. If it is not possible to use distilled, then it is worth at least pre-filtering it.
3. Non-metallic capacity for crystal growth... Its size can be limited only by the desired crystal size. Important requirements - the material of the container should not stain water or oxidize under the influence of salts. The container should be washed thoroughly. Any foreign objects inside, even if they are small specks, can become the basis for the growth of other small crystals, slowing down the growth of the main one.
4. A small crystal of salt from the pack, a piece of a branch, a leaf, a wire, thread or any other object for the base of the future large crystal. A suitable large lump of salt is easy to find in an almost empty salt shaker. Small particles fall out of it during use, and large ones do not crawl through the holes and remain inside. It is necessary to choose the largest and having a shape that is as close to a parallelepiped as possible.
5. Something non-metallic for stirring the solution - wooden stick, plastic or ceramic spoon, etc.
6. Filter paper or gauze.
7. Paper napkins or toilet paper.
8. Varnish for coating the finished crystal.
9. Patience... It's not enough to know how to grow salt crystals at home, you still have to be able to wait. A little bit decent in size crystal will be formed not earlier than in 3-4 weeks.
As you can see, no complicated or expensive equipment is required. All these objects and substances are easy to find in the household of absolutely any person.
How to grow salt crystals at home: a sequence of actions
The technology for obtaining a crystal from salt is very simple, besides, the process requires very little human participation, basically it only takes time. A container with clean water is placed in warm water (50-60 degrees, no longer needed), and salt is gradually poured into it, constantly stirring the solution. When it becomes saturated, i.e. there will already be so much salt in it that it will not be able to dissolve further, it is poured into a clean container so that the sediment from the old one does not get into it. You can even further clean the solution from impurities by passing it through filter paper or gauze folded several times.
It is possible to achieve the required water temperature for heating the solution even in the absence of a thermometer. To do this, mix freshly boiled boiling water and water at room temperature in a ratio of about 1 to 2.
Further, it is necessary to place (on the bottom or hanging on a thread) an object in the container, around which a crystal will subsequently form.
• For the traditional crystal form, it will be a large grain of salt that is easy to find in any pack;
• For an elongated crystal, a thread is lowered into the solution so that it does not touch the walls and bottom;
• If you want to get a crystal of a complex and bizarre design, then a small twig or curved wire is suspended on a thread.
Knowing how to grow crystals from salt at home, you can not limit your imagination to objects that are simple in shape. To get not just a crystal, but a truly original craft, you can place a wire curved in the form of a star, snowflake or other similar simple shape in the solution as a base. In principle, you can use absolutely any item that is not subject to oxidation from salts.
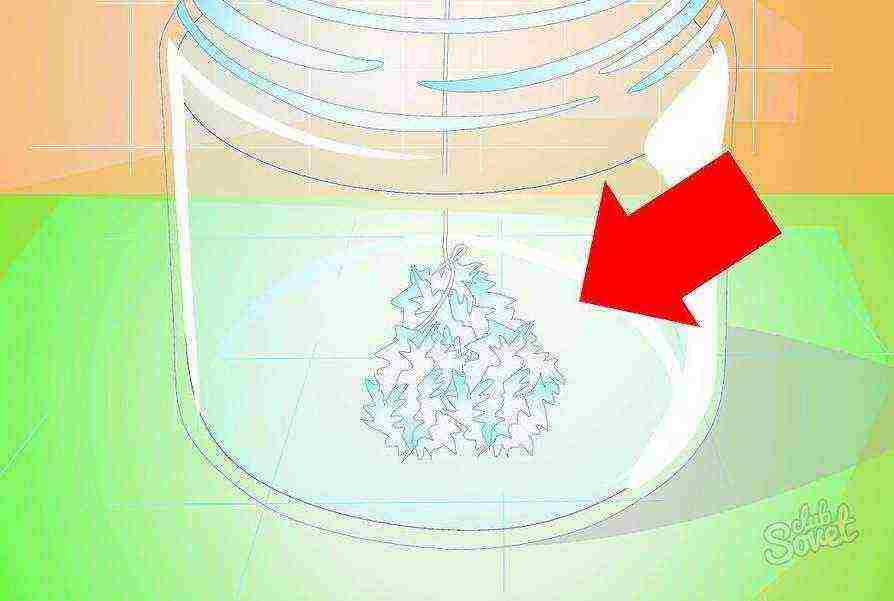
Next, the container is covered with a lid, a napkin, a sheet of paper, and in general anything, just to protect the solution from dust and foreign objects. The container with the growing crystal should be stored in a dark, cool place without drafts. Strong mechanical influences on it should not be allowed - too frequent movements, shaking, etc., as well as regular and significant changes in temperature or humidity, i.e. for example, it is not worth placing a crystal in the bathroom, as well as near the stove in the kitchen or near heating appliances.
Naturally, the more the crystal grows, the less salt remains in the surrounding water. Therefore, to speed up the process about once a week - ten days, a new salt-saturated solution must be added to the container. And if the crystal has already grown out of an old glass or jar, it can be transferred to a larger one, taking care not to drop or break it. it is very fragile.
The crystal removed from the solution is dried from the remaining water by gently blotting it with a soft cloth or ordinary paper napkin. This should be done very carefully, because the crystal is not particularly strong. For preservation, the crystal is coated with household or manicure colorless varnish. If this is not done, then the life of this beautiful object will be short-lived. In dry air, the remaining water will quickly evaporate, and it will crumble into powder, and with excess moisture, on the contrary, it absorbs excess liquid and spreads into a shapeless pile of separate small crystals or even into a slurry.
White crystals will be obtained from table salt.
If you want other shades, then you can:
• use a different type of salt (for example, copper sulfate for a deep blue color);
• cover the finished crystal not with a transparent, but with a colored coating;
• add food coloring agents to the solution at the stage of crystal preparation, for example, those used in baking or for Easter eggs. However, such substances cannot give very bright colors.
There will be no fundamental difference in the growth rate and shape of the finished crystal when using table or sea salt. However, in the second case, the crystal will turn out to be denser in structure and will be more durable.
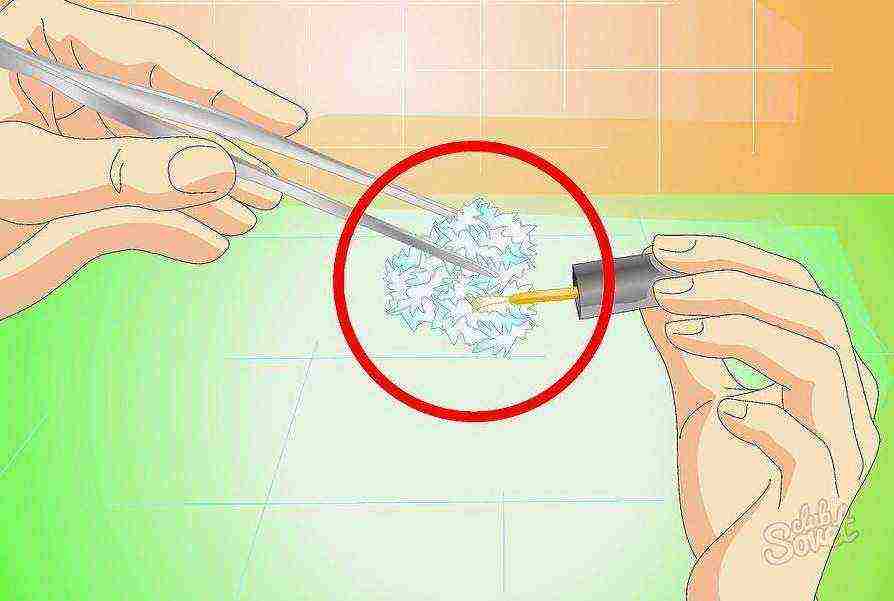
If the crystal grows a little of the wrong shape, then the excess areas can be carefully scraped off with a knife or a nail file, remembering that the crystal is very fragile. It is easy to give the crystal the desired shape if you treat those areas of undesirable growth with ordinary petroleum jelly or another thick fatty substance. If it needs to be removed, it can be done with acetone or alcohol.
In order for the crystal to split, as if branching in different directions, a small amount of glycerin is added to the solution.
Precautionary measures
Table salt is an absolutely harmless substance for humans, because we eat it every day without health consequences. Therefore, there is no need to follow any safety precautions when growing a salt crystal.
However, so that foreign objects do not get into the solution, the hair should at least be collected, and it is better to cover it with a kerchief, and wash your hands with soap and even wear rubber gloves. And if there are scratches or wounds on your hands, it is simply necessary to put on gloves, otherwise the strong saline solution will pinch strongly. Nothing fatal or harmful, but not a pleasant experience. Likewise, hands are better protected if dyed salt is used and there is a possibility of allergy to these dyes.
But when working with copper sulfate and other more aggressive salts, it is imperative to observe precautions, trying not to inhale the solution, prevent it from getting on the skin, and also be in a well-ventilated room and keep small children or pets away from the container from growing crystals ...The containers used for this chemical experiment should in no case then be used for receiving or storing food, medicines, personal hygiene items, cosmetics, in general, everything that will subsequently be in direct contact with the human body.
How to grow salt crystals at home: reasons for failure
Why did the lump of salt, taken as a base, dissolve instead of forming a crystal around it? This means that the salt solution was initially insufficiently saturated. When preparing it, add a little salt until it no longer dissolves, but precipitates. The diagrams of the solubility of these salts in water of a certain temperature, easily found on the Internet, will help to choose the proportions of food and other salts for preparing a solution.
If, instead of one, several small crystals suddenly grew in the container, then this indicates foreign impurities in the solution. This can be both insufficiently well-filtered water, and litter in salt or a poorly washed container where the solution was poured.
What is the reason for the lack of uniform color of the colored crystal? Perhaps, when adding the dye, it was not stirred very thoroughly. And if the crystal is large, and for it the saline solution was prepared several times, then one of the times the dye was added significantly less or more than the others.
Of course, even knowing how to grow crystals from salt at home and following all the recommendations, you can get not quite what you wanted. This is normal, because the conditions in which the growing crystal is placed and the substances used for this may differ. However, over time, it will certainly be possible to get a handle on, to find the optimal proportions of components and conditions for crystal growth.
source
Today we will learn with you how to grow crystals at home. In general, this is not so difficult to do as it might seem at first glance. Especially in the modern world. Literally 10-15 years ago, not every child could grow a crystal at home. But now everyone has this opportunity. As a rule, parents are engaged in this entertaining activity together with their children "from the cradle". After all, crystallization is a very beautiful and interesting process. Kids love him. And for schoolchildren, such a phenomenon helps explain chemical phenomena. But how do you grow crystals at home? Let's try to understand this difficult issue with you.
What are crystals
To begin with, it is worth understanding what we will be dealing with at all. That is, any person should know what exactly he wants to grow. Crystallization is a very beautiful phenomenon. But what is a crystal?
This object originally denoted frozen water, or ice in a simple way. Now it is a solid body in which the constituents (atoms) are arranged according to a certain pattern, but in a chaotic order. And in the course of this action, they form the so-called crystal lattice.
In simple terms, it is just a solid and beautiful pebble of some three-dimensional shape, which has a special structure under a microscope. That is, the crystal lattice. Crystals are often considered to be iridescent particles that sparkle in the sun. A kind of sediment formed during the evaporation of a substance. And now we will try to understand how to grow crystals at home. It's not that hard. The main thing is to properly prepare for the process.
Security measures
Regardless of what kind of material for crystallization we will use, there are certain rules of behavior. They will have to be followed without fail. Especially if copper sulfate is used as a crystallization material. Let's quickly find out what you can and cannot do if you want to figure out how to grow a crystal at home.
Let's start with the fact that we need dishes.And it will not be possible to use it for domestic needs, or rather, for food purposes. Even after disinfection. You can simply get poisoned. In principle, when it comes to sugar or the most common salt, then you can really rinse the dishes thoroughly after use, and then use for any purpose. The main thing is not to touch these containers in cases where copper sulfate or something else is used as a material.
You cannot eat during the process. This can cause poisoning. And then playing with crystallization will turn into a huge problem. It is best to wait for the action to complete if potentially hazardous substances are used.
It is prohibited to work with substances that you do not know about. Indeed, with some materials, you will have to follow special rules of conduct. Otherwise, you run the risk of causing a lot of problems for yourself and your body.
How to grow crystals at home? To do this, you will have to find and assign a special place for this activity. One where no one will bother you. And where very small children and pets will not get to the reagents, as well as directly to the crystals. Especially in cases of copper sulfate and any other chemicals. Exceptions are sugar and salt.
Basics of action
How to grow a crystal at home? For this, to be honest, it is important to know the method of work and the process of crystallization. What are these actions based on? In general, if you want to make a homemade crystal, you will have to prepare for the fact that you will need to prepare a special concentrated solution.
It is on this that home "crystal growing" is based. That is, in order to grow such a "little thing" at home, in any case, you need a special concentrated solution with the material of your choice. Sometimes dyes can be added to it in order to obtain a colored crystal. It is very beautiful and interesting.
In principle, it is already more or less clear how to grow a crystal at home from salt or sugar, for example. We need a concentrated solution. And as a matter of fact, a place that will grow overgrown with crystals. Let's find out several options for the development of events that will help to carry out crystallization extremely quickly and easily at home.
Evaporation
Let's start with you with the simplest and least popular scenario. If you want to grow a crystal at home, then you will need water, as well as a reagent. For example, salt. Plain, cookery. The sea may also be suitable. In other words, any salt for food production.
What should be done now? To begin with, warm up the liquid a little. Now add salt to the water. Make sure your solution is concentrated. That is, approximately 2-3 tablespoons of salt are needed for a glass of water. Stir the "brew" until completely dissolved. Now all that remains is to leave the concentrated salt water in a warm place for a while. Moreover, in a ventilated space. As soon as all the water evaporates, you have a precipitate - salt crystals.
If you want to quickly see the effect, you can start evaporating the water - boil it. Most importantly, do this process with care. But it’s better to just be patient. So we learned how to grow a crystal at home from salt. By the way, from sugar too. This method is not very good. After all, it simply forms a precipitate as crystals. For this reason, there are several other approaches to solving our problem.
Ready set
How to grow a crystal at home? In truth, there are several ways to do this. One, not the most popular, we have already studied. Now let's move on to more interesting methods. Especially among the youngest children.
In order to figure out how to grow a crystal from sugar, salt or any other substance quickly and without problems, it is enough to go to any toy store and buy there a special play set called "Crystallization". Or something like that.
In the box you will find everything you need to carry out the process - and a special container into which liquid is poured, and a reagent, and dyes (if needed), and even special forms on which crystals will be placed. For example, a tree or a flower. Very interesting are the options on which different dyes are applied directly to the molds. That is, as it grows, you will be able to see multi-colored crystals on various areas of the craft.
What do we have to do? The same as last time - mix the water with the reagent, and then lower the mold into it and put it in a warm place. How to grow sugar crystals at home (or salt crystals) using the play set? The most popular option for the development of events is not directly lowering the template into concentrated water, but pouring it onto a mold. That is, you will need to collect, for example, a stable Christmas tree template, put it in a special deep form (it is attached) - in something like a flower pot, and then pour a concentrated solution into it and leave everything like this. For a while, of course. About a day, maximum two.
After the specified period of time has passed, look at your craft. It will be covered with various crystals of sugar or salt. Just be careful - such formations break down and fall off very easily. After all, they will turn out to be small and fragile. Now we know how to grow a crystal at home from sugar or salt, and even describing any form. But there are other ways that will help us in solving this problem. Let's get to know them.
From salt
For example, there is another very interesting approach to solving this problem. How to grow salt crystals at home? To do this, we need salt (table salt, including in pieces), water and special strings. Better to take twine. A crystal will settle on it. Let us now get down to business with you as quickly as possible.
Heat the water. It is not necessary to bring to a boil. Now start adding salt to it and stirring. It is worth continuing the procedure until a concentrated solution is obtained. That is, until the salt begins to settle on the bottom of the dish. During this period, it is best to keep the water warm without boiling. When you have achieved the desired result, simply pour the liquid into another form. Make sure you don't have any sediment at the bottom.
Next, you need to take a string or thread and tie a piece of table salt to one end of it. So that it does not fall and slip out. Ready? Hang the other end of the string over a glass of concentrated salt water, and then lower a piece of salt into it so that it does not touch the bottom and walls of the dish. It just remains to wait a while. Of course, this process will be slow - it will take about 2-3 days for a normal crystal to form. Moreover, the thread that you hung up will also begin to become covered with small crystals in a chaotic manner, forming a beautiful pattern.
That's all the problems are solved. We now know how to grow a crystal at home from sugar or table / sea salt. As you can see, nothing difficult. The main thing is to be able to wait. True, this is not all the options for the development of events. Now we will try to grow sugar crystals with you again, and also try to figure out how to grow a crystal from vitriol.
Sugar dream
Well, in the case of salt, we can have a special material prepared to help crystallize. In our example, this is a large lump of table salt. But such a "number" will not work with sugar.We cannot break off a piece from it, like from salt. Therefore, the process of sugar crystallization will be slightly different. How to grow a sugar crystal at home? Let's figure it out.
To begin with, there are two options for the development of events. The first is when we will force a ready-made solid crystal to grow, the second is when some material starts to be covered by these "objects". Let's start with a familiar approach.
How to grow a crystal at home? Photos of this process are now very popular. And the results of cultivation too. But how is this procedure done using sugar? To begin with, slightly (this is important) heat the water, and then mix it with sugar until you get a concentrated solution. Now, like last time, pour the "brew" into another container with the sediment filtering out. Ready? Then tie some crystal (solid, but not salt) to a thread or wire. For example, sodium sulfate. Dip it in sugar water and then just wait for a while. Your crystal will grow and become composed of sugar.
In the second case, you can do without sulfate. That is, simply lower the thread or wire (preferably a string or floss) into the solution and hang it in this position. Leave it as it is for a few days and then look at the result. Don't be afraid to lower the rope deeply. Now we know how to grow a sugar crystal at home. Let's get acquainted with another rather interesting method that we have not yet gone through.
Vitriol
Of course, now is the time to think about how to grow a crystal at home from copper sulfate. This material is also salt. Only chemically active. And so the cultivation procedure will change a little. But insignificantly.
What do we need? For starters, the reagent itself. That is, copper sulfate. As in a "free flowing" form, and a crystal. Be prepared for it to turn out to be blue. What a stroke of luck - a natural colored crystal without the use of dyes! Next, prepare a thread, and then tie a piece of vitriol to one end. Tie the other on a stick that will act as a holder. It seems that the process is not much different from working with salt or sugar. But that's just for now. The most interesting is yet to come.
What are we talking about? Of course, about water. When working with copper sulfate, you will have to use only distilled water. That is, cleaned of sediments, impurities and salts. Only in this case can one hope for the success of the operation. Mix the remaining vitriol with warm distilled water, filter it, and then lower the crystal and thread into the mold with liquid. Wait a while. That's all. Now we know how to grow a crystal in 1 day at home.
Recommendations
True, there are not only rules of conduct regarding the procedure, but also a few tips. They will help you achieve maximum and good results. What are we talking about?
For example, do not remove the crystal from the solution unnecessarily. Otherwise, the crystallization process will be interrupted. And, of course, the experience will fail. In order to look at your work, you can use transparent containers - through them you will watch how the crystal grows.
Make sure that no debris or any impurities get into the concentrated solution. If there are any, try to remove them carefully. Did not work out? Then leave it as it is. Just do not "disturb" a suspended crystal or a rope dipped in a solution. This will also hurt the process.
For best results, always use distilled water. It has already been cleared of impurities and salts. And this means that your solution will be as concentrated and high quality as possible.
Conclusion
Today we have learned how to grow crystals at home with you. As you can see, this process is not as difficult as it might seem at the very beginning.Exercising caution during the procedure is an important element of the procedure. Otherwise, the crystal will not be able to grow.
If you are just getting acquainted with this process, then start with ready-made play sets for crystallization. In it you can find a lot of useful things that can teach you how to grow original crystals at home without any difficulty. The main thing is to fantasize and follow the safety rules during the experiment. Now you know how to grow a crystal at home from salt, vitriol and other materials.