Content [show]
Hello dear readers!
So, dear friends, after reading the previous articles, you are probably thinking about planting lemon, dill, parsley or cilantro at home. Maybe some of you have already planted these plants? Then let's talk about the next inhabitant of our windowsill - sweet pepper.
Sweet pepper is very beautiful for its tight fruits, bright, tasty, filled with vitamins. It is him that we lack so much on rainy autumn days, and on harsh winter weekdays, and during the period of spring beriberi.
Do you want to admire the pepper and eat it all year round? In this case, feel free to start landing. pepper on his windowsill, as these plants are ideal for home care and cultivation.
Best grade pepper on the windowsill
Compact, undersized varieties of pepper (they are the most unpretentious and persistent) will be ideal for planting at home. The growth of this plant will reach half a meter and it will perfectly fit into the size of your window. The best varieties:
- Treasure Island. After 90-100 days, the pepper will invite you to taste its juicy orange-red heart-shaped fruits. Their mass reaches up to 60 grams, the thickness of the peel is up to 7 mm.
- The firstborn of Siberia. The crop ripens in 108-113 days from the moment of germination. The fruits are large, up to 100 g (peel thickness up to 6 mm). Bright red in color, these peppers are aromatic and tasty.
- Dwarf. Pepper variety with juicy, red fleshy cone-shaped fruits. Their weight reaches up to 83 grams (walls up to 9 mm). You can harvest the crop after 110 days from the time the sprouts appear.
- Watercolor. Glossy scarlet cone peppers will be ready for your table in 110 days. This pepper on the windowsill has small fruits, "for one bite", their weight reaches 30 grams, with a thin peel up to 2.5 mm.
- Gift from Moldova. Large peppers of a dark red color will delight you with a rich, sweet taste after 124-136 days. The weight of the fruit reaches 90 grams, the thickness of the peel is up to 6 mm.
- Martin. A fragrant variety, the red juicy fruits of which can be used to decorate the table after 130 days. Fruits are large, up to 84 grams, with thick (up to 5 mm) walls.
These varieties of pepper are highly productive and will delight you with their attractive fruits all year round.
Seed preparation
To rid future plants of infections, the seeds should be kept for 20 minutes in a 2% solution of potassium permanganate, then rinsed with cool water. And soak in nutrient solutions of epin or zircon (growth biostimulants):
- Epin. Take 2 drops for 100 ml of water.
- Zircon. Add 1 drop to 300 ml of water.
In the healing solution, the seeds should be kept for about a day at room temperature. Then place them in damp gauze and place them in a dark, warm place.
Keep the pepper seeds there for 3 days at a temperature of + 20 ° C to + 25 ° C. Periodically moisten the cloth with warm water (it must not be allowed to dry out).
As soon as the seeds hatch, you can transfer pepper on the windowsill.
Getting started landing
We need to prepare several containers in advance for growing pepper... Each pepper needs its own house, a separate wide and deep enough pot (so that the root of the plant is spacious and comfortable).
Do not forget about the drainage layer (fine gravel, expanded clay or broken small pieces of red brick will do).
You can plant seeds at one of the most convenient periods for you:
- The last days of February are the beginning of March. It is necessary to find the most suitable time for landing (be guided by the weather forecast). If, a week after planting the seeds, nature decides to pamper us with very warm, sunny weather, the pepper can slow down its growth. In this case, at the beginning of its growth, it is better to keep the pepper at home on the northern window for a while.
- Winter months. When planting seeds in winter, it is necessary to ensure that the daylight hours are 12 hours daily. In addition, light the pepper with fluorescent lamps.
- The plant germinates well when planting seeds in late July or early September. Again, keep an eye on the weather forecast (so there are no too warm days ahead).
Preparing the soil
For peppers, it is better to purchase ready-made soil ("Terra-Vita" or "Ogorodnik"). This soil is already enriched with essential microelements and does not contain harmful microorganisms.
If you decide to use ordinary garden soil, ignite it first with a saturated solution of potassium permanganate, then pour it over with water. Or prepare an enriched soil:
- Sod land 2 parts
- Humus 1 part
- Clean, sifted sand 1 part
Sod land is best taken from the place where meadow clover grows. Ash must be added to any soil (2 glasses of ash for every 10 kg of soil). Peppers are extremely sensitive to soil salt and acidity levels. Add dolomite flour or lime to the soil (take 16 grams of the substance for 1 kg of soil).
You can use special hydrogels. They are made for home gardening. When hydrogels mix with the soil, they swell, absorb excess water and simultaneously loosen the soil, retaining nutrients.
Planting seeds
To wait for the first shoots of pepper on the windowsill, you need to be patient. Peppers germinate after 1-2 weeks.
If the plant stubbornly does not want to germinate, increase the length of daylight hours (extend additional lighting from 7 am to 9 pm).
- Plant two seeds in small peat pots (pre-filled with loose, fertile soil). Pour and cover the pots with cling film. Place them in a warm place at a temperature of + 25 ° C. The pots can be buried under adult, fruiting peppers in a lighted place (if you have already grown peppers before).
- After the first, tender sprouts appear, pierce the film with a knitting needle in several different places. When the peppers start growing confidently and acquire the first two or three leaves, the film can be removed. And start transplanting (picking) one young sprout into a large pot. We remove the weaker plant.
Picking. Transplanting seedlings into a more spacious dwelling (with root shortening). The shortened root begins to branch out and develop more violently.
The rhizome after the pick becomes stronger, wraps around and holds the earthen ball better, and the homemade pepper itself on the windowsill brings more harvest. Dive process:
- fill the soil in the pot where you will transplant the pepper with plenty of water a day;
- before diving, make a depression in the center of the pot in the new ground;
- moisten the soil around the sprout abundantly an hour or two before the operation;
- gently take it and lift it together with an earthen lump, shake it off the ground;
- very carefully shorten the root by about 1/3 (you can pluck it with your nails);
- gently place it in the prepared hole in a new pot so that the central root does not bend, and the leaves are 2 cm above the soil level;
- compact the soil around the seedling with your fingers;
- pour warm water over the transplanted pepper.
In order for the pepper to grow large, fertile, it must be transplanted and grown in small capacious buckets or large ceramic bowls.
Before diving, gradually accustom the young sprout to more severe conditions (gradually take it out into fresh air, increasing the walking time).
But make sure that the small pepper does not fall under drafts and the effect of a low, destructive temperature for it (below + 13 ° C).
Taking care of our pepper
| Operation | Pepper desires | Tips |
| Watering | As needed | Pepper on the windowsill should be watered with settled warm water (water temperature + 30 ° C). Sprinkle the pepper with warm water daily. To prevent the plant from overheating during the winter heating season, cover the battery with a damp cloth. Remember to loosen the soil constantly. |
| Lighting | In winter, daylight hours should be 12 hours | Periodically turn the plant with different sides to the window. Fluorescent lamps will work with the usual white spectrum. Avoid direct sunlight. |
| Temperature | Day + 25 ° - + 27 ° С Night +10 ° - + 15 ° С | In the summer, it is good to keep the pepper on the balcony, in the winter, transfer it to the windows in the south. Beware of drafts and sudden temperature fluctuations. |
| Top dressing | Fertilize once every two weeks after watering | You can feed the peppers on the windowsill with purchased nitrogen fertilizers for indoor flowers. Or make a nutrient solution (3 liters of water and 6 tablespoons of ash). As a top dressing, you can prepare decoctions of nettle, plantain, clover. This is very beneficial for peppers. |
The plant may suffer from a lack of minerals. How to grow peppers in the most favorable conditions? Just monitor the condition of its leaves and apply the necessary fertilizer with a suitable composition in a timely manner:
- the leaves curl, a dry edge appears at the edges - a lack of potassium (add potassium sulfate or potassium nitrate);
- the matte color of the leaves with a grayish tint, the foliage begins to shrink - there is not enough nitrogen (ammonium nitrate, which contains 35% nitrogen, will help);
- the lower part of the leaves acquires a purple color, and the leaves themselves begin to nestle against the trunk and stretch up - there is little phosphorus (phosphoric acid is needed 16-18% percent);
- the deciduous crown acquires a marble color - the pepper on the windowsill lacks magnesium in the diet (magnesium in sulfate form is needed).
You can not use potassium salt, potassium chloride (their composition with an excess of chlorine is harmful to the roots of the pepper). But the excess nitrogen is not terrible for pepper.
We are waiting for the harvest
Most domestic peppers are self-pollinated plants. By the way, they can also be pollinated. Therefore, try to keep different varieties of peppers apart from each other.
When the first fruits appear, do not overload the plant - leave up to 4-5 fruits on it.
Getting our own seeds
For this we select red, ripe fruits. Cut the pepper neatly in the circle of the stalk and very carefully remove the seed-bearing, holding it by the stalk.
We devote the next 4 days to drying the seed crop at a temperature from + 25 ° C to + 30 ° C. And we separate the seeds. Store them in a paper bag in a warm, dark place.
The maximum shelf life of seeds is 5 years.
We transplant the plant
It is necessary to transplant peppers on the windowsill once a year. He wants new, fresh land for a richer harvest (after all, he has already taken everything useful from the old soil). Change the land completely to fresh.
Transplant the plant carefully, being careful not to injure the root system with an earthy clod.
And after two years of the pepper's life, it already needs to be changed. It is a biennial plant and will readily pass the baton to younger, stronger peppers.
I wish you a rich harvest!
See you soon, dear readers!
You can also read on this topic:
Tags: pepper
Today our topic is sweet peppers: seedlings, growing bulgarian peppers at home. Is it possible?
Cooking bell pepper seedlings for home and garden
Pepper belongs to tough-like crops, therefore it is better to propagate it by seedlings... Selected seeds are sown in peat pots or containers, they germinate in 8-10 days. Separate pots allow you to grow seedlings without picking. Young plants need abundant watering. Watering sweet pepper seedlings is done with warm soft water.
It is necessary to place containers with seedlings in a warm and well-lit place; the container with sown seeds is preliminarily covered with glass or film.
Sowing seeds is usually done at the end of winter.... The seedlings of the February sowing are gaining strength by the time they are transplanted into the warmed-up soil. Plants very light and nutritious soil is required... Purchased options will not work, these mixtures are too poor.
 The best substrate is made up of old garden or turf soil, humus or rotted compost, sand and ash. For disinfection the mixture must be ignited.
Seedlings need water twice a week... It is convenient to use a spray bottle, it moistens the soil, preventing moisture stagnation. After the formation of 2-3 true leaves, young plants can be fed with an aqueous solution of complex mineral fertilizers... Ash infusion, rich in phosphorus and potassium, is also suitable as a top dressing.
The root system of peppers is very sensitive, therefore picking seedlings is not recommended... The grown bushes are planted for permanent residence directly in peat pots or moved by transshipment.
Before planting plants need to be hardened... After the formation of the first leaves, the glass is removed from the container covering the plants. At first for a few minutes, but gradually the airing time increases. When the sprouts get stronger, the containers can be taken out to the balcony or open the window.
The temperature should not drop below 15 degrees, the optimal mode is 20 degrees during the day and 18 at night.
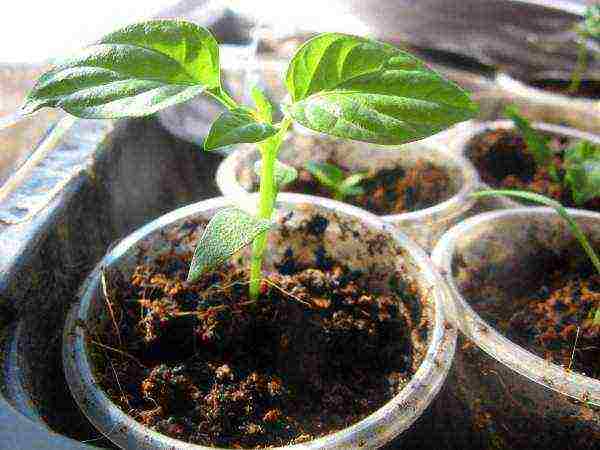
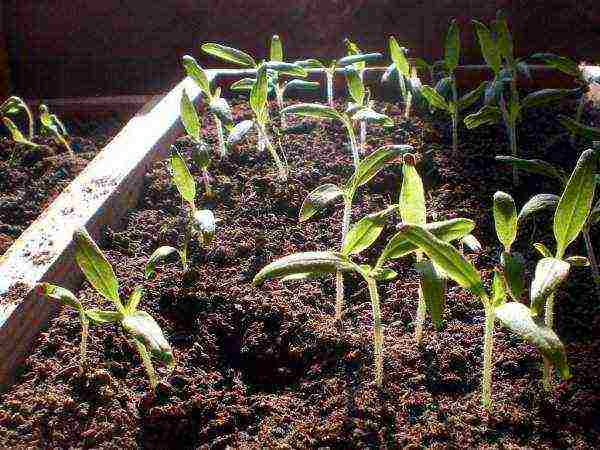
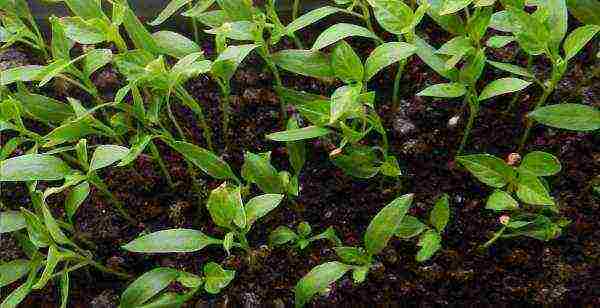
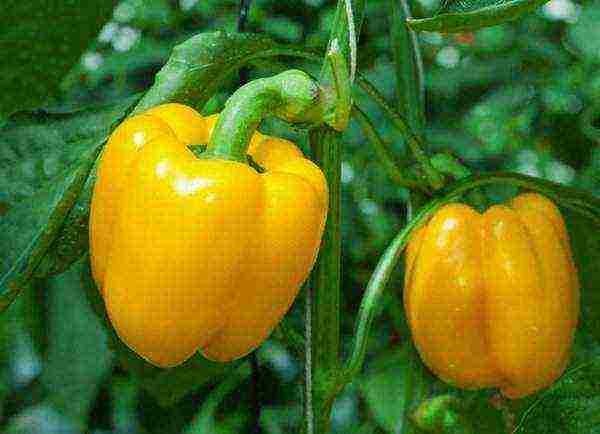
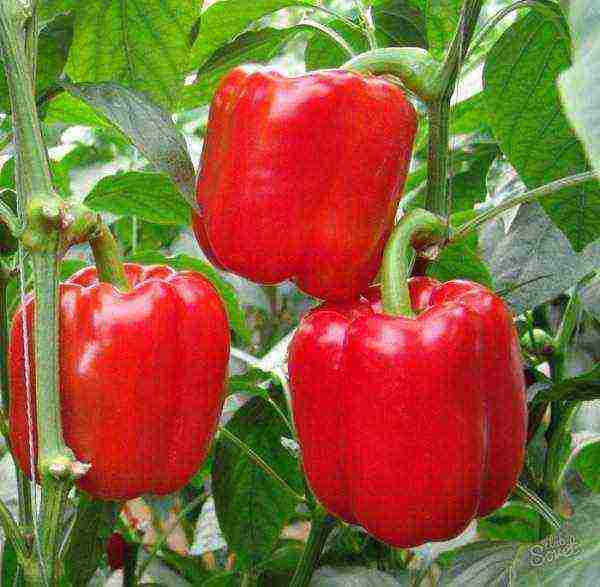
In the photo below you can visually familiarize yourself with the seedlings of sweet (Bulgarian) pepper:
How to grow seedlings of sweet or bell peppers?
Let's talk about growing sweet peppers from seeds at home.
Seedlings of bell pepper at home. It is advisable to place them on a window or a glazed loggia; the plants will be cool on an open balcony. They are planted in spacious tall pots or flowerpots with a volume of at least 5 liters. Each layer is laid out with a layer of drainage and pre-prepared soil.
Seedling sweet pepper doesn't like a transplant too much... Growth stimulants added to the irrigation water will help mitigate the shock of moving. The water should be warm and soft, cold can cause growth retardation and even death of sprouts.
Important
provide the required level of lighting ... In partial shade, young shoots stretch out, flowering slows down or stops altogether. The pots are placed on a south window or a sunny loggia; on especially hot days, the plants are recommended to be shaded.
In order for the peppers to receive the necessary oxygen, the soil in the pot must be loosened at least once a week... Be careful not to damage the roots near the surface of the soil. To accelerate fruiting, fertilizing is recommended 2 times a month.
With the beginning of flowering, watering is intensified, combining it with top dressing. Peppers prefer the alternation of organic matter and mineral complexes.
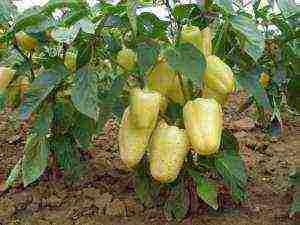 No need to form bushes... Plants do not tolerate damage to the branches, moreover, most modern varieties do not form unnecessary lateral shoots. Tall bushes are tied to supports and must be protected from the wind.
The collection of peppers begins when the fruits reach technical ripeness, become glossy, acquire a rich green color and the desired size. The bright red fruits of physiological ripeness are very tasty, but they should be consumed immediately after harvest.
The most popular varieties for experienced and beginners
When choosing varieties for cultivation, you should rely on proven options that invariably receive excellent reviews from gardeners. Each variety has special care features that need to be taken into account.
Hercules... Mid-season, large-fruited variety, suitable for open ground and greenhouses. Forms compact bush, which can be placed in a pot or tub displayed on the loggia. During the ripening of the fruit, the plant looks very decorative.
A small bush is covered with large glossy cuboid peppers of different shades, from dark green to red. Fruits are juicy, not watery, taste good... Seeds are best planted in February, the seedlings are moved under the film after 50-60 days. The survival rate is good, the plants are practically not affected by pests, they are resistant to viruses. Peppers love warmth, but they also put up with small changes in temperature.
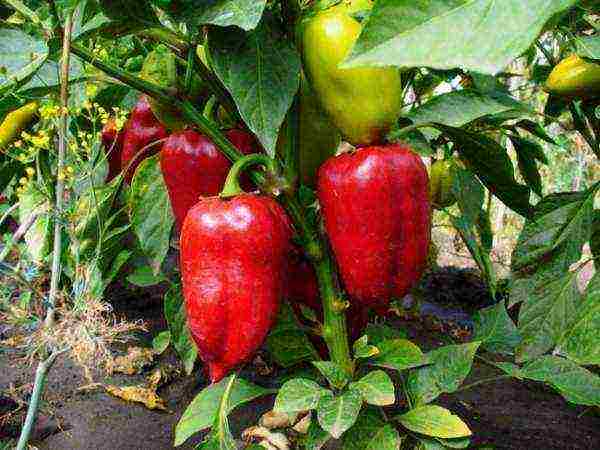
California miracle... A very popular variety. Fruits are early ripe, large, juicy, with a pleasant sweetish taste... The yield is high, up to 2.5 kg of fruit can be harvested from the bush. Peppers are suitable for canning and preparing any kind of food, suitable for freezing.
The plant is very hygrophilous; less watering can cause the ovaries to drop.
Watering is intensified during flowering; to maintain moisture, the soil can be mulched or a hydrogel can be added to the soil. Seedlings are distinguished by almost one hundred percent survival rate., after transplanting into pots or greenhouses, practically does not get sick.

Bogatyr... Large-fruited variety that forms tall bushes. Can be grown outdoors, but yields in a greenhouse are much higher. Suitable for planting in large flowerpots, requires a mandatory garter... The fruits are bright red, thick-walled, juicy.
The variety is suitable for canning and cooking anything from snacks to soups. Variety has a stable yield, at least 15 ovaries appear on each bush. Very picky about watering and soil nutrition, prefers alternating organic and mineral fertilizers.
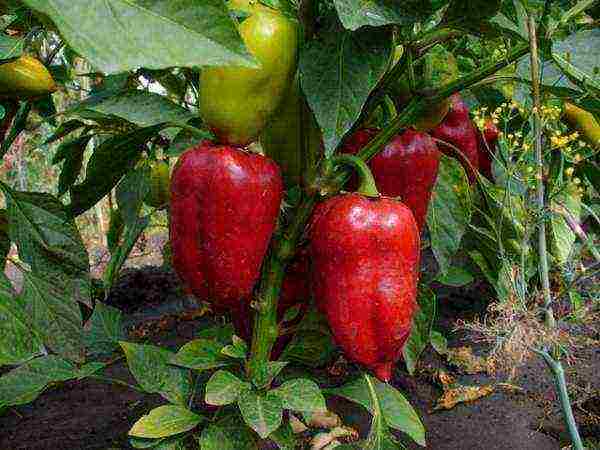
Vegetable lovers should not be limited to summer cultivation in greenhouses or in the ground. Household peppers in pots also give an excellent harvest, with proper skills, you can achieve winter or early spring forcing, providing seven vitamins. Try different varieties and planting times for better yields and increased production lines.
Useful materials
Read other articles on pepper seedlings:
- Correct cultivation from seeds and should they be soaked before planting?
- How to grow black peppercorns, chili, bitter at home?
- The main reasons why leaves curl at shoots, seedlings fall or stretch.
- Planting dates in the regions of Russia and the peculiarities of cultivation in the Urals, Siberia and the Moscow region.
- Learn recipes for yeast-based fertilizers.
Useful video
Videos about containers and soil, about growing conditions for bell peppers and about biostimulants:
Vegetable garden (vegetables)
|
2016-10-27 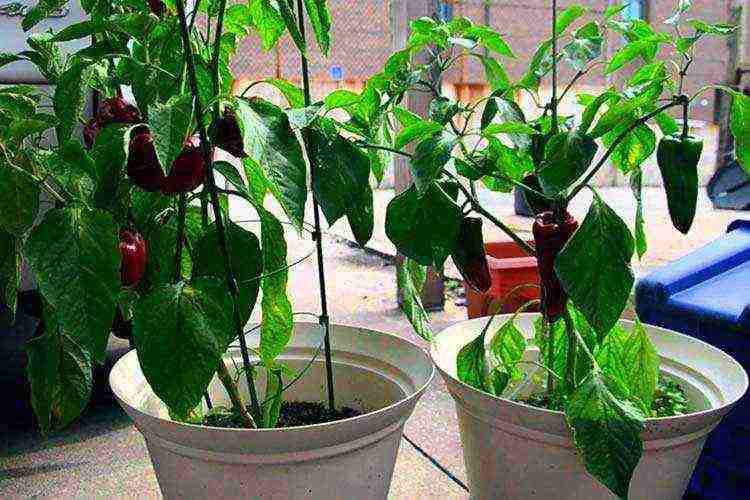 Bell peppers can be successfully grown at home
Autumn and winter are not a reason for boredom, especially for skilled and non-lazy gardeners. During the winter months, it is doubly pleasant to observe the bright bushes of sweet peppers, strewn with colorful fruits.
It is not difficult to grow sweet peppers on a windowsill, in room conditions - the agricultural technology of growing pepper in winter does not differ from the method of growing in a greenhouse. Pepper seedlings are grown similarly to greenhouse ones, seeds are sown, and grown seedlings dive.
At the age of 4-6 leaves, sweet pepper seedlings are carefully transplanted into decorative pots with fertile soil. The volume of the pot must be more than 1.5 liters, and a gravel drain must be laid on the bottom of the pot.
By the way, many gardeners in the fall dig up fruit-bearing bushes in the garden and transfer them to a room for winter cultivation, and plant them back in the spring.In this case, the process of plant growth and development does not stop - pepper is grown as a perennial plant.
 Bell peppers can be grown on a windowsill
Therefore, in the fall, you can dig up a suitable pepper bush, cut each shoot shortly, plant it in a pot of fresh soil and transport it home to a bright window. It is advisable to spray the future crown of the plant with a solution of Epin or Novosil. Such a plant will continue to bear fruit with proper care without interruption throughout the winter.
By replanting plants from open ground with an already formed crop, without removing all the fruits and without shortening the shoots, we doom the plants to rapid death.
What kind of pepper to choose
The correct selection of the variety is the main condition for success for the winter cultivation of sweet peppers on the windowsill.
The compact crown and small size of the bush are the main characteristics of the pepper variety or hybrid that you should pay attention to. Fruits ripen early or ultra-early.
- Western film - a very early variety of pepper. Plants are compact, 30–35 cm high. Fruits are bright red, weighing 60–80 g, fruiting amicably. The variety is unpretentious, shade-tolerant, grows well on the windowsill.
- Winnie the Pooh - early ripening dwarf sweet pepper. Fruiting occurs 100–110 days after germination. Standard bushes up to 30 cm high. Fruits are cone-shaped with a pointed tip, weighing up to 70 g, red when fully ripe. Differs in the simultaneous ripening of fruits. To obtain the maximum yield, the plants must be planted thickened.
- Yova - early ripening variety of pepper. Fruits weighing up to 200 g, thick-walled, juicy. In technical ripeness - salad, in biological ripeness - red. The variety is unpretentious, harvestable, grows well on a loggia and on a windowsill.
- Carat - an early ripening variety of pepper. Sprawling bushes, 60–70 cm high. Fruits weighing 60–70 g, dense, fleshy, directed upwards. The plants are very decorative.
- Gingerbread man - an early ripening variety of pepper. The plant is semi-stemmed, undersized (20-30 cm), leafy. Fruits are round, smooth, slightly ribbed, tender skin and pulp, ripen together. Coloring of fruits from light green to dark red. The walls of the fetus are thick (7–8 mm). Fruit weight 100–160 g. The taste is excellent.
- Red bell Is an ultra-early ripening, high-yielding sweet pepper variety. The fruit tastes great. It grows well in the open field, in the greenhouse, on the window and on the balcony.
- Sturdy - early maturing, high-yielding variety with abundant fruiting and amicable ripening of fruits. The plant is compact, 37–55 cm high, the fruits are cone-shaped, with a blunt apex, smooth and slightly wavy, protruding upward, the color of the fruits is from yellow to red. Fruit weight 70-75 g.
- Treasure Island - an early ripe sweet pepper variety for growing in pots. Plants 40-60 cm high. Fruits are orange-red, weighing up to 60 g.
- Sweet chocolite - mid-early variety with very beautiful fruits with a superficial chocolate color. Fruits weighing up to 100 g, excellent taste. Grows well and bears fruit in winter indoors.
- Triton F1 - ultra-early ripening hybrid, unpretentious, undersized and productive. Fruits are conical in shape, directed upwards.
- Filippok F1 - early ripening (75–80 days) hybrid. The plant is short, slightly leafy. Fruits are small (50-60 g), cuboid. The color changes from green to dark red. The taste is very high.
Artificial lighting
Artificial increase in daylight hours is the most important condition for the successful cultivation of sweet peppers in the winter.
Most gardeners use ordinary incandescent lamps for supplementary lighting, but they give little light and a lot of heat, burning the leaves and stems of the peppers when they are close.
Cold light fluorescent lamps are most convenient for lighting an apartment plantation. For 1 m2 of area, fluorescent lamps with a total power of 100-150 watts are necessary and sufficient.
Fluorescent lamps provide little heat - they can be placed near plants, but there is little orange-red light in their spectrum, which stimulates photosynthesis.
Phytolamps can be used - they are the most effective for illuminating plants and are very economical in terms of energy consumption. One drawback of phytolamps is poorly eliminated - the lilac-pink glow of these lamas irritates the human eye and causes headaches.
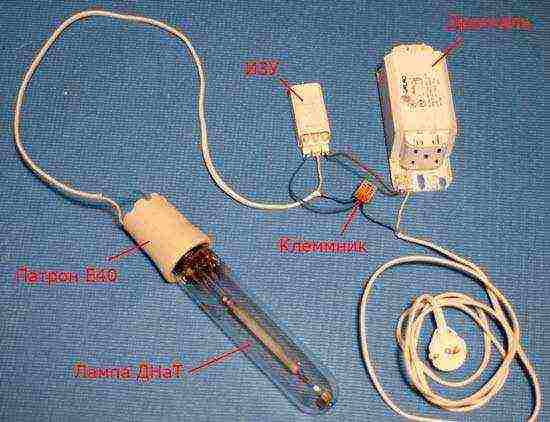 Sodium lamp connection diagram.
 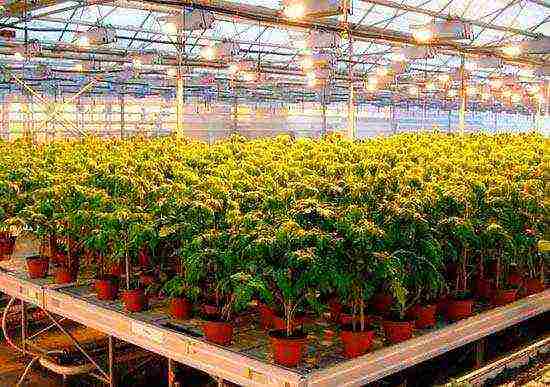 Lighting of plants with sodium lamps.
Sodium gas-discharge lamps give the greatest effect when illuminating seedlings (for example, DNaZ or Reflax) and combine high radiation activity with a favorable spectrum for photosynthesis. Sodium lamps give an orange-yellow glow similar to the setting sun. Such a light does not irritate a person, which is very important when placed in an apartment.
Temperature regime
Pepper is a thermophilic plant, so the tray with pots should be placed not on the windowsill, but on a layer of foam, which will protect the soil and plant roots from hypothermia.
If the apartment is warm, the temperature is above + 23 ° C, this does not mean that the soil on the windowsill is warm. Take the time to stick the thermometer into the ground, and you will be very surprised.
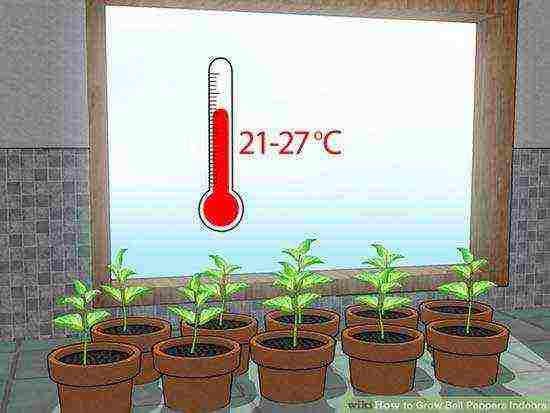 Recommended temperature for growing sweet peppers at home. Photo: WikiHow
If the box is located far from the window glass, then the temperature of the soil in it is usually 5 ° C lower than the air in the room. And if the box is on the windowsill next to the frame, then it may be 10 or more degrees lower.
At this soil temperature, heat-loving peppers will not grow or may rot at all. Plants in such cases must be removed from the window sill at night or, in extreme cases, the window glass must be carefully covered with thick paper.
And if your apartment conditions permit, it is better to place boxes with plants not on the windowsills themselves, but on specially made wooden or metal gratings (attachments to the window sill) at a distance of 20-30 cm from the window. And the cracks in the windows should be sealed to avoid drafts.
Watering and feeding mode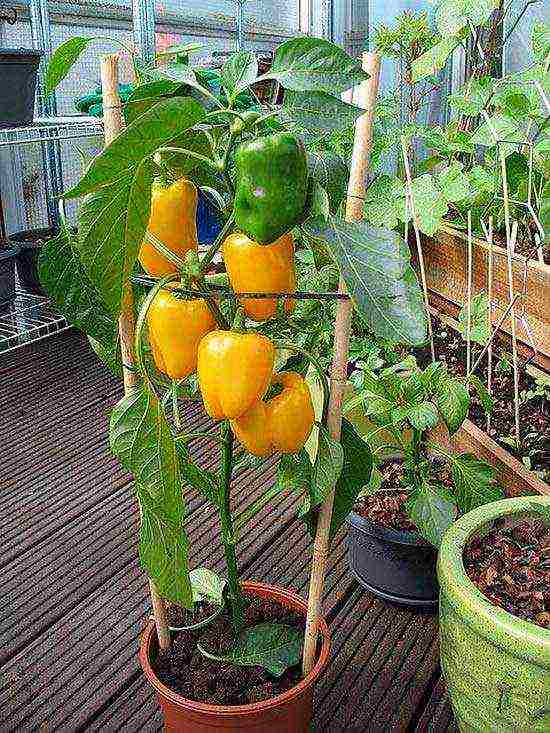 Optimal watering and feeding works wonders
In rooms with central heating, it is necessary to carefully monitor both the moisture content of the soil coma, preventing it from drying out, and the humidity of the air. Plants need to be watered in moderation, but very warm water. Cold, unsettled water from the tap will quickly destroy the plants.
Top dressing should be carried out regularly every 12-15 days with complex fertilizer containing microelements and only after abundant watering. It is useful to spray the plants with cooled boiled water and watered once a month with an extract of wood ash (20-30 grams per 1 liter of water).
Pepper, sown for seedlings in the fall, will develop a powerful root system by the beginning of winter and branch out with the formation of several lateral shoots. With sufficient light and temperature, the pepper begins to bloom and bear fruit in early February.
For better pollination and fruit setting, you can additionally walk with a cotton swab over the flowers, transferring pollen from one flower to another, or spray the plants with "Ovary" or "Bud".
With low air humidity, pepper is often affected by spider mites. In this case, regular treatment with Fitoverm can help. But it is very difficult to deal with a tick in an apartment, tk. children may accidentally feast on treated fruits.
Growing pepper seedlings at home is not so much a whim as a necessity, since pepper came to us from southern countries, which makes the seedlings extremely sensitive to temperature conditions.
Given this fact, today we will talk in detail about how to grow pepper seedlings at home so that they can be planted in open ground and get a decent harvest.
When is the best time to grow?
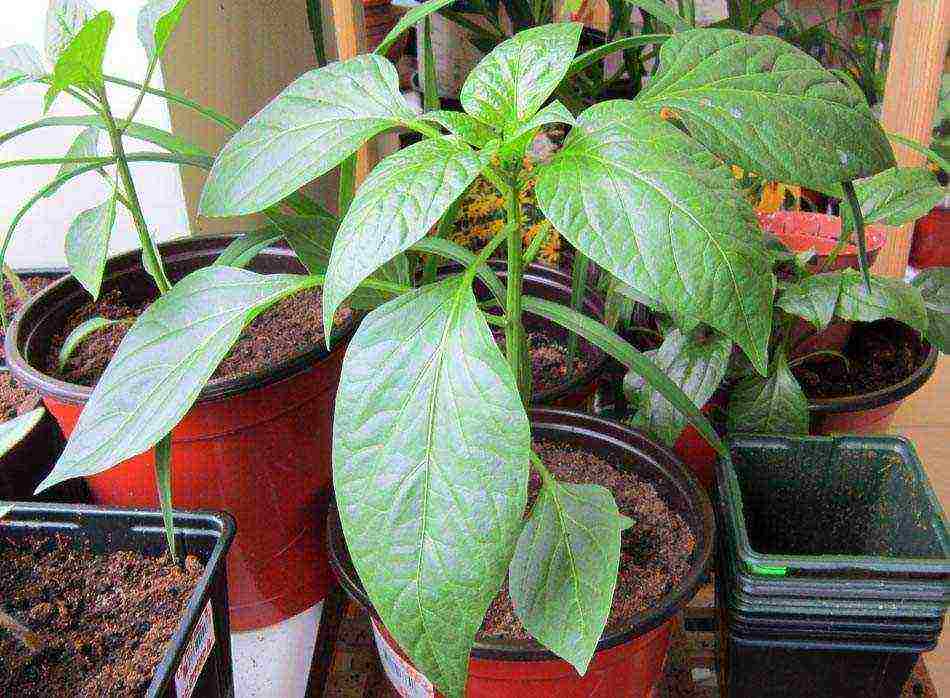 If you plan to transplant pepper seedlings outdoors, it is best to start planting it on February 20, or if the pepper variety is early maturing, plant it on March 10.
These terms will give enough time for growth and correct formation of seedlings, and will allow weather conditions to stabilize, ensuring the proper temperature regime. Such dates are relevant for the latitudes of the middle lane.
If you live in northern regions, where summer comes late and lasts a short period of time, refrain from planting pepper in open ground, because in such conditions, if you get a crop, it will be small and stunted. To grow peppers in the northern regions, you need a greenhouse. Greenhouse seedlings should be planted in late February or early March.
As for the timing of planting pepper seedlings for planting and growing exclusively in a greenhouse, there is no special framework here, since greenhouse conditions are suitable for year-round cultivation of this crop.
For southern countries, pepper seedlings should be planted in mid-January or early February.
Planting pepper seedlings in open ground should be 60-80 days of its growth. If the variety is early maturing and prone to fruiting at 60-100 days of growth, replant the seedlings at the age of 30-45 days. These criteria will allow you to independently calculate the optimal planting time for seedlings of any kind of pepper, adjusting it to the weather conditions of your region. Remember, peppers are planted in the garden only when the average daily temperature has reached a stable level of + 15 ... + 17 ° C and above.
How to choose a pepper variety and seeds?
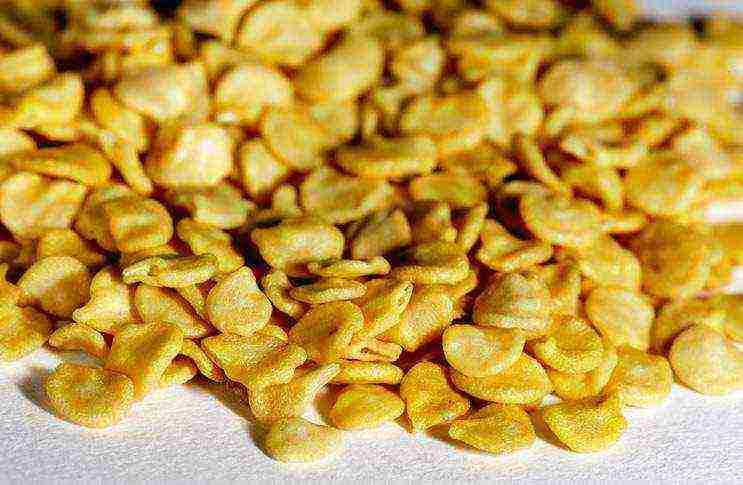
Having learned about when to plant seedlings, you should decide on the choice of the pepper itself, the care of which will be optimal in your particular case.
So, there are 3 main types of pepper, such as:
- Bell pepper.
- Bitter pepper.
- Peppercorns.
It should be noted right away that peppercorns are not suitable for growing outdoors in the conditions of the CIS countries. This type of pepper can be grown in greenhouse conditions, but it is difficult, expensive and not profitable, which means we will leave it for industrial companies that grow it in huge quantities and sell it as spices.
Sweet peppers are the most numerous and demanded plants of this type in our latitudes, and are divided into categories, such as:
- Large. The fruits of such peppers reach a mass of over 200 grams, are distinguished by thick walls, and are best suited for fresh consumption.
- Average. The fruits of such peppers reach a mass of 100-150 grams, have thinner walls, and are best suited for stuffing, preservation, freezing and any preparation for the winter.
- Small ones. The fruits of such peppers reach a mass of 20-50 grams, have very thin walls, and are intended for canning and drying, while maintaining the integrity of the fruit.
All three categories have the following types of peppers in their assortment:
- Early ripening peppers. Varieties for those who want to get everything at once.
- Mid-season peppers. Varieties for those who do not like to rush things.
- Long-ripening peppers. Varieties for those who value the process rather than the result.
Any of these peppers requires approximately the same conditions, consisting in warmth, plenty of sunlight, good watering and feeding. Choose peppers based solely on your aesthetic and gastronomic preferences. There are also varieties of pepper focused on warmer, or vice versa, colder regions, but their whole difference is reduced to minor fluctuations in relation to a comfortable growing temperature.
As for the bitter peppers, they have also gained sufficient popularity and success among domestic summer residents and gardeners, as they are distinguished by abundant fruiting, and, in general, have a piquant taste.
Everything that has been said for sweet peppers is equally true for bitter peppers, with the exception of a few points, such as:
- Sweet and hot peppers should not be grown in close proximity to each other, as the sweet variety will become unpleasantly bitter.
- Seedlings of hot pepper are transplanted a little earlier than sweet, at the age of 60-65 days.
- Seedlings of hot pepper are more thermophilic, and they are transplanted at an average ambient temperature of 20-24 ° C.
- Some hot peppers can be grown on a windowsill, with frutescens being an excellent example. In addition, most hot pepper varieties can be grown in pots and pots, making them easier to carry around when needed.
Having decided on the type of pepper, you should talk about the choice of its seeds. Many people mistakenly believe that by buying a beautiful and large pepper in a large store, you can extract seeds from it and grow a similar specimen in your yard, which is fundamentally wrong. The fact is that store peppers are represented by hybrid forms, the seeds of which are either sterile, or if they give a crop, it will be much worse than the parent plant.
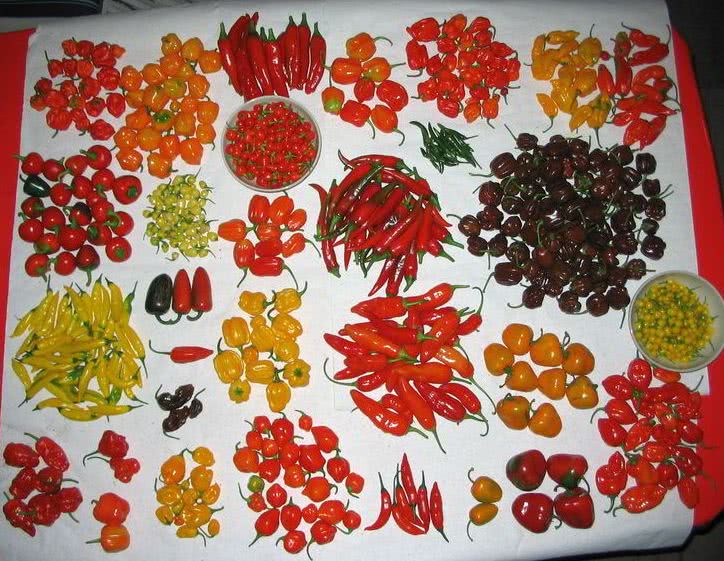
And here we come to the main points of choosing seeds, such as:
- Hybrid pepper seeds. If you buy fresh peppers in the store and get seeds from it, they will not meet your expectations. Despite this, special hybrid pepper seeds are sold in flower shops, which can please you with the sizes and shapes presented in large grocery stores, but at the same time require you to follow the ideal rules of agricultural technology, and their seeds, as in the case of store analogs, will be either sterile or give a poor harvest. It is recommended to purchase hybrid pepper seeds for experienced gardeners who want to grow the largest and highest quality peppers.
- Varietal seeds. These seeds have lower requirements for their content at the seedling stage, and in general are suitable for beginners. Despite this, it is the varietal seeds that give the peppers weaker to diseases and pests, which should be taken into account by any gardener. Peppers grown from varietal seeds can give their fertile seeds, but with each generation of such peppers, they will degenerate.
Based on this, we can make an affirmative conclusion, if you want to plant and grow beautiful, healthy and tasty peppers, give preference to hybrid seeds. If you are a beginner, plant varietal seeds in the first season, the care of the seedlings of which forgives many mistakes, and if you like your crop, buy hybrid seeds next year and enjoy fruits that are in no way inferior to store counterparts.
What boxes and pots should be?
The container in which you will plant seeds and grow pepper seedlings is not of fundamental importance, and here any cups and plastic containers with a depth of about 10 cm are suitable.The diameter of the container depends on how many seeds you plan to plant, which should be located at a distance of 1.5 -2 cm from each other (seeds can be planted both in separate and in a common container).
The only requirement for the container is that it must be waterproof in order to retain moisture well and prevent the soil from drying out, which can lead to the death of seedlings.
Also, at the initial stage of seed germination, the container will have to be covered with glass or polyethylene, which means that the container where the seeds will germinate must be strong enough and retain its shape even in conditions of high humidity and heat.
How to prepare the substrate?
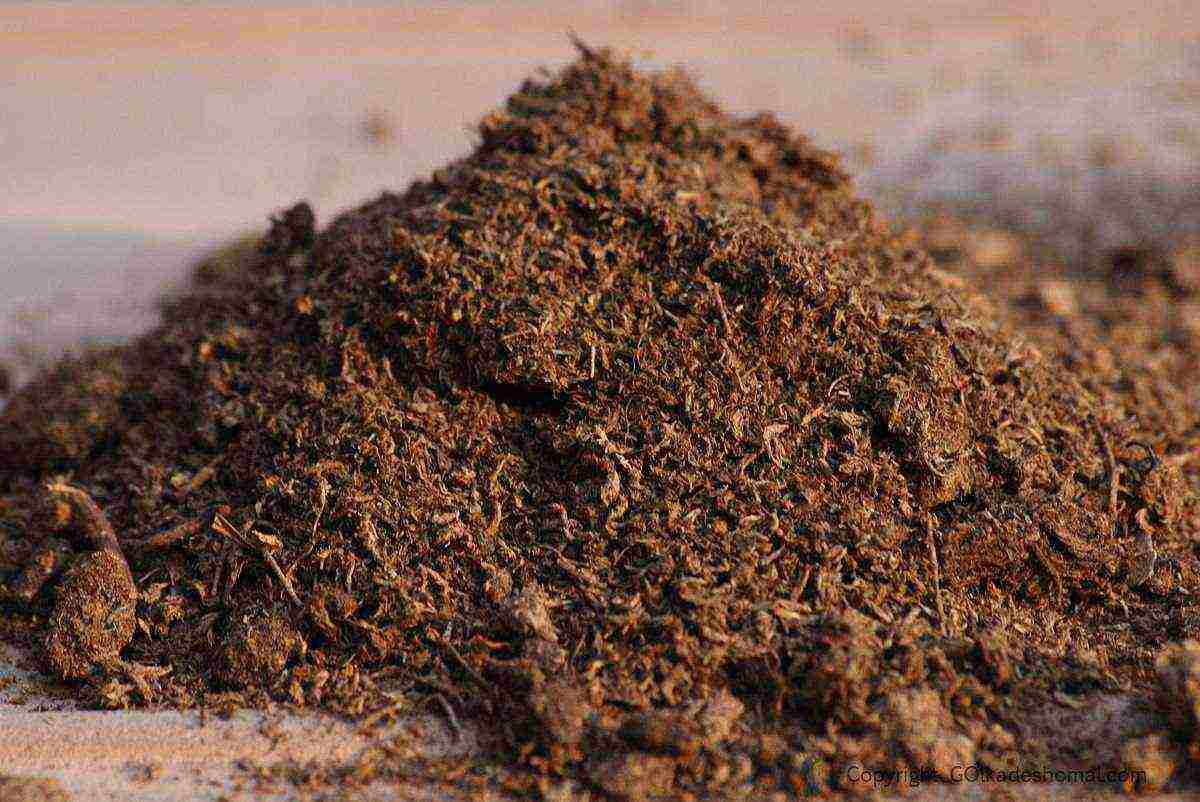
When growing pepper seedlings at home, you should properly prepare the soil substrate, which is discussed in detail in the following paragraphs:
- Take 2 parts of humus or compost and mix well until smooth.
- Take 2 parts peat and 1 part washed sand.
- Mix the peat with the sand, and then sift the resulting mixture through a sieve.
- The sifted mixture should be steamed in a double boiler for an hour in order to protect the seeds and seedlings from fungal invasions and bacteria.
- Combine the humus and the sifted mixture.
- The substrate for sowing pepper is ready.
If you don't want to mess around with preparing the substrate yourself, just buy it at any flower shop. For growing pepper seedlings, both the soil for general-purpose seedlings and the soil for pepper seedlings, which are sold in most stores, are suitable.
Remember, if you are going to grow healthy and viable seedlings, we do not advise you to use ordinary soil without preliminary heat treatment, because when germinating seedlings you will have to create high humidity in the container combined with high temperature, which can most likely activate fungal spores , especially if the soil was taken under the fallen leaves of fruit trees.
Step-by-step planting instructions
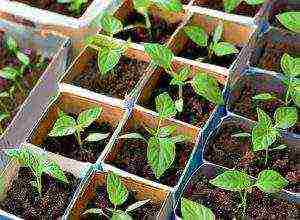 Before planting, you should first prepare the seeds themselves. The detailed seed preparation process consists of the following points:
- Examine the seeds you have and remove damaged, underdeveloped, spoiled samples, leaving the largest and healthiest ones.
- The remaining seeds should be additionally protected from fungi. To do this, collect the seeds, place them in gauze, and place the gauze in a solution of one of the preparations "Maxim", "Fitosporin-M" or "Vitaros". Soak the seeds in the indicated solutions according to the instructions on their packaging.
- If you do not have the above preparations, soak the seeds for about 30 minutes in a concentrated solution of potassium permanganate. After potassium permanganate, you should thoroughly rinse the seeds without removing them from the gauze.
- After washing the seeds, spread them on a damp cloth, cover with another damp cloth on top, and place them in a place whose temperature will be approximately + 25 ° C. Check the fabric periodically and do not let it dry out. If the fabric starts to dry out, dampen it.
- After 7-14 days, the seeds will sprout, and then you can start planting them.
As mentioned above, you can grow pepper seedlings in almost any container, from cups to containers. But before planting viable seeds there, the container should be washed in a solution of potassium permanganate, and then dried thoroughly.
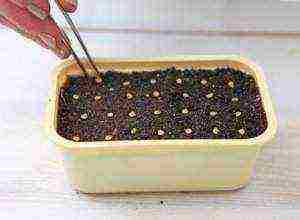
Next, you should fill the container with the previously prepared mixture, and slightly compact it so that the top layer of soil is about 2 cm below the side of the container. how tweezers will help you.
The seeds should simply be placed on the ground, without tamping them, so as not to damage the fragile roots. The decomposed seeds should be moistened with warm water, sprinkled with a spray bottle, and covered with soil 1-2 cm thick, lightly and tamped as gently as possible. Next, water the seeds using a spray bottle; when watering, make sure that the seeds are not washed out.
After watering, cover the container with seeds with cellophane and put it in a warm place, where the temperature will not be lower than +25 degrees. Periodically look into the container and re-irrigate the soil in order to always maintain moisture.
After 7-14 days, the first shoots will appear, and at this moment the container should be opened and placed in a bright place, the temperature of which will be at least + 15-17 degrees. Sprouted seedlings should be watered with warm water in moderation, keeping the soil moist, but at the same time, do not allow water to accumulate in the pan.
Rotate the container with seedlings from time to time so that it grows even, otherwise it will reach for the light, and may become crooked to one side.
After 3-4 weeks, the seedlings can begin to dive. The best picking time is when 1 or 2 true leaves appear in the seedlings.Before picking, the seedlings in a common container should be well watered, and wait until the water drains into the pan. This measure will allow, when picking seedlings, to preserve maximum soil on its root system, and will protect it from mechanical damage.
The very picking of seedlings is carried out in any containers, the volume of which does not exceed 100-150 ml. The pick is carried out exclusively with single sprouts, since paired cultivation will not allow them to be transplanted into the ground in the future without damaging the tangled root system. The previously prepared soil is poured into new containers, the recipe for which is mentioned in the middle of the article, or ordinary soil for seedlings bought in a store.
The sprouts should be transplanted into the holes that will allow their root system to settle without bends and twists. The root collar can be lightly sprinkled with earth, but no more than 0.5 cm. After picking the seedlings, pour plenty of warm water over it and put it in a bright place to grow.
Further care
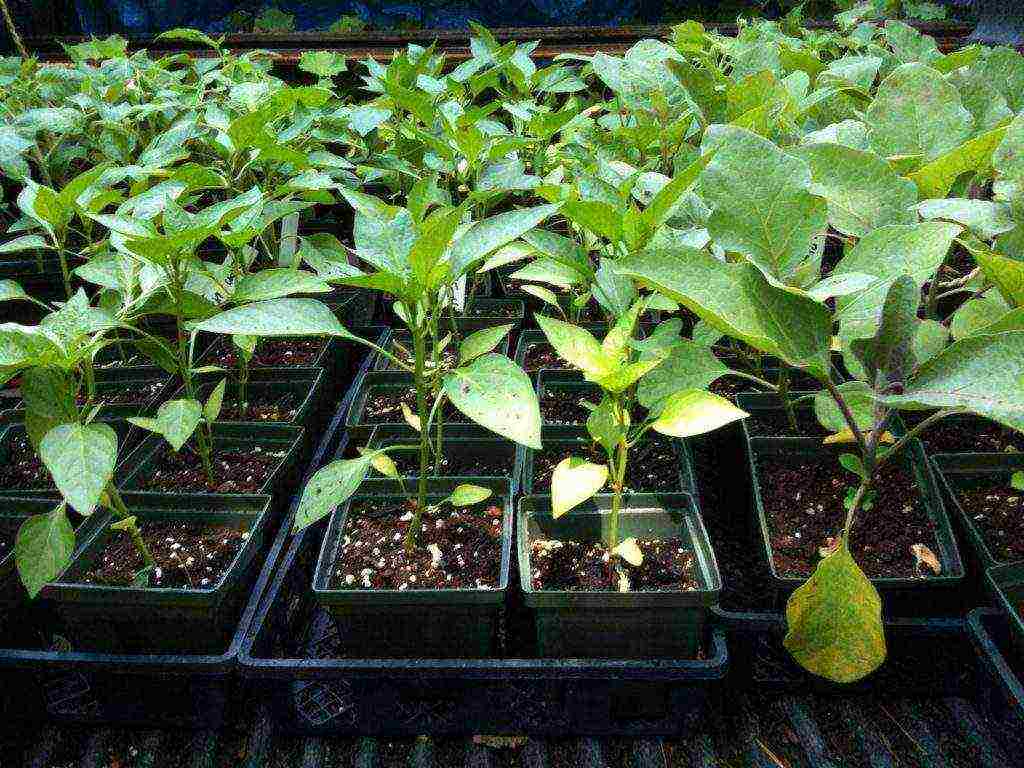
Seedlings planted in separate containers need some care, the basics of which are indicated below:
- Avoid direct sunlight on the seedlings.
- Store it in a light window, or illuminate it with lamps.
- Water regularly, but avoid stagnant moisture.
- Store seedlings at +15 degrees. If the temperature drops below +13, the growth of seedlings will stop.
- Feed the seedlings 2 weeks after the pick and 2 weeks after the last feeding. The best dressings are Agricola, Krepysh, Fertika Lux, Solution;
- 2 weeks before planting pepper in the ground, you can take it out into the fresh air in the daytime, thereby hardening it.
- After planting the seedlings in the ground, after about 10-14 days, it should be slightly trimmed, shortening the longest shoots. It is also necessary to remove all processes that are located below the main fork of the stem, so that they do not pull on the nutrients intended for the fruit.
What problems can arise when growing?
The main problems and how to solve them are indicated in the following paragraphs:
- The seeds did not hatch. To avoid this trouble, we recommend planting 50% more seeds than you need, since some of them may be sterile.
- The sprouts began to rot. You have waterlogged the soil.
- The sprouts do not grow. The temperature at the window is too cold.
- The seedlings are stretched out. There is little sunlight on the window, or overfeeding with fertilizers.
If you intend to grow large and healthy peppers, we recommend growing bell pepper seedlings, as this is one of the best species for a beginner. Sweet pepper seedlings can take up a lot of space, which means that you should prepare a lot of space for it on the site in advance, removing all objects shading the area from it.

