Content
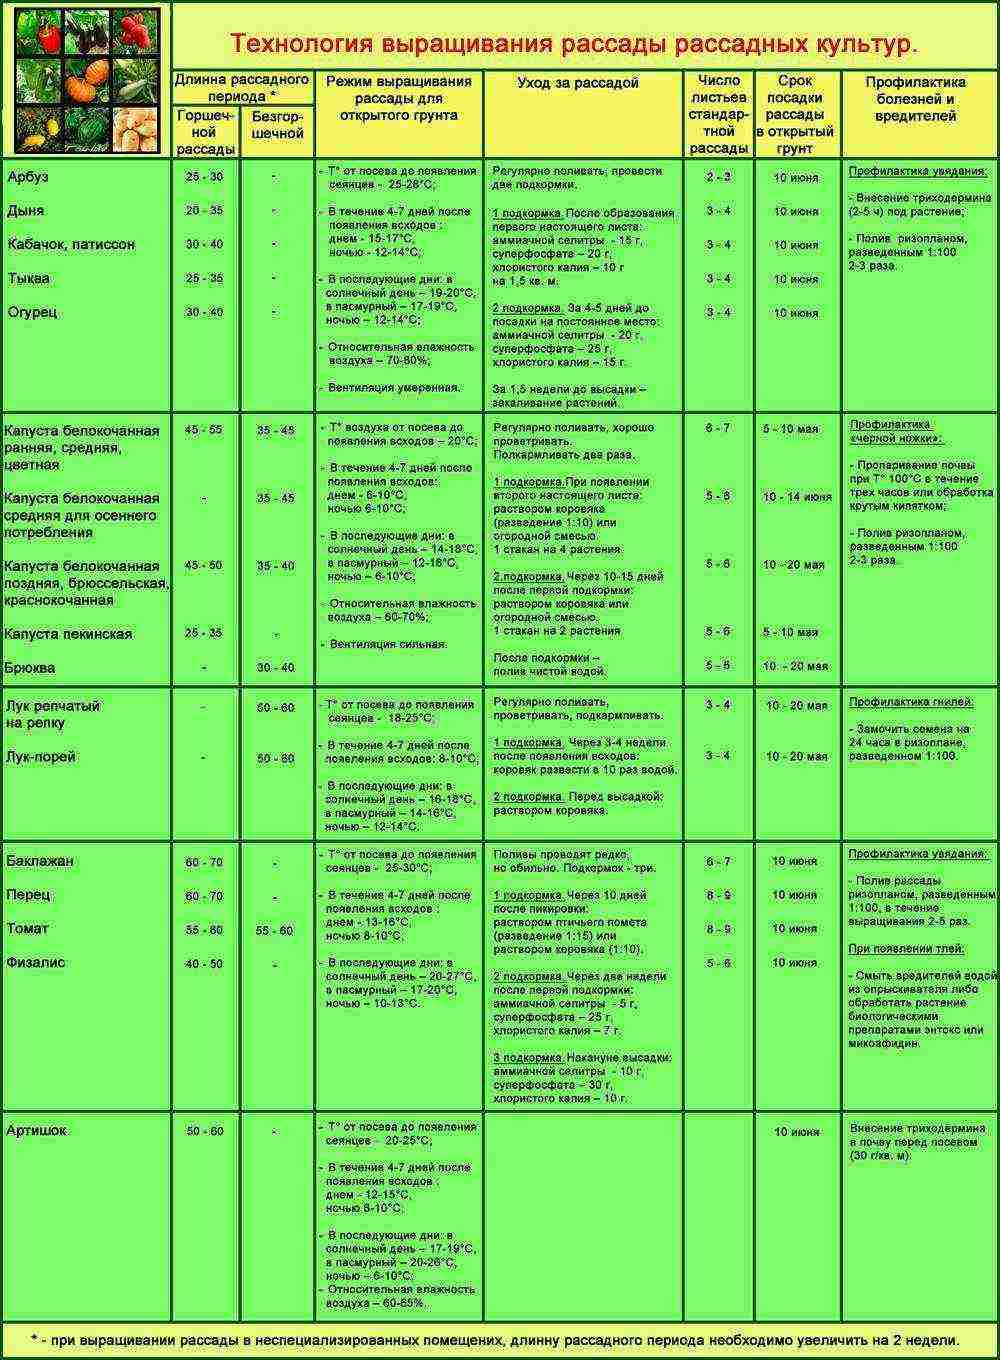
- 1 The time interval from sowing the seeds of some vegetables to planting seedlings in open ground
- 2 Preparing vegetable seeds for planting
- 3 Planting vegetable seeds for seedlings
- 3.1 Soil preparation
- 3.2 What to sow the seeds into?
- 3.3 Correct planting of hatched seeds
- 3.4 Marking
- 3.5 Natural and artificial lighting of seedlings at home
- 3.6 Temperature conditions for growing
- 3.7 Correct watering of seedlings
- 3.8 How to prevent the disease of vegetable seedlings "black leg"
- 3.9 Dive
- 3.10 Fertilizing vegetable seedlings
- 3.11 Stimulating plant growth through touch
- 4 Growing healthy vegetable seedlings in peat pellets
- 5 Preparing vegetable seedlings for transplanting into the ground
- 6 We plant seedlings in open ground
- 7 What crops are grown by seedlings
- 8 Dates of planting horticultural crops for seedlings
- 9 Growing seedlings in boxes and cups
- 10 Growing seedlings in peat tablets
- 11 Growing seedlings in "snails"
- 12 Growing seedlings in "diapers"
How to properly grow healthy seedlings in order to get a good harvest of vegetables and favorite flowers at the dacha and to avoid unpleasant moments that may occur during the growing process and spoil your mood.

In order to properly grow good seedlings at home, you need to prepare the seeds for sowing (including early ones), choose the right soil and pots, properly water, dive and fertilize the plants. You also need to take into account the date on the calendar, the temperature regime, determine whether there is enough natural light and pay attention to what phase the moon is in.
The time interval from sowing the seeds of some vegetables to planting seedlings in open ground
Eggplants and peppers / medium-sized tomatoes / standard tomatoes / tall tomatoes, respectively: in 2 months / 40-45 days / 50 days / in 2 months.
Watermelon / pumpkin / cucumbers - 20 days, strawberries (strawberries) - 2 months.
Celery / onion, respectively: 2 months / 1.5-2 months.
Early varieties of tomato
They sprout about a week after sowing. Therefore, we plant them in open ground in a month and a half. A favorable period for planting tomatoes in the garden is the beginning of June. If planted in a greenhouse, then this should be done in mid-May.
Mid-season and late varieties of tomatoes
They give sprouts for 6 days after sowing the seeds, but they should be planted in a permanent place no earlier than after 1-2 months. This period falls on the beginning of June, so the sowing of seeds should be much earlier than the early varieties of tomatoes.
Cucumbers
Their "upstarts" -growths appear already in 2-3 days. After a month, the plants are ready for transplanting to the garden. They are transferred to the greenhouse at the end of May, and to the garden in June.
Pumpkin
Pumpkin, squash and squash, close relatives of cucumbers, sprout 4-5 days after sowing for seedlings. A month later, they are ready to be planted outdoors.
When handling cucumbers, pumpkins, zucchini and squash, their delicate root system cannot be damaged, therefore, first you need to moisten the soil well, and then, with a large lump of earth, transfer the plants into the prepared hole.
Eggplant
They hatch for a long time. It is possible to wait for the emergence of seedlings of dark-skinned darlings only after 2 weeks. And it should be planted in the garden only after 60 days, in the month of June.
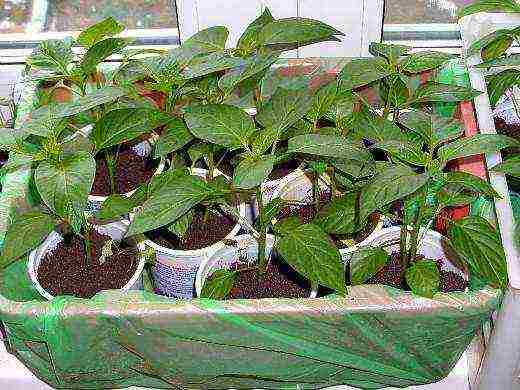
Bell pepper
This is the case with this vegetable. Pepper seedlings develop rather slowly, so it is necessary to sow them at the end of February in order to plant them in the garden after 3 months. Under good conditions, the seedlings can even bloom even before they are transplanted into the ground.
Salad
Fans of growing it in seedlings can be advised to sow seeds at the end of May, and transfer them to the garden at the end of June.
Preparing vegetable seeds for planting
Presowing seed preparation plays an important role in obtaining good and healthy seedlings of flower and vegetable crops. There are many methods of seed preparation, but some of them take time. If it is not enough, you can use simple techniques for preparing seeds for sowing.
Warming up
The seeds should be poured onto a plate and placed on the battery for 2 hours.
Disinfection
In order to disinfect the seeds, it is not necessary to dip them in a solution of potassium permanganate, you can put them on a white sheet and hold them in the sunlight. An ultraviolet lamp also helps to kill microorganisms.
Sorting
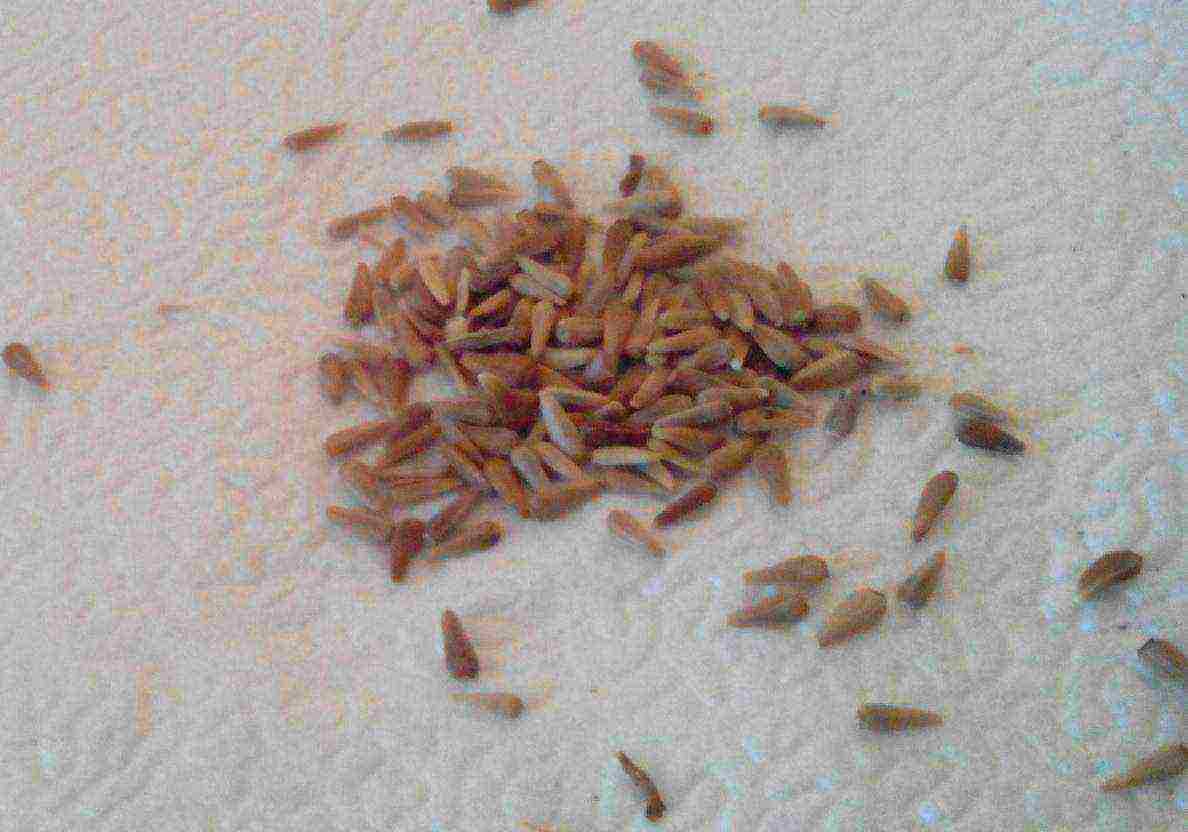
You only need to sow good seeds, so you need to sort out high-quality seeds and remove the defective ones. After pouring water into a glass, add the seeds. The bad ones will remain on the surface, and the good ones will be at the bottom of the glass.
Germinating seeds and testing for germination
Those seeds that are at the bottom must be put on a 10 by 10 cm cloth (there are as many squares as there are varieties of seeds), wrapped in a bag and tied with a thread. Each bag needs to be signed or a tag with the name of the variety attached to it. Prepared fabric bags must be placed on a ceramic or glass saucer, moistened with water and covered with a plastic bag. Now the seeds need warmth, which means that the battery will again be the best place to germinate.
Moisture support
The main task at this stage is to prevent the pouches from drying out, as the seeds will die. A plastic bag placed on top of the "rags" will help to maintain constant humidity. The seeds will hatch after 1.5-2 weeks, in some plants - earlier. Now you need to select the best ones and plant them in the ground. Late hatching seeds can be thrown away without regret, since there is no point in waiting for a record harvest from them.
Planting vegetable seeds for seedlings
Soil preparation
Producers offer buyers a variety of soils for growing seedlings, but the soil for planting must be "correct". Of course, you can experiment with different soils, but the success of getting good seedlings will depend on the composition of the soil. The fact is that for sowing seeds you need to take 50% of the purchased soil and mix it with 50% of the garden land. This is an important point. The seedlings will initially get used to the composition of the soil and, when replanting, the process of adaptation to the new soil will be much faster. Therefore, even in the fall, you need to stock up on high-quality soil from your summer cottage.
What to sow the seeds into?
Due to the fact that dairy products are now on sale in plastic cups, housewives have no problems choosing pots for planting and growing seedlings. But you need to take into account the following that, in the future, when transplanting into open soil, the clod of earth must be thoroughly moistened, cut the cups on both sides with scissors, remove the seedlings with the clod and plant them in open soil or a greenhouse.
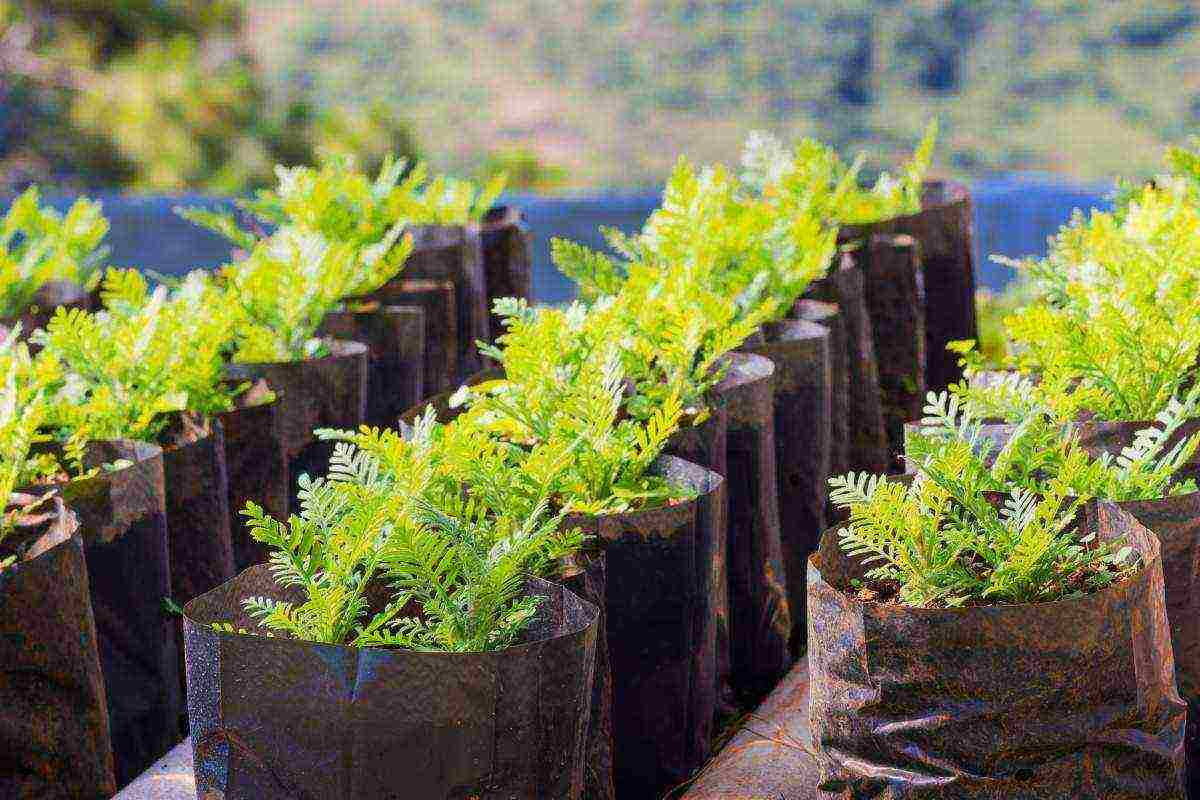
You can buy pots made from pressed peat.When transplanting from them, first we dig a hole, then we deepen the peat pot and sprinkle it with soil.
Peat pots should be completely covered with earth, this will allow the walls to get wet, and the cups will dissolve over time, thus forming a kind of nutrient substrate for plants.
Correct planting of hatched seeds
We plant seeds only in pre-moistened soil. To avoid injury to seedlings during growth, you need to reduce the number of intermediate transplants, so you need to plant the seeds in separate cups. First of all, this applies to seedlings of cucumbers, eggplants (here is more about growing these vegetables) and zucchini. The root system of these vegetable crops is too sensitive and some of the plants may die during transplantation. After sowing, planting needs to be watered.
You can plant a couple of seeds in one glass or cassette. After germination, when 2 true leaves appear on the plant, you need to leave a healthy plant and remove the weak one.
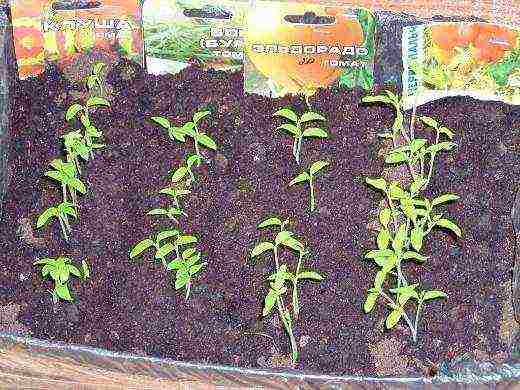
Marking
The marking should be done immediately after sowing the seeds. On a label that is resistant to washing off with a felt-tip pen or marker, the following data must be indicated: planting date, variety, manufacturer. In the future, labeling will make it possible to determine which varieties of vegetable crops, which producer grow and develop better, and give a good harvest. You can simply stick the seed bags into the ground by rolling them up.
Natural and artificial lighting of seedlings at home
How to properly grow good seedlings with insufficient natural light? Of course, sufficient lighting is the main factor in determining good seed germination. Young plants require more light than adults. If there is not enough daylight or it is not possible to place all the cups with seedlings on the windowsill, you can organize artificial lighting by installing fluorescent lamps above the plants.
Sprouted seeds should receive bright light from 14 to 16 hours a day. Fluorescent lamps should be located at a distance of 20 centimeters from the seedlings. The outgoing light from the lamp should not be white, it would be more correct to install lamps with yellow light. From bright lighting, the foliage begins to brighten and becomes transparent, leaves may even wilt. If the seedlings develop on the windowsill, artificial lighting should not be connected in the daytime, the plants should be supplemented in the morning and in the evening.
The cups should be rotated from time to time to ensure the plants develop properly.
Temperature conditions for growing
In an apartment, seeds should be germinated while maintaining a temperature of + 20 + 24 degrees. This is doable, but for the correct development of seedlings, no more than +15 + 18 degrees is required. This task is more difficult to cope with, but you need to try. Cover the plantings with a blanket to keep the hot air from the batteries away. It is recommended to open the vents more often to ventilate the room and provide fresh air to the plants. The lower the temperature regime when growing seedlings, the better the planting material will turn out.
At low temperatures, growth will slow down, but the seedlings will be stronger, hardened and resistant to adverse environmental conditions.
Correct watering of seedlings
It is necessary to monitor the soil moisture in the cups. The soil should not dry out. At the slightest drying out, modern soil becomes hard like a stone, air exchange stops, the root system "suffocates" from lack of oxygen and seedlings die. But stagnant water is just as undesirable as a lack of moisture. Water the sprouts from a spray bottle, evenly wetting the soil and moisturizing the seedlings.
It is more correct to water young plants from above, but adult seedlings are better off through a pallet.Thus, the growth of the root system is stimulated, the roots become strong and begin to branch out, trying to get to the water. It is better to water the seedlings more often, but little by little.
Watering with melt and "living" water - only "for!" and no "against"
The secret to properly growing good seedlings is to water them with melt water at the stage of development of 3-4 true leaves. To do this, you need to bring snow from the street to a house or apartment and wait until it melts and the water warms up a little.
For watering plants, you can independently prepare "live" water. To do this, as soon as the first bubbles appear in the poured water in the kettle, put on heating, we immediately remove it and cool it in cold water. One thing is bad that it is recommended to use this miracle cure no more than 2 times during the period of growing seedlings at home.

How to prevent the disease of vegetable seedlings "black leg"
Everyone was faced with such a sad situation when the black leg "exterminates" all the seedlings. In small and quite healthy plants, the stem becomes thin, like a thread, and breaks right at the very surface of the soil. Seedlings grown from small seeds are susceptible to fungal disease. To prevent the development of blackleg, only disinfected and disinfected mixtures should be used for planting. The substrate of your own preparation must also be disinfected. The black leg appears on overly waterlogged soil, so you need to regularly open the glass or remove the polyethylene from the boxes to remove condensation and ventilate the seedlings.
Dive
Seedlings that have grown up to 3-4 cm in height should be cut open. But this procedure is carried out only after the appearance of the second pair of leaves on the shoots. The picking applies only to strong plants, taking away all the nutrients and not allowing weaker specimens to gain strength. After all, small sprouts need space, lighting and nutrition to grow, therefore, when the plantings are thinned out, this will allow you to get good seedlings from the remaining specimens.
A fork is brought under strong plants, they undermine a little and, holding with their hand under the first pair of leaves, carefully remove them with a small clod of earth. In order for the sprouts to develop a good root system, the main root should be slightly shortened during transplantation. In a new pot, the seedlings are buried up to 1 pair of leaves, the soil around the plant is compacted so that the roots are not in the surface layer of the soil.
"For" and "against" picking
Opinions differ about plant diving. Some believe that transplanting affects young seedlings. At this time, there is a high probability of damage to the root system, leading to the death of the plant. The opinions of others are completely opposite. They believe that diving will allow plants to become more resistant to stress and increase their endurance. Therefore, each summer resident must decide for himself whether he will dive or not. The process is simple, but before planting the seedlings in separate cups, you need to think about whether there will be enough space to get good seedlings.
When diving peppers and tomatoes, no problems should arise. Vegetable crops tolerate transplanting well, grow well and quickly.
Fertilizing vegetable seedlings
Seedlings should be fed at a time when the second pair of leaves appears on the plants. Top dressing should be regular. You can apply fertilizers during the pick, that is, add “long-playing” universal granules to the soil. They dissolve gradually, and the seedlings receive the required amount of trace elements. In the process of introducing granules, you must adhere to the proportion recommended by the manufacturers and indicated on the package. You can even take a slightly smaller amount, but not more.
You can also feed the seedlings once a week with liquid fertilizers.
If the plants stretch up, the stems become skinny, and the leaves are light, then there has been an overload of fertilizers. Excessive feeding is bad for the appearance of the seedlings.
Stimulating plant growth with touch
As a result of recent research, it was found that love, care and gentle touch to the leaves of seedlings have a beneficial effect on the development of vegetable crops. This is due to the fact that during the stroking of the leaves, that is, during mechanical action on the plant, a colorless gas is released - ethylene, which has no odor. In turn, it regulates plant growth, being a kind of growth hormone. We are all familiar with the action of this gas. It helps fruits and vegetables ripen. If, for example, you put a banana or an apple in a box with unripe tomatoes, the tomatoes will turn red faster. As you know, ethylene is present in large quantities in these fruits. The effect of gas on young seedlings is that the plants grow stronger and become squat, rather than stretching.
Growing healthy vegetable seedlings in peat pellets
Summer cottage gardeners and gardeners are very interested in the process of obtaining good seedlings when grown in peat tablets.
Advantages:
- Coconut and peat tablets do not take up much space, that is, you can get more copies for planting and harvest a good harvest;
- The tablets contain only a clean substrate, there are no weeds, seeds;
- The tablets do not need to be disinfected as they are already disinfected;
- You will not need to think about picking, since only 1 seed grows in the 1st tablet.
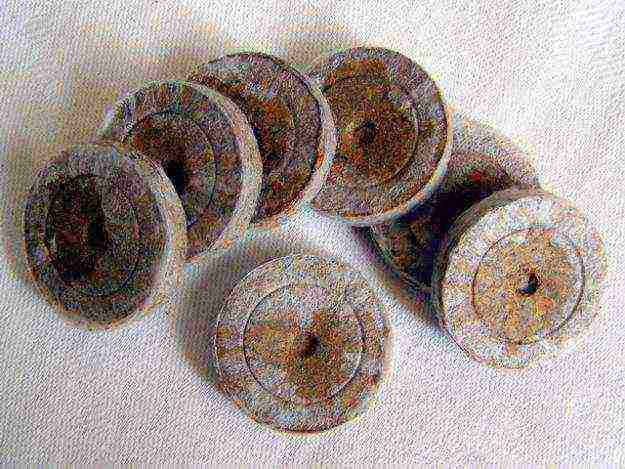
The tablets are dark brown in color and are available in three sizes in diameter: 2, 3, 4 cm. The outer side consists of a mesh, which is very difficult to see with the naked eye. It is noticeable only after the tablet has swollen. When soaked in water, the diameter of the tablet does not change, it only rises upward.
Growing process in tablets
They should be soaked in water before planting. To soak 10 tablets, you need 1 liter of water. In 15 minutes, they will increase 5 times.
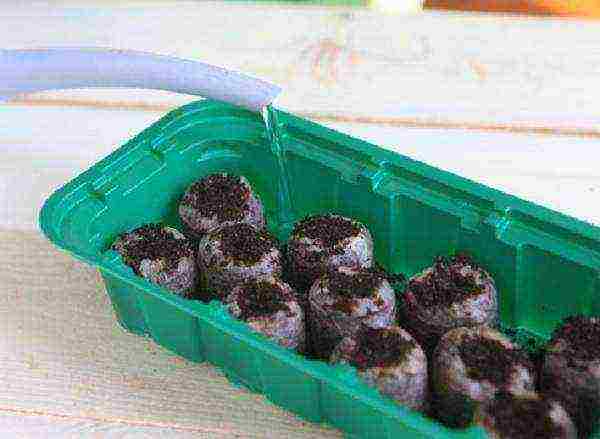
When the tablets "grow", excess water needs to be drained. Now you can start sowing seeds, just decide on the top and bottom side of the tablet. From below it is covered with a mesh, and on the upper end, the mesh is located only along the edges.
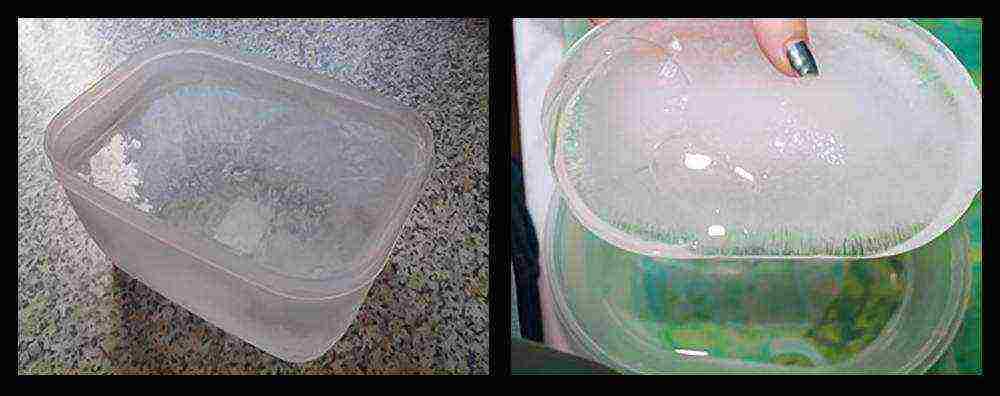
You need to make a depression with your finger, put a seed and sprinkle with the same soil that is in the tablet. It is prohibited to take other soil. Now all that remains is to arrange the tablets on the pallet and cover with a transparent lid. A kind of mini-greenhouse can be created by covering the crops with a round transparent cake lid. In a greenhouse created by your own hands, a favorable microclimate will be created for the development of healthy seedlings.
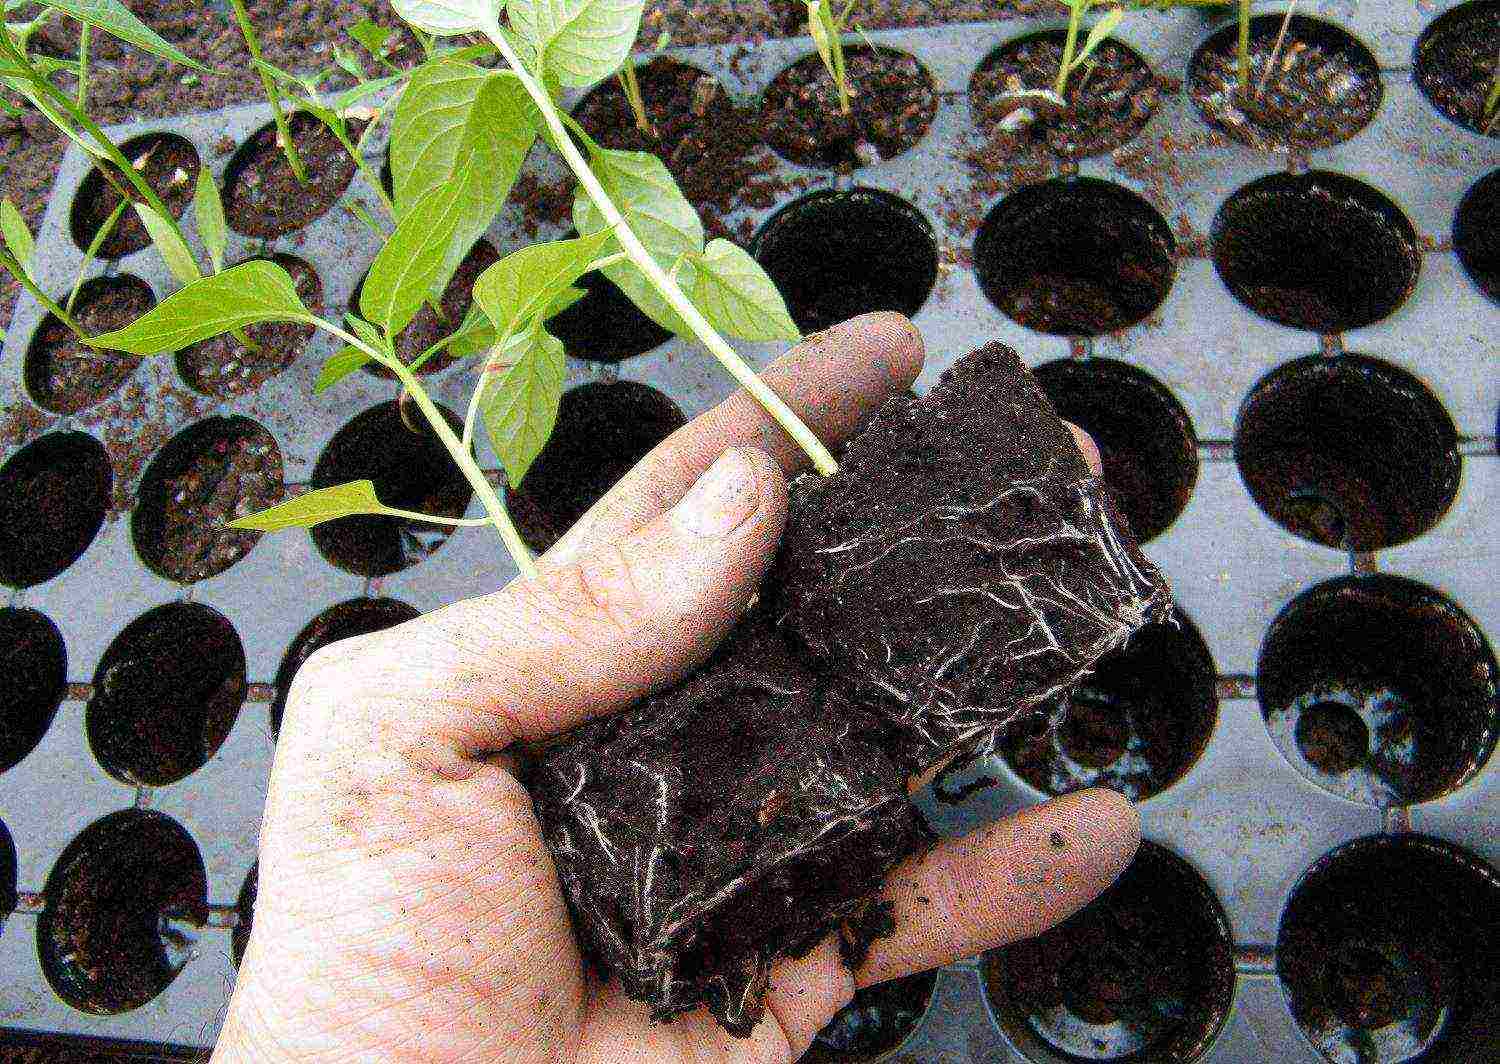
But even in tablets, seedlings cannot grow forever, when roots begin to appear from the side walls, which means it's time to "transfer" the seedlings into a large container.
"Transfer" of plants into a large container - diving
Choose a pot that is larger than the pill. Pour earth at the bottom and set a tablet with a plant. Before installation, you will need to remove the mesh by tearing it at the sides. Now it is necessary to pour soil around the tablet and add it to the top of the glass so that the soil reaches the 1st pair of leaves. As the seedlings grow, you will have to fill up the earth. After transplanting, the soil around the plant should be watered.
Preparing vegetable seedlings for transplanting into the ground
Hardening
When the time for transplanting the prepared seedlings to a summer cottage is approaching, it is necessary to harden it. So the plants adapt better and grow faster. At first, you can take out the seedlings to the balcony, and when the threat of frost has passed, you can leave the boxes on the street, but you still have to wrap them with foil overnight.Hardening should begin 1-1.5 weeks before planting in open ground in the country.
Watering
Before planting, the plants need to be watered, and then planted in the holes, deepening the planting to the 1st pair of leaves. The ground near the plant must be pressed tightly with your hands. When the seedlings take root and start growing, the first feeding with liquid fertilizer (for example, water with ash) will be required.

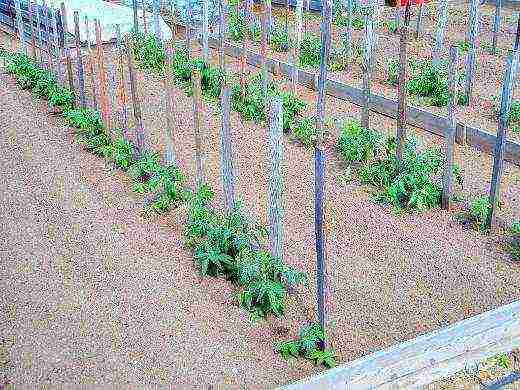
We plant seedlings in open ground
Young seedlings are vulnerable to the scorching sun, suffer from gusty winds and can "lie down" on the ground in pouring rain. Therefore, at first, it is recommended to protect planting with a covering material from the vagaries of nature. You can remove the shelter only after the plants have completely rooted.

To get healthy seedlings, and then a rich harvest, you should follow simple growing rules. After all, young plants are like small children. They also need "eye and eye". Therefore, constant supervision and care will help to get good seedlings of vegetable crops.
Many garden crops in the middle lane are grown through seedlings, otherwise the plants do not have time to give a full harvest. Growing seedlings is a crucial stage, at this time the future harvest is laid, therefore it is so important to sow the seeds correctly and create good conditions for the plants. Find out all the secrets of growing seedlings from our article.
Seedling
What crops are grown by seedlings
Most heat-loving plants with a long flowering and fruiting period are grown by seedlings. In the middle lane, such plants do not have time to fully grow, bloom and bear fruit during the warm season.
Thermophilic plants grown in seedlings include:
- peppers, eggplants and tomatoes;
- cucumbers and zucchini;
- melons - pumpkin, watermelon and melon;
- varietal potatoes from seeds.
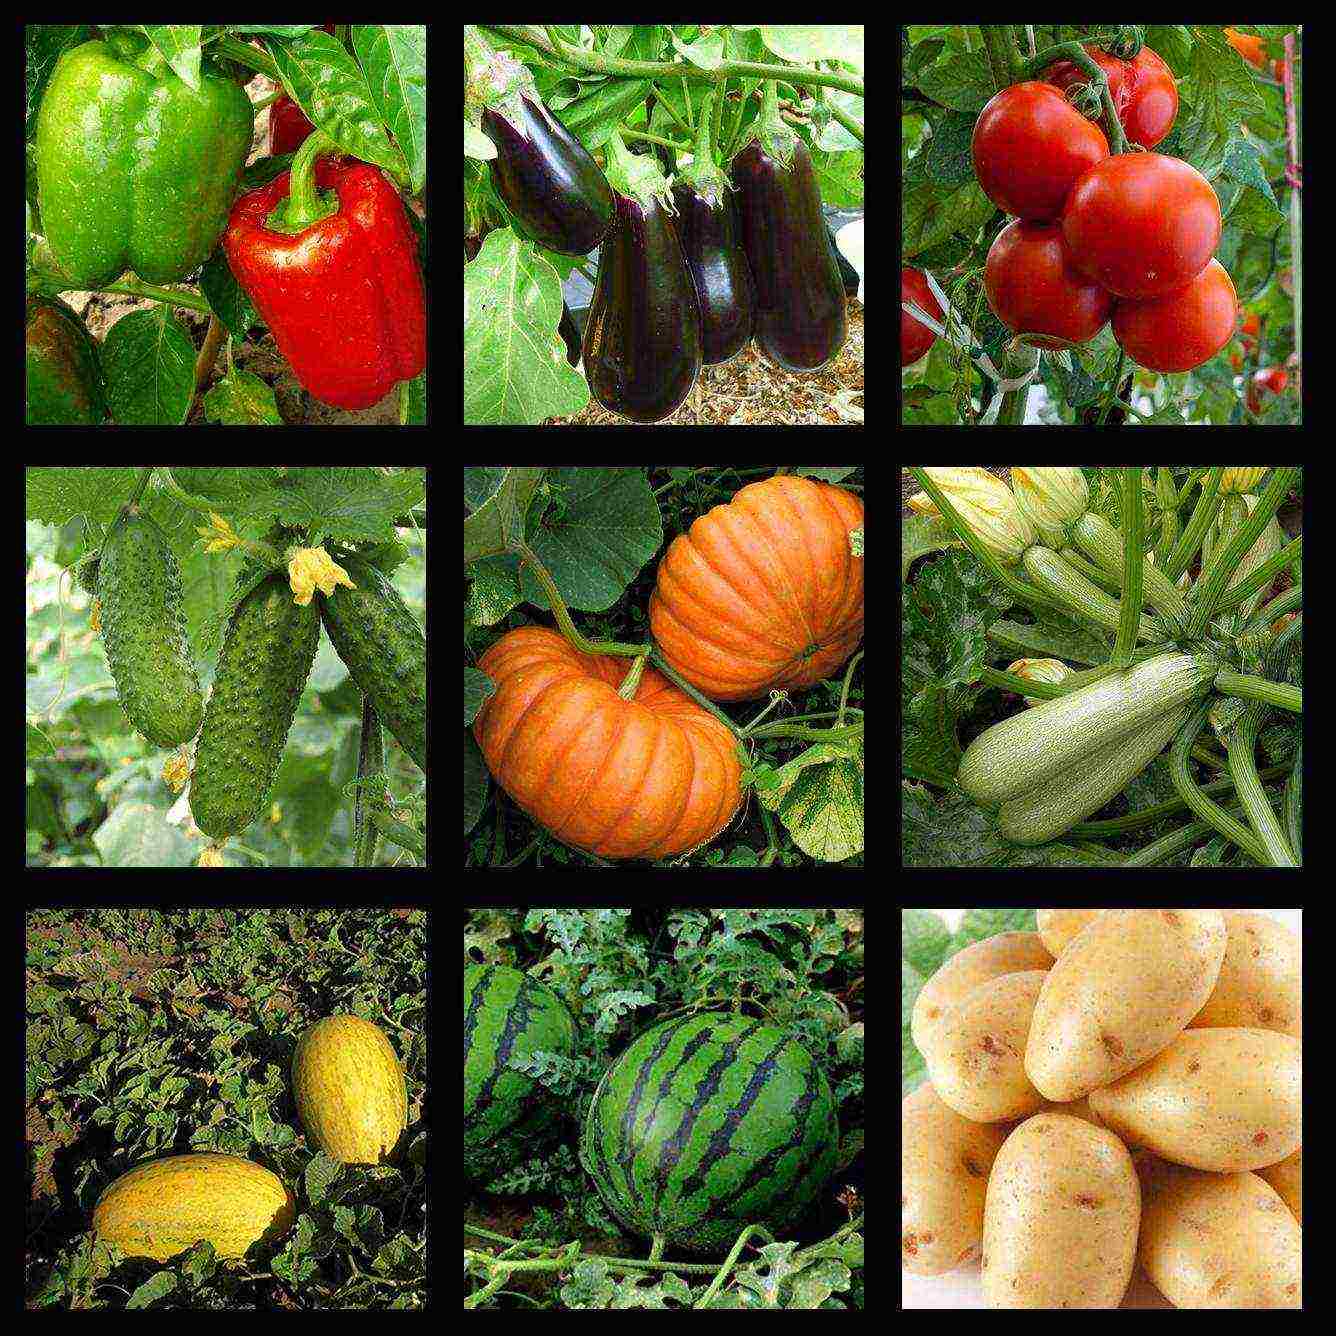
Heat-loving crops grown by seedlings
To obtain an early harvest through seedlings, all types of cabbage are grown - white and red cabbage, cauliflower, broccoli, Brussels sprouts and kohlrabi. You can grow seedlings and root crops - beets, radishes and daikon.
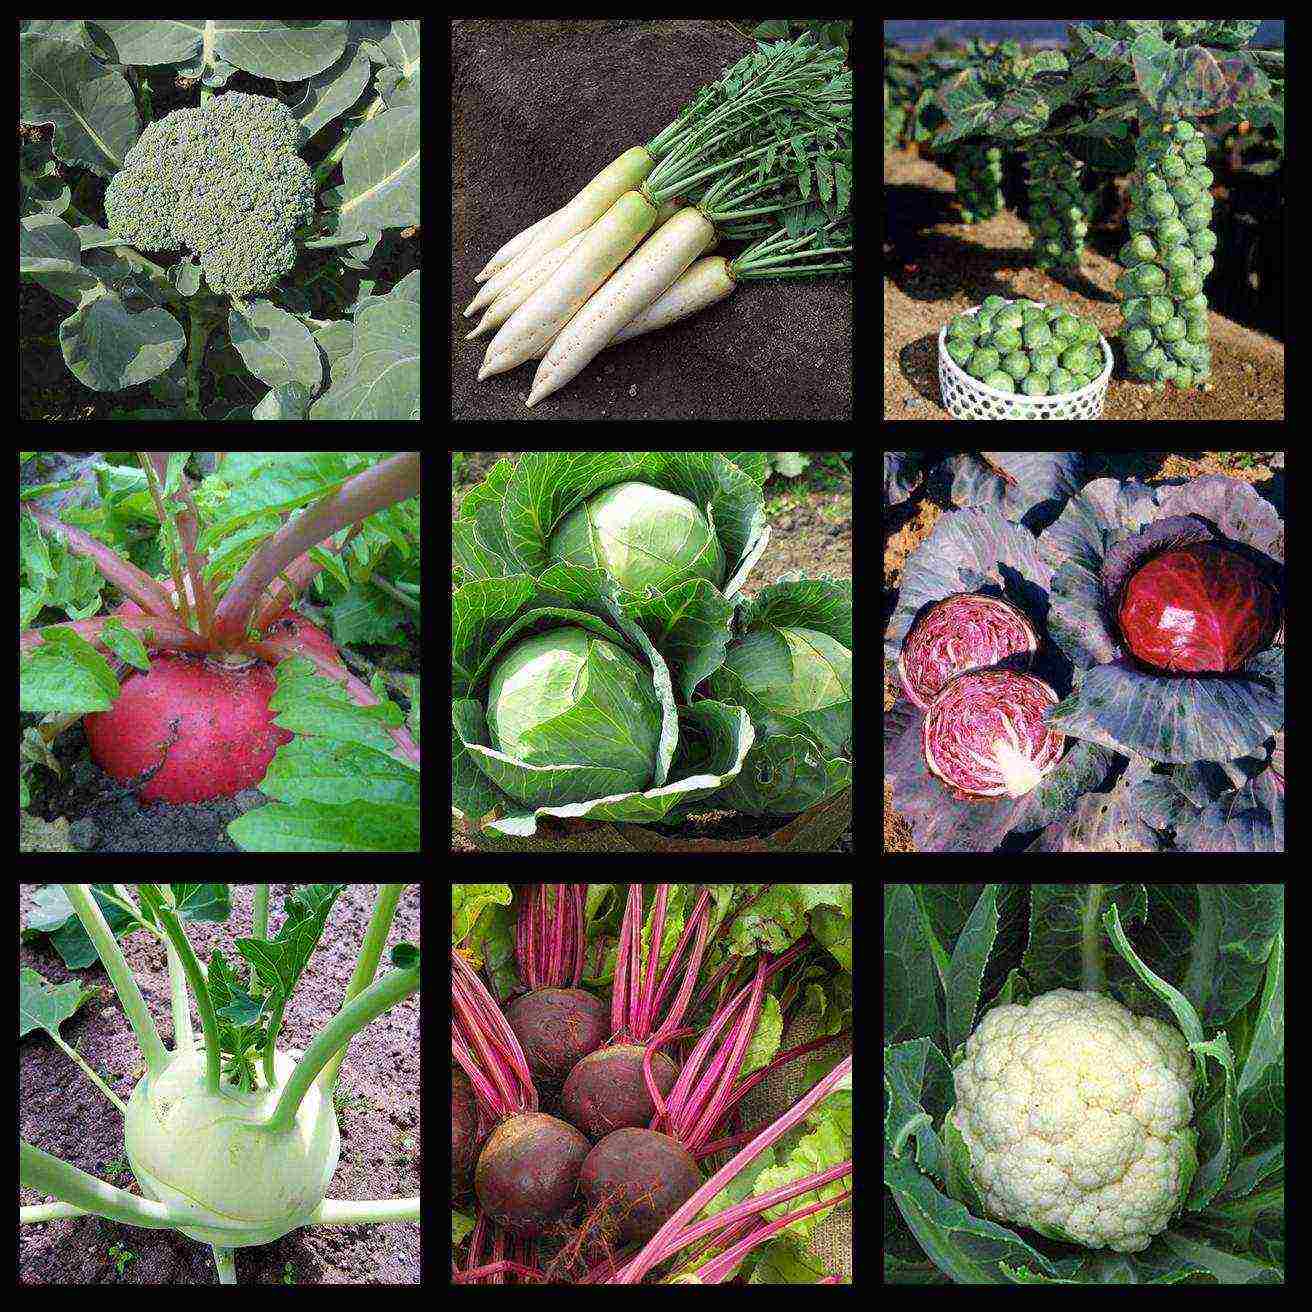
Vegetables for seedlings
Biennial and perennial plants are grown through seedlings to achieve flowering or fruiting in one year. Cold-resistant plants grown in seedlings include nigella and leeks, celery, parsnips. Also, some spicy herbs are sown on seedlings - basil, lemon balm, thyme and oregano.
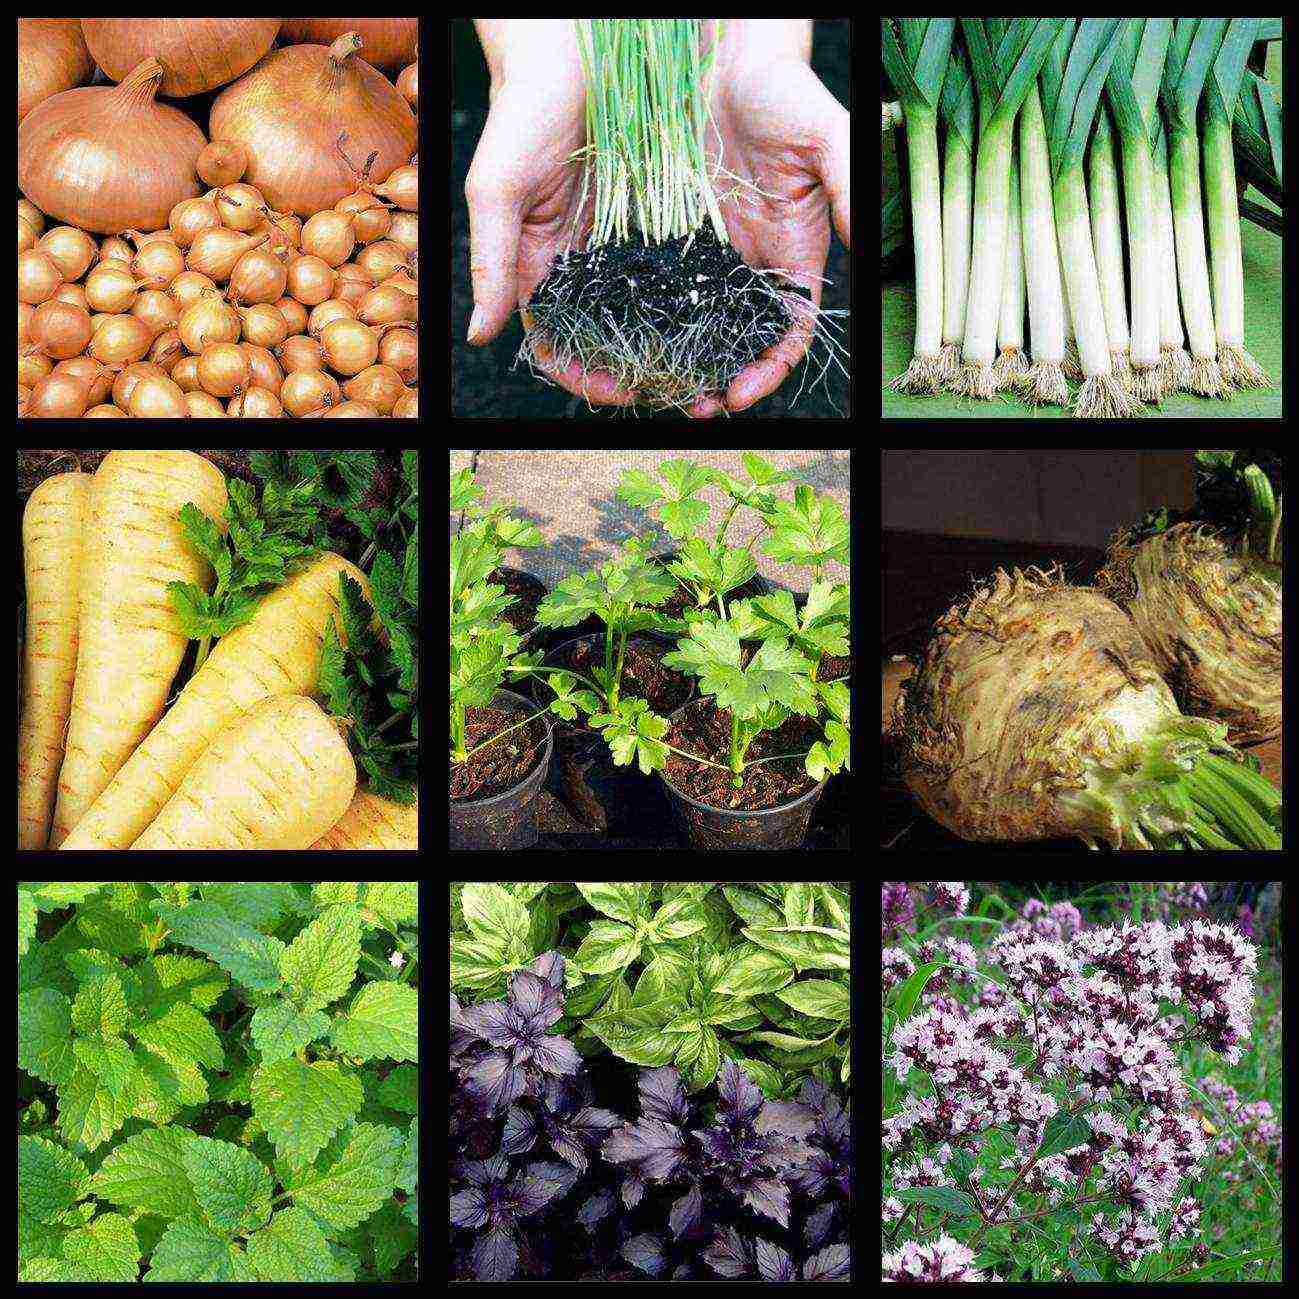
Onions and herbs for seedlings
Garden strawberries from seeds are also grown in seedlings, and they are sown at the beginning of winter. By the summer they get developed bushes, which quickly take root and even manage to give the first berries. Flowers with a long development period are also best planted with seedlings - this way they will bloom already at the beginning of summer.
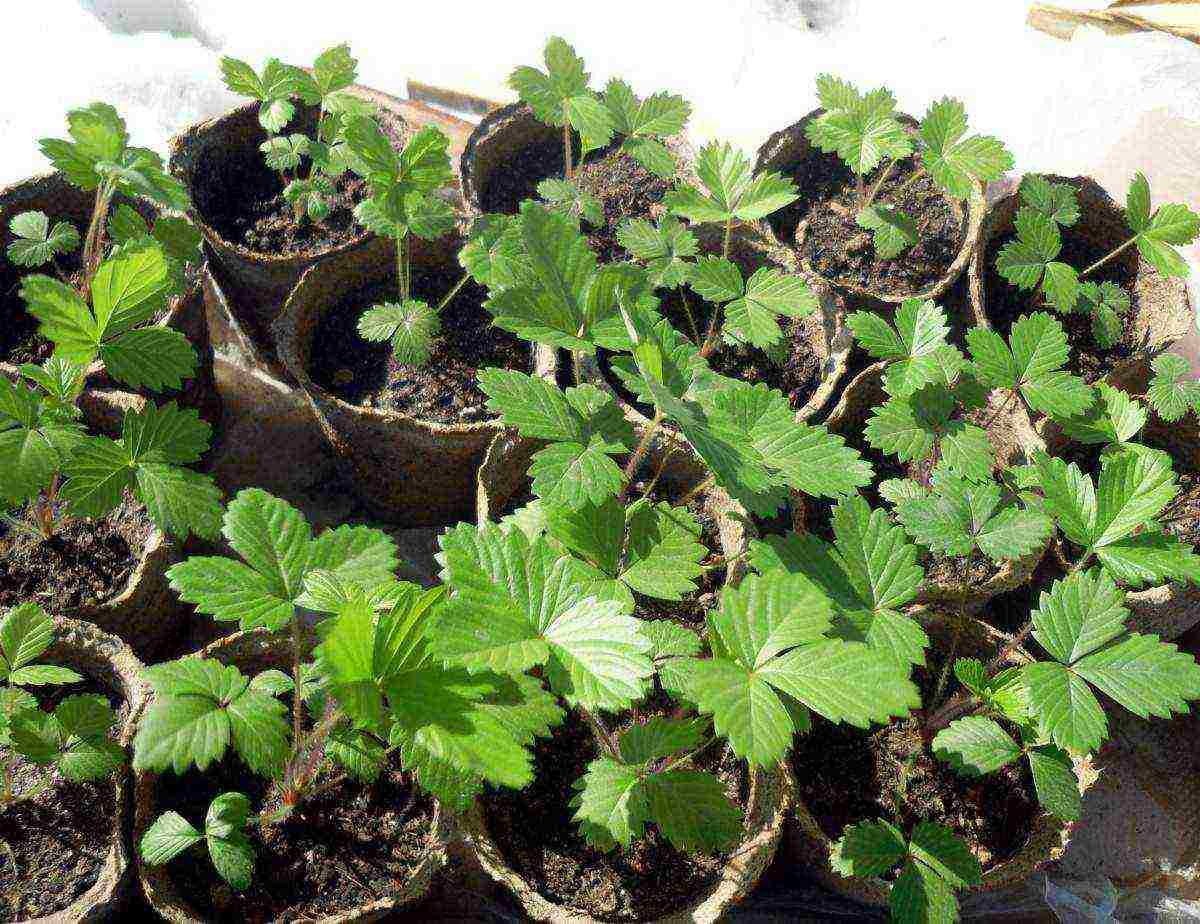
Strawberry seedlings
Dates of planting horticultural crops for seedlings
All plants grown in seedlings have different timing for sowing seeds and planting seedlings. They depend on the growing season and optimal conditions for plant development. So, in the middle lane, cold-resistant cabbage can be planted in the ground at the beginning of May, and with thermophilic peppers, tomatoes, melons and watermelons it is better to wait until June.
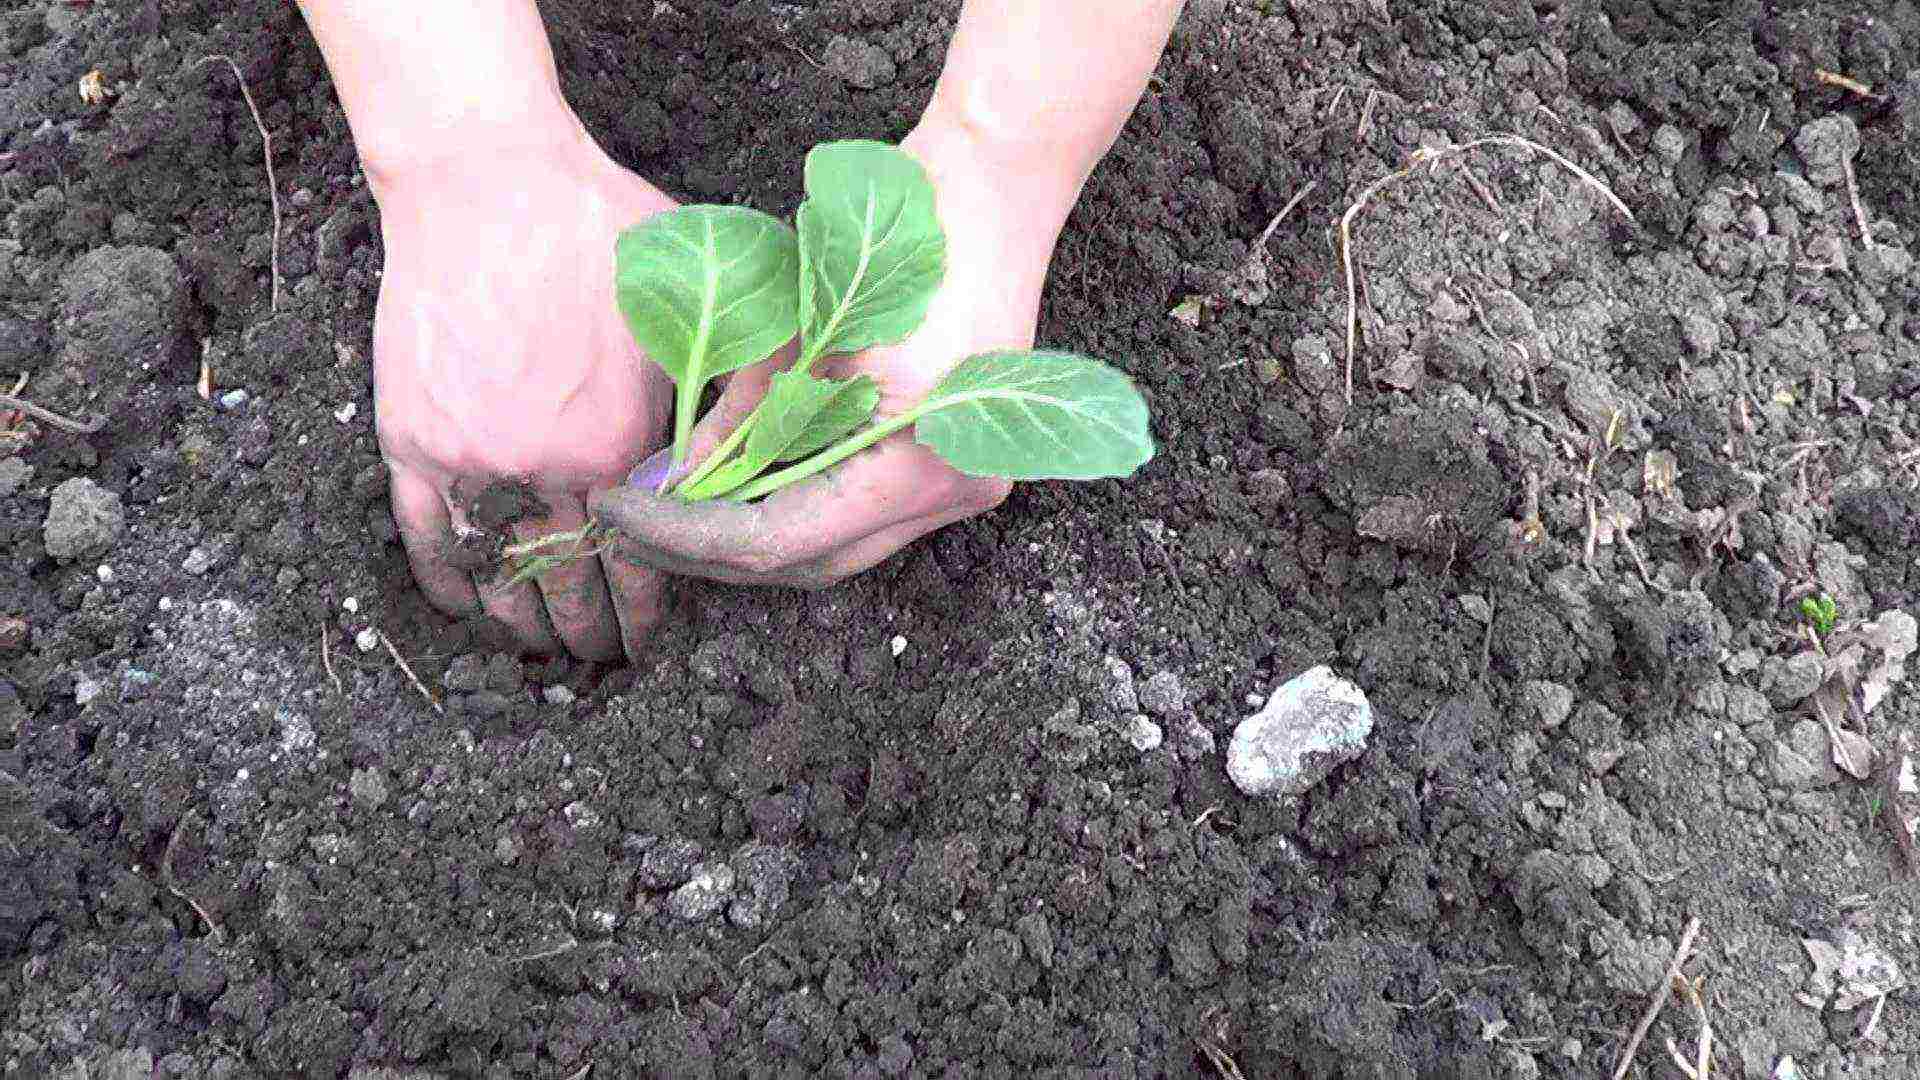
Planting cabbage seedlings in May
When planting seeds, it is important not to be late, otherwise the seedlings will not have time to grow and develop, and the fruiting period will come later than usual. At the same time, there is no need to rush with planting either - the overgrown seedlings take root worse, get sick and may even die.
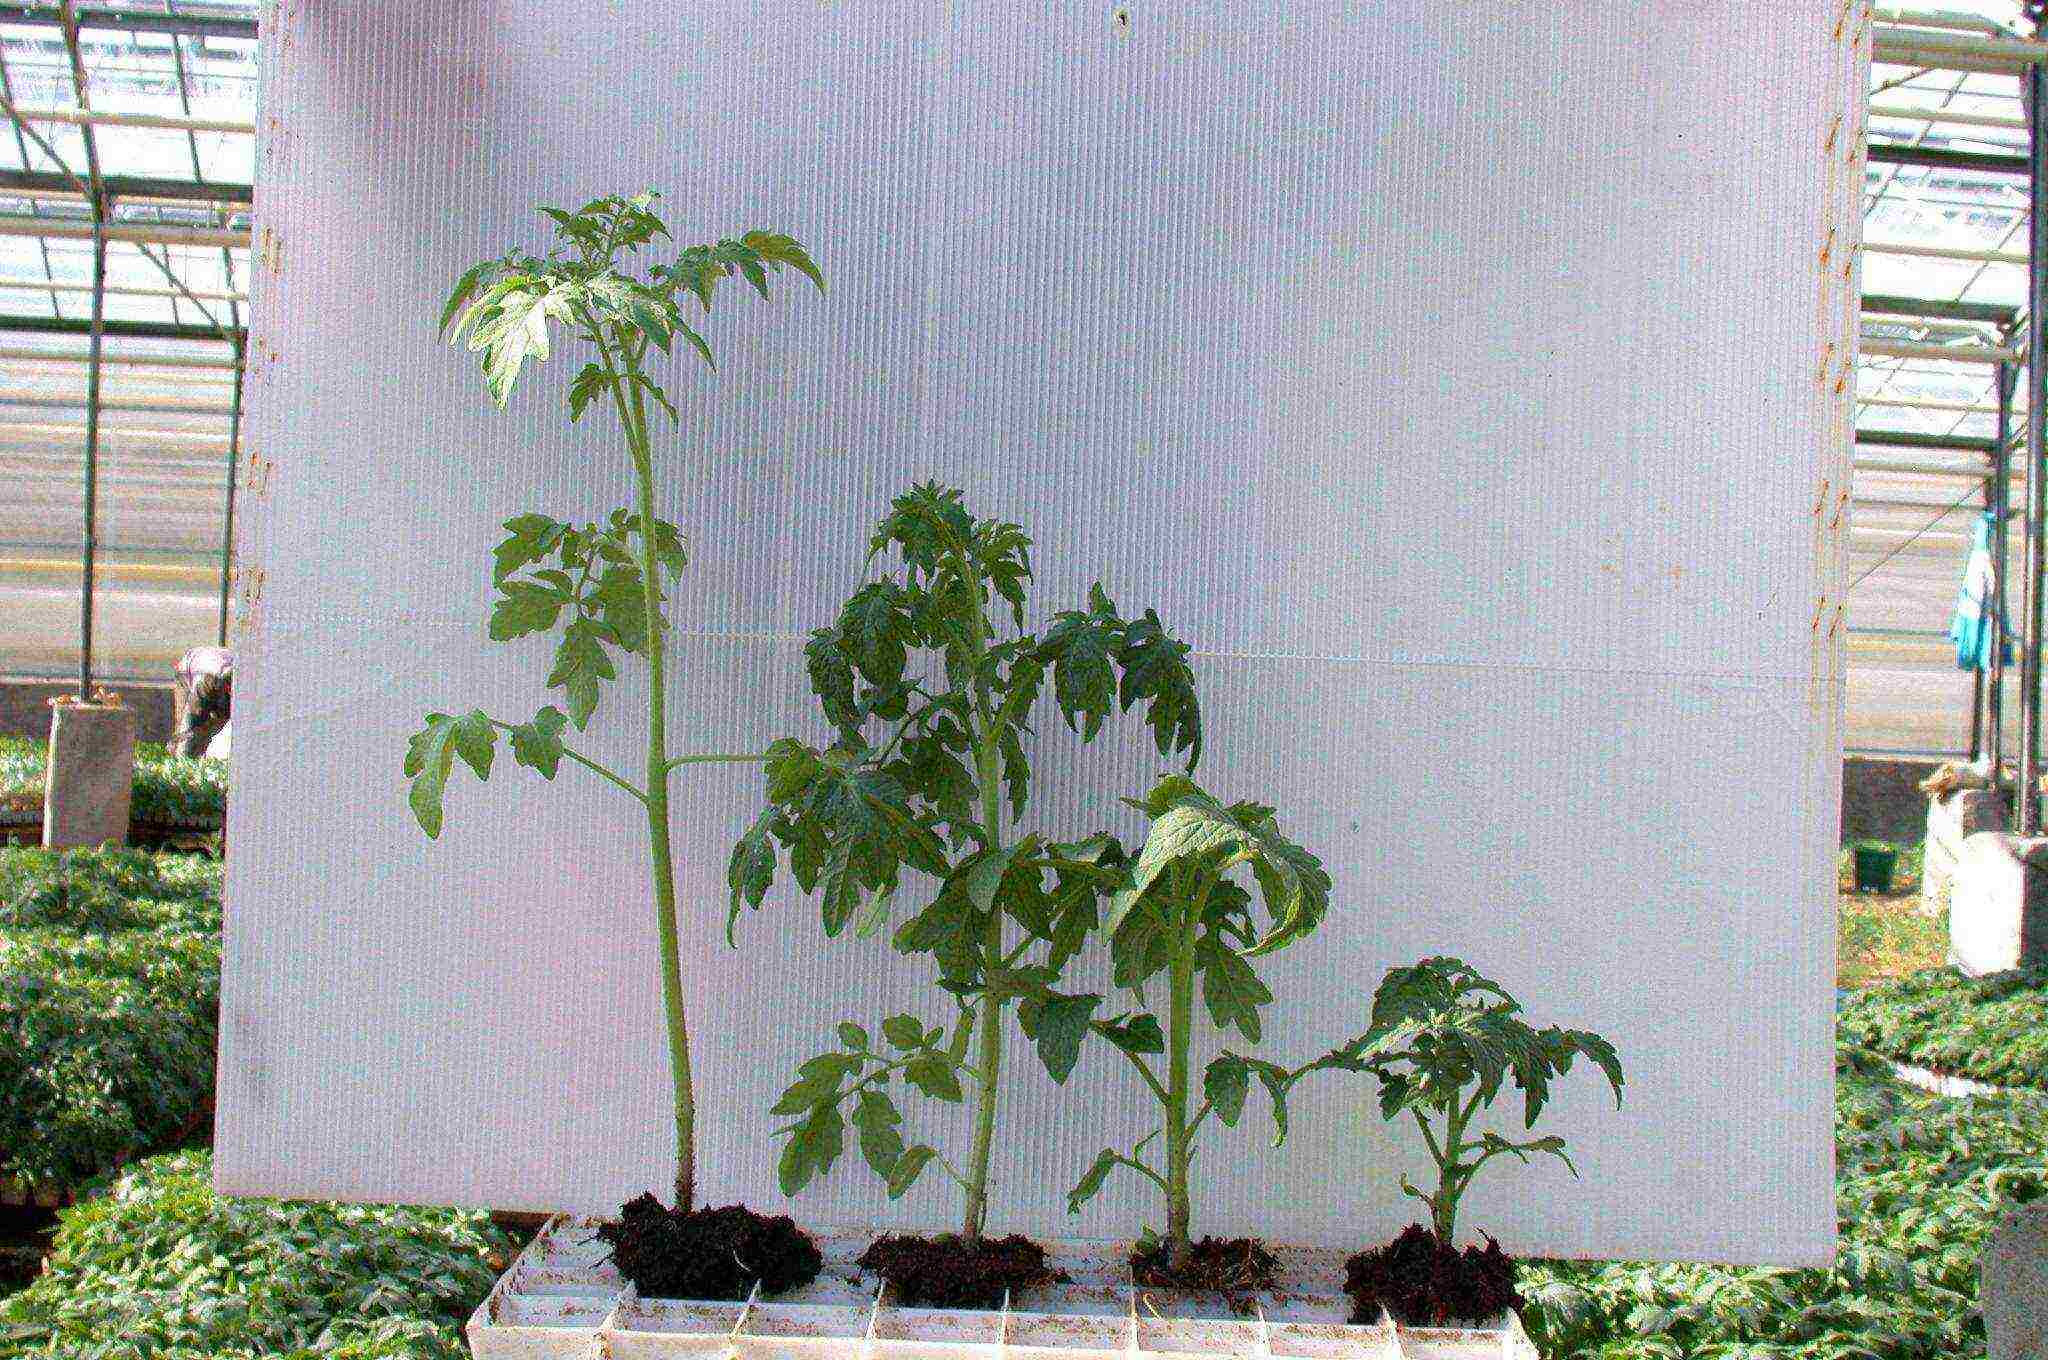
Seedlings of tomatoes, planted at different times
In addition, for the active growth of seedlings, good illumination is needed, which is impossible to provide in the winter months without additional supplementary lighting. This leads to an increase in expenses, but they turn out to be meaningless: seedlings from seeds planted on time will quickly catch up and overtake earlier plantings, will be stronger and will lay more fruit points.

Illumination of seedlings with fluorescent lamps
If you want to accelerate the ripening of the first fruits, you can plant a few roots earlier by 2-3 weeks, while providing them with an optimal heat / light regime and a larger container. It is better to plant the rest of the seeds on time - within the terms indicated in Table 1.
Table 1. Dates of planting seeds of different crops for seedlings, planting in a greenhouse and open ground.
| Eggplant | February 10 - March 15 | May 10-25 | May 25 - June 5 |
| Peppers | March 1-20 | May 1-25 | May 20 - June 5 |
| Early tomatoes | March 10-20 | May 1-25 | May 15 - June 5 |
| Mid-ripening and late-ripening tomatoes | March 1-15 | May 1-25 | May 15 - June 5 |
| Cucumbers | April 15 - May 5 | May 15-31 | May 25 - June 10 |
| Zucchini, squash | April 15 - May 5 | – | May 20-31 |
| Pumpkin | April 10-25 | – | May 20-31 |
| Melon | April 5-15 | May 15-31 | May 25 - June 5 |
| Watermelon | April 10-20 | May 15-31 | May 25 - June 5 |
| Early cabbage b / c | March 25 - April 5 | – | May 15-31 |
| Cabbage, medium and late ripening b / k and k / k | April 5-25 | – | May 15-31 |
| Cauliflower, broccoli, Brussels sprouts, kohlrabi | April 5-25 | – | May 15-31 |
| Strawberry | February 1 - April 30 | – | July 1 - August 31 |
| Celery, parsnip | 5-25 February | – | April 25 - May 15 |
| Leek and black onion | March 1-31 | – | April 25 - May 15 |
| Potato | April 1-10 | – | May 10-25 |
| Flowers: petunia, lobelia, salvia, carnation | February 10 - March 10 | – | from May 10 |
| Flowers: amaranth, aster, fragrant tobacco, levkoy | March 1 - April 10 | – | from 20 May |
| Flowers: marigolds, zinnias, dahlias, sweet peas | April 10-20 | – | from 20 May |
Note! You can more accurately calculate the time of planting seeds by the time of planting in a greenhouse or open ground and the recommended age of seedlings. This information is indicated on the seed bags.
Growing seedlings in boxes and cups
Traditionally, seedlings are grown in seedling boxes, cups or cassettes filled with soil. There are other growing methods, which will be discussed below.
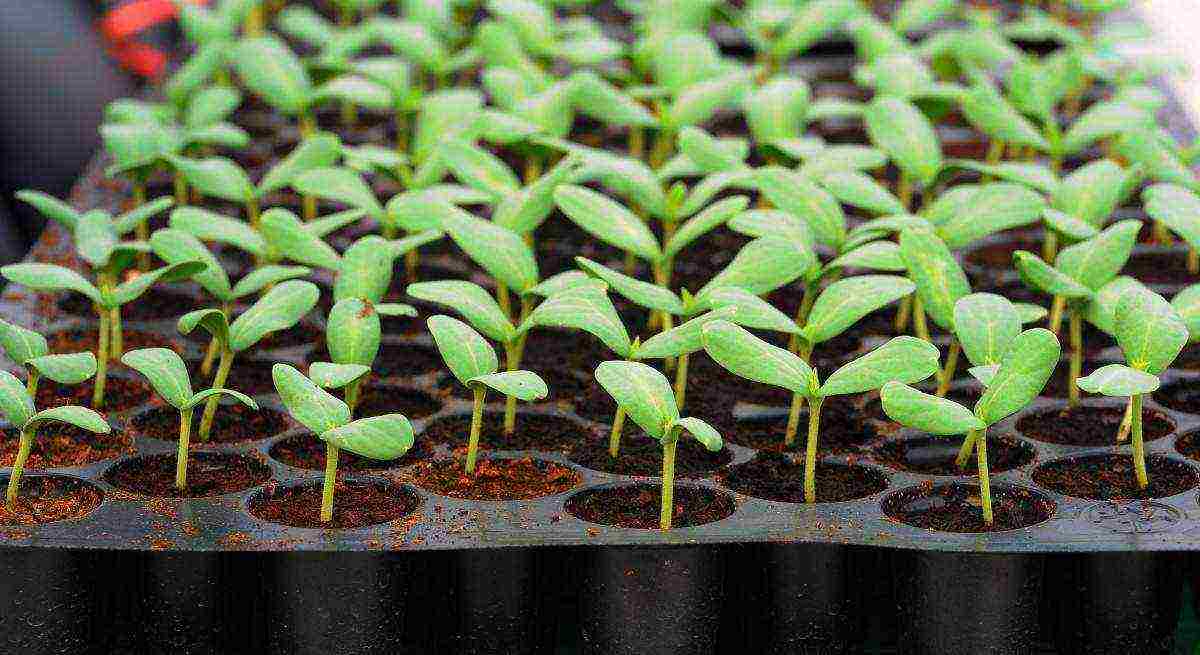
Growing seedlings in cassettes
Soil preparation
Healthy and fertile soil is the key to high-quality seedlings that can produce strong and healthy plants and a good harvest.
Good quality soil without fail:
- loose, breathable;
- well hydrated and retains moisture;
- does not contain weed seeds;
- processed from bacteria, viruses and fungi;
- balanced in the content of macro- and microelements.
Most quality purchased seedling soils meet these requirements. They are treated with steam and fungicides, after which they become sterile. To increase fertility, it is recommended to water them with a solution of EM-preparations ("Baikal EM-1", "Siyanie-EM" and analogues) before planting.

Microbiological fertilizer "Baikal EM-1" for high productivity
You can make your own potting mix by preparing it in the fall. When sowing seeds in the ground, it is important to choose a composition suitable for a particular crop. Plants have different requirements for soil nutrition, structure and chemical composition. Potting mixes suitable for different crops are described in Table 2.
Table 2. Soil mixes for different crops.
| Nightshade | Humus, garden soil, sand in a ratio of 2: 1: 1, add 1 tbsp for 1 liter of the mixture. a spoonful of wood ash |
| Melons | Garden soil, humus, sawdust in a ratio of 2: 1: 1 |
| Cruciferous | Humus, garden soil in a 1: 1 ratio, add 1 tbsp for 1 liter of the mixture. a spoonful of ash and 1 teaspoon of slaked lime |
| Onions, herbs | Humus, garden soil, sand in a ratio of 2: 1: 1, add 1 tbsp for 1 liter of the mixture. a spoonful of wood ash |
| Strawberries, flowers | Peat, garden soil, sawdust, humus in a ratio of 5: 2: 1: 2 |
The components are mixed in a large container until homogeneous, after which they are heat treated.

Preparing the potting mix
It can be done in several ways:
- warm up at a temperature of + 60-70 degrees for 1-2 hours, for example, in the oven;
- heat to a high temperature in a metal bucket or basin, for example, over a fire;
- spill with a hot solution of potassium permanganate.
After heat treatment, the soil mixture is cooled, laid out in bags and put away for storage.
Instead of heat treatment, freezing can be used - it helps to get rid of insects and their larvae, and also sharply reduces the germination of weed seeds.At the same time, it is important to take garden land from those parts of the garden where crops related to seedlings have not been grown for 4-5 years.
Note! It is not recommended to take soil from the greenhouse - there are almost always spores of fungal diseases that can destroy all seedlings immediately after germination!
Video - Preparing the soil for seedlings
Seedling containers
For growing seedlings, special cups, cassettes and boxes are used, as well as any improvised containers of a suitable size. Of the materials, smooth plastic is preferable - it is convenient to wash and disinfect, it has low thermal conductivity, does not rot.
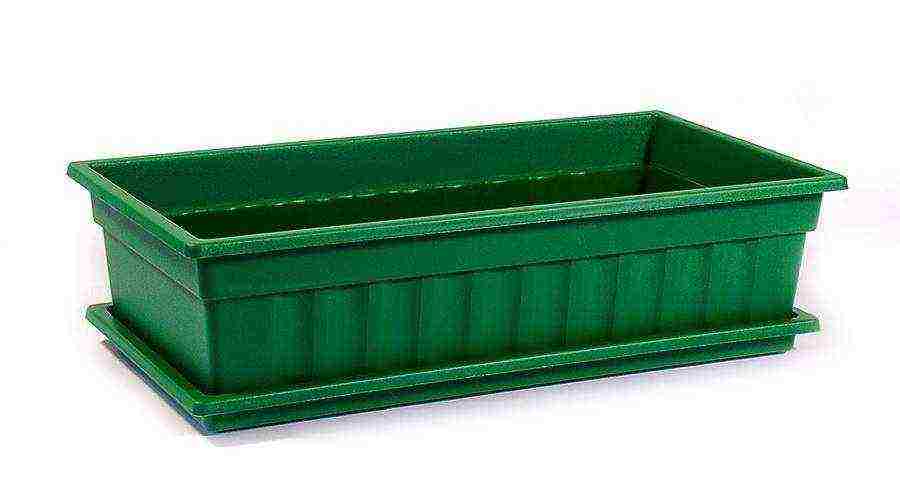
Seedling box
The size of the common seedling boxes can be any, they depend on the number of seeds sown. The depth must be sufficient so that the soil does not dry out. In boxes, seedlings of vegetable crops are successfully grown before picking, as well as onions, celery and flowers before planting in the ground - they tolerate transplanting well and quickly take root even with a slight violation of the root system.
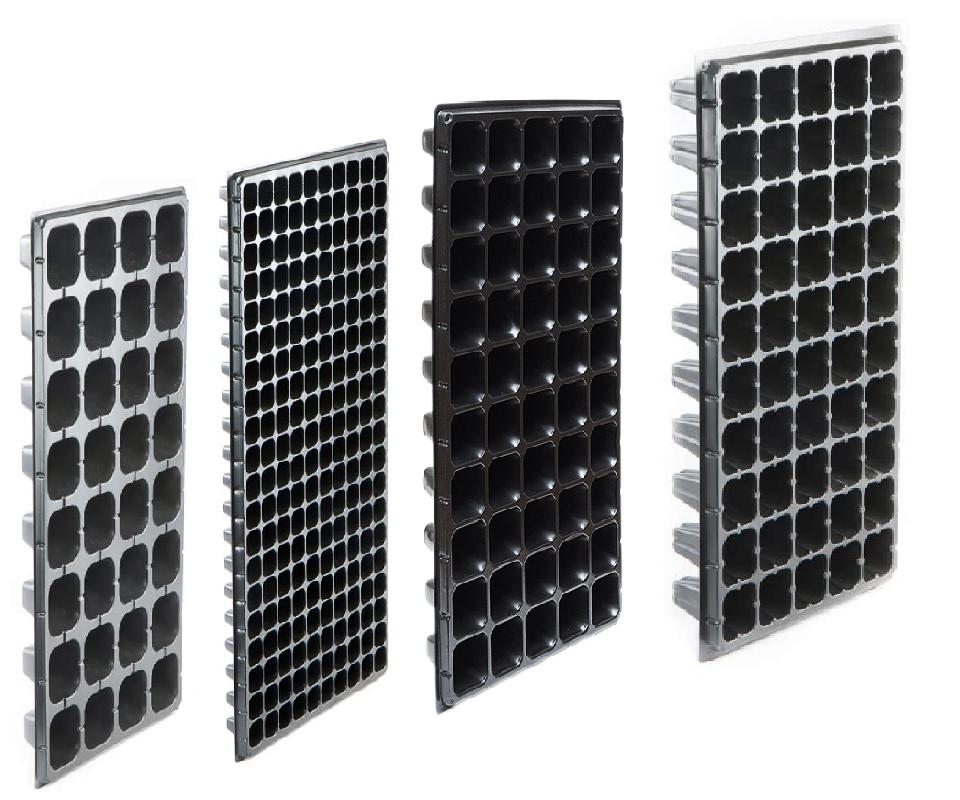
Seedling cassettes
DIY seedling boxes
What exactly you plan to grow tomatoes, peppers, eggplants, other vegetables or garden flowers is of great importance. It will be great if you can make your own seedling boxes.
Crops with sensitive root systems are best grown in separate containers. These include peppers and eggplants, pickled tomatoes, cucumbers and all melons and gourds, as well as some types of flowers.
The volume of seedling cups and cassettes is selected depending on the culture:
- tomatoes, peppers and eggplants - 200-350 ml;
- cucumbers, watermelons and melons - 200-300 ml;
- pumpkins, zucchini, squash - 250-400 ml;
- spicy herbs, leeks and nigella - 70-150 ml;
- flowers with small seeds - 100-200 ml;
- flowers with large seeds - 200-300 ml.
Disposable cups are often used as seedling containers. They are inexpensive, have a different volume and a convenient shape. However, the strength of such cups is low, usually they only last for one season. When using disposable cups, drainage holes must be made in their bottoms.
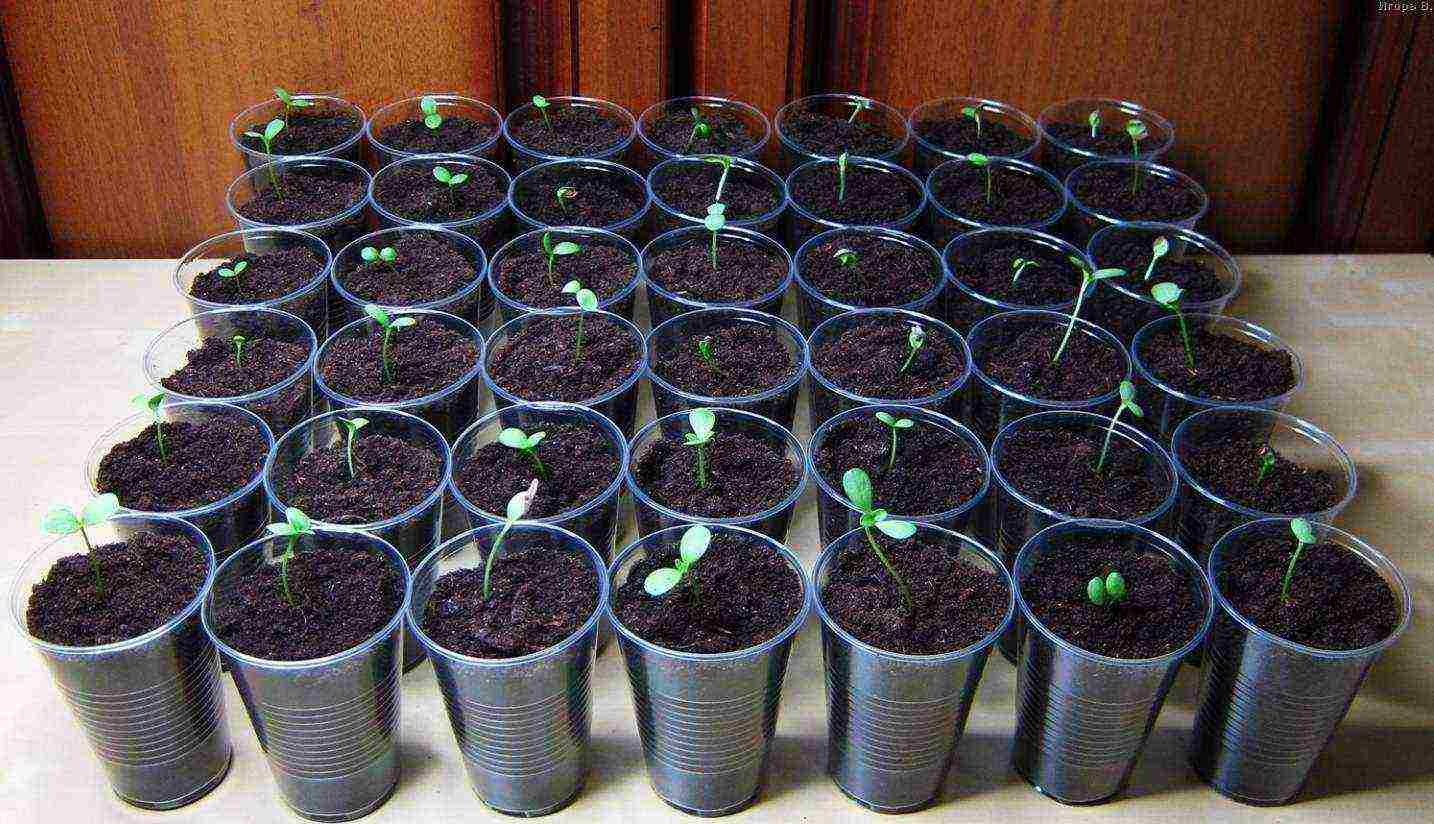
Seedlings in disposable cups
Another option is peat cups. They are made from a compressed peat mixture that decomposes in the ground in one season. Seedlings are planted directly in a glass without damaging their roots. Peat glasses are usually used for plants with a delicate root system - peppers, cucumbers, pumpkin seeds.
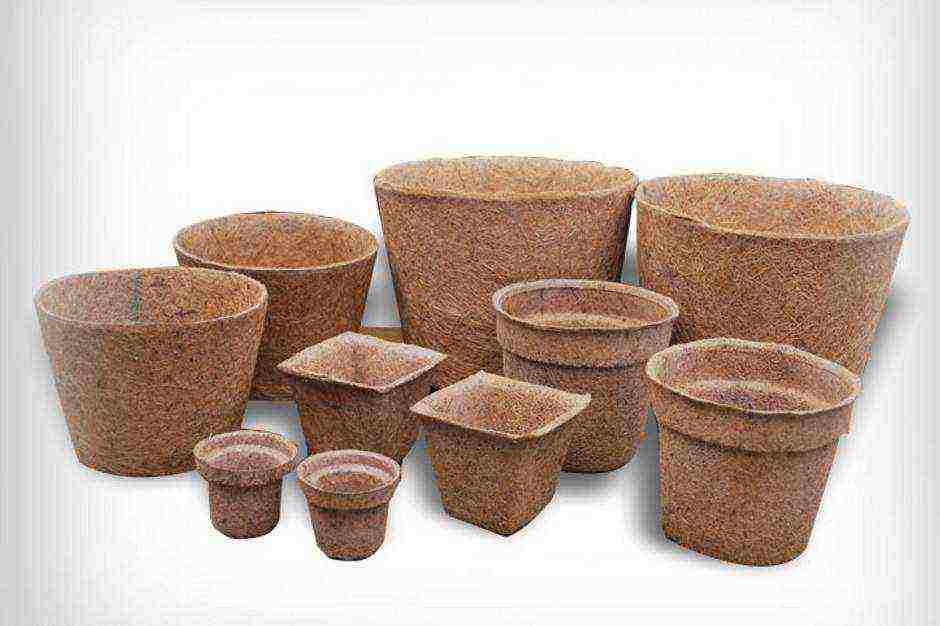
Peat pots and cups
Note! The soil in peat cups dries out faster, and when overflowing, their walls become soaked and destroyed. Therefore, watering should be regular, but moderate.
Video - Features of planting seedlings in peat cups in the ground
Also, for seedlings, you can use dense bags of the same size, for example, from milk. They are convenient in that you can roll up the bag when planting, and as the seedlings grow, gradually roll it out and add soil. This technique is useful for plants that, when deepened, take out additional roots - for example, for tomatoes or flowers.
Seedlings in packages
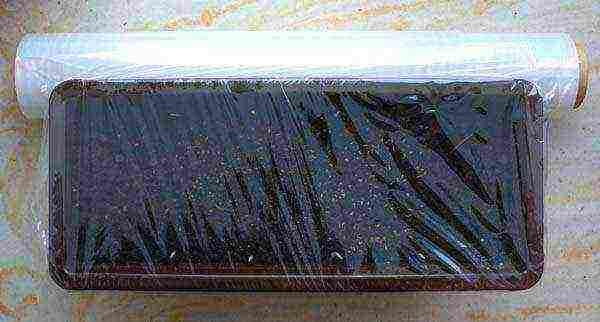
It is better to germinate seeds under a film or glass - this creates a greenhouse effect, the soil remains moist and warm, and sprouts appear faster. Mini greenhouses with removable transparent covers are convenient for germinating seeds. You can make a greenhouse yourself from transparent disposable containers.
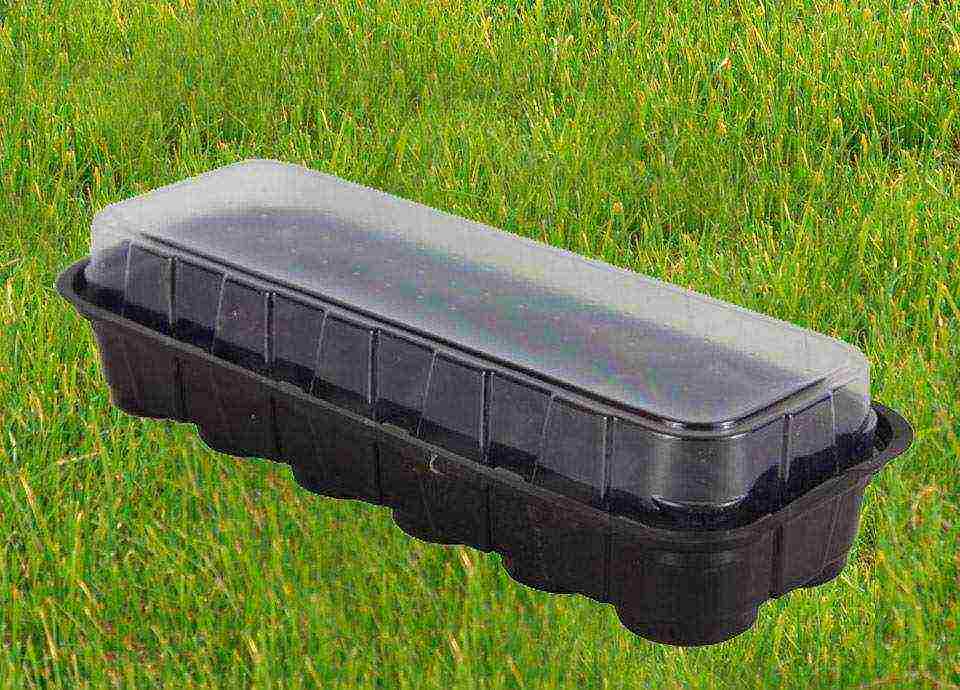
Mini greenhouse for seedlings
Before planting seeds and picking, reusable seedling containers must be washed with warm water and laundry soap and rinsed with clean water. When using wooden boxes, it is recommended to disinfect them with a solution of copper sulfate or bleach.
Seed preparation
Presowing preparation allows you to reject empty seeds, disinfect them and accelerate germination.The preparation of seeds for different crops is carried out in different ways, below are the main steps necessary for all garden crops.
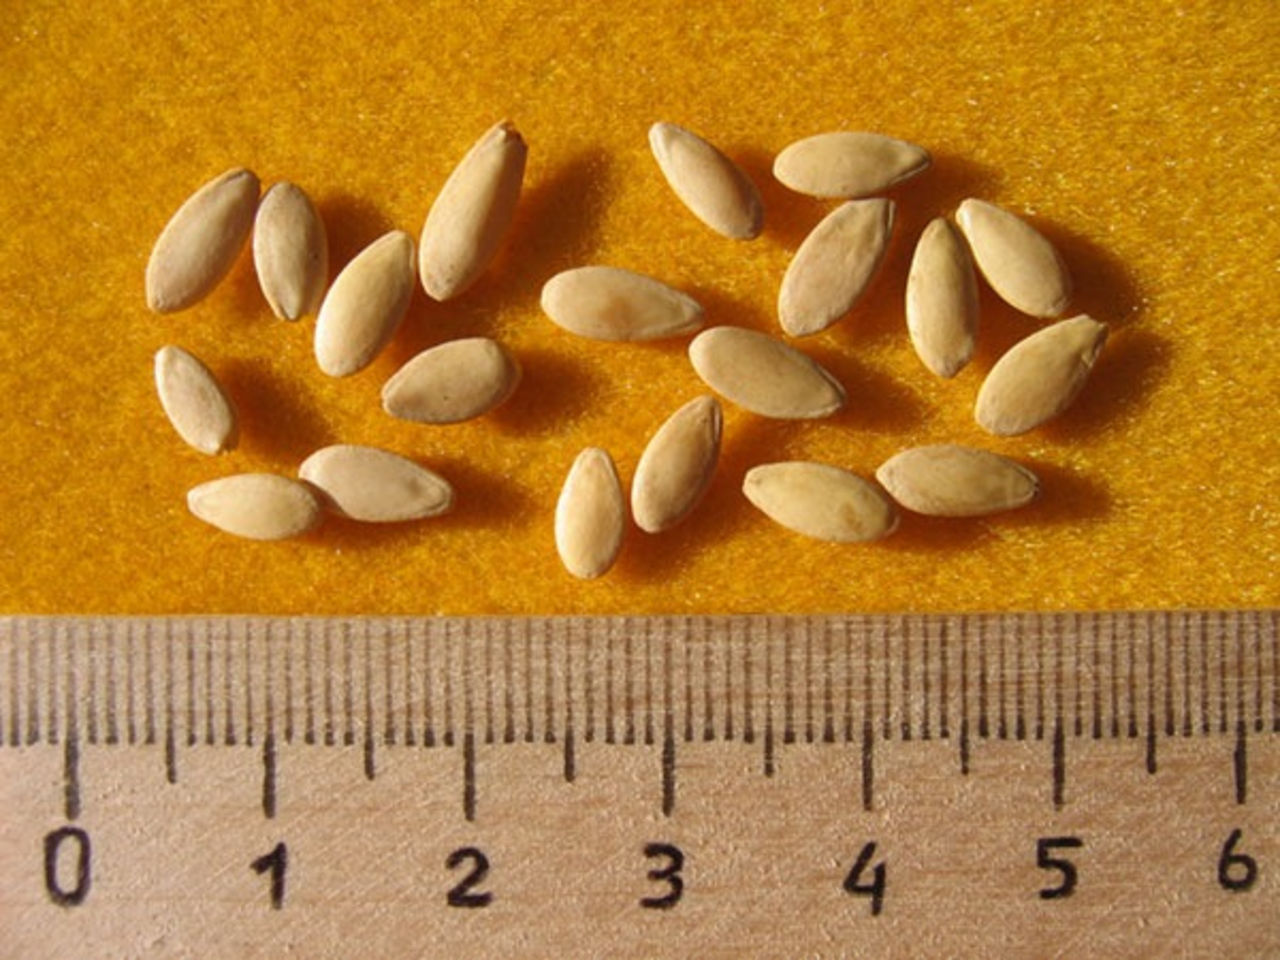
Step 1. For selection of the largest and fullest seeds, calibration is carried out. You can make it at home in two ways - by hand and by soaking in a saline solution. The first method is suitable for plants with large seeds - pumpkins, zucchini, cucumbers. For calibration in saline solution, medium and small seeds are more suitable (such as tomatoes, peppers, eggplants, onions and most flowers).
The seeds are manually calibrated using a checkered sheet or ruler. Spread the seeds on a flat surface or a sheet of paper and wipe off the largest, even and densest ones. Reject all seeds of irregular shape, as well as empty and too small.
Calibrating seeds using a ruler
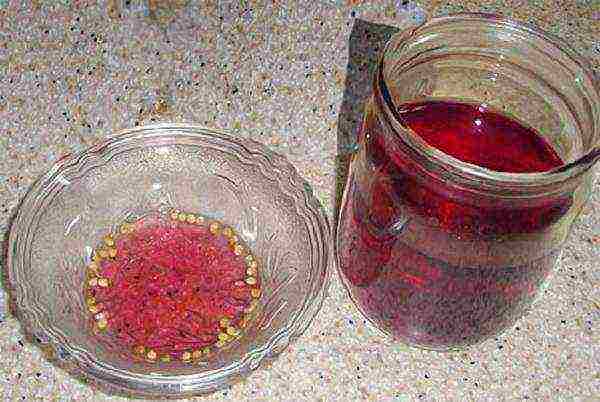
For calibration in solution, 1 tablespoon of table salt is stirred in a glass of warm water, then the seeds are lowered there for 15-30 minutes. The floating seeds are removed, and the ones that have settled to the bottom are washed and dried.

Calibration of seeds in sodium chloride solution
Note! Viable seeds can also float if they are dry. If there are many such seeds, you need to check their germination in a small batch.
Step 2. Seed disinfection is carried out in several stages. For bacterial infections, seeds are treated with a solution of potassium permanganate at a concentration of 1 g per 1 liter of water. Stir the crystals until completely dissolved and pour the seeds into a small bowl. Soak in solution for 20 minutes.
Treatment in a solution of potassium permanganate
You can use a 3% hydrogen peroxide solution. It is heated in a water bath to a temperature of + 38-40 degrees and the seeds are poured in for 10 minutes.
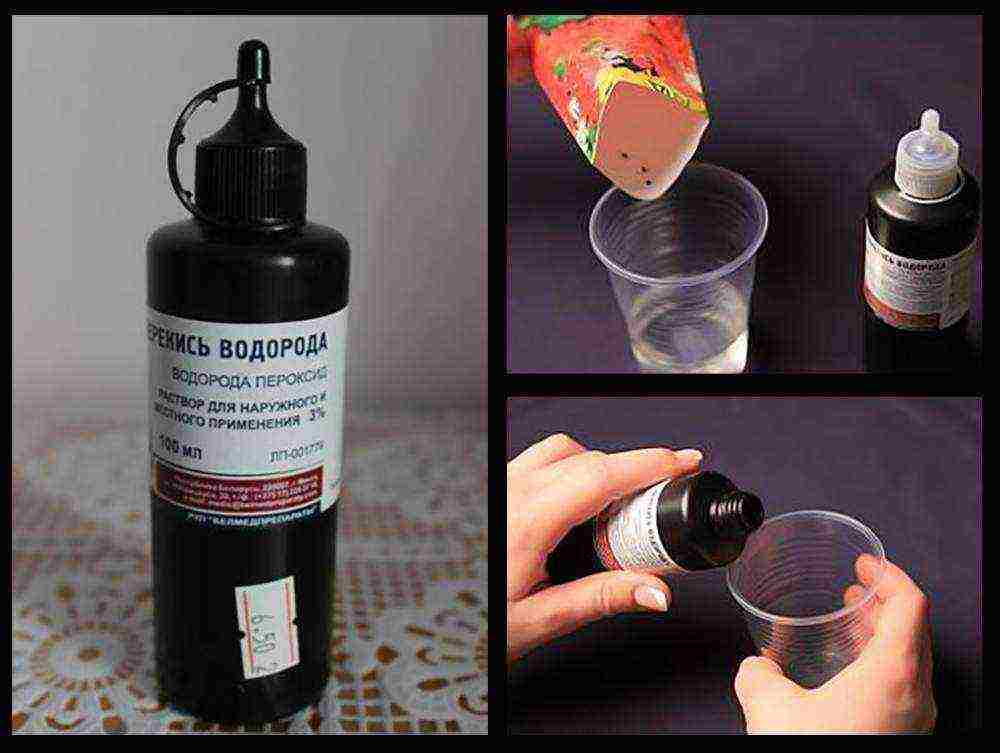
Hydrogen peroxide treatment
Step 3. Treatment for fungal infections is the second stage of seed disinfection. It is carried out in fungicides - antifungal drugs. They can be in the form of a solution or in powder. At home, the most commonly used drug of natural origin "Fitosporin-M". It comes in powder, paste or liquid form. The drug is diluted as indicated on the package, and the seeds are poured for 2-3 hours.

Seed treatment with "Fitosporin-M"
Step 4. Surface treatment does not help against viral diseases, so the seeds are heated with dry heat for 5-7 days, hanging in fabric bags on a battery.
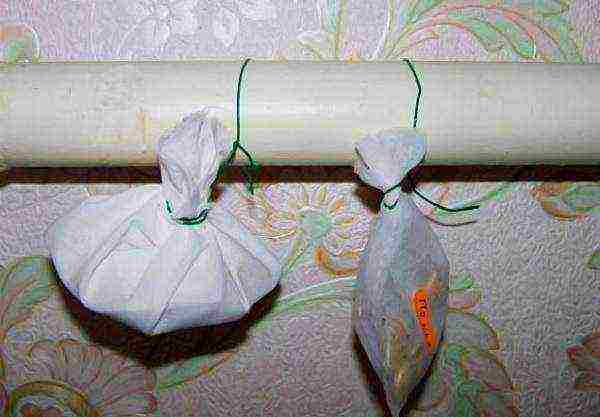
Warming up the seeds
For accelerated processing, you can place the seeds in water with a temperature of + 50-60 degrees for 1-2 hours. It is more convenient to do this in a thermos, where the water does not cool down longer.
Step 5. Immediately before planting, the seeds are treated in a solution of growth stimulants, these include "Epin", "Zircon", solutions of potassium and sodium humates, aloe juice and other natural preparations. The solution is prepared according to the recommendation on the package and the seeds are poured over it. The processing time depends on the drug and can be 1-24 hours.
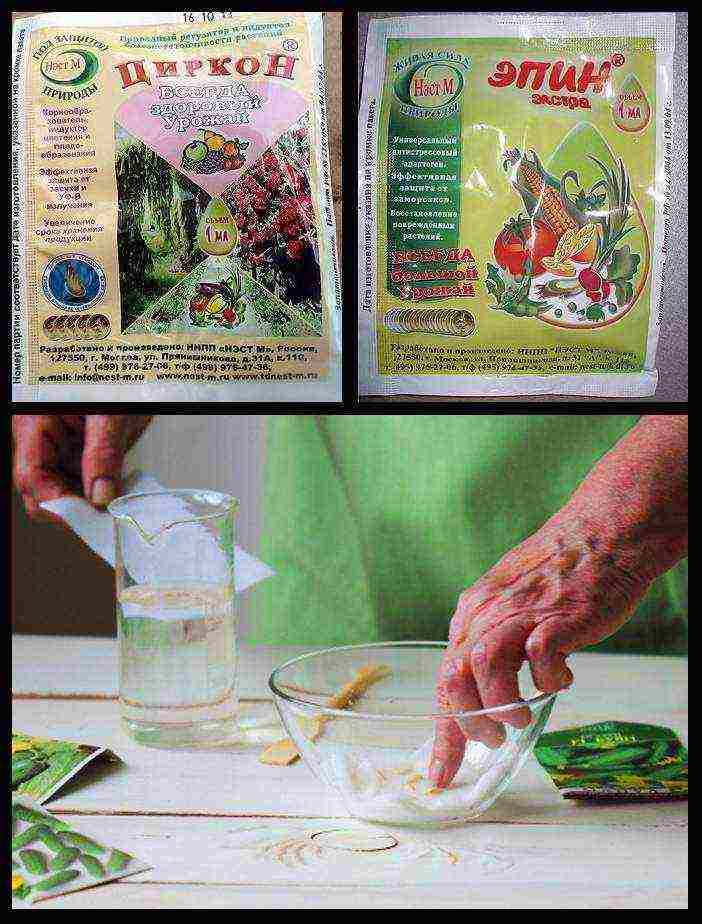
Soaking in stimulants
Step 6. After treatment with stimulants, the seeds are soaked in water and left in a warm place to swell. Soaking is necessary to soften the seed coat and accelerate its germination.
Soaking time depends on the size and density of the seeds:
- tomatoes, peppers, eggplants - 3-4 hours;
- cabbage - 3-4 hours;
- cucumbers, melons - 12 hours;
- leek and black onion - 12 hours;
- pumpkin, zucchini, watermelon - 24 hours.
This process can be accelerated by bubbling - treating seeds in water with air bubbles. An aquarium compressor is used for bubbling, its tube is lowered into a jar with soaked seeds and the device is turned on. The soaking time can be cut in half. The seeds are best placed in gauze bags.
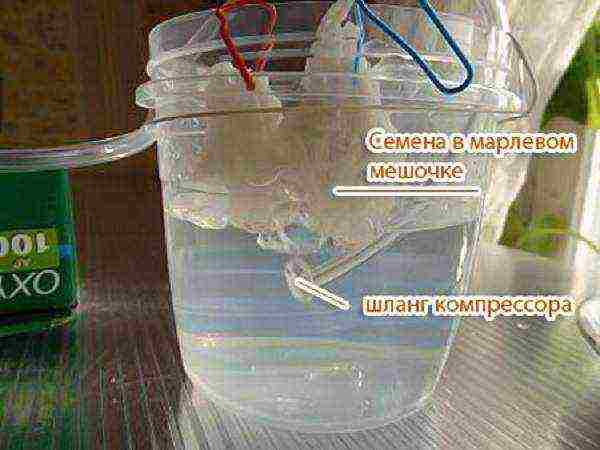
Seed bubbling
Step 7. After soaking, the seeds can be planted in the ground or germinated by wrapping them in a damp soft cloth or gauze. Germinate the seeds at the recommended temperature for the culture before pecking and sprouting.The fabric must be kept damp at all times. It is important not to miss this moment and prevent roots from growing into the tissue - it will be difficult to get the seeds out of there without damaging the roots.

Germinating seeds
Germination can be combined with hardening. Seeds, wrapped in cloth, are placed on a saucer in a refrigerator with a temperature of + 2-4 degrees overnight. The seeds of plants intended for planting in open ground can be subjected to cyclic temperature changes: put in the refrigerator overnight and keep at room temperature during the day. In this mode, they are hardened for two or three days, after which they are removed to a warm place before germination.

Seed hardening
Note! Seeds with fragile roots, such as cucumbers and all pumpkin seeds, are best planted immediately after pecking.
Sowing and germinating seeds
Crops that lend themselves well to picking can be sown in common seedling boxes for germination; these include:
- tomatoes and eggplants;
- leek and black onion;
- all types of cabbage;
- flowers with medium-sized seeds - marigolds, asters, zinnias, dahlias.
Aster seeds
Plants with a delicate and fragile root system do not tolerate picking well, it is better to immediately plant them in separate cups or seedling cassettes of the appropriate size. As they grow, they are transferred into individual larger containers.
These crops include:
- cucumbers and all pumpkin seeds;
- sweet and hot peppers;
- roots;
- flowers with large seeds.
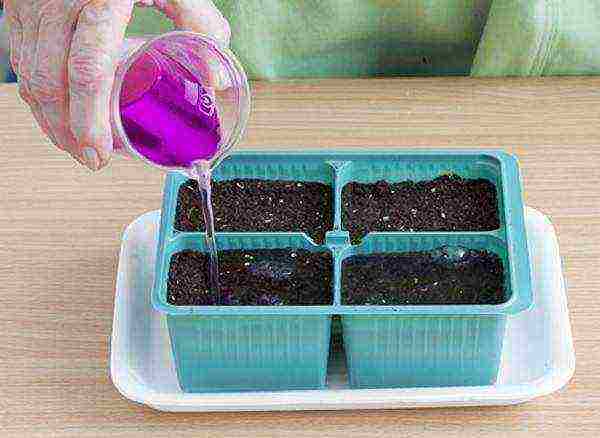
Step 1. The seedling containers are filled with soil suitable for the crop. Slightly compact it and make grooves or indentations. Watered with settled water, and if disinfection of the soil is required - with a weak solution of potassium permanganate. They allow water to be absorbed and moisturize the soil well.
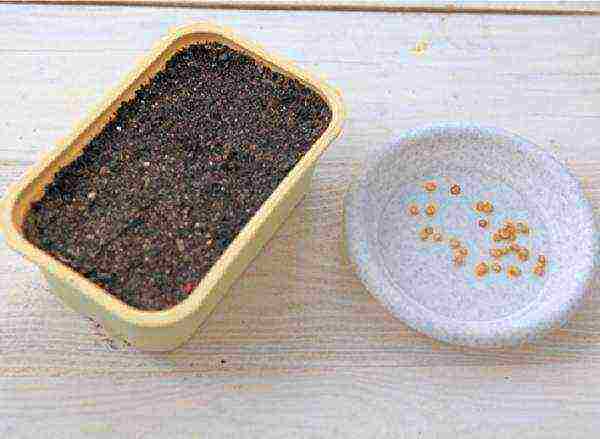
Preparation of seedling boxes, soil and seeds
Step 2. Pre-treated seeds are laid out in the grooves by hand or using tweezers; small seeds can be conveniently laid out with a toothpick.
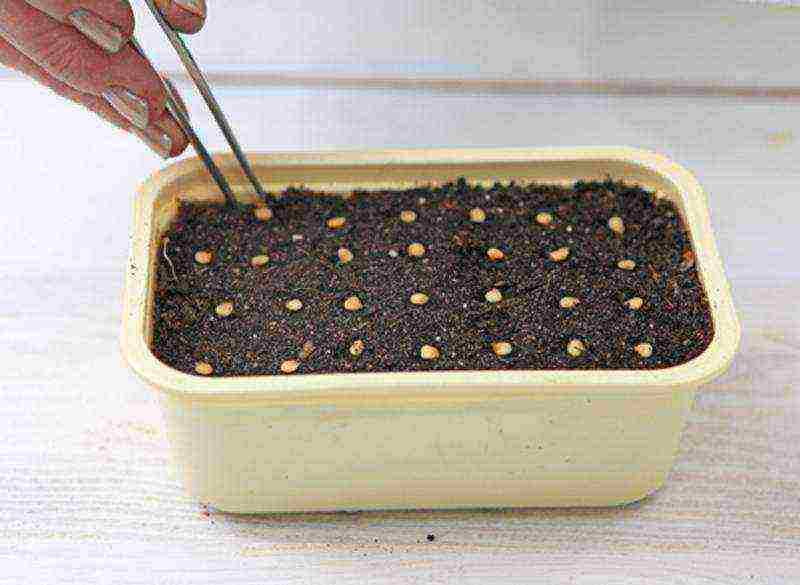
Sowing seeds
Step 3. On top of the grooves or grooves, sprinkle with a layer of soil. Additional watering is not necessary - the moisture absorbed into the soil is enough to feed the roots, at the same time, air will be provided to the seeds through the upper loose layer.
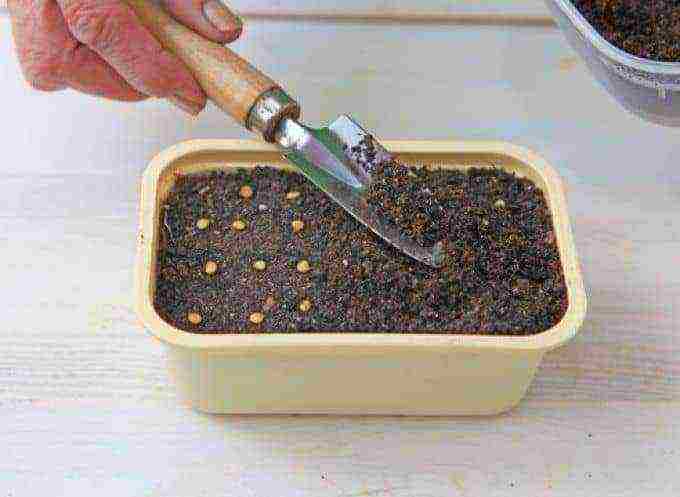
Backfilling seeds with soil
Step 4. The containers are covered with cling film and placed in a warm place. Light is not needed for seed germination, except for small flower seeds, which are sown superficially, without falling asleep with soil.
Box with seedlings under the film
Step 5. Immediately after the appearance of the loops, you need to remove the film and put the containers with seedlings in a well-lit place. It is desirable to provide additional lighting with fluorescent or LED lamps. In the first days, in the phase of cotyledon leaves, the seedlings can be illuminated for 16-18 hours a day - this will help it not to stretch out. After the appearance of true leaves, daylight hours are gradually reduced to the norm for a given culture.

Supplementary lighting of seedlings
Note! If in the phase of cotyledon leaves the seedlings are stretched out, it is necessary to add soil to the level of the cotyledons.
Picking and transshipment
Seedlings usually dive in the phase of 2-3 true leaves. Later, the root system grows strongly and is damaged during the pick. Transfer of seedlings from glasses and seedling cassettes in containers of a larger volume is performed as the root system grows.
Step 1. Seedling cups or cassettes are prepared and filled with pre-prepared soil by about 2/3 when picking and 1/2 when transferring. Water the soil and allow it to be evenly moistened. If necessary, disinfect with a solution of potassium permanganate.
Preparing seedling glasses with soil
Step 2. Gently pry the sprout with a small spatula or wooden stick. They are taken out together with an earthen lump, being careful not to damage the root system. It is better to hold the sprout by the leaves, and not by the stem - if the leaves are damaged, the plant will quickly recover, and a broken stem will lead to death.In tomatoes, cabbage and onions, pinch the central root by 1/3.
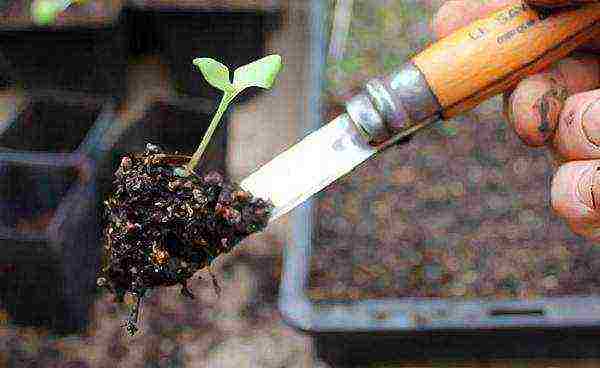
Extracting a sprout from the ground
Step 3. A depression is made in the ground along the length and width of the earthen coma. Carefully put a sprout there and sprinkle the earth. Consolidate and lightly watered. When planting tomatoes, cabbage and cucumbers, the sprout is buried to the cotyledons, peppers and eggplants are not buried.

Recess for planting a sprout
Step 4. When transshipping in a larger container, carefully remove the seedling, put it in a larger glass and sprinkle earth around it. If necessary, deepen. Lightly water and compact the soil.
Transfer of seedlings when growing in cassettes
Step 5. In the first few days after transshipment and picking, plants need to be provided with diffused light and moderately moist soil. As soon as the root system adapts, the seedlings will start to grow.

Seedlings after picking
Note! Some flowers, such as lobelia, dive several seedlings into one seedling glass.
Watering seedlings
Much depends on proper watering - when the earthen coma dries up, the seedlings stop growing and wither, and when overflowed, they can get sick with fungal infections. It is better to water the seedlings with soft water - rain, thawed or settled water - with the addition of a small amount of humates.
Getting melted water at home is quite simple: they pour tap water into any container, defend it for a day and put it in the freezer. Water begins to freeze from the edges of the container. As soon as it freezes by about 2/3 of its volume, it is taken out, the unfrozen part of the water is drained - it contains all the dissolved elements. The remaining ice is thawed and used to water the seedlings.
Getting melted water
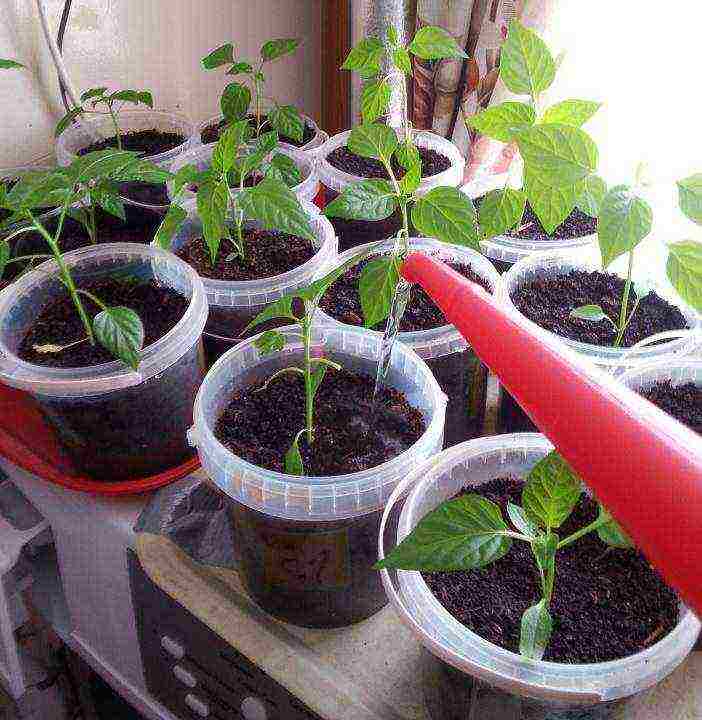
In the first stage of cultivation, before the appearance of true leaves, the seedlings are watered very carefully so as not to damage the fragile shoots. This can be done from a small watering can or a spray bottle set to a small spray angle. Seedlings are watered at the root.

Watering seedlings from a watering can
After picking, as the vegetative mass develops, the seedlings are watered less often, but more abundantly, until the earthen coma is wetted. It is important to avoid stagnant water and allow the topsoil to dry out between waterings.
Watering seedlings after picking
Note! The first 3-5 days after picking it is undesirable to water the seedlings! Loose roots can rot.
Fertilizing seedlings
Top dressing is carried out as planned or when signs of nutritional deficiencies appear. Before true leaves appear, the sprout consumes the nutrient reserve contained in the seed. After the first true leaf appears, the active development of the root system begins and the plant can absorb micro and macro elements from the soil.
There are many recipes for fertilizing containing organic and mineral substances, but the easiest way is to buy a complex fertilizer for seedlings. It can be both universal and specially adapted to the needs of different cultures.
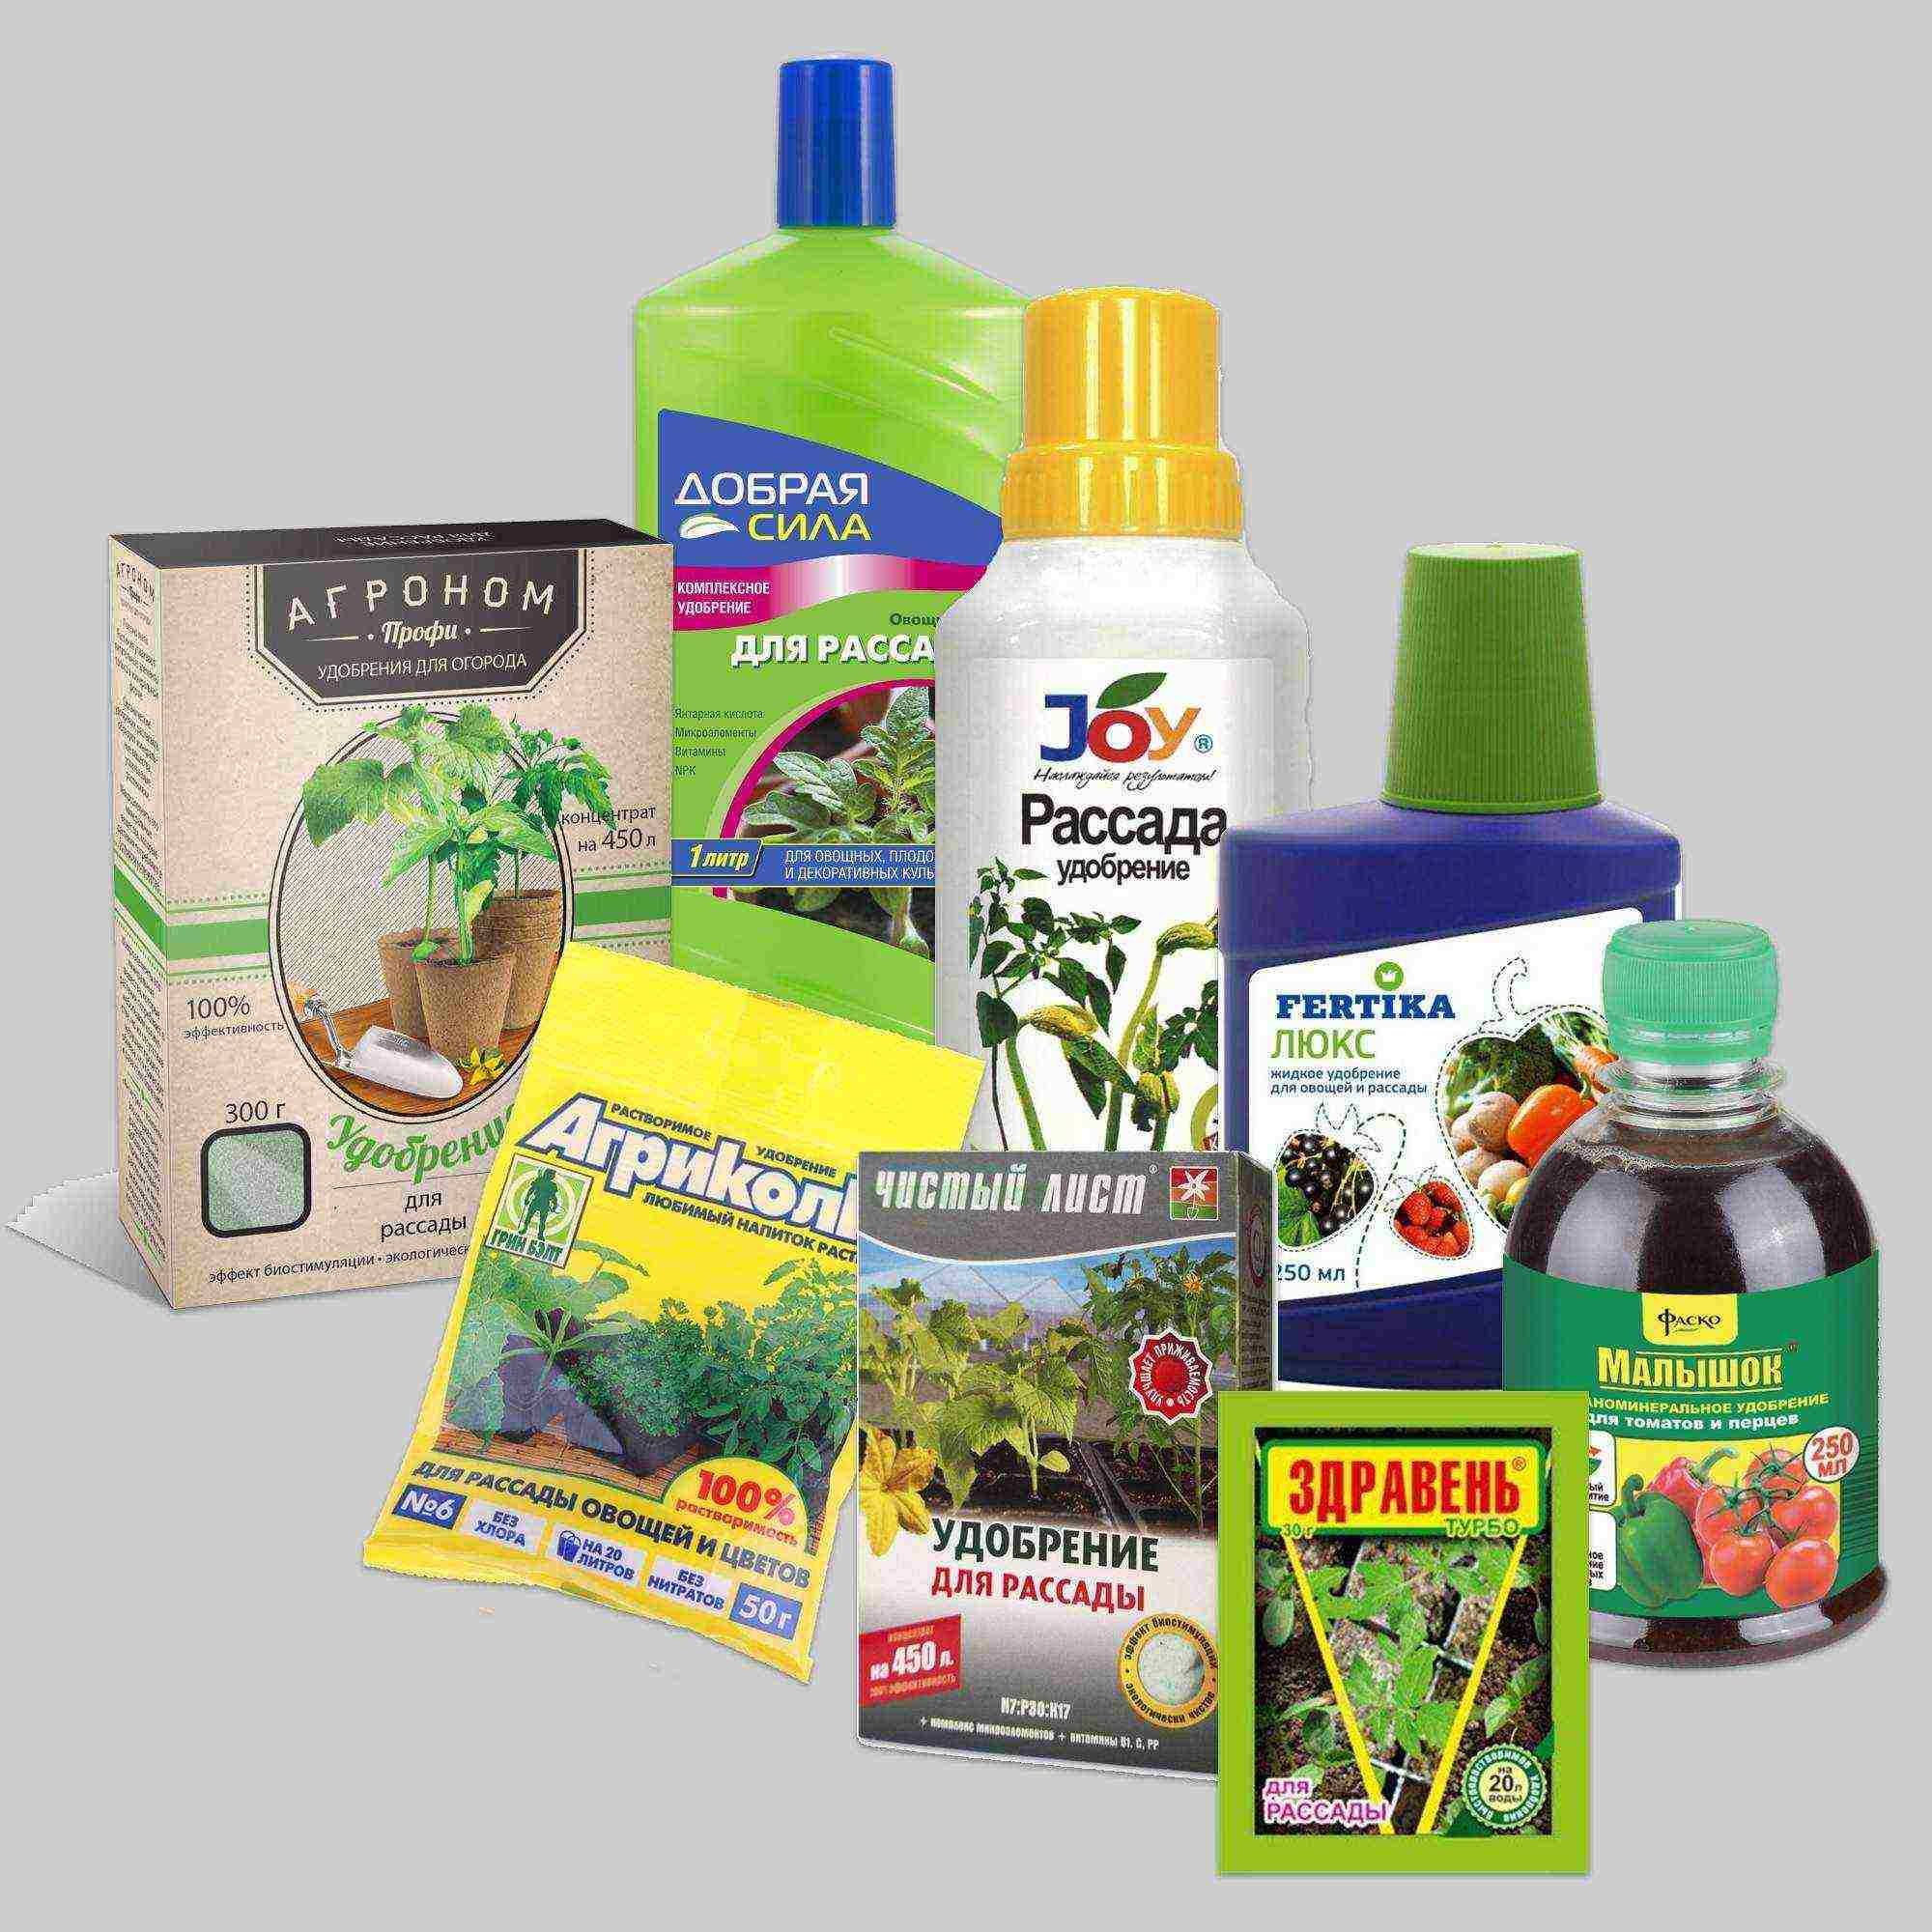
Complex fertilizers for seedlings
Fertilizers for seedlings are produced in various forms:
- liquid concentrate;
- water-soluble granules;
- powder.
A good seedling fertilizer contains:
- nitrogen (N);
- potassium (K);
- phosphorus (P);
- microelements in a chelated form.
The exact dosage and feeding schedule for seedlings are always indicated by the fertilizer manufacturer on the package. If there is no such information on the package or bottle of fertilizer, it is better to refrain from using it.
Before picking, the seedlings usually have enough nutrients contained in the fertile soil. 7-10 days after the pick or transplant, you can start feeding. Fertilizer in dissolved form is applied with morning watering. With a strong drying of the earthen coma, you must first moderately moisten it with clean water, and only then apply top dressing.The second and subsequent feeding with complex fertilizer is carried out 7-10 days after the previous one, up to the transplanting.
Extra dressings are needed when there are obvious signs of a lack of elements. You can determine them by the appearance of the seedlings.
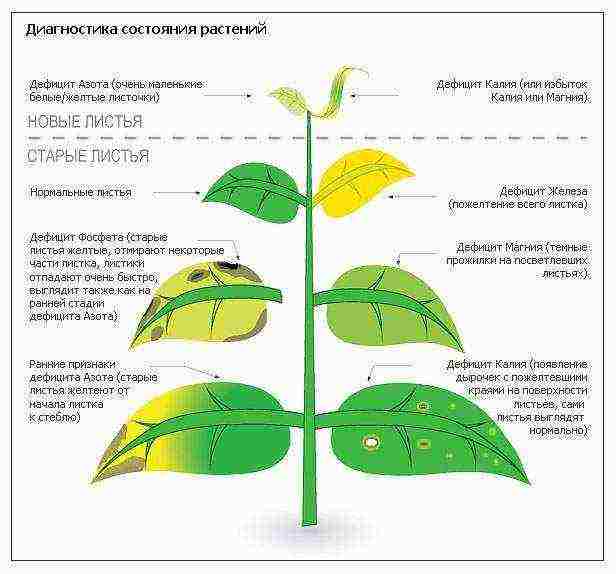
Signs of a lack of micro- and macronutrients
The reasons for the lack of elements, as well as the ways to replenish them, are different, they are described in the table in the figure. Sometimes it is enough to change the light mode or temperature so that the plant can absorb nutrients from the soil.
Causes and signs of micronutrient deficiencies
Note! It is undesirable to use organic fertilizers for fertilizing young seedlings - their composition is unstable, therefore it is difficult to calculate the dosage.
Growing seedlings in peat tablets
Plants with a particularly delicate root system, as well as valuable flower seeds in granular form, are more convenient to grow in peat tablets. The tablets consist of sterile peat soil, which is well permeable to water and air.

Peat tablets
When dry, their height is 1-2 cm, the diameter may vary. After swelling in water, the height of the tablets increases 6-8 times, this is quite enough for the root system of most crops in the first phase of growing seedlings.
Peat tablets for growing seedlings
Below is a step-by-step technology for planting granular petunia seeds in peat tablets. The rest of the crops are grown in the same way.
Step 1. Seedling tablets are prepared. To do this, they are placed in a plastic container close to each other. Pour a small amount of water into the container, wait for the tablets to absorb it, and then add a new portion. This is repeated until the tablets stop absorbing water, after which the excess is drained.
Preparation of peat tablets
Step 2. The seeds are carefully placed in the indentation at the top of each tablet. When sowing very small seeds, such as lobelia, several seeds are placed in each tablet. If the depression is not large enough, it is widened or deepened with a toothpick.
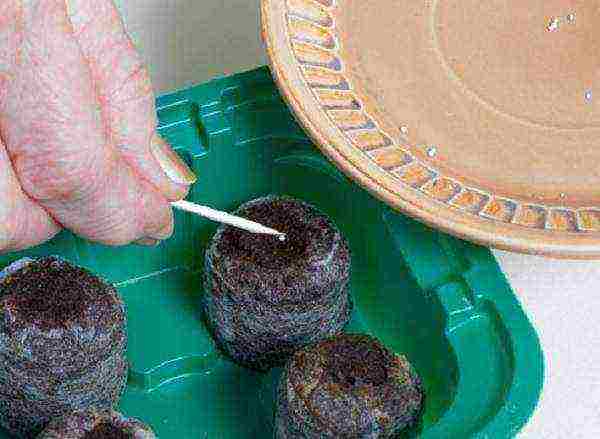
Sowing seeds
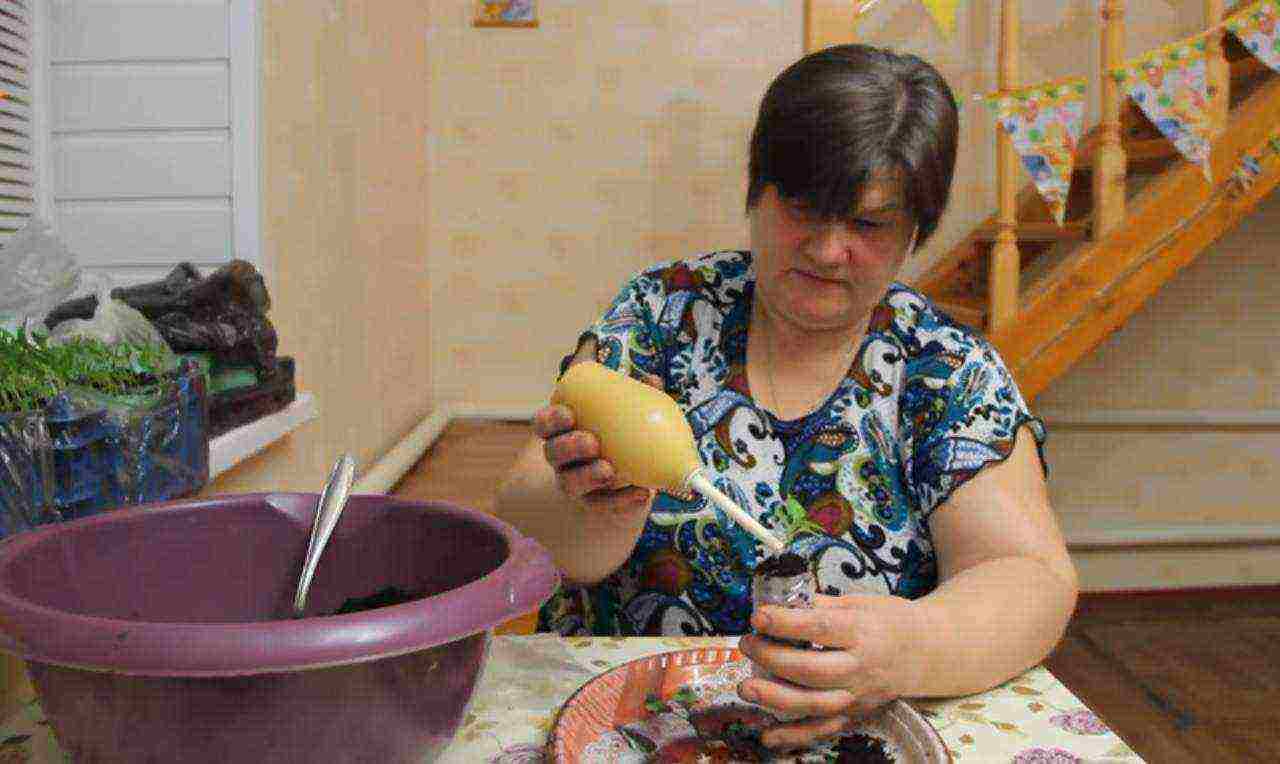
Step 3. When sowing granular seeds, it is necessary to moisten their shell until they are completely wetted, otherwise they will not germinate. This is most conveniently done from a spray bottle, pipette or rubber bulb.

Moisturizing the seed coat
Step 4. The seeds are covered from above with a small amount of soil, spreading it with a toothpick. You can simply drown the seeds slightly into the tablet.
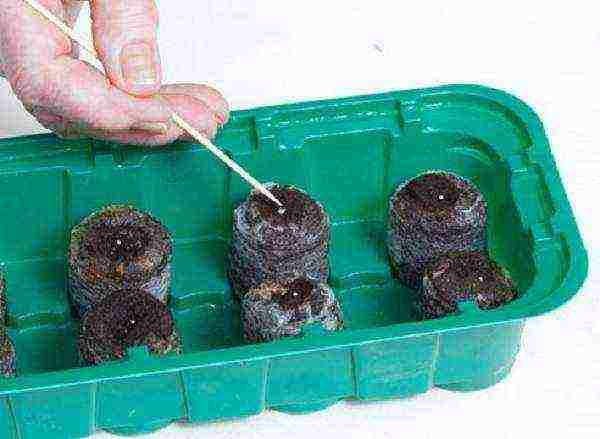
Adding soil
Step 5. The grown seedlings are transplanted into pots filled up to half with fertile soil.
Pot transfer
Step 6. Further care of the seedlings does not differ from the usual growing technology and includes watering, feeding and other necessary operations.

Watering
Note! Seedlings with a short growing season can be planted in the ground directly in tablets, bypassing the stage of transplanting into a pot.
Growing seedlings in "snails"
One of the original ways to get strong, ready-to-pick seedlings is to grow them in "snails" made of expanded polyethylene. The latter is used as a substrate for a laminate or as a film thermal insulation. The strips of this material are rolled into a roll along with a thin layer of soil in which the seeds are placed. As a result, a "snail" is formed, inside of which excellent conditions are created for the development of seedlings.
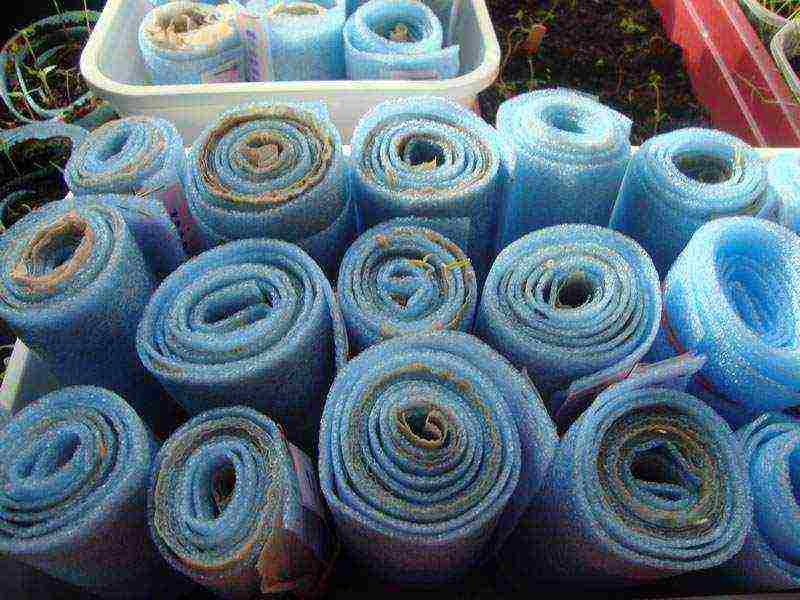
Growing seedlings in "snails"
Advantages of the method:
- saving space and soil;
- optimal conditions for seed germination;
- easy picking without damaging the roots.
Flaws:
- long process of sowing seeds;
- if the sprouts are not transplanted in time, they may die.
In this way, most garden crops can be germinated - nightshade, all types of cabbage and lettuce, as well as root vegetables. Another "snail" is suitable for the germination of medium-sized flower seeds.The preparation of soil and seeds is carried out according to the usual technology described above.
Step 1. The foamed polyethylene is cut into strips about 50 cm long, 10-12 cm wide. Lay out on a tray with one end towards itself.

Backing strips for laminate
Step 2. A few tablespoons of moderately moistened soil are poured onto one end of the strip, leveled.
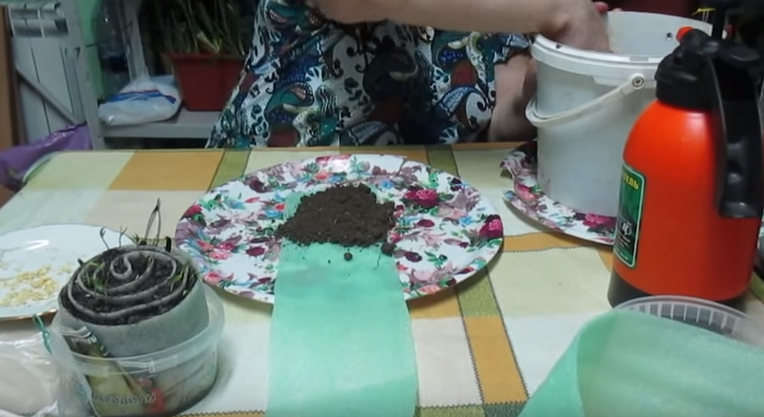
Layout of soil on a substrate
Step 3. The prepared seeds are laid out at a distance of 2-3 cm from one edge. The distance between the seeds is 1-2 cm.
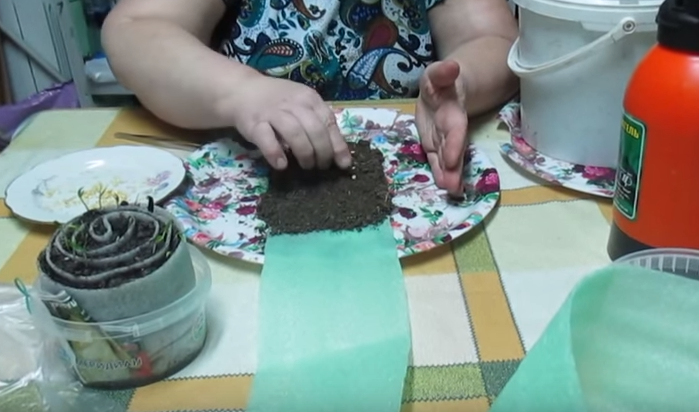
Sowing seeds
Step 4. Gently begin to fold the tape from the end. Sprinkle the next portion of soil and sow seeds. This continues until the end of the tape.
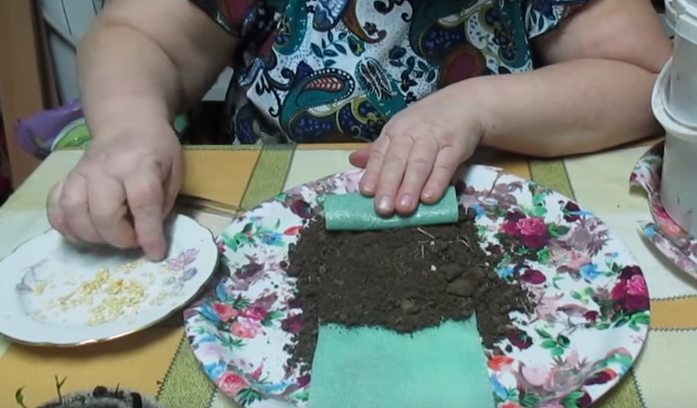
Formation of the "snail"
Step 5. The folded "snail" is secured with a clerical elastic band. Place in a container with a depth of at least half of its ("snail") height. In this case, the seeds should be at the upper edge of the "snail".
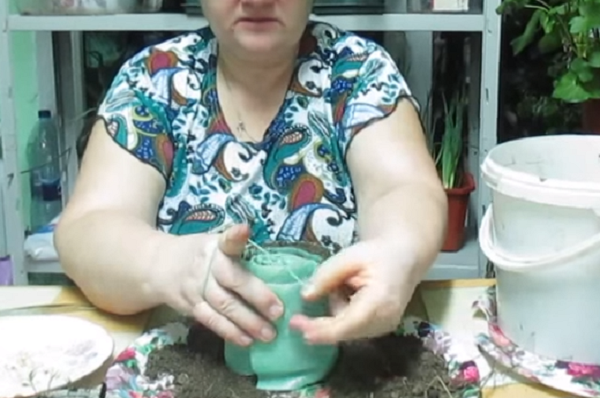
Securing the "snail"
Step 6. Well moisten the soil inside the "snail" with a spray bottle. In the future, watering can be carried out in a container - the moistened soil will absorb moisture by itself.
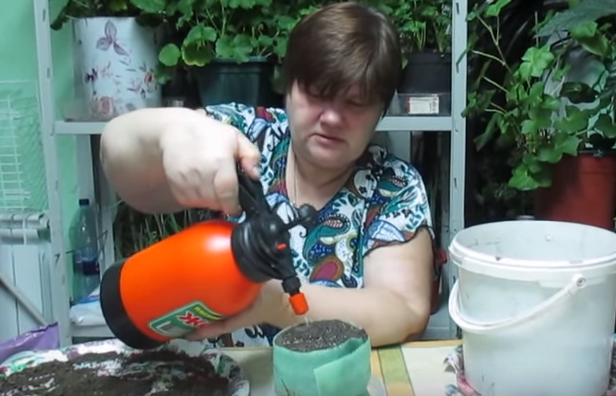
Watering
Step 7. A regular plastic bag is put on the container with the "snail" and tied to create greenhouse conditions inside. Place in a warm, bright place until seeds germinate. Once a day, the bag is opened for airing.

Creation of greenhouse conditions
Step 8. Germination of seeds in "snails" is usually faster than in soil, due to the stable temperature and humidity. It is necessary to monitor the appearance of loops in order to immediately place the seedlings in the most illuminated place.

Germinating seeds
Step 9. After germination until the appearance of two true leaves, the care of the seedlings does not differ from the usual technology. Due to the small amount of soil, the seedlings may not have enough nutrition, therefore, a little complex or humic fertilizer for seedlings is added to the water for irrigation, about 20% of the concentration recommended for feeding.
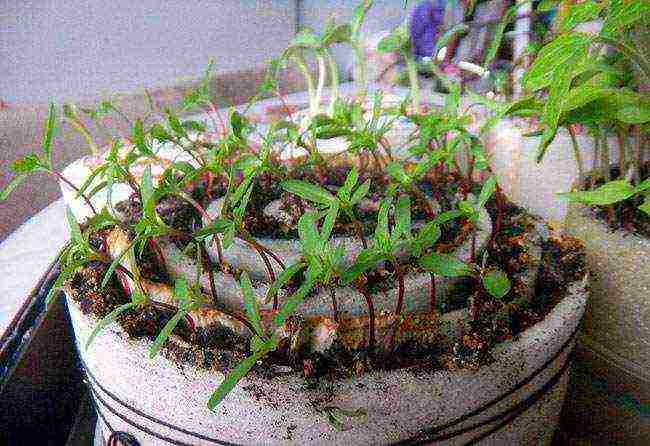
Sprouts ready for picking
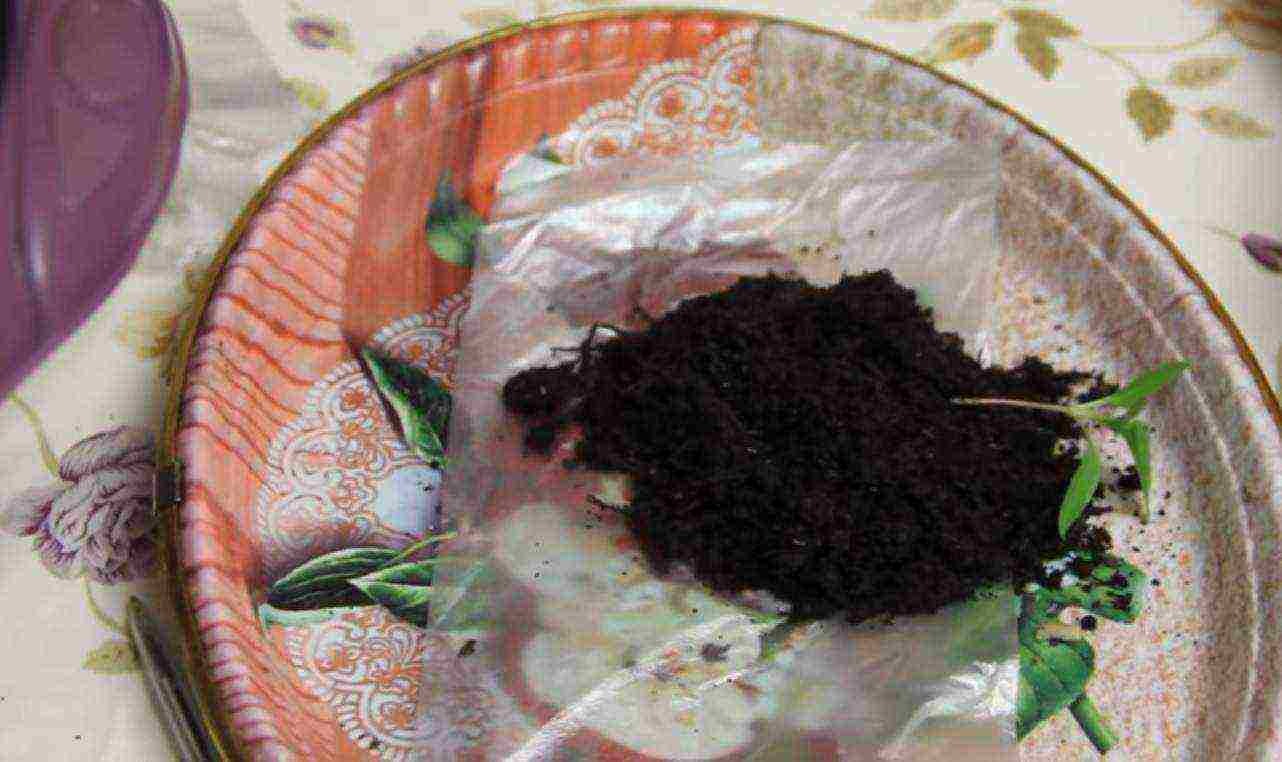
Step 10. When two true leaves appear in the sprouts, the "snail" is rolled out, the strongest seedlings are selected and dived into cups using conventional technology or into "diapers" - they will be discussed below.

Pickling of seedlings from "snails"
Video - Growing seedlings in "snails"
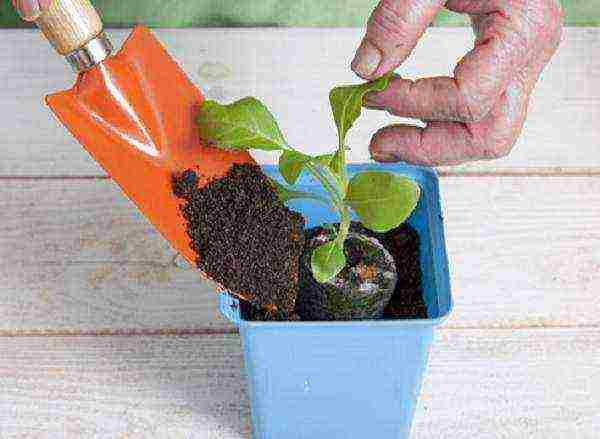
Growing seedlings in "diapers"
Seedlings sprouted in "snails" can be dived not only into glasses, but also into "diapers". This method also saves space and soil. In this case, conventional plastic packaging bags are used as the wrapping material.
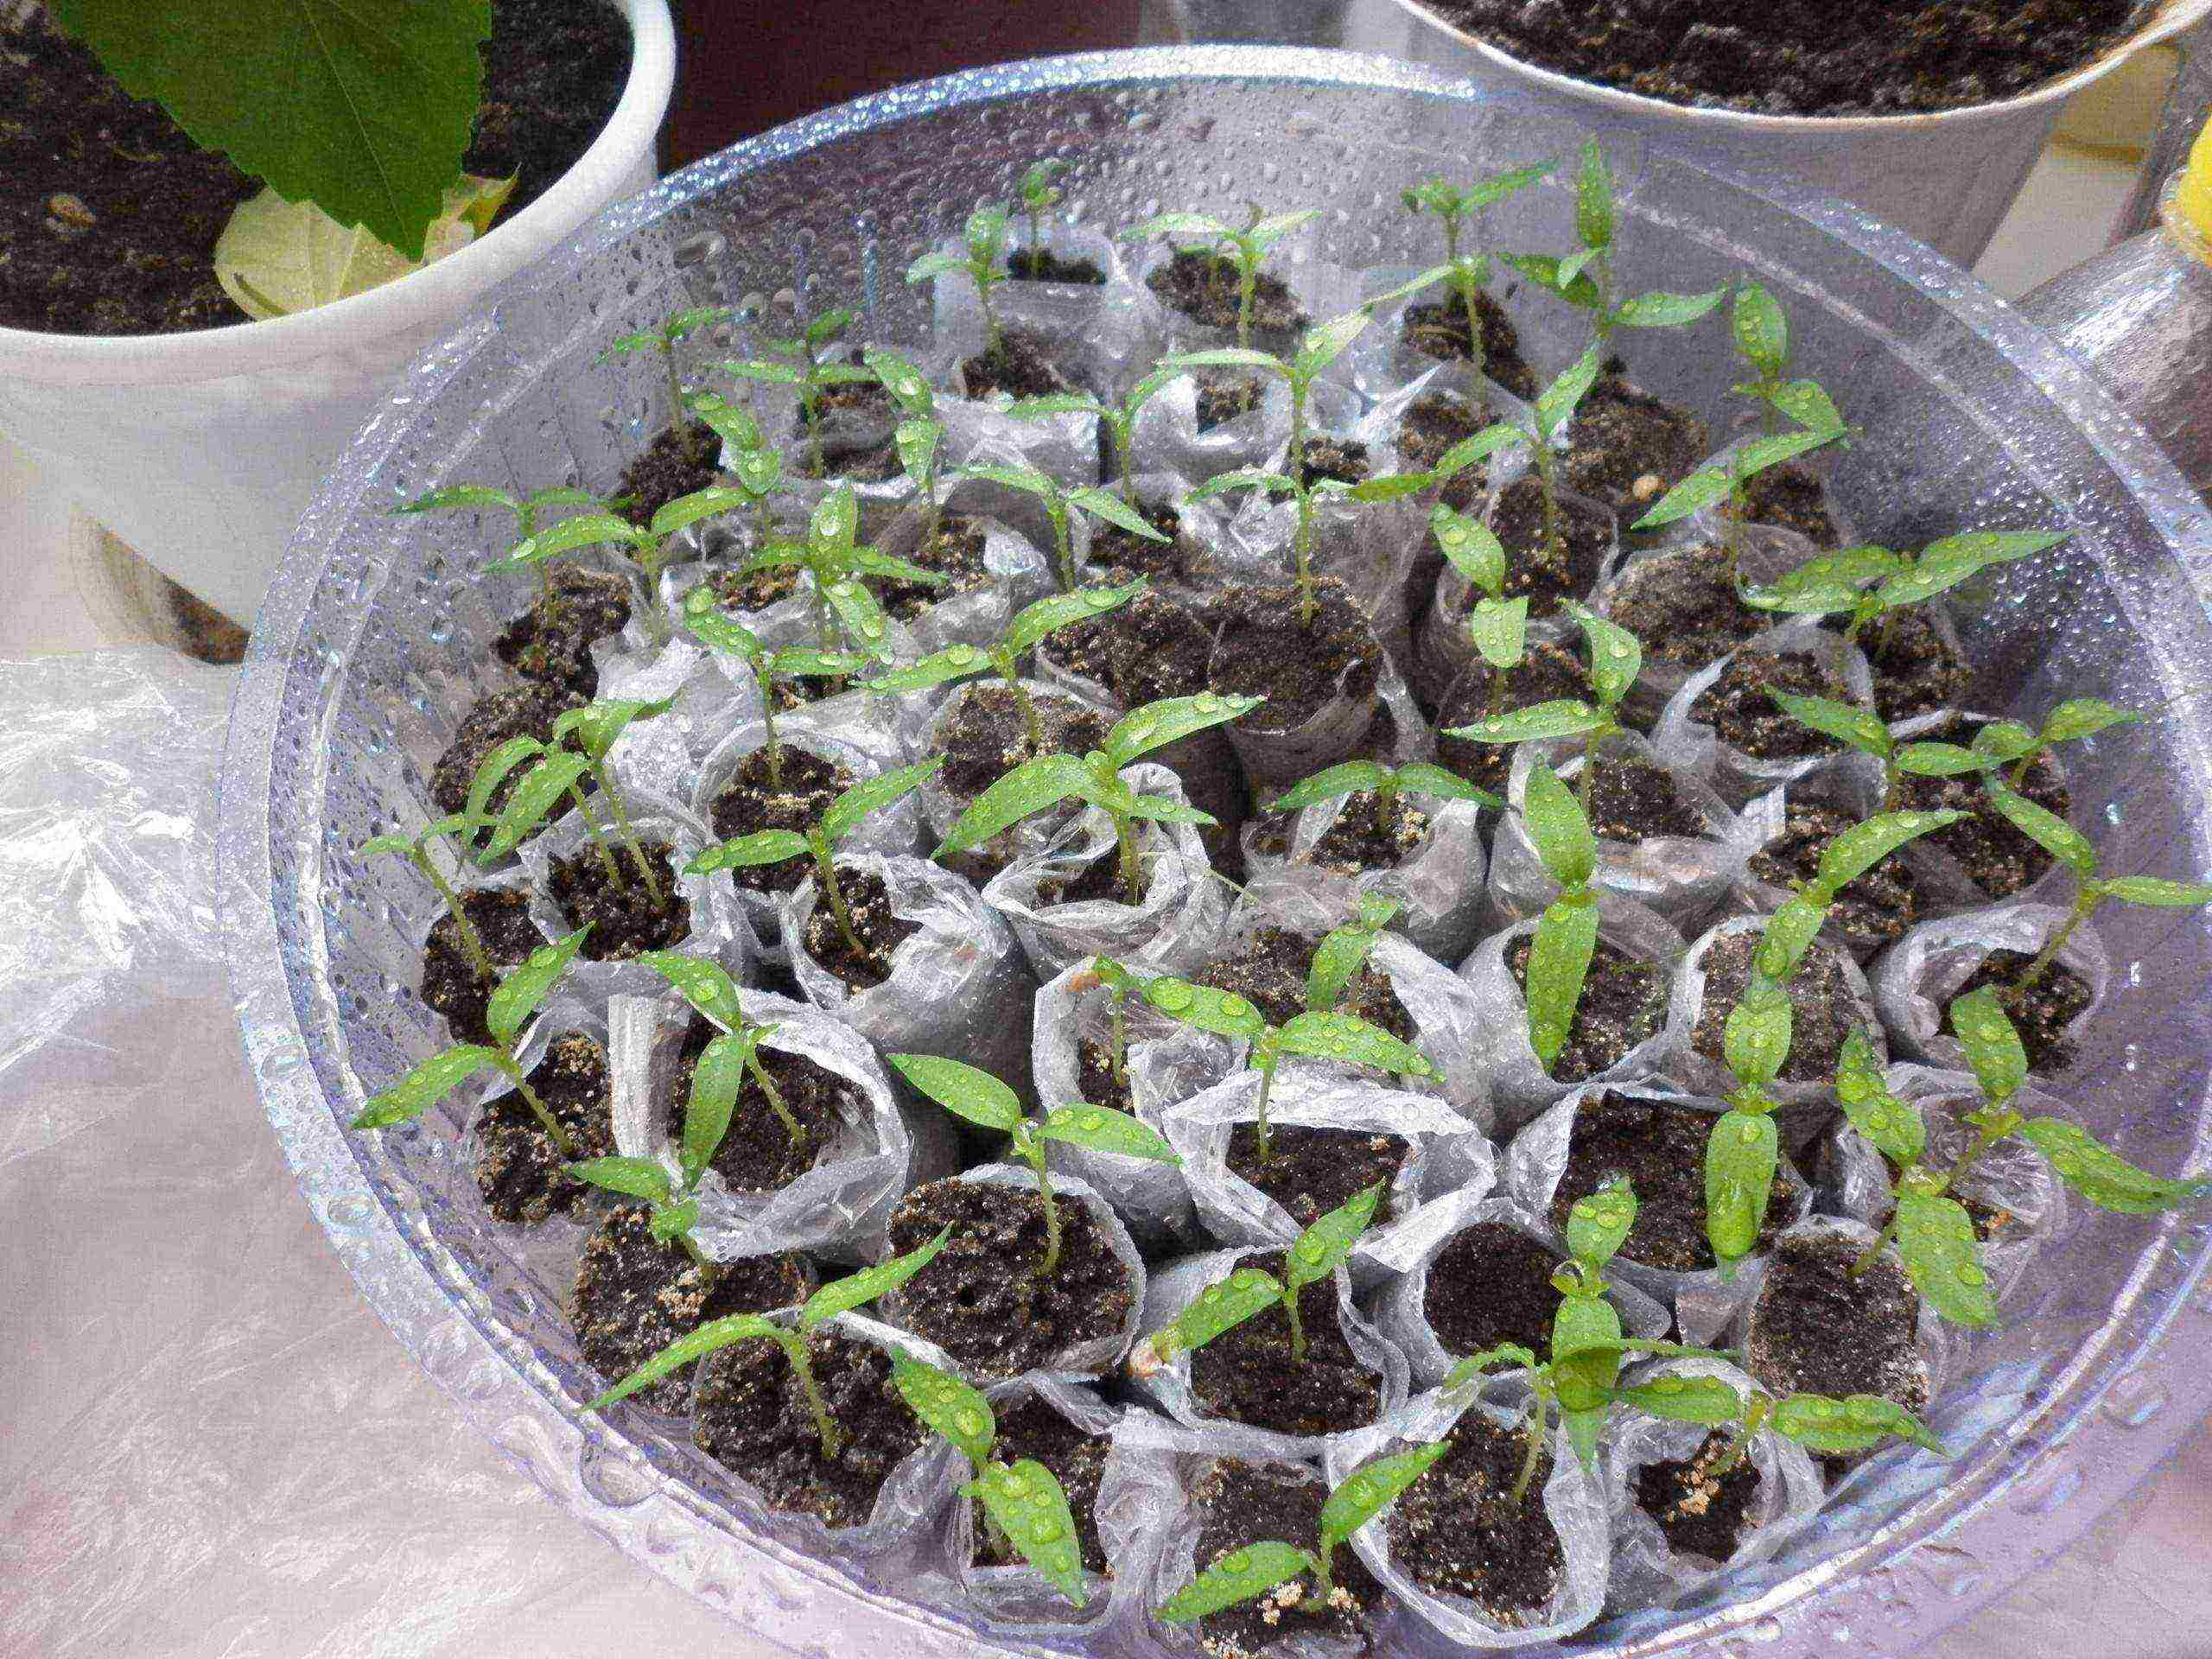
Growing seedlings in "diapers"
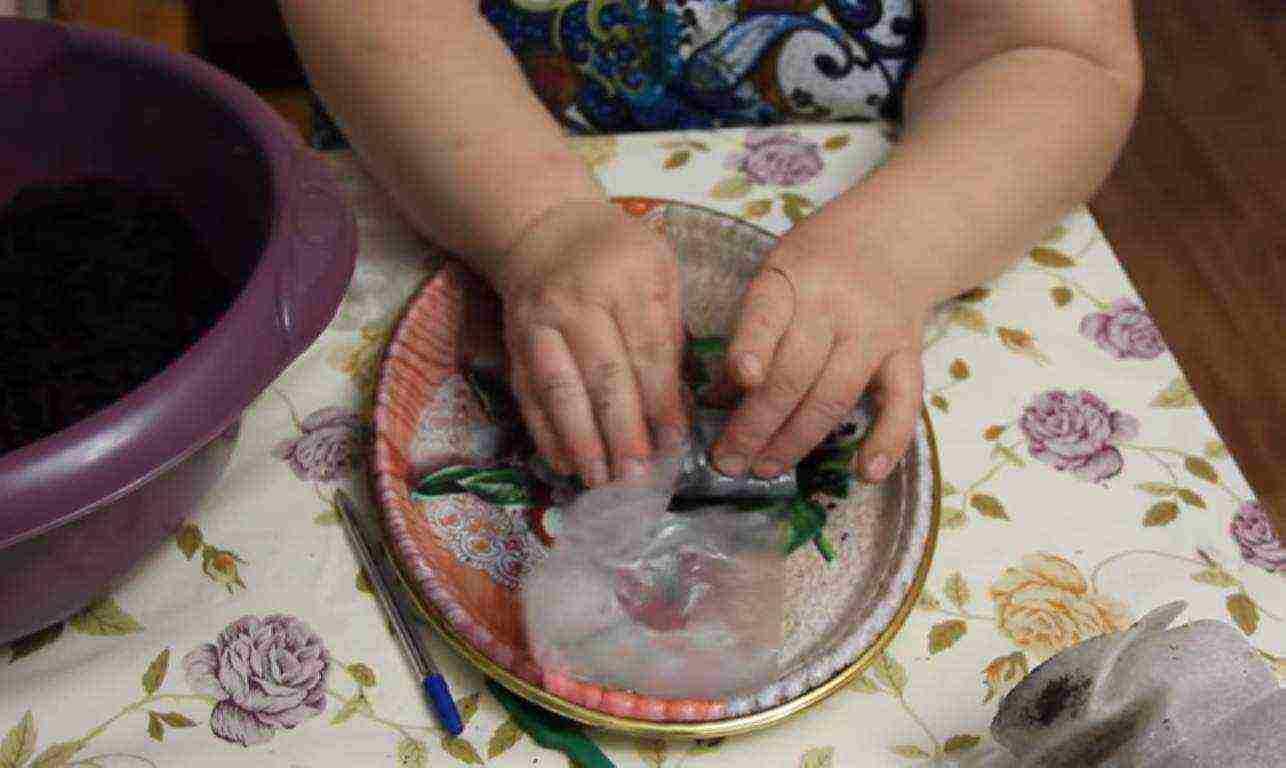
Plants dive into "diapers" is performed according to the technology below.
Step 1. Spread out a plastic bag on a tray. Prepare the soil - it should be moderately moist so that it does not crumble when squeezed in a fist.
Preparation of the "diaper" package
Step 2. On one end of the "diaper", closer to one edge, pour a tablespoon of soil. Level it out.
Soil on the pick bag
Step 3. A sprout taken from the "snail" is laid on top of the ground. To do this, the "snail" is slightly rolled out to release the root system together with the earthy clod. The sprout is placed so that the cotyledon leaves are above the edge of the film.
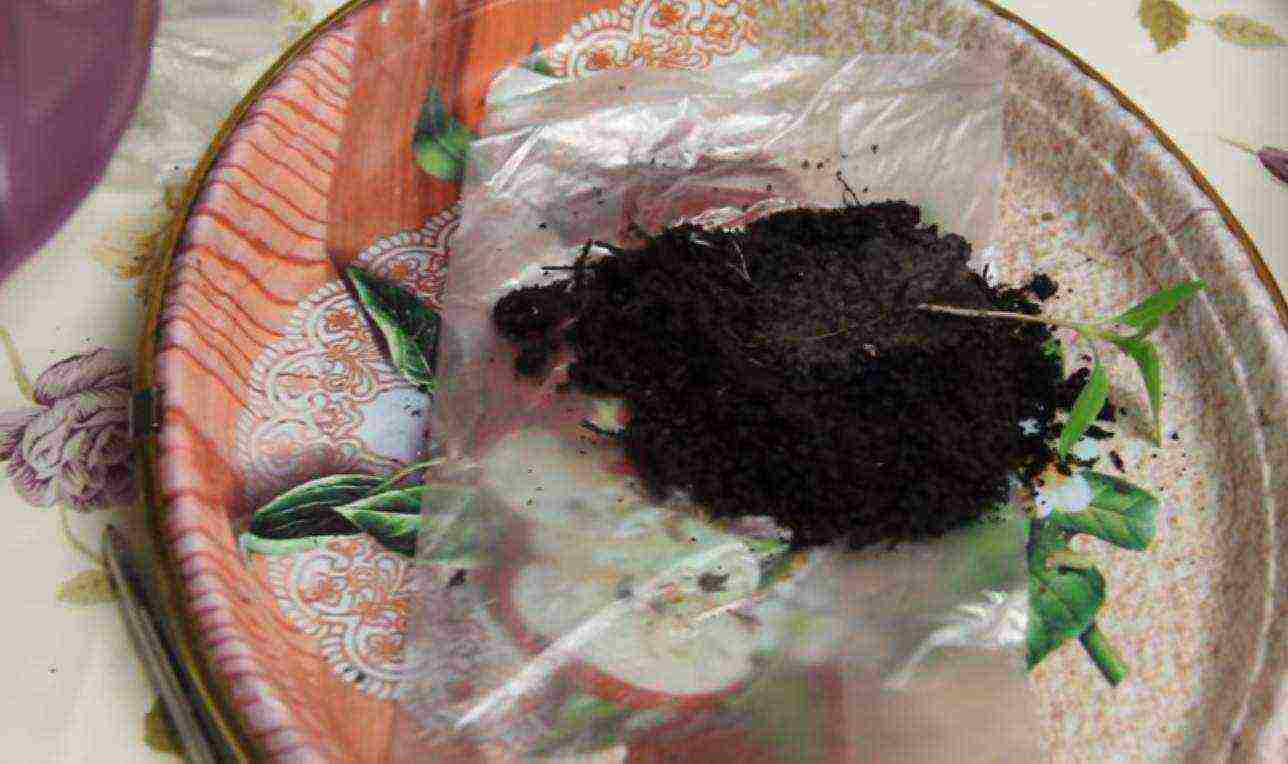
Sprout placement
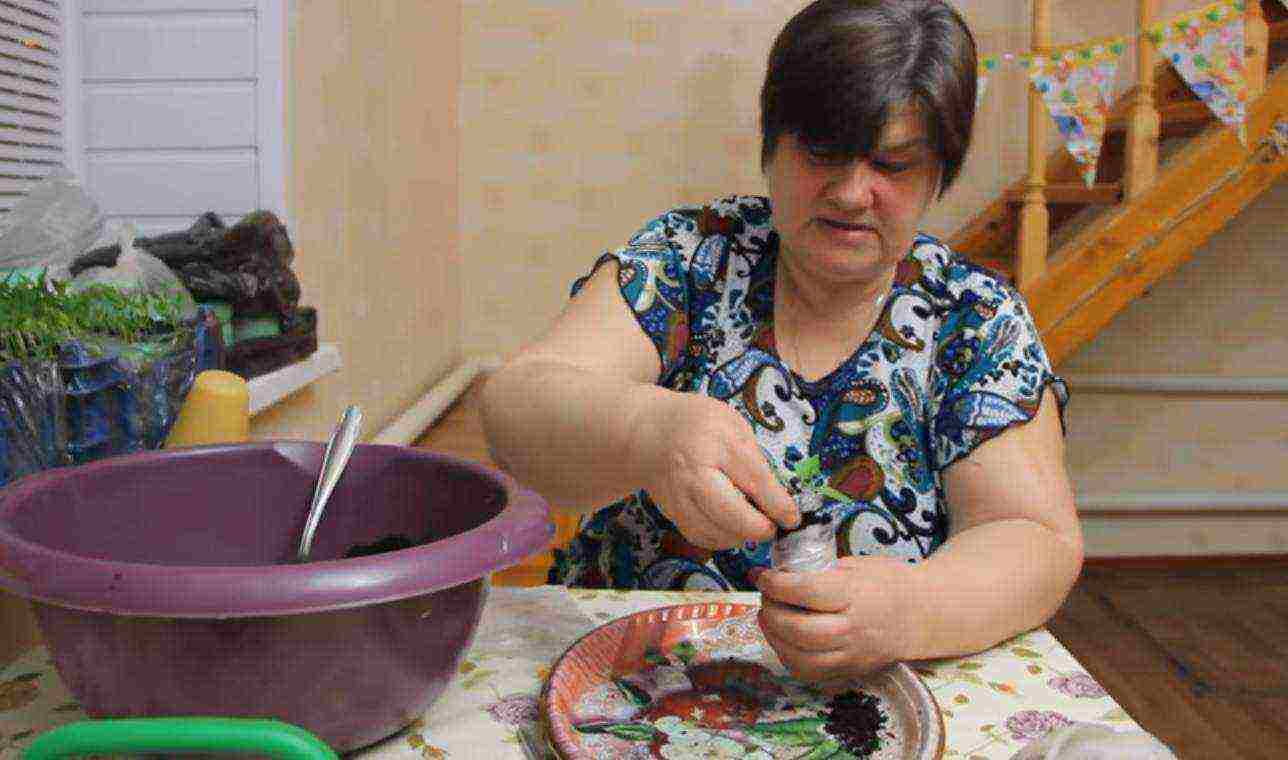
Step 4. From above, the sprout is covered with another tablespoon of soil, trimmed (soil) so that it does not spill out when wrapping. The bottom edge is left free of soil to make it easier to fold the film.
Backfilling the sprout with soil
Step 5. Wrap the film, gently compacting the soil around the root system. The bottom is bent so that the earth does not spill out and water does not flow out.
Film wrapping
Step 6. The soil on the surface is leveled, if necessary, compacted and poured.
Leveling and filling the soil
Step 7. Seedlings in a "diaper" are placed in a container, on the bottom of which sawdust is poured to absorb excess moisture. If the film unfolds, you can secure it with an elastic band.
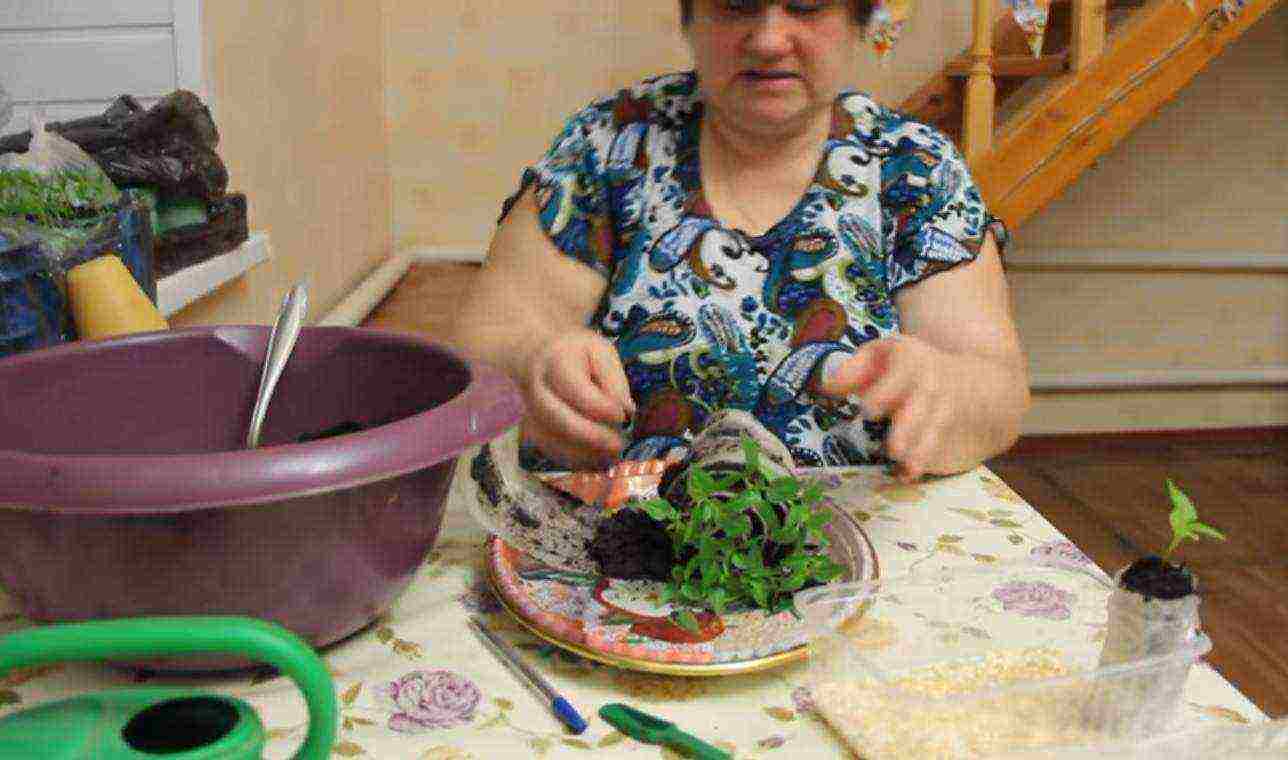
Placing seedlings in a container
Step 8. Water the seedlings at the root from a small watering can or a rubber pear. Feeding with this method of growing seedlings is best done with each watering, dissolving a small amount of fertilizer in settled water.
Watering and care
It is possible to grow in "diapers" not only cut seedlings, but also plants that do not tolerate picking - cucumbers and zucchini, pumpkins, tributes and watermelons, as well as other vegetables and flowers with large seeds before planting in the ground. They are planted in 2-3 seeds in prepared "diapers", watered and put in a container, covered with a bag. After sprouting, the strongest sprout is left in each "diaper".
Video - Picking peppers into "diapers"
The described general methods of growing seedlings are suitable for almost all vegetable and flower crops, at the same time, each plant needs a special regime and duration of growing, watering and feeding. A brief description of agricultural techniques for growing various crops is shown in the figure.
Conditions for growing seedlings of vegetable crops
If you follow the planting dates and follow all the care recommendations, you can get strong and healthy seedlings, which will quickly take root and give a good harvest.