Content
- 1 Phalaenopsis orchid: growing features
- 2 Home care
- 3 Reproduction of the phalaenopsis orchid at home
- 4 The main problems when growing a plant
- 5 Do I need to transplant the flower after purchase?
- 6 General information about Phalaenopsis
- 7 How to choose Phalaenopsis?
- 8 Choosing a location and temperature
- 9 Choosing the right substrate and pot
- 10 Humidity and watering
- 11 How to transplant phalaenopsis correctly?
- 12 Conditions under which the orchid will bloom
- 13 How to propagate domestic phalaenopsis?
- 14 Choosing fertilizers
- 15 What it is
- 16 At home
- 17 Miracle Orchid
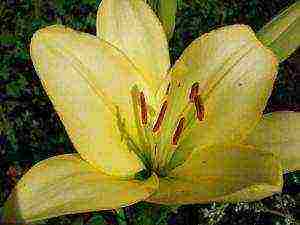
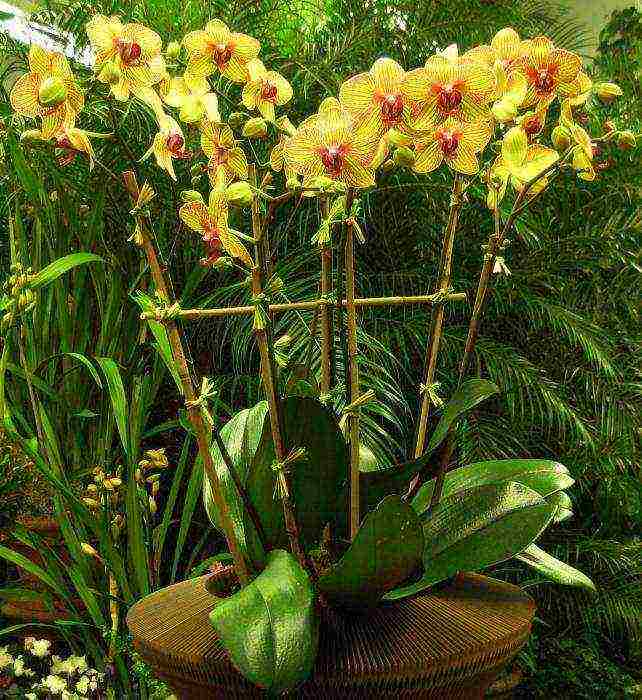
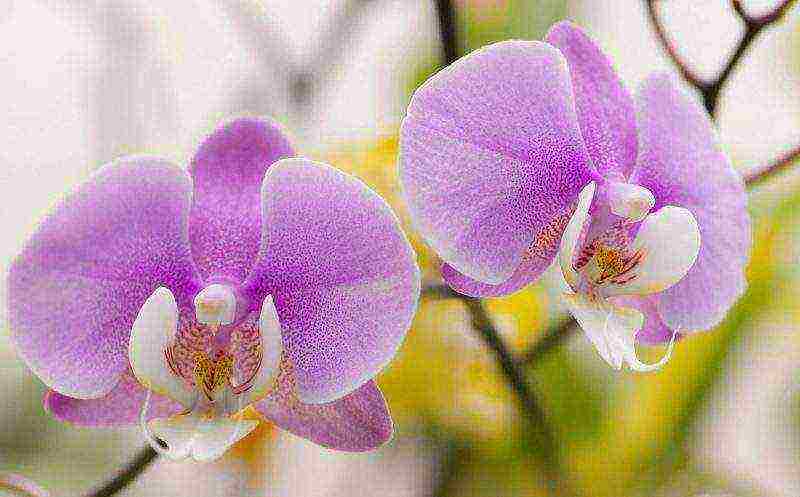
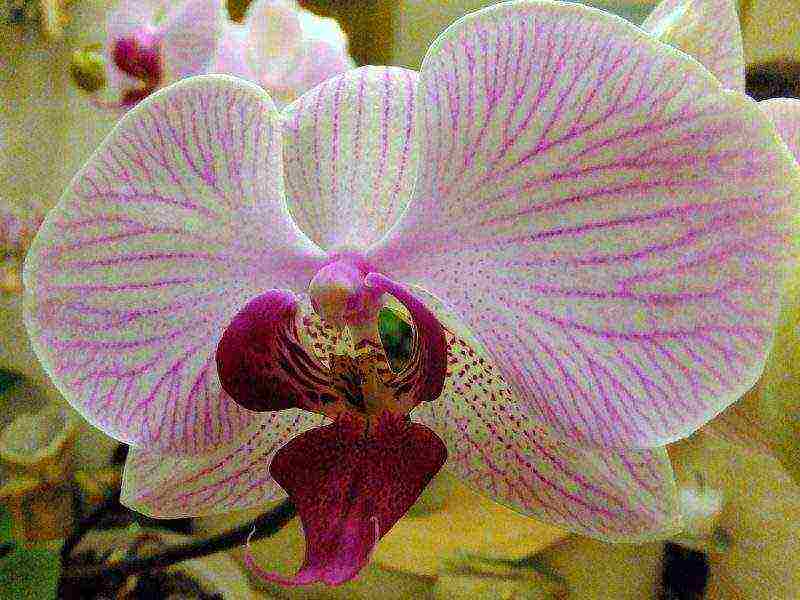
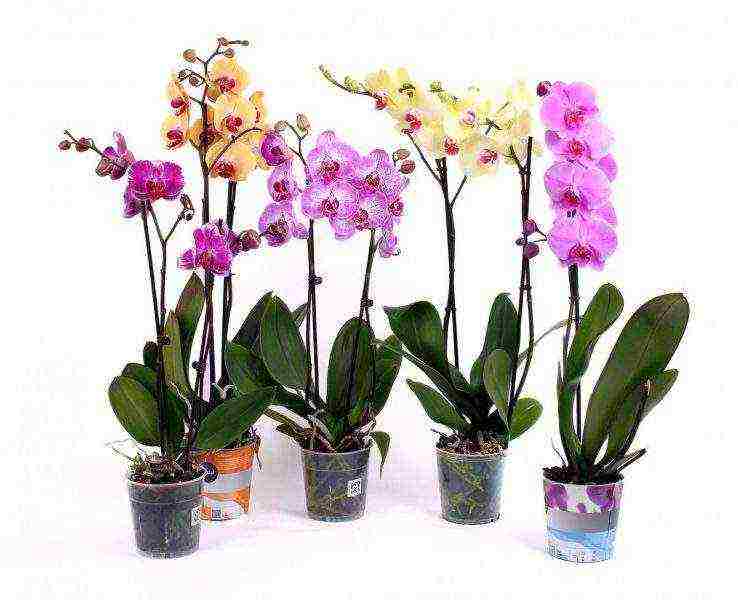
The orchid is considered one of the finest ornamental plants. According to many gardeners, the most luxurious representative of the Orchid family is the famous phalaenopsis. 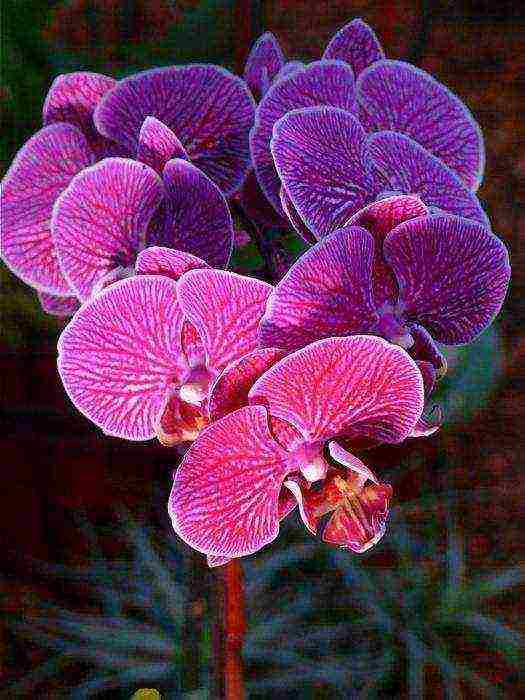 You can distinguish this graceful plant from others by the flowers that resemble the wings of a butterfly. They are located on curved long peduncles and open gradually, one after the other. Phalaenopsis can be very diverse in color - white, yellow, pink, purple, red and even green. The leaves of this flower are fleshy, arranged in two rows, forming a basal rosette. The plant's roots are designed to anchor on any surface and provide the orchid with moisture and nutrients. In this article, we would like to consider how to properly grow phalaenopsis at home. With the constant maintenance of favorable climatic conditions, the orchid will produce flower stalks twice a year and delight you with its amazing flowers in autumn and spring.
How to choose a healthy flower in a store?
Now there is a large species and hybrid variety of this plant. As a rule, such species as Phalaenopsis Stewart, Phalaenopsis pleasant, Phalaenopsis Schiller, Phalaenopsis mini pink and Phalaenopsis giant are most often grown at home. In order to buy a healthy plant, you need to carefully consider its roots: there must be a sufficient number of them. If the orchid is unstable in a pot, then there are few roots or they rot and die off. Also, when choosing a plant, you should pay attention to the deciduous mass. It should look healthy, without dark spots. After the purchase, it is advisable to transplant the phalaenopsis into a new pot with a good substrate for orchids.To carry out the transplant, the roots of the plant are carefully separated from the walls of the container and washed with warm water, removing the old substrate and, if necessary, cutting off the rotten parts. After that, the orchid is placed in a new container and covered with substrate so as to leave about 3 cm of space to the edge of the pot.
 For orchids, you should buy only specialized soil, but you can also make it yourself using ingredients such as charcoal, pine bark, sphagnum moss. A drainage layer (pebbles, pieces of bark, polystyrene) must be placed on the bottom of the pot. The most practical and convenient container for growing epiphytes is considered to be a transparent plastic pot with holes in the bottom.
Phalaenopsis at home: lighting and temperature
In principle, either side is suitable for growing an orchid, the main thing is that the sun's rays do not fall on the plant itself, especially in summer and spring. On the south and west windows, phalaenopsis should be shaded with blinds or curtains. In winter - with a lack of natural light - the plant must be additionally illuminated with lamps, thereby prolonging the daylight hours. Important: the orchid will gradually tilt towards the light source, and therefore it is advisable to periodically, every two weeks, turn the pot 180 °, the only condition is that the plant should not be disturbed during the budding period. The phalaenopsis orchid at home prefers a room temperature of at least 18 ° C, it feels most comfortable at 22 ° C - 24 ° C. In the autumn, it is possible to maintain a cooler temperature - about 16 ° C. This is necessary to bookmark the kidneys. It should also be borne in mind that phalaenopsis requires a difference between night and day values in the range of 6 ° C.
Phalaenopsis flower care at home. Watering and feeding
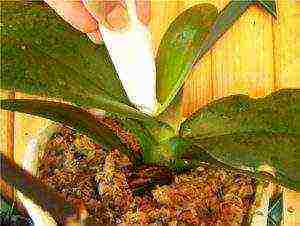
 It is generally recommended to water the plant twice a week, keeping the substrate well hydrated. Between waterings, the soil mixture should have time to dry out enough. How to water phalaenopsis in winter? In the cold season, the substrate is allowed to dry, so watering is carried out less often. Moisturizing the soil should be avoided at sufficiently low night temperatures (10 ° C). Important: you cannot water the orchid at night! To moisturize the flower, use extremely soft, settled water, close to room temperature. Your phalaenopsis will not do without regular spraying from a spray bottle. When carrying out this procedure, it is necessary to ensure that water droplets do not fall on the peduncle and the growth point, otherwise this can lead to a deterioration in the well-being of the plant. Remember that spraying is advisable in the morning or afternoon, and not in the evening. As for fertilizing, the orchid needs complex fertilizers during the growing season. They are diluted in a proportion of about 1 g per 1 liter and the solution is added once every 14 days after watering.
Phalaenopsis orchid, which is easy to care for at home, even for novice florists, is an epiphytic plant from the humid forests of Australia and Southeast Asia. The flower owes its name to its resemblance to a butterfly, which was noted by the head of the German botanical garden Karl Blum.
Phalaenopsis orchid: growing features
Certain features of its cultivation at home are associated with the natural growing environment of the butterfly orchid:
- A pot and soil for Phalaenopsis orchids is required as a support.
- Finding the roots in the air and with good lighting, which promotes photosynthesis, is ensured by choosing the correct location and light substrate;
- The presence of aerial roots requires constant monitoring of the plant from the grower in order to exclude the possibility of feeding them from pots with other indoor crops.
- The possibility of a plant flowering three times throughout the year due to the lack of a pronounced dormancy phase.
Home care

To be the happy owner of an often blooming and healthy plant, you must adhere to certain rules for caring for a moth-like orchid.
Location and lighting
The flower needs a lot of soft light, which the plant can receive from the west and east facing windows. If the window faces the south side, then during the peak of solar activity, a slight shading is created with the help of a loose curtain to prevent the appearance of spots on the shoots, indicating burns. To keep the plant symmetrical and not tilting to one side, the orchid pot rotates around its own axis twice a month.
Important! During the budding period, the flower should not be disturbed.
What soil is suitable for Phalaenopsis orchids?
A substrate for cultivating a flower can be purchased at a flower shop, both ready-made and as separate components, the main of which is moss.
When preparing the mixture yourself:
- Two days before planting the orchid, the pine bark is soaked in clean water to swell.
- A drainage layer of expanded clay or small pieces of polystyrene is placed in the pot.
- Large fractional parts of the cortex are located on top.
- The last layer is prepared from the bark of the fine fraction, mixed with chopped moss.
Temperature

To ensure optimal conditions under which a beautiful flowering of the culture occurs, a temperature regime is created in the range of 18-25 ° C.
Important! For a short period, the orchid is able to withstand high (up to 42 ° C) and low (up to 12 ° C) temperatures.
Watering the flower and air humidity
The frequency of humidification, between which the substrate must dry completely, is influenced by a number of factors:
- content temperature;
- the composition of the substrate;
- the phase of cultural development and the season.
When the pot becomes light and there is no condensation on its walls, the pot is half placed in water to saturate the substrate with moisture through the drainage holes. Boiled water is used for irrigation. In hot weather, to ensure the required level of humidity, which should not be too high, the container with the flower is placed on wet pebbles. To prevent rotting associated with stagnant water in the leaf sinuses, and burns due to evaporation of droplets from the leaves, the orchid is not sprayed.
Important! Bottom watering will avoid water ingress on the shoots, which provokes the development of rot.
Top dressing and fertilization
Additional nutrition of the orchid with liquid mineral fertilizers is carried out simultaneously with watering and only during the active growing season - growing green mass, budding, flowering.
Post-flowering care rules
After the flowering of a beautiful flower is over, the florist needs to carefully monitor the peduncle. When yellowing and wilting, the arrow is completely removed. If the peduncle remains green, then after resting on it, new flower buds will be laid on it. Therefore, the arrow is only shortened: the cut is made 1 cm higher than the developed kidney.
Transfer
Phalaenopsis orchid transplant is carried out every 2-3 years, during which the substrate loses the necessary qualities, and the branched root system is shown from the drainage holes.
The transplant technology is as follows:
- After flowering is complete, a new, larger pot is prepared.
- A drainage layer is placed at the bottom of the tank.
- An orchid is planted by transferring it into a pot.
- The remaining voids are filled with a new substrate.
How to care for in autumn, winter?
With the arrival of the cool season, the development of the flower stops. During such periods, feeding is excluded from the above measures for plant care. But often it is at this time that the phalaenopsis again throws out the peduncle, it all depends on the species and variety.
Protection of orchids from diseases and pests
Orchid diseases are manifested in violation of agrotechnical requirements for care.

Among the most common are:
- Fusarium - the disease arising from an excess of moisture cannot be treated. The affected plant is destroyed to prevent spread.
- Rot - fungal diseases, which are caused by waterlogging of the substrate, are treated by twice spraying the culture with a fungicide with an interval of 10 days.
- Hives - the disease, manifested in the form of large spots, is eliminated by ensuring an appropriate temperature regime and systematic ventilation.
- Botrytis - a disease that affects orchid flowers stops developing when the humidity level is normalized and free air circulation is ensured.
Along with diseases, the culture can be oppressed by harmful insects, among which mealybugs, thrips, scale insects and spider mites are noted. To combat pests, it is better to resort to treating the flower with an insecticidal preparation.
Reproduction of the phalaenopsis orchid at home
At home, phalaenopsis reproduces by a vegetative method - the separation of lateral shoots.
In order for the children to be formed, the following must be done:
- At the base of a faded peduncle, a dormant bud is determined.
- At the edge of the scales covering the kidney, a semicircular incision is made with a sharp knife.
- The scales are removed using tweezers.
- The released kidney is processed by the growth regulator.
- A month later, rosettes are formed, and after three months, air roots are formed.
When the children are already there, the reproduction procedure is carried out 1-2 months after the flowering of the orchid as follows:
- The shoot, on which two leaves and aerial roots 5 cm long, are formed, is separated on a peduncle or at the base of a rosette of leaves.
- The shoot is dried throughout the day and planted in a fine-grained substrate.
- The container with the fit is covered with a glass cover to maintain the temperature within 22-25 ° C.
- After the new plant has taken root, the glass is removed.
The main problems when growing a plant
Cultivation of a flower often causes a number of difficulties for novice flower growers.
Phalaenopsis does not bloom
As a rule, orchid bloom occurs after a three-month break.
There are several reasons why this may not happen:
- lack of light;
- excess nitrogen in the substrate;
- not enough time for a good rest of the orchid.
Attention! Having determined the cause, the florist will be able to eliminate the violations of the content and make the orchid bloom.
The reason for the yellowing of the leaves
Yellowing of the leaves is noted when:
- violation of the watering regime, which leads to the development of fungal diseases;
- populating the plant with mealybug;
- falling on the sheet plates of direct sunlight.
Do I need to transplant the flower after purchase?
The lack of aesthetic beauty of the pot in which the flower was purchased is not a reason for transplanting. Moreover, if the purchased orchid is in a blooming state, then the procedure should not be carried out. Such manipulations, carried out at the wrong time, can cause irreparable harm to the plant.
Thus, subject to the simple requirements for the content of phalaenopsis, the orchid will become an adornment of any interior, creating an even greater coziness and harmony of the atmosphere in the home.
 Herbaceous plants belonging to the Orchid family. They are represented by epiphytic (plants that live without connection with the soil, most often on another plant, receiving nutrients from the environment) and lithophytic (plants that need rocky or rocky terrain for life) forms. Epiphytes predominate among phalaenopsis.
In nature, phalaenopsis lives in the humid tropics of Indonesia, Australia, Southeast Asia, the Philippine Islands.
General information about Phalaenopsis
Literally translated from Greek, Phalaenopsis sounds like "moth-like". This is not surprising, because the flowers of this unusual plant are shaped like a flying tropical moth or butterfly. The variety of colors is amazing. Even if you set out to collect orchids of all existing colors and shades at home, it will take a lot of time to achieve it. But even one or more phalaenopsis can significantly decorate your home and give you positive emotions from contemplating their indescribable beauty.
How to choose Phalaenopsis?
 So, you have decided to please yourself with the purchase of this beautiful plant. What should be considered when choosing an orchid?
- It is desirable to acquire the plant during the flowering period. Then you can choose the color you like or lack in your collection.
- You should pay attention to the leaves: in a healthy plant, they are dark green, fleshy, with a waxy sheen. Flowers with damaged, dry or discolored leaves are best left in the store.
- Phalaenopsis roots are green and powerful. If you move a healthy flower in a pot, the roots will sit tightly in the substrate. If the root system of the orchid suffers, then the roots will be sluggish and mobile.
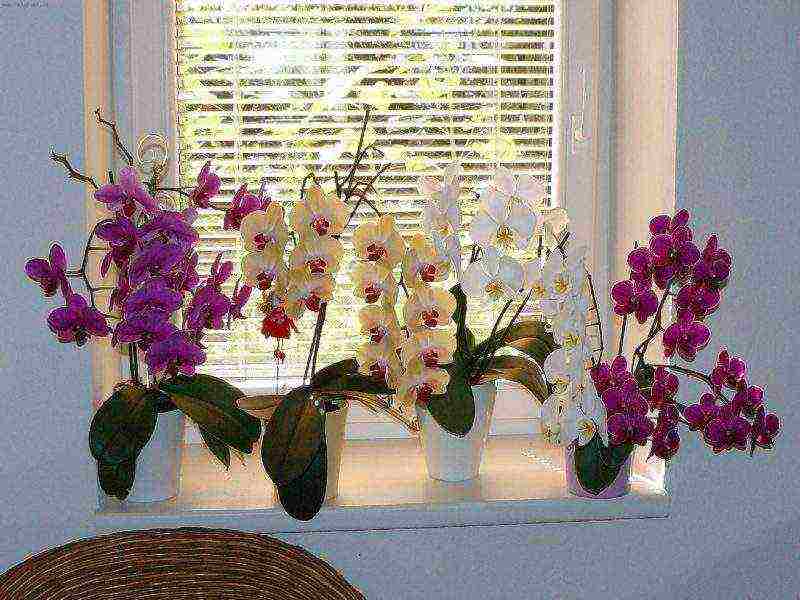
Choosing a location and temperature
So you bought your phalaenopsis and now he needs home care after the store. In order for the flower to be comfortable, you need to choose the right place where it will live and choose the temperature regime, since it directly depends on whether the orchid will please you with flowering or not.
Phalaenopsis is very fond of light, so you need to keep it in well-lit places, for example, on window sills. But it should be remembered that direct sunlight can cause burns to the plant. Therefore, it is better to put them on the east or west side. If in your house the windows face south, you can make a shelf, place it near the window and put the phalaenopsis there.
 There are some peculiarities regarding the temperature regime. To stimulate the flowering process, you need to create a temperature gradient: in the summer, maintain 24-26 degrees, and in winter, reduce the temperature to 15-17 degrees for a couple of weeks. The flower will withstand 30–32 degrees, but if such numbers hold for a long time, your phalaenopsis will respond by dropping its beautiful flowers and wilting leaves.
With proper home care, the phalaenopsis orchid will delight you with flowering from 3 to 6 months.
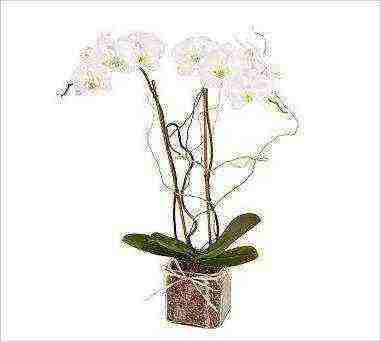
Choosing the right substrate and pot
In order for the Phalaenopsis orchid to feel good, home care should mean a responsible approach to choosing a pot and soil in which it will grow.
Phalaenopsis needs a substrate to give a stable vertical position, since. in nature, the flower is watered with tropical rains and from the bottom, when moisture diffuses through the leaves, it receives nutrients. Phalaenopsis roots are called aerial roots and do not need to be constantly in water. Therefore, especially for them, there is a substrate for sale, consisting of bark, which provides constant air access to the root system of the flower. If there is insufficient humidity in the room, a little sphagnum moss can be added to the substrate, however, the main thing here is not to overdo it, as it will retain water.
 It is better to choose a transparent pot, then the state of the substrate and plant roots will always be under your visual control. Pot size matters: if it is large for phalaenopsis, then the soil will not dry out well, which will eventually lead to rotting of the roots. And too small a pot size will lead to permanent trauma to the root system. For aesthetics, you can place a transparent pot in a multi-colored planter, although the sight of a healthy and blooming orchid will attract all eyes.
Humidity and watering
In order for the orchid to grow and delight its owner with it air humidity is required in the range of 30-40%... If the air temperature exceeds the comfortable temperature for phalaenopsis, the flower pot can be placed on a pallet with wet rubble or pebbles. But do not forget that with excessive moisture, the roots may begin to rot.
Watering or "Bathing" the phalaenopsis is a kind of ritual, which allows you to provide the flower with proper care. You should always have standing water or rainwater close at hand. The water temperature for bathing an orchid at home should be slightly above room temperature — approximately 26–8 degrees.
 Into a container filled with prepared water it is necessary to immerse the pot with the plant for 20–45 minutes to sufficiently saturate the substrate with moisture. After bathing, place the phalaenopsis pot on a tray or recessed dish so that excess moisture is removed through the drainage holes in the bottom of the pot. Stagnation of moisture around the roots of phalaenopsis should not be allowed.
This ritual should be performed once a week. But if the temperature in the room where the orchid grows is above 30 degrees, you need to do it 2 times a week.
How to transplant phalaenopsis correctly?
The orchid is transplanted no more often than once every three years. This is best done in the spring.... But it may also be that the plant will need a transplant immediately after you bring it from the store. It is advisable to do this when the orchid stops blooming.
For transplanting, it is better to use a new substrate, but if this is not possible, then the old one will do. Rinse it thoroughly, boil it and dry it completely.
 Phalaenopsis must be removed from the pot, the roots must be cleaned of soil residues. Then his nit's good to see and if so, remove yellowed leaves and spoiled roots. The cut sites should be treated with an antiseptic. You can use scissors to cut off unusable parts of the plant.
If there are no holes in the bottom of the pot where you will transplant the orchid, you need to do them yourself... Then a layer of expanded clay is laid on the bottom, which will perform a drainage function. Place the flower in the center and sprinkle it evenly with the substrate, not forgetting that the roots must have access to air.
Conditions under which the orchid will bloom
- Control of air humidity in the room where the phalaenopsis lives. Humidify if necessary, since humidity is often lowered in summer.
-
 Adequate lighting is required, but not in direct sunlight.
 - Temperature fluctuations should be minimal, with the exception of lowering it to stimulate the flowering process.
- Try to refrain from rearranging the orchid pot from place to place.
It is difficult to single out the main condition, since the observance of all of them in a complex leads to the desired result.
After the cessation of flowering, Phalaenopsis needs special care... In order for the flowers to appear again and again, you need to give the plant a rest. For this, the peduncle is cut to the third bud or remains intact. When the orchid is ready to bloom again, it will eject a new flower stalk.
How to propagate domestic phalaenopsis?
Once you realize that home orchid care is pretty simple, you may be tempted to try breeding your pets. There is nothing difficult here either, but you need to be patient.
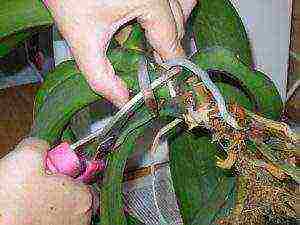
With a careful examination of the peduncle, it is necessary to determine the presence of dormant buds. To awaken her you need a temperature regime of 24-29 degrees... A semicircular incision is made with a sharp object in the area of the base of the kidney scales and it is removed with tweezers. The exposed kidney is treated with cytokine paste and covered with a piece of sphagnum.
 After 4-6 weeks one or more cubs can be observed on the plant with two or three tiny leaves.The number of babies depends on how many kidneys you have treated. But it should be remembered that more than one should not be processed on one plant, since it can give all its strength to the children, and itself perish.
At the end of 3-4 months, the cubs have the first roots. Once they get strong and reach a length of at least two centimeters, cut the young orchid with a piece of the mother's and transplant it into a separate pot. Cover the roots with moss to protect them from drying out. If there is insufficient air humidity in the room where the young flower will grow, you can make a greenhouse from a plastic bag. Further care is the same as for the rest of the phalaenopsis.
Choosing fertilizers
Another prerequisite for ensuring decent care is the right fertilizer, since this is important.
-
 In order for the plant to easily release new leaves, it is necessary to use complex fertilizers, with a greater proportion of nitrogen in them. But you should know when to stop, so as not to overdo it, since the massive build-up of leaves prevents flowering. To correct this oversight, you should stop feeding.
 - And now there are enough leaves. Now you can spur Phalaenopsis to flowering, feeding it with fertilizer with a higher content of potassium and phosphorus than nitrogen. The mixture should be added until the flowering process begins.
- For phalaenopsis orchids, ready-made liquid dressings are often used, so there is no need to prepare them on their own.
- In summer, plants should be fertilized on average twice a month, and in winter once.
Observing simple conditions and guided by the rules of caring for phalaenopsis, you can grow at home a whole greenhouse of fabulously beautiful flowers that will not leave anyone indifferent.
What it is

Caring for orchids at home is quite simple, you just need to know some subtleties, and it is also important to know what you cannot do, which we will consider in this article.
Phalaenopsis is well suited for beginners, since there are no particular difficulties in leaving.
Phalaenopsis does not tolerate shade well, in which case you need to take care of additional lighting. It is best to place the orchid in a sufficiently lit place, but without direct sunlight (western or eastern windows are suitable). If you have southern windows, then you should shade the plant.
Temperature
When caring for an orchid at home, the optimum temperature in winter and summer should be almost the same - 20 ˚С. The daytime temperature in summer for adult plants is 25 ˚С. They can withstand up to 30 ˚С as much as possible, but at this temperature they bloom worse and can lose buds and leaves can lose turgor.
Watering
You can read in more detail about watering the phalaenopsis orchid in our article watering the phalaenopsis orchid.
Top dressing
To feed the orchid, when leaving at home, should be throughout the year. In the spring and summer, the orchid should be fed every week, and in the winter, twice a month. You should only buy special fertilizers for orchids, fertilizers for other types of plants are not suitable.
Substrate
Unlike other plants, Phalaenopsis does not need soil as a substrate. The main component for the phalaenopsis orchid is the bark of small and medium fractions. If your apartment has very low humidity, then you can add sphagnum moss.
At the bottom of the pot, on top of the drainage layer, put the bark of the middle fraction, and in the middle and on top of the fine fraction. Before planting an orchid, the bark should be soaked for a couple of days so that it is saturated with moisture, then drain and rinse.
This is done due to the fact that the dry bark quickly allows water to pass through.
Which pot is right
When caring for an orchid at home, the question often arises, in which pot to plant your beauty? Nowadays, a lot of different pots have appeared and often in stores they offer to plant an orchid in a glass pot.
But such a pot is categorically not suitable for phalaenopsis. The best pot for an orchid would be a clear, plastic pot with numerous holes in the bottom and sides.
All this is necessary so that moisture does not stagnate, since waterlogging is destructive for an orchid.
What are the pros in a plastic pot? This capacity allows you to control the condition of the roots and substrate in which the orchid grows. The roots do not stick or grow into the walls of the pot. If you have not made holes in the store on the walls, then you can easily make them at home using a hot nail.
Block culture method
Recently, it has become very fashionable to grow orchids close to natural conditions - on blocks. Do you want to know how to do it?
In order to grow an orchid on blocks, you need to have a piece of pine bark, cork oak, or a piece of the trunk of any tree. These blocks can be purchased at a flower shop or made by yourself. The plant is planted on a block, the roots are straightened and fixed with fishing line or elastic, you can add sphagnum. Before use, the block should be boiled and disinfected.
Advantages of the method
- There is no root rot (it is easy to control the condition of the roots, the roots are ventilated).
- Take up less space.
- Has an attractive appearance.
Minuses
- Dries quickly, requires frequent watering.
- Difficulty with a transplant.
- It is difficult to provide food.
At home
Among inexperienced flower growers, there is an opinion that only specialists can plant orchids at home, however, this does not require special skills.
Undoubtedly, this is a complex process, which is preceded by a long preparation period, it requires attention and precision.
For the successful implementation of this procedure, knowledge about the species of the flower, about the methods of caring for this species and about the methods of reproduction is necessary.
In this article, we will discuss the reproduction of the Phalaenopsis orchid at home.
Training
Reproduction of Phalaenopsis at home is a procedure that is not difficult to perform, although it does involve some hassle.
An adult, healthy and sufficiently large plant is suitable for reproduction. The procedure itself is stress for the flower, therefore only a fully developed organism can survive it well.
Before you propagate the Phalaenopsis orchid, you should know and exactly follow some of the conditions for keeping Phalaenopsis, which will ensure the plant's full and comprehensive development, the absence of diseases and pests:
- Tracking the life cycles of a plant. Not all orchid life phases are suitable for reproduction, therefore, a period is chosen when the plant is ready for the procedure. Usually a few months after flowering is complete.
- Temperature and lighting play a huge role. Direct sunlight is contraindicated in orchids and causes diseases of the leaves and root system. In order to grow and prepare the flower for separation, it is shaded or diffused lighting is created, which is considered a favorable condition. The duration of daylight hours for an orchid during the preparation period should be at least 12 hours. The temperature regime should be organized in a special way. Daily temperature drops are important. Phalaenopsis belongs to orchids of a temperate climate, therefore, daytime indicators should not be higher than 28 degrees, and nighttime, not lower than 15.
- Watering and moisture are indicators that are important for the development of peduncles, leaves and roots. For the breeding procedure, watering is reduced, like drought during the flowering period. By the appearance of the roots, it is easy to tell when it is time to water again. They take on a silvery hue when they need moisture and are colored dark green when they do not need moisture. After the roots have become grayish, they wait a few more days and then water is carried out.
Phalaenopsis breeding requires high quality and temperature of water. Use soft water, or settled, boiled, preferably rainwater. The water temperature should be 3 degrees higher than room temperature, because this activates the dormant kidneys.
Cuttings
This method is great for inexperienced flower growers, because it does not require titanic efforts and multi-step actions.In order for the reproduction of an orchid by a peduncle to be successful, living dormant buds must remain on the peduncle. Peduncles must also be healthy. Not always, after a period of color, it remains full and vibrant. Then Phalaenopsis propagation by cuttings is not carried out.
The tools for breeding the Phalaenopsis orchid are sterilized with antiseptic preparations so as not to infect. After that, the peduncle is cut off at the base at an acute angle or perpendicular. The cut must be rubbed with charcoal or treated with antiseptics.
The resulting cutting is divided into many separate cuttings 3-4 centimeters long. Sections on cuttings are also disinfected and treated with charcoal.
There should be at least one living, dormant bud in the middle of each cutting. Then they are placed on a previously prepared substrate, which is created from 2 layers: drainage from expanded clay or pumice and sphagnum moss.
In order for the cuttings to get into comfortable conditions for them, they create a greenhouse environment.
A greenhouse for separating orchids by cuttings can be purchased at the store, or you can organize it yourself. The main condition is constantly high humidity and a temperature of at least 28 degrees.
Under such conditions, dormant buds will awaken and the active growing phase begins, when leaves and roots grow.
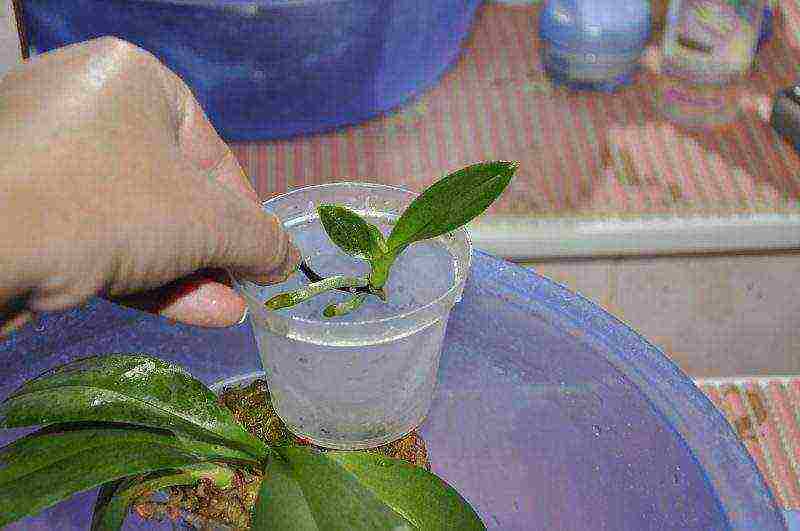
When the length of young roots becomes about 5 centimeters, they can be strengthened on permanent soil and grown in conditions familiar to all orchids.
Another way of reproduction of Phalaenopsis by a peduncle is to separate the entire cutting from the flower without further dividing it into small cuttings. The entire peduncle is placed in a container with water and left in the sun. Fertilizers are added to the water, which accelerate the development process.
The rise in water temperature due to the sun's rays awakens dormant buds and soon they begin to actively develop. As soon as they puff out 2 leaves, young roots should begin to grow.
When their length becomes at least 3 centimeters, the shoot is carefully separated and planted on a permanent substrate.
Reproduction by children
Let's look at how Phalaenopsis reproduces by children. Children appear on healthy flowers without the help of a gardener. If during a visual examination, activating buds were noticed, from which a sprout appeared, nothing needs to be done.
Leave the conditions the same and wait for them to develop to an acceptable size and start their roots.
When they reach a length of 3-5 centimeters, they are carefully separated and strengthened on the substrate, or, if they look weakened, create greenhouse conditions.
If the kidneys are not activated, then the scales are carefully removed from them. It is most convenient to do this with tweezers. Then a small amount of cytokinin ointment is applied. After applying the phytohormone, greenhouse conditions are also created.
Care of a young shoot
A young shoot does not always appear on the peduncle, which often leads to injury to the flower during separation.
In order for the children to appear on Phalaenopsis peduncles, you should make sure that they are healthy and not in the wilting stage, and then create a temperature regime for them with a constant temperature of 28 degrees and high humidity.
To do this, you can install a tray with water near the orchid, or spray from a fine spray gun. The water should be warm.
When separating, they do not leave roots on the mother flower and make sure that several leaves are formed on the shoot. After separation, the cut is rubbed with charcoal or treated with antiseptics.
The soil into which the young shoot is transplanted must be well crushed and have good aeration properties. The drainage layer is also very important. In no case should moisture stagnate after watering.
Splitting the bush
One of the most difficult methods, which also poses a danger to the plant, is the division of the bush.Inexperienced growers often make mistakes when carrying out this procedure, which leads to the death of the plant.
The selected flower must be large and completely healthy. Cut the plant in two with a sharp and sterile knife. Leaves and roots should remain on each of the halves of the bush.
The sections are treated with charcoal and antiseptic agents. The mother flower is left in the same pot, and a new substrate is prepared for the seedling. The soil is specially prepared. Sterilized, then dried and only then mixed.
At first, do not carry out abundant watering. The temperature regime and humidity are standard for the orchid family, and the length of daylight hours is increased.
Seed reproduction
Seed propagation of orchids is a very complex process that rarely ends up being successful at home. Phalaenopsis seeds are very small and do not contain the endosperm that nourishes and protects them, therefore, orchids of this species rarely breed at home.
In order for orchid seeds to form at home, during the flowering phase, a stressful atmosphere is created, which forces it to form a seed box.
If this does not happen, then reproduction from seeds at home will have to be carried out with purchased materials. Orchid seeds are often purchased in China. The medium in which the seeds are placed is agar-agar.
It is best to purchase it from a store.
Before sowing, the seeds are prepared. To provide protection against fungal and bacterial lesions on the seeds, they must be thoroughly sterilized.
Miracle Orchid
If you have unequivocally come to the conclusion that a blooming miracle should settle on your windowsill, and your choice fell on a beautiful orchid, then you first need to familiarize yourself with the main factors that contribute to the cultivation of a full-fledged plant that will delight with its beauty every day.
Of course, you can buy a plant that is already quite mature and not bother.
But how nice it is to grow from a small sprout something that eventually blooms in the middle of a cold winter and becomes a matter of your pride! However, before you bring your long-awaited green friend home, you need to familiarize yourself with the theoretical side of the entire growing process.
Orchids are quite varied in size, appearance and lifestyle. Currently, there is a large selection of orchid varieties, but not all are suitable for indoor conditions.
The main number of orchids suitable for growing at home are epiphytic plants.
Creation of optimal conditions
Each type of orchid has its own characteristics, but there are also general requirements for caring for an orchid at home.
- Good lighting is important. Photophilous species require up to 16 hours a day of bright light. Therefore, in winter, you need to supplement natural lighting with backlighting. Less light-loving species thrive in ambient light and can be kept under artificial light.
An unambiguous sign of a lack of light is the elongated leaves, the absence of the color characteristic of the leaves.
- Orchids do not tolerate excessive heat and stuffiness, so you need to regularly ventilate the room even in cold weather, after placing the orchid in a place protected from drafts. On a warm sunny day, it will not be superfluous to take the plant out to fresh air.
- There are certain requirements for watering orchids. Do not pour water from a watering can under the flowers, pour water into the tray. With a lack of moisture, the flowers do not need to be watered, it is enough to spray.
Orchids are watered if the potted substrate is completely dry. With an excess of moisture, the roots rot, with a shortage, the leaves begin to fade. In winter, an open container with water is placed next to the plants, which, when evaporated, increases the humidity of the air.
Do not get carried away with frequent watering and spraying of the plant, this can adversely affect it. The plant itself will make it clear when to water it.
Depending on the humidity in the room and on the condition of the plant, watering is carried out approximately twice a week. To reduce the hardness of tap water, it is boiled and, after settling, only the upper half is used for irrigation.
Reproduction and transplantation
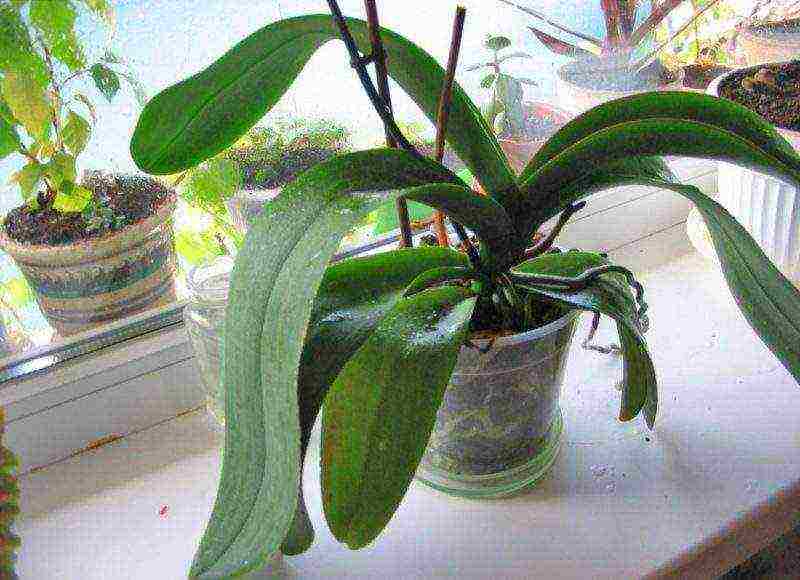
Caring for orchids at home also means replanting the plants correctly. It is not worth disturbing the plants once again with a transplant, orchids preferably choose tight dishes, even if roots begin to peep out of the lower hole in the dishes.
It should be transplanted when, due to the tightness of the pot, growth stops or there is a need for division.
Orchids have rather fragile roots; they can be easily broken when transplanted. Therefore, to simplify the process of subsequent transplants, plants are planted in plastic pots. After planting, the plant needs to be fixed for faster rooting. Watering is desirable 2-3 days after planting, but it is required to spray regularly.
Reproduction of orchids at home is a laborious process. this is done, as a rule, by division during transplantation. If the separated plant develops well the root and deciduous system, then it will definitely bloom the next year.
Basically, orchids are best planted in pots with a sufficient number of holes, additionally drilled in the bottom and in the walls. This is done so that there is more free air access to the roots.
Orchids need a special substrate that has good moisture capacity, air permeability, a long decomposition period, which includes natural components: moss, high moor peat, fern roots, charcoal, as well as the bark of conifers.
Usually, during the growth period, orchids are fertilized at intervals of ten days with mineral fertilizers. To exclude the growth of plants at an unnatural time for them, it is not worth feeding them during the dormant period.
Orchids respond well to foliar feeding (fertilizers are diluted with water and the leaves and aerial roots are sprayed with a solution). They do it in cloudy but warm enough weather.
Phalaenopsis
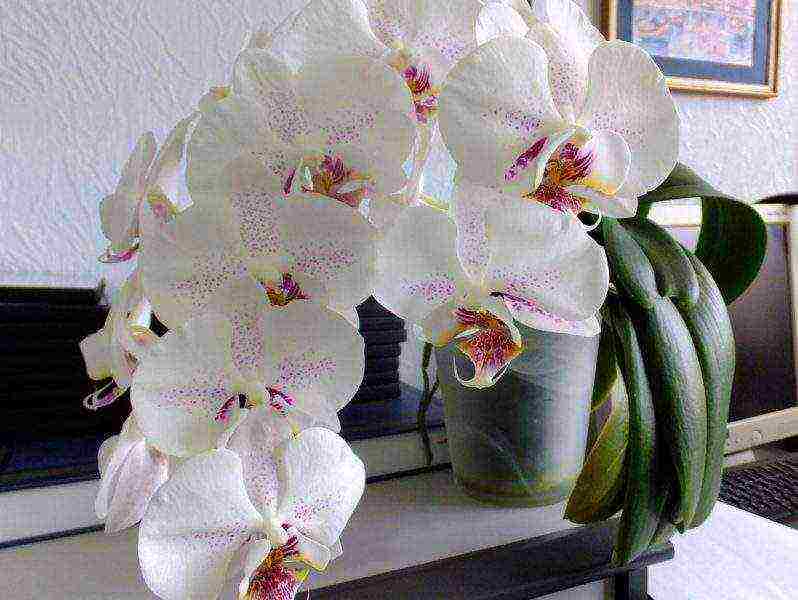
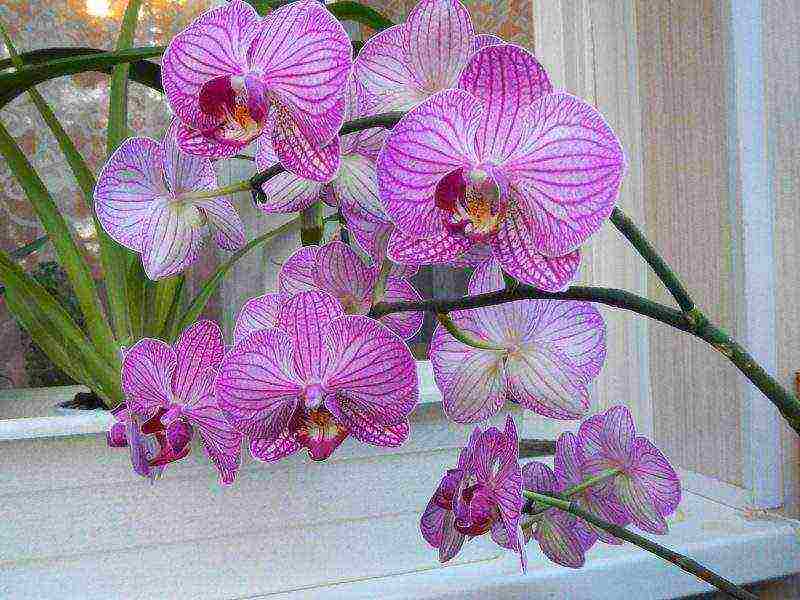
Phalaenopsis have amazing flowers of various shapes, patterns, colors, sizes. The flower petals, ranging in color from white to deep brown, reach a diameter of up to 8 cm. The plant blooms all year round and usually has a short dormant period.
The phalaenopsis orchid at home is very popular with flower growers. Even an amateur florist can grow it.