Content
- 1 Features of growing on a windowsill
- 2 Choosing a variety for planting
- 3 Features and conditions for planting at home - step by step instructions
- 4 Features of further care
- 5 Major diseases and pests
- 6 The timing of the emergence of seedlings and the first harvest
- 7 Choosing a variety for the home and greenhouse
- 8 Seedling preparation
- 9 Seedlings for greenhouses
- 10 Growing hot pepper seedlings at home
- 11 Useful materials
- 12 Useful video
- 13 General information
- 14 Varieties
- 15 How to grow hot peppers from seeds on a windowsill
- 16 Care
- 17 Video
- 18 Harvesting
- 19 Useful tips and secrets
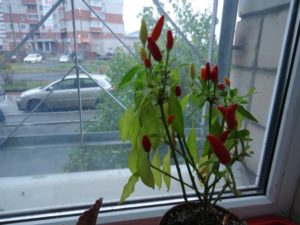
In the cold season, you want to create a special comfort in the house, and plants grown on the windowsill at home are ideal for this. Indoor pepper is no exception, it will not only add originality to the interior, but also give spicy food lovers an opportunity to spice up their dishes.
Features of growing on a windowsill
Important! With proper care and regular feeding, indoor peppers can grow fully and give a stable harvest for 5 years.
Growing pepper on a windowsill is not only an exciting experience, but also useful... Eating pepper in food, even in minimal quantities, can normalize metabolism in the body, reduce cholesterol and blood sugar levels.
For the successful cultivation of pepper on the windowsill, you need to create optimal conditions for its growth and development, because this culture is a little capricious. Therefore, in advance it is necessary to familiarize yourself with the features and preferences of the plant, as well as with the rules of planting and further care.
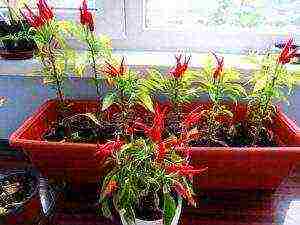
To grow peppers at home, you need to consider the following factors:
- seeds of a suitable variety from a trusted manufacturer or fresh cuttings;
- choosing the optimal place for plant growth;
- selection of planting containers and a suitable substrate;
- lighting and feeding features;
- knowledge of diseases and pests of pepper.
Important! With observance of all the rules of care from one plant, you can get one hundred or more fruits at the same time.
Choosing a variety for planting
Before planting pepper, you need to decide on its variety. Having picked up several different types of plants, you can create a multi-colored vegetable garden on the windowsill, which will delight with its bright fruits.

The following varieties of decorative peppers are ideal for growing on a windowsill in an apartment:
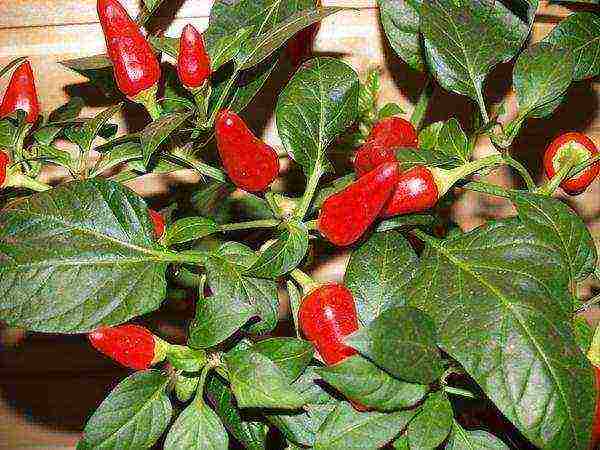
- A twinkle. This variety has long been popular for its compact shrub, which grows to a height of 40 cm. It was bred by crossing chili and cayenne pepper. Forms fruits up to 5 cm, which at the base have a diameter of 1-1.2 cm. As they grow, they change their color: green, yellow, red. The fruits ripen within 120 days.
- Aladdin. Ultra-early compact variety, the height of the bush reaches 35-40 cm at home. Forms cone-shaped multi-colored fruits, the length of which does not exceed 3 cm. In the process of growth, the shade of the fruit changes: green, purple, red. Fruit ripening occurs within 105 days.
- Garda Firewoks. One of the new indoor varieties. Forms compact bushes 30 cm high. The length of the pods is 5 cm. The peculiarity of the pepper is that the fruits stick out with their tips up. As they ripen, they change their color, so the plant can simultaneously have fruits of green, lilac, orange and red.Pods ripen within 115 days.
- Exploding amber. The peculiarity of the variety is that the foliage of the plant has a dark purple color. Forms cone-shaped small fruits 2.5 cm long. As they grow, the shade of the fruits also changes: purple, pink, scarlet. The bush is compact, 30 cm high. The variety is considered early ripening, the fruits ripen in 115 days.
Depending on individual preferences, you can pick up one or more varieties at the same time.
As a rule, the most popular variety for growing on a windowsill is Spark pepper.
Important! You cannot use seeds from a store-bought pod to grow pepper on a windowsill, since it is an industrial variety and needs completely different conditions.
Features and conditions for planting at home - step by step instructions
To grow Spark pepper on the windowsill, you need to prepare for the procedure by studying the preferences and features of growing this culture in room conditions. Only by observing all the stages of planting, you can achieve the desired result in the end.
Choosing a suitable location and creating optimal conditions
Hot peppers are very picky about light and heat, for its full growth and development it is necessary to choose south or east window sill. During the period of active sun in spring, the plant needs light shading. In summer, the plant should be taken out to a balcony or loggia, but drafts must be excluded.
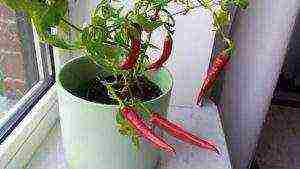
For full growth and development, the plant needs 12-hour daylight hours. In the period of short days from the beginning of October to the end of January, bitter pepper especially needs additional lighting with phytolamps in the evening and cloudy days.
Important! Lack of light is manifested by a light shade of foliage, which can eventually lead to leaf fall, in this case the duration of additional lighting must be increased.
For normal plant growth in winter air temperature should not exceed 18 degrees C, and starting from spring, the optimal temperature is 20-22 degrees C.
Hot peppers are very picky about soil moisture and does not tolerate watering with cold water. It is necessary to water the plant sparingly, with water at room temperature, as the top layer in the pot dries, but allowing it to absorb moisture from the pan. If water remains in the pan 1 hour after watering, then it must be completely poured out.
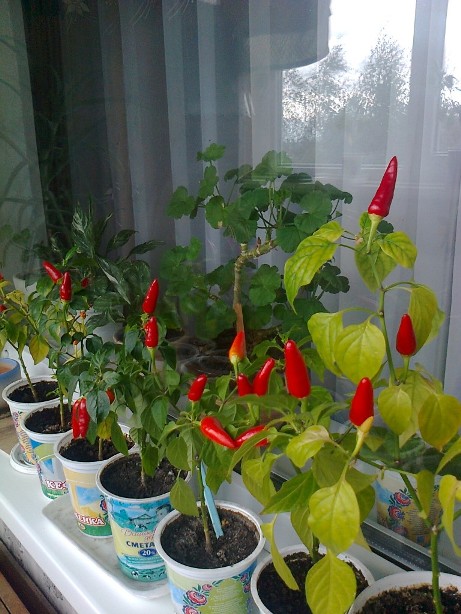
In conditions of low air humidity it is necessary to carry out additional spraying of foliage using a spray bottle.
Important! Pepper does not tolerate cold gusts of wind, therefore, when ventilating the room, it must be kept away from the open window.
Planting capacity
Indoor pepper forms a compact root system that is closer to the soil surface. For planting, it is recommended to select wide and shallow containers... The height of the planting pot should be within 10 cm.
A prerequisite is the presence of drainage holes in the bottom of the pot, which helps to remove excess moisture. Before planting on the bottom, it is necessary to fill the drainage with a layer of 2 cm, which will exclude stagnation of water in the pot.
Suitable substrate
For planting hot pepper seeds, you can purchase seedling substrate in a specialist store. But you can prepare a nutrient mixture for planting yourself. This will require the following components:
- 2 pieces of leafy land;
- 1 part peat;
- 1 part river sand;
- 1 part coconut fiber
- 1 part perlite or vermiculite.
Immediately before planting hot pepper seeds, it is necessary to disinfect the soil by spilling it with the fungicide Previcur, which will prevent the development of fungal diseases.
Presowing seed preparation
For the friendly emergence of seed germination and disease resistance of young plants, it is recommended to carry out pre-sowing treatment of planting material. To do this, you can use the following drugs:
- Epin - dilute 3 drops of the product in 100 ml of water, soak the seeds for 2-4 hours before planting;
- succinic acid - make a working solution at the rate of 1.5 g of the product per 1.5 l of water, soak the seeds for 12-24 hours;
- Zircon - for the solution, add 3 drops of the product to 100 ml of water, soak the seeds for 2-4 hours before planting.
After processing it is necessary to dry the planting material to a loose state.
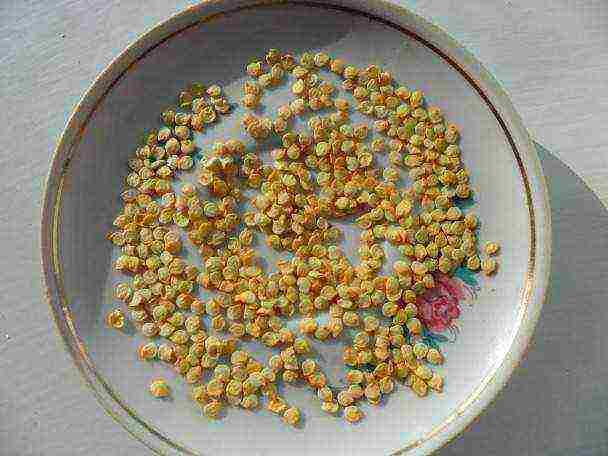
It is recommended to germinate pepper seeds in a humid environment before planting. To do this, you need to spread them out in damp gauze and gently wrap the fabric.
For germination, place in a dark, warm place (25 degrees) for several days, periodically opening, moisturizing and examining for sprouts. Once most of the seeds have hatched, they must be planted in prepared soil.
Important! Seeds must not be allowed to dry out during the germination period, otherwise they will die.
In some cases, to preserve all view properties it is recommended to carry out cuttings of pepper. Cuttings must be cut from green young shoots without fruit, 7-8 cm long, and each of them should have 3-4 leaves.
Before planting them in the ground, it is necessary to soak in advance in a solution of zircon (3 drops per 100 ml of water) for 12-24 hours or powder the lower cut with root powder.
Step-by-step instructions for landing
To grow pepper on a windowsill, you must initially plant it correctly. Only if all the necessary conditions of the procedure are met, you can achieve the desired result in the end.
Step 1. Spill the planting containers with a strong solution of potassium permanganate.
Step 2. Fill the pots with the required substrate and level the surface.
Step 3. Moisten the soil abundantly with water and allow it to fully absorb.
Step 4. Place seeds on the surface and sprinkle with a layer of substrate 0.5 cm.
Step 5. Moisten the top layer with a spray bottle.
Step 6. Cover containers with glass or foil to maintain high humidity inside the landing container.
Step 7. Place the containers in a dark, warm place (25 degrees) until shoots appear.
When planting cuttings pepper, the procedure takes place in the same order, only they must be planted to a depth of 1-1.5 cm. And after planting and covering with a film, the pot is placed on the window, shading it from direct sunlight.
Video: how to grow pepper on a windowsill from cuttings
Features of further care
After the appearance of pepper sprouts, the container with seeds must be rearranged on the windowsill and the temperature must be lowered to 18-20 degrees. To exclude warm air from heating devices, they must be covered with a layer of foam.
Daily container with seedlings it is recommended to ventilate and take away from the cover or film gathered condensate using a paper napkin.

10-14 days after the emergence of sprouts, it is necessary adapt seedlings to the external environment... To do this, on the first day, it is recommended to open the container for 30 minutes, increasing this period by 30-40 minutes with each subsequent day. After a week, the glass or film must be removed completely.
Pepper cuttings take root within 2-3 weeks. When young leaves appear on them, it is necessary to begin the adaptation of plants to the environment. It is carried out in the same way as for seedlings obtained from seeds.
When 2-3 true sheets appear it is necessary to plant the peppers in separate containers. During transplantation, it is not recommended to pinch the main root, since the plant painfully tolerates this procedure and significantly slows down growth. The first planting should be carried out in pots with a diameter of no more than 9-10 cm.
Video: how to plant indoor peppers
Further it is necessary to transplant young seedlings as they grow. As soon as the roots start crowding in the pot, it is recommended to transfer the plant, increasing the diameter of the pot by 2-3 cm. The container for an adult plant should be 30 cm high and 20-25 cm in diameter.
Pepper Ogonyok needs a 12-hour daylight hours, therefore phytolamps are located at a height of 50-60 cm from the seedlings.
Watering carried out regularly as it dries, the higher the air temperature, the more often the soil is moistened.

For the full growth of hot pepper on the windowsill, it is necessary carry out regular feeding. During the active growing season, preference should be given to mineral fertilizers with a high nitrogen content or organic fertilizers, and when forming buds and fruits, fertilizers with a large amount of potassium should be used. The plant should be fed once every 2 weeks.
Important! During the flowering period, it is recommended to shake the pot of pepper sometimes, which will improve the self-pollination of the flowers.
Major diseases and pests
Pepper, including indoor pepper, is susceptible to fungal diseases and various pests. Therefore, it is necessary to know in advance what problems may arise and how to deal with them.
- Aphid. This pest loves to feast on young shoots of pepper, therefore, it is on them that a large accumulation of pests is formed. To combat them, it is necessary to treat the plant with a phytoverm preparation.
- Spider mite. It is characterized by a stop of plant growth and curliness of young leaves, on which a small cobweb later appears. To combat the pest, it is necessary to spray with actellik, but after a week the procedure should be repeated.
- Whitefly. The accumulation of pests is observed on the back of the leaves, if you touch the shoots, then white flies fly over the plant. To eliminate the problem, it is recommended to carry out a complex treatment, which consists of spraying with actellik and irrigating with insecticide aktar, which is carried out on the same day. After 7 days, the procedure should be repeated.
- Decay of the stem at the base... It appears as a result of overflow of a plant, which leads to its death. It will no longer be possible to save the plant.
- Gray rot. Formation of wet spots with a gray bloom on any part of the plant. For treatment, it is recommended to use the biological product phytosporin.
- Blackleg. It affects the sprouts of pepper during the germination period. The stem at the base of the seedlings becomes thin and blackens. To prevent the disease, it is recommended to shed the soil and spray the shoots with the fungicide Previcur.
Video: how to care for and treat indoor peppers at home for diseases
Important! After the treatment with drugs, it is necessary to adhere to the waiting period indicated on the packaging of each product, it is not allowed to use pepper during this period for cooking.
The timing of the emergence of seedlings and the first harvest
Hot pepper seeds germinate for a long time, therefore this feature must be taken into account when planting. Seedlings appear within 14-21 days, subject to all planting recommendations.
The first crop of pepper on the windowsill ripens in 105-120 days from the moment the sprouts appear, depending on the variety chosen.
If you follow all the recommendations, growing hot peppers on the windowsill will not be difficult. But it is necessary to understand that further care of the plant must meet all of its requirements, since the pepper will grow and bear fruit only taking into account all the necessary conditions.
.
Hot pepper belongs to one of the most thermophilic crops, and growing it at home is a rather difficult task. The problem with pepper is that it can regulate its growth, that is, either slow down growth or stop it altogether. For this reason, even if the climate is warm, the cultivation of hot peppers is only possible through seedlings.A favorable time for this is mid-February, because there are different varieties of pepper and different ripening times. There is superearly ripening, early, middle, medium-late and late.

Growing chili peppers has many nuances.
A very early variety of hot pepper from the moment of planting in the ground to the growing season of fruiting takes up to 100 days, just the early days from the moment of germination of the seed to fruiting takes 100 days, the middle 120, and the later from 135 to 150 days. All these indicators will need to be taken into account when planting seeds in the ground.
Necessary lighting for hot peppers
Seedlings are planted at the age of 45-50 days from the appearance of the first shoots. The pepper germinates quickly enough, in a maximum of 2 weeks. Caring for pepper seedlings includes optimizing the light regime, maintaining the temperature of the soil and air.
Pepper is a plant with a short daylight hours and a window sill that faces the south side or a balcony illuminated by sunlight is most suitable for growing at home. Several times a day, the container with the plant should be turned upside down so that the seedlings do not stretch in one direction. Light reflectors made of foil or just white paper will not interfere here either.
If the weather is cloudy for a long time or all windows face the north side, then the seedlings must be supplemented with fluorescent lamps or special lighting devices. In winter and in the evenings, when there is little light, many gardeners also use lamps. In insufficient light, buds may not form on the first brush.
Lighting should be intense and long-lasting - 12-14 hours a day. In terms of demanding growing conditions, peppers are higher than other vegetables and even tomatoes. The soil should be fertile, loose and soft. You can use straw and lay it in a container with seedlings - this gives the soil airiness.
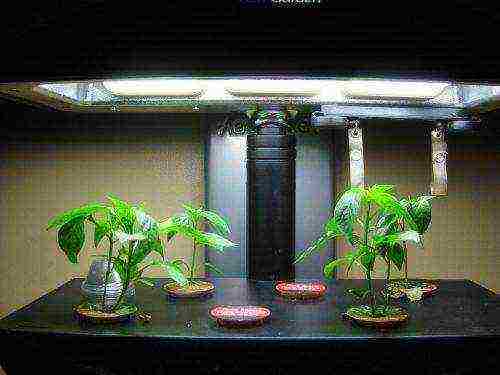
If there is a lack of natural lighting, pepper seedlings need to be highlighted
Optimum temperature and preparations for seedlings
The most optimal temperature for the growth of hot peppers should be at least 22-24 degrees, but not higher than 32. In the dark, it should be at least 16-18 degrees. A drop in temperature below 12 degrees can lead to the death of the plant. Also, the plant does not tolerate cold air and drafts. The food regime must also be normalized, and the moisture content of the soil must be monitored.
There are preparations for the root system that inhibit the growth of the plant, but develop the root system. The drug "Energen", on the contrary, improves and stimulates plant growth, but it makes sense for them to cultivate the land only after the first leaves of pepper have appeared. These drugs are either added to the soil to already planted seedlings, or they are treated with seeds.
In order for the pepper to grow good, long pods, it is very important to form the stem correctly. The overgrowth of bushes should not be allowed. The plant must produce at least three stems. From the bosom, where one pod is already growing, the remaining shoots should not be allowed, therefore the extra flowers are removed. Only then is the formation of 2-3 stems obtained.
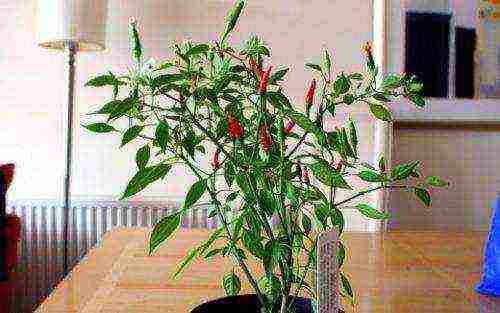
The pepper bush should not be allowed to grow too thick.
Preparation of containers and soil for planting
You can plant seedlings in different containers, in boxes, rectangular plastic containers, small plastic cups or pots. Ideally, vermiculite should be added to the ground, since this mineral absorbs water well and does not allow the seeds to dry out and become waterlogged. Beforehand, it is imperative to make several holes in the containers so that the water in the soil does not stagnate and acidify. From this, the roots of the plant can begin to rot.
After the holes are ready, you can start pouring soil into the container. In fertile soil, hot peppers grow strong, high-quality, and also contain a lot of useful microelements.The layer of earth should be slightly compacted and no more than 5-6 cm in depth. Then oxygen is well retained in the soil, and its aeration is at an optimal level.
Further, with the help of the handle rod, grooves are made separating the rows of plants. They are performed to a depth of 1 cm and are 5 cm apart from each other. Do not make more than 2 rows in one container so that the pepper has enough space and it does not grow weak and elongated. Immediately after this, the grooves on the mini-bed must be watered with hot water (50 degrees), to which you can add a little natural growth stimulant. If it is in the form of a liquid, 10-15 drops will be enough, and the powder on the tip of a knife.
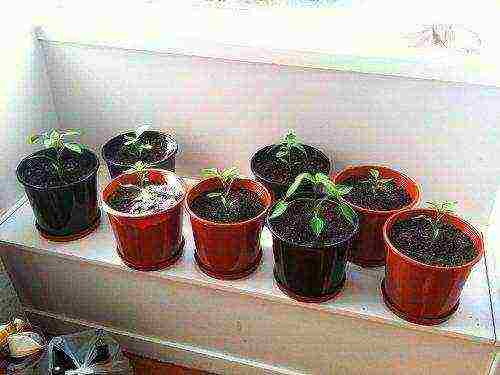
Chili seedlings grow well in regular pots
Water regime and irrigation rules
Watering the soil with seeds should be moderate, it is more convenient to do this from a small teapot or a tablespoon, so that the stream of water is thin and falls clearly on the rows. Three tablespoons per groove is sufficient. Subsequently, the earth is watered as soon as it dries up a little - the plants should not be allowed to wither.
Frequent watering is no less dangerous because the roots receive an insufficient amount of oxygen and develop poorly. Seedlings can get sick with black leg.
For peppers, you need to use coasters to keep the plant as warm as possible. For this, foam plates, bubble plastic bags, which need to be laid on the table under the containers with pepper, are well suited. Foam sticks can be placed on the table without a stand; it is better to plant the most valuable varieties of pepper seeds in such containers.
How to plant pepper seeds
Once the soil and containers are ready, you can start planting pepper seeds. To do this, they are poured onto the palm and checked for cleanliness. They should be decorated, large and light. If they have a gray tint, then their quality is not good enough.
Seeds of hot pepper are placed in the ground at a distance of at least 2.5 cm, that is, 5-7 pieces are obtained in one row. Immediately afterwards, it is very important to press the seeds into the moist soil. The last procedure consists in sprinkling earth on top of the seeds, after which the beds should be tamped a little. The top of the container is sealed with a plastic lid to create a greenhouse effect. It is placed in the warmest place in the apartment, after 6 days it is necessary to moderately water the ground with warm water. As soon as shoots appear, the container is placed in a sunlit place so that the plant grows well.
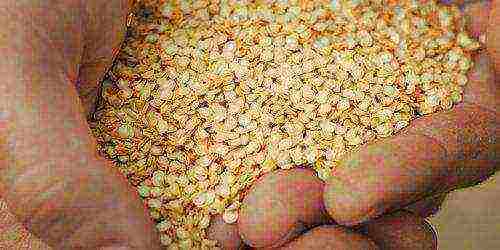
Pepper seeds should be inspected for tainted specimens before planting.
How to pick hot pepper
Normally, the first shoots appear in 7-12 days from the moment of planting, it is very important not to miss this moment. The sprouts that appeared earlier than others are the earliest and strongest, from them the best harvest is obtained. After that, the seedlings must be put into the light immediately. Seedlings before picking with sufficient soil preparation usually grow without additional fertilizing.
Each grown seedling must have its own personal container in which it will grow and develop until it is planted in a permanent place. Pepper seedlings tolerate picking worse than tomatoes and it should be remembered that because of it the plant is delayed in development for 8-10 days. Due to the many risks, some gardeners generally avoid picking hot peppers.
The pick is done in the phase of two true leaves, about 20-25 days after the first shoots appear. Only well-developed seedlings are selected. It is impossible to tighten with a dive, since the roots, while developing, are strongly intertwined, and in peppers they are very poorly and take a long time to recover.
Containers for seedlings with a volume of 0.5-0.7 liters should have holes for the drainage of excess water, and the optimal soil-mixture should be loose, light, nutritious and have an acidity close to a neutral medium.
Hot peppers in seedling age are very picky about phosphorus nutrition, the amount of nitrogen nutrition during this period should be moderate. As for potassium, the plant needs it almost always. If the soil for seedlings is on the balcony or in another cold room, then 2-3 days before picking the seedlings, it must be placed in a warm place. The soil should warm up well.
2 hours before the pick, the seedlings are watered abundantly with water, because if the soil is dry, it simply crumbles from the roots. The container is filled with soil and lightly tamped. A hole is made in the ground 5-6 cm deep.With a teaspoon, the seedling is carefully removed together with a lump of earth, then it is lowered into the prepared hole, deepening the stem by 2 cm.It is necessary to ensure that the root does not bend when diving, and the roots of the plant have good contact with soil. In no case should you pinch the central root of pepper seedlings. Seedlings that develop poorly and lag behind in development are subject to destruction.
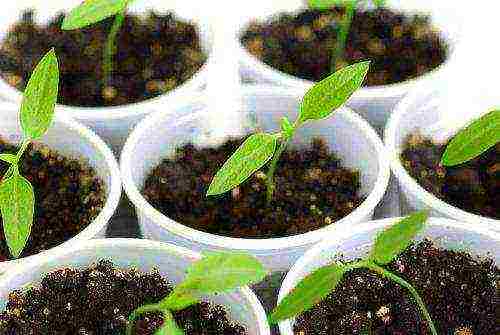
Chili peppers should be picked carefully so as not to damage the plants.
Several ways to control pests
Hot pepper pests appear not only in greenhouses, but also in homes. In the greenhouse, ants are usually found crawling over the plant and bringing aphids onto it, which eats the leaves of the pepper. If you do not take any measures, over time the plant dries up and dies.
In order to prevent this from happening, there are several ways to fight:
- It is necessary to wrap the trunk of the pepper with a cloth from below, near the ground and from time to time process it with a few drops of vegetable oil. Thanks to this, the ants will not harm the plant.
- Add 5-10 ml of alcohol per liter of water and pour it into a small watering can. It is necessary to water the ground in which the pepper grows with this liquid. Already on the 2nd day, midges and aphids leave.
- A small basin is filled with water, ash and a little liquid soap are added to it. Having mixed well, the liquid is poured into a spray bottle and the plant is slightly sprayed at the site of aphid infestation.
Despite the fact that it is quite difficult to grow hot peppers at home, a sense of pride will be overwhelmed for a self-grown product. You can make spices from it for various dishes or use it as a treatment for diseases.
Subscribe Be aware of new products on our site
Today we will discuss the following topic - hot peppers: growing from seeds, when to plant and how to care for seedlings?
Choosing a variety for the home and greenhouse
It is a perennial plant with a compact bush, decorative foliage and bright fruits. Peppers can be grown in an apartment or greenhouse. Some varieties are also suitable for outdoor use.
Breeders have developed many varieties that differ in flavor nuances and fruit size, yield, and ripening speed. At home, varieties and hybrids of Dutch, Polish or Russian selection are more often grown..
Hot pepper varieties for growing at home:
Small miracle - Dutch variety suitable for home cultivation. Bears abundantly, fruits are small, orange, red or yellow. The taste is spicy but delicate, perfect for sauces.
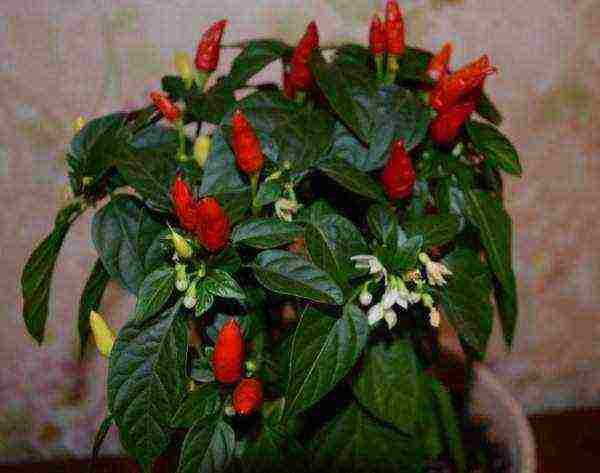
Red fat man - a variety of Russian selection. A fairly tall shrub abundantly covered with large cone-shaped fruits suitable for canning. Can be grown both in the greenhouse and in the open field.
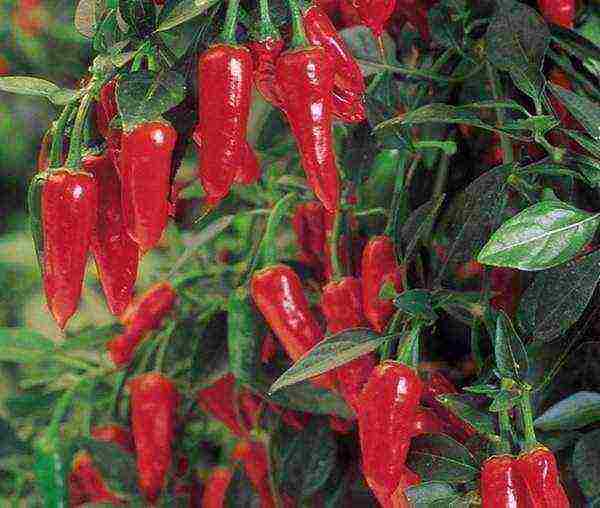
Astrakhan Is a Russian variety with a high yield. The compact bushes produce many small, elongated, bright red fruits with an unusually pungent taste. Used for making infusions and sauces.

Ukrainian spicy - a small shrub that grows well in a greenhouse or pot. The fruits are very long and thin, with a spicy, pungent taste.

Flames - medium-yielding high-yielding variety. The fruits are bright red, elongated, very juicy. They are widely used in cooking. Greenhouse cultivation is preferred.
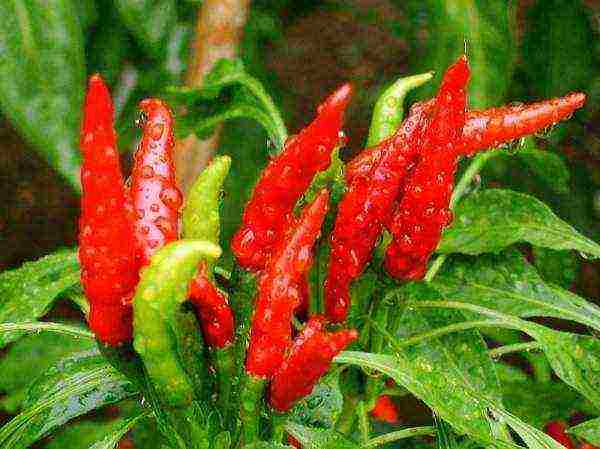
Jalapeno - Hot peppers, popular in Latin American cooking, have small red or green fruits. The taste is moderately spicy, recognizable. The fruits are well stored, the variety is quite fruitful.
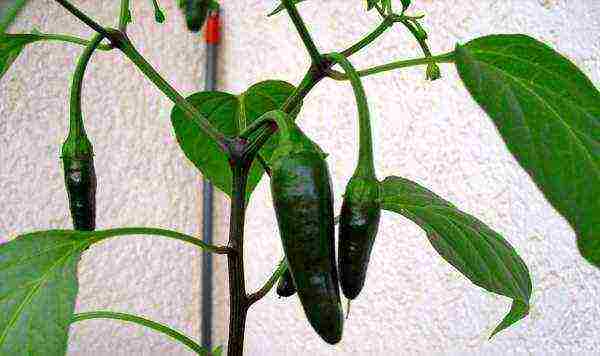
After choosing a variety, we will describe how to grow hot peppers from seeds at home?
Seedling preparation
Hot peppers need light soil with moderate acidity. The ideal mixture consists of old garden soil, peat and washed sand... You can also use a purchased soil mixture to which humus has been added.
Peppers do not like dense soil; for successful growth, good drainage is necessary, excluding stagnant moisture.
Seedlings of bitter pepper: cultivation and care. You need to sow seeds in February. Before sowing, they are sorted, selecting empty and ugly ones. To accelerate germination and strengthen the seeds, you can soak them in an aqueous solution of a growth stimulator for 10-12 hours. After that, the seed is washed and wrapped in wet cheesecloth for swelling.
A spacious plastic or ceramic container is thoroughly washed and poured over with boiling water. Drainage is laid at the bottom: broken shards, river pebbles or expanded clay. Soil is poured on top and poured abundantly with heated, settled water. When the soil cools down, holes are made in it no more than 1.5 cm deep.
A seed is placed in each and sprinkled with earth. The container is covered with a foil and placed in a warm and well-lit place. Peppers can also be sown in peat pots placed on a deep tray.
Sprouts appear one week after sowing... They need to be carefully examined, weak ones can be removed so as not to interfere with the development of promising seedlings. With this approach, a pick is not required. When young plants are up to 20 cm long, the crown of each is gently pinched to stimulate the development of lateral shoots.
Some gardeners prefer to sow hot peppers in the fall in order to get abundant fruiting in the spring.
The best option is to combine these methods by sowing seeds 2-3 times a year. Such a conveyor will help create a small garden of continuous fruiting and will provide an opportunity to test new promising varieties.
Seedlings for greenhouses
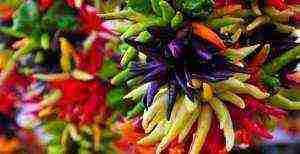 When planning to grow peppers in a greenhouse, you need to prepare fertile soil in advance by spreading it along the ridges. For greenhouses, hot pepper seedlings in peat pots are more convenient, it takes root better and practically does not get sick.
The transplant is carried out when the soil warms up enough, usually in late spring. In a continuous cycle greenhouse, heated all year round, the plant is planted at any convenient time.
How to distinguish hot pepper seedlings from sweet ones? Some gardeners prefer not to grow seedlings on their own, but to buy them from the market or from nurseries. In order not to confuse hot pepper seedlings with sweet seedlings, you need to carefully consider the plants. In bitters, the stems are noticeably thinner, and the leaves are narrower.
The older the seedlings, the more noticeable the difference becomes. You can lightly bite a leaf of the plant. Hot peppers have a brighter, slightly pungent flavor.
Experienced breeders do not recommend placing hot and sweet peppers next to each other.... Over-pollination is possible and both species will lose their taste. When planting plants in a greenhouse, place them as far away from each other as possible, or better, separate them with partitions.
Growing hot pepper seedlings at home
Let's describe in detail how to grow hot pepper seedlings at home?
The grown seedlings of indoor hot peppers are transferred to spacious ceramic or plastic pots. The ideal height is 40-50 cm. Drainage is laid at the bottom of the tanks, the plants are transferred to a new place of residence by transshipment.
Important do not disturb the delicate roots, this can delay the further development of the bush and reduce the future yield.
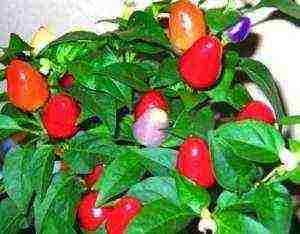 Hot peppers prefer good lighting, warmth, and moderate watering.... The pot must be placed on a loggia, glazed balcony or windowsill.
A day of at least 12 hours is desirable, so in winter and autumn you will have to organize additional lighting.
In partial shade, the stems are stretched, the ovaries are poorly formed and may fall off. For better sun exposure, you can regularly remove excess lateral shoots.
Water the plant with soft water at room temperature 2 times a week. It is preferable to water through a pan, but before applying fertilizers, it is necessary to moisten the earthen lump from above. Peppers benefit from fresh air, the rooms where the pots are placed need to be ventilated often, and the soil in the pots should be loosened regularly.
Bitter peppers love nutritious soil. During the period of active growth, an aqueous solution of fertilizers is applied to the pots every 2 weeks... Superphosphate, potassium sulfate and ash are preferred; universal complexes (Kemira and others) also work well.
For successful fruiting, it is necessary to maintain a stable temperature. Ideal mode - 22 degrees during the day and not lower than 17 at night... Pepper does not tolerate even short-term frosts, the exhausting summer heat is also destructive for it. During the period of especially active sun, it is recommended to shade the bushes.
Timely pinching will help to increase the yield. 1-2 strongest shoots are left on the bush, the rest are removed. The formed bush looks neater, the plant does not waste energy on a set of green mass, focusing on the ovaries. For greater stability, the fragile stem can be tied to a support.
To increase the number of ovaries, regular spraying of the bush with an aqueous solution of succinic acid will help.
Pepper is a self-pollinating crop, but many gardeners prefer to stimulate pollination by regularly shaking the pot or swiping a cotton swab over the buds.
In the dry and warm air of apartments, plants can be affected by spider mites. For prevention, plants and the air around them should be regularly sprayed with warm water. Having found cobwebs, the affected plants are treated with an aqueous solution of an insecticide. It is better to take the affected bush to a separate room. The treatment is carried out until the pests are completely removed.
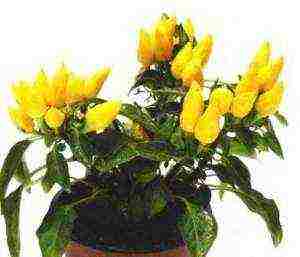 Harvesting can be done gradually, focusing on the technical ripeness of the fruit.
For those looking for quality seeds, choose a few peppers and leave them on the bush until fully ripe. The collected seeds are suitable for sowing within 3 years after collection.
After the end of fruiting, the pepper bushes are cut in half and transplanted into new soil. Then the bush moves to a well-lit place (to the south or southeast window). Watering is intensified after the active formation of new shoots begins. With timely pruning, three crops of hot peppers can be obtained from one bush in a year.
Having started growing hot peppers at home, you can arrange a real greenhouse at home. When planting new varieties, it is worth trying to cross them, achieving new interesting results. Collecting seeds, you can consolidate the results of the experiment and even get your own interesting hybrid.
Useful materials
Read other articles on pepper seedlings:
- How to grow black pepper peas, chili, sweet home?
- The main reasons why leaves curl at shoots, seedlings fall or stretch.
- Planting dates in the regions of Russia and the peculiarities of cultivation in the Urals, Siberia and the Moscow region.
- Learn recipes for yeast-based fertilizers.
Useful video
Tips and tricks for growing hot peppers at home:
Although it's cold outside, January and February are ideal months to start growing hot chili peppers. This culture has been especially popular lately. Read on for tips on how to grow hot peppers on a windowsill and how to properly care for them is fun and economical as the plant will bear fruit year after year.
General information
By the content of the bitter substance, sweet (vegetable), semi-hot and hot peppers are distinguished. All three species are cultivated at home, and mainly decorative forms of hot chili peppers with miniature fruits of various shapes and colors are grown in pots on the windowsill.
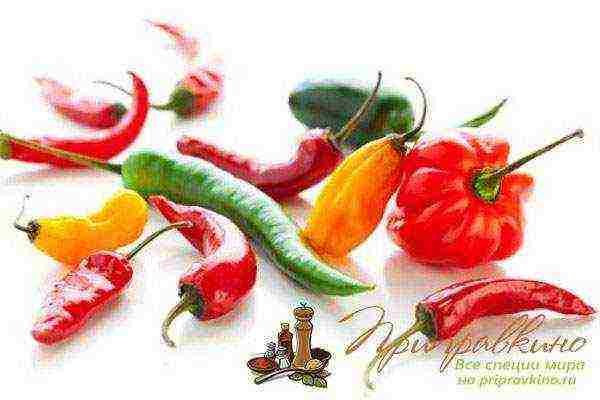
This exotic, pungent herb can be used in a variety of dishes, from pizza to pasta and sauces. Chile will make you feel hot even in winter.
The pungent taste of the peppers comes from the chemical capsaicin, which is incredibly pungent. A drop of solution containing only 1/1000 mg of capsaicin can cause a prolonged and intense burning sensation.
Varieties
There are many types and varieties of hot peppers that can be planted on a windowsill. Take a look at the range of seeds most commonly grown at home:
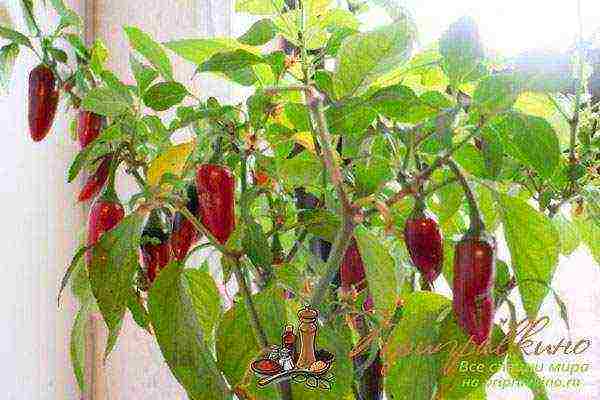
- Jalapeno - grows quickly, forms compact bushes 50-100 cm high.Up to 40 fruits 5-8 cm long, 2-3 cm in diameter, weighing up to 50 g ripen on the bush at the same time.The color is dark red, but green, unripe fruits are also used ... The taste is fruity-burning, moderately spicy.
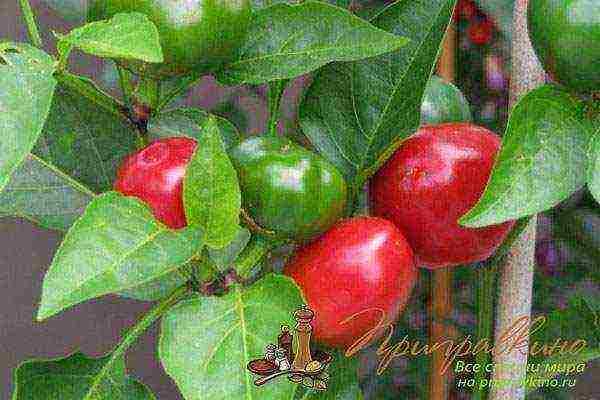
- Hot cherries - from sowing to the first harvest 85-90 days. The plant is small, compact, all dotted with small round red fruits 2.5-3.5 cm in diameter.
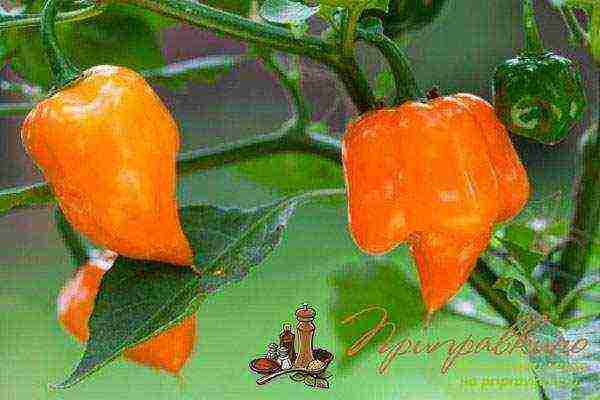
- Habanero is one of the hottest peppers. The plant is branched, fruits 3-4 cm long, up to 2 cm wide, uneven cone-shaped, red or orange when ripe.
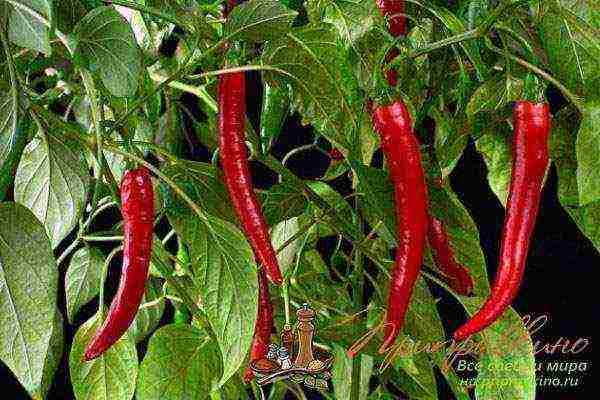
- Pungent Bouquet - Productive, delicious chili, great for cooking. Fruits are conical, curved, red.
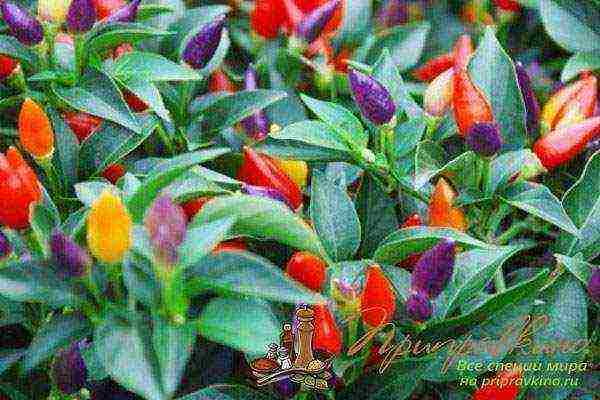
- Spice Boys are small plants ideal for a 1 liter windowsill pot. White, green, purple pods become orange, red, yellow as they ripen.
How to grow hot peppers from seeds on a windowsill
In the apartment, you can start sowing as early as January, since the sharpest varieties usually have a long growing season.
Pre-soak the seeds overnight in warm water or epin solution.
Fill small low containers with ready-made seedling soil, sow seeds (not too thickly) and sprinkle with a thin layer of soil.
Peppers need a lot of heat to germinate, so first put the seed container in a warm, dark place and cover with a plastic bag. They germinate at a temperature of 21-28 C.
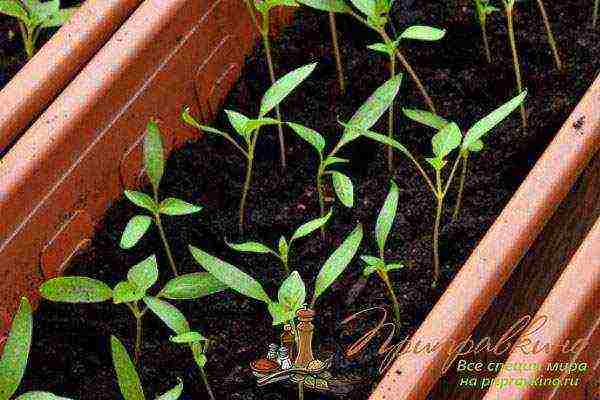
Seedlings will appear about a week after planting. But don't worry if they are in no rush - peppers germinate well if the seeds are fresh.
Once germinated, move the hot peppers to a warm, sunny windowsill.
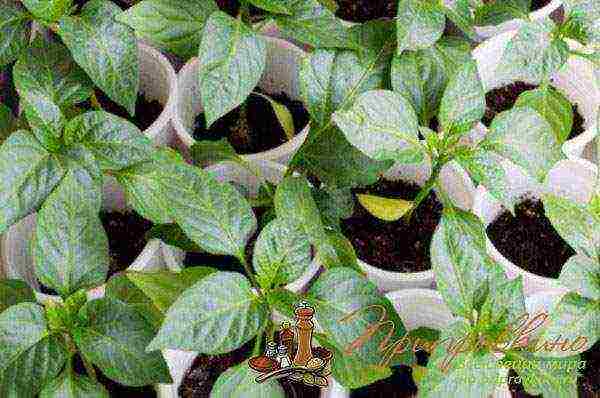
After the seedlings have the first true leaf, they are transplanted one plant at a time (dive) into pots with a diameter of 10-15 cm.
Care
As a rule, hot peppers grow quite successfully on the windowsill, develops well, blooms and bears fruit, but there are still important recommendations for leaving.
Temperature
Chile are demanding for heat and die even from minor frosts, so the room climate is very suitable for them. In a pot on a windowsill, hot peppers can grow for many years. Most of all they like sunny windows facing south.
Make sure that the temperature does not drop below 15 C. Peppers do not tolerate sudden changes in heat and cold and abundant watering with cold water.
Watering
Water the peppers regularly, avoiding overdrying, but be careful not to overfill them.
Lighting
Hot peppers need at least 6 hours of sunlight a day. With a lack of light, the plants stretch out, the leaves turn yellow on them, the buds and ovaries fall off.
If additional lighting is arranged for the plants in winter, then they will bear fruit better.
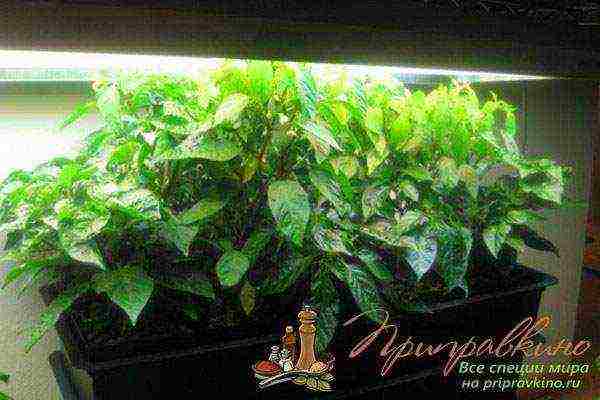
Experienced home chili lovers recommend 12 hours of light and 12 hours of darkness for them. Increasing the light time to 16 or even 18 hours a day will help the hot peppers grow quickly and well.
Top dressing
While light and water are most important for the development of hot peppers, there are other nutrients required for growth and fruiting. These are nitrogen, phosphorus and potassium. But don't overdo it with fertilization!
After the plants bloom, you can feed them a little potassium.
If chili peppers have wrinkled leaves or dark spots on the tips of the pods, your plant is lacking calcium and phosphorus.
Pollination
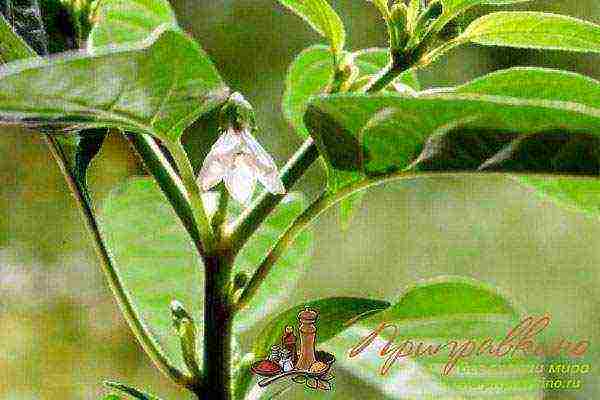
Peppers self-pollinate very well. Just shake the plants gently from time to time. This simulates the action of wind that occurs in nature.
Transfer
As the plants grow, larger pots will be required. The standard progression of diameters is 7 cm, 15 cm, and then the final 20 cm.
To transplant a plant:
- Fill the pots with fresh soil and lightly dampen it with water.
- Then make a fairly large indentation in it.
- Take the plant carefully from the previous container, grabbing the roots with a lump of soil so as not to damage them.
- Place the peppers in a new pot, gently compact the soil around the stem and water a little.
Pruning
To make the bush grow more lush, its upper shoots, which have reached 40 cm, are cut off. Chiles respond very well to pruning.
Pests
One of the main pests of chili peppers is the green aphid. Even one individual who accidentally got into an apartment from the street is capable of infecting your plant, creating a whole army of offspring.
To get rid of aphids, rinse the leaves and stems with a jet of water. The use of chemical control agents is not recommended.
Video
Harvesting
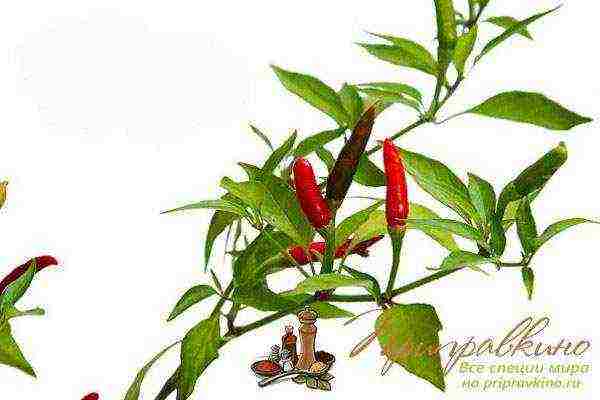
After 60-70 days after sowing, the plants bloom, and later they form fruits of various colors (depending on the variety) - from brown to bright purple or yellow. When the fruits are ripe, they turn red in most varieties. It is better to cut them off with a knife.
The very first fruits are best removed while still green in order to stimulate further fruiting.
You will be able to harvest fresh chili from late spring to December. One plant can give you over a hundred hot peppers.
Useful tips and secrets
- Chile can be planted anytime from January to May, but from an earlier date there is a better chance of getting fruit quickly. By sowing seeds in January, you will be harvesting as early as July.
- By mid-May, when it is warm enough, move the pepper pots to an open balcony or veranda, but out of the sun.
- The spicier and more unusual varieties, such as the habanero, take longer to mature.
- The yield of peppers increases in the second and third years.
- Inspect your plants regularly to make sure there are no aphids growing there and that the soil is still relatively fresh.
- After 4-5 years, the yield of peppers will decrease, and it will be time to grow a new plant.
So, to grow hot peppers in winter on the windowsill, you need a sunny window, a spacious pot with fertile soil and easy maintenance. Compact bushes with many original bright red and green fruits are unusually beautiful and perfectly decorate the apartment.

