Content [show]
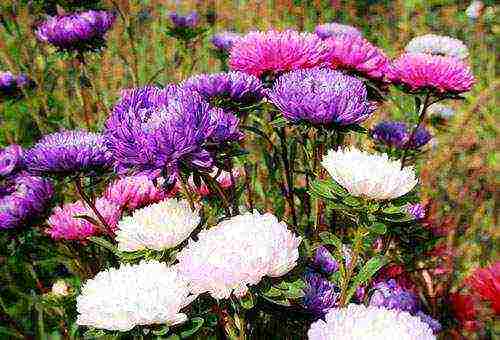
Aster is one of the most common flower crops among Russian gardeners. Planting an aster in the open field will not cause much difficulty even for novice flower growers. Unpretentiousness, easy care of the plant, long flowering make this flower a desirable decoration for any garden.
The homeland of the aster is the Far East, Korea, China. In another way, the annual aster is called Callistephus Chinese. This plant is quite cold-resistant and light-loving enough. The successful cultivation of asters will be ensured by a low air temperature and optimal soil moisture. Astra prefers light soil, with weak acidity.
Advice
When preparing the soil for planting asters during autumn digging, you can add humus or compost. In no case should manure be fertilized, its introduction contributes to the infection of plants with fusarium!
Aster varieties differ in the size of the flower baskets and the height of the stems. Tall varieties are good for cutting into a bouquet, undersized and small-flowered varieties will perfectly decorate flower beds and lawns. You can also plant asters on balconies and loggias.
2 ways to plant asters
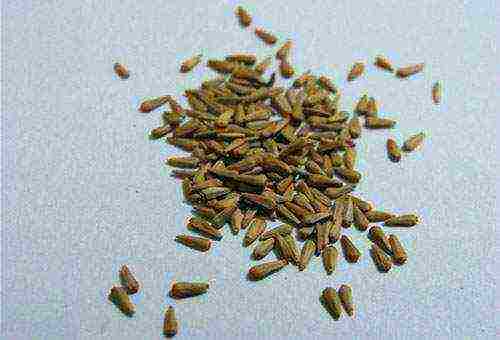
Growing annual asters from seeds is possible in 2 ways: seedling and seedless. Germination lasts 2 years, so when buying seeds, you need to pay attention to the expiration date - by the end of the second year, germination decreases. Which method of planting asters to choose depends only on the timing of flowering of a particular variety. The early varieties bloom after about 90 days after germination, the middle ones after 100, and the later ones after 120 days.
Seedling method
Growing asters from seedlings around mid-summer allows you to get flowering plants. Sowing for aster seedlings is done in the last decade of March - early April, if you plan to plant it in open ground by mid-May.
Growing asters for seedlings consists of several stages.
- First you need to prepare the soil, it must be nutritious, abundantly fertilized and breathable. You can take soil from a garden or vegetable garden, add sand, compost or humus (or peat). For disinfection, a solution of potassium permanganate is prepared - 1 g per 5 liters of water - and the soil is poured with a hot solution. Rinse boxes and pots for planting with the same solution. The drainage must be placed on the bottom so that the water can easily drain away.
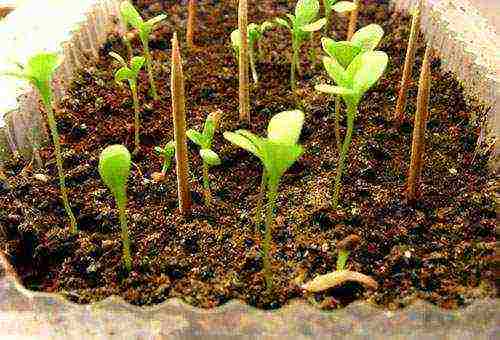
- The seeds are buried by 0.5-1 cm, water for irrigation needs warm water. The next watering is done only after the seeds have germinated. It is advisable to cover the seed boxes with foil to maintain temperature and humidity. After seed germination, the film is removed. Seedling care is to provide good lighting and not very high air temperature, about 18˚C.
- When two full-fledged leaves appear, the seedlings need to be transplanted, preferably in separate pots. Although the aster is not too afraid of transplanting, the base of the stem of the seedlings is very delicate.It is advisable to water the seedlings abundantly, but rarely, avoiding excessive soil moisture, which contributes to the appearance of fungal diseases.
- It is better to plant asters in open ground around mid-May, when the seedlings reach a height of 10-12 cm. It is better to plant the plants in the evening, the soil must first be watered and preferably mulched with grass or sawdust. Tall varieties are planted at a distance of about 30-40 cm so that the grown bushes do not interfere with each other. It is better to plant low species at a distance of about 20 cm, then adult plants form a continuous carpet during flowering.
- A place for planting asters should be chosen well-lit, dry, so that the water does not stagnate for a long time after irrigation. Growing asters in the place where tomatoes or potatoes grew is undesirable; pathogens of fungal plant diseases often remain in the soil after these crops. When planting, you need to try not to bend the roots and not cover the growth point with earth.
Sowing aster seeds in open ground (seedless method)
With a seedless planting option, asters are sown in 2 terms: in early spring or in autumn. For spring planting, sowing is carried out by the end of April - beginning of May, when the soil warms up enough. In autumn, asters are sown, when the ground is already freezing, in shallow grooves prepared in advance. Asters planted in autumn bloom 10-15 days later, but bloom longer and more abundantly.
- For sowing asters in open ground, grooves with a depth of about 2 cm are prepared, it is advisable to water the prepared beds with a solution of potassium permanganate as well as the earth in containers prepared for seedlings.
- Seeds are sown in prepared grooves, lightly sprinkled with earth, watered with rather warm water and covered with foil before sprouting during spring planting. Instead of a film, you can mulch the grooves with garden soil or humus - with a layer of about 1 cm. Before the seeds germinate, the beds are not watered.
- Plants are thinned out after the formation of the third or fourth true leaf, leaving the required distance between shoots, depending on the variety. It is better not to pull out excess shoots, but carefully get them out of the ground - and you can plant them on other beds.
When sowing in the autumn, it is impossible to plant seeds in the ground, since the soil is already frozen. Therefore, the seeds are mulched with humus with a layer thickness of 3-4 cm or compost. In the spring, when the ground thaws, you need to loosen the aisles, leaving the mulch in place until sprouts appear.
Caring for asters in the open field: watering and feeding
If the land for planting flowers was properly prepared, caring for aster in the open field is so simple that it allows novice growers to grow them. Only timely watering and weeding of the beds will be needed.
- Planting should be watered as the soil dries up, avoiding waterlogging. Growing asters on moist heavy soils with a close occurrence of groundwater is extremely undesirable, since it leads to decay of the roots. In addition, asters need to loosen the soil to saturate it with oxygen. Regular weeding and weeding helps prevent disease.
- If the summer is dry, you can mulch the land under the asters with dry grass, sawdust or pine needles. This will keep moisture in the soil between waterings.
- Care in the form of top dressing will be useful for the aster. Plants are fed with mineral fertilizers: superphosphate, ammonium nitrate, potassium sulfate. You can also use wood ash. But nitrogen fertilizers should not be used for feeding, since this leads to increased leaf formation and reduces the number of inflorescences.
- Fertilizers can be applied by dissolving in water or dry. The first feeding of asters is done 2 weeks after planting in the ground. Fertilizers are applied the second time during the formation of buds, and the third time - at the beginning of flowering.
Diseases and pests affecting asters
Asters are quite often affected by various viral and fungal diseases, even despite rather careful care. Let's list the most common hazards.
- Fusarium.
The soil is usually infected with fungi, their reproduction is facilitated by excessive moisture in the soil and high air temperature when growing asters. Annuals get sick more often, the disease manifests itself in the form of dark stripes, and only on one side of the plant. Then the leaves begin to turn yellow, the buds wither, the plant dies.
To combat the disease, you need to lower the acidity of the soil by adding lime to it, spray the flower garden with copper chloroxide, and make sure that there are no aphids.
- Blackleg.
The fungi that cause this disease are found in any soil. They mainly affect young shoots near the base of the stem, which becomes thinner, blackens, and the plant quickly dies. Acidification and high soil moisture contributes to the spread of the disease.
You can fight the disease by disinfecting equipment and soil with a strong solution of potassium permanganate, removing diseased seedlings, maintaining optimal humidity and careful care.
- Septoria (brown spot).
The causative agents of this disease are localized on plant debris. Rusty or light brown spots appear on the affected leaves, which spoil the appearance of the plant. Sick leaves dry up and fall off. Fungi actively proliferate at 23-25 ° C and high humidity.
Caring for a diseased flower bed consists of spraying with copper oxychloride or Bordeaux liquid every 2 weeks - this will help stop the spread of the disease. It is imperative to destroy the affected plants.
- Mosaic disease, or jaundice.
The virus is transmitted by insects: aphids and cicadas. Light veins appear on the leaves, the plant stops growing, the buds do not bloom. It is impossible to fight this disease, there are only preventive measures: immediately remove diseased specimens, destroy insects.
- Bacterial spotting.
The bacteria live in plant debris, and seeds can also be contaminated with them. Brown spots appear on the leaves, stems and buds, the disease begins during the period of bud formation and greatly spoils the appearance of the plant. All leaves are gradually affected, dry up and fall off.
If signs of the disease appear, the plantings should be sprayed with Bordeaux mixture or copper chloride 2-3 times every 10 days.
Advice
For the prevention of fungal diseases, you can add infusion of nettle or celandine to the water for irrigation. To prepare the infusion, pour 1 kg of raw grass with a bucket of hot water, leave for 2-3 days, strain. When watering, add about a glass of infusion to a bucket of water.
To make the flower garden happy until late autumn, it is enough to adhere to simple recommendations and take care of the plantings:
- use proven healthy seeds;
- carry out seed treatment before planting;
- deal with pests that carry diseases;
- remove diseased plants immediately;
- avoid waterlogging of the soil;
- loosen row spacings regularly.
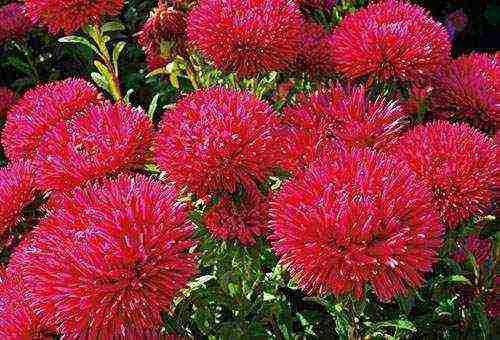
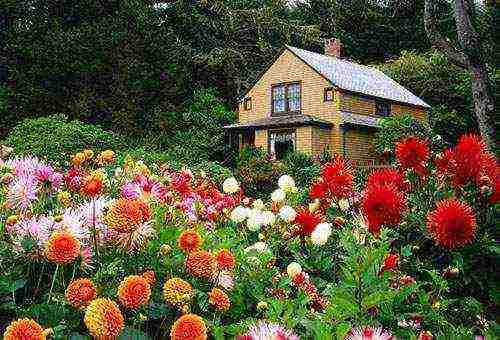
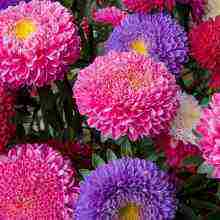
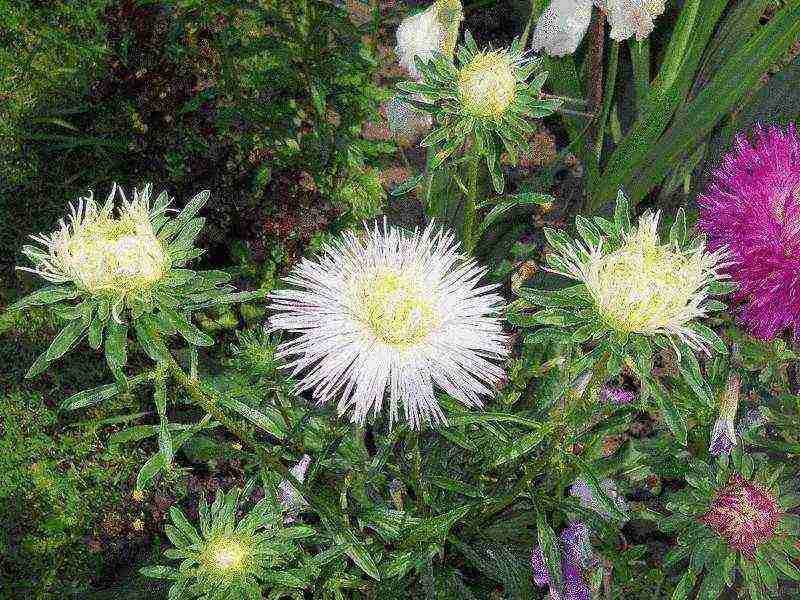
Aster is a real star of autumn flower beds. Not a single florist does not ignore her variety of colors. There are about 600 varieties of this flower, striking in a variety of shapes and colors. Growing special varieties in greenhouses will allow you to get blooming asters in early spring or late autumn. Simple rules for planting and caring for this flower will allow each grower to grow asters on their site.
How to grow asters outdoors
 Good afternoon friends!
Most summer residents are happy to grow unpretentious and surprisingly beautiful annual asters in flower beds, in flower beds and in front gardens. Lush and long flowering in late summer - early autumn pleases gardeners and decorates the local area.
Like every culture, aster has its own rules of agricultural technology, the observance of which will allow you to enjoy the blooming beauty every year without any problems. How to conduct growing asters in the open field we'll talk today.
Place for asters
The plant is very light-requiring and does not grow well in shaded areas of the garden. On one site, it is contraindicated to grow one-year-old aster from year to year due to the accumulation of pathogens in the soil, for example, fusarium. The aster should be returned to the old flower bed only after 4 years.
Like most crops, asters love well-drained, fertile, fertilized and structured neutral soils. Soils with a slightly alkaline reaction are also suitable. Light loam and sandy loam with acidity ranging from 6.5 to 8 pH are most suitable for them. If your site has clay soil, then it should be loosened by adding river sand, tyrsa, rotted sawdust.
Soil preparation for asters
It is advisable to prepare a plot for a flower garden in the fall. To begin with, digging the soil to a depth of a shovel bayonet is carried out with the simultaneous introduction of organic matter - compost (matured) or mullein (necessarily rotted, since fresh manure of farm animals, embedded under asters, can provoke damage to flowers by fusarium).
Additionally, it is recommended to enrich the land with mineral fertilizers at the rate of about 10 grams of superphosphate and 8 grams of potassium salt per square meter. landings.
Acidic earths need to be alkalized. To do this, in late autumn, the soil is lime on the basis that the incorporation of 400 grams of carbonic lime cannon per sq. meter increases pH by 1.
Spring digging is carried out if the site was not prepared in the fall. At the same time, garden compost (1/2 bucket per square meter), superphosphate and potassium magnesium (10 g / square meter) are introduced. Instead of potash fertilizers, it is allowed to use wood ash (200-400 g / sq. Meter).
In other cases, the soil is loosened to a depth of 18 cm. Presowing soil preparation is carried out a month before planting flowers in open ground. During this time, the overwintered seeds of weeds germinate, which makes it possible to carry out high-quality weeding, loosening to a depth of about 6 cm and leveling the soil surface with a rake during the day after planting.
We plant asters in open ground
Annual flowers are grown through seedlings for earlier flowering and obtaining seed. Plants also thrive when planting seeds and directly into the ground, while they are less susceptible to dangerous fusarium disease and are characterized by a longer late flowering period. Most summer residents practice sowing asters directly into the ground.
Seeds germinate well in warm soil. As a rule, in the middle lane, asters are sown in early - mid-May. The time of emergence of the first shoots is 3-3.5 weeks. The depth of planting seeds in the grooves should be from 0.5 to 0.8 cm.The distance between the rows should be at least 15-20 cm.
The ground should first be moistened abundantly. Evenly distributed seeds are covered with a layer of fertile loose soil or sand, and in dry weather they are mulched with a thin layer of humus or compost (1-2 cm) to save moisture or cover the flower bed with non-woven material until shoots appear.
When 2-3 true leaves are formed on seedlings, the plantings are thinned out, leaving a distance between the plants about 12-14 cm, taking into account the fact that some seedlings may fall out. It is not necessary to destroy excess flowers, they can be dived to another place, for example, in the front garden, along the paths, on the combined flower bed.
Caring for flower beds with asters
To grow good asters in the open field, you need to know that this culture is quite demanding on moisture, but does not tolerate its excess. The lack of water in the soil in drought affects flowering - the inflorescences become smaller and become small-double.In the heat, planting asters is rarely spilled, but abundantly, at the rate of up to 25-30 liters per square meter. meter plot.
Plants need frequent loosening to increase soil aeration. They are carried out after each watering or precipitation. The soil is loosened to a depth of 6 mm with simultaneous removal of weeds.
Hilling of plants is carried out before the start of branching of the bushes. This activity helps to enhance the development of the root system. The height of the soil when hilling is about 6-7 cm.
Top dressing of asters increases the size of the inflorescences and the duration of flowering. Flowers respond best to watering with mullein solution (1:10). It is also possible to fertilize flower beds with mineral compounds.
The first feeding is carried out after thinning. For each meter of planting, 20 g of urea (carbamide), 45-50 g of superphosphate and 15 g of potassium chloride are used.
The second feeding is done during the formation of buds to enhance the nutrition of the inflorescences. Nitrogen compounds are not present in it; it is enough to enrich the soil with phosphorus (50 g of superphosphate) and potassium (10 g of potassium sulfate).
The third feeding is advisable at the beginning of flowering. The composition is made the same as for the second time. Asters also respond well to ash infusion watering.
Observing the recommendations given, carry out growing asters in the open field on your own summer cottage or in the front garden near a multi-storey building, it will not be difficult even for an inexperienced florist. Beautiful and colorful flowering for you! See you!
Agriculture ecology. So your seedlings of annual asters have grown. It's time to start planting on a flower bed
Growing asters attracts gardeners with the opportunity to decorate the garden with a variety of flower forms and colors without much difficulty at a time when most other flowers have long faded, and golden prints of autumn are about to appear around. Often, in order to see their friendly flowering early, asters are grown from seedlings. If the process of sowing and growing was successful and the seedlings are pleasing to the eye with several pairs of leaves, then the question becomes “when to plant asters in the ground at a permanent place of growth and how to do it correctly?”.
What should be done before planting asters in the ground?
1. The location of the beds and soil features. It is better to prepare and fill a flower bed for planting flowers in the fall, as well as for sowing asters with seeds. The site itself should be sunny or slightly shaded, preferably even or with a slight southeastern or southern slope, because asters hardly tolerate waterlogging and stagnant water, which negatively affects the quality of inflorescences and contributes to the development of fungal diseases.
If the site was not prepared in advance, then for digging before planting seedlings, it can be filled with humus or compost (but not fresh manure). You can also use complex mineral or phosphorus-potassium fertilizers. For example, about 40 g of potash fertilizers and nitroammofosk (40-60 g) or superphosphate (60-80 g) are distributed per 1 square meter. In the case of cultivated nutrient soil, additional fertilization is not necessary. In addition, you should pay attention to the acidity of the soil. Asters grow best on soils with neutral indicators. If the pH level is higher than 6.4-7.4, while digging the soil into it, you need to add lime, 120-200 g of dolomite flour or 100-150 g of wood ash, again per 1 sq. m.
For the cultivation of asters, they do not use the areas on which gladioli, levkoi, gerberas, daffodils, chrysanthemums, carnations, nightshades and asters themselves grew before, in order to avoid planting damage by fungal diseases.
2. When to plant asters. It is possible to plant aster seedlings in a flower garden from mid-May, when relatively warm weather sets in with a stable night temperature of at least +5 degrees. The plants themselves at this time should already have at least 5-6 developed leaves and reach 5-10 cm in growth.Planting is carried out in cloudy weather or in the evening. With proper preparation of seedlings, it should not only take root well during this period, but also tolerate short-term frosts up to -3 degrees.
3. Preparation of seedlings. A few weeks before the time when it will be just right to plant asters on a flower bed, the seedlings must be hardened. Quenching begins immediately after the appearance of 4 leaves, setting the temperature regime in the daytime to 10-12 degrees, and at night to 8-10 degrees. Every day it is necessary to increase the duration of the seedlings' stay in the fresh air by 15-20 minutes. The hardening period of seedlings is about 15-20 days. The number of waterings at this time is reduced.
A couple of days before the transplant and immediately before the procedure, the seedlings, if they are not contained in separate pots, are watered. This will help preserve the earth ball and roots.
With proper preparation of the conditions and hardening of the plants themselves, aster, planting and caring for which in the future will not become a big problem, will take root well and give healthy and powerful plants.
How to plant grown asters on a flower bed
The technology of planting aster seedlings in the ground is not particularly difficult. Before planting, the soil is loosened and grooves or pits are made so deep that the roots of the plant can freely fit in them and it was possible to deepen it a couple of centimeters. The latter is especially necessary if the seedlings are stretched out for some reason.
With a moisture deficit in the soil, it is advisable to do before and after planting watering, spending a total of about a liter of water per plant. If the soil is damp, one watering is enough. In this case, during planting, the soil around the plant is compacted in the form of a hole. When planting is complete, asters are watered in the holes and mulch the surface of the beds with dry soil or peat with a layer thickness of up to 1.5 cm so that a crust does not form.
The distance between asters when planting is primarily determined by the characteristics of the variety. It is impossible to thicken the plantings, so as not to weaken the plants and not to complicate the further care of the asters. Often, tall varieties are planted according to the 30 × 30 cm scheme, medium - 25 × 25 cm, and low - 20 × 20 cm. For example, undersized asters "Pinocchio", planting and care of which is carried out according to the same principles as for others varieties of asters, can be planted even at intervals of 10-15 cm. This will allow you to create a more holistic composition of them in the foreground of a flower garden or in a border.
If asters are grown for cutting (usually these are tall large-flowered varieties), then the distance should be approximately 25 × 40 or 20 × 45 cm.With multi-row planting, the gaps between rows can reach 60-70 cm.
In the case when the weather is cool outside, at first it is sometimes practiced to cover freshly planted asters with non-woven material at night to protect them from possible frost. For the same purpose, small "nests" of hay are formed around the plants, thanks to which, moreover, moisture is retained. In hot weather, seedlings sometimes try to shade so that they can take root without suffering from the scorching sun rays.
How to care for asters after landing
Caring for asters in the early stages of growth is simple. After 10-14 days, fertilizing with complex mineral fertilizers is carried out, which is repeated after another 3-4 weeks. Watering is infrequent and in moderation, mainly on dry days, because the plant does not tolerate excess moisture well. After watering and precipitation, it is necessary to loosen the soil and remove weeds. This procedure is especially necessary if the site is not mulched. Optionally, using special preparations, pest control and disease prevention are carried out, if there is a possibility of such.
Before branching, some varieties of asters are pinched to obtain larger inflorescences. At approximately the same stage, the plants are spud 5-7 cm.
As you can see, aster, planting and caring for which is an easy task even for a beginner, is undemanding to growing conditions. It is enough to make a minimum of efforts and elementary care to see the bright colors of blooming asters in the summer. published
When the colors of summer disappear, the stars of asters light up with multicolor, delighting the eye until the very frost.
Aster, everyone's favorite flower, decorates front gardens, city flower beds, summer cottages. How the asters are planted and care for these flowers in the open field will be described in detail in the article.
Growing methods
Asters are grown in two ways, both are quite successful:
- seedless - directly sow seeds in the ground;
- seedling - sowing seeds for seedlings in a greenhouse or in a house.
Due to the long growing season for growing asters, they often use the seedling method in order to get a flowering plant in a flower bed in a short time. This is true in central Russia, and especially in Siberia, where the summer is short.
Seedling method
Growing from seeds by seedling in the middle lane and northern regions is considered reliable, but time consuming.
The prepared planting material is sown in containers installed in a greenhouse or other closed premises to obtain seedlings.
Seed sowing dates
The sowing time depends on the variety, they do this in March and April.
Planting material processing
Seed treatment before planting includes:
- soaking in a product that accelerates the germination period;
- treatment with solutions of special drugs that protect against diseases.
A week before sowing for seedlings, the seeds are disinfected and germinated: they are kept in a weak solution of potassium permanganate for two hours, washed, laid out without drying on a damp cloth. Put in a warm place for pecking.
Soil for asters
As a soil for seedlings, they take ordinary soil from the garden with the addition of sand, humus, ash, its consistency is loose, light. The soil is disinfected with a hot solution of fungicides or potassium permanganate.
Sowing seeds
Aged in a means to accelerate germination, the seeds are sown in one container to a depth of 1 cm, before moistening the soil.
Cover with glass to create a greenhouse effect, set in a warm room (up to + 20 ° C). When sprouts appear, they are transferred to a lighted cool place. After the formation of two true leaves, they are planted one at a time in pots.
Temperature control and lighting
After the emergence of seedlings, the temperature is gradually reduced (within 3 days) by 5 ° C. Enough + 15 ° C.
Maintain optimal lighting at all stages of growth to avoid pulling seedlings. With a lack of lighting, artificial lighting with a lamp is used.
Watering seedlings
Watering is carried out in the morning, carefully moistening the soil so that the excess moisture dries up during the day.
Plant picking
Planting and leaving include a pick, which is necessarily carried out when three or four true leaves appear, pinching the central root by a third.
- The composition of the soil for cut plants is identical to the soil for seeds, ash is added to it (1 tablespoon per 1 liter).
- Watering is moderate.
- After 7 days, the first feeding is applied with complex mineral fertilizers with a high nitrogen content. Subsequent feeding is carried out every week before planting in a permanent place.
Hardening
Quenching is carried out before disembarkation. The containers are taken out into the open air, each day increasing the duration of the seedlings being outside. By the time of planting in the ground, up to 8 leaves should appear on the seedlings, the height of the seedling is 10 cm with a strong stem.
Planting seedlings in open ground
They begin to plant asters in open ground in mid-spring, when the plants reach one month old. Saplings grow up to 10-12 cm, and the root system is powerful and well developed.
Determined with the choice of location and soil preparation.Comfortable for the flower will be the sunny part of the site with fertile light drained soil, where calendula grew before.
Since autumn, the selected area is deeply dug up, and humus or compost is added at the same time. Mineral fertilizers (superphosphate, potassium salt) are added with loosening the soil.
Tall varieties are planted, maintaining a distance between plants up to 40 cm, 20 cm is enough for undersized varieties.It is recommended to leave 50 cm between rows.
It is better to do planting in the evening, before that you should water and mulch the soil.
Sprinkle the soil with dry earth. Watered after 2-4 days. The first fertilization with nitrogen fertilizers is carried out after 2 weeks.
Direct sowing of seeds in open ground
You can get new specimens if you plant asters with seeds directly in open ground. At the same time, the seedlings become hardened and get sick less, but they begin to bloom much later.
When to sow
In spring, seeds should be sown in open ground after thawing and warming up the soil, when the temperature is set at + 10 ° C. When the temperature drops, the crops are covered with a film.
Sowing of early varieties is carried out in the last days of April, late ones are sown in mid-May. The method of sowing seeds before winter is not popular, although it has several advantages. The seeds have enough moisture from the melted snow for swelling and emergence of seedlings. In a rainy, cold spring, when sowing cannot be carried out, asters sown before winter will immediately begin to grow when warmth appears.
Sometimes winter sowing is carried out directly into the snow furrows (in December-January). After the snow melts in the spring, the plantings are covered with a film. It is necessary to strictly observe the timing of winter sowing: seeds sown too early can germinate before the onset of cold weather and die from frost, and late sowing cannot be carried out due to freezing of the soil.
Choosing a place on the site
Asters grow and develop better in well-lit areas without waterlogging, sloping to the south or southeast, protected from the wind.
Soil preparation
Aster prefers fertile, manure-free soil with neutral acidity. In the fall, the site chosen for planting a flower is limed. When digging, add superphosphate and potassium sulfate (50-80 g per 1 m²).
Suitable predecessors are calendula and tagetes.
Before planting, the earth is weeded, loosened to a depth of 6 cm.
Sowing scheme
When planting on the site, holes are made according to the size of the cups with seedlings. The distance between the holes depends on the variety and ranges from 15 to 35 cm.
Outdoor care
With proper soil preparation, planting asters and care in the open field include the basic procedures: watering, weeding and feeding, which is available even for beginners.
Weeding, weed control is the prevention of diseases.
Loosening enriches the soil with oxygen. In dry times, it is recommended to mulch the soil to retain moisture.

Growing asters outdoors requires a number of rules:
- prevent waterlogging of the soil (leads to decay of the roots);
- loosening regularly;
- timely remove diseased plants;
- to destroy pests - carriers of diseases.
Watering
An important care measure is watering, however, from an excess of moisture, as well as from its absence, the flower on the street suffers greatly, which affects the decorative appearance of the inflorescences.
Water the aster flower when the soil dries, avoiding waterlogging.
In the heat, it is suggested to water less often, but more abundantly (up to 30 liters per 1 m²).
Top dressing
The aster flower requires feeding up to three times during the season for normal growth and full bloom. Timely application of fertilizers is the key to successful plant growth.
Application terms, mineral fertilizers, the required amount are indicated in the table:
| Application time | Fertilizers, number of grams per 1 m² |
| On the 10th day after landing | Ammonium nitrate, 20 Potassium sulfate, 10 Superphosphate, 50 |
| The appearance of the first bud | Potassium sulfate, 10 Superphosphate, 50 |
| The beginning of the flowering period | Potassium sulfate, 10 Superphosphate, 35 |
The application of nitrogen fertilizers should be discarded, because this causes abundant leaf formation and reduces the number of flowers.
What is cropping flowers for?
So that the aster does not lose its decorative effect, it is necessary to promptly remove drooping flowers and dried leaves. It is better to do this in the morning, then during the day the wounds will heal and healing will accelerate. Otherwise, the plant is forced to devote strength and nutrition to the restoration of diseased and faded parts.
Seed collection
For planting material, seeds of strong healthy plants are selected without pests and signs of disease.
Ripening occurs 40-60 days after the beginning of flowering. This period, and accordingly the time of seed ripening, shifts depending on the weather.
Baskets of drooping flowers are harvested in dry, sunny weather.
Bushes with unripe seeds are carefully transplanted into pots, placed in a dry, ventilated room for growing and ripening seeds. Turn the pots for even lighting and airing.
Ripe seeds are cleaned, put in glassware with sealed lids.
Store at a low temperature (+ 2 ° C) in a dry place. With proper storage, germination is maintained for three years.
Reproduction
Did you manage to grow beautiful flowers? Do you want to multiply your favorite varieties?
There are several ways to do this.
Annual varieties are grown from seeds, using seeds of the past and the year before last for planting. Annual aster abruptly loses germination of seeds of earlier collection. Planting is carried out in the spring.
Perennial seeds are harvested and sown in the same fall. Perennial varieties successfully reproduce vegetatively - by dividing the bush. A bush is subject to division with the presence of four shoots, one bud and several roots at the separated part. The plant tolerates division painlessly, and a detached bush transplanted in spring will bloom in autumn.
In the summer, perennial asters are propagated by cuttings, cutting off the apical cuttings up to 6 cm long. For planting, a mixture of sod land, sand and peat is used. Rooting occurs one month after planting.
Diseases and pests
Aster is attacked by insects, fungal and viral diseases.
The table shows the most dangerous diseases, signs and methods of struggle:
| Diseases | Signs | Methods and means of struggle |
| Fusarium
(fungal disease) |
The appearance of dark stripes on the stem, pinkish bloom on the root area; wilting leaves on one side. |
Adding lime to the soil. Prevention: etching of planting material in a solution of foundation; steaming the soil before planting |
| Jaundice of asters (viral disease, vectors - cicadas, aphids) |
Lightening the leaf along the veins; gradual suppression of growth; Acquisition of green color, cessation of development in buds. |
Destruction of the carriers of the virus. Removal followed by burning of diseased plants. Spraying with yarrow infusion of all aster bushes on the site. |
| Blackleg (fungal disease) |
Blackening of the base of the stem, the neck of the root in young plants. |
Removal of diseased plants with subsequent disinfection of the soil. |
Prevention of fungal diseases will be watering with the addition of celandine or nettle infusion.
The danger for asters is posed by insect pests, carriers of viral infections.
The table shows common pests and control methods:
| Pests | How to get rid of |
| Spider mite (active reproduction in dry weather) |
Spraying with 0.2% solution of "Karbofos" or onion infusion. |
| Plowed slug (reproduction in high humidity conditions) |
Weed control winter plowing. Sprinkle lime in a strip along the border of the site. |
| Earwig | Pollination of plants with foundation. |
| Aster blizzard (butterflies and caterpillars are dangerous) |
Do not plant asters next to sunflowers. Prevention: |
| Aphid |
Prevention: |
Preparation of infusion:
Put 100 g of onions (warm) in a 3-liter jar of water, close tightly. Leave on for 8 hours. Strain, add 7 liters of water and 45 g of liquid soap.
In the fight against other pests, they use special chemicals available on the market.
Proper care is essential to avoid losses from diseases and pests.
Attention! The choice of varieties resistant to infections and the use of high-quality planting material is the key to the successful cultivation of asters.
Unpretentiousness, variety of shapes and colors have made aster one of the most popular flowers.
Planting asters and care in the open field does not require a significant investment of time, which has become the reason for the widespread distribution of the flower.
Existing varieties and varieties in terms of flowering time, shape of inflorescences, color palette make it possible to choose and grow a favorite flower in the country - the star of autumn flower beds.