Content
Household incubator "Laying": instructions and varieties
Incubator "Laying" BI 1, which is presented on the market in different models, is considered one of the most suitable for home use.
It gained its popularity due to its affordable price. produced in Russia (Novosibirsk) and in small sizes, which is convenient for small farms.
Modifications: automatic and manual mode
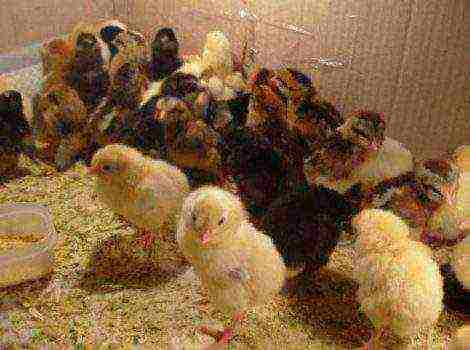
The BI 1 incubator is designed for breeding chicks of chickens, ducks, geese and quails. Suitable for pheasant, pigeon, parrot eggs.
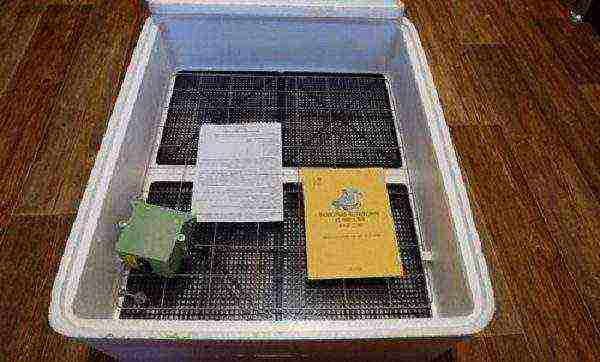
The body of the device is made of polystyrene, which makes the structure lightweight and provides thermal insulation. The device is equipped with a viewing glass window, at the bottom - a container with cells for water, an evaporator and a sensor, a thermometer. The latter, depending on the model, may be:
- analog, the temperature setting on which is carried out manually by turning the knob clockwise to increase and counterclockwise to decrease.
- digital, typical for automatic models.
This allows you to make work settings, save them and automatically maintain the set temperature and humidity parameters.
The device models differ in the way the eggs are turned:
- manual;
- auto;
- semi-automatic.
They also have different capacities. The minimum size is designed for 36 eggs, and the maximum size for 104.
Please note that if necessary, the device can work for about 20 hours from the battery, which you should prudently purchase in advance.
Each household appliance comes with a clear instruction manual and a warranty card.
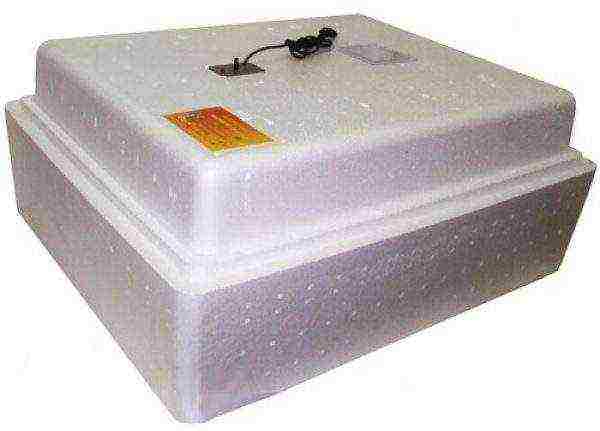
Household incubator for laying hen BI 1
There are two variants of the BI-1 model, which differ in the capacity of the incubation material:
- BI-1-36 (on 36 eggs);
- BI-1-63 (on 63 pieces).
The body of these models is made of durable foam. Heating in BI-1-36 is carried out by incandescent lamps, in BI-1-63 - by special heating elements. There is a thermostat to control the temperature. The turning of the eggs is carried out automatically. A 12 W battery can work for about 20 hours. For normal operation of the incubator, you need to monitor the temperature and humidity inside.
Incubator laying hen BI 2
The main difference between the household incubators "Laying" BI-1 and "Laying" BI-2 in size. The BI-2 model is designed for a larger amount of incubation material. Like BI-1, BI-2 also has two types:
- BI-2-77 is calculated for 77 eggs;
- BI-2A has a capacity 104 pieces.
BI-2-77 is one of the best models in its segment. The device is equipped with a powerful thermostat that maintains the same temperature throughout the incubator. The permissible errors are noted in the instructions, the average may be 0.1 degrees. For large duck and small quail eggs, special grates can be purchased. The foam housing has a window through which all the material is visible. The incubator consumes 40 watts.
In addition, you can:
- read about egg incubators
- make an egg incubator yourself
BI-2A combines a favorable price and digital devices. The model has a standard case with a viewing window, and additional grilles are included. The device is equipped with a digital thermostat and a psychrometer. There is a type of the same model without these sensors.The device consumes up to 60 watts.
Pros and cons
Comparing incubators "Laying" with analogues, the following advantages can be distinguished:
- accessible price;
- ease structures (2-6 kg);
- good thermal insulation.
These positive qualities are due to the body material - foam. However, the disadvantages are also associated with this:
- fragility;
- absorption of incubation odors.
Incubator instructions for laying hens
Full instructions for using the BI 1 and BI 2 incubator can be found here.
Preparation for work
The main stages of preparation for the operation of the incubator are described in the instructions in the sixth section.
- First, an external inspection the device and check its completeness.
- At the bottom of the case lies lattice, smooth side up. How this is done is shown in the figure in the instructions.
- The incubator is equipped with an automatic turning device... All details are described in the appendix to the instructions.
- The case closes lid.
- Connection incubator to the 220 V network, the grate will move to the opposite wall.
- The average value is set temperature on the thermostat. The indicator lights up. Incubator within 10-30 minutes warms upwhen the operating temperature is reached, the indicator will flash.
- 12V connection thermostat... For this, the incubator is disconnected from the 220 V network and connected to the battery terminals. The principle of operation of the 12 V thermostat is completely the same as described above. After switching to the operating mode, this is indicated by the blinking of the indicator, the clamps are disconnected from the battery terminals.
Laying eggs
Before laying the eggs, following the instructions, warm boiled water is poured and the thermostat is adjusted. It is necessary to reach a temperature of 37.7 degrees. A medical thermometer and a thermometer from the incubator kit are used for measurement.
You can use an ovoscope to check. Eggs for setting must be kept no more than 10 days at a temperature not lower than 10 degrees. Otherwise, their incubation qualities are reduced.
Before laying, some marks are made on the eggs with a soft pencil on opposite sides (for example, "1", "2"). This will make it easier to control when rolling over.
Reviews
“The incubator is, in principle, not bad, lightweight, compact, the electronics work well, it can be connected to the battery in case of power outages, but there are also disadvantages. This is, first of all, the case itself made of polyester, although it is an excellent heat insulator, but how to disinfect it after hatching is problematic, uneven heating over the incubator area, although the difference is small, has an effect on the percentage of hatchability. "
“The incubator is budgetary, for 63 eggs, mechanical egg turning. Lightweight, foam. But I will note that it is extremely difficult to set the desired temperature. The thermostat must be purchased separately. " Reviews site
“In principle, there is nothing complicated in the incubator itself, you can assemble and connect it correctly using the instructions that come with it. There is also a detailed description of the process of hatching chicks, what temperature is needed, etc. It is obligatory to read the instructions! " Reviews site
The incubator "Laying" is good for home use. Suitable for both hatching chicks for your farm, and for sale. The most popular are models with a large capacity. Among the main advantages, in the first place is available price, Then - simplicity of the device and ease of use.