Content [show]
Dutch potato planting and growing technology
Growing potatoes in Dutch is a technique that takes into account every little thing. When planting using this technology, up to 250-300 kg of tubers are harvested from one hundred square meters.
Dutch technology provides potatoes:
- sufficient warmth;
- oxygen supply to the roots;
- fertilizers.
Growing potatoes using Dutch technology
How many technologies for growing potatoes are there
In addition to traditional and Dutch cultivation, there are other new methods: Chinese; technology developed by the doctor of agricultural sciences Jacob Mitlider from the USA; the method of Galina Aleksandrovna Kizima, who spent her childhood in a working village in the South Urals.
Which varieties are suitable
The varieties from Holland are immune to diseases, they are high-yielding, but they are not not suitable for planting in the north of Russia... It is better to plant domestic zoned varieties there, adapted for home conditions.
It is required to plant early and late potatoes in the country.
Suitable Dutch potato varieties:
- Anosta - early. The tubers are yellow, even. The pulp is creamy. Potatoes are immune to nematodes.
- Red Scarlett - early. The tubers are scarlet, the flesh is snow-white, does not change color when cooked.
- Impala - early variety. It is planted in the Central regions of Russia and in the Siberian Federal District. It takes 50 days from germination to harvest.
- Jarl - early. Unpretentious in care, they are planted even in depleted lands.
- Prior - early. He has immunity to viral diseases, nematodes, late blight.
- Romano - medium early. The tubers are pinkish, the flesh is snow-white. Immune to late blight.
- Monaliza - mid-early. It is immune to all diseases.
- Sante - mid-season. The tubers are yellow, the flesh is creamy. Resistant to mechanical damage.
- Eba - medium late. Immune to viral diseases. Tubers are yellowish.
- Impala
- Romano
- Sante
Domestic varieties:
- Nevsky - mid-early grade. Immune to nematodes, cancer, scab, mosaic and other diseases. But its minus - the tubers are stored at a temperature of about 0 degrees, otherwise they will germinate.
- Zhukovsky early... It is immune to disease. It tastes great, but there is very little starch in the tubers, so it does not boil over. You can collect 600 kg of potatoes from a hundred square meters.
- Luck - early variety. It is immune to all diseases. The tubers are yellowish, the flesh is snow-white.
- Zdabytak - late grade. Immune to diseases. There is a large amount of starch in tubers.
- Nevsky
- Zhukovsky
- Luck
Is this method suitable for growing potatoes in the country
Potatoes are grown in the fields using technology, and in summer cottages, doing all the operations by hand.
Technology detail
What is the Dutch way
- For cultivation of tubers, varieties from Holland are taken, immune to diseases, in which a large number of tubers grow. And in the northern regions of Russia, domestic zoned varieties are planted. Select required only healthy tubers... Change the varieties you planted.
- Tuber crops are selected with 3-5 cm in diameter, with 100% germination.
- According to the planting scheme, 1 m2 is planted 6-8 tubers... It seems to the Russian gardener that with such a planting, the land is empty in vain, but according to this technology, the bushes grow sprawling, they have powerful roots, they harvest more than with the traditional planting method.
- The Dutch also feed potatoes, taking into account the needs of this variety.
- It is required to spud and sprinkle combs with a height of 10 cm.
- The crop must be harvested on time. If you need seed, then the potatoes are dug up a month earlier than the tubers intended for consumption.
Selection and preparation of seed material
For planting, even healthy tubers are chosen. diameter 3-5 cm, best varietal.
Potatoes, which are smaller in size, should not be chosen, since the grown bushes will be very weak. Larger potatoes are only planted if the harvest is from their own seeds. Each selected tuber has 5 eyes.
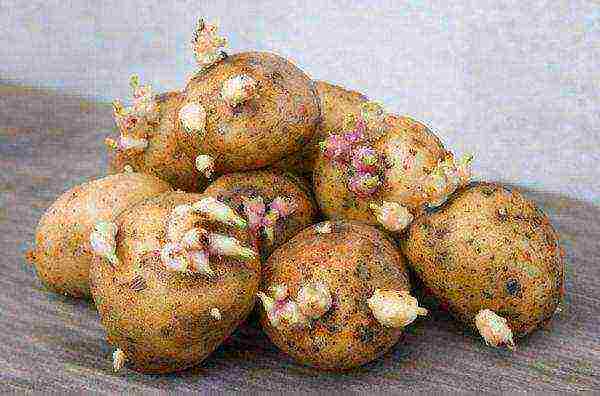
It is required to choose the right planting time so that the sprouts do not die from return frosts. The tubers are carefully placed in polyethylene bags with handles, when the sprouts are 0.5 cm high. So it is convenient to transport the potatoes to the place of disembarkation. For planting by hand, they wait until the sprouts, placed in plastic bags, grow to 2.5-3 cm.
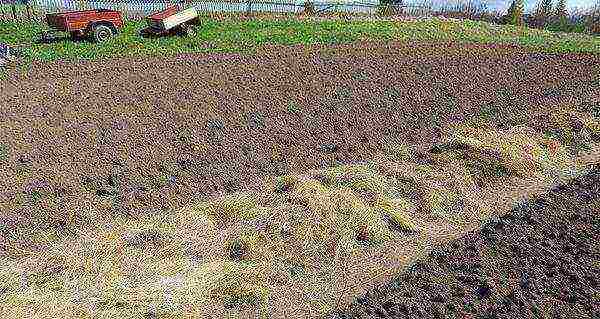
Land cultivation before planting
Potatoes will be less sore and less affected by pests if planted in one place every 3 years... It is required to give the soil a rest and not plant anything at all for 1 year, but mow the weeds. If you do not have this opportunity, then plant tubers in the place where beans, peas, oats, rye grew before.
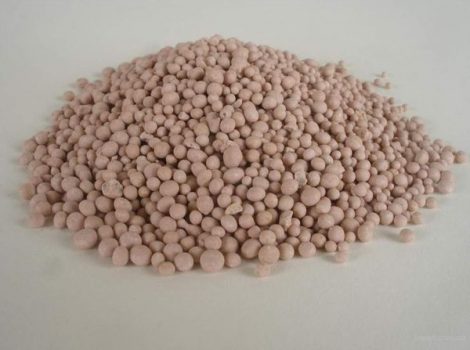
Phosphorus, potassium, nitrogen are scattered on a flat place in the fall and the soil is dug to a depth of 22-27 cm.
If you have a slope, then in the fall, do not dig up the soil and do not put top dressing, since in the spring the flood will wash away all the nutrients.
Care

- In the spring they dig up the soil, make holes 6-8 cm deep... The distance between the rows is kept at 75 cm, and between the holes - 30 cm.But such a long distance has its advantages:
- The soil for hilling is poured from the aisles, because of this, the tubers are located above the aisles. The ridges are well illuminated by the rays of the sun, and oxygen is supplied to the root system.
- The cross-sectional area of the ridge is 1200-1500 cm².
- With heavy rains, the water does not stagnate under the bushes, as it is in the aisles;
- In case of heat and no rain, there is enough moisture in the ridge so that the potatoes do not die from drought to rain or watering.
- Rotted manure or humus is first put into the hole.
- Then add 100 g of ash and a handful of crushed egg shells, as well as a little onion husk, which will scare away the wireworm and slugs.
- Tubers placed in the wells sprouts up and sprinkle with soil.
- If you see weeds growing, pull them out.
- When sprouting sprouts, spud them so that the ridges have a height of 10 cm.
- If there is a threat of frost, then young shoots are sprinkled with soil, and tall shoots are bent and sprinkled with earth. When the weather is warm again, the bushes are raised and poured with water from a watering can.
- 14 days after planting, weeds are pulled out, and the soil from the rows sprinkled with sprouts so that the ridges become about 25 cm high, the width of the ridges at the base is 75 cm, and at the top - 30 cm.
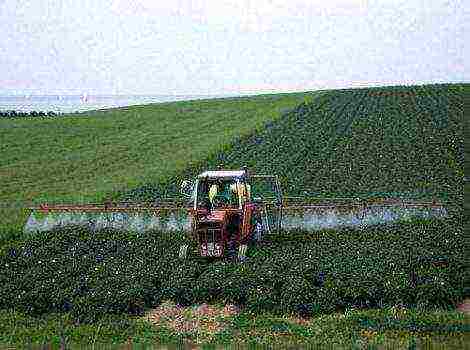
- When Colorado beetles attack, the bushes are sprayed with insecticides.
- If there is a drought, then the bushes are watered 1-3 times per season (1-2 times before the buds bloom, once - when the flowers bloom).
When and how to harvest
Then the peel will be strong, and the potatoes will be able to lie for a longer amount of time without spoiling.
That is, growing potatoes in the Dutch way is planting tubers at a distance of 30 cm, observing a distance between rows of 70 cm. This is also poured high ridges and taking into account the need for potatoes in fertilizers.