Rules for planting summer garlic in the spring in open ground
Garlic belongs to the onion family... It is widely used in cooking and traditional medicine. The plant has a piquant taste and smell, and is an excellent antiseptic. Its agricultural technology is quite simple. and its cultivation is not a problem even for inexperienced gardeners. In this article, we'll talk about planting summer garlic in the spring.
When can you plant summer garlic, timing
The differences between them are as follows:
- winter forms arrows with air bulbs, through which it multiplies; summer arrow does not form and reproduces by denticles;
- the summer bulb has a large number of cloves (up to 30 pieces), the winter bulb has about 10 cloves;
- the main advantage of the summer one is the long shelf life; it can be stored until the next harvest;
- planting dates for summer garlic: late April - early May, winter: mid-autumn.
To get a good harvest, it is necessary to plant summer garlic in open ground after the soil reaches a temperature above + 5-6 ° C.
This is explained by the formation and active growth of its roots and leaves occurs only at low temperatures.
If the timing is shifted even by 1-2 weeks, the leaves and roots stop their active development, which will negatively affect the harvest.
How to plant in open ground in spring
Correct site for planting summer garlic should be on the sunny side. The soil should be fertile, with a neutral environment.
Acidic soils require ash liming. The crop grows best on loamy soil..
Preparing the bulbs for planting
Warm storage bulbs (stored at room temperature) are slightly immature. 2 months before planting, they are placed in the refrigerator.
With cold bulbs (cellar) storage, such a procedure is not necessary.
After that, the selected cloves are sorted by size.
All teeth are disinfected solution of copper sulfate. For 8 hours before planting, the teeth are soaked in a warm solution of nitroammophos; the concentration is 5 g per 10 l of water.
Preparing the beds
The precursors to garlic can be legumes or cruciferous plants. Also, the culture takes root well on soils where pumpkins or cucumbers were cultivated before it.
Since the root system of the bulbs is small, the beds for him should not be more than 15 cm high... The width of the beds is chosen from 80-90 cm.
Before landing, it is advisable water the beds with saline (150 g of salt per 10 liters of water).
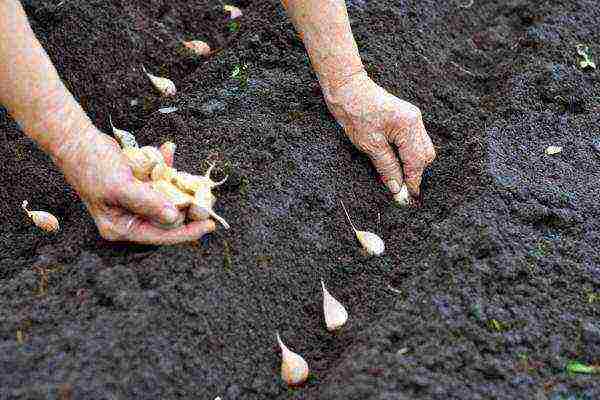
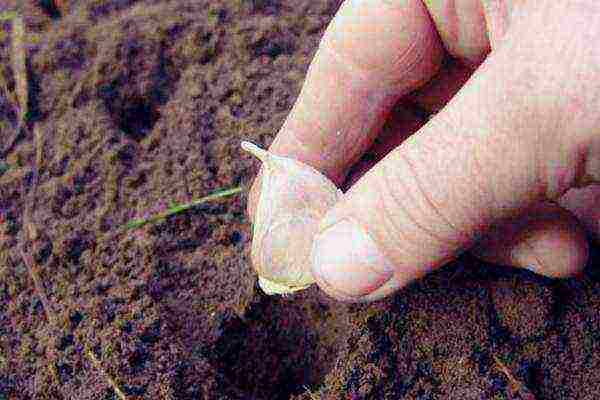
How to plant
Prerequisite make furrows on the beds 5-8 cm deep... Landing is done with the tip of the clove to the top.
It is necessary to plant it in the ground to a depth of 2-3 cm from the surface to the tip of the prong.The distance between the teeth is about 10 cm, between the rows - 15 cm. Large teeth are planted separately from small and medium ones.
After planting and covering the teeth with earth, it is necessary to feed the beds with ammonium sulfate (20 g per 10 l of water) in order to prevent pests from spoiling the seed.
Spring planting of garlic:
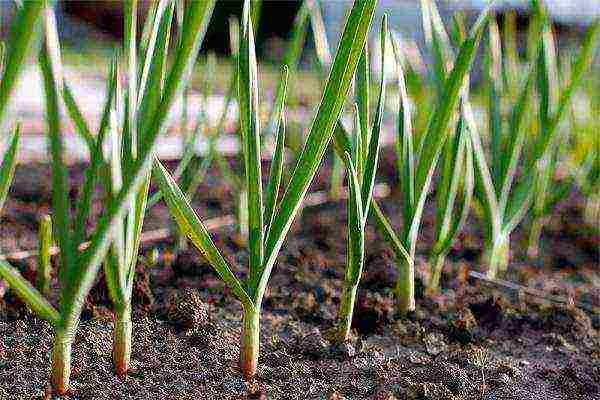
Growing and caring for the future harvest and the first shoots
After the first shoots appear the culture needs care and feeding. Nitrogenous fertilizers are preferred.
The calculation of the required amount of complementary foods is determined based on the sowing area: per 1 sq. you need 3 liters of the mixture. After 10 days, feeding is repeated.
During May and June, the beds must be watered every 5-6 days.... During this period, watering is carried out once, but in such a way that the soil is moistened all the time.
During the entire growing season, it is necessary to loosen the beds and remove weeds from them... Loosening is done the next day after watering.
As soon as the bulbs begin to form, it must be fed with phosphorus-potassium fertilizer.
After 10 days, fertilization is repeated.... In the interval between applications, preferably on the 3rd day, wood ash is added to the soil.
Even when planted at the end of April, the garlic does not always ripen. It is necessary to control the degree of maturity of the bulb by leaves from the end of July.
If they begin to dry out in early August, the garlic has time to ripen. If the leaves are still fresh during this period, its ripening should be accelerated.
There are two ways to speed up the ripening of the bulbs.... The first is to partially pull the bulbs out of the ground. In this case, some of the roots are injured, and all the forces of the plant go not to the growth of the leaves, but to the ripening of the bulb.
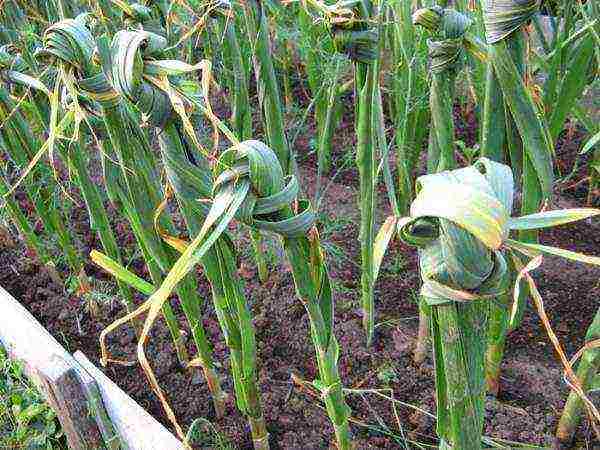
In the second method, the leaves of each bulb are tied in a knot, their growth stops, and nutrients begin to accumulate intensively in the bulb. Any of these procedures are performed in mid-August.
Diseases and pests
The main crop pests are onion fly and black mold... And although garlic has an excellent protective function, it is advisable to monitor its condition.
Helps with onion fly watering with saline (200 g of salt per 10 liters of water).
Against black mold fungus well recommended spraying plants with Bordeaux mixture.
Cleaning and storage
Traditionally, the crop is harvested in mid-September... After harvesting, the plants are dried: the first hour in the garden, then under a canopy or in a well-ventilated area.
He is tied in braids and dried in limbo.... At the end of the drying process, it is sent for storage, after cutting off the dry leaves at a distance of 5-7 cm from the top of the head.
Store garlic in the coldest corner of the apartment (warm storage) or in the basement or refrigerator with a temperature of + 1-5 ° C (cold storage).
Tips for harvesting and storing garlic: