Content
- 1 Seed preparation
- 2 Dill sowing dates
- 3 Dill: planting and care in the open field
- 4 Bush dill: growing features
- 5 Dill diseases
- 6 Growing dill: the main nuances
- 7 Growing dill: variety selection
- 8 Harvesting and drying of crops
- 9 Features of growing dill
- 10 When to plant dill: planting dates
- 11 How to plant dill in open ground: preparation and planting
- 12 How to care for dill after planting
- 13 When to harvest and how to store
- 14 Varietal variety of dill
- 15 Choosing a place for planting greenery
- 16 How to choose a time to sow seeds
- 17 Preliminary preparation of seeds
- 18 Features of sowing dill
- 19 Seedling method of growing greens
- 20 Umbrella crop care technology
- 21 How to harvest correctly
- 22 Specificity of the protective system of dill
- 23 Preventive measures against diseases of umbrella crops
- 24 The main diseases of dill and the fight against them
- 24.1 Fusarium wilting
- 24.2 Blackleg
- 24.3 Powdery mildew
- 24.4 Peronosporosis (downy mildew)
- 24.5 Rust
- 24.6 Fomoz
- 24.7 Cercosporosis
- 24.8 Site selection in open ground
- 24.9 Choosing a place in the greenhouse
- 24.10 Choosing a place in the apartment
- 24.11 Landing dates
- 24.12 Planting methods
- 24.13 Priming
- 24.14 Seeds
- 24.15 Outdoor and greenhouse care
- 24.16 Care in the apartment
Dill is a perennial herb that is familiar to everyone. It is loved for its delicious spicy aroma. Learn about how dill is grown in a summer cottage (secrets, tips and basic nuances), and then you will always have a bunch of fragrant and fresh greens at hand. It can be dried and frozen, as well as used for salads, soups. Inflorescences and seeds are also used, mainly in the preparation of marinades for canning vegetables.

Seed preparation
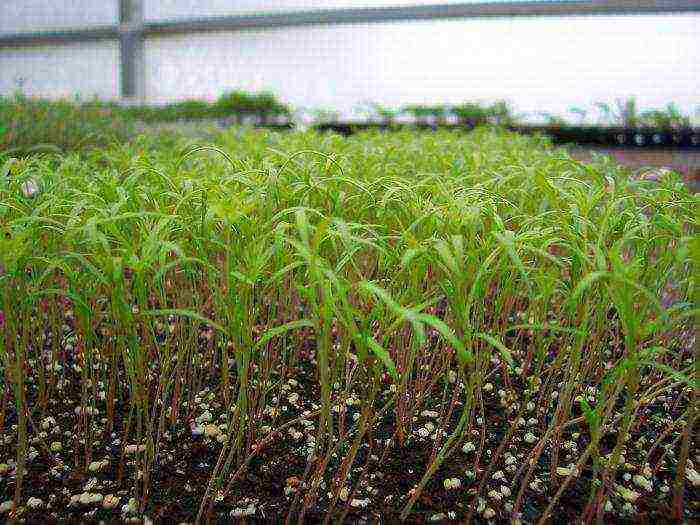
Experienced gardeners and gardeners recommend soaking the seeds before planting dill. Growing dill with seedlings is also practiced, without fail it is used for bush varieties. To soak the seeds, just wrap them in a cloth and keep it moist for a couple of days, until they swell. Then they need to be dried for 20 minutes in the air and sown in the prepared soil. Uniform seedlings appear, as a rule, after two weeks. All this time, it is required to maintain constant humidity. Dill seeds are not demanding to the temperature and begin to actively germinate already at +3 ° C.
Dill sowing dates
Growing dill outdoors can be done in two ways: sowing in spring or late autumn. This plant is quite cold-resistant and can tolerate frosts down to -6 ° C, so the seeds can be planted in the ground in late autumn (October-November), the timing depends on the region. The second option involves a spring planting. They also start it early enough, as soon as the snow melts and the soil dries out a little. The approximate dates are from mid-April to the end of May. Dill reproduces very well by self-seeding. If the umbrellas with seeds are not removed in the fall, then next spring, most likely, the whole garden will be strewn with fragrant herbs.
Dill: planting and care in the open field
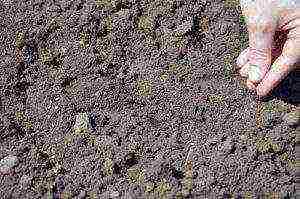
The garden for spring sowing needs to be prepared in the fall. It is required to dig up the ground to a depth of about 25 cm and add a bucket of humus (one square meter). In the spring, it is enough to level the bed with a rake and make grooves at a distance of 20 cm from each other with a depth of 2-3 cm. Seeds should be sown in them, sprinkled with a small layer of humus on top. You do not need to water until shoots appear.
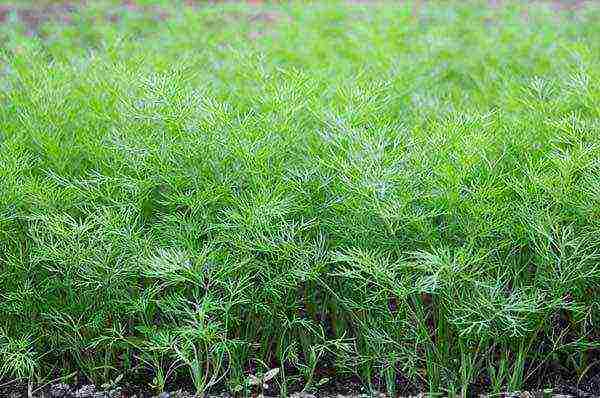
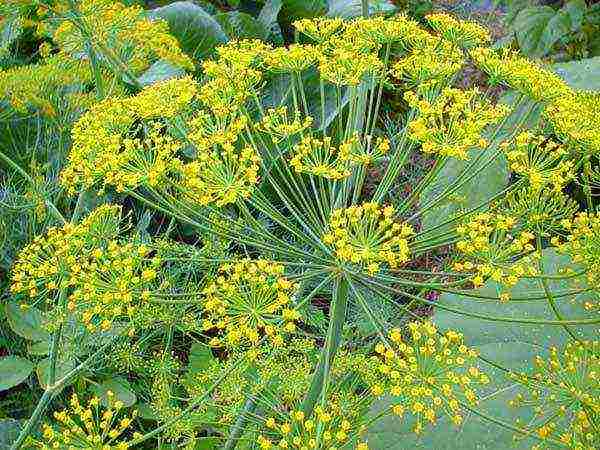
Throughout the summer, dill can be sown more than once, but at intervals of 20-25 days to obtain fresh greens. This is exactly the period of its ripening. By this time, the plant reaches a height of about twenty centimeters. To get the seeds, you will have to wait a little longer until the umbrellas ripen. These are the basic rules for growing dill outdoors. Everything is quite simple and will not cause difficulties even for a novice gardener.
Bush dill: growing features
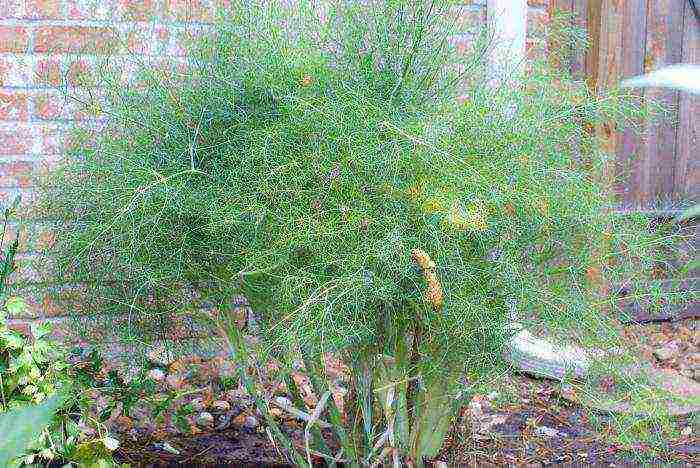
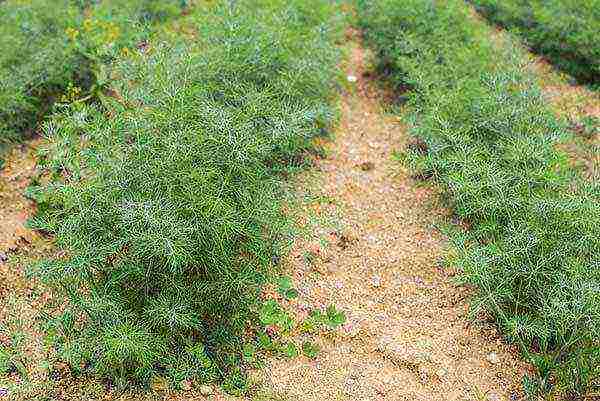
This variety has recently appeared on the seed market. Its appearance and growing technology are somewhat different from those of ordinary dill. If you do not follow agricultural techniques, then, of course, he will grow, but he will lose his elite qualities. The main feature of this variety is its size and strong foliage. Bush dill can grow up to one and a half meters in height, so the distance between plants should be large (25 cm). It is more demanding on soil fertility and climate, which is why it is planted in greenhouses. Growing dill in the open field is also possible, but only by seedling (sowing in mid-April - early May). It is planted on the garden bed when the air temperature is set in the range of 20-25 ° C.
The capriciousness of bush dill is compensated by its high yield. So, 20 plants will provide you with greenery not only for the whole summer, but also for the winter.
If you practice growing dill in the open field, then the peduncles are best removed, especially in central Russia, since the seeds still do not have time to ripen even in greenhouses. The plant will only waste energy. This variety is best grown exclusively for greenery.
Dill diseases
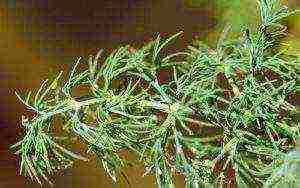
One of the main enemies of fragrant greens is powdery mildew. It can appear at any time as a white coating on seeds, stems and leaves. Powdery mildew most often occurs in late summer when the nights are chilly. As a result, the plant loses its taste and is no longer suitable for consumption. The appearance of downy mildew is possible, which is characterized by the appearance of chlorotic spots, gradually turning yellow.
Also, dill can be subject to phomosis. This fungal disease manifests itself as blackening on seeds, stems, and sometimes leaves.
These diseases, in principle, can appear at any time, regardless of whether you practice growing dill in the open field or in a greenhouse. It is impossible to treat plants with chemical preparations, therefore, only the use of preventive measures is possible, namely, the alternation of crops, the timely destruction of weeds and infected specimens, as well as the disinfection of dill seeds. To do this, before planting, they need to be warmed up in hot water (50 ° C) for 30 minutes.
Growing dill: the main nuances
- Thinning. This is the case when you don't need to feel sorry for the plants. In the phase of 2-3 true leaves, seedlings should be thinned out, leaving at least 6-7 cm between neighboring bushes. This contributes to the better development of dill, it will be strong and even. For bush varieties, this is generally a mandatory procedure, and it can be carried out in several stages, gradually bringing the distance between plants to thirty centimeters.
- Greens grow in about a month, so fertilization is not required during the growing season. As a last resort, if you notice yellowing of the leaves, you can water the plants with a solution of urea or mullein.
- Young greens can be pulled out directly from the root, but from adult plants (25 cm and above) it is better to pick off only green leaves.
- Choose sunny places for planting, where there is no stagnant moisture and fertile soil. In the shade, you will get a pale green or almost yellow dill.
Growing dill: variety selection
Often, vegetable growers and summer residents do not attach importance to dill varieties, because greens are greens. And this is a completely erroneous opinion.In the modern seed market, the choice of dill varieties is very large. As a rule, they all differ in terms of ripening, and sometimes in cultivation agrotechnics. Therefore, carefully read the inscriptions on the bags with fragrant seeds. It is worth noting the following varieties of dill.
- Mid-season: Anna, Gribovsky, Umbrella, Lesnogorsky, Salute, Patterns.
- Late ripening: Alligator, Borey, Superdukat.
- Bush varieties: Buyan, Bouquet, Sultan.
Harvesting and drying of crops
The collection of greens for drying or freezing is carried out 25-30 days after the shoots appear. By this time, the plant grows up to 15-20 cm in height. Before freezing, greens should be rinsed and allowed to drain. Then the dill must be crumbled and packaged in sachets or containers. You can also dry it. This should be done not in the sun, but in the shade, in a well-ventilated area. Store dried dill in jars with tight-fitting lids or paper bags, and the same goes for seeds.
Be sure to plant fragrant dill on your site! Planting and grooming outdoors does not take much time and effort. But as a result, you will get not only tasty, but also very healthy spicy herbs, and the seeds are perfect for use in pickling and salting vegetables, in addition, they have medicinal properties.
Thanks to its spicy aroma, dill has become a regular regular in any garden. However, despite the general unpretentiousness, planting a culture often ends in failure. What is the reason for this phenomenon, and what you need to know in order to properly grow dill on your site in spring, summer and autumn?
Features of growing dill
The ideal temperature for the growth of dill is + 15- + 20 C. Due to this property, it is better to grow a plant to obtain fragrant leaves in spring and autumn. In summer, however, they are usually planted exclusively to obtain umbrellas.
Gardeners who want to harvest spicy greens in the summer should take into account one caveat. When daylight hours lasts 10-14 hours, dill actively forms new leaves, and as soon as the day begins to last 15 hours, the culture instantly releases a peduncle. Therefore, in late spring and early summer, early varieties that ripen quickly are undesirable to plant.
Before winter, dill is sown when the soil is not frozen yet. For sowing, rows are made with a depth of 3.5 cm in the garden bed. To achieve good germination, the seeding rate of planting material is increased by 25%.
When to plant dill: planting dates
The optimal planting time depends on the purpose for which the fragrant greens are grown. So, in spring and autumn, dill is planted to get greenery, and in summer - umbrellas.
Dill planting dates for each season are as follows:
- In the spring planting the plant is carried out immediately after the temperature rises to + 2- + 5 C, and the soil at the selected place has finally thawed. Depending on the geographic location of the region, planting dates vary from mid-March to mid-May.
- Summer you can plant greens at any time. To constantly have fresh greens, the plant is planted 3-4 times every 15-20 days.
- In autumn the crop is sown in October-November. Before winter, a plant is sown in order to speed up the appearance of leaves in spring: the first harvest of winter dill can be harvested 2 weeks earlier than spring dill.
Video: planting dill for the winter
How to plant dill in open ground: preparation and planting
Even novice gardeners who recently acquired their own plot know that before planting dill seeds in the ground, you need to study the features and requirements of a cultivated plant. What is worth knowing?
Video: sowing dill in open ground
How to choose a place for planting and prepare a garden bed
For planting dill, it is better to choose a sunny bed or a bed in partial shade. Plant a crop not in the shade: due to the lack of sunlight, the bushes grow thin and lose their original color.Since aromatic greenery prefers to grow on loose soils and does not tolerate waterlogging poorly, sow a crop in places where it is often stagnant water or wherever they approach the surface groundwater is not allowed.
The plant prefers to grow on neutral soils... Dill growing in acidic soil turns red, and in alkaline soil it turns yellow. In both cases, the plant develops slowly, resulting in delayed harvest of spicy greens.
Better neighbors and predecessors for dill are cucumbers, tomatoes, cabbage and other vegetable crops, under which a lot of fertilizers were applied. To prevent plants from competing with each other for nutrients and moisture, greens and vegetables should be placed at a short distance from each other. The only plants incompatible with dill are celery and carrots.
What soil is needed and how to prepare it
Dill loves to grow in loose, nutrient-rich soils. The soil for planting a spicy crop is prepared in the fall: rotted manure or compost is introduced, and then the site is carefully dug up. Substance consumption per 1 sq. area - 5-6 kg. If there is no organic matter, the bed is fertilized with purchased mineral mixtures such as "Kemira Universal", "Solution".
Important! Heavy soil is not suitable for planting: due to poor air permeability, dill is sick and grows slowly.
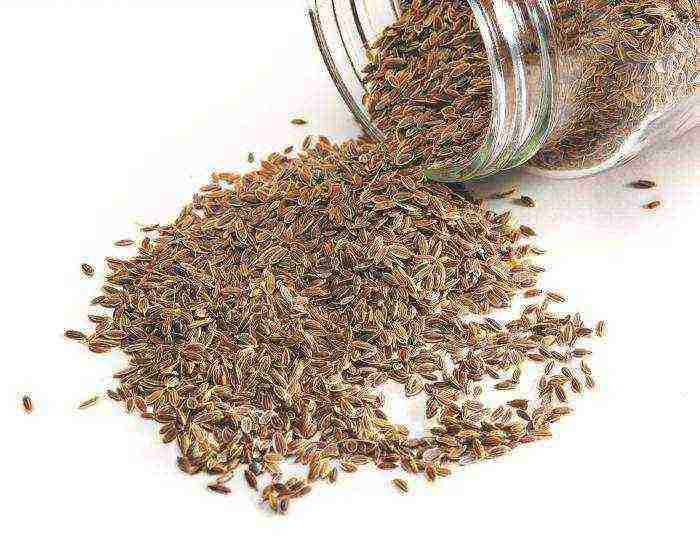
How to prepare seeds
Due to the content of essential oils, dill seeds have a low germination rate. To improve this indicator, the planting material is poured into a container, filled with warm water (50 degrees) for two days. As it cools, the water is changed every 8 hours.
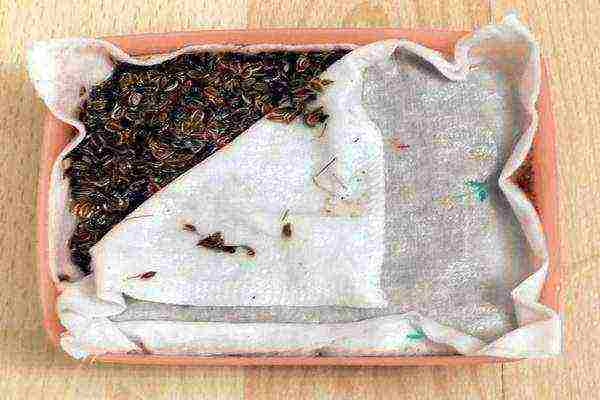
After two days, the seeds are removed from the water, laid out on gauze and covered with a damp cloth. The bookmark is placed on a plate and left at room temperature for 4 days. As soon as the seeds sprout, the planting material is slightly dried.
If dill seeds are not properly prepared, the first seedlings will appear in 2-3 weeks. Planting material that has been soaked emerges 4-6 days after laying. Moreover, such treatment disinfects the planting material from diseases characteristic of the culture.
Direct landing
Planting dill with seeds in open ground is as follows:
- In the prepared place, rows are made with a wooden peg or plank with a depth of 2 cm at a distance of 20 cm from each other.
- Then the depressions are moderately watered and the seeds are sown according to the seasonal seeding rate, which is 1 g / m2 in spring and 2 g / m2 in autumn.
- The sown rows are covered with dry soil. When dill is sown before winter, the rows are not watered before sowing.
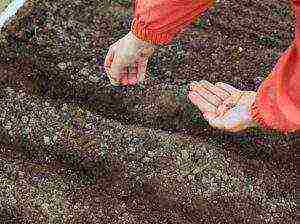
Besides the usual private schemes, for planting dill is used carpet scheme. To decorate the site with a lush green blanket, the planting material is evenly scattered over the surface and covered with a rake. The planting site is watered abundantly.
By the way! Dill can be successful grow all year round at home on the windowsill.
Video: how and when to sow dill
How to care for dill after planting
In order for the plant to sprout and please with a generous harvest, dill must be provided with comfortable conditions. What manipulations does the care of fragrant bushes consist of?
Watering
Dill is a moisture-loving plant, so the soil in the garden must be kept moist at all times. However, it is not worth watering the greens too often and abundantly: staying in swampy soil, the plants grow slowly and get sick. Moreover, due to excess water, the concentration of oils contained in greens is greatly reduced, which makes them less aromatic.
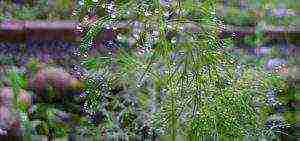
The plant also cannot grow for a long time in drought: development stops, the leaves become stiff and stretch with nitrates. To create a comfortable environment, the plantings are watered 1-2 times a week. On the hottest days, dill is irrigated by sprinkling.
Top dressing
Fertilizers are not applied for dill varieties with a short ripening period, since the greens are quite enough nutrients that were introduced during the preparation of the garden. If the bushes grow slowly, at the age of 2-3 true leaves they are fed urea or nitrophobic, based on the calculation of 10-15 g per sq.m. beds.
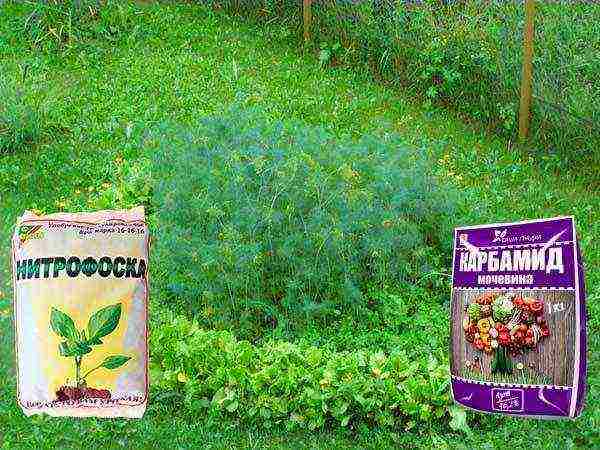
Mid-ripening and late-ripening species of dill are fed twice. First once under the plants that have formed 2-3 leaves, make nitrophosphate, urea in the same amount as for early species. Second once the plants are fed 20-25 days after the first feeding: by 3-4 sq.m. area contribute 15 g potassium salt, 20 g urea... Fertilizers are applied directly under the root, trying not to get on the leaves. After feeding, dill is watered abundantly.
Important! Nitrogen is introduced under the plant only in case of urgent need, since the leaves of the plant are capable of accumulating nitrates.
Weeding and loosening
In order for the nutrients to get into the greens, and not wasted on the growth of weeds, as soon as the need arises, the dill garden must be weeded. In addition, weeds compact the soil and retain water in it, which adversely affects the development of the plant. Since fragrant greenery prefers to grow on air-permeable soils, after watering or rain, the rows are loosened. The first loosening is carried out to a depth of 5-7 cm shortly after germination. In the future, the earth is loosened to a depth of 8-12 cm. If the seedlings have sprouted very densely, they are thinned out.
Shelter in the heat
Like most greens, dill doesn't really like the heat. Due to high temperatures, the soil dries out quickly, and the plant stops growing, the leaves become lethargic. So that the greens do not lose their structure and organoleptic qualities, a small canopy is installed over the garden bed.
Dill pests and diseases
The most popular diseases are false mealy dew and phimosis... The first disease manifests itself on the leaves with a white bloom, the second - with black spots on the stem and leaves. Excessive watering makes dill sick root rot, bacteriosis, curly and curly leaves.
Since dill cannot be treated with chemicals, it is better to take care of prevention in advance. To protect the plantings from infection with fungal diseases, it is recommended to disinfect the seeds, observe crop rotation, monitor the cleanliness of the beds, periodically removing weeds and diseased plants.
If the plants nevertheless become infected with the fungus, the plantings are sprayed with biological products Fitosporin, Trichodermin, Mikosan-V. Since these products are made up of beneficial bacteria, the sprayed greens can be used for cooking as soon as a couple of days after processing. How to process greens and after how long it can be consumed is indicated on the back of the drug packaging.
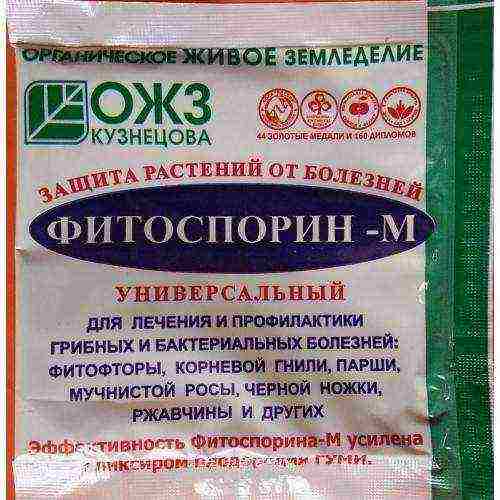
As for insects and pests, dill is most susceptible to attack. aphids, umbrella and earthen beetles. As soon as aphids have been seen on the plants, the plants are watered abundantly, directing a stream of water to the affected areas (for example, with manganese) or dusting them with ash or powdered sugar. The bushes and the soil around them are cultivated from flea beetles.Fitosporin ".
When to harvest and how to store
Dill can be harvested 30-40 days after germination. The most useful greens are bushes, the height of which is 5 cm. Depending on the needs and preferences, gardeners collect greens, cutting off only individual leaves or the entire stem.
Harvesting the spice after the beginning of flowering is undesirable, since the leaves by this time become tough and not tasty. Leaving the plant in the garden after throwing out the arrow is advisable only if you plan to harvest canned vegetables for the winter.
As for the time of day, it is better to harvest dill in the early morning, after the plant has dried from the dew.Harvesting spice during the day is not recommended: under the influence of hot sunlight, delicate leaves fade.
Greens are folded in bags or containers and placed in the refrigerator. In this form, dill is stored for a week. To prepare fragrant leaves for the winter, they are dried or frozen. After the sun has dried the pre-washed greens, they are placed in jars or bags and stored in a dark place.
Planting dill in open ground is one of the simplest garden manipulations. If you fulfill all the requirements of the culture, the plant will quickly rise and give an excellent harvest. And if you also prepare greens for the winter, you can enjoy the unsurpassed aroma of dill all year round.
Video: the secrets of growing dill
Fragrant dill (garden dill) is a valuable flavoring plant of the umbrella family. The culture contains many vitamins (C, B, P), carotene, iron. Indispensable for disorders of the gastrointestinal tract. Dill essential oil is used to normalize metabolism, increase appetite. Along with parsley, the spice is a popular flavoring in many dishes.
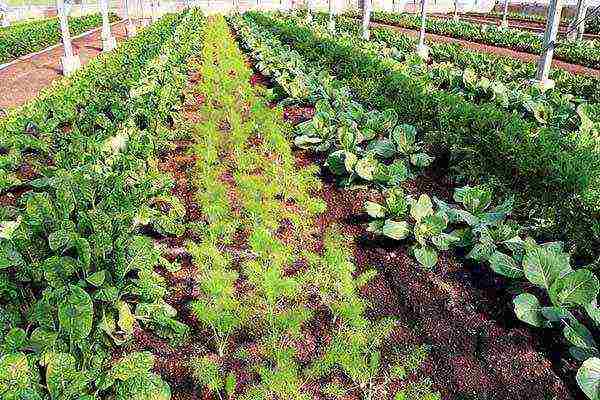
Summer residents strive to organize the production of greenery during the entire spring-autumn season. Unfortunately, for many, the question of the correct high-quality breeding of dill remains relevant.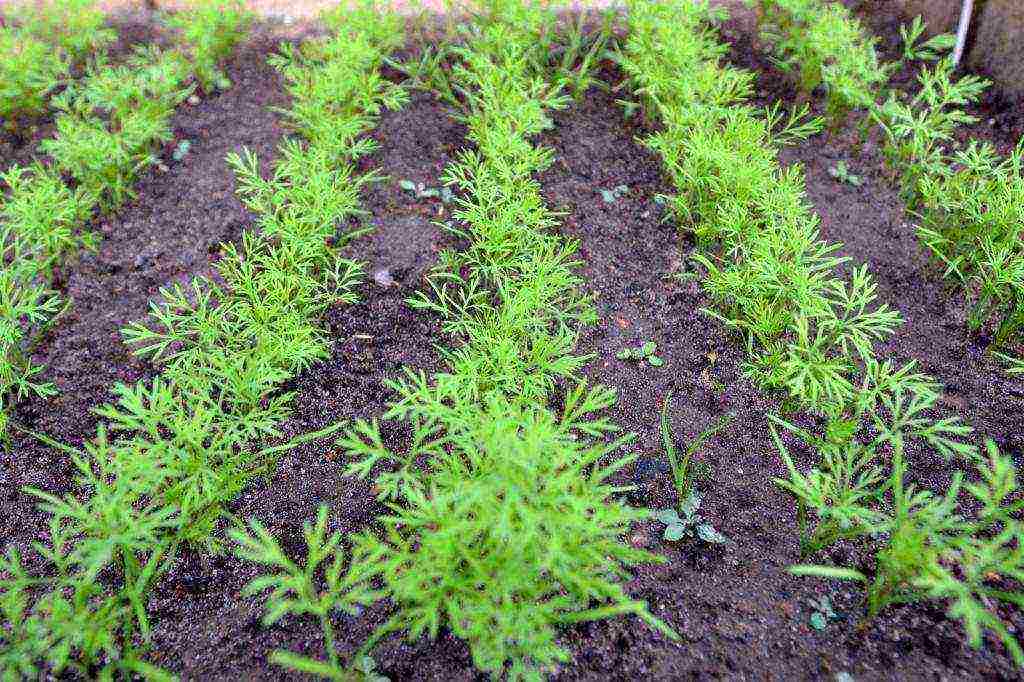 The culture is grown both in greenhouses, at home, and in the open field. Planting, growing and caring for dill outdoors has its advantages:
- Easy to choose a suitable landing site.
- The plant feels best in open spaces, since it can reach a height of one and a half meters, and bush varieties, moreover, occupy a sufficient area of \ u200b \ u200bthe area.
- It is easy to organize abundant watering on the site without stagnant water.
- The open area is well ventilated, which is a good preventive measure against diseases.
This method has its drawbacks.
First, being outdoors makes crops dependent on weather changes.
Secondly, the growing season is reduced to six months.
In order to grow green, lush and fragrant dill outdoors, you need to pay attention to the main factors:
- Choose a seasonal varietal composition of the culture.
- Choose the right place for planting the plant.
- It is good to prepare seeds and seedlings for open ground.
- Strictly follow the cultivation technology.
- Harvesting correctly.
Varietal variety of dill
When choosing a variety, pay attention to the ripening time of the crop.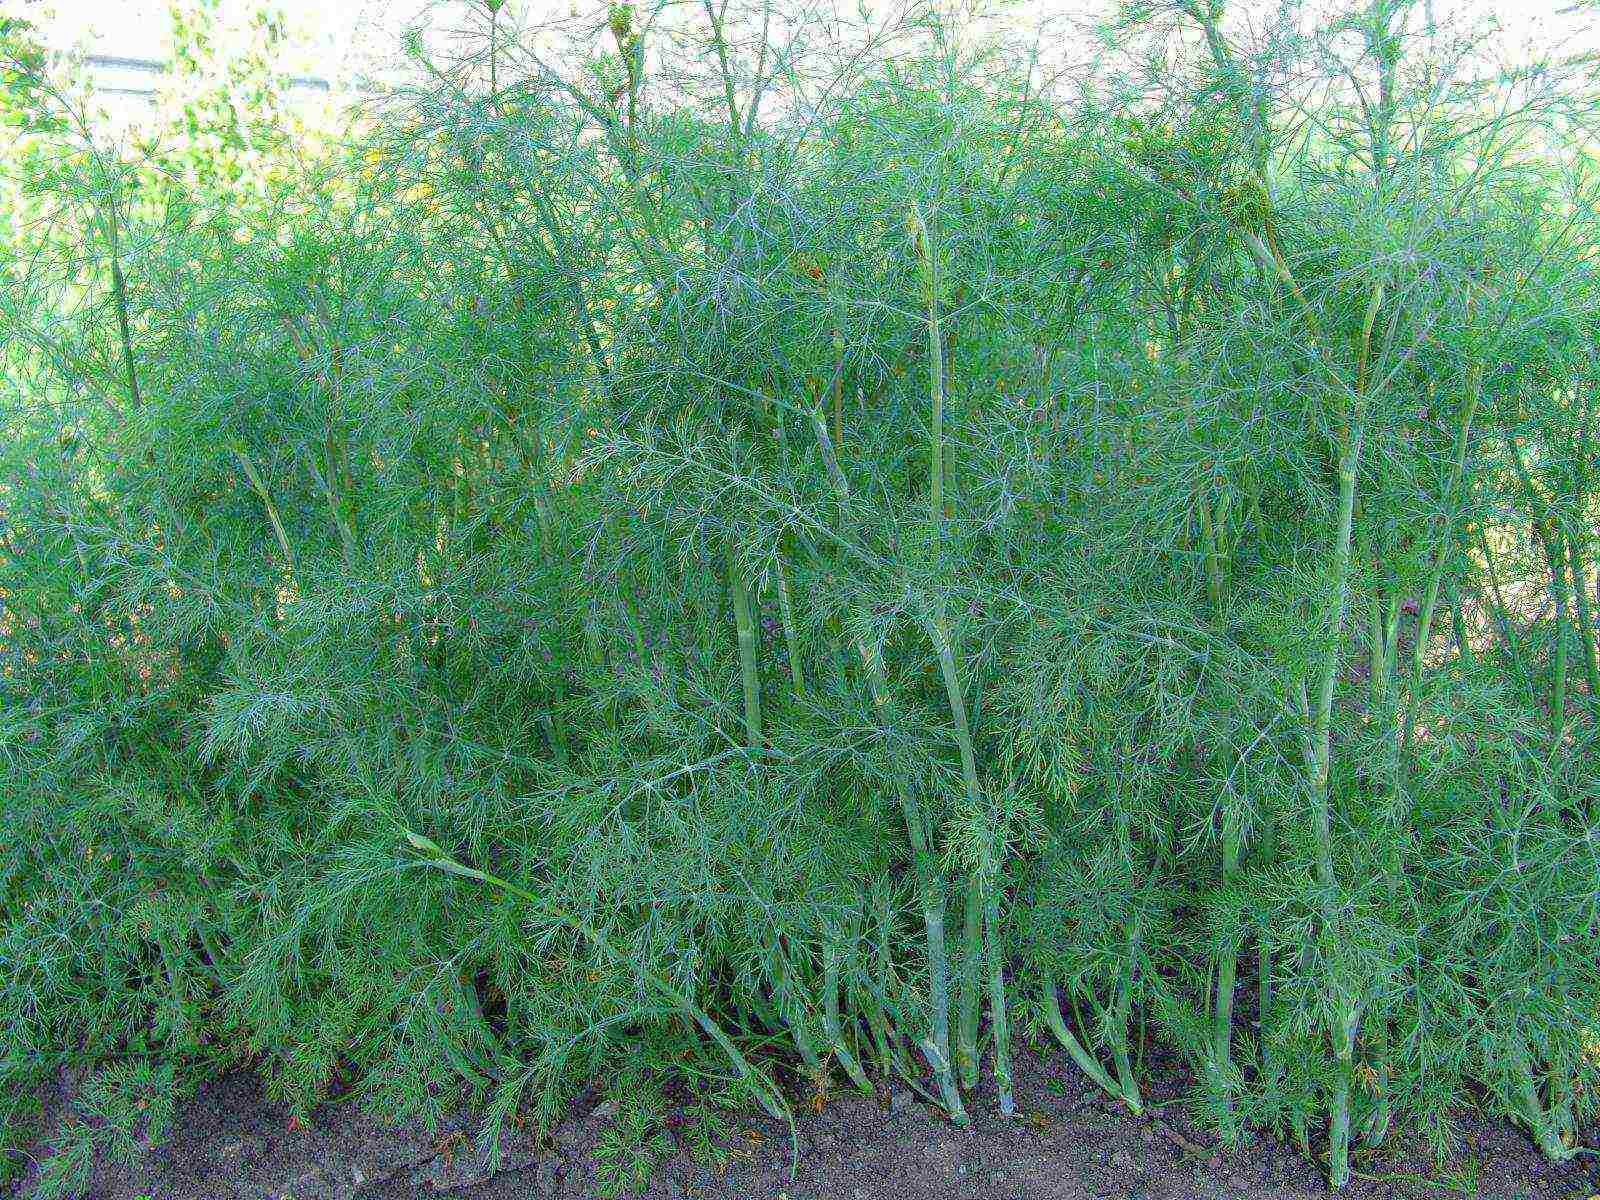 All varieties are divided into early, medium and late ripening.
- Early varieties. You won't get a lot of green mass for sale from them, although dill will be enough for cooking. The varieties are good for use in conservation, as they bloom and ripen quickly. Dill is sown in early spring, covered with foil. After 1.5 months, you will already have a harvest. The early varieties include Gribovsky, Umbrella, Grenadier.
- Medium varieties, for example, Umbrella, Richelieu, Uzory - ripen 2 months after sowing the seeds. They give more greenery - up to 10 branches. Suitable for the preparation of spices, and for freezing for future use, for sale and for use during the conservation period.
- Late ripening. The most productive are the late varieties - Alligator, Salyut, Buyan, Aurora, Kibray. They provide lush, luxurious greens that can be used not only for preparing family meals, but also for sale. You will get the harvest in 2-2.5 months after sowing.
Late bush varieties. They do not have umbrellas for a long time, new leaves grow quickly, which can be constantly cut off throughout the season without constantly sowing new seeds. These varieties are characterized by close stem internodes, so they look like small bushes, which is where their specific name comes from.
Not all late varieties have time to ripen in the beds and give seeds.But they have green, juicy, fragrant leaves that can be used all summer. 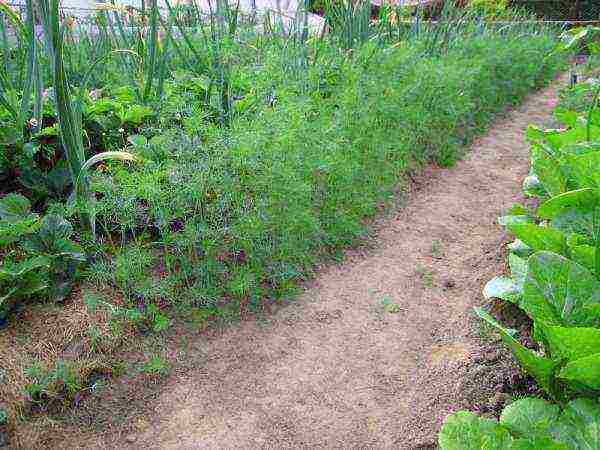
Choosing a place for planting greenery
For planting and caring for dill in the open field, you should choose a sufficiently illuminated place or partial shade in the garden. In the shade, it will not actively grow.
The culture is fully developing on acid-neutral soils. If the soil is acidic, the dill will turn red, on alkaline it will turn yellow.
The soil must be loose and fertile; on poor soils, the crop will not work.
For planting dill, choose a high, not low-lying place. For sowing, it is advisable to prepare the land in the fall. It must be dug up to a depth of 20 cm, organic and mineral fertilizers applied. Liming of acidic soils is carried out. When digging in the spring, add 20 g of urea, potassium salt and superphosphate.
Consider the rules of crop rotation before choosing a place:
- You can not sow the plant where the umbrella grew last year - carrots, parsley, caraway seeds, fennel, parsnips.
- Umbrella are also the worst neighbors for dill.
- Good precursors of greens are cabbage, beets, potatoes, cucumbers, legumes, and tomatoes.
- Dill is a plant that favorably affects the development of some vegetables. When planting, keep in mind that the proximity of the culture will improve the taste of cabbage, and increase the duration of picking cucumbers. Spice adjoins well with potatoes, beets.
The influence of the umbrella plant will adversely affect the development of tomato, carrot, fennel, sweet pepper. 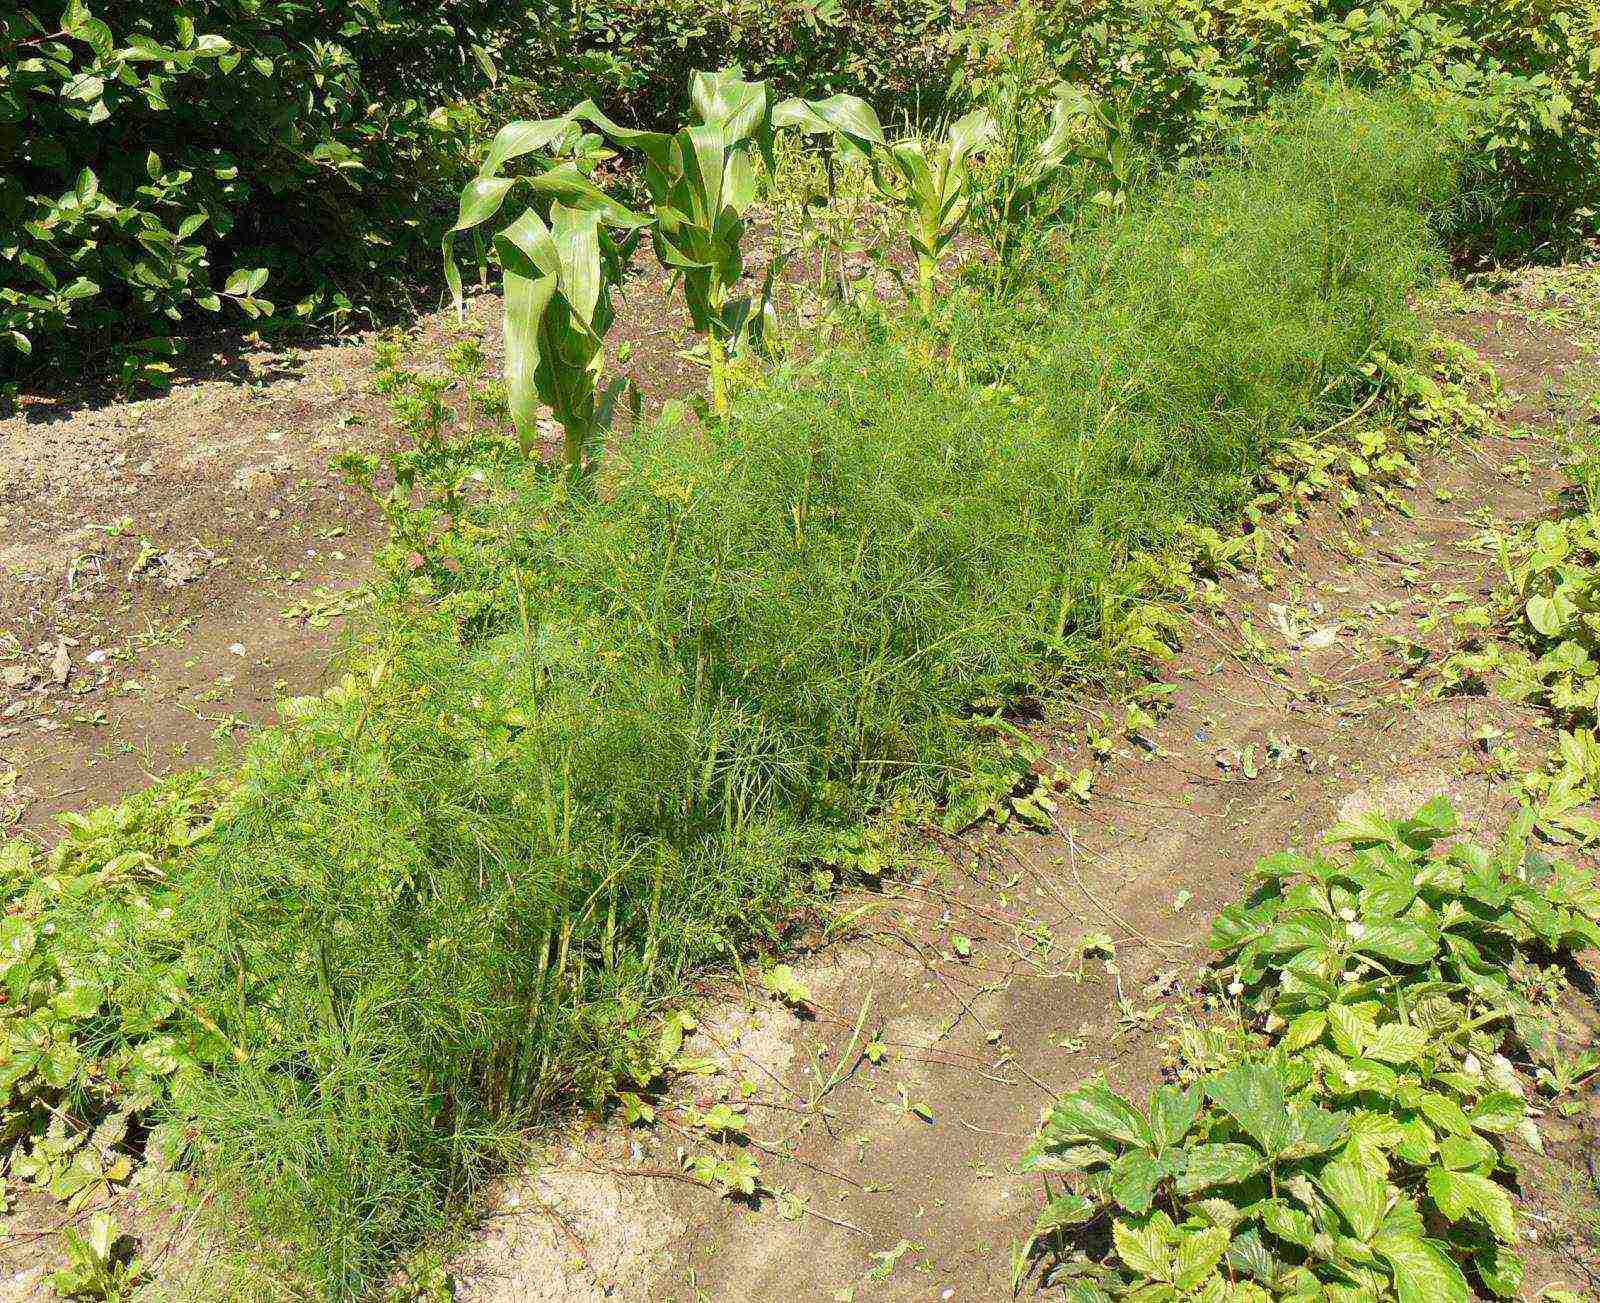
How to choose a time to sow seeds
Lovers of fresh greenery can sow seeds before winter, in winter, in early April.
- When sowing before winter, the material is deepened by 4 cm into the ground.
- In winter, you should clear the bed of snow and scatter seeds over the surface. Pour a mixture of compost and soil on top. The seeds will begin to germinate when the snow melts. When the bed is free of snow cover, cover it with foil.
- A frost-resistant crop is sown in early April to a depth of 0.5 cm.
To obtain greenery during the spring-autumn season, they practice constant sowing of seeds every 10 days.
Preliminary preparation of seeds
Dill seeds saturated with essential oils may not germinate for a long time. To speed up the process, as well as to disinfect the seed, it is necessary to perform a set of measures:
- Go through the material, selecting dry, irregularly shaped specimens.
- Soak the seeds in warm water (about 50 degrees) for 3 days, changing the water regularly.
- Put on a wet cloth, stand until sprouts appear.
- Dry. After drying, the seeds are ready for sowing.
Features of sowing dill
For sowing, you will need to make grooves with a row spacing of 15-20 cm, a depth of 2 cm.
Shed the grooves with water beforehand.
Sow the material with a row spacing of 1-2 cm, water.
Dill seeds germinate at a temperature of 5 degrees. To accelerate germination, cover the crops with foil or agrospan.
Expect sprouts in 1-2 weeks. 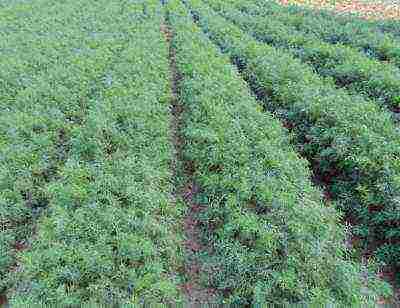
Seedling method of growing greens
They practice planting late bush varieties in a seedling way. When growing seedlings, follow the sequence:
- First, you need to sow seeds in March for seedlings on the beds in the greenhouse or boxes at home.
- Upon reaching 2-3 true leaves, you can make a pick, which the dill tolerates perfectly.
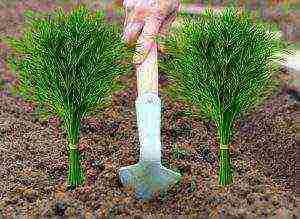
- Seedlings with 3-5 leaves are transferred to an open bed about a month after sowing. Transplanting is carried out in the evening or on a cloudy day to avoid damage to weak seedlings by the sun's rays.
- The distance in the row between the shoots is 10 cm, the row spacing is 20-30 cm.
- After planting, watering is carried out.
- For several days, it is necessary to protect the delicate and weak seedlings from the sun's rays. To do this, cover the seedlings with paper, agrofibre.
The seedling method speeds up the harvest time.After a week, spices can be removed from the bushes that have taken hold.
Umbrella crop care technology
If you want to have greens throughout the spring / fall season, you should continually sow the seeds every 2 weeks. Seedling care consists in watering, weeding, loosening, thinning (at the same time harvesting), fertilizing, and protecting against pests.
- Watering should be abundant (20-30 liters per square meter), since in its absence, the taste of the spice decreases. It is advisable to water in the evening or in cloudy weather. In dry weather, 2 waterings are organized per day.
- The first weeding is carried out after the rooting of the plant. While the seedling is thin and weak, it is required to free it from weeds more often. Further, if necessary, approximately every 2 weeks.
- Loosening is performed after rooting of seedlings, loosened to a depth of 5 cm to remove the crust after watering. If the soil is loose, loosening is not required at other times.
- Thinning of dill is mandatory. If seedlings interfere with each other, they bloom faster, the growth of greenery stops.
- It is advisable to apply fertilizer in advance, before planting. Fertilization during the growing season is not done, only fertilizing will be required in case of insufficient plant development. For example, if you see that the bush turns yellow, it means that there is a lack of nitrogen and it is necessary to add urea - 1 tsp. 10 liters of water, 1% mullein solution.
Phosphorus-potassium fertilizers are also introduced - 10 mg per square meter, also preferably before planting.
Pay attention to the nitrate accumulation property of dill. As a substitute for fertilizers, you can use nettle infusion, fermented for 5 days (used as a means to combat aphids). 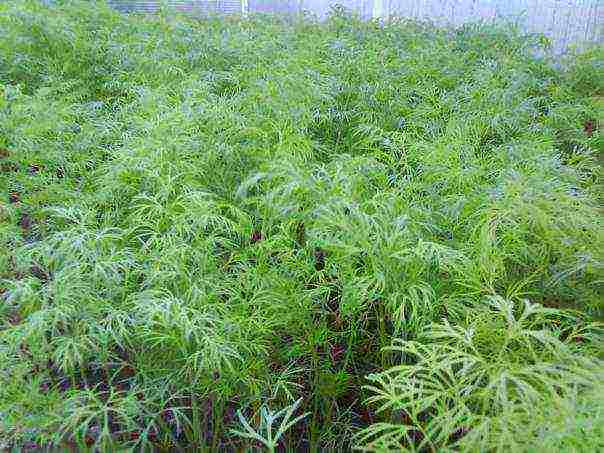
How to harvest correctly
Dill greens, mature preservation plants and seeds are harvested.
The plant is cut only at a young age. As soon as the umbrella appears, the greens are no longer suitable for cutting. The seedling is then left for seed, for making spices, or for use during conservation.
During the harvesting of greens, the following rules are adhered to:
- First, the rows of young seedlings are thinned out.
- During development, until it reaches full maturity, you can remove a few leaves from the dill for food, but leave enough for normal functioning.
- Before flowering, the entire plant is removed from the root.
In bush varieties, in which the umbrella does not appear until 50 days, the period for collecting greens is quite long.
First, the lower tier of the bush breaks off, a rosette is left for regrowth. Then the lateral shoots are plucked out of the sinuses, and then the whole bush is collected.
In some late varieties, the bush may not mature before seed formation. The green part is harvested until late autumn.
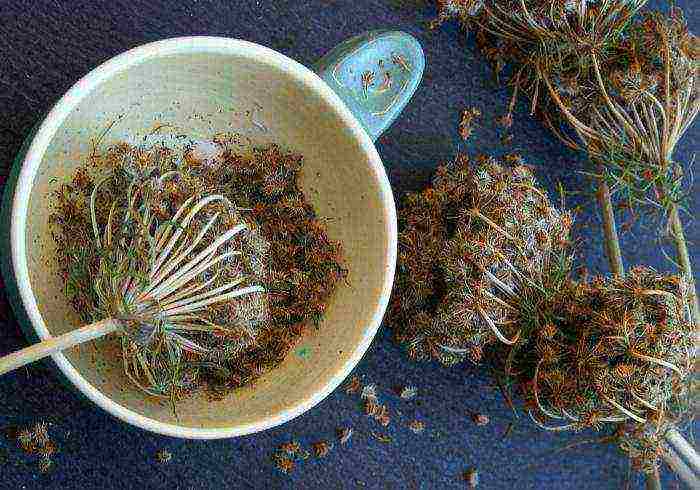
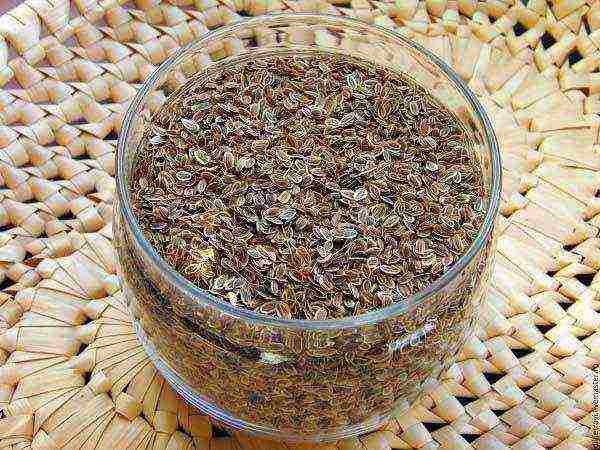
So, the dill is ripe. The seeds in the umbrellas turned brown. It's time to collect them. After collection, they will need to be dried. Dill seeds retain their germination capacity for up to 3-4 years.
Specificity of the protective system of dill
Dill is a fairly resistant crop against diseases and pests. The plant contains a large amount of essential oils, which can be judged by the strong smell of dill.
Please note that the use of insect preparations on dill, which can be cut off for consumption at any moment, is undesirable. Therefore, preventive measures are of particular importance. 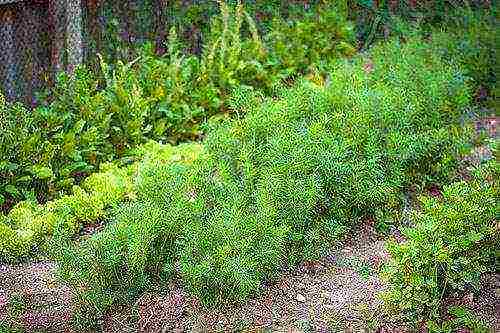
Preventive measures against diseases of umbrella crops
Preventive work against diseases of dill is largely consistent with the general measures for the prevention of diseases of vegetable crops. Follow the main points outlined in the checklist:
- Follow the rules for changing crops.
- Timely carry out the autumn-spring cleaning of the remnants of previous plants.
- Collect seeds from healthy specimens.
- Warm up the seed for disinfection.
- Observe the technology of growing the plant.
- Kill weeds regularly.
The main diseases of dill and the fight against them
Among the main diseases of umbrella plants, a special place is occupied by fusarium, black leg, powdery mildew, peronosporosis, phomosis, cercospora, and rust. Basically, these are fungal diseases that develop with temperature changes, waterlogging, damage to the roots, on poor soils, if the rules of crop rotation are violated.
Fusarium wilting
Leaves are affected, which gradually turn yellow, then darken, wither.
To prevent the disease, the soil is pretreated before sowing with biofungicidal preparations (for example, trichodermine), stimulants, humates, micronutrients are used.
Blackleg
The root collar at the base of young seedlings turns black and rots, which leads to 50% death of seedlings.
Apply a foundation solution. It is advisable to pre-treat the soil with biological products. 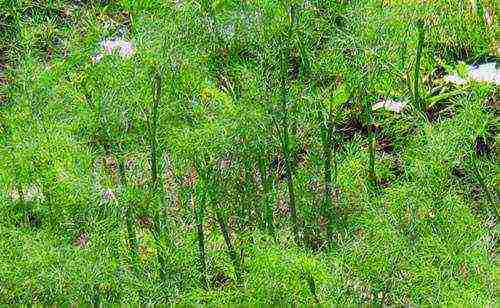
Powdery mildew
It affects the ground parts of dill, which are covered with a whitish bloom. The quality of the spice is significantly reduced. Almost after the development of the disease, the plant cannot be eaten.
The planting should be treated with a 2% solution of colloidal sulfur (20 g per bucket of water).
Peronosporosis (downy mildew)
It affects the ground part of the plant, which externally manifests itself in the form of brown spots.
It is recommended to use 4% copper oxychloride (40 g per bucket of water) or Bordeaux mixture (100 g of copper sulfate and lime per bucket of water).
Rust
Notice the symptoms of the disease on the leaves: yellow-brown pads with fungal spores will be on the underside of the leaf.
It should be treated with 1% Bordeaux mixture or 4% copper oxychloride.
Fomoz
Its sign will be the appearance of brown spots on the ground part and root. It is necessary to treat the plants with a 1% solution of the Bordeaux mixture. Spray several times with a break of 2 weeks, but no later than 2 weeks before harvest. Plants will need to be washed before eating. 
Cercosporosis
You can recognize the disease by the leaves, yellow with gray bloom, yellowish-brown spots. In autumn, black capsules with mushroom larvae are visible on the umbrellas.
Please note that the antiseptic treatment of the plant is suspended at least 20 days before harvest.
As for pests, dill lovers do not exist. Pests can infect the plant at the same time with others nearby. Therefore, you should just carefully monitor the garden as a whole when growing and caring for dill in the open field. Then the harvest will delight you and your loved ones with its juiciness, splendor, bright aroma and full composition of vitamins.
Growing dill is usually straightforward. It can grow like a weed, multiplying by self-sowing, sprouting in beds occupied by other plants.
However, growing lush and aromatic dill is not so easy, especially in the off-season.
Preparation before landing
When growing dill, you should pay attention to pre-planting work.
Site selection in open ground
It is best to grow dill outdoors.
The optimal place will be the beds on which a lot of organic matter was introduced in the previous year.
Light is very important for dill, so choose a sunny spot for planting. Dill is unpretentious, but it will not give thick and odorous greenery in the shade or on poor soil.
Pros of open ground:
- a large amount of vitamins;
- almost unlimited space;
- ease of care and collection of culture.
The disadvantages include:
- dependence on weather conditions;
- relatively short growing period.
Choosing a place in the greenhouse
When choosing a place for dill in a greenhouse, you need to adhere to the same rules as for open ground.
If you plan to sow it in a stationary greenhouse made of polycarbonate or glass, then the choice will be limited to the area and structure of the structure.
Pros of planting dill in a greenhouse:
- the possibility of getting an early harvest;
- longer growing period;
- less dependence on outdoor temperature.
The cons will be:
- lack of the possibility of sprinkling irrigation (in stationary greenhouses);
- limited landing space;
- proximity to taller plants (tomatoes, peppers), hence the shading of dill.
Choosing a place in the apartment
You can grow dill in an apartment all year round, but this will require special conditions, such as additional lighting and temperature control.
Advantages of a place in an apartment:
- the possibility of obtaining a harvest all year round;
- the plant is constantly in sight.
Cons of growing at home:
- higher requirements for crop care;
- crop less saturated with vitamins;
- plantings take up space in the apartment.
The highest quality dill harvest is obtained in the open field, the worst - in the house. Outdoor cultivation requires minimal labor, and the most fragrant and vitamin-rich greens grow on the beds.
If you need an early harvest, then the best option would be temporary transparent shelters, which are installed immediately after the snow melts and removed when warm weather sets in.
Landing dates
Autumn sowing of dill should be carried out as late as possible so that the seeds do not have time to germinate ahead of time. The beds are prepared by the warmth and grooves are cut, and after the first frost, seeds are sown on the soil and covered with frozen ground. In the middle lane, planting in autumn begins no earlier than the end of October.
Planting in the open ground in spring begins as soon as the soil warms up to at least + 10 degrees - in the middle lane this is usually the twentieth of April. You can use a special trick and warm up the soil under a black plastic wrap and thereby ensure that dill can be sown in open ground within a week after the snow melts.
When grown in an apartment, the sowing time depends on whether there is additional lighting. If there is, then dill can be sown at any time. If it is not there, then the sowing time is limited to the period of March-August.
Planting methods
In most cases, the crop is planted by direct seeding into the ground, but sometimes dill is grown in seedlings.
Planting seeds for seedlings allows:
- get more harvest per unit of area in a season;
- to reduce the consumption of seeds, since thinning is excluded;
- accelerate the production of greens by 1-2 weeks.
Cons of the seedling method:
- labor costs increase;
- the quality of the products is worse - the stems are thicker and the leaves are smaller than when sown in the ground.
The seedlings are grown for 30 days and then planted in a greenhouse. By this time, she should already have several true leaves.
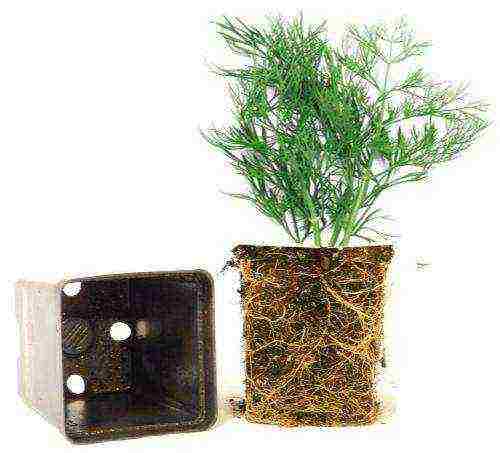
When growing dill through seedlings, priority should be given to the preservation of the earthen coma during transplantation, since the root system of the umbrella is poorly restored. Seedlings are not dived, but 1-2 seeds are sown in small cassettes of 3x3 cm, from where the plants are subsequently carefully taken out together with a lump of earth.
Priming
The greenest and most aromatic crop grows on slightly acidic or neutral, loose soil with a high organic content. But it is impossible to make compost and humus just before sowing. For these reasons, crops that require large doses of organic matter, such as cabbage or cucumbers, are the best precursors for dill.
Mineral fertilizers do not need to be applied. Nitrogen fertilizers should be completely excluded, keeping in mind that dill is prone to excessive accumulation of nitrates.
Dill loves water, so the soil should be moist enough. However, the liquid should not stagnate, so that the roots do not begin to choke, and the plant turns yellow and withers.
Seeds
Whether it is necessary to soak the seeds before planting dill depends on the timing of sowing. Dry seeds are sown in insufficiently warmed soil (below 10 degrees) and before winter.
For late spring and summer crops, as well as for seedling, greenhouse and indoor cultivation, dill seeds should be soaked in water for three days to accelerate germination, changing the water 1-2 times a day.It is not scary if the seeds have time to hatch - in this case, you need to embed them in the ground as soon as possible.
The seeds contain a large amount of essential oils that impede germination. The following seed preparation helps to speed up pecking: they are placed in a gauze knot and tied to a tap in the bathroom, so that the water washes over the knot. Then they turn on warm (about 40 degrees) water for half an hour - this is enough to wash the ethers out of the seeds.
Features of growing dill
Dill is a plant with a fairly short growing season. The greens are cut within 40 days after germination, so the culture can be used as a compactor for other crops and repeated sowing during the season.
The main feature of growing a culture can be considered its cold resistance. Seeds germinate already at +3 degrees. Adult plants can easily withstand a decrease to +8. But they feel most comfortable at + 16-18.
All greens, and dill are no exception, accumulate nitrates very quickly. This must be taken into account when thinking over the planting fertilization system. In general, the culture needs not so much food as moisture and light.
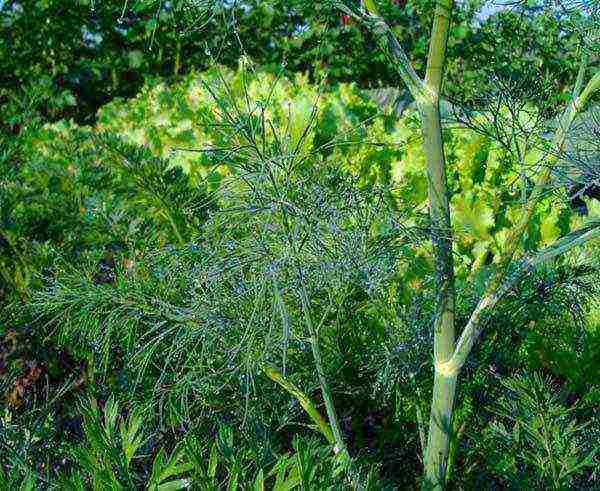
Dill can be grown not only for greens, but also for obtaining umbrellas or seeds. In this case, it is worth knowing that dill is a long-day plant and forms seeds only when the day length is more than 12 hours.
Landing
Seeds are sown in open ground in pre-cut grooves to a depth of 2 cm. The distance between rows is 20 cm, and when sowing on seeds - 45 cm. Rows can be cut both along and across the ridge. In the spring, the seeding rate is 1 g / m2, in the fall, 2 g / m2.
In a winter greenhouse, dill is cut off one leaf at a time, preventing the bush from growing, therefore, a thickened planting scheme is used - 2 g / m2.
Planting at home is carried out in boxes and pots with a depth of at least 15 cm.
Regardless of where the planting takes place in the ground - at home, in a greenhouse or on the street - they always work in the same way:
- A groove is made with a peg 2 cm deep.
- The grooves are spilled with water.
- Manually scatter seeds along the bottom of the grooves, observing the recommended seeding rate.
- The seeds are covered with dry earth.
Watering the dill immediately after sowing is not required. A layer of dry earth will act as mulch, and moisture will remain in the soil for a long time. If you are planting dill before winter, then you do not need to spill the grooves with water!
It is best to sow seeds in batches every 2 weeks to always have fresh herbs on the table.
The germination time of dill after planting in the spring depends on the air temperature and on whether the seed has been pre-soaked. In favorable conditions, when sowing seeds that have hatched, shoots can be seen already on the 7th day, otherwise - after two weeks.
When growing a crop with a solid carpet in an open field or greenhouse, you can simply scatter the seeds over the surface of the ground and cover them with a rake, and then water abundantly or turn on the sprinklers.
Care
Caring for dill after planting consists of standard operations: weeding, watering, loosening. During the growing season, the crop is not fed or sprayed with anything, since the use of pesticides on green plants is prohibited.
Outdoor and greenhouse care
The culture is quite resistant to diseases, but with dense plantings, especially in a greenhouse, it can suffer from fungal and bacterial lesions, expressed in root rot, wilting, chlorosis. At high air humidity, dill shoots are damaged by a black leg.
Dill can damage the following pests in the open field:
- Umbrella blinds, the Italian bug are sucking pests common in the southern regions. Adult insects and larvae suck sap from leaves and stems, resulting in excessive branching and death of plants.
- Omnivorous pests - wireworms, aphids, etc.
It is necessary to fight pests and diseases exclusively by mechanical and agrotechnical methods.The main role in the fight is assigned to the correctly composed alternation of crops when planting.
Care in the apartment
Dill care in the room consists of:
- compliance with the temperature regime;
- supplementary lighting in the "dark" months;
- watering.
Not all varieties of dill can be grown in the room. Early ripe ones quickly emerge and grow, but quickly stretch out and form few leaves. Late bush varieties are best suited for growing at home.
In winter, the temperature should not be higher than 22 ℃. If the room is warmer, a low glass or plexiglass fence is installed at the edge of the window sill. It will protect the plants from the warm air rising from the radiators.
For supplementary lighting, special phyto-lamps are suitable, and in the absence of them - fluorescent lamps. Lighting devices are fixed at a height of 0.5 m from the soil surface and are turned on for several hours in the morning and evening. In cloudy weather, supplementary lighting is turned on for the whole day. To prevent the plants from bending, the containers are rotated around their axis every 3 days.
Water the plants with settled tap water at room temperature. In no case should the soil be constantly wet, it should be allowed to dry out. In winter, it is enough to water twice a week, and in summer - three times.