Content
- 1 The correct timing for planting turnips outdoors
- 2 The best varieties for planting in the Moscow region and the Middle Lane
- 3 Turnip varieties for cultivation in Siberia and the Urals
- 4 Seed preparation
- 5 Preparing the beds for planting in the garden
- 6 The technology of sowing turnip seeds into the ground
- 7 Post-plant care conditions
- 8 The main characteristics of turnips
- 9 Useful properties of turnip
- 10 Turnip varieties for outdoor cultivation
- 11 Time to sow turnips outdoors
- 12 When to plant turnips? Sowing seeds in open ground
- 13 Care advice
- 14 Pest control
- 15 Fight disease
- 16 Harvesting and storing turnips
- 17 Conclusion
- 18 Hello dear readers!
- 19 Turnip, where will you live?
- 20 Planting a fabulous culture
- 21 Caring for a garden lady
- 22 Turnip protection from pests
- 23 Dangerous diseases of the turnip
- 24 Harvesting
- 25 What turnips will we plant
- 26 When to plant turnips so that the root crop is juicy and large
- 27 Seedling preparation
- 28 Landing in the garden
- 29 Care of young plants
- 30 Conclusion
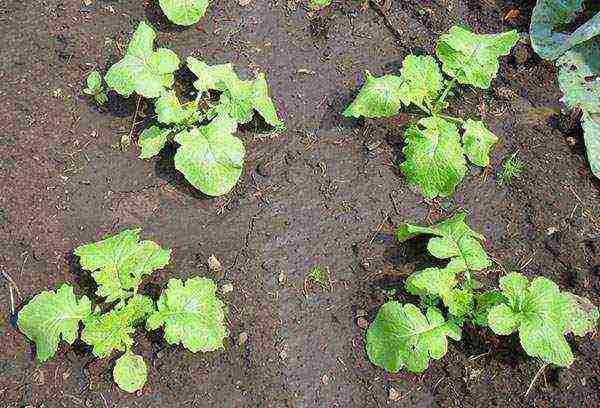
A turnip, which we learn about in childhood from Russian folk tales, must be able to grow. She does not always please the summer resident with her huge size and mouth-watering appearance. A useful root crop for an unlucky summer resident often goes all into the tops or, due to wormholes, has an unsightly appearance. Therefore, the question of when to plant seeds in open ground is quite relevant.
Subject to the conditions of care and agricultural technology, cultivation is available in the garden in many regions of Russia.
The correct timing for planting turnips outdoors
Short growing season 60 - 80 days lets get over the summer two crops... The first sowing is carried out in the Moscow region in mid-spring - April, early May. In the Urals and Siberia, the terms are practically the same, there turnips are planted in early May, in early spring - in the last days of April.
Planted in the spring root crops do not store for a long time, they are used for summer consumption or are used in the preparation of winter preparations. Commercial root crops are harvested in late June and early July.
Seeds hatch at zero temperature. Young shoots can withstand a night temperature drop of up to -6 degrees. For seed germination, the optimum temperature is 15 degrees.
Second sowing - summer, yields a crop suitable for long-term winter storage. In the central lane, the sowing deadline July (first decade), in the northern regions (Siberia, Urals), summer sowing should be carried out mid to late June.
When sown at a later date, the root crop may not form even when using early ripening varieties. You can calculate the period more precisely: subtract the ripening time indicated on the pack from the date of the expected end of the season.
The best varieties for planting in the Moscow region and the Middle Lane
In the Moscow region, any variety planted at the right time will give a good harvest. Thanks to the frequent rains, the turnip grows excellent at the dachas near Moscow. For winter consumption, you can recommend an old, proven variety - "Petrovskaya-1".
Peter's turnip is suitable for long-term storage... Root crops are yellow with white, juicy pulp. The taste is pleasant, slightly sweetish. The shape of the roots is neat, flat-round. The growing season is 70-80 days.
Not a bad variety for the Moscow region Geisha - ideal for summer. The root vegetable is juicy, tasty with white pulp and skin. The leaves are edible and contain beta-carotene. Plus varieties - does not shoot.
Turnip varieties for growing in Siberia and the Urals
An excellent choice for Ural and Siberian summer residents will be the variety Russian size... Root crops will delight you with their large size (2 kg), excellent classic taste and a long storage period. Sow the Russian size variety at the end of June, harvest after 2 - 2.5 months.
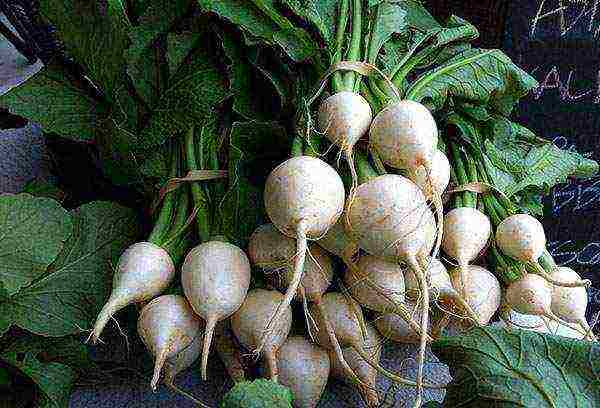
The variety is ideal for summer consumption. Snowball... Root crops are large, white, without bitterness, recommended for dietary nutrition. The yield of the variety is consistently high. The leaves can be used to make salads.
Seed preparation
It is possible to improve the germination of seed material, to rid it of possible infections in various ways:
- Bubbling during the day.
- Use biostimulant solution for soaking.
- Prepare an infusion of ash (a tablespoon per liter), leave for a day, keep the seeds in a ready-made solution for 6 hours.
- Seeds hold for 2 hours in garlic water... Garlic water protects against bacteriosis. You need to take a tablespoon of grated garlic, pour lukewarm water (½ cup).
- Germinate seeds in a damp cloth... Always moisten the napkin, periodically open it for ventilation.
- Pour the seeds into a small jar, close it with a lid and put in a container with hot water (50 degrees) for 30 minutes.
After any treatment, dry the seeds and only then sow.
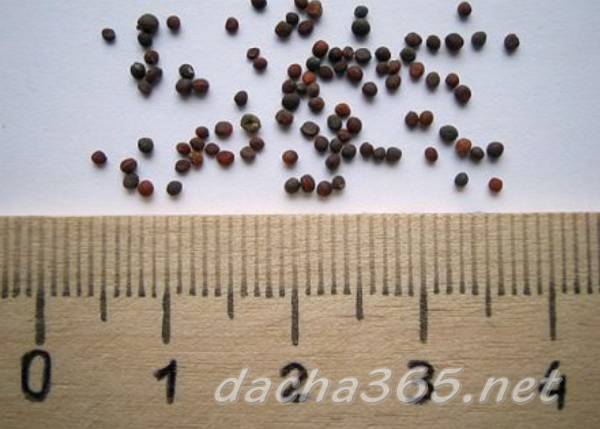
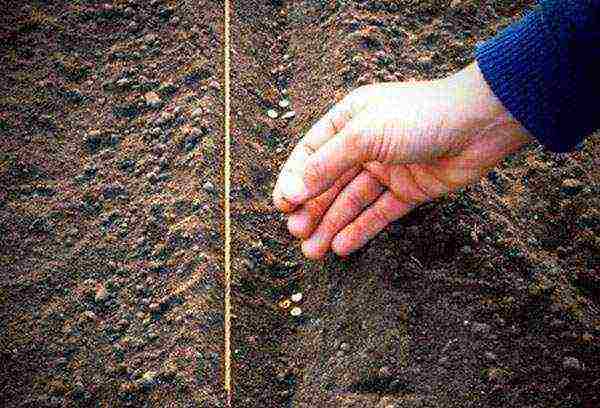
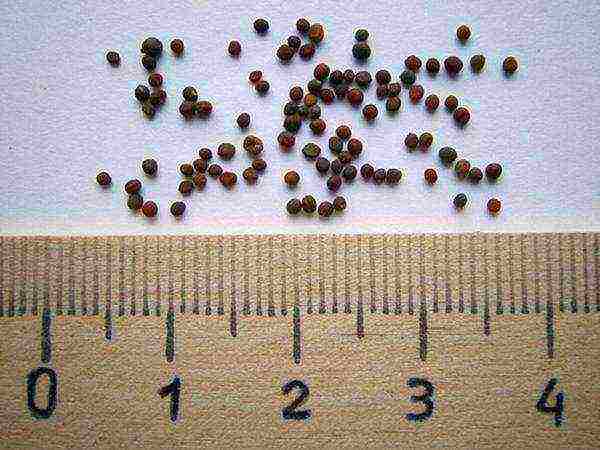 Turnip Seeds - Very Small
The seeds are small and dark in color. Sowing is difficult: it is difficult to normalize the number of seeds per unit area, it is difficult to see where it is sown and where it is not. The seeds can be mixed with river sand or sprinkled with potato starch.
Preparing the beds for planting in the garden
The ridge can be equipped in areas where they grew tomatoes, cucumbers, zucchini, corn, beans... It is impossible to plant after radish and cabbage. You can dig up the ridge in the fall, adding a standard set of fertilizers (superphosphate, potassium nitrate, humus) for digging, or in the spring, adding additional urea.
If there is wood ash, it should definitely be added to the soil during the preparation of the ridge. 1 glass is enough per square meter. Turnip responds well to ash. Digging depth of at least 20 cm.
Fresh manure is not added for turnips. Manure reduces the quality of root crops.
The technology of sowing turnip seeds into the ground
To grow turnips, you do not need to grow seedlings at home in advance.
I row the day before sowing seeds well watered, spending on each square. m for 2 buckets of water. Rows are marked on the ridge, observing an interval of 30 cm between them.
Planting depth on light soils 2 cm, on heavy, clayey soils - 1 cm... Sprinkle the seeds in the grooves with sifted compost or humus. Seed rate per square meter 1 g.
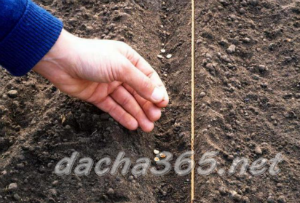
 Turnip seeds are planted in well-shed soil
Post-plant care conditions
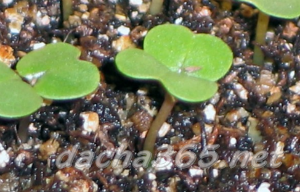
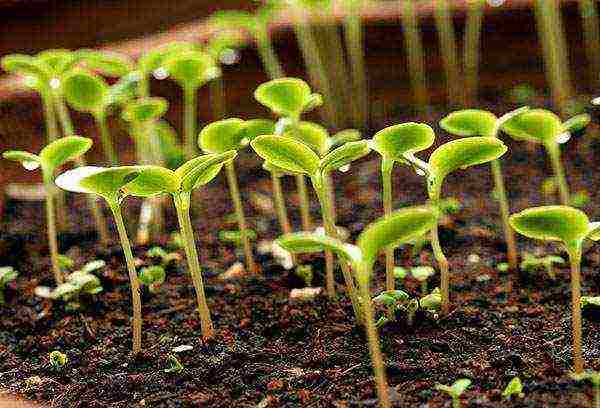
Already on the 7th day, the first green shoots will appear, on the 5th day, if the daytime air temperature is above 15 degrees. The emerging seedlings require watering. You should not expect high-quality root crops if you neglect watering. With a lack of moisture, the roots will be small, not juicy, with tough pulp. Irrigation rate 20 l / m².
Usually turnip sprouts often, after 2 - 3 weeks the shoots are thin out... After the first procedure, a distance of 3 cm is left between the two plants. A little later, planting will have to be pulled again. With spring sowing, 6 cm is left between two shoots, with summer sowing - 10 cm.
On average, up to 50 root crops should be placed on each square meter.
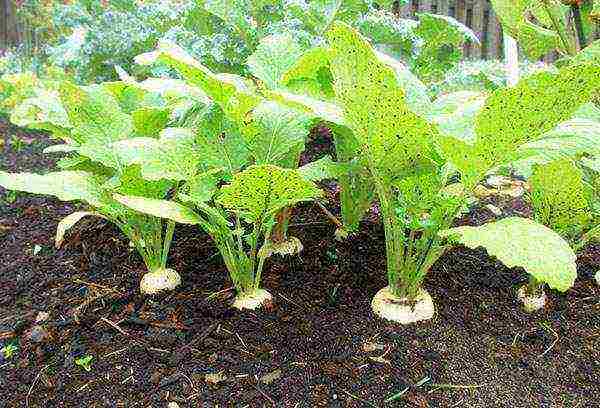
The main pest of young turnip - cruciferous flea... The pest is dangerous in the first month after germination. When pests appear, treat the ridge with Iskra.
 Turnip defeat by cruciferous flea
The second most dangerous pest of young turnip - cabbage fly... She is scared away from young plantings with tobacco dust, makhorka, hot pepper, ash. Dusting the ridge is carried out the next day after watering.
Turnips are especially good in winter. Cabbage soup with sauerkraut and turnips is a primordially Russian dish that will satisfy even a gourmet.It is not difficult to grow useful root crops for the winter, the main thing is to water them on time.
The secrets of growing turnips were known to our ancestors more than four thousand years ago. Even at that time, people knew the technology of growing crops. The vegetable was used as a staple food. However, after the potatoes were brought to Russia, the popularity of the plant slightly decreased.
The main characteristics of turnips
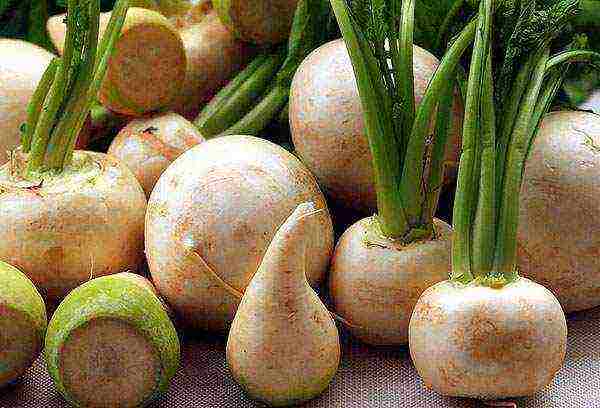
The vegetable is a biennial crop with a round root crop that can be yellow or white in color. The upper part of the fruit, which is visible from under the ground, turns green or brown when exposed to sunlight. The flesh of the vegetable has a yellowish or white color, pleasant to the taste. Yellow-green leaves in the first year reach a length of 50 centimeters.
Turnip stems of the second year are taller and more branched, and also become flowering, produce flowers of a yellow hue. The leaves of the stems are blue-gray, light green, the upper ones are sessile. The pod contains spherical small seeds.
It's important to know! The seeds of the vegetable have a brown tint and quickly lose their germination.
Useful properties of turnip
Few know that the culture contains glucoraphanin. Such a trace element is considered very rare and has unique properties: it prevents the appearance of cancer cells in the human body, and also neutralizes existing ones!
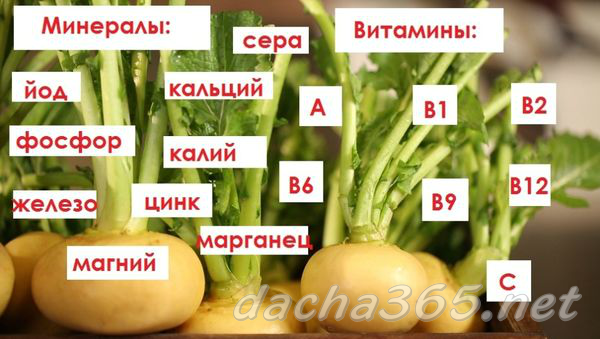
200 grams of turnips contains the daily requirement:
- vitamins A, C, B.
- useful substances such as potassium, calcium, sodium.
The fruits of the culture are low-calorie (there are 6.6 grams of carbohydrates per 100 grams).
The vegetable is considered to be useful for people who have diabetes mellitus, as well as for those who follow a healthy diet.
Turnip varieties for outdoor cultivation
Early ripening dates allow two harvests per year - in summer and autumn. Varieties that are suitable for summer crops:
- "White Night";
- Burnt sugar;
- "Greenhead";
- Milanese White Red Head;
- "Sapphire";
- May Yellow;
- "Russian size";
- "Petrovskaya-1".
Varieties that will allow you to harvest the autumn harvest for long-term storage:
- "Moon";
- "Namangan";
- "Orbit".
Salad varieties "Kakabu":
- "Snow Maiden";
- "Geisha";
- "Snowball".
Time to sow turnips outdoors
The culture is resistant to cold weather and can withstand frosts down to -4 ° C. You can sow a vegetable if the soil temperature is not lower than + 5 ° С, and the air temperature is about + 16 + 18 ° С. Seeds germinate already at + 1 + 3 ° С. Sowing time is determined based on the weather in the region.
Watch the video! How to grow a big turnip
Preparing the soil before planting
When choosing a site for sowing, consider the following:
- You should choose the places where they used to grow: potatoes, cucumbers, onions, tomatoes, carrots.
- You should not choose the place where it grew before: cabbage, parsnip or radish.
To begin with, in the fall, you need to prepare a site for turnips. If the soil is loamy in the country, then it is fertilized with humus or sawdust.
For sandy soil, humus will be enough. It is important to mix correctly all the components of the top dressing:
- Humus is added at the rate of 1 bucket (8 kg) per 1 sq. meter;
- Sand and sawdust - 5kg per 1 sq. meter.
Advice! If there is no humus, then you can use manure at the rate of 5 kg per 1 sq. meter, and also add lime (500 grams per 1 square meter).
It is also recommended to apply mineral fertilizers per 1 sq. meter:
- Urea - 20 grams;
- Potassium chloride - 20 grams;
- Superphosphate - 40 grams.
To prevent infestation of seedlings with a cruciferous flea, in the spring, at the time of loosening, wood ash must be added to the soil. (One square meter should account for 300 grams of ash).
When to plant turnips? Sowing seeds in open ground
Sowing time is determined by the purpose of its cultivation. For a seasonal harvest, sowing can begin in April as soon as the soil surface warms up. If the crop must be stored throughout the winter, then the sowing of seedlings begins in the middle of summer.The exact sowing time should be determined by the conditions of the region.
Autumn sowing
Turnip planting is done at the same time as winter garlic and bulb flowers are planted. The seeds are planted in grooves with a depth of 3 centimeters, then they are sprinkled with a specially prepared substrate of earth, sand and peat.
Important! Be sure not to forget to cover the beds. To do this, you can use coniferous spruce branches, corn stalks. This must be done in order to protect the crop from severe frosts.
In the spring, the covering material must be removed, as green shoots will appear soon.
Spring sowing
 In order to consume turnip roots in the summer, it is necessary to start sowing seeds from April 15 to May 15. Early turnips have their advantages.
The fruits ripen before the pest appears. The main threat to turnips is the cruciferous flea, which destroys the first tender seedlings.
Summer sowing
Before starting summer planting, it is important to process the area where the crop is planned to be grown. Previously, the soil must be loosened, dug up and leveled, observing the sequence:
- Form planting furrows approximately 1 centimeter deep. Leave the distance between the grooves - 25 centimeters.
- It is important to plant seeds in bunches. Each pile should consist of 3 seeds with a planting pitch of 10-15 cm.
- Make mulching crops using humus and ash.
After the seedlings have two pairs of leaves, thinning must be done. One strong sprout should be left in each nest. Re-thinning is carried out when the plants grow 3 centimeters in diameter.
Care advice
Crop care technologies are few. However, in order to harvest a good harvest with tasty and healthy roots, you need to pay attention to the following:
- Turnip is a moisture-loving plant and therefore regular and abundant watering should be carried out 2 times every 5-7 days. At the very beginning of plant growth, 8 liters of water should fall on each meter of the plot. After the fruits are formed, watering should be increased to 12 liters. If the fruits do not receive the proper moisture, the fruits will begin to crack, coarse.
- Root crops need oxygen for full growth, so the soil between the rows must be loosened and weeded.
- It is important to treat the garden with wood or tobacco ash to protect the plants from parasites. Pests destroy seedlings at night, so at night the beds need to be covered with non-woven material.
- The growing season for the culture is short, so experienced gardeners often do not feed the plant.
 At the time of sowing, ash should be added at the rate of 1 glass per sq.m. If the growth of the plant is slow, it is worth feeding the seedlings with urea. One square should account for 15 grams of urea. If the land on the site is depleted, then it is worth applying mineral fertilizers. Two times during the growing period of vegetables will be enough. Mineral fertilizers should contain the necessary trace elements.
Important! If you create favorable conditions for turnips, then the plants will delight you with a large harvest.
Pest control
Of the pests, turnip whites and earthen fleas are especially dangerous.
- White turnip can give several generations of butterflies per season. Caterpillars infect plant leaves and can get to root crops. To effectively fight this parasite, it is necessary to use drugs with a chemical composition.
- The earthen flea is a danger to crops in the early stages of growth. Treating the soil before sowing with a mixture of mustard, ash and tobacco dust will help prevent the emergence of earthen fleas.
 Cabbage is a pest that damages crops such as radish, cabbage, radish. The fight against cabbage should be started by alternating crops of dill, carrots and turnips. Spraying of contaminated crops with Iskra M or Iskra DE is an excellent fight against cabbage.One ampoule of Iskra M must be diluted in 5 liters of water and the crops must be treated. Iskra DE is sold in tablets. To prepare the solution, you need to take one tablet and dissolve in 10 liters of water. It is also recommended to use wood ash products for spraying. The solution will require 300 grams of ash, 10 liters of water and 10 ml of liquid soap.
- Cabbage aphid. Such a parasite is able to suck sap from plant leaves. Aphids appear when the weather is moderately hot and wet. To combat such a pest, you need to use trichlorometaphos-3, and karbofos. It is necessary to dilute the solution in a proportion of 60 grams per 10 liters of water. 10% or 25% rovikurt is considered effective. It is necessary to dilute the solution in a proportion of 10 and 25 grams per 10 liters of water. You need to process the crop twice a season. It is important to stop processing the plants 20 days before harvesting the roots. Predatory insects are able to fight aphids. A ladybug larva can destroy more than 6 hundred aphids in its entire life.
Advice! Beginners need to follow pest control technology. It is worth referring to the video instructions of experienced gardeners for competent processing of plants.
Fight disease
Powdery mildew of cruciferous plants affects petioles, leaves and even stems. How to fight:
- Correct crop rotation;
- Spatial isolation of cruciferous vegetable crops;
- Treatment of plants with special preparations that prevent the development of dew.
Keela is one of the most dangerous turnip diseases. The disease leads to damage to the root system. The formation of growths occurs, in which parasites accumulate. The development of the disease can be stopped by soil deoxidation. To do this, you need to add 120 grams of lime per square meter of soil.
Advice! It is important to take other measures to prevent the development of keela. Observe crop rotation, as well as remove weeds in time.
Harvesting and storing turnips
The timing of the collection of root crops is determined by the characteristics of the region. So for the Moscow region one harvest time, and for Siberia and the Urals another.
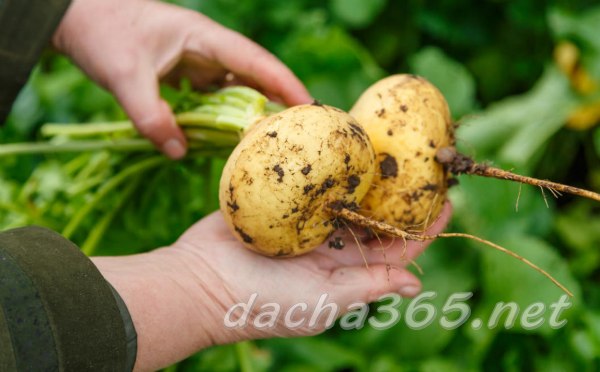
The timing also depends on the type of turnip. It is worth paying attention to the appearance of vegetables before harvesting. The ripe root vegetable reaches a diameter of about 10 centimeters and sticks out slightly from the ground. It is important to remove the fruits of a late-ripening variety before the onset of the first frost. Shortly before harvesting vegetables, turnips should be watered abundantly, this will help the fruits become juicy.
The turnips are pulled out of the ground by the tops, then the tops must be cut off. Root crops must be dried before storage.
It is recommended to store the fruits in wooden boxes with sand. The optimum room temperature is + 3 ° C.
Conclusion
Growing turnips allows you to get a product rich in nutrients. It will not be difficult for experienced summer residents to grow a crop, but beginners need to familiarize themselves with the basic technologies of agricultural cultivation.
Watch the video! How to grow sweet turnips
Hello dear readers!
We have chosen which varieties of turnips we will plant. We decided on which part of our garden it would be more comfortable for her to grow and learned about the best timing for planting turnips.
Now it's time for our Russian fairy-tale beauty to take her place in the garden.
Planting, growing and caring for turnips is not difficult.
The gardener needs to know only a few agrotechnical tricks.
Turnip is an unpretentious vegetable. Even if she did not find a separate corner in the garden, she can be planted with some green culture (dill, salad).
Turnip, where will you live?
The turnip feels great after any vegetable crops (cucumbers, tomatoes, corn, potatoes, pumpkin, legumes or squash).
But this beauty will not become a follower of cruciferous plants (radish, cabbage, daikon, radish).
A turnip planted after such crops runs the risk of getting sick due to oversaturation of common pests and acidity of the soil.
In such areas, turnips should be planted only after 4-5 years.
In order for the planting of turnips and its further development to be successful, take into account the wishes of the Russian garden beauty.
Where not to plant the root vegetable:
- In the soil, too oversaturated with organic matter and rotted fertilizers. Such soil negatively affects the quality of future fruits - tasty root crops can become frail and hollow.
- In poor soils, where there are few nutrients. With a deficiency of a mineral such as boron, turnip fruits will develop with voids and acquire bitterness.
What does a turnip need? Fertile and light soil! Loose, and by no means clay!
To compensate for the lack of nutrients, when digging and preparing the beds for sowing turnips (digging is carried out to a depth in the bayonet of a shovel), the following fertilizers are applied (for each square meter):
- Nitrogen, potassium chloride and urea (20 g each).
- Potassium and superphosphate (40 g each).
If the soil on your site is loamy, during the autumn preparation of the beds for planting turnips in the ground, add a mixture of humus and sand (5-6 kg per square meter).
Humus can replace manure. We add it together with slaked lime (500 g of lime and 5 kg of manure per square meter).
In the presence of sandy soil, we add one humus (8-9 kg per square meter).
If you did not manage to prepare the site for planting turnips in the fall, then in no case in the spring do not bring fresh manure before planting.
Do not forget to season the ground in the spring (when loosening) wood ash (300-350 g per square meter).
Ash will protect young turnip seedlings from the voracious and dangerous cruciferous flea.
Planting a fabulous culture
In order for the turnip, planting and caring for which is not difficult at all, to grow surprisingly large, healthy and tasty for everyone, turnip seeds should be prepared for future life.
What is needed:
- Wrap the seeds in a cotton cloth.
- Immerse them in water heated to + 50⁰C for 5-7 minutes.
- Take them out of the warm bath, dry them slightly and mix with sand.
Hole preparation... Turnip seeds are very small, therefore, before planting turnips, the soil should be thoroughly loosened, completely destroying weeds and their debris.
For sowing seeds, we prepare grooves with a depth of about 4 cm and a row spacing of 25-30 cm.
Experienced gardeners recommend making the width of the ridges about a meter (up to 3 rows of future crops can be placed on such ridges).
Fill the prepared grooves in half with sand, sprinkle them with ash on top and pour them with solutions of EM preparations (in the decoding "effective microorganisms").
These products contain pure yeast, enzyme fungi, lactic acid and photosynthetic bacteria.
Beneficial microorganisms, which are part of EM preparations, increase the nutritional value and fertility of the soil many times over. The most common agent in this series is Baikal-EM1.
Planting seeds... We spread the planting material of turnips in a nesting way, laying 3 pieces each with a distance between the nests of 13-15 cm.
Turnip hates thickening! Excessive crowding leads to damage to the growing roots.
Sprinkle the sown seeds with sand, top with compost (or loose soil, humus or coconut substrate).
We remove the covering material after planting turnips in a couple of days - at this time the first timid shoots will already appear.
Caring for a garden lady
The turnip is a plant with a purely peasant character, it is unpretentious and easy to care for.
These properties distinguish it favorably from most other root crops and vegetables.
To take care of your turnip was a pleasant experience, you should know the following simple recommendations.
Watering. To get strong, juicy and crunchy fruits from our beauty, the turnip should be watered regularly and abundantly (at least a couple of times weekly).
If the root crop does not receive enough moisture, small fruits will grow, unpleasant and rough in taste.
Watering is especially important for lettuce varieties and young plants.
Water consumption (per square meter):
- When the first shoots appear and at the beginning of intensive root growth, 7-8 liters of water.
- As soon as the turnip picks up the volume of the root crop corresponding to its variety, we reduce the water consumption to 3-3.5 liters. After all, excess moisture is also harmful - the fruits can crack.
After each watering, be sure to mulch crops with straw or sawdust - mulch will save and retain moisture.
Loosening. When, after planting a turnip, a root crop begins to form in it, it is especially important to monitor the looseness of the soil.
Hard, caked soil causes the ripening of the deformation of the fruit, a decrease in its size and a deterioration in taste.
Therefore, after each hit of moisture on the soil (watering or rain), after 10-12 hours of planting, turnips should be thoroughly loosened.
Loosening combine with weeding... This will saturate the soil with oxygen more.
But at the first loosening of turnips, be sure to additionally season the soil with dry mustard or wood ash.
This will protect the tender sprouts from the attack of fleas.
Thinning... A turnip needs personal space to grow into a strong and healthy plant.
To do this, we carry out its thinning:
- The first time we thin out the crops of the weekly turnip, leaving the strongest plant in each nest.
- The second time we remove excess plants 25-30 days after the first thinning. At the same time, we maintain a distance between each plant of 12-15 cm. For the culture of early varieties, you can slightly reduce the distance, but no more than 8-10 cm between root crops.
Thinning is stress for any plant, so it is better to carry out this process in the evening, a couple of hours after watering.
So unnecessary seedlings will be removed faster, and the remaining ones will get stronger better, staying overnight in wet soil.
Fertilizer... The best food for a turnip is wood ash.
Experienced gardeners are advised to water the crops with an ash solution (a glass of ash for 9-10 liters of water) 2 times every week.
It is necessary to feed the turnip only with mineral fertilizers!
Nitrogen fertilization can be applied only once - when the culture has the first true leaves.
The best fertilizer for young root crops is considered to be a solution of ammonium nitrate (10 g of substance for 9-10 liters of water).
Just try not to overfeed the turnip with nitrogen, as it can become loose and cannot be stored for a long time.
The turnip needs mineral fertilizers. And it is advisable to apply such dressings to the plant in liquid form.
If you want to feed your turnips with dry almond supplements, do it at the same time as watering or after a good rain.
For fertilizers, it is advisable to use ready-made complexes or prepare top dressing yourself:
- Potassium 1.5-2 g.
- Urea 2-2.5 g.
- Superphosphate 6-6.5 g.
The norm of substances is given per liter of water. Consumption is ½ liter of fertilizer per square meter.
It is enough to feed the turnip twice during the entire growing season. The first time - after the first thinning, the second - 15-20 days after the first feeding.
Turnip protection from pests
Like other crops in the garden, growing turnips requires us to care and protect the plant from the attack of harmful, gluttonous parasites and diseases.
To protect your turnip plantings, it is best to use a folk pharmacy rather than chemicals.
Cruciferous fleas... Tiny parasites up to 10 mm in size.
These small beetles of a multi-colored color (they can be black, green, blue) are very jumpy, which allows pests to quickly colonize large areas.
Pests begin their activity in the spring (when the air warms up to + 15⁰C).
They are less active in the middle of summer (July). They mercilessly destroy the tops of the plant and lead to the death of the turnip.
What to do? The fight against the most dangerous pests for the turnip should be approached in a comprehensive manner.
Agrotechnical measures:
- Thoroughly weed the plantings regularly, especially for weeds of the cruciferous family (yaruk, shepherd's purse, wild radish and mustard, and others).It is these weeds that are the refuge for the first spring pests.
- In the fall, carefully dig up the soil - harmful fleas settle for the winter in the upper parts of the soil.
- Plant phytoncide plants near the planting of turnips (they emit volatile aromas that repel flea beads). Such plants include calendula, nasturtium, coriander, garlic, cumin, tomatoes, marigolds, and potatoes.
- Observe the timing of planting the turnip (in early spring, before the parasite awakens, or in the last days of June until mid-July, during this period the flea beetles have a "lull").
- Watch out for soil moisture! Pests don't like wet ground. Therefore, water your turnip beds regularly and abundantly.
Folk methods:
- Spraying the beds with a herbal soap infusion will help get rid of jumping parasites. Fill with water (10 L) dry yarrow flowers (800 g). Boil the mass, strain and add soap shavings (50-60 g).
- A vinegar solution will also help (for 10-12 liters of water, a tablespoon of 9% vinegar or a couple of tablespoons of vinegar essence).
- Prepare uninvited guests and "bitter pepper". Grind the garlic and tomato stepsons in a tablespoon. Add the mixture to 12 liters of water and pour 200 ml of liquid soap into it.
- Try a potato decoction. Pour the tops of the plant (4 kg) with water (10 l). Boil the mass for a quarter of an hour and cool. It is better to spray the plantings with broths in the evenings.
- Pollinate turnip leaves regularly. Add some mixture to a gauze bag: ash with tobacco dust, ash and fluff (slaked lime) in equal proportions. Shake the bags over the turnip plantings in the early morning so that the healing dust sticks to the dew-soaked leaves.
Cabbage and turnip white... The voracious caterpillars of cute butterflies are dangerous for the turnip.
They feed on the tops, leading to the death of the vegetable. Adults are greenish-blue with small black spots and yellow stripes.
Caterpillars live up to a month, managing to bring great harm to our turnips in such a short time.
To combat gluttonous caterpillars, use the following recipes:
- Ordinary wasps will help to cope with caterpillars. Attract them to turnip plantings by sprinkling the beds with sweet water and sugar or jam. Wasps feed their offspring with harmful caterpillars, significantly reducing their population.
- If you notice the caterpillars, destroy them with ash spraying: pour a couple of glasses of ash substance and a tablespoon of tar shampoo (or liquid soap) into 10-11 liters of water.
- Onion infusion also becomes a saving remedy. Take a liter jar and fill it with onion husks, fill it with boiling water (2 liters) and leave to infuse for a couple of days. Then filter the infusion and bring to a volume of 4 liters with hot water. Add liquid soap (tablespoon) before processing.
- You can use an infusion of tomato leaves. Steam 2.5-3 kg of tomato tops with boiling water (5-5.5 l). Boil the mass for about 3 hours. Then strain the broth and dilute with water (for a part of the tomato infusion, 2 parts of water). Before treating the beds, add liquid soap or tar shampoo to the liquid.
- The easiest and most affordable way to rid the turnip planting of glutton caterpillars is baking soda. Just sprinkle baking soda on the leaves of the plant. Soda will not do any harm to a turnip, but it is destructive for caterpillars.
Dangerous diseases of the turnip
The turnip, like other vegetable crops, is threatened by the following diseases:
White rot... Culture tissues affected by fungi become watery, thinner and covered with a white bloom (mycelium).
Gray rot... This fungal disease is dangerous for the harvested crop. Fungi attack root crops, destroying the turnip crop.
Radish Mosaic... The viral disease affects the development of the turnip.
The plant stops growing, the leaves become fragile and thin, ring-shaped patterns and spots form on them. Young leaves begin to curl.
Powdery mildew... The disease affects the entire plant.The disease begins with a white powdery coating that darkens over time.
The affected areas dry up. The plants themselves begin to lag behind in development and die.
Pernosporosis... The disease affects the leaves of the vegetable.
The ailment begins with the appearance of small white specks that spread throughout the sheet, turn brown and become oily.
Blackleg... The disease affects the lower part of the leaves and the root crop.
The affected areas darken and become thinner. The fruit softens and becomes covered with a whitish mycelium-mycelium.
On the cut of the affected turnip, dark flesh is visible.
What to do when you see symptoms of ailments?
To keep your pet safe from disease, carefully follow these guidelines:
- Observe the rules of crop rotation, agricultural technology.
- Be sure to prepare plant seeds before sowing.
- All diseased crops should be immediately removed from the beds and destroyed.
Soil preparation (complete destruction of all plant residues and the fight against increased soil acidity) is also of great importance when planting turnips.
In acidified areas, the turnip is most susceptible to disease.
Harvesting
Well, here's our turnip and ripe. Root crops should not be left in the beds - the ripe vegetable should be harvested immediately.
A ripe turnip left in the garden becomes bitter, the pulp of the fruit coarsens, and it will be bad to store such a root crop.
We carefully remove the root crop from the ground and immediately cut off the tops of the plant, leaving only 1.5-2 cm of the petiole (do not touch the roots).
Only then can the turnips be dried in the air. If the tops are not cut off, then during drying, some of the most useful substances and vitamins will go into it, and the fruit will lose its usefulness.
If, before harvesting turnips, sudden frosts suddenly descend, it is better not to touch the turnip. After the onset of a thaw, urgently remove it from the ground.
It is better to store the harvested crop in a cool place. We put the turnip in boxes and sprinkle it with sand.
Optimum storage temperature of the plant: 0- + 1⁰ С.
You can also use plastic bags or bags for storage.
Planting turnips, growing and caring for a fabulous garden beauty, with knowledge and observance of all the nuances of sowing and processing, will become an interesting and enjoyable experience.
And in the end, you will receive the richest harvest of delicious, crunchy, juicy and sweet root vegetables.
See you soon, dear readers!
You can also read on this topic:
Tags: turnip
When planning planting in the country, remember that any culture requires a special approach. If you calculate exactly when to plant a turnip, and then take care of it correctly, the root crops will grow big, very large, like in a fairy tale. It will be impossible for the old grandfather to pull them out, he will have to call young helpers or use a garden tool. Although not a single peasant family could live without this vegetable in Russia, they began to cultivate it not in our country, but in Western Asia 4 millennia ago. Until the inhabitants of Russian villages got acquainted with potatoes, turnip was the main product from which the first and second courses were prepared.
What turnips will we plant
Petrovskaya turnip seeds are most often found on sale. Many gardeners are accustomed to this variety, and not everyone knows that many other varieties can be grown and the flavor palette of vegetable dishes can be varied. Some families even eat fodder turnips - turnips - and prepare wonderful dishes from it. Breeders have bred special salad varieties, in which the tops are also used for food.
Depending on the ripening period, there are early turnip varieties that you can taste within 1.5-2 months after planting, medium ones, ripening in 2-3 months, and late ones, which need at least 90 days to gain full volume. In addition, plants differ in taste, the size of the root crops, the possibility of winter storage and many other indicators.
Plant varieties that are more suitable for your needs:
- Petrovskaya is well kept, the root crop is yellow;
- White night - white fruits weighing up to 500 g;
- Snegurochka - a variety with leaves suitable for salad and small white turnips;
- May yellow green-headed - early ripening turnip for summer use, unsuitable for storage;
- Sapphire - grown mainly for the production of leaves for lettuce;
- Geisha is a cold-resistant variety with excellent tasting white roots and lettuce leaves.
Another feature of the turnip is that it is very easily pollinated. If you want to get your own seeds, set up a garden bed away from cabbage crops. If this problem is not difficult to solve, then the rape grows wherever it wants, regardless of your desire. Destroy this weed in time, do not leave it even in a vacant lot next to the beds, so that next year you will not have an incomprehensible hybrid instead of a turnip.
When to plant turnips so that the root crop is juicy and large
If you want to get an early harvest of turnips, sow seeds for seedlings a couple of months before planting in open ground. In the second half of May, the seedlings can be relocated to the garden bed. The second way to accelerate the ripening of root crops is to sow before winter. Under the snow, the seeds will harden, prepare for the development of embryos, and in early spring you will see friendly shoots.
Not all gardeners want to tinker with seedlings, usually turnips are sown directly in the open ground. In the middle lane, this work can be carried out from late April to early June. The main condition is that the soil should already thaw and warm up a little. Frost-resistant seeds can germinate even if the temperature is slightly above 0⁰. Root crops obtained during spring planting are suitable only for consumption in a short time, they are unsuitable for winter storage. To avoid wasting labor and seeds, consider how much fresh turnip you need during the summer months.
To bookmark for long-term storage, turnips must be sown in July. When choosing a date, be guided by the ripening time of the selected variety and the climatic conditions of your area. For peasants in Russia, the best time for harvesting turnips was considered the Exaltation, or September 27. In the middle lane at this time there is an Indian summer, the most successful weather for harvesting root crops. If a bag of seeds has a ripening time of 60 days, add a week and a half to emergence, and you will see that you need to sow in mid-July. It is especially undesirable to delay planting: if the crop gets frozen, the fruits will become soft, tasteless and unsuitable for storage.
Seedling preparation
Many cruciferous diseases, such as turnips, are seed-borne. Before sowing, dissolve 5 g of salt in 100 ml of water, throw the seeds into a glass and stir well. Only grains that have sunk to the bottom are suitable for growing. Throw away the floating instances, there will be no sense from them. For disinfection, heat the seeds in a cloth bag in a thermos with water at a temperature of about 54⁰20 minutes - and immediately cool them in cold water. In this way, you will kill the infection and harden the embryos. Instead of heating, you can use a solution of potassium permanganate: 4 g of powder per glass of water.
After decontamination, rinse the grains and place them in a damp cloth for pecking. If you are going to grow seedlings in boxes, you can sow the seeds thickly.
Advice
Turnip does not tolerate root damage. If you want to grow strong, healthy seedlings, it is better to sow the grains in peat tablets or pots that you bury in the garden bed.
Seedlings need high humidity, and a comfortable temperature for them is from + 5⁰C to + 15⁰C. Cover the crops with a glass cap and take them out to the glazed loggia, where they will get stronger and will be ready for growing in the open field. When shoots appear, cut off weak plants with scissors, leave only strong specimens. Further care consists in watering, feeding and loosening.
At the age of one and a half months, start hardening the plants.Take them outdoors every day, first in the middle of the day, and gradually increase the time you “walk”. In 2 weeks, the turnip should be hardened so much that it can be left outside around the clock. Growing turnips through seedlings is a laborious method, and this culture hates transplanting. She is not afraid of frost, seeds can be sown in a greenhouse in early spring, and you will collect the first crop not much later than when planting seedlings in open ground.
Landing in the garden
Turnip beds are best prepared in the fall. Choose an area where legumes, potatoes, or tomatoes used to grow. After cruciferous crops, horseradish or watercress, it is better not to plant: pests and infections that are dangerous for root crops can remain in the soil. If you want to save space and compact your garden with other crops, plant peas or beans between rows. Turnip loves light loams, sandy loams and peat bogs, the acidic reaction of the soil is not to her liking. If you notice that sorrel or horsetail grows with pleasure in the garden, add lime to the soil. On acidic soils, turnip can grow and give a good harvest, only root crops will be poorly stored.
Advice
Turnip loves ash very much. Before digging, light a large fire in the future garden bed, and then distribute the burnt coals over the entire area.
Fresh turnip manure is contraindicated; during autumn digging, add 3 kg of rotted organic matter to each m2. Add 15 g each of nitrogen, potash and phosphorus fertilizers. Now you can sow seeds before winter or early spring. Loosen the soil first, then compact it slightly. The distance between the grooves should be about 20 cm. If you do not save seeds, sow densely, 1 cm per seed. When shoots appear, you will destroy all weak plants so that only the strongest specimens remain in the garden. If planting turnips takes place in the spring, cover the seeds by 2 cm, in the fall, make the grooves a little deeper. You need to sow after frost, when the soil has already frozen over, turned into dense clods. Sprinkle the seeds with warm peat - and wait for spring when shoots appear.
Advice
If you are sowing turnips before winter, mark the edges of the rows with small pegs so that in the spring you know where the seedlings should appear.
When the plantings rise, remove the weak specimens, do not pay attention to the seedling density for now. To protect against cruciferous flea beetles, treat the bed with ash, and then mulch it with hay or last year's fallen leaves in a layer not thinner than 5 cm. Weeds will not break through such a barrier, the soil will remain loose and retain moisture for a long time. After half a month, carry out a second thinning, in which you need to provide space for the turnip. The distance between plants must be at least 10 cm.
Care of young plants
Turnip is an unpretentious plant, but if you leave it completely without care, the harvest will be meager and tasteless. Plants are especially demanding for watering. If you had to try a bitter tough root crop, it means that the owners, when growing, regretted water for the garden. In dry weather, the beds need to be moistened 2 times a week, at least 5 liters of water should be poured for each m2. Watering should be stopped when the turnip reaches the desired size: after that, excess moisture will lead to cracks.
There are 3 periods when plants are especially in need of watering:
- from sowing seeds to emergence;
- during the formation of true leaves;
- with active growth of root crops.
The turnip does not need special feeding. If you have prepared the bed correctly, there should be enough nutrition for the plants. During growth, you can fertilize it with organic matter a couple of times. Newly appeared seedlings can be watered with herbal infusion. To protect against pests, you can spray the plantings with a decoction of tomato leaves or potato tops. Before processing, dissolve 40 g of soap shavings in 10 liters of broth.
Conclusion
To get an early harvest of turnip, it can be grown through seedlings, but this is a troublesome occupation, the plants do not tolerate transplanting well.It is better to sow seeds in open ground as soon as the ground warms up a little. You will get the harvest of early ripening varieties in 1.5 months after the shoots appear. If you also plant salad species, you can enjoy delicious juicy leaves.
For spring sowing, the entire crop must be consumed after harvest. For winter use, the seeds must be sown in July. Calculate planting dates correctly to harvest the entire crop before frost. Pay attention to the peculiarities of the variety: some varieties are not suitable for long-term storage. They need to be eaten first.
This culture does not like density; after the appearance of entrances, it is necessary to thin out the plantings. The rest of the care is simple. If the soil has been properly prepared in advance, a couple of additional fertilizing will be enough. Particular attention should be paid to watering. Turnip is an unpretentious and grateful plant, pay very little attention to it, and it will repay with a rich tasty harvest.