Content
- 1 Land preparation
- 2 Video "Growing and caring for pepper"
- 3 Top dressing of seedlings
- 4 Top dressing after planting
- 5 Stimulation of fruiting
- 6 Watering features
- 7 Video "Growing pepper in a greenhouse"
- 7.1 Step-by-step technology of seedbed preparation
- 7.2 Agrotechnics of sowing bell pepper seeds for seedlings
- 7.3 Features of caring for pepper seedlings
- 7.4 Top dressing of pepper seedlings
- 7.5 Dates for planting pepper in open ground
- 7.6 Hardening seedlings before planting
- 7.7 Choosing a place and preparing the soil for growing pepper
- 7.8 The procedure for planting pepper seedlings in open ground
- 7.9 Pinching peppers outdoors
- 7.10 Watering pepper in the open field
- 7.11 Top dressing of peppers in the open field
- 7.12 Pepper growing problems and solutions
- 7.13 Protection of pepper against diseases and pests in the open field
- 7.14 The timing of harvesting pepper in the open field
- 7.15 Technology of planting bell peppers in the greenhouse
- 7.16 Greenhouse peppers cultivation and care
- 7.17 How to properly feed peppers in a greenhouse
- 8 Outcome
Perhaps,
bell pepper
belongs to the most common vegetables among domestic gardeners. It is actively planted both in open ground and in greenhouses. Caring for him cannot be called scrupulous, however, some basic principles and agrotechnical features still need to be considered in more detail. By being ready for the process of growing bell peppers at home, you can achieve visible results.
Land preparation
Very often, it is the choice of the optimal land plot for planting bell peppers that becomes a whole problem. Many farmers believe that a vegetable garden is also suitable for this purpose: the land is regularly fertilized, while it is rather loose. However, there is one significant drawback. As a rule, a vegetable garden is an open area, there are constantly blowing winds, and there is no way to protect the plants from it. These conditions are not considered optimal in the case of bell peppers. Therefore, try to plant this vegetable in a place protected from strong drafts. It is also very important that it is well lit.
Before planting bell peppers in the open field, you should carry out some soil preparation procedures. What exactly does the farmer need to do:
- it is necessary to prepare for planting this culture, however, like most vegetables and root crops, in the fall. To do this, the land in the garden or garden plot is plowed and then loosened. The final stage of the autumn soil preparation is its fertilizing with mineral fertilizers. In particular, it is worth paying attention to mixtures containing potassium and phosphorus - these are the substances most necessary for pepper;
- in the spring, before you start planting vegetables, it is worth re-feeding the soil. Ammonium nitrate is added to the soil at the rate of 40 g per square meter;
- the final stage of soil preparation is saturation with a solution of copper sulfate. You must add 1 tbsp. l. of this substance in a bucket of water.
It is recommended that you pay attention to one more nuance before you finally plant a pepper in your garden. Let's say you want to breed several varieties of pepper at once. In this case, it is better to plant the sprouts away from each other. The thing is that this crop can get dusty during the ripening process. There is a risk that the result will not be the result you expected. However, there is a way out of the situation. Divide your home plantation of several varieties of peppers with taller plants (corn, tomatoes, or sunflowers). Thus, you can easily grow several varieties of bell peppers in the garden at once.
Video "Growing and caring for pepper"
From the video you will learn how to properly grow and care for peppers.
Top dressing of seedlings
It is necessary to feed the pepper, but you need to clearly understand what kind of soil you are dealing with. Your choice of fertilizers should also depend on its features. Let's say you decide to plant a pepper in a greenhouse and take in the usual garden land. In this case, be prepared for the fact that it will be necessary to recharge the soil every 10 days. If you approached this issue more thoroughly, using a specially prepared earthen mixture for planting bell pepper seedlings in it, it will be enough in the future to carry out no more than three stages of fertilization.
How do experienced gardeners-gardeners get out of the situation?
Many people prefer exclusively natural feeding. Shallow trenches are dug between the rows with seedlings, into which manure or bird droppings are poured. When can this kind of procedure be carried out? It is advisable to do this after 2-3 leaves bloom on the sprouts. When the seedling of bell pepper grows noticeably, it must be dived, and after that the next stage of fertilizing the soil is carried out. You can use both special complex mixtures and dry ash or compost tea.
Top dressing after planting
You can endlessly determine the optimal place for planting bell peppers. But your efforts to grow a bountiful harvest of peppers shouldn't end there. Particular attention should be paid to regular fertilization of the soil with mineral fertilizers. Moreover, this must be done not once, but during the development of the plant, ripening the fruits. What kind of fertilizers are suitable for bell pepper, and in what proportions should they be added to the soil?
Among the variety of modern fertilizers, urea and phosphates are most distinguished for this agricultural crop. But that's not all.
Today, many summer residents use potash and phosphorus fertilizers for feeding, as well as folk remedies (cow dung or bird droppings). It is best to feed the pepper with natural mixtures.
For example, cow dung is recommended to be diluted with water in a ratio of 1:10. As for poultry droppings, the proportions here are 1:12. These types of dressings are considered the most versatile for bell peppers.
If you prefer to feed a vegetable plant as a preventive measure for diseases and in order to strengthen the vegetative part of agriculture, you can safely use universal fertilizers. However, if for some reason you did not feed the soil in advance, or did it, but noticed certain deterioration in the appearance of the bell pepper seedlings, you must act immediately. First, identify the problem and then quickly fix it. For example, if your plant is not sufficiently saturated with nitrogen, over time, the vegetative mass begins to turn yellow. In the case when burns appear on the edges of the leaves of seedlings, the cause is in most cases a deficiency of potassium in the soil. It happens that the bell pepper bushes acquire a purple hue: this means that it is necessary to apply phosphorus fertilizers to the substrate.
Stimulation of fruiting
In order to prevent the occurrence of such problems, it is worth supporting the seedlings at all stages of their development. For this, there are universal natural fertilizers, among which nettle tea stands out. How to cook it? It is necessary to grind the stems of this plant, and then fill them with some kind of barrel or container (about 2/3). The greens are filled with water. It is advisable to leave the resulting mixture in a dark place for effective fermentation. At the end of the process, and it will take about a week, the solution is used to fertilize the soil, before diluting it with water in a ratio of 1:10. If you wish, you can feed the soil to obtain a more generous yield of bell pepper using a high concentration of nettle solution. To do this, you need to add dandelion, woodlice, plantain and other herbal plants to it.
Stimulating fruiting is a good thing, however, it is undesirable to overdo it with it. With excessively large amounts of fertilizer and too frequent feeding, the branchy part of the bell pepper can become stiff. In addition, sometimes you can get the opposite result: when the soil is oversaturated with fertilizers, the fruits grow almost empty inside, falling off long before the end of the ripening period.
Watering features
Outdoor varieties of bell peppers do not require too much maintenance. However, with regard to moisturizing, oversights in this matter are unacceptable, as they can cost you dearly. Interestingly, it is recommended to water the pepper seedlings regularly, it is impossible for the soil to dry out. But it is also not worth breeding excessive dampness.
What rules should be followed about watering pepper:
- after planting seedlings in open ground, it is undesirable to water it immediately. It is necessary to give her a few days to adapt and only after that carry out the first phase of watering. Next, try to observe the established intervals until the seedlings begin to actively sprout;
- as soon as the sprouts are green, it is recommended to water them daily;
- be sure to use warm and pre-settled water for irrigation - non-observance of such recommendations is fraught with the occurrence of diseases in the plant;
- it is important that water does not fall directly on the leaves of the pepper;
- drainage must be present at the bottom of the seedling container. Thus, excess moisture will evaporate in a timely manner.
If you follow the key recommendations, the bell pepper harvest will certainly delight you. In addition, caring for him does not require huge investments and efforts.
Video "Growing pepper in a greenhouse"
From the video you will learn how to effectively grow peppers in a greenhouse.
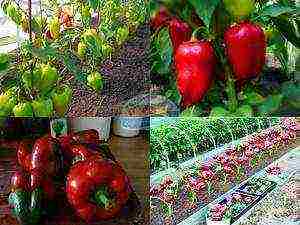 Pepper is one type of vegetable that no holiday is complete without. Bell pepper is always present on the table in the form of slicing or a hot dish, and bell pepper is present on the winter table as a preparation for the winter. But few people know how grow peppers outdoors at their summer cottage. Such a vegetable is very picky and requires good care, but every novice gardener dreams of trying to grow it on his site.
Seedlings of bell peppers and sweet peppers
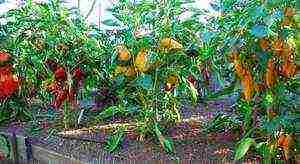 Growing such a vegetable has its pros and cons, with an error with watering, sudden changes in temperature or with an incorrect transplant, the yield decreases to almost zero.
Damaged plants will no longer give what you want harvest in a short summer, since there will be no pollination without a tie, and without this the plant will receive less nutrition and thus will not give the long-awaited harvest in the fall.
But in order for it to grow and please with its harvest, you need to plant very early and ensure seedlings and development without stress and temperature changes. This is the most important rule when growing sweet peppers outdoors.
The most important points in the sowing of bell peppers are:
- Seed preparation for sowing;
- preparation of soil for sowing peppers;
- sowing seeds;
- picking peppers.
It is better to consider each procedure separately, so as not to miss and avoid mistakes.
Preparing seeds for seedlings for growing peppers in the open field
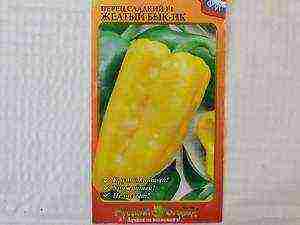 Purchased seeds need to examine the seeds and remove any frail and damaged seeds. Good seeds must be treated with a fungal infection.
To do this, put the seeds in cheesecloth, as in a bag and place them in a thick solution of potassium permanganate for 20 minutes. After this procedure, rinse with warm, running water.
There is another good way for good shoots of bell peppers - this is Eline's solution. It is necessary to put a bag of gauze in a solution of 1 drop of Elina, diluted with 1 liter of water and leave for one day.
After all these procedures, put the seeds on a damp cloth and close with wet gauze... In this form, the seeds should be put in a warm place for one week, but if the seeds are not swollen, then you can wait another week.
The main thing is not to leave the seeds dry, they must be moistened, otherwise the seeds will dry out and disappear.
Preparation of soil for planting
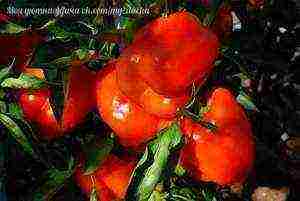 For sowing, you can buy ready-made soil in a specialized store. and only add one fifth of the washed sand.
You can no longer add anything to the finished soil, because it already contains:
Horse ground;
- deoxidizing additives;
- mineral fertilizer;
- Gezminic substances;
- sand;
- agropermit.
> To understand what the soil needs them for, it is better to know all the additives in detail.
The riding soil is practically free of microbes and absorbs moisture well; all plants cannot do without this additive.
Deoxidizing additives are needed to remove high acidity from the topsoil.
Mineral fertilizer provides mineral nutrition and promotes plant growth.
Gezminic substances are needed for stimulation and root formation, as well as plant resistance.
Sand reduces soil shrinkage during long-term plant growth. Usually, large quantities of sand are needed for home flowers in pots.
Agropermit saturates the roots with oxygen and promotes good growth and nourishes the substances necessary for growth.
Experienced gardeners do not buy soil, but do it themselves at home. This requires only two parts of humus, one part of sand and two parts of peat. Mix everything well and heat in the oven for about one hour. In this way, the soil will be ready for planting seeds.
Sowing seeds
 Seed ripening occurs 10 or 14 days after germination, and it is better to plant seedlings when it is 60 days. Therefore, sowing is best done in mid-February when the day is still short.
Before you start landing, you need to rinse the plate well in a potassium permanganate solution, and then fill it with the prepared soil mixture. Slightly compact the soil so that the bowl is two centimeters higher than the soil.
Make a depression and gently spread the seeds at a distance of 1.5 cm. Then cover the seeds with the prepared soil and compact.
Drizzle with warm water, just gently so as not to wash out the seeds. To prevent moisture from evaporating, you need to close a special lid, and if there is no such lid, you can use a regular plastic bag.
The seeds should be placed in a warm place, where the air temperature is about 17 degrees. It is imperative to water it with warm water and not let the soil dry out, but you cannot fill it either.
It is imperative to look after the pepper seedlings so that they do not bend over. To avoid this, you need to turn in turn to the sun. And you can also over the seedlings
How to cook properly
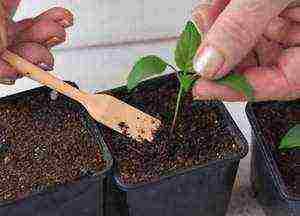 To reduce the risk of root rot damage to plants, peppers are transplanted when the plant has two leaves.
But it is better to transplant after 4 weeks, then when the seedlings are stronger and more resistant to stressful conditions and the stalks of the pepper seedlings are already stronger.
Before transplanting seedlings, you need to shed well and wait for the excess water to drain.
It grows and develops more slowly than tomatoes and therefore it is better to transplant it into separate small pots.
Pour the prepared soil into half of the pot, make a hole and place the pepper seedlings, send with earth and slightly compact. Spill carefully with warm water, holding the stalks and if the soil has settled, then you need to fill it up with prepared soil, but not too much. The peppers should be half in the pot and not completely covered.
Place such seedlings in a warm and well-lit room.
How to feed seedlings
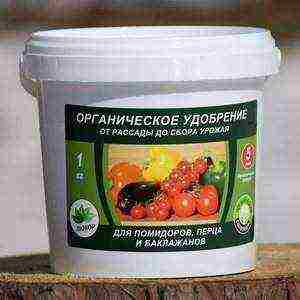 Care for the seedlings should already be started after the peppers are transplanted into the open ground in the summer cottage.
The first groundbait is made in two weeks after diving and two weeks after the first bait. While the plant is young, it is better and very convenient to apply fertilizing in liquid form.You can buy it in a flower shop and it is best to choose:
- Agricola;
- Strong man;
- Fertika;
- Suite;
- Solution.
How to properly dilute the pepper feed will be written in the instructions for use.
Two weeks before planting bell peppers in ordinary soil at a summer cottage, you need to harden the seedlings in the open air.
But you need to take into account one necessary part of the open air: direct sunlight should not fall on the peppers, but there should be no cold and strong wind either.
The best option for hardening is a closed balcony with a non-solar side.
Grow seedlings in peat tablets
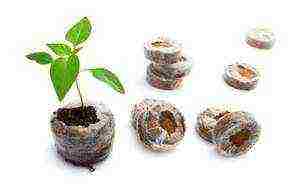 There is another great way to seed peppers with peat tablets. Peat tablets give excellent results, and a plant that is under stress during a dive can no longer be afraid, so like this procedure with a peat tablet do not need to be performed.
A peat tablet contains all the necessary additives for the development of pepper and with the help of such a wonderful tablet, grow good seedlings even for novice gardeners.
Seedlings still need to be grown in separate pots, so peat tablets can be taken with a diameter of three centimeters.
Place the required amount of peat tablets on the pallet and fill them with warm water. When swelling, the tablets increase and take the form of a cup.
As soon as the peat tablet swells to the desired size and stops absorbing water, you need to drain the excess water and make a small hole in the cups
Pepper seeds should be prepared in the same way as when sowing in the soil. This must also be done in advance. The seeds must be carefully placed in the holes and sprinkled with prepared soil. Close the tray with a lid or put on a plastic bag.
Pepper planting and care in the open field
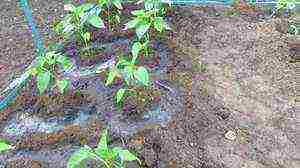 Peppers do not like cold and heavy soil, and if there is clay soil on the site, then it is better to grow bell peppers in the open field to fertilize with peat and humus.
The earth must be well dug up on the bayonet of the shovel and well level with a rakeso that there are no large lumps. After that, make not very deep holes for planting, but very frequent holes also do not need to be done.
Before planting, you need to put a little mineral fertilizer in each hole, which will contain nitrogen, phosphorus and potassium. This composition must be mixed well until smooth.
Carefully remove the seedling from the pot, being careful not to damage the root system of the pepper. Place the seedlings in the hole and cover the hole halfway with earth. You need to fall asleep so that the entire root system of the seedling is closed.
Sprinkle abundantly with warm water and the water will be absorbed for a year, cover the entire hole with dry earth.
If the plant is tall and requires a garter, then it is worth tying the peppers to a special support. If the nights are still cold, then you need to cover sweet peppers in polyethylene meadows, but you cannot cover with woven covering material.
Outdoor Pepper Care
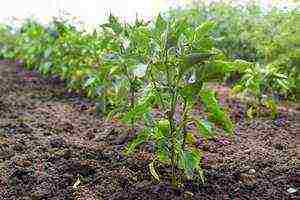 For outdoor cultivation to be carried out with proper care, there are four rules:
- Top dressing.
- Watering.
- Prophet.
- Garters.
Top dressing. During growth and cultivation, it is imperative to feed it three times. The first feeding after 10 days after planting in normal soil can be fed with ordinary manure.
The second feeding is done before flowering. They are fed with a tree hall or supperfasphat. To do this, dilute potassium humate with 10 letters of water. Pour the peppers with this solution.
The third feeding should take place two weeks after flowering. Feed with a tree hall. You can also feed the bell peppers with nettle solution. To do this, cut the nettle into small pieces and cover with warm water. Infuse such a solution for several days, and then pour over the peppers.
Watering. Sweet peppers are very fond of moisture, but too much pepper is very harmful. Therefore, you need to water the sweet peppers as the soil dries.
Prophet. Light and fluffy soil allows plants to grow well.It is imperative to ensure that the peppers are not overgrown with grass, and the soil must be loosened near the peppers.
>
Bell pepper also called sweet, it is rich in nutrients and vitamins, in various colors, juicy and tasty.
Process growing sweet peppers has its own characteristics, as pepper is a heat-loving vegetable. To get a good harvest of peppers, you need to have knowledge and certain skills.
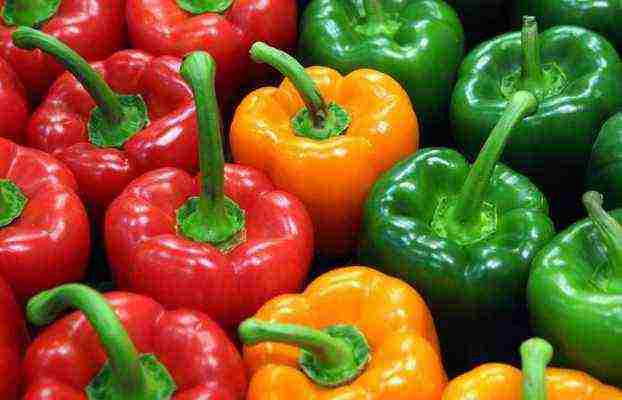
Consider growing bell pepper from seeds, from seedlings, especially care when growing in open ground, pest and disease control, when harvesting.
Content:
Growing bell pepper seedlings
Choosing a place for planting bell peppers
- Video - Peppers, the secret of a rich harvest
Outdoor Pepper Care
Top dressing of peppers in the open field
- Video - HOW CORRECTLY TO FORM A PEPPER !!! CARE AND FEEDING !!!
Pepper pruning
Pests and diseases of bell pepper
Harvesting bell pepper
- Video - 10 ERRORS when growing sweet peppers
Pepper is a plant of short daylight hours, and if the daylight hours are less than 12 hours, the pepper begins to bear fruit earlier.
Planting pepper seeds in open ground is impractical even in the southern regions, because it is necessary to wait until the soil warms up, the pepper will begin to bear fruit later and not for long. Therefore, mainly sweet peppers are grown in seedlings.
Growing bell pepper seedlings
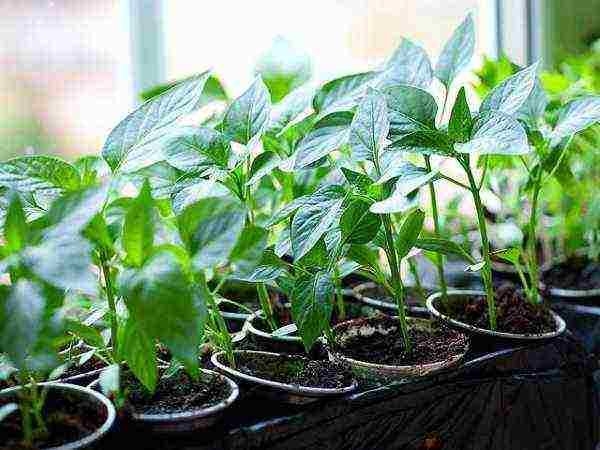
When growing seedlings at home, pepper seeds are sown in February, so that the plants are 90-100 days before transplanting into the ground. Peppers do not tolerate diving well, so try to immediately sow seeds in separate peat pots with a diameter of 8-10 cm.
There is no need to use large pots due to the slow development of the root system of the peppers.
Seedling soil
A light and loose substrate consisting of humus mixed with 1 part earth and 1 part sand is suitable. Add 1 tbsp for 1 kg of substrate. l. wood ash.
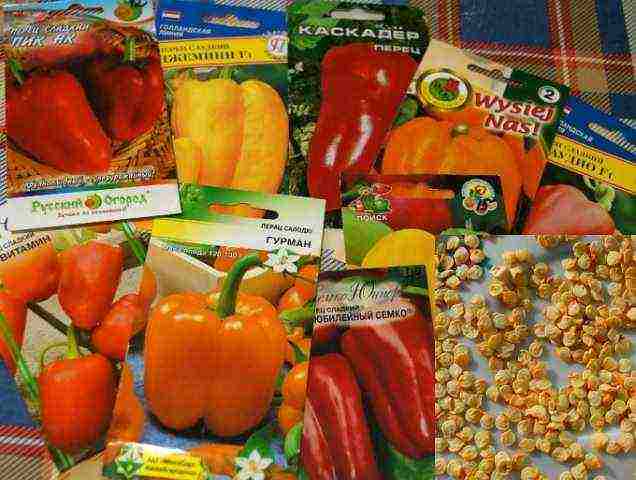
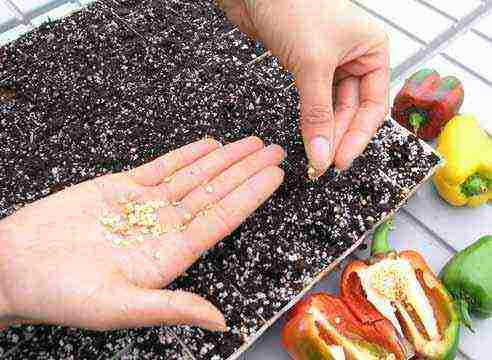
Before sowing, carry out the processing of pepper seeds - soak the seeds in hot water + 50 degrees for 5 hours. Then place the seeds in a damp cloth for germination for 2-3 days, the room temperature should be + 20 degrees. After such pre-sowing preparation, seedlings appear the very next day after sowing.
Seeds sown in cups, pour and cover with plastic wrap or glass. Until the emergence of shoots, keep the pots in a warm place with a temperature of + 22 degrees. After the emergence of seedlings, remove the film and transfer the seedlings to a room with a temperature of 26-28 degrees during the day and 10-15 degrees at night.
When caring for seedlings of peppers, do not allow the soil to dry out, but we do not recommend excessive watering.
Watering with warm water +30 degrees, cold water will grow frail seedlings, the plants can get sick. The indoor air should not be too dry, protect the plants from drafts and spray the plants.
In winter in February, the seedlings require additional lighting so that the daylight hours are from 7 am to 9 pm.
First feeding carried out in the phase of appearance of 2 true leaves with the following solution: dilute 5 g of ammonium nitrate, 10 g of potassium fertilizers, 30 g of superphosphate in 10 liters of water.
Second feeding carried out 14 days after the first mineral fertilizers in 2 times greater proportion than the first.
Third feeding carried out 2 days before planting seedlings in the ground. The dose of potassium fertilizers in the solution is increased to 70 g per 10 liters of water.
A few weeks before planting pepper seedlings, the plants are hardened, taking them out into the fresh air for several hours. Make sure that the air temperature is not lower than +13 degrees, the seedlings may die.
Choosing a place for planting bell peppers
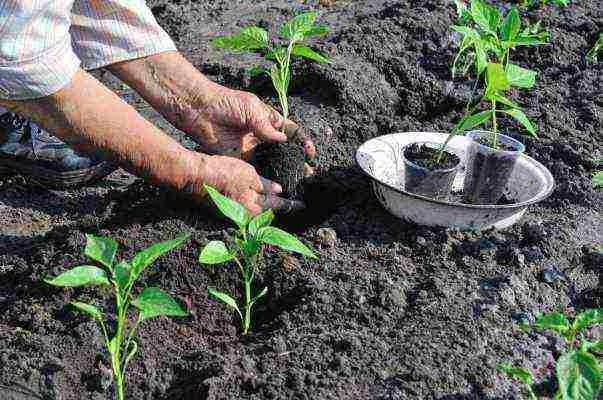
Pick up a plot in the garden where cucumbers, onions, pumpkins, carrots, cabbage, zucchini, and various siderates grew before.Pepper does not grow well and bear fruit if planted on a site where potatoes, eggplants, tomatoes, peppers had previously grown.
Pepper grows best on light soils. Prepare the site for planting in advance, in the fall add 50 g of phosphorus and potash fertilizers per m2, dig deep. In the spring, add 40 g of ammonium nitrate per m2 of the plot to the topsoil.
Before planting seedlings in open ground, decontaminate the soil with such a solution: dilute 1 tbsp of copper sulfate in 10 liters of water.
At the end of May, pepper seedlings are planted in open ground with a distance of 40x40 cm between plants. Seedlings are planted in a film greenhouse at the end of April.
Seedlings should be planted at the same depth as the plants grew in cups or boxes. Do not expose the roots, but also try not to drop in the root collar.
Peppers do not like cold soil, arrange for peppers in tall beds, raised 25 cm to get a good harvest of peppers.
Attention: peppers are susceptible to over-pollination, so plant different varieties of peppers as far away from each other as possible or separate them using tall plantings of tomatoes, corn, sunflowers.
Video - Peppers, the secret of a rich harvest
Outdoor Pepper Care
It is necessary to carry out watering, fertilizing, garters and weeding of pepper plantings in a timely manner.
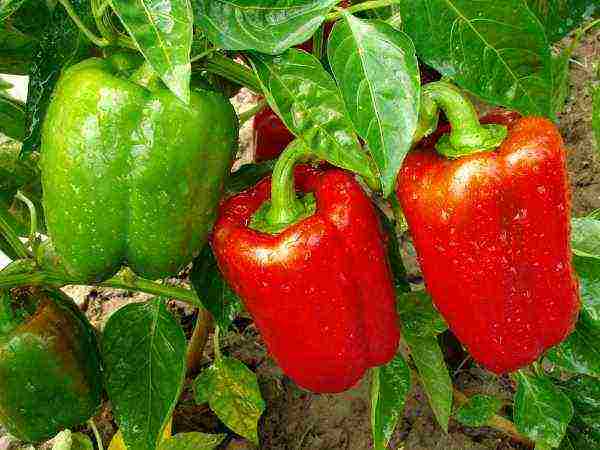
Top dressing of peppers in the open field
During the season, it is necessary to carry out 3-4 feeding with chicken manure diluted with water 1 x 10. Alternate such feeding by foliar, using spraying with nitrophos (1 tbsp. L. Per 10 l. Water).
Lack of potassium will lead to curling of the leaves, the appearance of a drying border. But pepper does not tolerate an abundance of potassium chloride.
At lack of nitrogen pepper leaves become smaller, acquire a matte grayish tint. If there is an excess of nitrogen, flowers and ovaries are shed.
Lack of phosphorus - the leaves on the lower side become deep purple, nestle against the plant stem and rise up.
At lack of magnesium leaves become marbled in color.
Video - HOW CORRECTLY TO FORM A PEPPER !!! CARE AND FEEDING !!!
Pepper care
Carry out pinching in hot and humid weather, removing side shoots, especially the lower ones. Conversely, when the hot and dry weather is not the peppers, the leaves during this period protect the plants from evaporation of soil moisture.
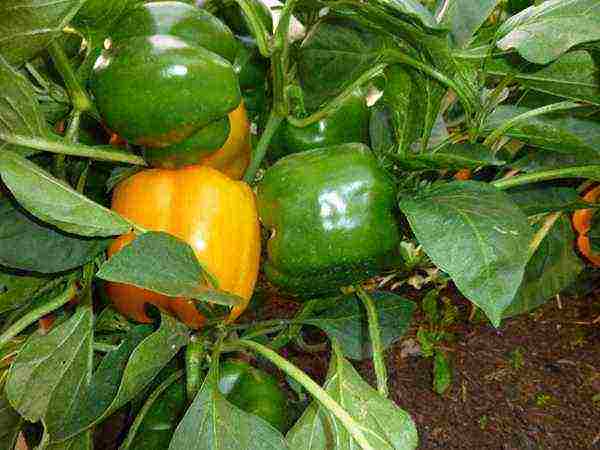
Pepper pruning
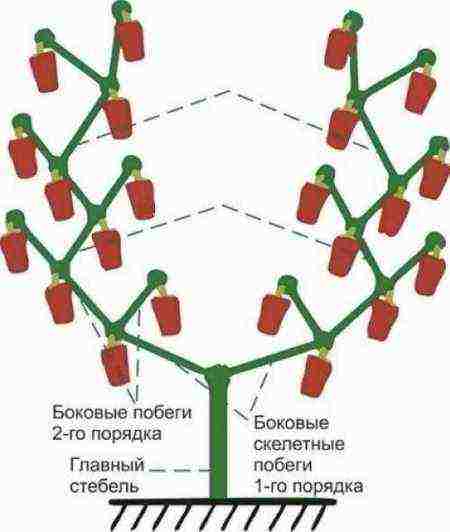
During the growing season, the longest shoots are pruned, especially all the shoots below the fork of the main stem, as well as all the branches that go inside the plant, are removed. Prune every 10 days and after harvesting.
To attract pollinating insects, spray the planting of pepper with a sugar or honey solution: 100 g of sugar, add 2 g of boric acid, dilute everything in a liter of hot water.
Mulching the pepper with rotted straw (10 cm layer) will reduce the frequency of watering to 1 time in 10 days.
Timely carry out the garter of plants, it is better to do this after hilling.
Pepper pests and diseases
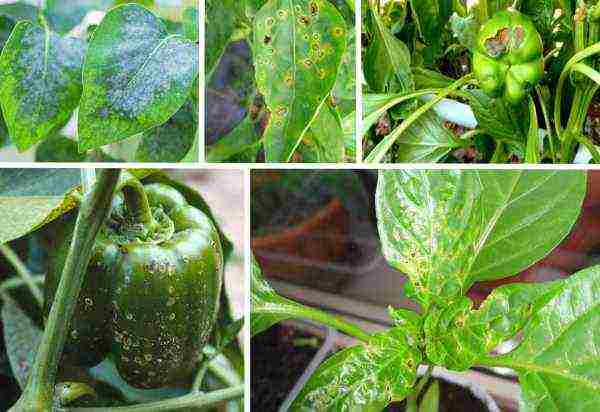
Pests such as slugs, scoops, aphids, whitefly, bear and Colorado potato beetle can harm plants. It is necessary to pollinate the pepper with wood ash 3 times per season.
Common Bell Pepper Diseases - late blight, Septoriasis, macrosporiosis, apical rot, white rot, black leg.
In the fight against the bear, before planting in the ground, fill the planting holes with onion water (insist 500 g of onion husks in 10 liters of water for 3 days).
If aphids are damaged, treat the plants with a solution: dilute 1.5 liters of milk whey in 10 liters of water. After processing, shake with ash.
Harvesting bell pepper
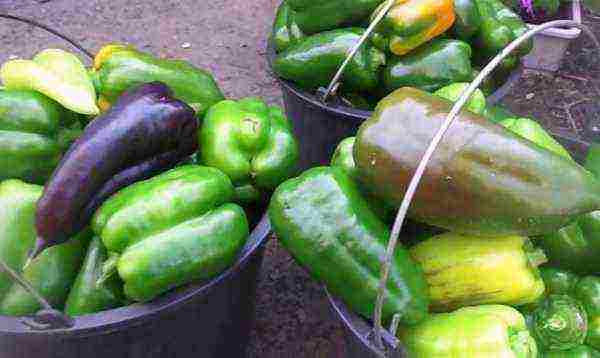
When the peppers are maturing in size and color, start harvesting by cutting off the stalked vegetables. Ripening of pepper begins from the beginning of August and lasts until the first frost.
Video - 10 ERRORS when growing sweet peppers
Big harvests of sweet pepper!
Bulgarian pepper cultivation and care
Growing pepper requires care and attention.But if you prepare strong and healthy seedlings, properly care for them, then the result will be an ideal harvest of large and juicy vegetables.
Seed preparation
According to the lunar calendar, it is recommended to sow peppers for seedlings on the days of the growing moon. To grow pepper seedlings, the seeds are sown back in February, because by the time of transplantation in the greenhouse - in early May, or in open ground, the seedlings should reach three months of age.
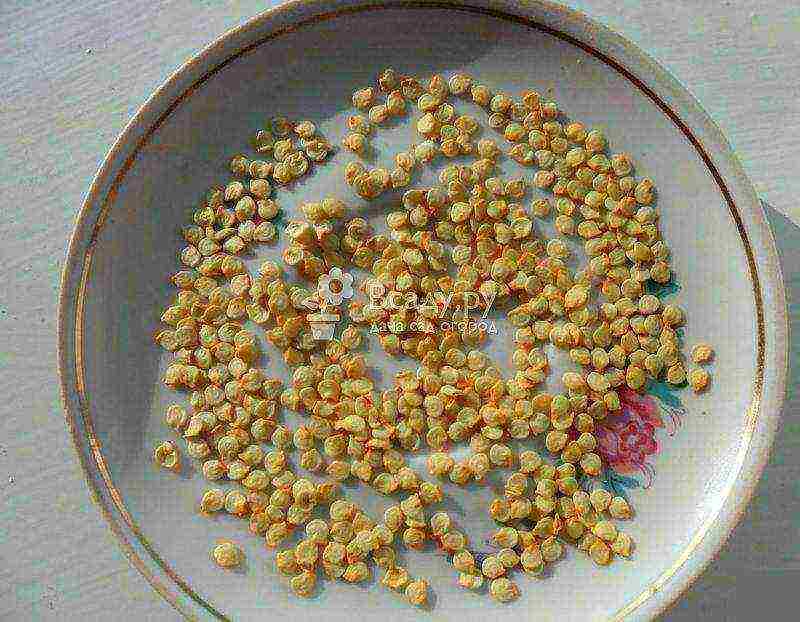 Preparing pepper seeds before sowing
Step-by-step technology of seedbed preparation
- Disinfect the seed in 1% iodine solution for half an hour, then rinse.
- Immerse them in warm water (temperature - up to 50 ° C) for 5 hours.
- For final germination, leave the seeds in a warm room for a couple of days, covered with a damp cloth.
If sowing is for seedlings, prepare the soil by mixing earth with sand (one to one), add the same amount of humus to get a 1: 1: 2 ratio. For every kilogram of soil, add a tablespoon of ash.
Agrotechnology of sowing bell pepper seeds for seedlings
- After filling the boxes with prepared soil, moisten it.
- Make grooves 1.5-2 cm deep in the ground.
- Plant the seeds at a distance of 4-5 cm from one another, so that the seedlings do not dive in the future.
- Sprinkle with earth and pour well with warm water. Cover the container with polyethylene or glass and place it in a warm room.
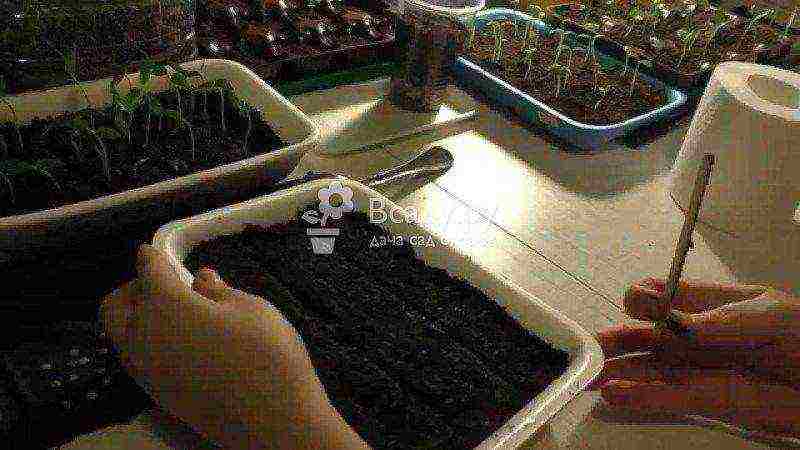 Sowing bell pepper seeds for seedlings
The presence of light does not matter at the moment. But after seed germination, additional lighting is required from 7 am to 9 pm.
Growing bell pepper seedlings
When the first shoots appear, after 4-7 days, the shelter will need to be removed.
Features of caring for pepper seedlings
Watering is necessary for seedlings once a day, it is advisable to carry out the procedure in the morning or in the evening. Use warm water, preferably thawed water, infused to room temperature (up to + 30 ° C). Before watering, loosen the soil to a depth of 5-6 cm.
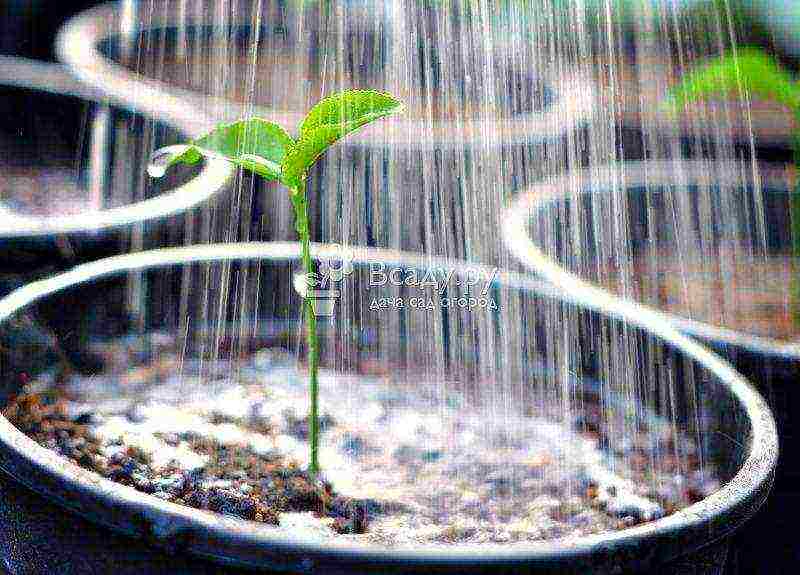 Watering pepper seedlings
High soil moisture can lead to black leg disease, but the soil should not dry out completely. To avoid diseases and the appearance of pests, the air must be constantly humidified by daily spraying, and the room must be ventilated.
- Maintain the daytime temperature at 22-27 ° С, nighttime - 14-16 ° С.
- Dive the first sheet that appears, this will prevent the roots from tangling.
Top dressing of pepper seedlings
During cultivation, seedlings are fertilized twice.
- The first time - after the formation of 3-4 leaves (13-15 days after the first shoots). Use urea: 1 tablespoon 10 liters of water. To improve the effect, first grind the soil with ash.
- The second time - 4-5 days before transplanting into the ground. The composition is used the same as for the first time, but superphosphate (1 tbsp) is added to it.
Nettle infusion is also an effective top dressing.
Bell peppers: growing and care in the open field
Taking proper care of peppers outdoors involves careful preparation. You will need tools and means for watering, weeding, feeding and frost insulation.
Planting pepper seedlings in open ground
Dates for planting pepper in open ground
For planting, you must wait for warm weather so that the soil warms up.
- In the south of Russia and in the middle lane - in late May or early June.
- For the northern regions, this time comes by mid-June, when the threat of return frosts has passed.
Hardening seedlings before planting
In order for the cultivation of peppers in the open field to be successful, the seedlings must be hardened 14 days before planting.
Tempering seedlings in boxes on the veranda
- For several days, the window is slightly opened for 1-2 hours if the weather is warm.
- Having built a sun shield from plywood sheets, they are hardened on the balcony or veranda for a week.
- If the night air temperature is not lower than 14 degrees. Celsius, then it is no longer brought into the room.
Choosing a place and preparing the soil for growing pepper
Select the area where you plan to grow pepper. It must be protected from strong drafts and well lit. The bed must be pre-processed:
- In autumn, the soil is carefully dug up and loosened, after which complex potash and phosphorus fertilizers are applied (50 grams per 1 sq.m.)
- In the spring, 40 g of ammonium nitrate is added to the top layer of the soil on each square meter.
- Five days before planting seedlings, the soil is disinfected with a solution of copper sulfate (1 tablespoon per bucket of water).
Advice
If you use different varieties, it is better to cultivate peppers in the open field at a remote distance from each other, since the crop tends to be pollinated. You can differentiate varieties by planting tall plants - corn, tomatoes or sunflowers.
The procedure for planting pepper seedlings in open ground
Pepper does not tolerate cold soil, so it is better to raise the height of the beds by 20-50 cm.
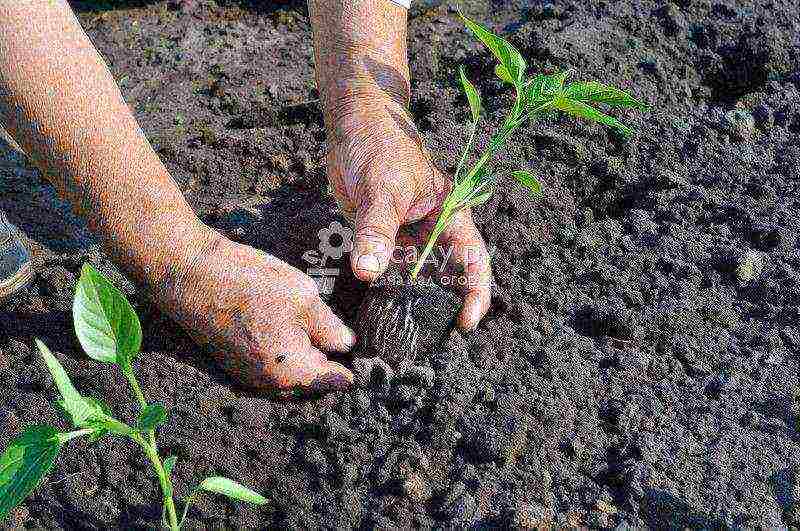 Planting pepper in open ground
- Pepper seedlings are watered to remove them by the roots from containers, planted in the morning or evening, when the sun is not too active.
- They are planted vertically according to the 40x40 cm scheme.
- The peppers are sprinkled with earth, the area around it is slightly compacted and well watered with warm water.
- Leaves of young plants break easily, so put a peg to each and tie it up.
- To provide oxygen access, loosen the soil around the plant.
- Cover the ridge with a film, pulling it over the previously installed arcuate rods. After rooting, remove the film.
Advice
Build a protection for peppers from the cold with the available materials at hand by building a tent from roofing material, boards or cardboard. From above it can be covered with burlap or agrofibre.
Pinching peppers outdoors
For proper formation of the bush and good development of the fruits, pinching is carried out every 10 days. When the plant reaches a height of 25 cm, its top is cut off. As a result, the stem will give many shoots, they must be partially removed, leaving 5-6 upper ones. They will serve to form the crop. Docking is carried out in hot, but not dry weather.
How to pinch peppers correctly
Advice
To attract insects to your area that will pollinate the pepper during flowering, spray it with special sugar syrup. It is prepared like this: dissolve half a glass of sugar and 2 grams in a liter of hot water. boric acid.
Watering pepper in the open field
Growing bell peppers in the open field does not require abundant watering. The first time it is watered during planting, the second - after 5 days, then - once a week. For watering one plant, 1-1.5 liters is enough. But as you grow up, the rate can be doubled.
When the pepper begins to bloom, water it only with warm water (20-22 degrees Celsius). Watering is stopped 2 weeks before the vegetables are completely harvested. After each watering or rain, the soil must be loosened.
To reduce the number of waterings and better retain moisture at the plant roots, mulch the peppers with a 10 cm layer of quilted straw.
Top dressing of peppers in the open field
Caring for pepper after planting in the ground necessarily includes three dressings per season.
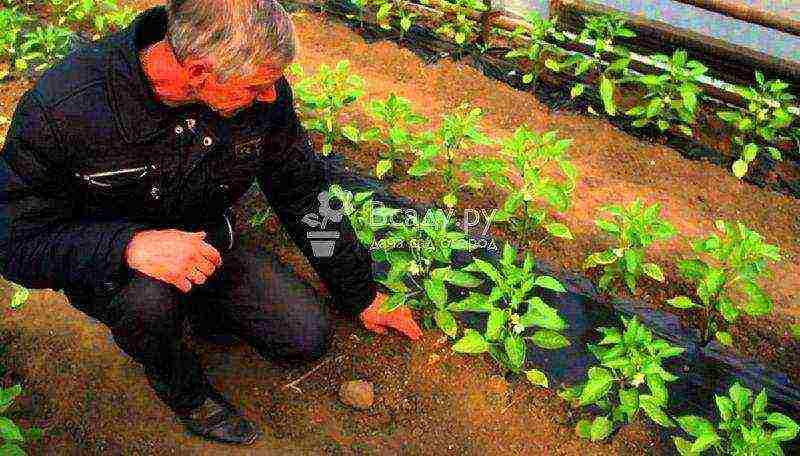 Top dressing of peppers in high beds
- The first is carried out two weeks later. Nitrogen fertilizers are needed for good growth. To do this, dilute a tablespoon of superphosphate and urea in a bucket of water. You can mix urea (1 teaspoon) in the same amount of water. Pour 1 liter with this composition under each plant.
- The next feeding is done during flowering. Since potassium is needed to set the fruit, use wood ash. Feed with urea again as you did for the first feeding.
- The last time the pepper is fed with the appearance of the first fruits. To do this, dilute potassium salt and superphosphate (2 teaspoons each) in 10 liters of water.
Watch the growth of the pepper, it may need additional feeding.It can be foliar, since the plant can receive the necessary substances not only through the roots, but also through the leaves.
Pepper growing problems and solutions
- If the leaves turn yellow, then they lack nitrogen. To provide this substance, spray with a solution of urea in water in the ratio: 1 tablespoon to a bucket of water.
- If the pepper loses the ovary, then prepare a boric acid solution: a teaspoon in a bucket of water.
- In case of poor fruit formation, feed with superphosphate or ash: a teaspoon per 5 liters of water.
Foliar dressing is carried out exclusively in the morning or evening, otherwise the leaves may burn out in the scorching sun. In this case, the weather should be calm. Feeding with yeast has a good effect on the development of peppers.
Pepper Yeast Feeding Recipe
For cooking, you need 100 grams of fresh yeast. They are soaked in 0.5 liters of water for a day. Before use, add 5 liters of water to the solution.
Dry yeast fertilizer recipe for peppers
Dissolve one packet of dry yeast in a bucket of water, add 2 tablespoons of sugar, leave for 2 hours to activate the fermentation process. Dilute the infusion with water at the rate of 0.5 liters per 10 liters of water.
Apply this top dressing only to sufficiently warm soil. It can be applied no more than two times per season. After feeding with yeast, be sure to add wood ash.
Protection of pepper against diseases and pests in the open field
- To protect the pepper from the main pests of the pepper, dust it with wood ash three times per season. This should be done in the early morning when the plant is still growing.
- To prevent damage to the bear, 1 hour before planting the pepper, fill the wells with onion water (insist 0.5 kg of onion peel in 10 liters of water for three days).
- If during the growing season you find aphid infestation, treat with a solution of 1.5 liters of whey in a bucket of water. After spraying, grind with ash.
The timing of harvesting pepper in the open field
- The fruit is harvested when it has matured in size and color. Since these vegetables are fragile, it is better to cut them with a stalk.
- The first crop appears in mid-August, then it is harvested every week until frost.
Advice
To harvest seeds for the next year, choose a few large fruits. Leave them on until the end of summer, allowing them to fully mature. Cut and wrap in paper until dry. Cut and collect the seeds. Their varietal characteristics can persist for three years, if cross-pollination does not occur.
Sweet pepper: growing and care in a greenhouse
Since pepper is a very thermophilic culture, its cultivation in the open field most often begins with seedlings. When sowing pepper seeds in the ground, they are carefully processed and well tempered. That is why many gardeners prefer growing bell peppers in a greenhouse, where ideal growth conditions can be created for the plant.
Growing bell peppers in a greenhouse
For planting seedlings or sowing seeds, glass, film greenhouses or greenhouses are used. It is also now widely practiced to grow peppers in a polycarbonate greenhouse.
Technology of planting bell peppers in the greenhouse
Peppers are planted in a greenhouse in early April. You can sow with seeds, but for better yields, use 2-month-old seedlings with a height of 20-25 cm, on which there are already from 6 to 10 leaves.
Planting bell peppers in a greenhouse
- In the greenhouse, ridges are prepared at a distance of half a meter from one another.
- They make holes in them corresponding to the size of the container in which the seedlings grew.
- A solution of manure or chicken droppings is poured into the pits. To prepare it, half a liter of manure or a glass of droppings are dissolved in a bucket of warm water (about +50 C).
- 1 liter is poured into each well.
- Pepper seedlings are watered to remove them from the container by the roots.
- After that, the pepper is planted in the prepared holes and tied to the pegs.
Greenhouse peppers cultivation and care
The main care for pepper in the greenhouse is to maintain the optimal temperature regime, water, regularly feed, weed and loosen.
Drip automated watering of pepper in the greenhouse
- The greenhouse must be ventilated and shaded in the heat.
- Pepper is watered every 2-3 days, 1-2 liters of water are poured under the root of each plant.
- Growing peppers in a greenhouse involves maintaining an optimal temperature. During the day it should be at the level of 20-27 ° С, at night - 15 ° С. After the onset of fruiting, it can be reduced by a couple of degrees.
- Shrubs spud when the soil is still wet. After the earth dries up, it is necessary to loosen the aisles.
Caring for peppers in a polycarbonate greenhouse does not differ from the rules for caring for a regular greenhouse.
How to properly feed peppers in a greenhouse
Growing peppers in a greenhouse is impossible without sufficient nutrients. Urea is used for feeding in a similar proportion. But it is better to use a solution of bird droppings in water in a ratio of 1 to 15. They are watered with 1 liter of each sprout. Before feeding, caring for pepper includes adding wood ash.
Fertilized pepper beds in the greenhouse
- The first feeding is carried out two weeks after planting in the greenhouse.
- The second is when the fruit is set.
- The third is before harvesting.
The composition of fertilizers can be the same for each of the procedures, if the plant does not show signs of a lack of any trace elements.
Outcome
Bell peppers, the cultivation and care of which we have considered, will delight you with an excellent harvest, subject to agrotechnical rules. Follow the recommendations, carry out timely watering and fertilization and you will not have any problems with this crop.
