Content
- 1 Irises - description and features of culture
- 2 Rules for planting irises in open ground
- 3 Iris care - basics and secrets
- 4 How and when to transplant irises
- 5 Irises in landscape design
- 6 Autumn is the time for planting bulbs
- 7 How to properly care for irises?
- 8 What does an iris bulb look like
- 9 Botanical description
- 10 Where are Dutch irises used?
- 11 How to choose soil for planting
- 12 How to plant bulbs
- 13 Another convenient way to disembark
- 14 Flowering time
- 15 How to care for blooming Dutch iris
- 16 What to do next
- 17 Diseases and pests
- 18 Florist reviews
- 19 Features of growing irises
- 20 Planting irises
- 21 Proper care of irises
- 22 Pests and diseases of irises
 Irises are a popular garden crop with spectacular flowering and unpretentious nature. Many gardeners are interested in planting and caring for irises in the open field. Velvet multicolored irises are a perennial plant that serves as a real decoration for a flower garden or flower bed.
Irises - description and features of culture
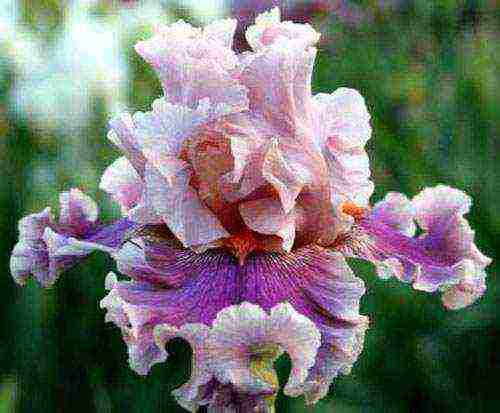
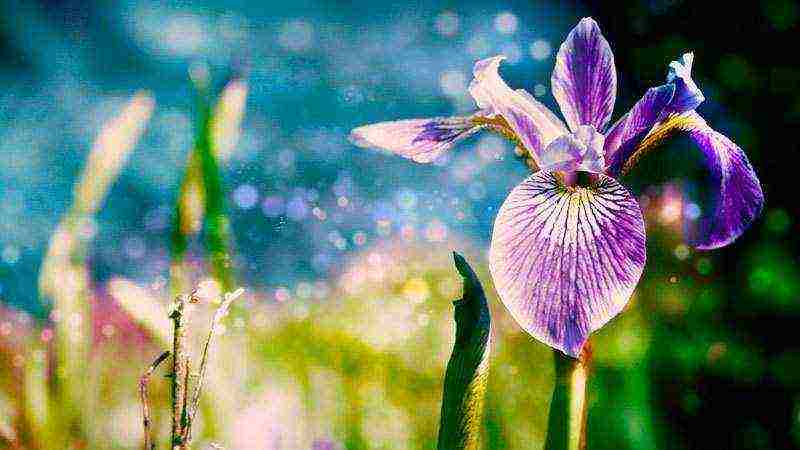
 Irises are short perennials of the rhizome genus. Translated from Greek, the word Iris means rainbow. Indeed, more than 700 types of irises are known, differing in size, shape, structure and color of the flower. Outwardly, the iris flower stalk is similar to an orchid, the color of the petals is very diverse - from white and pale to rich and bright. In some varieties, the peduncle is painted with two, three or more flowers, and a peculiar pattern is applied to the lower petals.
The beginning of flowering of irises is May and June, the lush flowering can continue until the end of June. In autumn, iris can bloom again - in August and September.
The culture has an extensive geography around the world, with some varieties found in the harsh climate of the Northern Hemisphere. In nature, there are rhizome and bulbous irises, which outwardly are absolutely similar to each other. Rhizome irises are stable and unpretentious, winter well and are not afraid of cold weather. Bulbous varieties require a little more care and attention. The wild flower iris has long been loved by flower growers and has become an urban flower. You should learn everything about the care and planting of irises in open ground.
Rules for planting irises in open ground
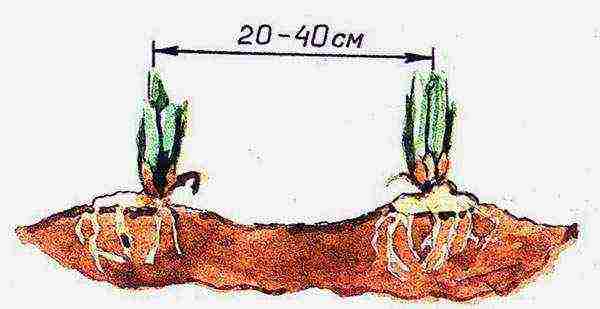
 Rhizome irises prefer a well-lit area where they will bloom beautifully for a long time. For the free spread of the roots, irises need space - at least half a meter from each other. All species love loose, nutrient-rich and oily soil. Planting irises in the spring in the ground is carried out after the compost and potassium-phosphorus fertilizers have been introduced. It is not recommended to apply manure.
Soil moisture for each variety needs its own:
- bearded iris is best planted in a fan on the slopes so that there is a good outflow of rain and melt water;
- Siberian iris and marsh iris are best grown where it is always damp - near water bodies and in partial shade.
The area for irises is dug up, treated with fungicides against harmful insects, and herbicides to reduce weed growth. For rhizome irises, a neutral soil is preferred. If the soil is acidic, you should mix it with ash, lime or chalk. When planting, the upper bud remains on the surface of the soil, it is not buried.
 Rhizome varieties - how to plant irises in spring:
- A hole is dug under the root, in the center of which a small mound is poured.
- The central root should be placed on a mound, and the lateral roots should be distributed to the sides.
- The main rhizome is sprinkled with earth, a layer of sand is applied on top, the earth is slightly compacted.
- Do not deepen the roots too deep, they should be located close to the soil surface.
- Let the central kidney remain free of the earth - above its surface.
Experienced flower growers recommend planting irises in the open ground in spring and summer. During the warm season, the plants have time to fully take root in the soil, due to which they winter without loss and begin to bloom the next year.
 Bulbous irises - planting and care in the open field:
- The bulbs are planted in early spring or autumn before frost.
- The soil temperature for planting must be at least 10 °, otherwise the bulbs may freeze.
- A shallow trench is dug, the bulbs go deeper into the trench by 3-4 cm, no more.
- The total planting depth should be about 10-12 cm.
- The excavated soil is mixed with garden soil for nutrition, river sand and crushed coal for drainage, with double superphosphate for growth.
- The prepared grooves are disinfected by spilling with a solution of potassium permanganate and a growth stimulator to strengthen the roots.
- Iris bulbs are planted sprout up, not too deep, at a sufficient distance from each other - 15-20 cm.
- The soil is poured on top, which should be lightly tamped so that the bulbs do not crawl out to the surface.
- Re-watering is necessary only after 3-4 days.
Excessive root deepening harms the growth and development of irises, while the soil should not be heavy. For loosening, compost, peat and coarse sand are added to the soil.
Small-bulbous varieties of irises are not demanding on moisture. They are buried three times the height of the bulb, and their flowering begins next spring.
Iris care - basics and secrets
 According to experienced flower growers, irises are strong and viable plants that grow and bloom well without fertilization. However, in the third year of life, it is recommended to pamper the flower with a step-by-step complex feeding - in the spring, during the budding period and after flowering. In response to care, the plant will become stronger and stronger, it will grow faster and bloom more abundantly.
Irises - care in spring:
- top dressing in a ratio of 2: 1: 1 - nitrogen, phosphorus and potassium;
- watering depending on the surrounding weather conditions.
During the budding period, fertilizing should be carried out at a ratio of 3: 1: 3 - nitrogen, phosphorus, potassium. In this case, watering and spraying are carried out as needed. A month after the end of flowering, it is recommended to apply top dressing in a 1: 1 ratio - phosphorus plus potassium. In the autumn, before wintering, dry mineral fertilizer should be applied in a tablespoon, scattering it under each root of the plant.
Irises should be watered at the root when the soil around the bush is completely dry. After planting, the plant is watered only three days later.
How to feed irises in spring:
- if a lack of minerals is noticed, then mineral dressing should be applied personally for each bush;
- in early spring, a complex nitrogen-potassium-phosphorus fertilizer for flowers is useful for a plant.
Prevention of diseases and pests includes sanitary pruning of dead plant parts, timely removal of wilted flower stalks, regular spraying and shower, cleaning the beds from fallen leaves. In the open field, the planting of irises is weeded by hand, the soil is loosened with care and watered as needed. Before winter, the rhizomes are sprinkled with earth and covered, since they are located close to the surface itself and can freeze.
How and when to transplant irises
 Irises can be planted in three ways - rhizomes, shoots and grown from seeds. Getting plants from seeds is the longest and most difficult way.In practice, it is much easier and faster to grow flowers by dividing the bush and branches. At the same time, plants grown from rhizomes will bloom the next year, and seed plantings will have to wait another 2-3 years.
How and when to transplant irises:
- the best time for transplanting is early spring, that is, March-April, before flowering;
- flowers are propagated by dividing rhizomes and sprouts.
Transplanting irises in the spring to another place is carried out using only healthy and strong plants that will take root quickly and without problems. The rhizomes are removed from the ground and divided into parts so that each individual root rosette has one leaf bud. Excess foliage should be trimmed. Before planting, the roots are dipped in a potassium permanganate solution for disinfection for several minutes. Dried rhizomes are planted in shallow trenches or small planting holes at a distance of 50-60 cm from each other.
 When propagating vegetatively, the iris should bloom at least once. After that, until the moment of budding, young shoots can be taken from it. New plants should be rooted from March to May in a shaded place, creating greenhouse conditions. Full rooting can be observed after 2-3 weeks.
Irises can be grown from seeds. In autumn, seeds are sown in a pot with a sandy substrate, covered with plastic or glass. By spring, the seeds will sprout, they are dived and planted in open ground. When to plant irises outdoors in spring? The optimal time for planting in the ground is early spring, the month of March and April. By this time, young plantings have already grown up enough, they will be able to quickly and fully take root in the ground.
Irises in landscape design
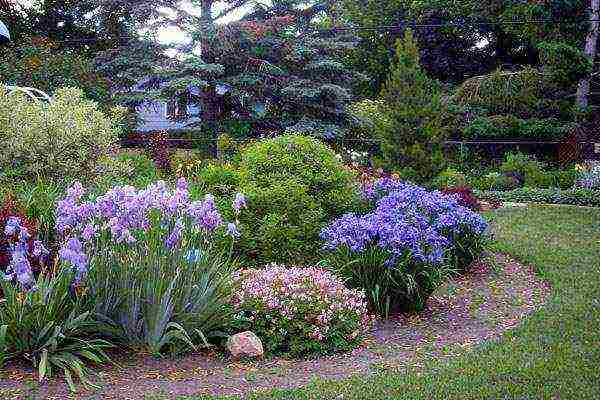
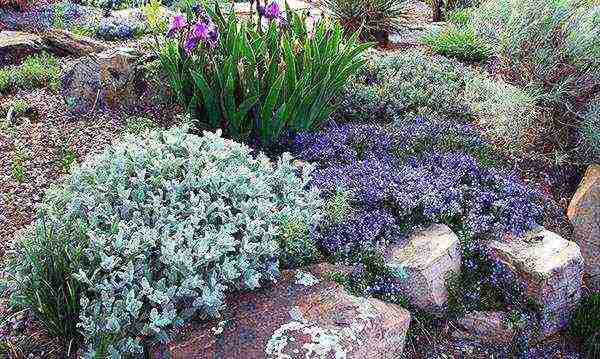
 The high decorative qualities of irises allow them to be planted in flower beds and mixborders, along fences, in flower beds and rockeries. The ideal place for them is on a hill where there is no stagnation of moisture and there is no close adherence of groundwater. There are short and tall types of irises. Tall plants are usually tied up so that they do not break and hold the bud well. Dwarf irises grow in a solid wall and require periodic pruning and watering in dry weather.
Irises in landscape design photo: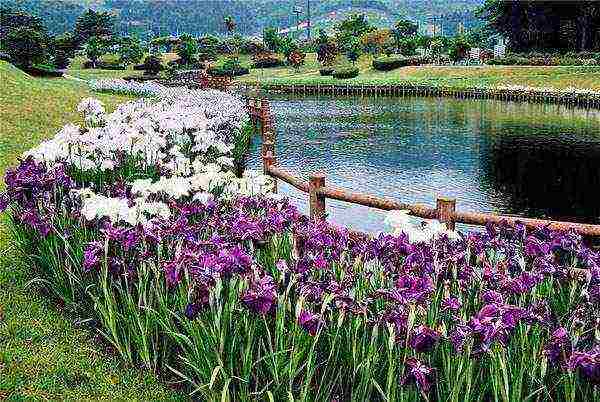

Knowledge of the rules for planting and caring for irises in the open field will make it easy and simple to grow these plants in your garden plot. When you see an iris, you do not want to pick it at all, you want to admire it endlessly, inhaling the delicate and delicate aroma of a flower.
Such different irises on the site - video

- Type: iris
- Full-bloom Period: May, June, July
- Height: 15-40cm
- Color: purple, blood red
- Perennial
- Sun-loving
- Moisture-loving
Spring flowers are the most desirable, they are associated with warm sun rays, the imminent onset of summer. Apparently, this explains the great popularity of irises - already from the beginning of May, lush buds of all shades of the rainbow open on the flower beds of suburban areas. A huge number of species (about 800) allows you to choose flowers in the right combination and, together with other plants, create amazingly beautiful compositions. Let's consider in more detail how the bulbous irises are planted and taken care of.
- Soil preparation: drainage and feeding
- Autumn is the time for planting bulbs
- How to properly care for irises?
Soil preparation: drainage and feeding
Irises are not particularly demanding, but there are several points that should be considered. They are not recommended:
- waterlogged soil;
- mineral-poor soil;
- constant shadow.
Planting on an artificial slope serves as protection against excessive moisture. If the groundwater rises close to the roots, you should build a small elevation with a slope to the south and arrange a drainage system. To do this, it is enough to raise the flower bed by 20 cm and ensure the outflow of rainwater.

There are several ways of planting irises: single, bush, group, free sowing.Flowers with large buds are used for single planting, with small ones for group

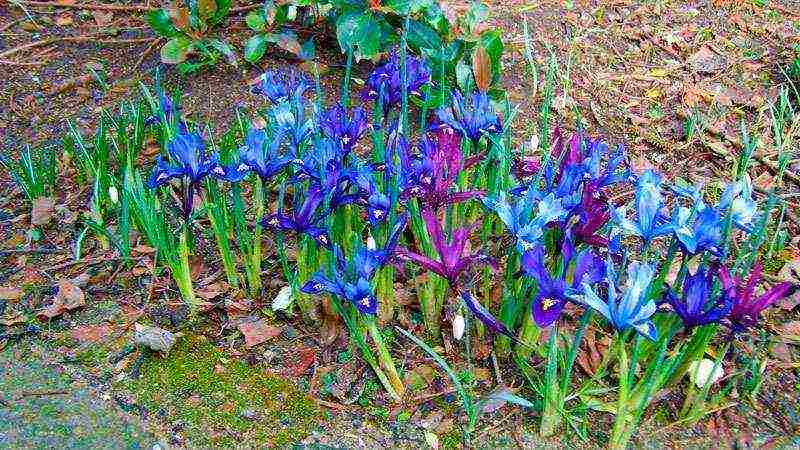
A sample of a flower bed with irises: 1 - Purple Voice hyacinth; 2 - tulip Flashpoint; 3 - daffodil New Baby; 4 - iris mesh Kantab; 5 - Scylla Siberian Alba
Irises love sunlight, but they can spend some of the time in the shade, so it is advisable to split the flower garden in an unshaded or slightly shaded area. Before planting, the soil is enriched with organic fertilizers, then carefully dug up and loosened. Manure is usually applied in advance, about a year before planting.
The ideal soil for bulbous plants is calcareous. An alkaline reaction is provided by lime, chalk or eggshells introduced into the soil during digging. It is better to dilute the sandy soil with humus, ash and about 40 g of superphosphate (per 1 m²) will not be superfluous. Clay, on the contrary, is better to dilute with coarse sand and add a little humus or compost to enrich it.
Related article: Liming the soil in the garden: why, when and how is it necessary to do it?

Do not limit yourself to traditional flower beds located in recreation areas and along paths. The original stump flower bed looks much more attractive!
The place of planting flowers can not be changed for about 10 years, hybrid varieties - 5 years. The ability of irises to grow rapidly leads to a deficiency of nutrients in the soil, as a result of which a change of place is required, that is, a transfer of the flower bed.
Autumn is the time for planting bulbs
First of all, we invite you to watch a video on the topic:
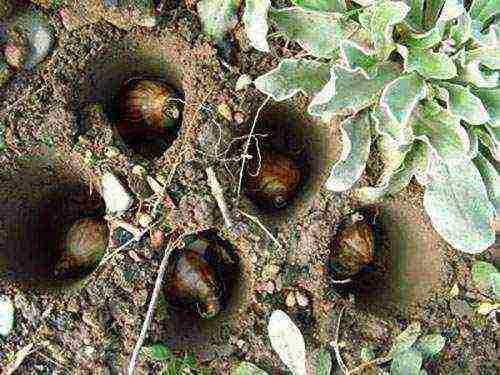
Planting features depend on the variety. In temperate climates, iridodictiums, Turkish and Caucasian, as well as their hybrids, perfectly take root and tolerate winter. We choose a dry, open place and dig shallow holes - up to 7 cm. We fill in the bulbs so that the soil does not fit tightly to them, and it is better to add a little sand to its composition. To protect plants from fungal diseases, the purchased bulbs are pretreated with "Fundazol" or "Benlate". In the summer, after the stem and leaves die off, we separate the small daughter bulbs, which are necessary for further reproduction.

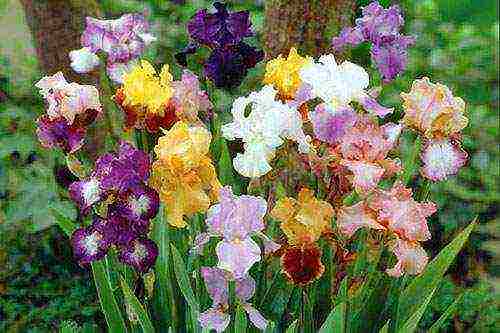
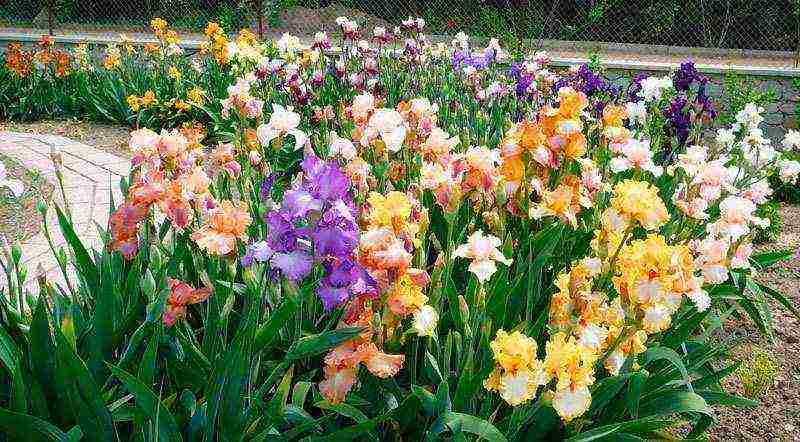
One or more varieties of irises are used to decorate flower beds. A variety of colors allows you to create compositions of rare beauty
Juno bulbs are large and have fleshy roots that are renewed every year, which should be handled with great care. If the roots fall off, the plant will die. The best period for planting bulbous irises in open ground is the last week of September or the first decade of October. The bulbs are carefully lowered into the pits so as not to damage the roots, and sprinkled with a layer of earth up to 6 cm thick.

The planting hole should be relatively small - about two bulb heights, therefore, for small iris bulbs, a depth of 4 to 7 cm is suitable
Summer preparation consists in the fact that the bulbs are dug up after the iris wilts and dried in a room with a temperature of 22-25 ° C. The second option is to cover the flower bed with a film, protecting it from rain, until the beginning of October. Further reproduction of Juno is carried out either by daughter bulbs, or by seeds, which are sown in special boxes. Seed boxes, like bulbs, must be dried. Seedlings appear, as a rule, in the second year.
The distance between future plants during planting can be different: the minimum is considered to be a gap of two bulb widths (as a result, a dense bush is formed), the maximum is up to half a meter (usually single irises with lush buds are planted in this way).
Using a plastic growing basket
At the supermarket you can buy a simple but very handy bulb basket.

In order to remove part of the turf, we put a plastic basket on the desired area and around the circumference with the help of a shovel or scoop we circle the contour to a depth of 12 cm

Carefully remove the separated piece of turf, and deepen the resulting hole by about 20-30 cm so that the basket can fully fit in it

Pour fertilizer at the bottom of the pit, then install the basket. We fill it with a dense wet layer of fertile soil and plant the bulbs

We cover the planted bulbs with a thin layer of earth and return the removed piece of turf back. Thus, the bulbs will spend the whole winter in favorable conditions for themselves.
The basket is convenient in that it can be easily taken out of the ground and, together with the planted bulbs, can be moved to a drying room.
How to properly care for irises?
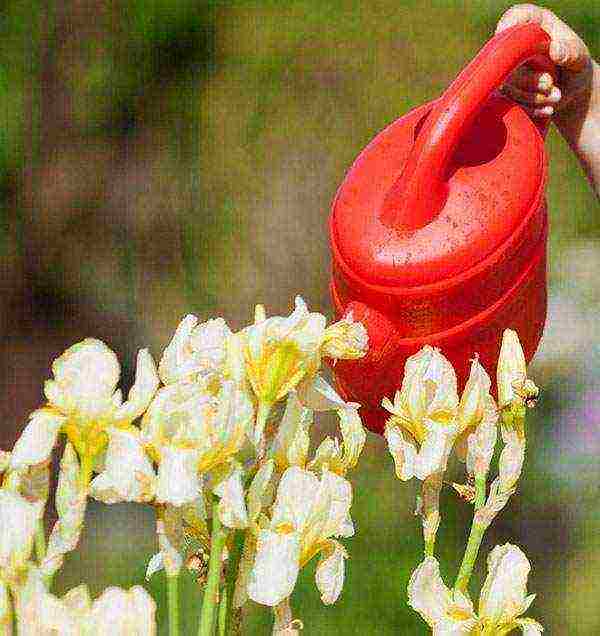
In addition to timely planting and soil preparation, it is necessary to take care of the plants during their flowering: early irises begin to bloom in May, late ones - in June. Competent care of bulbous irises consists in regular fertilizing and protection from pests. Another point of care for flowers is watering. During the rainy season, irises should not be watered, and in dry times, moderate irrigation is necessary strictly in the evening.

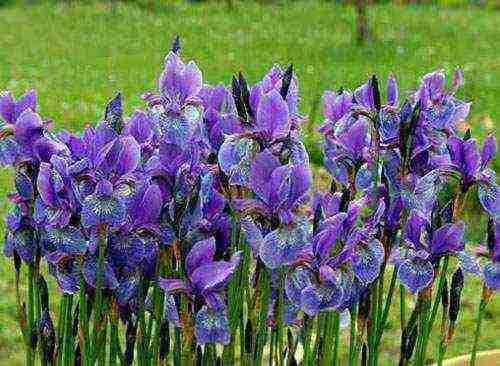
It is important to choose the right varieties of flowers. For example, Siberian irises are considered the most frost-resistant, so they easily endure winter in northern latitudes.
Application of mineral fertilizers
In the spring, after the snow has melted, we wait until the top layer of the soil is completely dry in order to apply fertilizers. Ready-made solutions and dry universal mixtures, for example, "Reasil" or "Good Power", are suitable. We place the required amount of top dressing in the top layer (or simply scatter it over the soil surface around the bulbs), then carefully loosen it, trying not to catch the roots.
One of the three-stage options for feeding hybrid irises from the first year of flowering:
- nitrogen, potassium, phosphorus (2: 3: 1) - in spring on dry soil;
- the same composition, but in a different proportion (3: 3: 1) - at the time of bud formation;
- potassium, phosphorus (1: 1) - 1 month after the beginning of the flowering period.
Regular and correctly dosed feeding guarantees high decorative qualities, rapid development and long flowering. One of the important periods in the life of a plant is the formation of flower buds. Fertilizing at this stage ensures a lush, full bloom the next year.

Fertilizers for bulbous plants contain lignohumate, which performs several important functions: promotes rapid growth, increases plant resistance to diseases, increases decorative effect

It is not necessary to make your own complex fertilizer for irises, the store sells ready-made formulations for bulbous in two forms: solution and dry mixture
Monitor the amount of nitrogen carefully. Excess of this substance causes "fattening" - a process when leaves develop remarkably, but flowering is completely absent.
Preventive work to protect against pests
Despite the short flowering period, the cultivation of bulbous irises is accompanied by protective measures. To prevent the appearance of uninvited parasites, the plants should be sprayed on duty every two weeks. It is necessary to start from the period when the leaves reach a length of 10 cm. Usually they use "Malathion" (helps against herbivorous mites) or universal pesticides. With the beginning of the appearance of buds, the treatment is stopped.

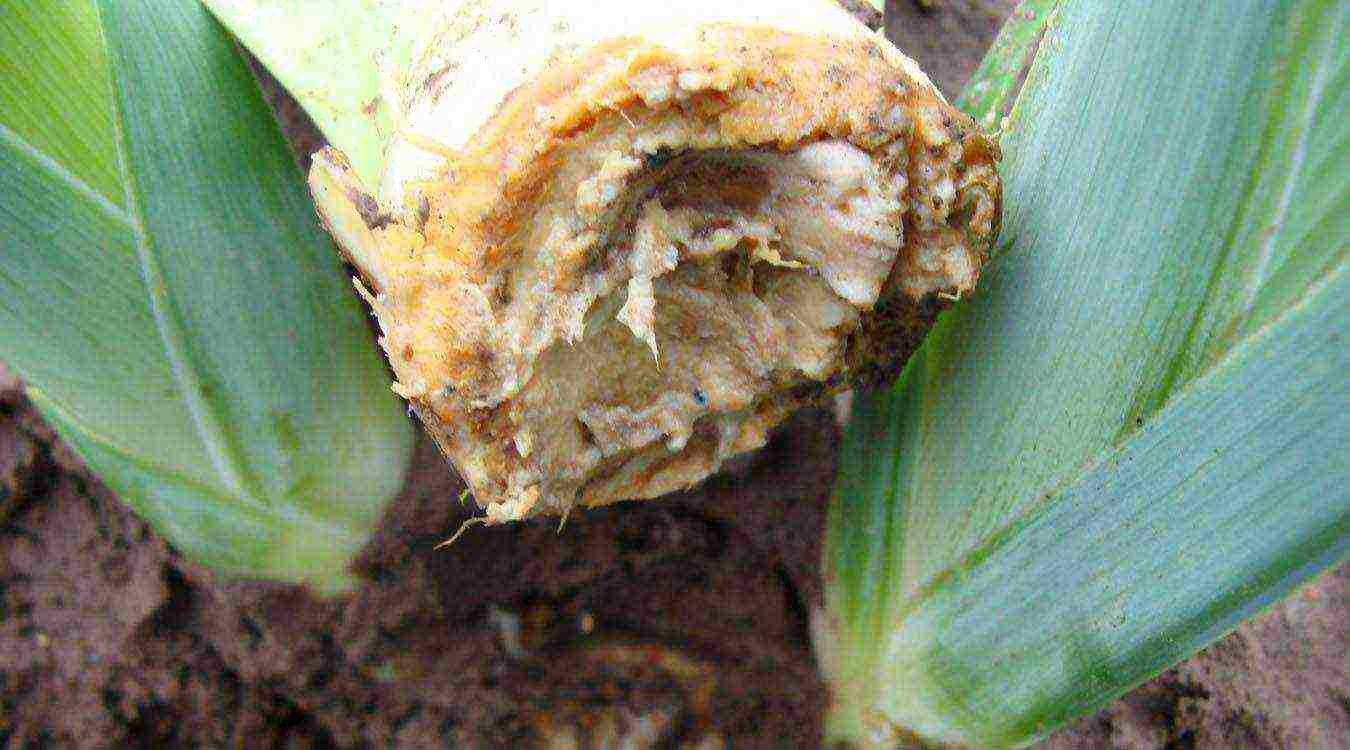
Most often, irises have a disease of the roots and bulbs - bacteriosis, which causes rotting of individual parts. The plant is dug up, diseased parts are removed, washed in potassium permanganate and transplanted to another place
How to determine the disease in bearded irises? Usually a healthy plant has a bunch of 7-9 leaves, while in a sick plant no more than 5. There is a problem with the formation of flower buds. For treatment, the plant is dug up, cleaned of rot and insects, and treated with an antiseptic. If the irises are affected by thrips, the natural waxy coating on the leaves is disturbed.
Prevention consists in competently preparing the bulbs for next year - removing the old stem along with leaves, peduncles and flowers, in which harmful insects may remain.
The traditional care of irises guarantees their extraordinarily bright bloom and the possibility of creating unique flower beds.
Rate the article:
(3 votes, average: 3.7 out of 5)
The choice of plants for a flower bed has long ceased to be a problem - a huge amount of seeds, seedlings and bulbs are sold in stores, nurseries and markets. The main thing is to decide on the composition of the flower bed and choose the necessary palette. Every florist is like an artist. But the beauty is created not by wide strokes of oil paints, but by delicate flower buds.
Dutch iris can be a safe option for decorating large and small flower beds. It is a bulbous plant with large, beautiful flowers of an unusual shape.

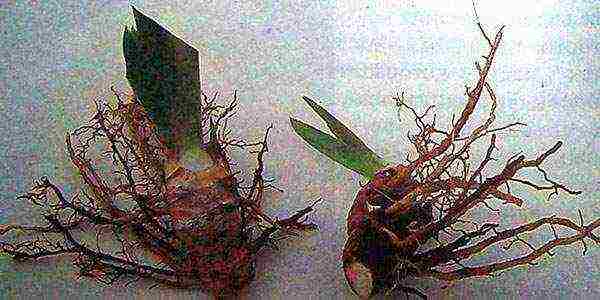
What does an iris bulb look like
It is a perennial herb with an elongated bulb instead of a rhizome. The bulb itself is a modified and shortened underground shoot that resembles a bud. When cut vertically from top to bottom, a flower arrowhead embryo can be found in the middle of the bulb. Around it, like wrappers, are the rudiments of leaves. They are entrusted with the function of accumulating nutrients.
Axillary and central buds are located between the embryos of the leaves. The outer layer of the bulb is the integumentary scales. The diameter of the bulbs is not very large - it ranges from 2 to 3.5 cm.

Botanical description
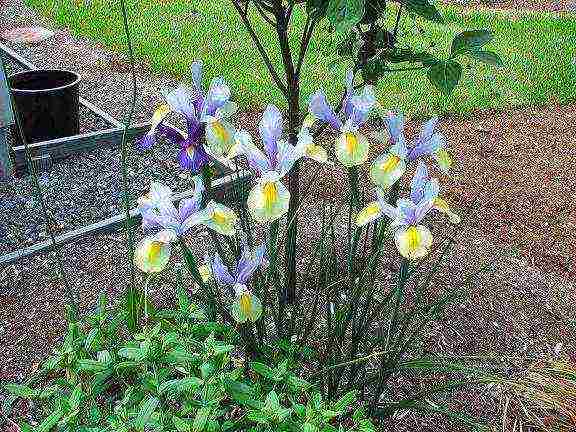
More common for our gardeners are rhizome types of irises. These are the flowers that in childhood we called cockerels and killer whales. However, bulbous irises are no longer exotic either. The most common of these is Dutch iris. The scientific name for this flower is Xiphium. Despite the fact that xyphyum belongs to the Iris family and belongs to the Iris genus, it is recognized as a separate representative of the genus. Sometimes, by the way, this causes confusion in the special literature.
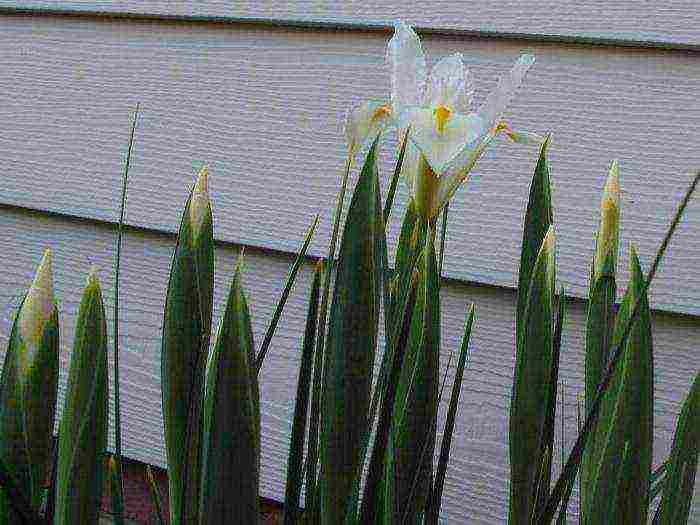
Iris Dutch bulbous, planting and caring for which are described in this article, gives flower stalks of different heights. A dwarf species can give a peduncle 30 cm high.A common xyphyum reaches a height of 80 cm.
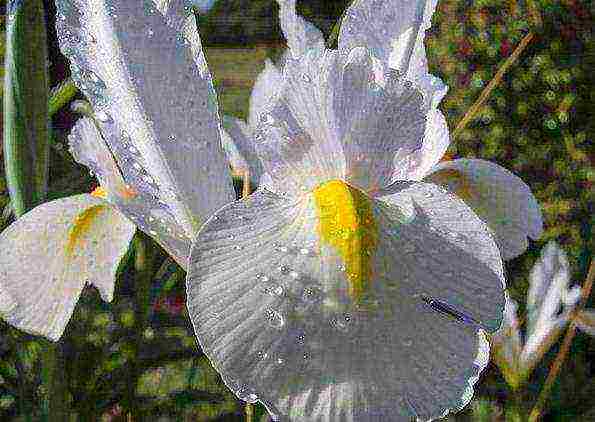
The plant has narrow-grooved leaves, and the flower has a complex structure. The bud has 3 external and 3 internal perianth lobes. The internal lobes are located vertically and have a narrow and broad lanceolate shape. The outer lobes are rounded and directed towards the bottom.
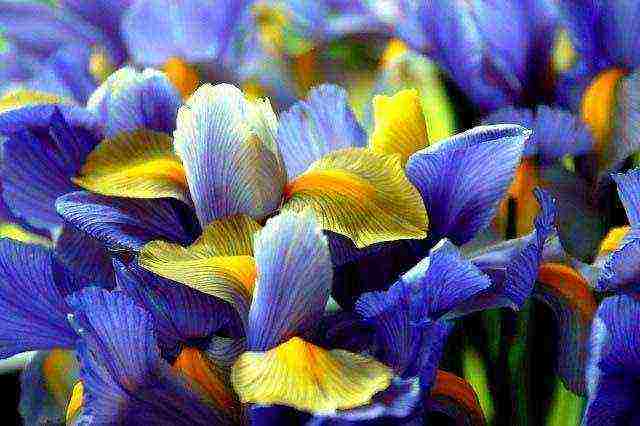
Usually on the outer perianth lobes there is a yellow or orange spot in the center. The Dutch iris bud has several color options and leaf widths. Moreover, it can be one-color or two-color.
The following color of the petals is possible:
- White;
- yellow of varying intensity;
- different shades of blue and light blue;
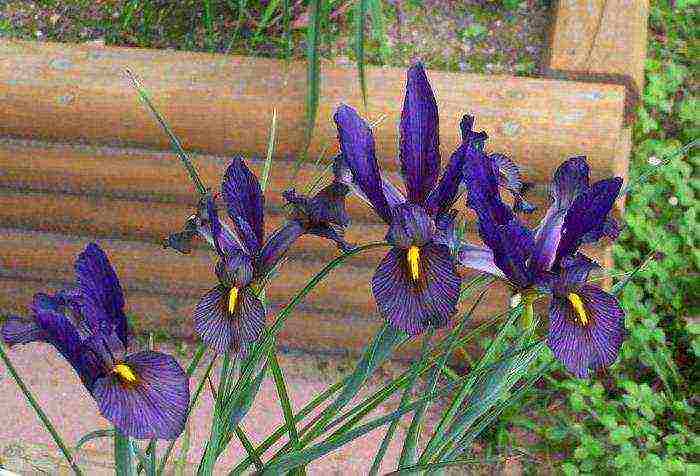
- different shades of purple;
- purple;
- combined options for all of the listed colors.
Where are Dutch irises used?
Dutch iris is often planted in personal plots and garden beds. Landscape designers are actively promoting the look using it in mixborders and alpine slides. Of the bright flowers, bouquets are made that are appropriate to give to men, especially bouquets of blue and purple colors. Low-growing bulbous irises can be grown as indoor plants.
It is worth noting that the cut flower of the bulbous Dutch iris will stand in the bouquet much longer than the root varieties. It is especially good to use rainwater for the vase, since it does not contain chlorine.
How to choose soil for planting
When the Dutch iris is described, planting is presented to many as a difficult task. But it is not so.It is enough to have information about several nuances of this process.
One of them is the choice of soil for the plant. The main thing to know is that irises do not tolerate excess moisture. They quickly die from rotting of the bulb and roots. It is important to take care of drainage before planting. However, it is not necessary to place it directly under the plants. Shallow trenches filled with gravel or broken brick, dug along its entire length near the flower bed, have proven themselves well.
For those who are going to plant the Dutch bulbous iris for the first time, planting and care begins with the choice of soil. The ideal soil for this plant is loose, with high air permeability, nutritious, neutral or slightly alkaline. In addition, it must be permeable to water.
Sod and leafy soil is mixed into sandy and peaty ones, if necessary, the acidity is adjusted. Fresh manure and excessive doses of chemical fertilizers should not be used. The ideal option is a well-matured compost or humus (there is a compost bucket per 1 m² of land). After application, the top dressing is thoroughly mixed with the soil. In the future, irises are fed with wood ash.

How to plant bulbs
Do you want Dutch bulbous iris to bloom under your window? Planting is done as follows:
- A round peg (about 5 cm in diameter) pierce the soil 15 cm deep. A distance of about 10 cm is maintained between the pits.
- A handful of coarse river sand is poured into the hole, into which the bulb is buried by 1-2 cm.
- From above, the onion is covered with the same sand.
After purchase, any bulbs should be treated with a fungicide solution and dried slightly. Before planting, no later than 2 days before, the flower bed or flowerpot is watered with a weak solution of potassium permanganate and potassium humate.
Slightly sprouted bulbs, with sprouts and roots, are planted in a trench. The depth can be from 15 to 20 cm. This helps to neatly position the roots and not damage them. In this case, the sand is filled up to about 2/3 of the trench height. From above, Dutch irises (bulbous species) are carefully squeezed with sand and covered with soil mixture. Then watering is performed. The soil can be mulched with sand, small pebbles, gravel.
Another convenient way to disembark
Dutch bulbous irises can be planted in a special basket. This is a plastic container with a lot of holes and holes for air intake and water outflow. It is inexpensive, it can be found in flower shops or ordered on the World Wide Web.
Put the basket on the ground and circle it with a shovel, remove the sod along the contour and dig a hole about 15 cm deep, add the necessary fertilizers into it, then put the basket on top and pour loose earth mixed with compost into it. Further, the required number of bulbs is placed in the basket, which are covered with earth from above. At the end of flowering, the container is dug out, and all the bulbs are stored.
Flowering time
Flowering begins at the end of May. Depending on the variety, the difference in the time of appearance of flower stalks with buds is 2-3 weeks. If it is humid and cool outside, then the flowers delight up to three to four weeks. In dry, sunny weather, they fade faster.
If you choose varieties of bulbous irises with different flowering, then a chic flower bed will delight you even longer. And after that, juicy and beautiful foliage will remain, which can also serve as an ornament.
How to care for blooming Dutch iris
During flowering, Dutch iris is not very whimsical. It should be watered only in very dry summers. Usually xyphyum has enough natural moisture and morning dew. If neighboring plants require watering, then the irises are simply covered with a film, so that water does not fall into the holes. Bulbous irises do not need regular feeding. It is enough to feed with wood ash or mineral mixture a week before flowering.The time is determined by the beginning of the formation of buds, they look like seals between the leaves of the plant.
What to do next
So, the buds have faded, the foliage of the xyphyum has completely dried up. What to do next? Does iris require Dutch maintenance after flowering? After the leaves of the plant have completely dried, the bulb should be dug out. What is nice, where the gardener planted one onion, there will be a small nest of them. Each bulb can be planted separately for the next year, or you can leave them nest for 3-4 years. If the gardener divided it, then next year only the largest bulbs will bloom, and the trifle will grow for several seasons, preparing for flowering.
The bulbs are dried and stored in a dry place until the beginning of Indian summer. Then they can be planted again in flower beds, but if the climate in the region is cold, then the planting should be covered for the winter. Thus, you can understand the color scheme, flowering time and height of the peduncles, and form the perfect flower garden for the next year.
Diseases and pests
Dutch iris is damaged by sheet drills. In this case, the damaged leaves are cut off, and the plant is treated with insecticides. Be sure to dig up the ground in the fall and remove last year's foliage and cut stems and branches of other plants.
Of the diseases, the most dangerous for irises are various forms of spotting.
Florist reviews
There are a lot of varieties of Dutch irises. As flower growers note, these plants have a very large flower. In the reviews, most people praise the Dutch iris, as it is unpretentious to care for and has a rather beautiful appearance. Such a plant takes root well in a temperate climatic zone.
All flower growers are unanimous that Dutch irises (planting and care have been described in this article) will adorn any garden plot or flower bed.
Iris is an ornamental plant, which in the territory of Russia is mainly planted in garden plots. The flower got its name from the variety of colors, which in Greek means "rainbow".
For the presented genus, numbering more than 800 species, the correct planting and care in the open fieldto provide your site with unprecedented beauty. But, according to the gardeners themselves, planting and caring for irises is not difficult, the main thing is to provide the plant with suitable conditions and observe the basic rules of self-cultivation.
Features of growing irises
Planting and self-cultivation of the flowers presented should be carried out strictly in accordance with the rules and characteristics of each variety, therefore, before independent actions, it is necessary to fully study all the subtleties. But there are some rules that apply to all types of irises:
- The root system of irises differs from others in its horizontal growth with subsequent exposure. This "awakening" can negatively affect growth, so you need to carefully monitor the condition of the roots and their location underground.
- Irises have the ability to move. Do not be surprised if, after a month or two after germination, your flat bed changes its shape - this is directly related to moving a few centimeters. To prevent such troubles from happening, the plant should be planted in a "fan".
- Top dressing of iris is done only with the use of liquid mineral fertilizers. They do not like the other composition.
These simple rules apply to all types of irises, without exception. But when disembarking and leaving, it is recommended to observe the basics allocated for the particular species selected.
Irises, photo of flowers:
this is what iris looks like
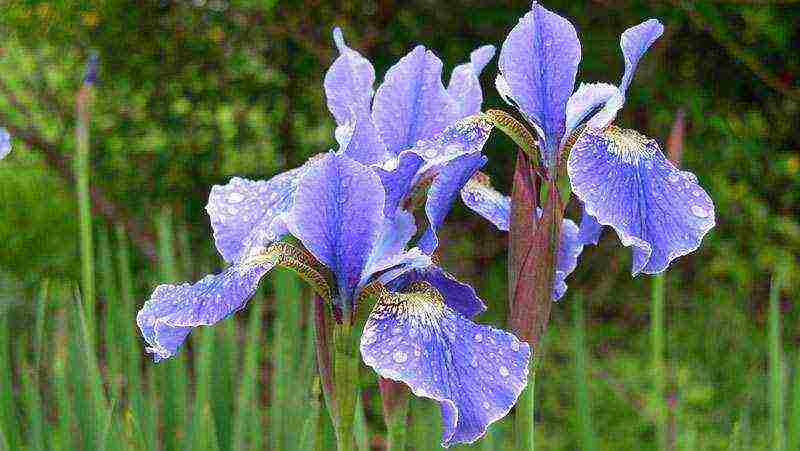
Siberian iris
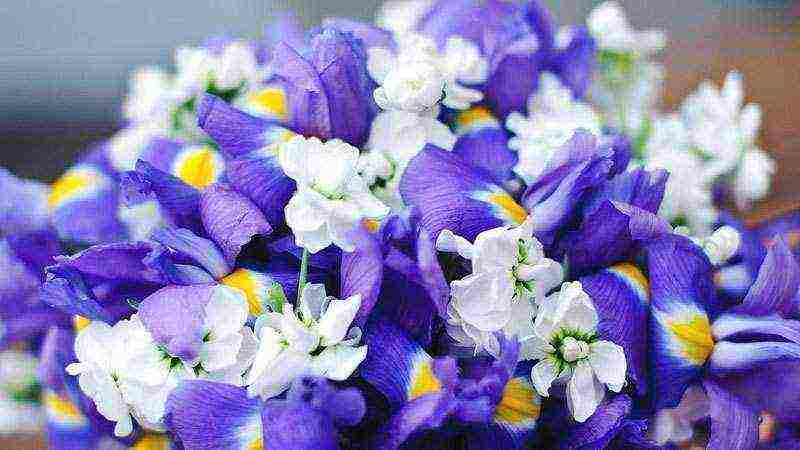
bouquet of irises
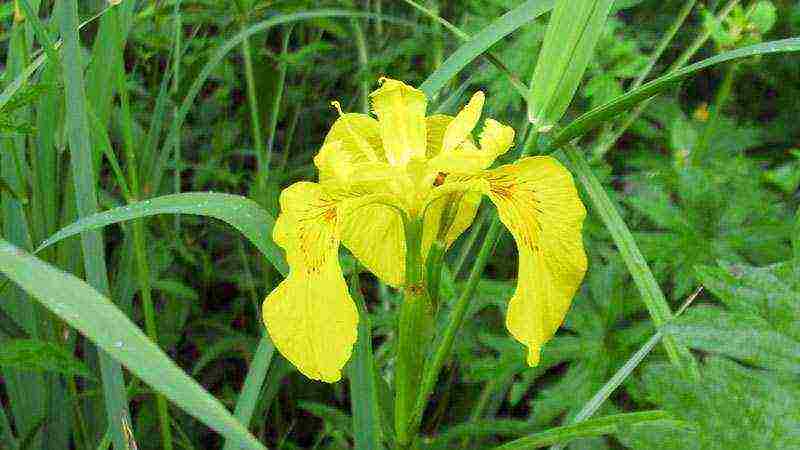
marsh iris
dwarf iris
Planting irises
Correct planting of this flower will further ensure easy maintenance and an attractive flower bed. Planting all types of irises directly depends on the type of root system.
Planting root irises
Root irises are rarely planted, as finding them for purchase is not so easy, unless you yourself contribute to the formation of root shoots.
Choose a well-lit place for planting them on the site, but so that in the summer it is not strongly exposed to sunlight.
Now prepare the soil according to the following guidelines:
- If the soil is depleted, any fertilizer should be applied with a minimum amount of nitrogen.
- In the case of acidic soil, it is better to neutralize it with chalk or ash. Otherwise, the leaves of the iris will grow intensively, and flowering will be weak or absent altogether.
- If the soil is heavy, it is better to add peat or sand.
All fertilizers or additional components are applied to a depth of one shovel bayonet. The presented processes are carried out a week before planting. Immediately before planting the irises, you can lay out a layer of drainage on the bottom of the entire place, also to the depth of one bayonet with a shovel.
When the drain is laid out, the irises sink to the bottom. Spread out the roots and cover them with earth. Such actions will save the flowers from root rot, especially if the planting takes place in a rainy area. 
Planting bearded irises
1. The main mistake of most novice gardeners lies in the wrong planting of bearded irises. Here it is important to properly prepare the plant: to select from the already faded bearded representatives of the delenka and one-year-old rhizomes. Then the planting material is stored until dry. In this case, they use an ordinary box or basket, and in no case polyethylene or a wet rag.
2. In July, you can start planting bearded iris species. Place and sand should be prepared here. The place should be well lit, but without direct exposure to sunlight, and the sand should be fine, free of impurities and dry. In the place where the landing is planned, they dig a flower bed to the depth of a shovel bayonet, sprinkle sand with a thin layer.
3. Planting is carried out with even distribution and spreading of the roots. The iris is buried in the ground so that the lower bud remains on the surface.
The leaves are necessarily perpendicular to the ground, and the upper part of the root system remains unburied.
4. Immediately after planting, bearded varieties are watered abundantly, since the next watering takes place only after three days.

Planting bulbous irises
Bulbous irises - the most popular among all similar representatives in the family. They have earned popularity by simple planting, cultivation and further storage. It is known that some species of the presented flower can be grown for at least 7-8 years in a row.
The correct planting of irises with a bulbous root system is as follows:
- A sunny place, well-ventilated and with loose soil, is chosen. Some varieties prefer rocky slides.
- Bulbs are planted from September to October, depending on the climate in the region.
- There are no other preferences in the choice and preparation of the soil. The main thing is to maintain the indicated planting depth of the bulbs, which is two diameters of the used "seedling", but not less than 5 cm.
Pay attention to this material - Gladioli: planting and care. When to dig it out and how to store it?
The bulbs tolerate winters and the harsh climate of the local area, but it is better to choose a more suitable variety for planting. Already in early spring, as soon as the snow begins to melt from the soil, the first shoots of the bulbs will appear.
The basis of the correct cultivation of the bulbous form of the root system is their digging immediately after the end of flowering.
As soon as the irises have faded, and their leaves have almost turned yellow, the stem is cut off, and the bulb is dug up. The excavated specimens are washed well in water and in a 0.2% solution of potassium permanganate. Then they should be quickly dried and removed to a cool, ventilated area.The bulbs can be folded into a box with regular onion husks, which will prevent the tubers from touching each other.
You will be interested in this article - Chrysanthemums: planting and care in the open field.
Proper care of irises
As already described above, these colors need to provide good lighting, which should not be exposed to the scorching rays of the sun, but it cannot be attributed to shading. This condition is central to the entire process of growing flowers.
The second important condition is proper watering of the flower. Irises should be watered when the soil near the sebry becomes dry. Watering is always plentiful, but you should not fill the flower bed until puddles form - this will lead to root rot.
Proper care of irises is timely and high-quality watering during the budding period of flowers. As for feeding, everything is strict here.
-
Firstly, you should not use top dressing during the flowering period of the plant - this leads to the premature end of this process.
-
Secondly, it is better not to feed the roots during the growth period at all, there are enough fertilizers that were scattered in the spring or during planting. If you do decide that you need to use additional complementary foods, choose a phosphorus-potassium solution. Pour it in at the root.
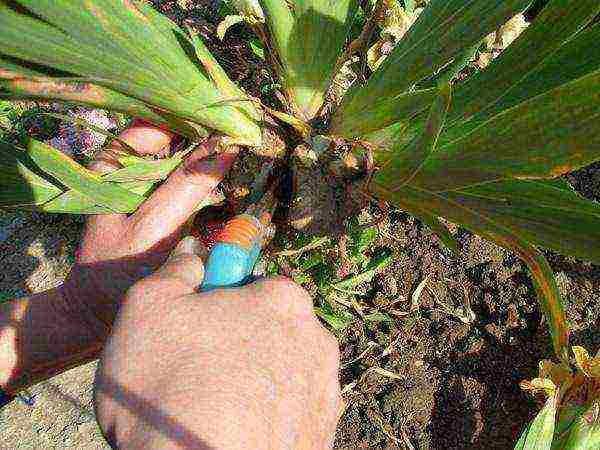
Weeding, obligatory during the growth period. Weeding is necessarily carried out manually, because the horizontally growing root system is on the surface, which means that it is easy to damage it with a hoe.
During the growing period, it is important to loosen in any way you can. It is better to use a small stick or fork with three teeth for this purpose. This metal object will be sufficient, since the depth of loosening should be small - you cannot expose the root system.
An important condition in the care of irises is the regular removal of faded flowers. Otherwise, there is a high probability of the spread of pests and any diseases.
Irises. Nursing and reproduction. Video:
Pests and diseases of irises
In order for a flower bed of irises to always delight with its magnificent flowering, it is necessary to periodically carefully inspect the flowers. It is important here to prevent diseases and problems such as:
- Root rot. Sometimes, due to abundant watering and a large amount of precipitation, the roots of the iris begin to rot. It looks like a little blackened leaves and even an inflorescence. They simply get rid of the problem - first, they dig out the flowers, then cut off all the decayed roots. The remaining root system is treated with any suitable antiseptic. Then the rhizome is thoroughly dried in the sun and planted again. Sand or drainage should also be changed or washed and dried.
- Infection with heterosporosis. It is a leaf disease with small brown spots. You can get rid of the presented problem only by cutting off and destroying the affected areas by burning. Then a solution of copper sulfate should be prepared with the calculation of a dilution of 100 g of substance per bucket. Spray all flowers thoroughly.
As for pests, the situation here is not critically dangerous. The maximum that can get here is thrips. These pests are destroyed by spraying with fungicides. In conclusion, it should be noted that, despite the presented conditions for self-cultivation, caring for irises is not difficult. It is also important to preserve the bulbous irises in winter.
If you live in a harsh region, the bulbs planted in autumn should be covered with any covering material. Some adventurous gardeners build something like a structure topped with plastic. Such actions provide reliable protection and promote spring emergence.
Like the article ? Show it to your friends:


