Content
- 1 Outcome
- 2 Growing and caring for onions: features
- 3 Pests and diseases of onion turnip
- 4 Why did the bow go to the arrow
- 5 How to speed up the ripening of onions
- 6 Harvest
- 7 Presowing preparation of material and planting in the ground
 Onions are popular vegetable crops. It is added to salads, soups, meat and fish dishes. Therefore, in almost every summer cottage and personal plot you can see beds with plantings this vegetable. But in order to get a good harvest, you need to know how to properly plant and care for onions.
Planting onions
The crop can be grown in three ways:
 From seeds in one year... This method of growing vegetables is suitable for areas with a warm climate.
- From seed in two years... In a two-year culture, the plant is grown in areas with short summers.
- Seedling method... This method is suitable for sweet and semi-spicy varieties of vegetables.
But before you start planting onions in open ground, you should prepare a site for it. The beds are recommended to be made in organic-rich, dry, sunny, open areas with neutral soil. If the soil is acidic, then it is preliminarily lime.
You can plant onions after tomatoes, green manure, peas, beans, cabbage crops, potatoes. After other types of onions, cucumbers, carrots and garlic, onions can be planted only after three years.
When planting in spring seed soil for planting is prepared in autumn:
 Rotted manure or humus is added to the soil, and the bed is dug to a depth of fifteen to twenty centimeters. It is not recommended to add fresh manure, otherwise only greens will grow.
- The acidic soil is mixed with limestone, ground chalk, wood ash or dolomite flour.
- In the spring, before sowing seeds or planting seedlings, mineral fertilizers are introduced into the soil - potassium chloride, urea, superphosphate.
Growing onions from seeds
 Semi-sweet and sweet varieties in warm climates can be grown from seeds in one year. The planting material is pre-processed, for which the seeds are placed in gauze, moistened and kept for swelling for a day.
A bed prepared for planting seeds is watered copper sulfate solution (for 10 liters of water - 1 tablespoon), after which seeds are placed into it to a depth of one and a half centimeters. The distance between the rows should be about thirteen centimeters, and between the seeds - one and a half centimeters. Crops are watered with water from a watering can with a shower head and covered with foil.
Crop care consists in timely moistening of the soil and daily airing of the plantings. When the seedlings appear, the shelter is removed. Seedlings must be thinned out so that there is a distance of two to three centimeters between the plants. The plantings are watered, and the soil around them is mulched with humus. This mulch will feed the plants, retain moisture and prevent weeds from growing. Once again, the seedlings must be thinned out three weeks after germination. The distance between them should be at least six to eight centimeters.
Growing seedlings
 In early or mid-April, pre-treated onion seeds are sown thickly in soil-filled seedbeds. The planting material is placed at a depth of one centimeter, moisten from a spray bottle and cover with foil.After the shoots appear, the shelter is removed. Seedling care consists only in timely soil moisture.
In open ground, seedlings are planted at the age of fifty to sixty days. Before planting in the garden, the roots on the onions are recommended to be shortened by one third of the length.
Planting sevka
In regions with a short summer, in the first year, onion sets are grown on the beds, which are stored at home in winter and planted in the next spring on the beds for growing. Before planting, the onions must be sorted out, warmed up for seven days in the sun and held for ten minutes in a solution of copper sulfate.
Sevok is planted in the beds in May according to the following scheme:
- The distance between the rows should be thirty centimeters.
- The distance between the onions is from eight to ten centimeters.
- Sevok should be planted to a depth of five centimeters.
When growing sets in the fall, you can get turnips, and in the summer - greens. For this, the distance between the landings is five centimeters. During the summer, the onions are torn out through one and used as greenery.
Planting onions in the fall
 To get the harvest already in July, the seed should be planted in the beds from the fifth to the twentieth of October. Before winter, only cold-resistant vegetable varieties are planted, which include variety Stuttgarten, Strigunovsky, Danilovksky and Arzamas varieties.
A bed for winter plantings should be done in sunny, elevated areas. Snow should melt on them before everyone else and water should not stagnate.
The soil for planting the sevka should still be warm. However, before frost, onions should not be planted, since the sevok can dry out.
The planting material is pre-sorted out and warmed up. Sevok is placed in the ground to a depth of five centimeters, in seven centimeters increments. The distance between the rows is about fifteen centimeters. The beds are covered with straw or spruce branches. As soon as the snow begins to melt in the spring, the shelter is removed.
Autumn planting sevka has its advantages:
- After harvesting, another crop can be planted on the garden bed.
- The onion fly is not afraid of autumn plantings, since they have time to get stronger by its appearance.
- At home, the sevok dries quickly and is difficult to preserve until spring.
Onion care
 When growing onions in open ground, it should be provided with timely watering, dressing and treatments from pests and diseases.
Onions should be watered once a week, using five to ten liters of water per square meter of planting. However, if it rains regularly in summer, then watering may not be necessary. Otherwise, in waterlogged soil, the onions will begin to rot. Learn about the condition of the soil can be green. If it becomes pale, then there is an excess of moisture in the soil. The bluish-white feathers indicate that the soil is dry. In July, the bulbs begin to ripen and watering is reduced.
When growing onions during the season, three additional fertilizing with organic fertilizers are carried out. You can use a solution of mullein, urea or bird droppings for this (for 10 liters of water - one glass of organic matter). One square meter of the garden bed is watered with three liters of solution. The first feeding is carried out after the greens appear. Two weeks later, the plantings are fertilized a second time. The third time, the plants are fed when the onions are about the size of a walnut.
When the greens of the onions reach a size of about fifteen centimeters, it is recommended to treat the plants with copper sulfate, which is good protection against many fungal diseases... To do this, the feathers are sprayed with a solution prepared from ten liters of water and a teaspoon of the drug.
Harvesting and storing onions
 From about mid-August, when the bulbs grow to the required volume, the feathers lodge and new leaves stop forming, you can start harvesting. This should be done in warm, dry weather. If you skip the onion harvesting time, then it may start to grow again... These vegetables are not stored for a long time.
The collected bulbs are evenly laid out on the garden bed. When the onions are dry, they are freed from the ground and additionally dried in a dry room or in the sun. Dried vegetables should be examined carefully. The husked and spoiled bulbs are not suitable for long-term storage. Before you put vegetables for storage, you need to cut off the leaves. Only a neck about six centimeters long should remain. To increase the shelf life of the bulbs, the roots are cauterized.
It is recommended to store onion heads in a dry room with an air temperature slightly above 0 degrees. Since air must flow to the bulbs, they are stacked in stockings, baskets, nets or boxes. During storage, vegetables are regularly sorted out, removing bulbs that have begun to grow or rot.
You can store the crop in the apartment. In this case, you do not need to trim dry leaves on the plant. The container with vegetables is placed away from the batteries. The optimum air temperature should be from +18 to +20 degrees.
It is not recommended to store it along with other vegetables that need high humidity.
Onion pests and diseases
When growing onions in open ground, the following pests are most dangerous for the plant:
 Onion moth. To prevent the appearance of these pests, weeds should be removed in a timely manner, crop rotation, agricultural technology should be observed and plant residues should be destroyed.
- Onion fly. To prevent this pest from settling on onions, the vegetable is recommended plant in the same bed with carrots, the smell of which the onion fly is afraid.
- Tobacco thrips. Pests are destroyed by Karbofos or Aktellik.
- Caterpillars of the scoop. You can get rid of the caterpillars by treating the plantings with a solution of Gomelin or Bitoxibacillin.
Unfavorable growing conditions and mistakes in care can lead to damage to the onion with various diseases:
 Fusarium is a disease that often appears on plants affected by onion flies. With fusarium, tissues die off at the bottom of the onions, and rot appears, after which the tips of the greens turn yellow. To avoid the appearance of this disease, the set is warmed up before planting at a temperature of forty degrees for ten hours.
- Downy mildew - the disease can be recognized by a gray bloom on the leaves. Affected vegetables do not form seeds and do not store well. To avoid the appearance of powdery mildew, the sets are warmed up before planting. It is also necessary to ensure that the plantings are not thickened.
- Gray rot - the disease occurs in rainy and damp weather. Diseased plants must be removed. For the purpose of prevention, the planting material is treated with a solution of copper sulfate.
- White rot - acidic soil and excess nitrogen in the soil contribute to the appearance of the disease. Therefore, before planting vegetables, the acidic soil is limed, and fresh manure is not used to feed the onions. Diseased plants should be removed.
- Mosaic is a viral disease in which the plant lags behind in growth, the seeds are almost not formed, the inflorescences become small, and the leaves turn yellow. Affected instances must be removed.
- Neck rot is a disease that can only be detected after harvest. It manifests itself as mold on the outer scales of the bulbs. Neck rot develops under unfavorable conditions for growing plants. To avoid its appearance, the seedlings before planting and the harvested bulbs are warmed up at a temperature of forty-five degrees. Most often, late varieties are affected by this disease.
Viral diseases of the plant are not cured, therefore, preventive measures must be used. To do this, it is recommended to observe crop rotation, not to make thickened plantings, regularly remove weeds and follow all agricultural techniques. Before planting, the onion sets can be warmed up and treated with copper sulfate.
Fungal diseases can be cured special fungicidal preparations.However, it is not recommended to use them, as the bulbs are capable of accumulating poisons.
Onions are an unpretentious plant that even a novice gardener can grow in his area. The popularity of this vegetable is due to the content of substances useful for the human body in it. Eating onions improves digestion and induces the secretion of gastric juice. In addition, the vegetable has a bactericidal, sedative and diuretic effect.
>
Correct and timely feeding of onions to turnips is a guarantee of large and healthy bulbs. We will tell you what kind of care for onion sets in the open field is necessary for this, about the types and rates of fertilization, as well as about protection from pests and diseases.
We grow strong and large onions
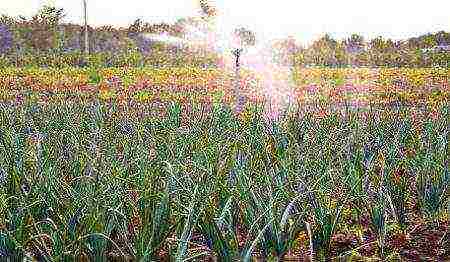
Growing onions in the open field or in a greenhouse is impossible without additional planting care. To obtain high-quality and large bulbs that will not hurt and survive well for the winter, it is necessary to properly feed and water the plants in each of the growth periods.
Growing onions from seedlings in the open field also involves weeding from weeds throughout the summer, with a frequency of once every 1-2 weeks. Removing weeds is very important as they create excess moisture and increase the risk of fungal diseases. If weeding is not followed, the bulbs become very damp and cannot withstand long-term storage. Weeds begin to be removed with a growth of 3-5 cm.
Water the onion once a week at a rate of up to 12 liters of water per square meter, or use automatic drip irrigation. Water for irrigation is taken below +18 degrees Celsius to avoid powdery mildew infection. After that, be sure to spud the plantings, and loosen the aisles to provide access to the roots of oxygen.
Automatic irrigation system for onion beds Care for onion sets in early summer
14 days after planting the plant in open ground, the onion is initially fed on the turnip. This is usually early to mid-June. Leaves during this period grow weak and have a light shade. Top dressing of onions in June is carried out with nitrogen-containing fertilizers to accelerate growth. Choose one of the tools popular among gardeners.
- Organic fertilizers: 1 cup mullein or chicken manure and 1 tbsp. l. urea, diluted in 10 liters. water; or 1 glass of manure, dissolve in 10 liters of water. Consumption up to 3 liters per 1 sq.m .;
- Mineral: 30 gr. ammonium nitrate, 40 gr. superphosphate and 20 gr. potassium chloride, diluted in 10 liters of water. Consumption 1-2 liters per sq.m .;
- Of the chemicals, Vegeta is suitable, 2 tbsp. spoons, which are diluted in 10 liters of water with 1 tbsp. l. urea. Consumption up to 5 liters per 1 sq. m .;
- Folk method: 3 tbsp. l. ammonia diluted in a ten-liter bucket of water. Consumption 1-2 liters per sq.m.
With a lack of nitrogen, feathers will grow slowly and weakly. If you overdo it with fertilizers, the plant will put all its energy into forcing the greens and the head will form poorly. After fertilization, plantings are irrigated, unless an automatic drip irrigation system is connected. After each watering, loosening of the soil is necessary.
Loosening onion beds after watering
Onion care in June also offers protection from insects and disease. Once a week in wet weather, and every 2 weeks in dry weather, they are treated with fungicides, choosing one of the following general action agents:
- 0.2% Ridomil at the rate of 1.5 kg per 1 ha;
- 0.4% Tsineba at the rate of 2.4 kg per 1 ha;
- 7% Bordeaux liquid at the rate of 6-8 kg per 1 ha;
- 0.4% copper chloride at the rate of 2.4 kg per 1 ha.
For the best effect, it is recommended to alternate the drugs.
Onion care in July
On the 20th day after the end of the first feeding, secondary fertilization is carried out. Fertilizers containing phosphorus and potassium are applied. The most popular among gardeners are the following recipes from an approximate consumption of 10 liters per 2 sq. m. beds:
- 30 gr. ammonium nitrate, 60 gr. superphosphate and 30 gr.potassium chloride diluted in 10 liters of water;
- 1 tbsp. l. salt, 1 tbsp. l. ammonium nitrate and 10 gr. 1% iodine dissolved in 10 liters of water;
- 2 tbsp. l. nitrophosphate, for 10 liters of water;
- 1 liter of herbal liquid fertilizer: pour a third of a bucket of mint greens of weeds or nettles with 3 liters of water, add a tablespoon of yeast, leave for 2-3 days, dilute to 9 liters with water before use;
Preparation of herbal liquid fertilizer for onions
- Top dressing of onions in July is also done with ready-made preparations, such as Agricol-2, 1 tbsp. l. which is diluted in 10 liters of water.
With a lack of potassium, the leaves turn yellow in the plant, with a lack of phosphorus, the tops dry out. They need to be pruned so that they do not take away energy from the bulb.
At high temperatures and prolonged heat, watering is carried out twice a week, at the rate of up to 6 liters of water per 1 sq. m. Water from a watering can under the leaves in a small stream, in the morning or in the evening.
Top dressing of onions in August
If the soil is poor during the formation of the onion head, a third feeding is carried out. The head of the plant should grow up to 4 cm in diameter. For these purposes, one of the potash-phosphorus fertilizers is selected:
- 30 gr. potassium chloride and 60 gr. an aqueous solution of superphosphate, 10 liters of water;
- 2 tbsp. l. superphosphate, diluted in 10 liters of water;
- 10 gr. potassium salt and 20 gr. superphosphate per 10 liters of water;
- 250 g wood ash, diluted in 10 liters of boiling water and infused for 2 days;
- From chemical preparations "Effekton-O", 2 tbsp. l. which is diluted in 10 liters of water, additionally adding 1 tbsp. l. superphosphate.
The consumption of ready-made mixtures for fertilization is up to 5 liters per 1 sq. m. All stages of dressing are carried out in dry, calm weather in the evening. You need to pour it at the root, trying not to get on the greens. 24 hours after feeding, it is advisable to spray the plant with clean water so that no fertilizer residues remain on it.
Outdoor onion care video
Rules for harvesting and storing turnip onions
2 weeks before harvest, at the end of August - September, watering is stopped. The bulbs begin to be dug out when the growth of new green feathers stops and the existing feathers mass adhere to the ground, the head is fully formed and colored brown.
Do not delay the harvest
Harvesting is not delayed further than mid-September, as the onions can resume growth. Such fruits become unsuitable for storage.
 Harvesting onions in the country
After harvesting, onions are spread in a dry ventilated room or hung in bunches. The greens are not cut off so that the head draws out the remaining juices from it. After a month, it can be transferred to a storage location. First, you need to cut off the dried tops and roots, but at the same time leave 3-4 centimeters of the neck and some roots. You can learn more about harvesting and storing onions in our article.
Outcome
Onions are considered an unpretentious and undemanding culture to care for. However, only compliance with the rules of feeding, watering and general care will allow you to get a good harvest.
It is difficult to imagine our menu without onions, it is no coincidence that every gardener strives to plant this vegetable in his area. Growing onions for a turnip has its own specifics, and if you know all the agricultural techniques and properly care for the plants, the yields will always be high.
Growing and caring for onions: features
Many people are interested in how to grow onions per head? At the same time, everyone wants to get large beautiful turnip bulbs. This is possible if planting sets, as well as picking onions. By autumn, with proper care, large onions will grow from them.
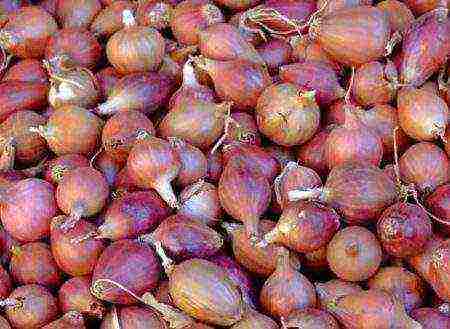
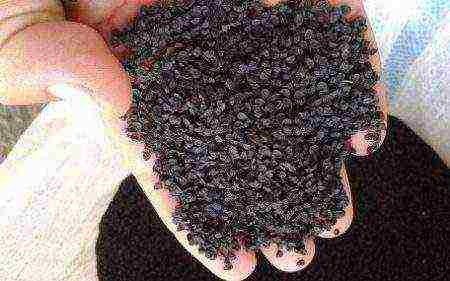
You can get onions for a turnip from seeds (directly into the ground or through seedlings), but in this case, to get a large onion in one year, you need to select the appropriate varieties of onions. And so the scheme is traditional, when in the first year nigella is sown, sevok is obtained, and then turnip is grown from it in the next season.
Growing onions per head can be done in different ways.Someone buys sevok, others prefer to grow their own - it all depends on the desire, opportunities and availability of time. In addition, it is not always possible to acquire the exact variety of onions that you want to grow yourself with sevkom. At the same time, the assortment of seeds presented in the store is very diverse, and you can choose the variety you like and sow nigella. But only then for breeding, you can grow your own seeds of your favorite variety.
How to grow good onion sets from nigella
To get your own high-quality sevka, you will have to start growing it from seeds. In the south, you can sow nigella directly into open ground, in the northern regions it is best to grow onions through seedlings.
ON A NOTE! The best germination rate is possessed by nigella no older than two years.
Seeds to be sown are calibrated, then placed in a potassium permanganate solution for disinfection (about 30 minutes). To get friendly and strong shoots, for growth, the seeds can be soaked in any stimulator. After which they are placed for a couple of days in a damp cloth for germination, then they are slightly dried and sown.
IMPORTANT! The listed procedures for the preparation of seed material are carried out both for seeds that will be sown in open ground and for sowing seedlings.
The timing of sowing nigella depends on the climate of the area, as well as the weather conditions of a particular year. But usually nigella is sown on the ridges around mid-late April, the main thing is that the soil is warmed up. Sowing dates are chosen for seedlings, based on the fact that seedlings, when planted in open ground, should be 60 days old and have 3-4 true leaves.
Grooves are made on the prepared ridges, then prepared seeds are sown in them or seedlings are planted. When sowing nigella, it is difficult to control the density of seedlings, therefore, after the emergence of shoots, it will be necessary to thin out. If everything is done correctly, the seeds will sprout quickly.
Further, the care for turnip onions is standard:
- loosening;
- compulsory weeding;
- watering onions.
Onions are not watered often, about once every 7-8 days, being guided by the weather. For feeding, you can use a mullein diluted in water (1:10) or complex fertilizers.
IMPORTANT! As soon as the formation of onion sets begins (in July), watering should be stopped. They also stop feeding the plants.
In the second half of summer (from late July to early September), the feather of the onion turns yellow, lays down, the neck of the onions becomes thin, and this is a signal that the onion can be removed. Carefully dig up the onions, shake off the ground and lay them out to dry, first on the ridge, and then under the canopy or in the attic.
After this stage of drying, the leaves are cut off, leaving a small neck, and the onions are dried for about 14 days at a higher temperature - up to + 30 ° C. Then it is kept at + 40 ° C for about 10-12 hours, and then sorted and removed for winter storage.
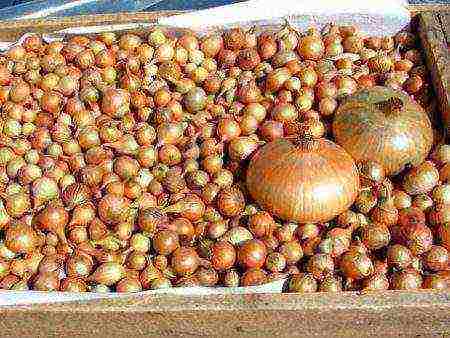
The best sowing for future sowing is from 1.5 to 2 cm in diameter. Smaller specimens can dry out over the winter, larger ones with juicy inner scales, although they are used for sowing (the so-called sampling), do not differ in yield.
Sevok is stored in boxes, baskets, boxes at temperatures from 10 to 24-25 ° C.
IMPORTANT! Sevok is poured in boxes and boxes with a layer of no more than 6 cm, and no more than 3 kg are stored in baskets and bags with onions.
Usually, gardeners know how to grow onions for a turnip from a set, but not everyone succeeds in saving it without losses for subsequent planting. But adherence to simple recommendations will allow you to avoid damage to the seed and in the spring start planting on a turnip.
ON A NOTE! Small heads of sevka can be planted on a turnip before winter, avoiding problems with its storage, and at the same time getting early production in the spring.
Growing turnip onions from seedlings in the open field
The most popular and affordable way for everyone to grow onions for a turnip is to grow it from a set.Planting and care in the open field does not require much trouble, the main thing is to follow the basic rules.
Cooking a place for onions
In the fall, the ridge where it is planned to plant the sevok is carefully dug up. If the soil is poor, then humus or compost (0.5 buckets per square meter), wood ash should be added. Onions do not like a lot of organic matter, so fertilization rates should be observed. Also, fresh manure is never applied for planting onions.
The ridge should be in a sunny place, where groundwater does not fit, there is no stagnation of moisture. The best soils are sandy loam and loamy; on acidic soils, dolomite flour or fluff lime is added.
Preparing onion sets for planting
In the spring, the sets are taken out of the bags and boxes, and they are sorted again. Large (more than 2.5 cm) seedlings are planted separately, it will be possible to take greens from these plants. For a turnip, a medium-sized set is intended.
The planting material is first warmed up for about 7 hours at a temperature of up to 40 ° C. Then the onions are soaked in a solution of potassium permanganate (for 20-30 minutes) or any growth stimulant (for about two hours).
When to plant onions on a head from a set? The timing depends on the terrain, climate, and weather conditions. But the soil should be warmed up to about 12-14ºC.
Planting onions in the spring on the head
How to plant onion sets? On the prepared ridge, rows are made (the distance between them is at least 30-40 cm), where the bulbs are carefully planted. The distance between them should be at least 6 cm, the depth depends on the size of the set. When planted above the surface, the tail of the bulb should be slightly visible.
Usually, the first shoots appear after 8-10 days, but here it all depends on the quality of the planting material, weather conditions.
How to water onions
This vegetable crop does not require a lot of water when growing. The plant needs moisture in the first half of the growing season, when the feather grows and the mass of the bulb grows.
How often in the garden to water the onions on the turnip? Usually, plants are watered no more than once a week (in hot weather), with the obligatory loosening of the soil.
One month before the expected date of harvesting, it is necessary to stop watering the onions. You also need to stop feeding. Only loosening remains, which prevents the appearance of a hard crust on the soil surface.
How to feed onions on the head
Experienced gardeners know from their own experience that if the soil on the ridges was well filled with fertilizers, then in the summer season the onions will not really need additional feeding. But if there is slow growth and a pale feather, then fertilizers are needed.
How to properly feed onions for a turnip?
The first feeding of onions on a turnip is carried out when the seed has already 3-4 true leaves. Complex fertilizers are used (according to the instructions), as well as diluted mullein (1:10) or bird droppings (1:20). You can apply a special onion fertilizer (sold in stores) by foliar dressing.
The second time you need to feed it with wood ash or phosphorus-potassium fertilizers. Nitrogen is excluded, since during this period the plant grows a bulb and potassium and phosphorus will be more useful. The feeding regime should be tough, and you should not overfeed the plants.
IMPORTANT! The feathers of the sevka grown on the turnip are not cut off!
For greenery, samples are used, which is best planted on a hotel bed.
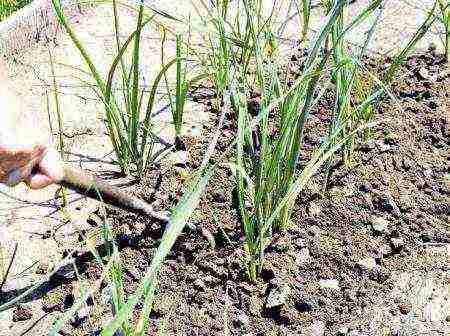
Weeding
Everyone knows that onions, like all vegetables, must be weeded. But, unfortunately, gardeners do not always have enough time for this. Meanwhile, weeds can not only cause poor onion growth and a decrease in its yield. They create increased moisture, which is detrimental to vegetables and very attractive to various pests and diseases. Also, a turnip that grows in weed beds usually has a large and thick neck, and such bulbs are poorly stored in winter.
Weeds must be removed by hand, preferably after rain or watering when the soil is wet.
Pests and diseases of onion turnip
Many people ask how to grow large onions, get a good harvest and avoid the use of "chemicals" in the garden. For fertilization, it was said above, but what about diseases and pests?
The most important thing is to carry out prevention, as well as adherence to the rules of agricultural technology, and then you will not have to use toxic drugs.
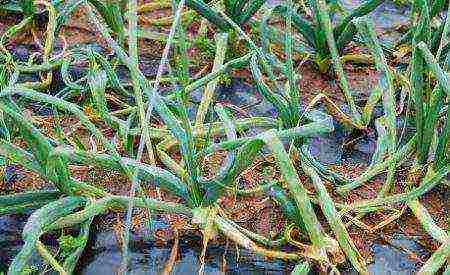
Most often, turnip onions are affected by various types of rot, as well as downy mildew. What to do for prevention, how to prevent onion disease?
- It is necessary to plant sevok on prepared ridges, avoiding thickened plantings.
- You cannot grow onions for several years in a row in one place. Optimal - return to the previous place in about three to four years.
- When watering, you need to carefully water the plants, and then immediately loosen the soil.
- When growing onions, soil mulching is used, which allows you to retain moisture and prevent the appearance of weeds.
- It is imperative to remove diseased or weakened plants, as well as those where the feather turns yellow.
- It will stop diseases and adherence to the dose of fertilization (especially for nitrogen, an excessive amount of which negatively affects the condition of the bulbs).
Good results are obtained by processing the seedlings before planting with a solution of potassium permanganate, copper sulfate, warming the bulbs. Also, on the ridges, you can spray the plants (when the leaves are about 14-15 cm) with copper chloride (a teaspoon in a bucket of water).
Plants that are grown to obtain feathers for greens cannot be subjected to such processing.
From pests - onion flies, thrips, onion moths, regular loosening, special mixtures help well:
- tobacco dust and lime (mixed in equal amounts and powdered onions);
- tobacco dust and black ground pepper;
- ash.
Also, planting onions can be saved with salt water, composition: 200 grams of ordinary table salt is diluted in a bucket of water. It is necessary to water carefully, not allowing water to fall on the onion feathers.
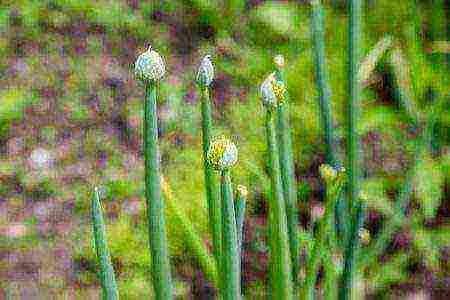
Why did the bow go to the arrow
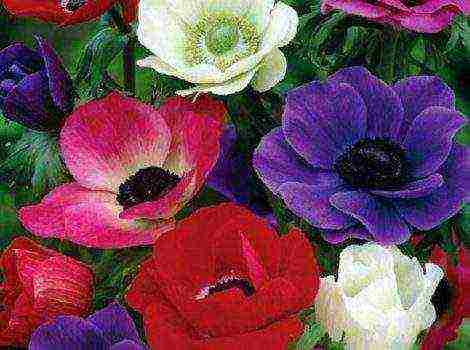
In addition to leaves, onions can produce a peduncle, or, as they say, go into arrows. In the basket of the peduncle, seeds ripen - nigella.
But if onions are grown for a turnip, then arrows are completely unnecessary. They take up nutrients and prevent the formation of a full and strong bulb. What if the arrows are coming? If this is observed, then the peduncles must be cut off.
And in order to prevent shooting, you must follow a number of rules:
- when storing bulbs in winter, sudden changes in temperature should be avoided;
- use only high-quality seed material;
- warm up the sevok before planting it on the ridges (especially for purchased bulbs);
- do not plant large onions on the turnip - samples, since it is he who most often goes into the arrow;
- plant sevok, observing the terms and always in the heated soil;
- water the onions correctly, avoiding excessive moisture. With a bad summer, watering should be completed already a month before harvesting the onions.
If there is a peduncle, it is cut off or broken off at the base. After breaking out the arrow, the torn peduncle is thrown away. But we must continue to monitor these plants, as there may be repeated flower stalks. These arrows are also broken out or cut off, and then, when stored, these bulbs are used for food in the first place.
How to speed up the ripening of onions
It so happens that gardeners want to speed up the ripening of onions. This is due to bad weather conditions, prolonged rains, and a drop in temperature.
What can be done and what acceleration measures can be taken?
- Trim the roots of the turnip at a depth of 5-6 cm from the bottom.
- For about 10-12 days, for accelerated ripening, you can slightly bare the bulbs, shaking off the earth from them. Also, in a month you need to finish watering the onions.
Many are interested in whether it is possible to completely cut off the leaves of a growing onion to accelerate ripening? No, this cannot be done, even if the feather is already turning yellow, since pruning will only lead to a deterioration in the quality of the bulbs and their decay.
Harvest
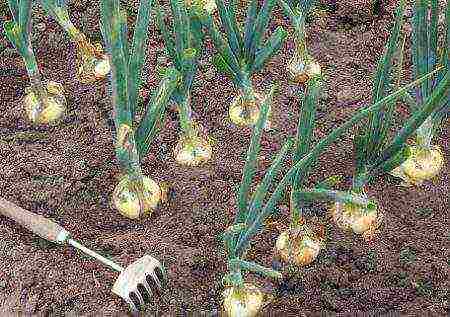
When to harvest onions? The timing depends on the variety, weather conditions, agricultural technology, but in general, onions are harvested from the ridges, from early August to early September. Readiness is determined by the following criteria:
- the feather turns yellow;
- mass lodging of leaves begins;
- the bulbs are fully formed in size and have the characteristic color of the outer scales for a particular cultivar. They can be, depending on the variety, yellow, red, white.
With lodging and yellowing of the feather, one should not be late in harvesting the turnip, since the onion can again give roots after 10-14 days. Then it will be unusable.
As soon as the feather turns yellow, the turnip is removed from the ridges. They choose a dry and clear day for this, carefully digging out the bulbs and shaking off the earth from them. Then they are laid out directly on the ridges for drying, and after that they are removed under a canopy.
ON A NOTE! It is not recommended to immediately tear off or cut off the feather of the onion, do it later, when the leaves finally turn yellow, dry, and the neck will be thin. If you tear off the leaves earlier, then an infection can get into the bulbs and they will rot.
The onions are dried under a canopy or in the attic for about two weeks, then the leaves are cut off and put back to dry. The temperature should already be slightly higher - up to 30 ° C, the period should be about a week.
If storage is supposed to be in braids, then the leaves are not cut off at all. A properly grown, well-dried and ready-to-winter turnip will have one layer of new scales in about two weeks.
After thorough drying, the onions are placed in boxes, bags or baskets and stored at room temperature.
Now, having learned how to grow onions for a turnip, you will always have good yields of this useful crop.
 Onions are a traditional vegetable culture, the peculiar pungent taste of which is indispensable in the preparation of salads and appetizers, first and second courses, pickles and pickles, and using strong golden onions from your own garden for culinary purposes is doubly more pleasant. Growing a good harvest of this healthy vegetable is not difficult science, but it is still worth taking on board a few useful recommendations.
The most successful is the technology of growing turnip onions from seedlings - small heads obtained as a result of sowing onion seeds (nigella). The advantages of this technique are obvious - onion sets are more resistant to shooting, infections and pest attacks, they are distinguished by early ripening periods and unpretentious maintenance.
For crops of the onion family, resistance to low temperatures is characteristic, therefore, seedlings are planted in the ground from the end of April, when the topsoil (10 cm) warms up to + 12 ° C, and the air temperature does not drop below + 5 ° C. Short-term return frosts do not threaten the growth of onions. Young seedlings easily tolerate a temperature drop down to -3 ° C, however, for adult plants, such a cold snap is critical - growth and development cease.
For planting sevka on a turnip, a sunny and ventilated place is allocated on the site on loose nutrient soils, neutral or slightly acidic. Of the predecessor crops, the best for onions are tomatoes, potatoes, cabbage, pumpkin, zucchini, as well as aromatic herbs (basil, dill, fennel, parsley), the worst is garlic. Near the onion, planting of any agricultural crops is allowed, except for legumes - he does not tolerate their neighborhood. But it perfectly "cooperates" with carrots: when planting together, crops save each other from pests - carrot and onion flies. Also, parasites are frightened off by the strong tart aroma of calendula and marigolds planted in the aisles. Every 3-4 years, the onion bed must be moved to a new place.
At the end of autumn, the area for sowing is dug on a shovel's bayonet, clearing weeds and filling the soil with rotted peat compost and adding for each m2? landing area for 2 tbsp. l. phosphorus-potassium granules (3/4 of the norm). It is impossible to use fresh manure to fertilize onions - it stimulates the intensive development of the green mass, as a result of which the bulbs do not have time to ripen on time. In the spring, before planting, the surface of the beds is actively loosened and a full dose of nitrogen and the remaining portion of phosphorus-potassium dressings are applied. Low beds with a width of 45-50 cm are poured at a distance of 60-65 cm from each other.
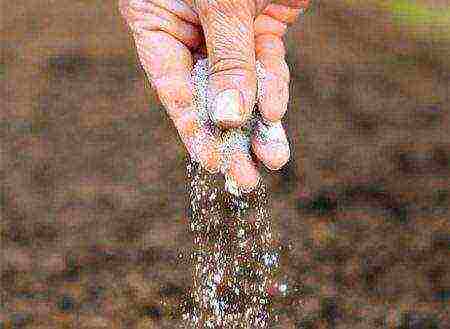
Presowing preparation of material and planting in the ground
To obtain a good harvest of onions, the seedlings need preliminary processing, which is carried out as follows:
- Sevka onions are sorted out, sorted by size and discarded dry, diseased specimens.
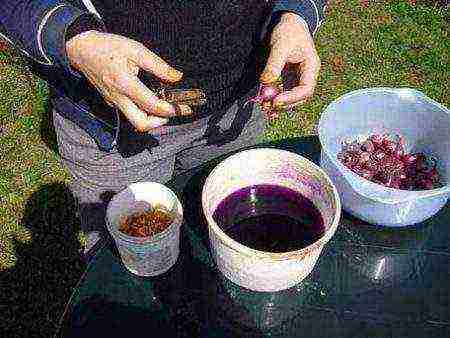
- To prevent early shooting and the development of fungal diseases, 15 days before the procedure, the material intended for planting is heated for 10 hours at a temperature of + 40 ° C to + 45 ° C. A good heating of the bulbs can be ensured by placing them on a central heating battery.
- The day before planting, the prepared bulbs are soaked in warm water or a weak solution of potassium permanganate. You can also sprinkle with hot water just before placing in the ground.
- Sowing shows good results when soaked in a solution of complex fertilizers and after treatment with growth stimulants.
- At the last stage of the preparatory work, the bottom and the apical "tail" of each onion are carefully trimmed to speed up germination.
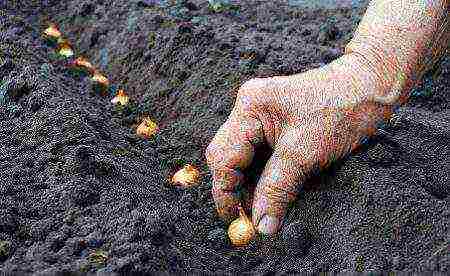
It is customary to plant sevok in a prepared bed in the following order:
- Planting grooves of small depth are formed on the surface of the soil, leaving row spacings 40 cm wide.
- If the soil is too dry, the furrows are sprayed with standing water before planting.
- Sevok is planted with an interval of 6-8 cm. The depth of the seeding depends on the caliber of the seed - the tops of the onions should "look out" a little from the ground.
Onion sets germinate quickly and amicably - after 9-12 days the first green feathers appear.
In order to grow and develop normally, onions do not need a lot of water, but in the first month after germination, the soil must be constantly moistened. Watering rate - 1-2 times every 15 days, in dry weather - 2 times a week with the obligatory loosening of the surface soil layer. During the first 25-30 days of growth, the soil is shed by 10-12 cm, increasing the depth of the strait to 20-25 cm as the bulbs grow. often loosen the soil, freeing the top of the heads from the ground. Contrary to popular belief, planting onions should not be hilled!
For the first time, onions are fertilized 15-20 days after planting at the stage of leaf growth; the need for feeding is especially great if the feather develops too thin and colorless. During this period, a solution of urea or nitrophosphate is used, with which the beds are abundantly shed. At the end of the procedure, the onions must be irrigated from a watering can or a hose with a fine-mesh nozzle in order to wash off the remaining fertilizer from the feather.
For the second feeding, which is carried out 3 weeks after the first, phosphorus-potassium fertilizers are used. To prepare the nutrient solution, take 20-30 g of superphosphate and 10-15 g of potassium salt.
If necessary, a third feeding is allowed. In this case, use the same nutrient solution as in the second procedure.
For all its unpretentiousness, onions make high demands on the condition of the soil, therefore, the surface of the beds must be regularly loosened by hand, acting extremely carefully so as not to damage the sensitive fibrous root system of the bulbs, located at a depth of 10-30 cm.In addition, the onion does not accept clogging of the beds with grass ...Growing, weeds prevent moisture evaporation, which leads to the development of infections and root rot. Bulbs grown in a weedy bed form an excessively thick neck, resulting in a shorter shelf life.
Of the diseases, the greatest danger to onions is represented by such fungal infections as powdery mildew and root rot. Planting pests are often attacked by onion fly, thrips, nematode. Rescue measures are taken at the first visible signs of damage (discoloration, wilting and curling of the feather, the formation of spots and light dots), using a mixture of biofungicides and bioinsecticides that are safe for human and animal health. The solution is prepared according to the manufacturer's instructions. It is not recommended to use aggressive agrochemicals for onion protection.
It is not too difficult to grow onions from sets, but it is not always possible to avoid difficulties. As a rule, you can solve this or that problem in advance by adjusting the care regimen.
- Early death of bulbs - usually this problem is observed due to strong thickening of the plantings without subsequent thinning, untimely impregnation and insufficient watering. As a result of violation of agricultural technology, too small, incompletely formed bulbs stop growing.
- Premature yellowing of leaves - observed with a high density of planting and a lack of moisture, therefore, the ripening of the bulbs occurs ahead of time (even for heads whose diameter does not exceed 5-8 mm). In addition, yellowed leaves can be a sign of an onion fly attack.
- Incomplete bulb ripening is a common occurrence due to the high concentration of nitrogen in the soil. To accelerate ripening in mid-July, potash fertilizers are applied to the soil at the rate of 30-40 g / m2.
- Shooting onions is a common problem when using store-bought sets. To avoid it, the material is kept at temperatures from + 25 ° C to + 30 ° C for 15-20 days before planting.
The problems listed above will not arise with strict adherence to agrotechnical standards.
Onions are harvested in the second half of August, choosing for this a dry, fine day. Unripe bulbs dug out in the rain, saturated with moisture, will not be stored for a long time. For the same reason, 25-30 days before harvesting, watering the onion garden is completely canceled. The signs of consumer ripeness and readiness of the vegetable for harvesting are the cessation of growth and mass lodging of the feather. It is impossible to hesitate at this stage - the onion can start growing again.
The bulbs are carefully dug in and pulled out of the ground, after which, if the weather is clear and warm, they are laid out to dry on the vacant bed - exposure to sunlight is an effective prevention of dangerous infections. In bad weather, the onions are dried indoors for 10 days at temperatures from + 25 ° C to + 35 ° C. In order to avoid the development of cervical rot and downy mildew, it is recommended to increase the temperature to + 45 ° C in the last 10-12 hours of drying.
The leaves of the dried bulbs are cut off, leaving a "tail" about 3-4 cm long. location.