Content
- 1 How to choose a set
- 2 When to plant onion sets in open ground
- 3 Processing and soaking onions before planting
- 4 Onion planting and care in the open field
- 5 How to treat onion flies
- 6 Growing and caring for onions: features
- 7 Pests and diseases of onion turnip
- 8 Why did the bow go to the arrow
- 9 How to speed up the ripening of onions
- 10 Harvest
- 11 The correct timing for planting onion sets in the open field
- 12 Methods for growing and planting onions
- 13 When it rises
- 14 How to care and loosen
- 15 Is it afraid of frost and what temperature it can withstand
Dear friends, the spring sun in May warms more and more confidently, which means that it's time to plant onions. We hope you have already prepared the onion sets.
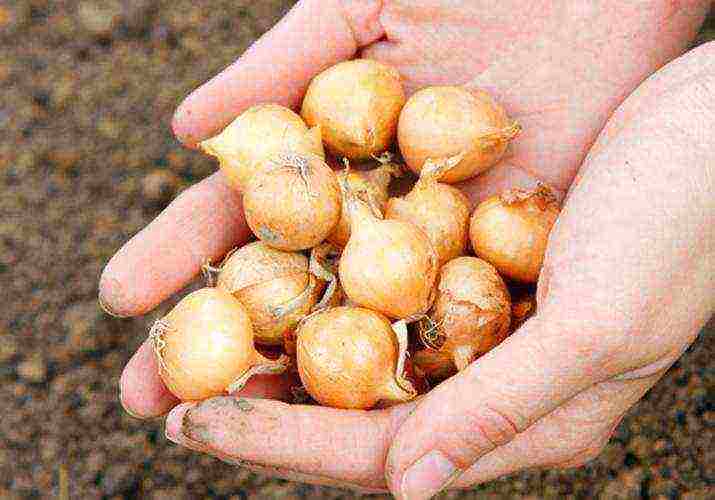
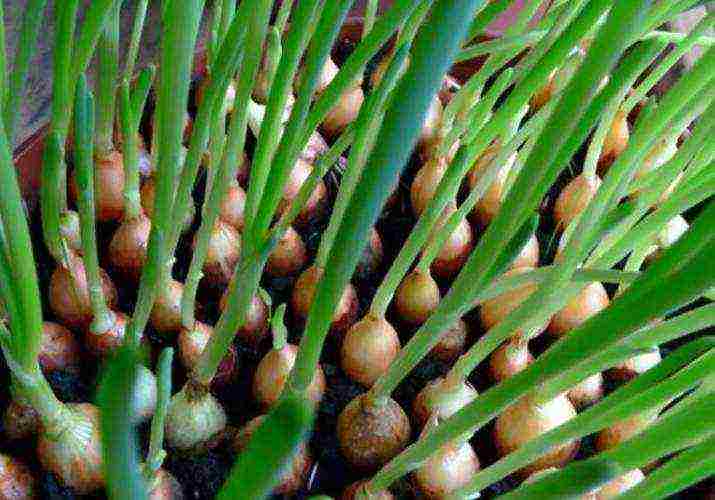
This is the name of a one-year-old onion grown from seeds (nigella) and representing a small onion.
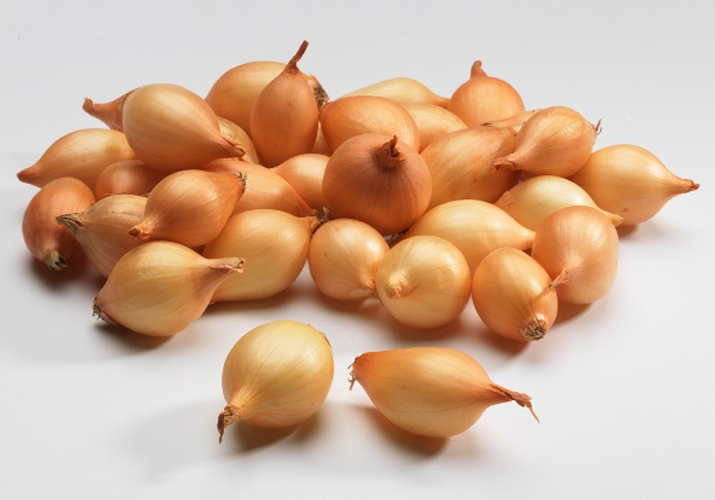
Sevok can be grown independently from seed or purchased at garden centers and shops.
How to choose a set
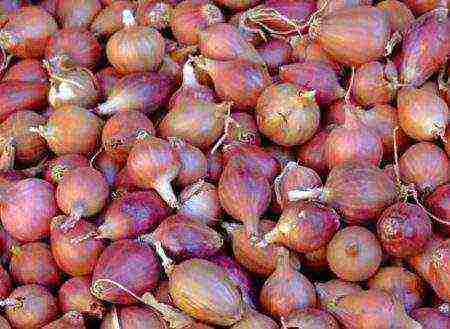
It is important to choose the right quality planting material. Bulbs should not be shriveled, already sprouted. In this case, the supply of their nutrients has already gone to the feather, and a good turnip will not work.
Also inspect them for damage and rot, this is important because a good onion head will not turn out from such a set, it will be susceptible to disease, it will grow poorly, or it may even rot.
The principle applies here: quality is more important than cheapness. It is better to purchase a good planting material than a discounted one that does not meet these criteria.
Good set, small in size, dense, with a shiny, smooth, solid and tight husk.
When to plant onion sets in open ground
The most popular month for planting onions is May. Specific dates depend on your climate zone. In central Russia, onions can be planted throughout May, as long as the spring soil moisture remains, which the onion respects very much.
When planting onions, it is not even the date that is more important, but the weather conditions and soil temperature. There is no need to rush to land if the weather is cold and wet. You need to wait for warm days when the soil warms up to at least 15-20 degrees Celsius.
If you hurry and plant the bow in the cold ground, then it will not lead to anything good. Although the onion tolerates frost and cold well enough, its character deteriorates because of this. He will certainly take revenge on you and, instead of a good turnip and greenery, will grow you flower arrows.
Therefore, it is better to wait for stable warm weather without rain than to be left without a crop. Pay attention not only to the lunar calendar as the ultimate truth, but also to the weather forecast, it will be more accurate.
What to do to prevent the bow from going into the arrow
Even before planting, it is important to know why the sevok goes into the peduncle and how to avoid it.
The reason that the bow is shooting is the wrong storage temperature of the planting material, lack of adaptation before planting, violation of the rules of care.
Let us explain in more detail: onion sets must be stored at above-zero temperatures, because it is the cold that provokes the onion to create arrows. This is a signal to start a self-preservation program and sooner give offspring. Therefore, as soon as you plant such a set, it will begin to give out flower stalks in order to give seeds faster.
The key to a large and strong onion turnip is storage in a comfortable environment without cold stress.
But what if you bought onion sets in a store, and you have no idea how it was stored? No problem. Purchased onions need to arrange an adaptation period.
To do this, for two weeks after the purchase, we keep the onion near the battery or in another warm place. And then we store before planting only at room temperature and in the dark, so that it does not start to germinate ahead of time.
If there is no time to warm up the battery or the heating has already been turned off, then you can proceed as follows: arrange a warm bath on the bow. Put the onion in a bowl of warm water (40-45) degrees and leave for 8 hours, periodically adding warm water. Then we take out the heads, dry it thoroughly and store it at room temperature until planting.
For planting on turnips, choose medium-sized heads, because large ones are more prone to shooting and are best planted on greens. Do not plant in cold ground. For the same reason, cold watering should be avoided.
Processing and soaking onions before planting
First of all, when preparing the set for planting, you need to carefully sort it out. Equip yourself with multiple sorting containers.
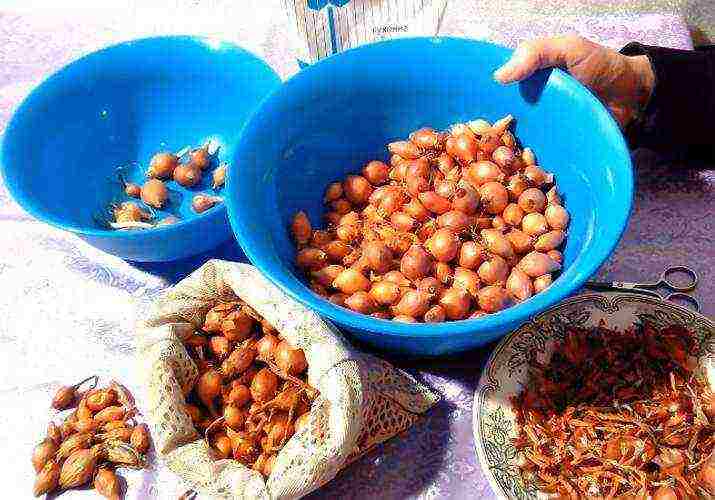
It is necessary to reject all damaged and small specimens, leaving medium-sized onions for planting on the head. Large bulbs, small and even sprouted ones, are suitable for greens. But we throw away empty, wrinkled, missing ones.
Next, carefully cut off each dry tail at the crown with scissors. This simple operation will help them germinate faster and better. Well, you need to be afraid that an infection will get into the cut, because the sevok will be treated from diseases before planting.
Should onions soak before planting? And what is the best way to do it? Let's figure it out.
Of course, we are interested in our sevok growing large and at the same time being protected from diseases and parasites. Therefore, a simple scheme is usually used: first, the planting material is soaked in growth stimulants, and a little later, just before planting, it is treated with protective agents.
To feed the bulb so that it grows large, it is recommended to dilute the complex fertilizer in water (40-45 degrees) and soak the onion there overnight. When the sevok is saturated with usefulness, you can proceed to its protective processing and planting.
Most popular recipes:
- Soaking onions in potassium permanganate. We make a strong dark pink solution of potassium permanganate and soak the bulbs in it for 2-3 hours. After that, they will need to be rinsed under running water so that the concentrated potassium permanganate does not damage future young roots. Potassium permanganate prevents fungal and bacterial diseases.
- Soaking the onions in a saline solution. 1 tbsp. Dissolve 1 liter of salt in one liter of water, immerse the bulbs in it for 2-3 hours. Salt also prevents rotting and disease.
- Soaking in copper sulphate. 1 tsp of copper sulfate in 10 liters of water, for 10-15 minutes. Copper sulfate disinfects seedlings and protects them from diseases.
These are the time-tested ways to prepare onions. But time does not stand still, and we want to share with you new interesting recipes that will help to comprehensively protect the plantings. One of these recipes is a combined treatment with salt, potassium permanganate and ash together, in one solution. How to do it, see below:
Processing onions before planting with salt, potassium permanganate and ash
For a three-liter jar of warm (60 degrees) water we take 2 tbsp. l with a slide of salt + dark pink solution of potassium permanganate + 2 tbsp. l of wood ash. Soak for 2 hours.
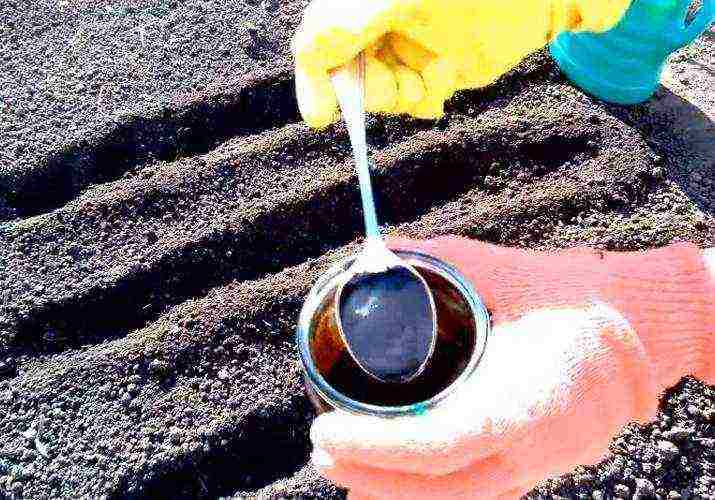
Treatment of onions before planting from pests with birch tar
The most nasty onion pest is, of course, the onion fly. Luckily for us, she can't stand the smell of birch tar. And if you want to protect your crops, then it would be useful to soak the onion in the solution as well: 1 tbsp. l. tar in a liter of water for 10-15 minutes.
With the same solution, you can additionally spill plantings during the growing season.
Onion planting and care in the open field
As we know, onions cannot be planted in the same place where the onion garden was also located last year. The likelihood of disease in this case greatly increases, and such plantings should be avoided.
Choose a place where tomatoes, carrots, potatoes, legumes, cucumbers, zucchini, pumpkin, cabbage were previously planted. The earth after them retains its nutritional value, and this is necessary for the onion to grow a good turnip. Onions and carrots have good neighborly relations, they scare off each other's pests, so you can plant them side by side.
He also prefers that the soil is not heavy, loose and nutritious. Places like light, with good drainage, without moisture stagnation.
It is better to prepare the future onion bed in advance in the fall, loosen the soil well and add humus and compost. In the spring, one to two weeks before planting, we loosen the soil and spill it with organic humic fertilizers. Gumi Kuznetsova will do.
Planting onions on a turnip (on a head)
We prepare grooves with a depth of about 8-10 cm.The distance between them is at least 15 cm.
We spill them with Fitosporin solution for disinfection. You can use both powder (1 tsp per 10 l of water) and paste (1 tbsp of diluted paste per 10 l of water).
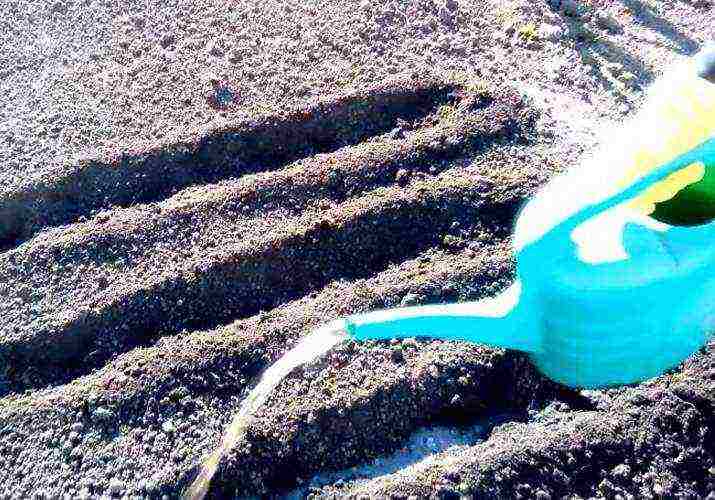
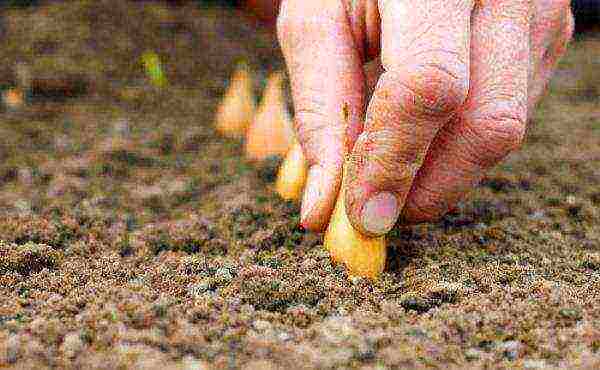
We plant our seedlings in the spilled grooves at a distance of 10 cm from each other. We put him on what is called "on the shoulders", i.e. not only to cover the roots, but much deeper. This is necessary so that the bulb has good contact with the soil and does not dangle, because it will not have roots soon.

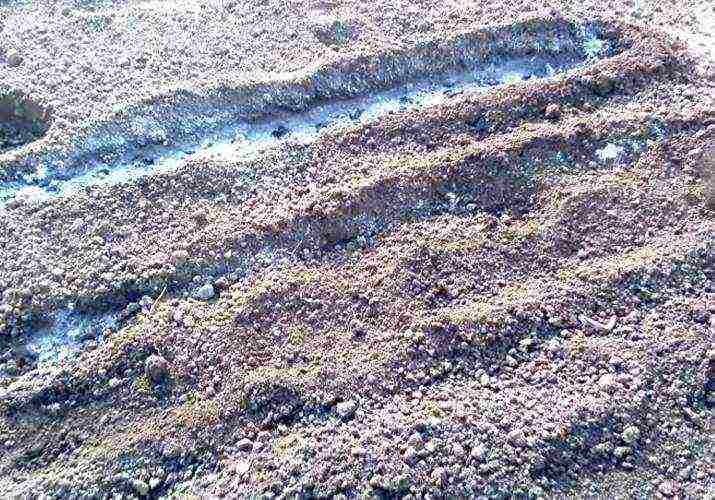
Sprinkle wood ash on top as fertilizer and disinfection. And we fill the grooves with earth.
Planting onions on greens (on a feather)
When we do not have a goal to grow a turnip, but we only want greenery, then to save space, we suggest you use bridge planting.
This is when the bulbs are planted one to one very tightly and not very deep. In this case, planting in open ground is not necessary, you can use a container with earth. Or select a small spot in the garden.
Mixed feather and head fit at the same time
When we don't have a lot of space, but you want to grow good onions and eat greens, then this method will come in handy. We make grooves as usual, but we plant the sevok in them in a checkerboard pattern and quite often.
With such a goal that some of these seedlings will grow into a turnip, and some can be pulled as they grow, not greens and consumed fresh.
Otherwise, the steps are the same as in the classic turnip planting (see above).

Onion care
When we have organized a good bed, in a lighted place, with nutritious loose soil, we only have to weed it in time so that the weeds do not interfere with the growth of the crop. Watering is carried out after planting once a week.
Also, onions need frequent loosening of the soil (between rows and between plantings, especially after rain, so that the earth does not turn into a crust) and top dressing.
At the end of May, it is necessary to feed him with nitrogen-containing fertilizers, in mid-June - he already needs potassium fertilizers and ammonium nitrate. For those who prefer to do without chemicals, green fertilizers from weeds and nettles, vermicompost and ash are suitable.
Fertilizing with ammonia is also effective: 2 tbsp. Dissolve l of ammonia in 10 l of water, watered with such a product on damp ground, and not on dry. Therefore, we pre-moisten the beds. The ammonia will drive away pests and nourish your plantings with the necessary nitrogen.
We do this feeding with trids with an interval of 10 days.And you will forget about the yellowing of the onion feather, and the onion fly will not stick its nose on your beds.
So dear friends, there is nothing difficult in growing onions, you will definitely succeed.
How to treat onion flies
If you liked our article, please share it on social networks. I wish you success!
108,683 views
 Onions are popular vegetable crops. It is added to salads, soups, meat and fish dishes. Therefore, in almost every summer cottage and personal plot you can see beds with plantings this vegetable. But to get a good harvest, you need to know how to properly plant and care for onions.
Planting onions
The crop can be grown in three ways:
 From seeds in one year... This method of growing vegetables is suitable for areas with a warm climate.
- From seed in two years... In a two-year culture, the plant is grown in areas with short summers.
- Seedling method... This method is suitable for sweet and semi-spicy varieties of vegetables.
But before you start planting onions in open ground, you should prepare a site for it. The beds are recommended to be made in organic-rich, dry, sunny, open areas with neutral soil. If the soil is acidic, then it is preliminarily lime.
You can plant onions after tomatoes, green manure, peas, beans, cabbage crops, potatoes. After other types of onions, cucumbers, carrots and garlic, onions can be planted only after three years.
When planting in spring seed soil for planting is prepared in the fall:
 Rotted manure or humus is added to the soil, and the bed is dug to a depth of fifteen to twenty centimeters. It is not recommended to add fresh manure, otherwise only greens will grow.
- The acidic soil is mixed with limestone, ground chalk, wood ash or dolomite flour.
- In the spring, before sowing seeds or planting seedlings, mineral fertilizers are introduced into the soil - potassium chloride, urea, superphosphate.
Growing onions from seeds
 Semi-sweet and sweet varieties in warm climates can be grown from seeds in one year. The planting material is pre-processed, for which the seeds are placed in gauze, moistened and kept for swelling during the day.
A bed prepared for planting seeds is watered copper sulfate solution (for 10 liters of water - 1 tablespoon), after which seeds are placed into it to a depth of one and a half centimeters. The distance between the rows should be about thirteen centimeters, and between the seeds - one and a half centimeters. Crops are watered with water from a watering can with a shower head and covered with foil.
Crop care consists in timely moistening of the soil and daily airing of the plantings. When the seedlings appear, the shelter is removed. Seedlings must be thinned out so that there is a distance of two to three centimeters between the plants. The plantings are watered, and the soil around them is mulched with humus. This mulch will feed the plants, retain moisture and prevent weeds from growing. Once again, the seedlings must be thinned out three weeks after germination. The distance between them should be at least six to eight centimeters.
Growing seedlings
 In early or mid-April, pretreated onion seeds are sown thickly in soil-filled seedbeds. The planting material is placed at a depth of one centimeter, moisten from a spray bottle and cover with foil. After the shoots appear, the shelter is removed. Seedling care consists only in timely soil moisture.
In open ground, seedlings are planted at the age of fifty to sixty days. It is recommended to shorten the roots on the onions by one third of the length before planting in the garden.
Planting sevka
In regions with a short summer, in the first year, onion sets are grown on the beds, which are stored at home in winter and planted in the next spring on the beds for growing.Before planting, the onions must be sorted out, warmed up for seven days in the sun and held for ten minutes in a solution of copper sulfate.
Sevok is planted in the beds in May according to the following scheme:
- The distance between the rows should be thirty centimeters.
- The distance between the onions is eight to ten centimeters.
- Sevok should be planted to a depth of five centimeters.
When growing sets in the fall, you can get turnips, and in the summer - greens. To do this, the distance between the landings is five centimeters. During the summer, the onions are torn out through one and used as greenery.
Planting onions in the fall
 To get a crop already in July, the seed should be planted in the beds from the fifth to the twentieth of October. Before winter, only cold-resistant vegetable varieties are planted, which include variety Stuttgarten, Strigunovsky, Danilovksky and Arzamas varieties.
A bed for winter plantings should be done in sunny, elevated areas. Snow should melt on them before everyone else and water should not stagnate.
The soil for planting the sevka should be still warm. However, before frost, onions should not be planted, since the sevok can dry out.
The planting material is pre-sorted out and heated. Sevok is placed in the ground to a depth of five centimeters, in seven centimeters increments. The distance between the rows is about fifteen centimeters. The beds are covered with straw or spruce branches. As soon as the snow begins to melt in the spring, the shelter is removed.
Autumn planting sevka has its advantages:
- After harvesting, another crop can be planted on the garden bed.
- The onion fly is not afraid of autumn plantings, since they have time to get stronger by its appearance.
- At home, the sevok dries quickly and is difficult to preserve until spring.
Onion care
 When growing onions in open ground, it should be provided with timely watering, dressing and treatments from pests and diseases.
Onions should be watered once a week, using five to ten liters of water per square meter of planting. However, if it rains regularly in summer, then watering may not be necessary. Otherwise, in waterlogged soil, the onions will begin to rot. Learn about the condition of the soil can be green. If it becomes pale, then there is an excess of moisture in the soil. The bluish-white feathers indicate that the soil is dry. In July, the bulbs begin to ripen and watering is reduced.
When growing onions during the season, three additional fertilizing with organic fertilizers is carried out. You can use a solution of mullein, urea or bird droppings for this (for 10 liters of water - one glass of organic matter). One square meter of the garden bed is watered with three liters of solution. The first feeding is carried out after the greens appear. After two weeks, the plantings are fertilized a second time. The third time the plants are fed when the bulbs are about the size of a walnut.
When the greens of the onions reach a size of about fifteen centimeters, it is recommended to treat the plants with copper sulfate, which is good protection against many fungal diseases... To do this, the feathers are sprayed with a solution prepared from ten liters of water and a teaspoon of the drug.
Harvesting and storing onions
 From about mid-August, when the bulbs grow to the required volume, the feathers lodge and new leaves stop forming, you can start harvesting. This should be done in warm, dry weather. If you skip the onion harvesting time, then it may start to grow again... These vegetables are not stored for a long time.
The collected bulbs are evenly laid out on the garden bed. When the onions are dry, they are freed from the ground and additionally dried in a dry room or in the sun. Dried vegetables should be examined carefully. The husked and spoiled bulbs are not suitable for long-term storage. Before you put vegetables in storage, you need to cut off the leaves. Only a neck about six centimeters long should remain.To increase the shelf life of the bulbs, the roots are cauterized.
It is recommended to store onion heads in a dry room with an air temperature slightly above 0 degrees. Since air must flow to the bulbs, they are stacked in stockings, baskets, nets or boxes. During storage, vegetables are regularly sorted out, removing bulbs that have begun to grow or rot.
You can store the crop in the apartment. In this case, you do not need to trim dry leaves on the plant. The container with vegetables is placed away from the batteries. The optimum air temperature should be from +18 to +20 degrees.
It is not recommended to store it along with other vegetables that need high humidity.
Onion pests and diseases
When growing onions in open ground, the following pests are most dangerous for the plant:
 Onion moth. To prevent the appearance of these pests, weeds should be removed in a timely manner, crop rotation, agricultural technology should be observed and plant residues should be destroyed.
- Onion fly. To prevent this pest from settling on onions, the vegetable is recommended plant in the same bed with carrots, the smell of which the onion fly is afraid.
- Tobacco thrips. Pests are destroyed by Karbofos or Aktellik.
- Caterpillars of the scoop. You can get rid of caterpillars by treating the plantings with a solution of Gomelin or Bitoxibacillin.
Unfavorable growing conditions and mistakes in care can lead to damage to the onion with various diseases:
 Fusarium is a disease that often appears on plants affected by onion flies. With fusarium, tissues die off at the bottom of the onions, and rot appears, after which the tips of the greens turn yellow. To avoid the appearance of this disease, the set is warmed up before planting at a temperature of forty degrees for ten hours.
- Downy mildew - the disease can be recognized by a gray bloom on the leaves. Affected vegetables do not form seeds and do not store well. To avoid the appearance of powdery mildew, the sets are warmed up before planting. It is also necessary to ensure that the plantings are not thickened.
- Gray rot - the disease occurs in rainy and damp weather. Diseased plants must be removed. For the purpose of prevention, the planting material is treated with a solution of copper sulfate.
- White rot - acidic soil and excess nitrogen in the soil contribute to the appearance of the disease. Therefore, before planting vegetables, the acidic soil is limed, and fresh manure is not used to feed the onions. Diseased plants should be removed.
- Mosaic is a viral disease in which the plant lags behind in growth, the seeds are almost not formed, the inflorescences become small, and the leaves turn yellow. Affected instances must be removed.
- Neck rot is a disease that can only be detected after harvest. It manifests itself as mold on the outer scales of the bulbs. Neck rot develops under unfavorable growing conditions. To avoid its appearance, the seedlings before planting and the harvested bulbs are warmed up at a temperature of forty-five degrees. Most often, late varieties are affected by this disease.
Viral diseases of the plant are not cured, therefore, preventive measures must be used. To do this, it is recommended to observe crop rotation, not to make thickened plantings, regularly remove weeds and follow all agricultural techniques. Before planting, the onion sets can be warmed up and treated with copper sulfate.
Fungal diseases can be cured special fungicidal preparations. However, it is not recommended to use them, as the bulbs are capable of accumulating poisons.
Onions are an unpretentious plant that even a novice gardener can grow in his area. The popularity of this vegetable is due to the content of substances useful for the human body in it. Eating onions improves digestion and induces the secretion of gastric juice. In addition, the vegetable has a bactericidal, sedative and diuretic effect.
>
It is difficult to imagine our menu without onions, it is no coincidence that every gardener strives to plant this vegetable in his area. Growing onions for a turnip has its own specifics, and if you know all the agricultural techniques and properly care for the plants, the yields will always be high.
Growing and caring for onions: features
Many people are interested in how to grow onions per head? At the same time, everyone wants to get large beautiful turnip bulbs. This is possible if planting sets, as well as picking onions. By autumn, with proper care, large onions will grow from them.
You can get onions for a turnip from seeds (directly into the ground or through seedlings), but in this case, to get a large onion in one year, you need to select the appropriate varieties of onions. And so the scheme is traditional, when in the first year nigella is sown, sevok is obtained, and then turnip is grown from it in the next season.
Growing onions per head can be done in different ways. Someone buys sevok, others prefer to grow their own - it all depends on the desire, opportunities and availability of time. In addition, it is not always possible to acquire the exact variety of onions that you want to grow yourself with sevkom. At the same time, the assortment of seeds presented in the store is very diverse, and you can choose the variety you like and sow nigella. But only then for breeding, you can grow your own seeds of your favorite variety.
How to grow good onion sets from nigella
To get your own high-quality sevka, you will have to start growing it from seeds. In the south, you can sow nigella directly into open ground, in the northern regions it is best to grow onions through seedlings.
ON A NOTE! The best germination rate is possessed by nigella no older than two years.
The seeds to be sown are calibrated, then placed in a potassium permanganate solution for disinfection (about 30 minutes). To get friendly and strong shoots, for growth, the seeds can be soaked in any stimulator. After which they are placed for a couple of days in a damp cloth for germination, then they are slightly dried and sown.

IMPORTANT! The listed procedures for the preparation of seed material are carried out for seeds that will be sown in open ground, and for sowing seedlings.
Sowing dates for nigella depend on the climate of the area, as well as the weather conditions of a particular year. But usually nigella is sown on the ridges around mid-late April, the main thing is that the soil is warmed up. Sowing dates are chosen for seedlings, based on the fact that seedlings, when planted in open ground, should be 60 days old and have 3-4 true leaves.
Grooves are made on the prepared ridges, then prepared seeds are sown in them or seedlings are planted. When sowing nigella, it is difficult to control the density of seedlings, therefore, after the emergence of sprouts, it will be necessary to thin out. If everything is done correctly, the seeds will sprout quickly.
Further, the care for turnip onions is standard:
- loosening;
- compulsory weeding;
- watering onions.
Onions are not watered often, about once every 7-8 days, being guided by the weather. For feeding, you can use a mullein diluted in water (1:10) or complex fertilizers.
IMPORTANT! As soon as the formation of onion sets begins (in July), watering should be stopped. They also stop feeding the plants.
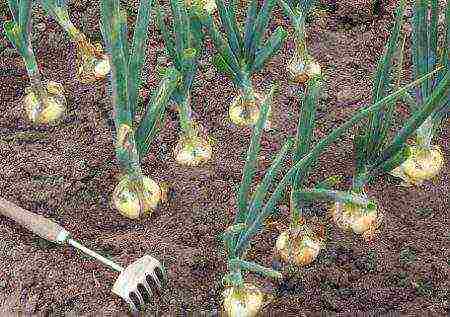
In the second half of summer (from late July to early September), the feather of the onion turns yellow, lays down, the neck of the onions becomes thin, and this is a signal that the onion can be removed. Carefully dig up the onions, shake off the ground and lay them out to dry, first on the ridge, and then under the canopy or in the attic.
After this stage of drying, the leaves are cut off, leaving a small neck, and the onions are dried for about 14 days at a higher temperature - up to + 30 ° C. Then it is kept at + 40 ° C for about 10-12 hours, and then sorted and removed for winter storage.
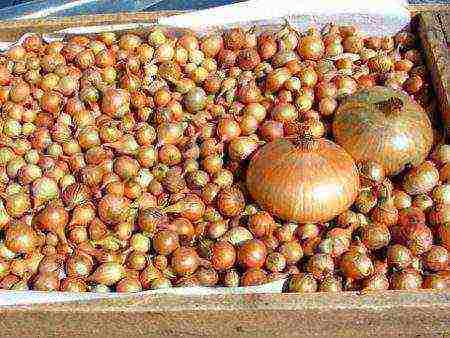
The best sowing plant for future sowing is with a diameter of 1.5 to 2 cm.Smaller specimens can dry out over the winter, larger ones with juicy inner scales, although they are used for sowing (the so-called sampling), do not differ in yield.
Sevok is stored in boxes, baskets, boxes at temperatures from 10 to 24-25 ° C.
IMPORTANT! Sevok is poured in boxes and boxes with a layer of no more than 6 cm, and no more than 3 kg are stored in baskets and bags with onions.
Usually, gardeners know how to grow onions for a turnip from a set, but not everyone succeeds in saving it without losses for subsequent planting. But adherence to simple recommendations will allow you to avoid damage to the seed and in the spring start planting on a turnip.
ON A NOTE! Small heads of sevka can be planted on a turnip before winter, avoiding problems with its storage, and at the same time getting early production in the spring.
Growing turnip onions from seedlings in the open field
The most popular and affordable way for everyone to grow onions for a turnip is to grow it from a set. Planting and care in the open field does not require much trouble, the main thing is to follow the basic rules.
Cooking a place for onions
In the fall, the ridge where it is planned to plant the sevok is carefully dug up. If the soil is poor, then humus or compost (0.5 buckets per square meter), wood ash should be added. Onions do not like a lot of organic matter, so fertilization rates should be observed. Also, fresh manure is never applied for planting onions.
The ridge should be in a sunny place, where groundwater does not fit, there is no stagnation of moisture. The best soils are sandy loam and loamy; on acidic soils, dolomite flour or fluff lime is added.
Preparing onion sets for planting
In the spring, the sets are taken out of the bags and boxes, and they are sorted again. Large (more than 2.5 cm) seedlings are planted separately, it will be possible to take greens from these plants. For a turnip, a medium-sized set is intended.
The planting material is first warmed up for about 7 hours at a temperature of up to 40 ° C. Then the onions are soaked in a solution of potassium permanganate (for 20-30 minutes) or any growth stimulant (for about two hours).
When to plant onions on a head from a set? The timing depends on the terrain, climate, and weather conditions. But the soil should be warmed up to about 12-14ºC.
Planting onions in the spring on the head
How to plant onion sets? On the prepared ridge, rows are made (the distance between them is at least 30-40 cm), where the bulbs are carefully planted. The distance between them should be at least 6 cm, the depth depends on the size of the set. When planted above the surface, the tail of the bulb should be slightly visible.
Usually, the first shoots appear after 8-10 days, but here it all depends on the quality of the planting material, weather conditions.

How to water onions
This vegetable crop does not require a lot of water when growing. The plant needs moisture in the first half of the growing season, when the feather grows and the mass of the bulb grows.
How often in the garden to water the onions on the turnip? Usually, plants are watered no more than once a week (in hot weather), with the obligatory loosening of the soil.
One month before the expected date of harvesting, it is necessary to stop watering the onions. You also need to stop feeding. Only loosening remains, which prevents the appearance of a hard crust on the soil surface.
How to feed onions on the head
Experienced gardeners know from their own experience that if the soil on the ridges was well filled with fertilizers, then in the summer season the onions will not really need additional feeding. But if there is slow growth and a pale feather, then fertilizers are needed.
How to properly feed onions for a turnip?
The first feeding of onions on a turnip is carried out when the seed has already 3-4 true leaves. Complex fertilizers are used (according to the instructions), as well as diluted mullein (1:10) or bird droppings (1:20). You can apply a special onion fertilizer (sold in stores) by foliar dressing.

The second time you need to feed it with wood ash or phosphorus-potassium fertilizers. Nitrogen is excluded, since during this period the plant grows a bulb and potassium and phosphorus will be more useful. The feeding regime should be tough, and you should not overfeed the plants.
IMPORTANT! The feathers of the sevka grown on the turnip are not cut off!
For greenery, samples are used, which is best planted on a hotel bed.
Weeding
Everyone knows that onions, like all vegetables, must be weeded. But, unfortunately, gardeners do not always have enough time for this. Meanwhile, weeds can not only cause poor onion growth and a decrease in its yield. They create increased moisture, which is detrimental to vegetables and very attractive to various pests and diseases. Also, a turnip that grows in weed beds usually has a large and thick neck, and such bulbs are poorly stored in winter.
Weeds must be removed by hand, preferably after rain or watering when the soil is wet.
Pests and diseases of onion turnip
Many people ask how to grow large onions, get a good harvest and avoid the use of "chemicals" in the garden. For fertilization, it was said above, but what about diseases and pests?
The most important thing is to carry out prevention, as well as adherence to the rules of agricultural technology, and then you will not have to use toxic drugs.
Most often, turnip onions are affected by various types of rot, as well as downy mildew. What to do for prevention, how to prevent onion disease?
- It is necessary to plant sevok on prepared ridges, avoiding thickened plantings.
- You cannot grow onions for several years in a row in one place. Optimal - return to the previous place in about three to four years.
- When watering, you need to carefully water the plants, and then immediately loosen the soil.
- When growing onions, soil mulching is used, which allows you to retain moisture and prevent the appearance of weeds.
- It is imperative to remove diseased or weakened plants, as well as those where the feather turns yellow.
- It will stop diseases and adherence to the dose of fertilization (especially for nitrogen, an excessive amount of which negatively affects the condition of the bulbs).
Good results are obtained by processing the seedlings before planting with a solution of potassium permanganate, copper sulfate, warming the bulbs. Also, on the ridges, you can spray the plants (when the leaves are about 14-15 cm) with copper chloride (a teaspoon in a bucket of water).

Plants that are grown to obtain feathers for greens cannot be subjected to such processing.
From pests - onion flies, thrips, onion moths, regular loosening, special mixtures help well:
- tobacco dust and lime (mixed in equal amounts and powdered onions);
- tobacco dust and black ground pepper;
- ash.
Also, planting onions can be saved with salt water, composition: 200 grams of ordinary table salt is diluted in a bucket of water. It is necessary to water carefully, not allowing water to fall on the onion feathers.
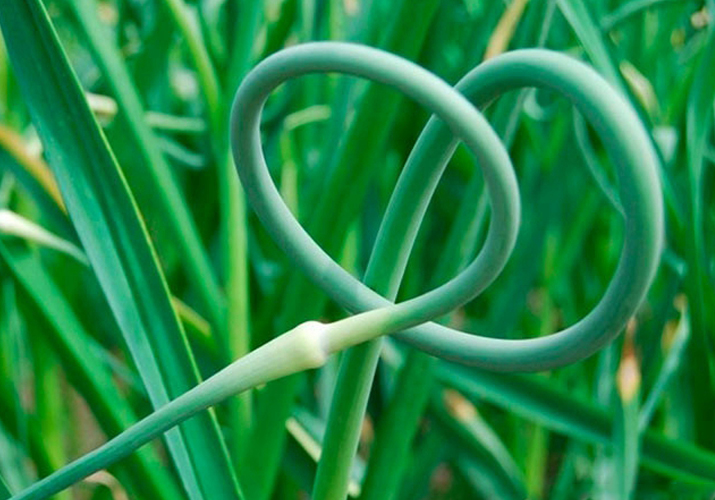
Why did the bow go to the arrow
In addition to leaves, onions can produce a peduncle, or, as they say, go into arrows. In the basket of the peduncle, seeds ripen - nigella.
But if onions are grown for a turnip, then arrows are completely unnecessary. They take up nutrients and prevent the formation of a full and strong bulb. What if the arrows are coming? If this is observed, then the peduncles must be cut off.

And in order to prevent shooting, you must follow a number of rules:
- when storing bulbs in winter, sudden changes in temperature should be avoided;
- use only high-quality seed material;
- warm up the sevok before planting it on the ridges (especially for purchased bulbs);
- do not plant large onions on the turnip - samples, since it is he who most often goes into the arrow;
- plant sevok, observing the terms and always in the heated soil;
- water the onions correctly, avoiding excessive moisture.With a bad summer, watering should be completed already a month before harvesting the onions.
If there is a peduncle, it is cut off or broken off at the base. After breaking out the arrow, the torn peduncle is thrown away. But we must continue to monitor these plants, as there may be repeated flower stalks. These arrows are also broken out or cut off, and then, when stored, these bulbs are used for food in the first place.
How to speed up the ripening of onions
It so happens that gardeners want to speed up the ripening of onions. This is due to bad weather conditions, prolonged rains, and a drop in temperature.
What can be done and what acceleration measures can be taken?
- Trim the roots of the turnip at a depth of 5-6 cm from the bottom.
- For about 10-12 days, for accelerated ripening, you can slightly bare the bulbs, shoveling off the earth from them. Also, in a month you need to finish watering the onions.
Many are interested in whether it is possible to completely cut off the leaves of a growing onion to accelerate ripening? No, this cannot be done, even if the feather is already turning yellow, since pruning will only lead to a deterioration in the quality of the bulbs and their decay.
Harvest
When to harvest onions? The timing depends on the variety, weather conditions, agricultural technology, but in general, onions are harvested from the ridges, from early August to early September. Readiness is determined by the following criteria:
- the feather turns yellow;
- mass lodging of leaves begins;
- the bulbs are fully formed in size and have the characteristic color of the outer scales for a particular cultivar. They can be, depending on the variety, yellow, red, white.
With lodging and yellowing of the feather, one should not be late in harvesting the turnip, since the onion can again give roots after 10-14 days. Then it will be unusable.
As soon as the feather turns yellow, the turnip is removed from the ridges. They choose a dry and clear day for this, carefully digging out the bulbs and shaking off the earth from them. Then they are laid out directly on the ridges to dry, and after that they are removed under a canopy.
ON A NOTE! It is not recommended to immediately tear off or cut off the feather of the onion, do it later, when the leaves finally turn yellow, dry, and the neck will be thin. If you tear off the leaves earlier, then an infection can get into the bulbs and they will rot.
The onions are dried under a canopy or in the attic for about two weeks, then the leaves are cut off and put back to dry. The temperature should already be slightly higher - up to 30 ° C, the period should be about a week.
If storage is supposed to be in braids, then the leaves are not cut off at all. A properly grown, well-dried and ready-to-winter turnip will have one layer of new scales in about two weeks.
After thorough drying, the onions are placed in boxes, bags or baskets and stored at room temperature.
Now, having learned how to grow onions for a turnip, you will always have good yields of this useful crop.
It is quite easy to grow high-quality onion heads from sets, especially since the technology has many advantages. High productivity is noted, rapid maturation of root crops, the release of arrows happens less often than when growing with a turnip. With proper care, outdoor planting is straightforward.
It is also possible to sow sevok in the country in the northern regions, Siberian regions and Novosibirsk. It is important to follow the sowing rules, take care of it properly and protect it from frost.
The correct timing for planting onion sets in the open field
The optimal period for planting work is end of April... The early term is due to the culture's resistance to cold. A method of growing onions from sets planted before winter (in the second half of October) is also used.
Planting seedlings at a later time leads to rapid drying of the upper layer, as a result of which the soil quickly loses the moisture accumulated over the winter. This negatively affects the rooting of the bulbs, which delays the emergence of seedlings. As a result, the roots do not fully ripen.
In the Urals and in the regions of Siberia, they plan to plant a sevka from the beginning of May (from 5-10 numbers) when the soil temperature is from +7 degrees.
It is not worth delaying planting work, this will reduce the yield. But there is also no need to rush to throw the planting material into cold ground, this will lead to the ejection of arrows during the development of feathers.
 For a good harvest, planting work should not be delayed
Methods for growing and planting onions
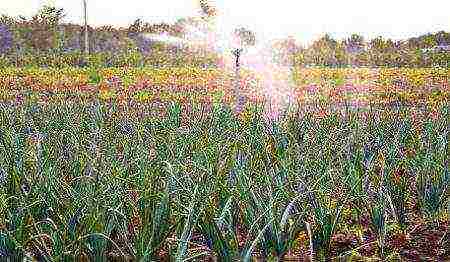
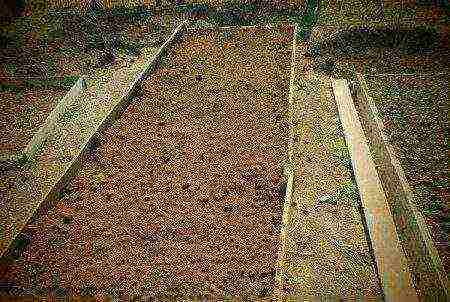
The place for the beds is selected well lit by sunlight and ventilated... This is necessary for normal vegetation, exclusion of the formation of rot and fungal diseases.
The soil is suitable light fertile with a neutral or slightly acidic medium... To reduce acidity, lime is introduced into the soil (up to 4-5 kg per hundred square meters). Suitable for this purpose are also: dolomite flour, wood ash, crushed chalk.
It is not worth breaking the beds at the place where the garlic is grown, the land after the spicy crop is very depleted, which will reduce the onion yield. But after tomatoes, eggplants, pumpkins, cereals and potatoes, you can plant a set.
When enriching the soil with fertilizers, you should not simultaneously introduce lime into it, as this leads to a significant decrease in the amount of nitrogen. And it is necessary for normal vegetation.
When preparing the beds for onions in the fall, humus is applied to the site (up to 5 kg per m2). In the course of work, the earth is dug to a depth 20 cm... Spring work begins with cleaning the area from debris and fertilizing the soil with minerals. Superphosphate (6 g / m2), urea (1 g / m2), potassium chloride (2 g / m2) are scattered over the ground and cultivated.
An obligatory preparatory step is soil disinfection. To do this, 7 days before planting, it is watered with a solution of copper sulfate (a tablespoon of the product in a bucket of water).
 A solution of copper sulfate is used to disinfect the soil.
The planting material also needs to be decontaminated before planting. Proper preparation affects yield and the resistance of the crop to diseases and pests. Sevka processing consists of the following stages:
- soaking in a weak solution of potassium permanganate (copper sulfate 0.35%);
- drying followed by 20-day storage at temperature +20 degrees;
- warming up the heads for 10 hours at a temperature +40 degrees;
- seed treatment with a growth stimulant.
Onion sets are grown in several ways:
- in the spring;
- before winter;
- in a greenhouse;
- by the bridge method.
In the spring in the garden
Spring disembarkation is carried out according to the scheme:
- row spacing for manual processing of beds - 25 cm (in the presence of a walk-behind tractor - 60-72 cm);
- distance between holes - from 5 to 10 cm;
- immersion depth - 3-4 cm.
 Planting onion sets in spring
The spacing between the heads is selected depending on the diameter of the bulbs used: up to 10 mm you need to indent 5 cm, up to 15 mm - 8 cm, over 15-20 mm - 10 cm.
After planting, the bed is mulched with a layer (2-3 cm) of peat, paper, sawdust or other suitable materials.
Before winter in the soil
The method of planting seedlings before winter has several advantages:
- there is no need to provide storage conditions for seedlings in winter until mid-spring;
- early dates harvesting (mid-July);
- by the time the pests appear, the culture is fully formed and strengthened.
In the vacant place, you can manage to grow a crop of some fruits with a short ripening period.
The peculiarity of choosing a place for a garden bed is the preference for a site located on a hill. There the snow melts faster, moreover, stagnation of melt water is excluded.
Disembarkation time - from 5 to 20 October... Planting material should be properly prepared: calibrated, disinfected and warmed up. The scheme is used standard or with a narrow row spacing up to 15 cm... The embedment depth is 5 cm.
With the onset of cold weather, the surface of the garden is covered with mulching material. In the spring, the old protective layer must be removed.
In the greenhouse
Growing seedlings in a greenhouse involves a number of preparatory measures:
- disinfection of structural surfaces;
- loosening the soil;
- the introduction of humus (5 kg per 1 m2);
- fertilization of beds with minerals (superphosphate - 30 gr., potassium chloride - 15 gr.);
- mixing and leveling the soil.
The seed is selected with a diameter of 30-50 mm. Any bad material is discarded. in the second half of October according to the scheme:
- the distance between the heads is 20-25 cm;
- immersion depth - 4 cm.
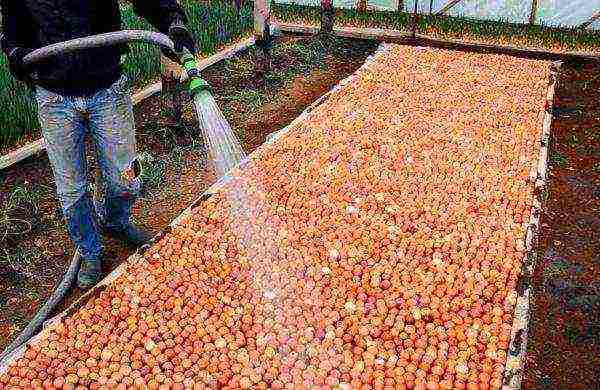
Over the beds is lined with straw or sphagnum moss mulch with a layer up to 20 cm.
Spring work begins with harvesting mulch material before planting and growing. Next, fertilizers with nitroamofos are introduced twice (up to 15 g / m2). Irrigation is performed as needed. It begins to sprout actively in mid-April-early May. When the height of the feather reaches 20 cm, the crops are harvested from the beds.
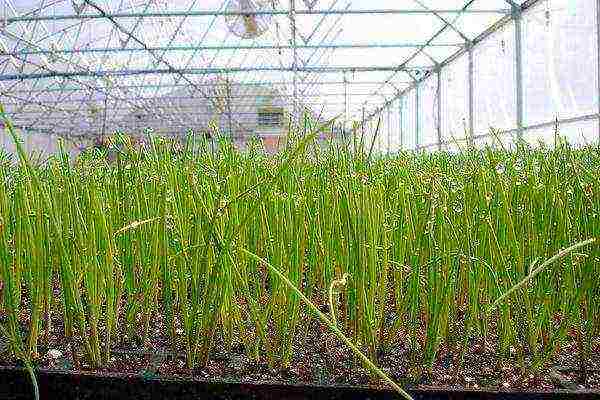 Growing onions in a greenhouse
Mostovoy
This method of growing onions on a feather is used more often on balconies or in small greenhouses. The essence of the technology lies in the deepening of the seedlings into the ground in one row at a minimum rate no head spacing... Thus, a bridge is obtained, which served as the name of the method.
For bridging cultivation, onions with a diameter of 3-5 cm are selected. Care includes watering and weeding. The soil must be constantly moist, it is important to water it on time in the right proportions.
From baits it is recommended to use:
- superphosphate and potassium chloride - 2 g / 10 l of water;
- ammonium nitrate.
Groundbaits are introduced on the 8th and 14th day of the growing season.
 Bridge method of planting onion sets
When it rises
When growing seedlings in the open field during spring planting, seedlings appear above the soil surface for 9-11 days... If the planting work was carried out in October, then the first greens break through, depending on the weather conditions, more often this happens in early-mid April.
Greenhouse cultivation also guarantees different times for seedling emergence, which is due to the variety of construction and the thermal conductivity of its surfaces. In the most ordinary polycarbonate greenhouse, you can see the greenery making its way from the ground in late February and early March.
When using the bridge method of growing seedlings, you can get the first shoots 5-6 days after disembarkation.
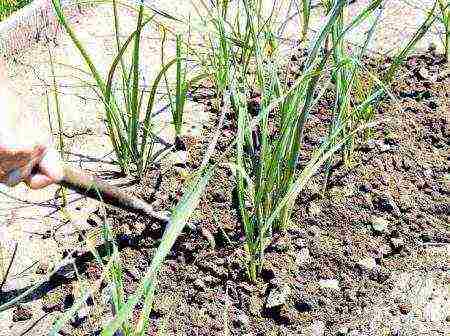
How to care and loosen
For the growing season, it is important to saturate the soil with oxygen, remove weeds from the beds, water the seedlings and introduce groundbait.
After the emergence of seedlings above the surface of the soil, it is necessary loosen the soil every 2 weeks in the beds to prevent the formation of an earth crust.
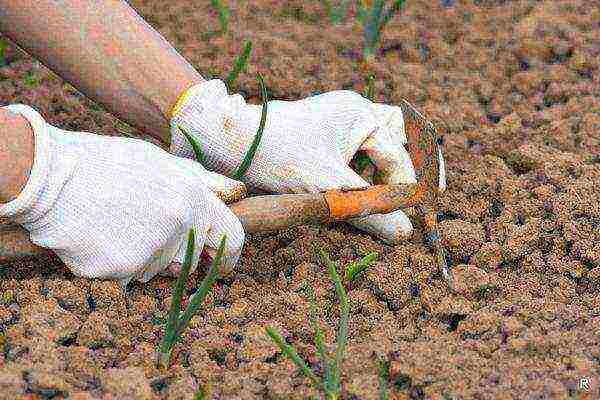 Loosening of the soil must be carried out every 2 weeks.
This process is often combined with weeding to remove weeds, which creates favorable conditions for disease and onion decay. In addition, such a neighborhood contributes to the formation of a thick neck, which subsequently complicates the drying of the crop.
Onions belong to crops that can do without baits, but this is the case when the soil is fertile. Many gardeners use a 2-3 single bait regime:
- 20-25 days after planting the seedlings, watering with a manure solution is carried out (1 kg per bucket of water);
- loose application of mineral fertilizers (urea, nitrophoska) before irrigation.
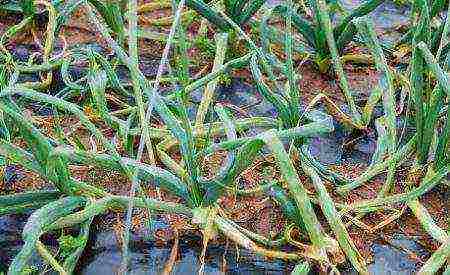
Watering the beds is carried out with strict control of the degree of soil moisture... Lack of moisture is just as unacceptable as its abundance. If you carefully observe the plant, you can understand what the slightest changes indicate. The water should not be salty, if it gets dirty, you need to drain a little from the bucket.
The appearance of a gray-white tint on the leaves indicates insufficient watering, and the pallor of the feathers indicates an abundance of moisture. For the first couple of months, the seedlings are irrigated weekly (7-8 liters per 1 m2). Since July, the amount of water is reduced, and 3 weeks before harvest it stops altogether.
 Strict control of soil moisture is extremely important
To protect against onion flies, it is recommended to use saline watering, which also stimulates plant growth.
200 grams of salt is taken per bucket of water, the amount of liquid is prepared at the rate of 300 ml per one bush. The procedure is repeated Once every 3 weeks... If the treatment proved to be ineffective, the concentration should be increased to 450 g / 10 l of water.
Is it afraid of frost and what temperature it can withstand
Onions are afraid of freezing and freezing temperatures at night. The temperature indicators of the air during planting should be within +12 degrees, soils at a depth of 10 cm - at least +5 degrees. Planting material germinates at 4-5 degrees... Mature onions of specially selected varieties can withstand frost down to -7 degrees, while sweet varieties die at -4 degrees.
When choosing a set, the climatic conditions of the region should be taken into account in order to give preference to the appropriate varieties.
Taking care of onions is quite simple if you perform the preparatory work correctly. Controlling the condition of the plant's feather will be a hint, and the action plan will not let you forget about important procedures that guarantee a high yield.