Content [show]
 Daylilies will become gorgeous plants for your garden, planting and caring for which will not cause much trouble.
However, there are several secrets that will allow the flower not to fight for survival, but to show itself in all its beauty.
Order
green beans
with home delivery from Instamart.
Free shipping promo code «
lediveka
»
Lily or daylily
It is always difficult for novice growers to distinguish a daylily from a lily. However, there are differences.
| Signs of difference | Lilies | Daylilies |
| Growing | Grow from a bulb. Leaves are attached to their stem, ring-shaped or spirally. In the place where the last lower leaf joins the stem, a bud is formed. As a result, it self-develops and a bulb grows from it, which will give a stem next year. However, if lilies are grown from seeds, then the first flowering stem will appear no earlier than three to seven years from the moment of planting. | They grow from thickened tubers (stolons) with a developed root system. |
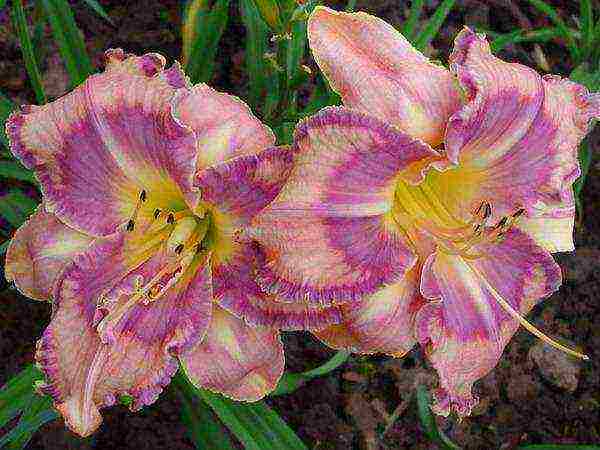
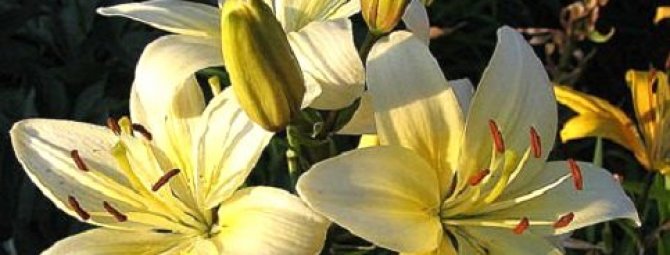
| Stem | They have a large perianth, which consists of six loose loose leaves-petals with gracefully bent ends. At the base of each lily there is a kind of jelly-like tissue that attracts insects that pollinate the flower. | They differ from lilies in a stem-peduncle with a height of 30-100 cm, to which large paired leaves are attached. The flowers of the plant consist of six petals that form a kind of funnel. |
| Care | For development, they need a minimum temperature of at least 10 ° C. They require adequate lighting, but are killed by direct sunlight. Need regular watering. | The growing season can start at 4 ° C. They can grow not only in sunny areas, but also in shady areas. Thanks to the developed root system, they can independently provide themselves with everything necessary for life. |
We are sure that you have caught the difference and know what lilies look like and how daylilies look like. Naturally, the daylily is identical in appearance to the flowers of the lily, therefore, it is best to purchase planting material in specialized stores that provide the necessary advice if necessary.
Boarding time
 Experienced gardeners prefer to plant daylilies during the "spring-autumn" period. However, the planting time will always depend on the climatic conditions in your area. The rapid onset of winter cold can destroy the daylily planted in the fall.
However, when acquiring varieties with an early or medium flowering period, they can be planted in vast expanses far from southern latitudes. This will allow the flower to take root and prepare for wintering in the garden.
Mulching the beds on which the daylily is planted will help protect it from winter cold and frost. And the most comfortable landing time is May and August (for middle climatic latitudes).
Armed with this simple knowledge, you can start landing.
We plant correctly
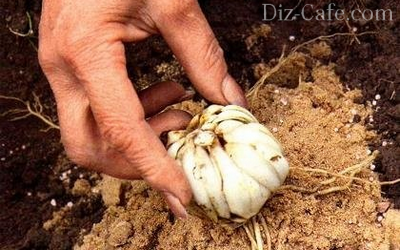
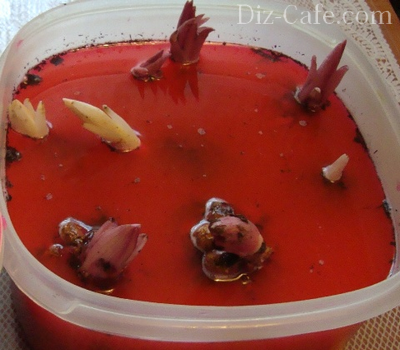
 Before the plant is planted, the acquired material must be soaked for several hours, if not in highly diluted mineral fertilizer, then in ordinary, but settled or rain water. This is necessary in order for the roots of the flower to swell and come to life. Thus, you can easily find dead roots and carry out their careful removal.
Before planting, the roots of the seedling should be pruned to a length of 20 or 30 cm.
Now let's talk about how the flower is actually planted:
- A shallow, up to 30 cm, fossa breaks out. During this process, it is necessary to take into account the planting of a plant for a long period (up to 10-15 years) and the growth of a bush up to 50-70 cm in diameter.
- A mixture of humus, sand and peat is poured into each hole in the form of a small slide. From above, everything is sprinkled with ash mixed with potassium-phosphorus fertilizers. The entire poured mixture must be placed over the roots in such a way as to avoid creating air pockets.
- The landing does not end there - the hole is partially covered with soil.
- Holding the flower with your hand, the soil near the roots is well squeezed.
- Now water is poured into the landing hole. Its rapid absorption will indicate that the landing was made with errors. To correct them, it is necessary to take a certain part of the dry soil and tamp it again.
- The process is completed by adding soil to the edges of the planting pit.
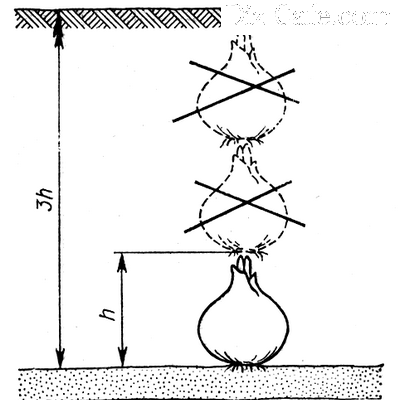
A strategically important point is the deepening of the root collar of the plant to a depth not exceeding three centimeters. Otherwise, improper planting will lead to decay of the root system, stunted growth or the risk of developing a variety of diseases.
However, if the planting is done correctly, then the moisture received by the flower will be quite enough for rooting.
Transplant is a separate science
 After the plant has been planted, sooner or later, it will need to be transplanted. In one place, a daylily can grow up to 15 years. Nevertheless, such a long period strongly affects the quality of its flowering and the young luxurious flower begins to lose its former beauty.
A decrease in the abundance of the peduncle will indicate the time of the daylily transplant. The negotiated process takes place according to the following scheme:
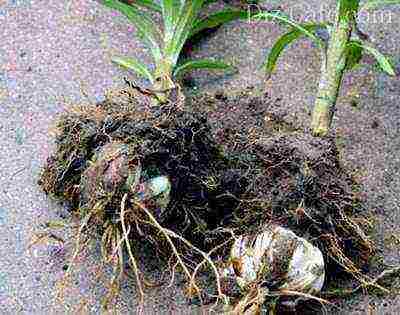
- A bush is dug along the outer borders.
- It is carefully removed together with an earthen lump.
- All adhering soil is washed off under a strong stream of water.
- The roots are separated by so-called individual fans.
When dividing the root system into fans, a knife or pruner is not always used. However, if it was not possible to do without it and as a result the root system was damaged, then the "wounds" must be treated with a fungicide.
Transplanting a plant, like planting itself, is carried out in cloudy weather. Before immersing the daylily in the ground, it is necessary to prune the roots and remove their dead and rotten areas.
Watering
Despite the fact that the daylily can be planted even in dry soil, water is vital for it. Therefore, certain plant care must include watering in the required amount. Due to sufficient moisture, not only the number and size of buds increases, but also their quality.
 During the growing season, the flower especially needs a lot of moisture. However, soil moisture will depend on its texture. To provide the required care at this time, you just need to ensure that the soil around the plant is always abundantly moistened with water.Ideally, up to a depth of 30 cm.
Based on the soil and climatic conditions, in order to maintain the requirements for the level of humidity, the plant must be watered 1 or 2 times over seven days. The daylily will also need special care if the planting was carried out in sandy soil, and mulching remains the best way to preserve moisture.
Ensuring proper care of a flower, one must not forget that the evening hours are the optimal time for watering. The water supply must be done directly under the bush itself.
"Bathing" of the daylily in puddles of water will lead to the appearance of peculiar spots on the buds.
 Using the phrase "proper care" it is necessary to understand the so-called correct watering, which consists of moistening the soil by sprinkling. This approach to the issue of providing the flower with moisture also avoids creating conditions for the development of spider mites. It is worth mentioning that in the case of sprinkling, irrigation occurs not only as efficiently as possible, but also rationally.
Despite the fact that constantly moist soil can serve as an excellent breeding ground for pathogens, they do not pose any threat to the daylily.
Necessary food
No matter how careful the care of daylilies is, the time for feeding will come. Many practicing gardeners today argue that daylilies respond to the introduction of a special nutrient medium with rapid growth and abundant budding.
When considering caring for a plant in terms of fertilization, it is necessary to know the shortcomings of the soil in which the flower is planted in order to compensate for the missing nutrients in it.
Before starting a conversation about something specific, you need to remember that the mineral fertilizers used should contain:
| Macronutrients | Trace elements |
|
|
Thanks to them, the growth of the flower is ensured and its vital activity is supported.
The required care of the plant forces the grower to be fluent in such a concept as soil acidity or pH. It is essential in the transport of nutrients from the soil to the flower.
As a rule, fertilizers are applied at certain periods, namely:
| Season | Feeding method |
| March | Nitroammofosk, in the proportion of one tablespoon of fertilizer per 10 liters of water. |
| April May | During the period of intensive growth from April to May, the daylily needs urea and calcium nitrate. |
| June | At this time of the year, budding or flowering begins. Therefore, it is important to provide the plant with tincture of chicken droppings or mullein. In the absence of them, fermented grass will do. |
| August | The main feeding always takes place during this period, because it is on it that the riot of flowers depends on the next year. Therefore, we again return to nitrophosphate or superphosphate in combination with ash. |
We must not forget that after applying any type of fertilizer, abundant watering of the daylily should always follow.
It has long been proven that 20% of all nutrients in daylilies are obtained from the soil, and the remaining 80% from the air. That is why practicing flower growers prefer spraying fertilizers on the leaves of cultivated plants to root feeding. Mist spray is the best option.
 At the end of the topic of using fertilizers, I would like to debunk a myth that a flower does not need additional feeding, since it has a unique vitality and enviable unpretentiousness. The modern daylily requires special attention. Therefore, the care for him must be appropriate.
However, in an effort to provide the bush with everything necessary, overfeeding should not be allowed. Such withdrawal will only be harmful. Excessive fertilization greatly increases the green mass and significantly inhibits budding.Also at this moment, the color of the plant suffers - its flowers fade, the petals lose their originality, become uneven and become stained.
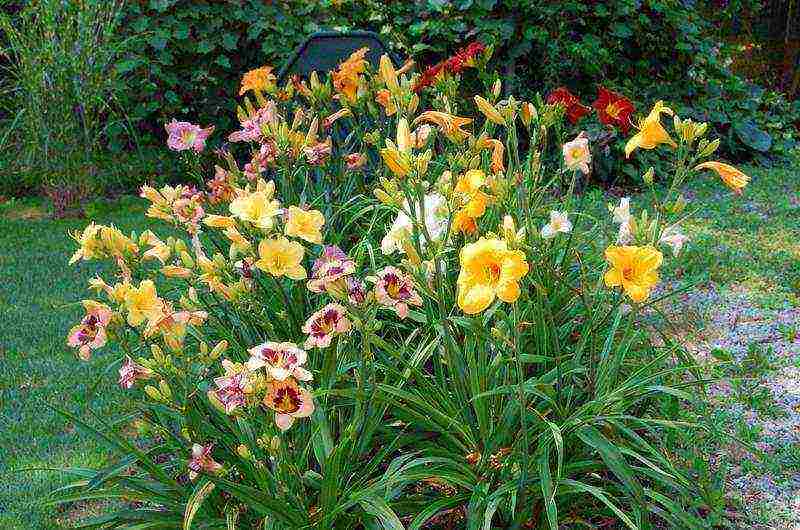
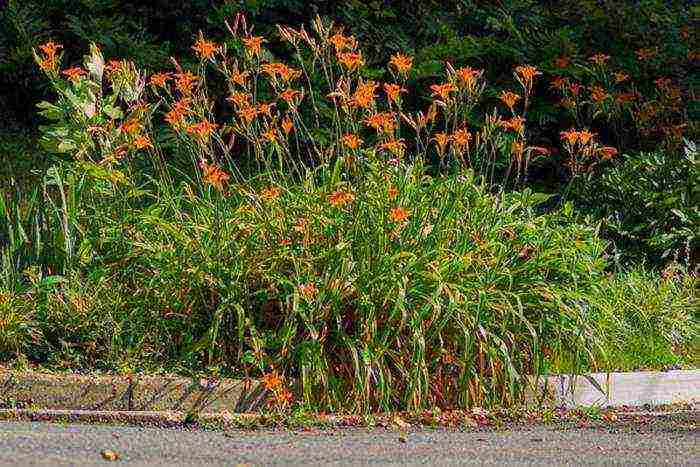
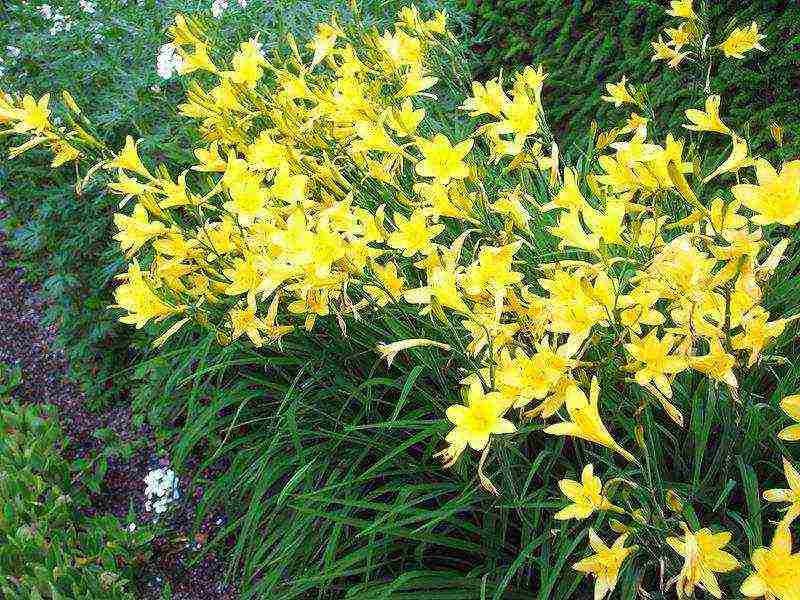
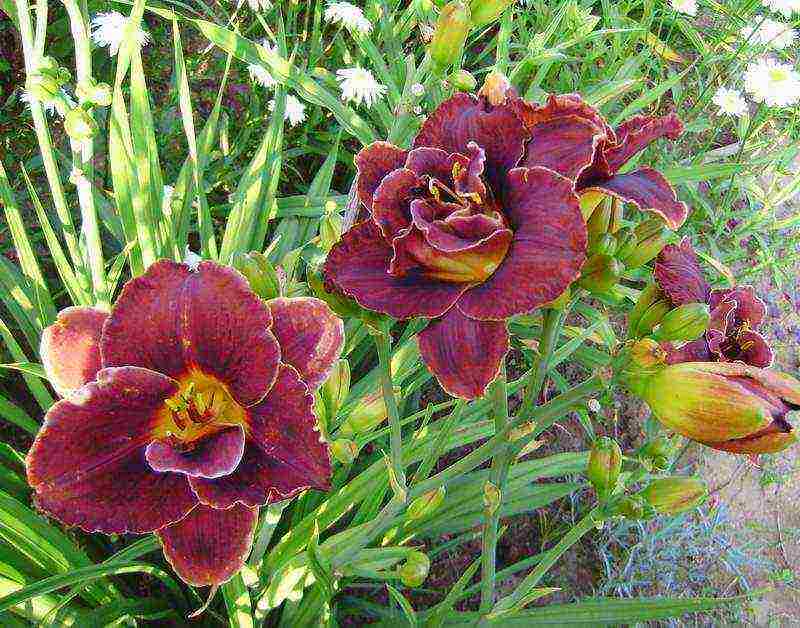
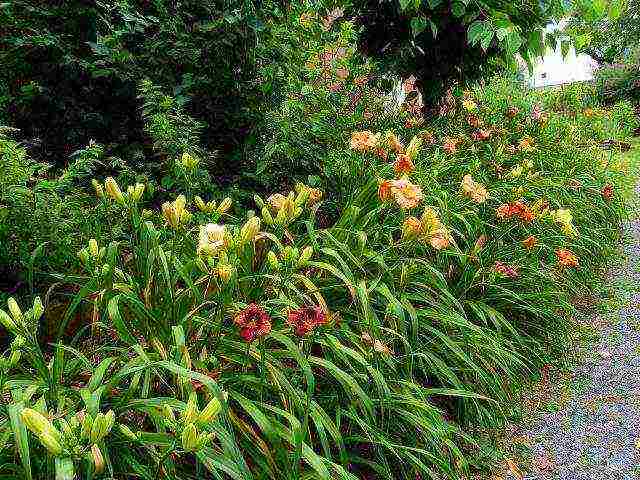
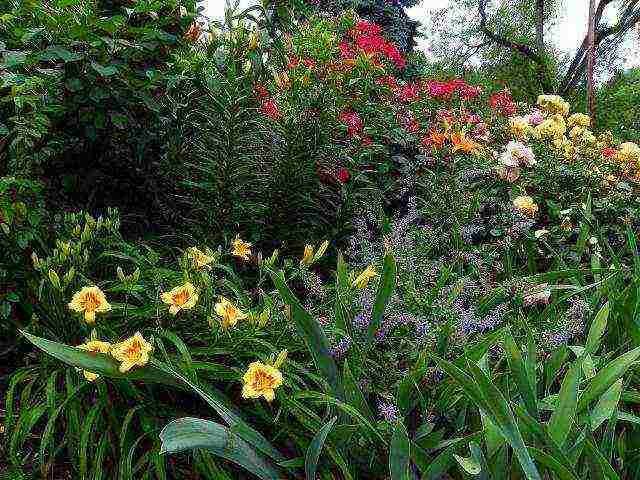
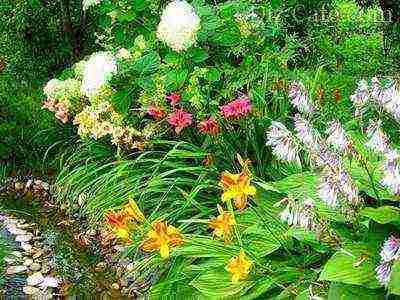
The daylily plant is boldly called a culture for lazy gardeners. Even the almost complete lack of care does not prevent its gorgeous flowering. You can decorate the garden with daylilies "savages", as well as hybrids and varieties of incredible beauty, bred by breeders.
They are called flowers of joy - one cannot but rejoice when looking at bright flowers. They believe that they bring good luck, taking all the sorrows and sorrows away.
The culture prefers sunlight, but feels good in light shading (enough active lighting of the site for 6 hours a day). They do not impose special requirements on the composition of the soil, they successfully grow in one place for many years, forming lush, flowering thickets. Perfectly adapted to the vagaries of the weather.
When does daylily bloom?
- Daylilies flowering time: active flowering occurs in April-June.
For the successful cultivation of a daylily, several points should be determined: what place to choose, when and how to plant, what, even minimal, care is required.
Place for planting daylily
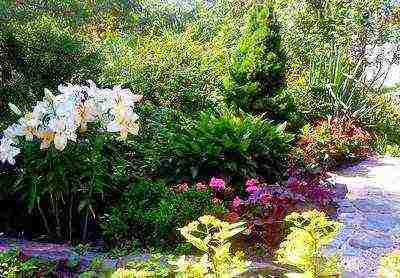
Flowers daylilies in the garden photo
It is very important to immediately choose the right site for growing, since daylilies are long-livers. Curtains with beautiful multi-colored corollas cost about 15 years without transplanting.
When choosing a site for growing a daylily, keep in mind that it develops best under bright lighting. At the same time, it is not afraid of drafts and strong gusts of wind. In such conditions, most garden crops will feel uncomfortable - daylilies are very helpful. For free growth, provide it with space that will not be limited to shrubs, trees, large herbaceous plants. They can compete with the plant.
Experienced gardeners recommend choosing the most illuminated places for planting daylilies of light colors, while shaded areas should be selected for multi-colored, red, purple ones.
Please note that the root system should not suffer from the close occurrence of groundwater and spring flooding.
Dates for planting daylilies in open ground
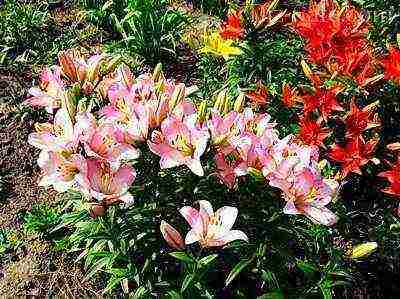
What flowers to plant daylilies photo
The time of planting daylilies in open ground can be attributed to the benefits of the plant. This can be done throughout the warm season. Nothing prevents you from transplanting until the fall.
Spring planting is most successful - seedlings quickly take root and grow, flowering will come in the same season. If the weather is cold, the planting material outside the ground can be stored for about a month: sprinkle the root system with sand or a sand-peat mixture, you can shift it with a damp cloth. At the same time, cut the leaf plates in half or 1/3 to reduce the plant's need for moisture.
If the summer is not hot, you can land at this time.
When planting in autumn, there is a riskthat before the onset of cold weather the plants will not have time to take root, may freeze in winter, or, if they do not die, will be weak. For the winter, young plantings should be covered with earth, mulch the soil with foliage or straw.
- According to experienced gardeners, in the middle lane, the most favorable months for planting a daylily are May and August.
Planting a daylily in the spring in open ground
How to plant a daylily photo
The seedlings should be prepared for planting. Examine them, remove dry, damaged or rotten roots. Treat the cut sites with a fungicide. Greens can be pruned, departing 10-15 cm from the base of the leaf plates.
If the roots are dry by the time of planting in open ground, the seedlings should be soaked for 4 hours in a solution with a growth stimulator.
Daylily grows well in loose, light soil of a neutral or slightly acidic reaction - this is ordinary garden soil.
- Dig the area to the depth of a full bayonet of the shovel. Dilute clay soil or loam with rotted manure, compost and sand.
- Make the planting holes to the size of the root system.
- If the soil is depleted, prepare a nutrient mixture: humus and peat with the addition of 30 g of potassium and phosphorus per 1 bucket of substrate.
- Pour earth with a slide into the planting hole, place the seedling on top of the soil, carefully distribute the rhizome so that the roots do not bend.
- Sprinkle with earth and lightly compact the soil around the seedling, water, the root collar can be deepened by 2-3 cm.
- Maintain a distance of 70 cm between individual plants.
To reduce moisture evaporation, you can mulch the soil around the plant. Use materials at hand (tree bark, pine needles, straw). The daylily is planted in the same way in summer and autumn.
How to care for daylilies in the garden
Daylily care procedures are minimal: water, periodically loosen the soil, remove weeds.
Watering
An actively growing and flowering daylily needs regular watering. Faded leaves indicate a lack of moisture, buds may be discarded. In the heat, water abundantly so that the soil is soaked 20-30 cm (to the depth of the root system). Also, the daylily will respond excellently to shallow sprinkling. Reduce watering if there is sufficient rainfall.
The best time for water treatments is evening or early morning - there is no risk of burns.
Top dressing
In the first season after planting, the plant has enough nutrients. From the second year, start feeding. Use complex mineral fertilizers. The proportion of nitrogen should be moderate so as not to provoke excessive tillering to the detriment of flowering. Feed in the spring, a couple of times in the summer. Closer to autumn, add potassium-phosphorus fertilizing to strengthen the plant for wintering.
Shelter for the winter
The plant's frost resistance is high, but the daylily can suffer during snowless winters. Cover with needles, spruce branches or other materials at hand. Free you from the shelter as soon as the snow begins to melt so that the root collar does not overheat and does not melt.
Reproduction of daylilies
Usually, the daylily is propagated vegetatively (dividing a bush, rooting a leaf rosette). When seed propagation from their seeds, there is a loss of varietal differences - therefore, a daylily is grown from seeds only if they were purchased from a trusted manufacturer.
When to plant a daylily or why it doesn't bloom
The most lush flowering of the daylily bush occurs in the first 5-7 years, then peduncles among the lush greenery appear less often, and the inflorescences become smaller. The situation can be corrected by the usual division of the bush. An unpretentious culture easily tolerates the process of division and transplantation.
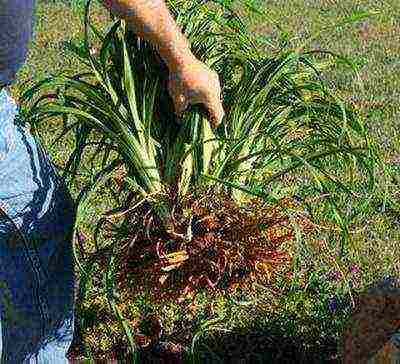
Daylily propagation by dividing the bush
- To split the daylily bush, gently dig in on all sides to remove it along with the root system.
- The resulting planting material is carefully divided into separate parts with a knife so that at least one green shoot with a part of the rhizome remains.

How to divide a daylily bush photo
- The resulting cuttings are planted as described above.
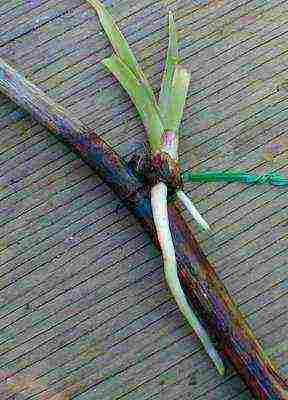
Reproduction of daylily by air children - proliferators
Proliferation - another way of breeding daylily. What he really is? This is the rooting of leaf rosettes formed on the peduncle (proliferation). They should be well developed.

Reproduction of daylily Photo of cut prolifera
- Wait until the upper part of the peduncle, going to the outlet, dries up, then cut out a part of the peduncle along with the outlet and place it in water for rooting.
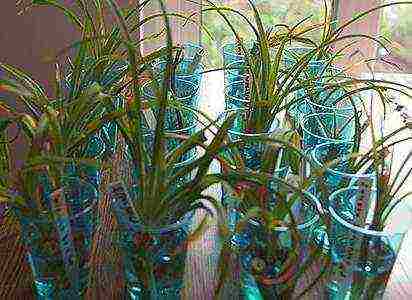
How to propagate daylilies with photo proliferators
- Shorten the leaves by 1/3 of the length.
- You can add a couple of drops of a growth stimulant.
Prolifera gave roots photo
- When the roots are 4-5 cm long, plant in pots with light soil and grow indoors until spring.
- Transplant into open ground in late April or early May.
Growing a daylily from seeds at home

How to grow a daylily from seeds at home photo
- You can plant a daylily with seeds at home already at the end of February.
- Daylily seeds are large enough. Before planting, they are soaked by spreading them out on wet small pebbles, perlite or damp cloth.
- When the seeds hatch, they are carefully planted in separate cups or pots filled with universal seedling soil.
- There must be drain holes in the bottom of the container.
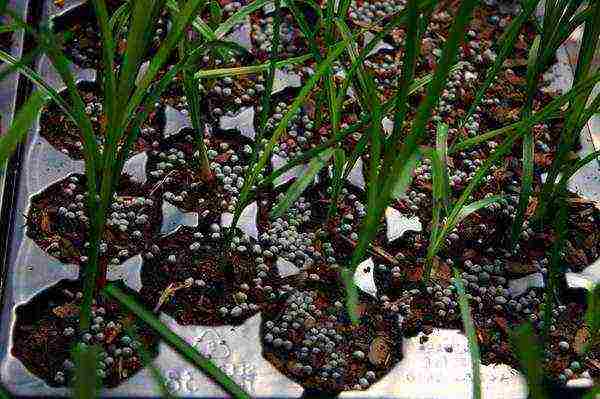
Daylily seedlings from seeds photo
- Seedlings are grown on a warm sunny window.
- Regularly watered without stagnant moisture, fed 1-2 times a month with complex fertilizers.
- At the end of May, when there is no more frost, daylily seedlings can be planted in the ground.
- Temper the plants in advance for 1-2 weeks.
Daylily species with photos and names
3 species of daylily are cultivated.
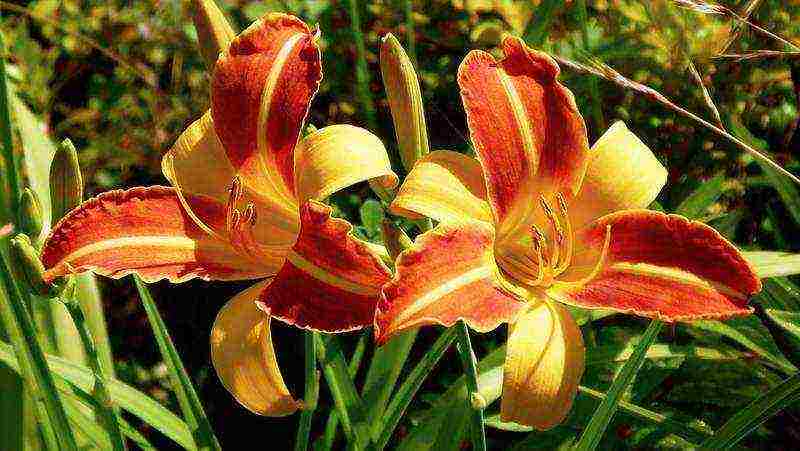
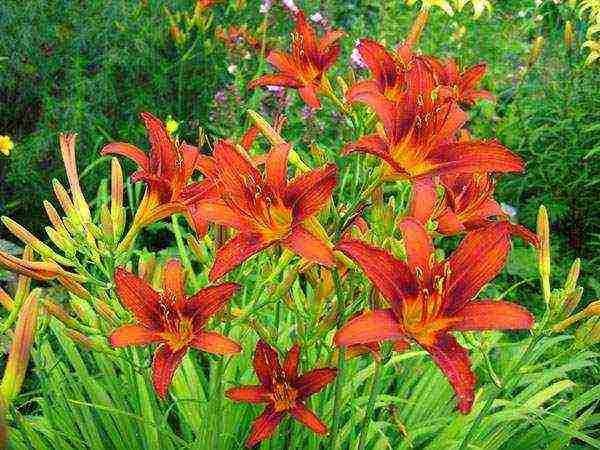
Daylily brown-yellow Hemerocallis fulva
Daylily brown-yellow Hemerocallis fulva photo
Six-petal corollas of orange hue flaunt on a peduncle of one meter height.
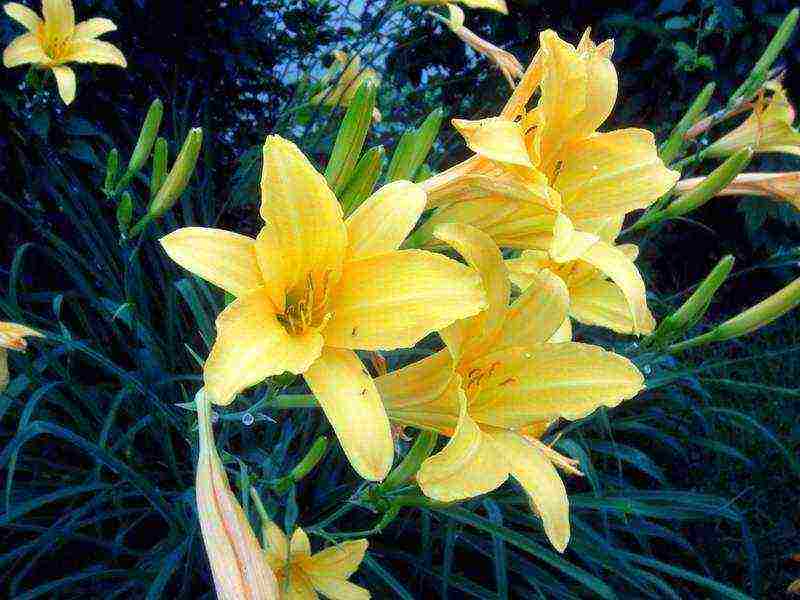
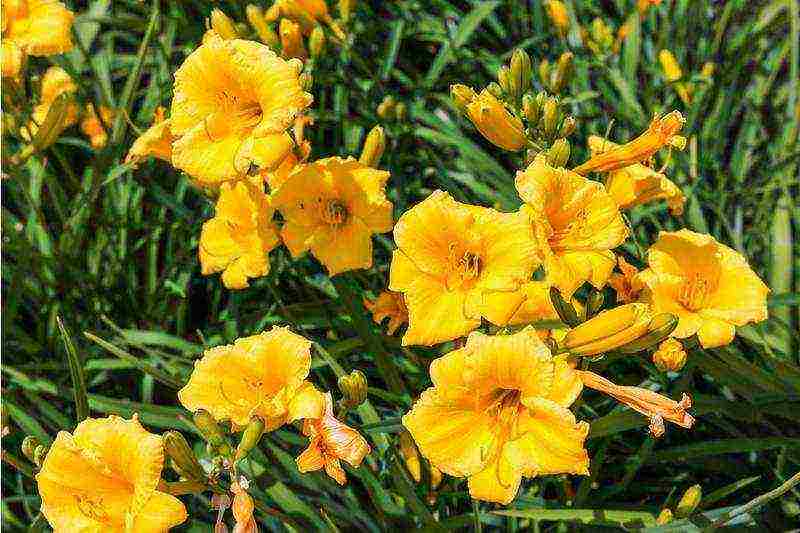
Daylily yellow Hemerocallis flava
Daylily yellow Hemerocallis flava photo
Corollas of a dusty yellow shade droop slightly.
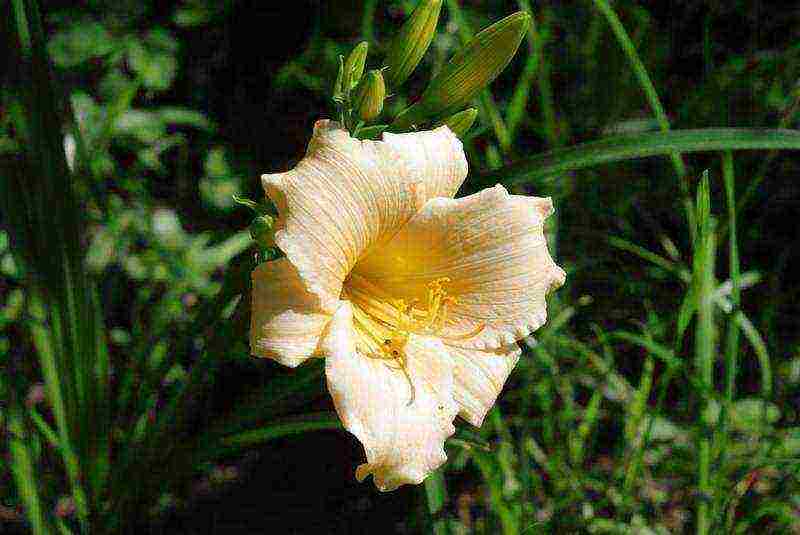
Daylily lemon yellow Hemerocallis citrine
Daylily lemon yellow Hemerocallis citrine cultivar baroni photo
Corollas of a lemon-yellow hue reach a diameter of about 10 cm.
There are about 30,000 varieties of daylily - the painstaking work of breeders.
They can be divided according to the shape of the inflorescences:
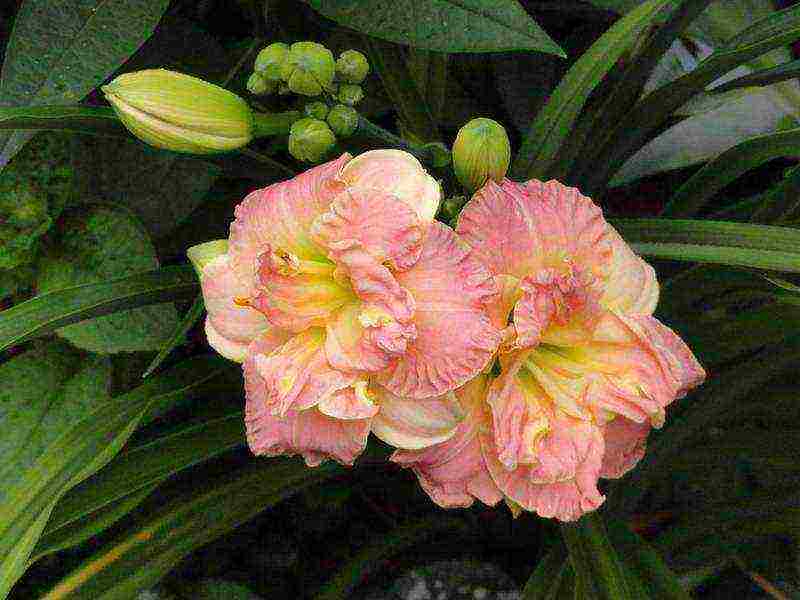
- Simple (closest to natural species);
- Terry (have a double, triple set of petals);
- Arachnids (elongated petals make the flower look like this insect);
- Unusual or indefinite shape;
- Multiforms (can be attributed to several groups at once).
Daylilies are distinguished by the flowering period:
- Dates are early and late, there are varieties with wave flowering (several times per season).
- There are also day and night views.
Height classification:
- Miniature varieties 30-40 cm high (corolla diameter 7-8 cm)
- Tall, reaching a maximum height of 1.5 m (corolla diameter can reach 15-17 cm).
The best varieties of daylily with photo names and descriptions
Daylily hybrid Frans Hals Frans Hals photo of flowers
Frans Hals - plant height 60-80 cm, the peduncle ends with yellow-orange corollas with a wavy edge, the diameter is 12-15 cm.

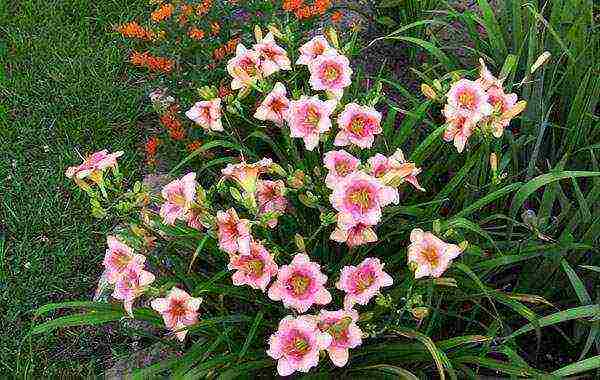
Daylily Bonanza Hemerocallis Bonanza photo
Bonanza - in the center of the yellow corolla there is a sputtering of a wine-red tint. Differs in regular flowering, high frost resistance.
There are varieties of daylilies whose inflorescences resemble gladioli in appearance:
Daylily 'Longfields Pearl' Longfields Pearl photo
Longfields Pearl - flowers of a yellow-cream shade bloom in August, delighting until mid-autumn. The corolla diameter is 10 cm.
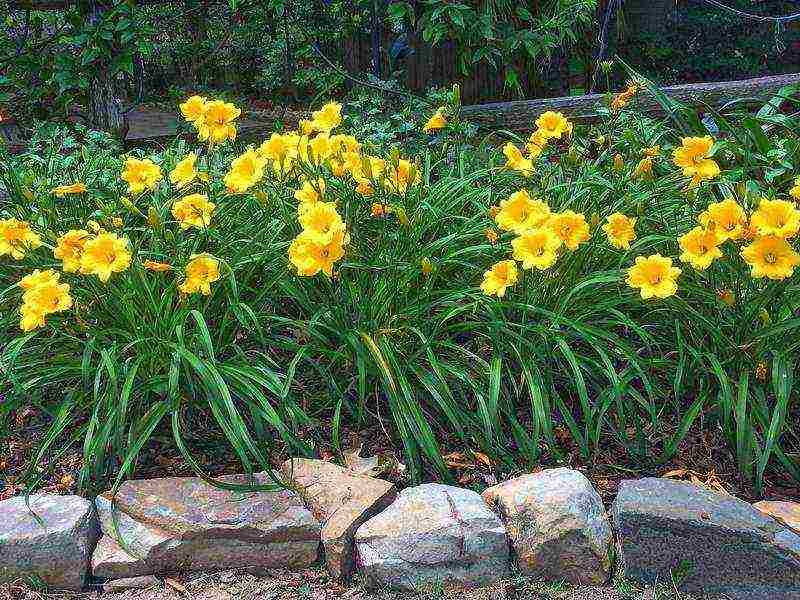
Daylily Stella De Oro Stella De Oro photo
Stella De Oro - the height of the bush is 30-40 cm. The yellow corollas are 6-7 cm. It has a long flowering period. The crumb will become a real star of the garden: undersized bushes will look spectacular along the paths, in border plantings.
New varieties of daylilies:

Daylily Katerina Woodbury Catherine Woodbery photo
Catherine Woodbery - the petals of a classic daylily shape have a quivering lilac shade that changes depending on the lighting (under the bright sun it becomes pink-yellow, and in shade it shows a lilac-pink sophistication). Diameter - 12-16 cm.

Daylily Night Bacon Night Beacon photo
Night Beacon - a colorful contrast of the yellow-green heart and purple petals, does not fade under the sun. Corollas reach a diameter of 8 cm.

Daylily Double River Wye Hemerocallis Double River Wye photo
Double River Wye - terry corollas with a diameter of about 12 cm, the color is deep yellow.
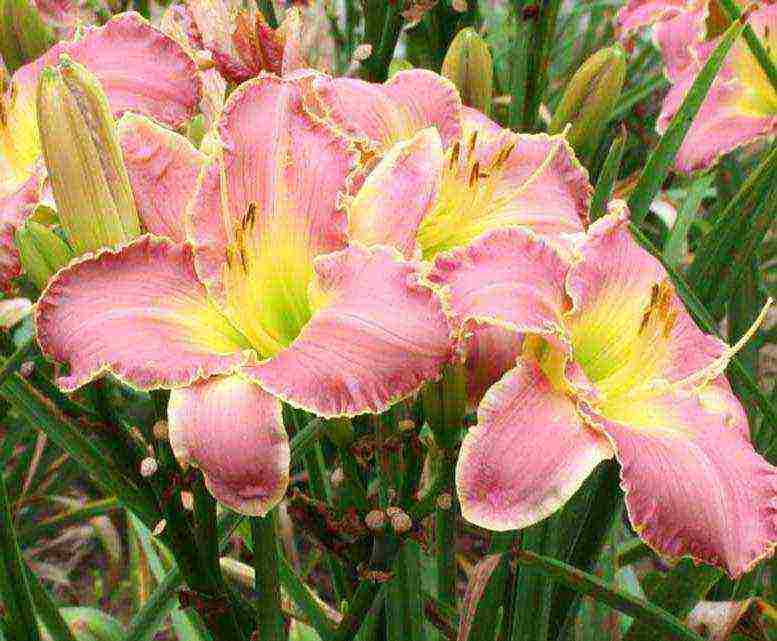
Daylily bestseller Hemerocallis Bestseller photo
Bestseller - the height of the bush is 60-70 cm. Large corollas (14 cm in diameter) impress with their shape and color. They are simple, but along the edges of the pink-purple petals there is a convoluted frill of a greenish-yellow hue.
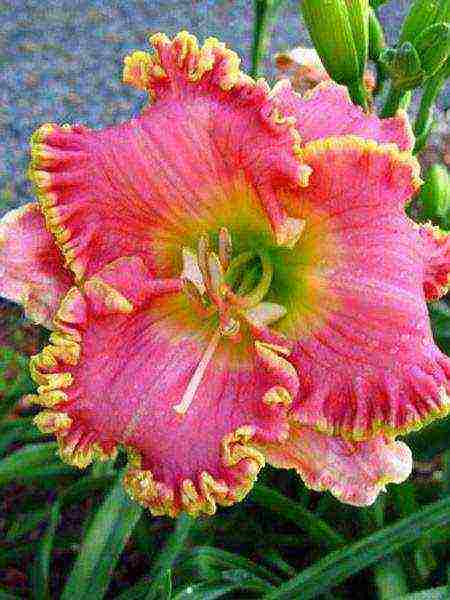
Daylily Divas Choice Hemerocallis Diva's Choice photo
Diva's Choice - in the depths of the neck there is a spot of a creamy yellow hue, smoothly turning into pink-cream petals, which becomes salmon-coral as it blooms. The record diameter of inflorescences is 17 cm.One peduncle holds 3-4 corollas.

Daylily Pandoras boxing Hemerocallis Pandora’s box photo
Pandora's box - with a half-meter height of the bush, pleases with inflorescences about 10 cm in diameter. The neck of the corolla is lime shade, then the bright middle is like a handful of ripe cherries, ending in pastel yellow petals.
Daylily Pardon Me Hemerocallis Pardon Me photo
Pardon Me is the leader among low growing varieties. Blooms from June to late September. The neck is a lime shade, the petals are dark cherry color.
Daylily Night Embers Hemerocallis Night Embers photo
Night Embers - the height of the bush is 75 cm. Corollas are terry, 12-15 cm in diameter. The petals seem to be velvety, raspberry-wine shade.
Daylily Lacy Doily Hemerocallis Lacy Doily photo
Lacy Doily - the bush is 60-80 cm high. Graceful double flowers have a pale pink tint.
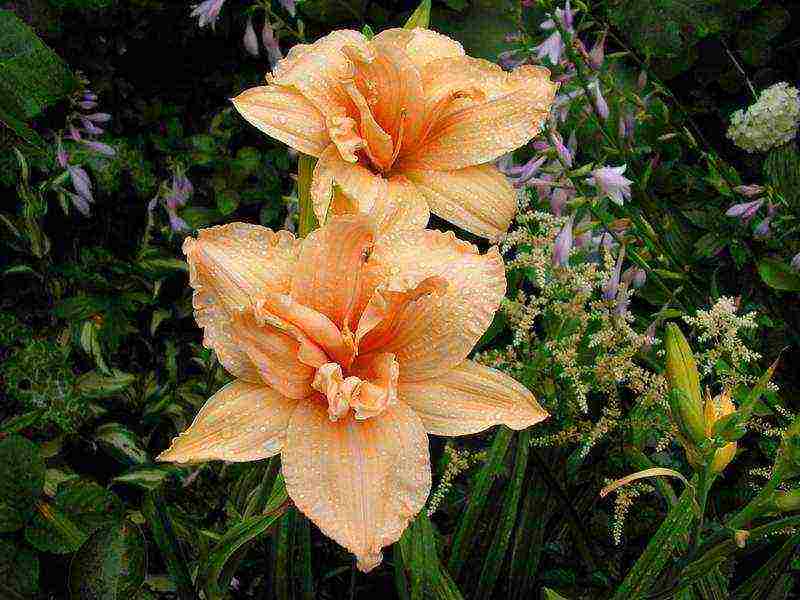
Daylily Double Dream Hemerocallis Double Dream photo
Double Dream is truly a dream. Huge (15 cm in diameter) terry corollas from creamy to salmon shade. It blooms early, is ready to grow in the sun, tolerates the absence of a strait, is not afraid of frost.

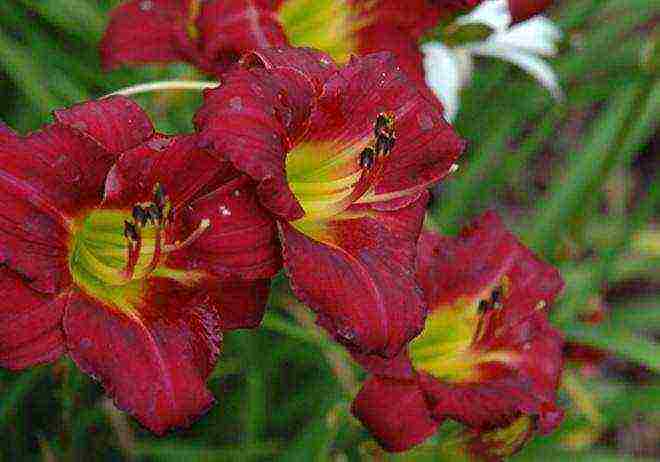
Daylily Red Rum Hemerocallis Red Rum photo
Red Rum - scarlet inflorescences with a diameter of 10 cm delight in the period June-August.

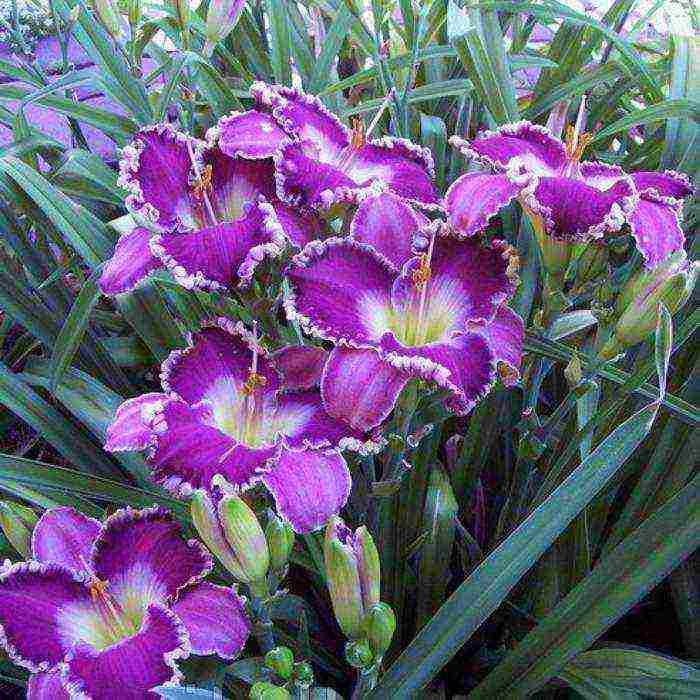
Daylily Black Stockings Hemerocallis Black Stockings photo
Black Stockings - new (launched 2015). Striking with a corolla diameter of 15 cm and a purple-violet shade of the petals, the yellowish core illuminates from the inside. The edges of the petals are corrugated.
Daylily Little Anna Rosa Hemerocallis Little Anna Rosa photo
Little Anna Rosa - miniature 40 cm tall, corolla diameter - 8 cm. Rich lemon-colored core, pale pink petals with corrugated edges. Has 2 flowering waves.
Daylily Mildred Mitchell Hemerocallis Mildred Mitchell photo
Mildred Mitchell - huge corollas (18 cm in diameter) open in June-July, repeating flowering in autumn. The most delicate colors, in pink and purple tones.
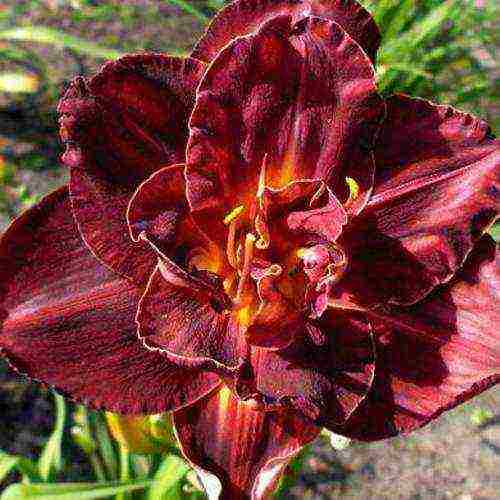
Daylily Burgundy Love Hemerocallis Burgundy Love photo
Burgundy Love - 2-3 waves of flowering can be expected from it. The corrugated petals have a noble burgundy hue.
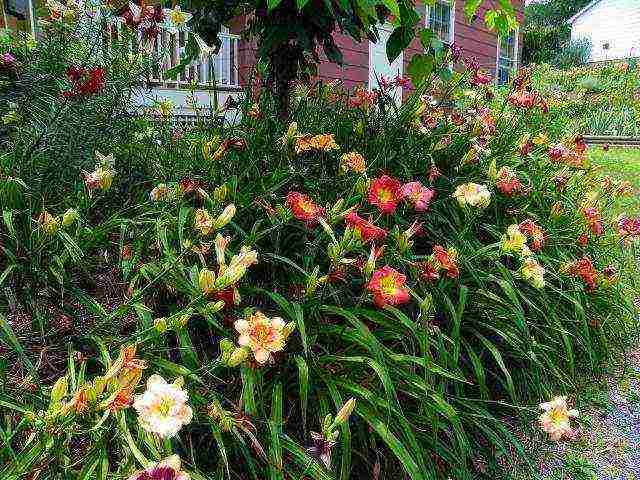
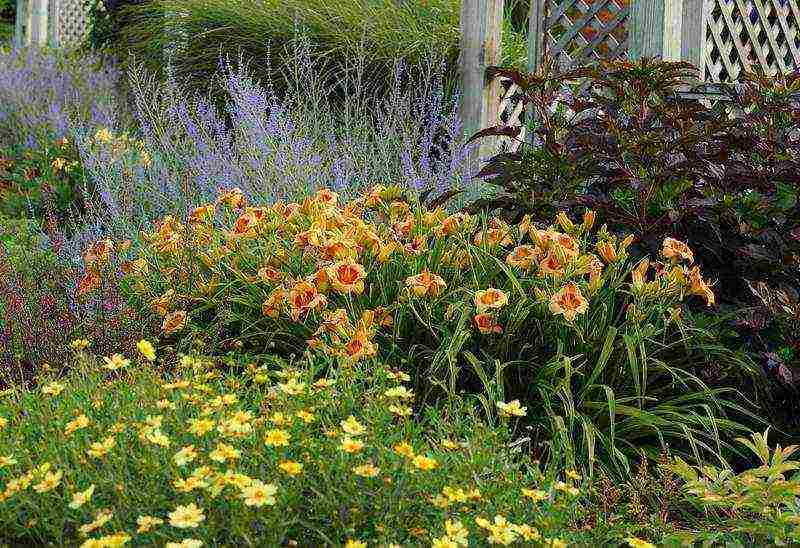
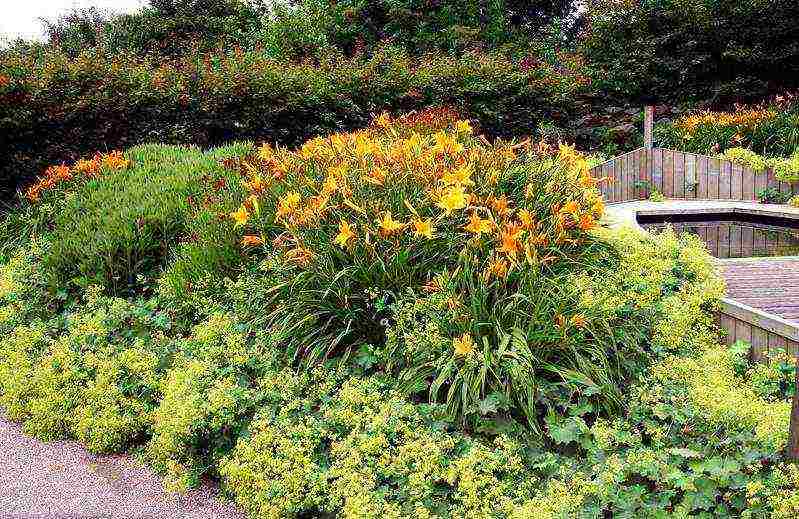
Daylilies in garden design a selection of photos:
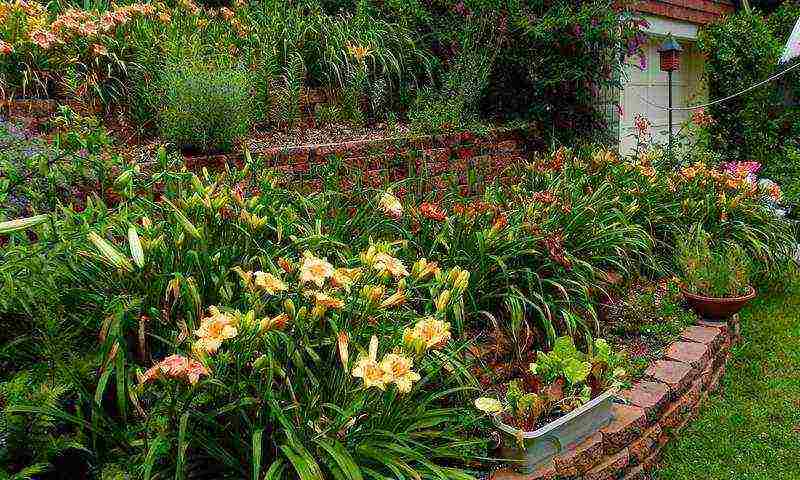
Daylilies in garden design photo flower beds
Daylily photo in the garden on the flower bed
Daylily border

Daylilies in a mix planting photo
Daylilies in landscape design photo
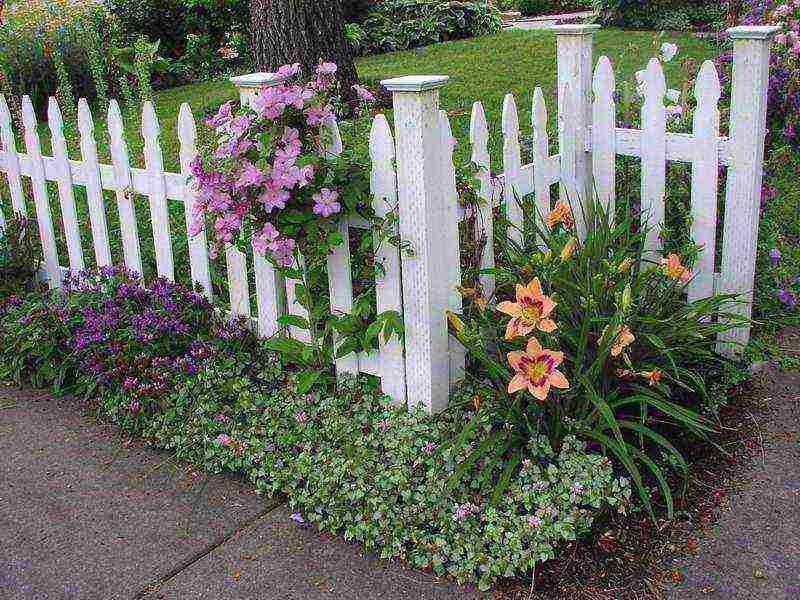
Daylilies as decoration of the fence photo
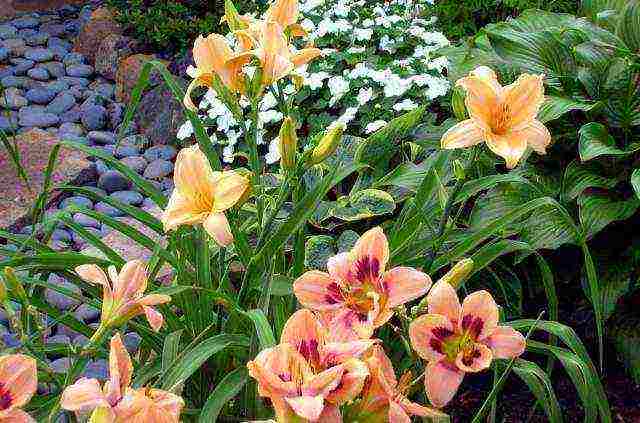
Daylilies with hosts on a flower bed photo
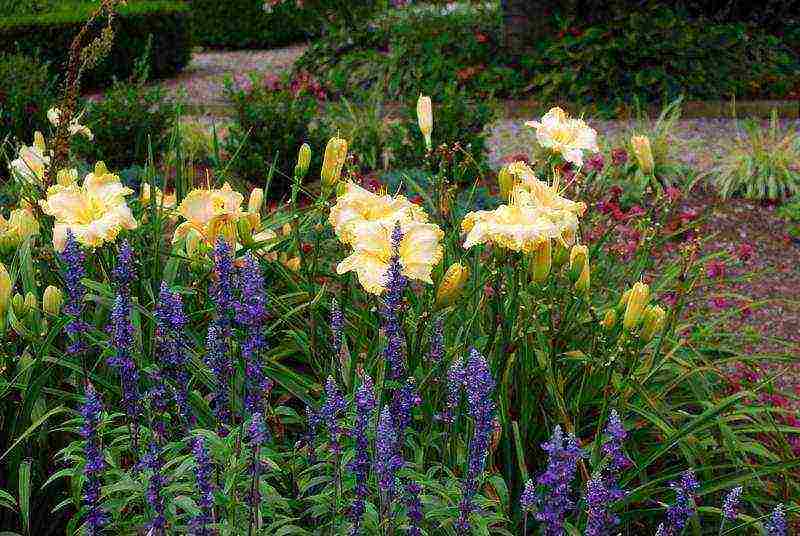
Daylilies with other flowers in the flower bed

Daylilies on a flower bed photo
Daylilies in landscape design photo
Daylilies in the garden photo

Daylily glade photo
How to plant daylilies photo with other flowers
- Type: lily
- Flowering Period: May, June, July, August, September, October
- Height: 20-250cm
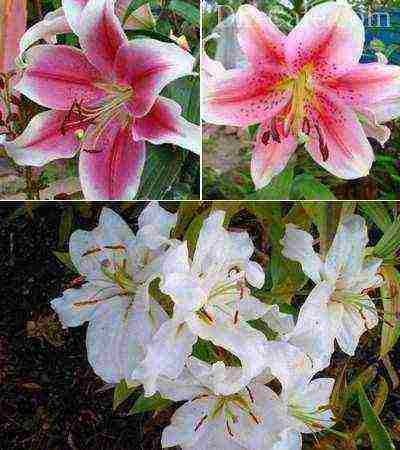
- Color: white, yellow, orange, red, spotted, two-colored
- Perennial
- Hibernates
- Sun-loving
- Moisture-loving
Lily is an amazingly beautiful flower with a pleasant aroma that has been revered in many cultures. The Greeks attributed her divine origin, believing that the lily grew from the milk of Juno - the mother of the gods. And when literally translated from Greek "li-li" sounds like "white-white". The Romans revered her as the main flower at festivals celebrating the goddess of spring Flora. Christians and Jews adorn their sacred altars with it, considering the lily a symbol of purity. This flower can be found on the coats of arms of noble families of different countries. Today, lilies adorn many parks and suburban areas, acting as a bright accent in any flower garden. One of the prerequisites for the lush flowering of these marvelous plants is the correct planting of lilies and their care.
- The main groups and popular varieties of lilies
- The choice of planting material
- Choosing a seat for landing
- Correct soil preparation
- Planting material processing
- Choosing the planting time
- Subtleties in the care of an exotic beauty
- Daylily - lily for the lazy
The main groups and popular varieties of lilies
According to the international classification, these flowering perennial bulbous plants are divided into 9 groups:
- Asian - include 5 thousand varieties. They are characterized by unpretentiousness and winter hardiness, flowers do not smell.
- Curly - there are 200 varieties. It got its name from the inflorescences that resemble a candlestick with drooping heads.
- Snow white - include 30 varieties.They have a wonderful aroma, they can have a pale yellow color. They are very moody.
- American - there are 140 varieties. The flowers are very original in bright exotic colors, often decorated with two-tone black specks. Quite finicky.
- Longiflorum - have an elongated bud shape with a direction to the side or downward, Extraordinarily fragrant. In garden conditions, they often suffer from viral diseases, they are mostly grown as greenhouse crops.
- Tubular - have a characteristic flower shape, reminiscent of an elongated gramophone, collected from dense wax petals. Capricious, in need of shelter for the winter.
- Oriental (oriental) - a large group of 1300 varieties. They are capricious, demanding for warmth, often affected by diseases.
- Interspecific hybrids - combine the best qualities of individual groups. Extremely beautiful and exotic. Among the varieties obtained as a result of crossing, the most popular are LA hybrids, OT hybrids and LO hybrids with large flowers up to 25 cm in diameter for distillation.
- Natural species - play a key role in the creation of new varieties.
Under natural conditions, these herbaceous plants are ubiquitous in the temperate latitudes of the Northern Hemisphere: in the Mediterranean, southeastern part of Central America, Japan, and China. Asian lily hybrids are most widespread in mid-latitudes.

Lilies are one of the most beautiful representatives of the bulbous genus. They belong to the daylily family and are relatives of onions, hazel grouses, tulips.

Asians come from natural species of Siberian lilies, such as Daurskaya and Tigrovaya, and therefore the most winter-hardy and adapted to not so favorable climatic conditions. Other groups of lilies, such as oriental, tubular or curly lilies, require more careful maintenance.
Among Asian hybrids, varieties are distinguished by the greatest decorativeness:
- "Marlene" - petals of a delicate pink hue. It is famous for its abundant flowering.
- "Landini" is a spectacular maroon beauty over a meter high.
- "Aphrodite" is a double flower with pink petals.
Of the old and time-tested varieties, it is also worth highlighting: "Inchantment" with flowers of a rich red-orange hue, "Destin" with delicate lemon-yellow petals, "Peprike" with bright red flowers.
Worthy representatives of the Orientali group can be considered: "Mona Liza" with graceful pale pink flowers, "Tiber" with lilac flowers framed by a white border, snow-white beauty "Siberia"
The choice of planting material
When choosing planting material, it is important to take into account the climatic features of the area, since not all lilies are able to painlessly tolerate temperature fluctuations.
When purchasing planting material, carefully examine the bulb: there are no spots and traces of rot on it. These signs indicate the defeat of the plant by diseases. The bulb should be evenly colored, the scales should adhere tightly to each other.
The marking will help to determine the varietal affiliation of the plant:
- The first Roman numeral denotes a lily group;
- The second digit indicates the position of the flower ("a" - directed up, "b" - to the side, "c" - down);
- The letter through the fraction denotes the shape of the flower ("a" - tubular, "b" - cupped, "c" - flat, "d" - turban).
It is best to store the bulbs in a cool place until planting, sprinkling with sand, sawdust or damp moss. Some adapt the bottom shelf of the refrigerator for this purpose.

For spring planting, choose bulbs on which sprouts have already hatched and short white roots have begun to grow
In the case when the bulb begins to germinate ahead of time, it is advisable to plant it in a flower pot, leaving it in a warm room. It is worth replanting in open ground after frost.
Choosing a seat for landing
When planning where to place an exotic beauty on a site, you should focus on her group affiliation. Tubular, Asian and Oriental lines show the greatest decorative effect only in well-lit areas.
They feel comfortable in the partial shade of lilies, which have adventitious roots on the underground part of the stem. These include varieties of the group of curly lilies. It is advisable to place them so that the root part is shaded, and the inflorescence is illuminated by the sun's rays.
Lily is a heat-loving plant that prefers well-lit areas, reliably covered with a "screen" of green foliage from gusts of wind
Lilies with large flowers look spectacular in solo performance. When planting small-flowered lilies, in order to obtain an expressive aesthetic effect, it is better to form small groups, placing them at a distance of 10-15 cm from each other. Against the background of the lush foliage of other perennials, bright graceful flowers will stand out favorably, creating a magnificent picture.
Sites located on a small hill are ideal for planting flowers. This prevents stagnation of rainwater, which often causes damage to plants by pathogens. Swampy soils are destructive for fastidious beauties. It is possible to improve the conditions on clay and heavy loamy soils by arranging drainage. For this, ditches are laid, placing them at a slight slope. The bottom of the ditches is lined with a layer of crushed brick or fine gravel, sprinkled with river sand on top and covered with earth.
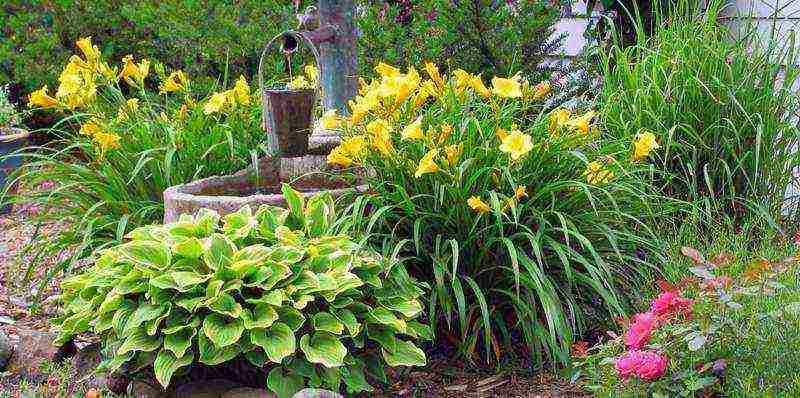
So that the soil near the root area of the flower is in the shade and does not overheat under the sun's rays, it is better to plant daylilies, bells and hosts in the immediate vicinity. Their spreading foliage will cover the surface of the earth, creating optimal conditions for the development of fastidious beauties.
Correct soil preparation
Correct soil is 80% of success in growing lilies. Regardless of the group belonging to the bulbous, they all prefer to grow on rich soils.
On enriched and well-drained peat soils, varieties of the American group and oriental hybrids thrive.
Humus is considered the best fertilizer for lilies. But it should be introduced with caution: with an excess of nutrition, the plants begin to "fatten". This provokes their slowdown in development, a decrease in disease resistance and a decrease in frost resistance. The optimal ratio of the introduced humus is 7-8 kg per 1 sq. M.
The introduction of poorly decomposed manure containing pathogenic microflora with pathogenic plants can have a detrimental effect on plants.
The soil under these flowering herbaceous plants must contain a sufficient amount of nutrients, because a plant can live in one place from 3 to 5 years. When digging the soil, it is filled with mineral fertilizers, which include nitrogen, potassium and phosphorus. They are brought in at the rate of 100 grams per square meter.
Since the roots of plants go quite deep, they dig up the soil before planting, deepening 30-40 cm.To drain heavy clay soil, sand is added to its composition
Most members of the daylily family do not tolerate acidic soils, preferring slightly alkaline and slightly acidic soil compositions. On acidic well-drained soil, only varieties of the eastern group feel comfortable. Asians and LA hybrids are more fond of neutral and humous soils, and tubular lilies show the greatest decorative effect on poor, slightly alkaline soil with admixtures of ash and sand.
Help to reduce the acidity of the soil:
- Wood ash - it is brought in at the rate of 150-200 gr per 1 sq. M;
- Chalk - during digging, 300-500 gr. Per square meter.
Planting material processing
The bulbs are examined before planting, discarding diseased specimens: they remove damaged tissues, cut off rotten scales and dead roots.
The examined material is washed under pressure for 20-30 minutes. Then, in order to prevent the development of fungal diseases, they are first kept in a solution of potassium permanganate, prepared in a proportion of 5 g per 10 liters of water, and then in a solution of the drug foundation. If necessary, they can be etched in an insecticidal solution based on chlorophos and 1% phosphamide.
The root system of these plants dries quickly enough. Therefore, after soaking, there is no need to dry them.
Choosing the planting time
The optimal planting time is after the plants have faded. This is the period from late summer to mid-autumn. If the bulbs are purchased in early spring, planting can be done as soon as the soil thaws and dries up. Late spring planting is risky in that young shoots can be damaged.
Spring planting is also more suitable for late-flowering varieties, the bulbs of which are slowly formed. These include LO hybrids and varieties of the eastern group: Rio Negro, White Haven, Rialto, Marco Polo.
When planting plants, you should be guided by the rule that large bulbs with a diameter of 8-12 cm are planted to a depth of 25 cm, and small ones - to a depth three times the size of the bulb itself
The only exceptions are Chalntcedony, Snow White and Testaceum. They form a root rosette of leaves, and therefore the soil layer above them should not exceed 2-3 cm.
When planting bulbs in heavy soil types, the bottom of the planting pits is covered with a 5 cm layer of sand. To protect them from voles, wire mesh is laid along the inner walls of the planting pit.
The bulb is laid out on the bottom of the pit, placed on an impromptu sand "pillow", and the roots are straightened. They cannot be wrung and bent upwards. The landing site is marked with a peg and sprinkled with earth, lightly tamping. The well is poured abundantly with settled water and covered with bark mulch.
Lilies are very sensitive to root drying. To prevent the bulbs from weathering while the hole is being prepared, it is better to wrap them in a wet napkin or hide them in a box with wet peat. Tender young sprouts are afraid of temperature extremes
To protect young shoots, the planted bulbs are covered with plastic bottles with cut-out bottoms. For this purpose, it is better to use bottles with wide walls with a volume of 2-3 liters.
Subtleties in the care of an exotic beauty
How to care for lilies? To minimize the care of these flowering plants, a number of recommendations must be followed:
- During the season, feed the plants with complex fertilizers and ash at the rate of 50 grams per square meter. Top dressing is carried out in three stages: in early spring, at the stage of bud formation and after flowering. Suitable for spring root feeding: ammonium nitrate (40 g per 10 l), nitroammophosphate (50 g per 10 l), a solution of fermented mullein in a ratio of 1:10.
- Provide timely watering. Although the lily does not like excessive moisture, especially dry days need frequent watering. You need to water at the root, trying not to moisturize the leaves. Accidentally falling water droplets can act as a kind of lens, causing sunburn.
- Mulching the soil. Very harmful to bulbous plants and soil overheating, which disrupts the course of biological processes. This can be prevented by mulching the soil with natural materials of light shades (cut grass, straw, sawdust).
- Pest control. The lily beetle and lily fly are dangerous for the aboveground part of plants. You can get rid of pests by collecting the larvae by hand and spraying the stems with preparations such as "Thunder", "Grizzly", "Mukhoed".
- Garter stalks. Tall varieties with thin stems must be tied to supports, thereby preventing them from breaking off and lodging.
- So that wilted inflorescences after flowering do not spoil the picture, they should be removed in a timely manner. Peduncles are removed at the end of the season.
- After the end of the growing season, the stems of the plants must be cut and burned so that in winter they do not serve as a conductor of cold to the bulb.
- For the winter, it is advisable to cover garden lilies with leafy soil, sawdust or spruce branches of conifers. Only Asian and LA hybrids do not need shelter.
Lilies are planted, separating the daughter bulbs, every three years, one and a half months after the end of flowering. By this period, they had built up mass and gained the greatest strength.
Lilies are planted, separating the daughter bulbs, every three years, one and a half months after the end of flowering. By this period, they had built up mass and gained the greatest strength.
Slowly growing varieties of Caucasian origin are best planted only after 5-6 years. Asian varieties can be replanted even in summer. The main thing is to dig up the plants with a garden pitchfork along with a lump of earth, while preserving the root system.
> When transplanting, baby bulbs are carefully separated from the stem and planted in seedling beds for growing. Immediately after planting, they are sprinkled with compost or manure humus, forming a layer 3-4 cm thick. They will form full-fledged bulbs in the second or third year.
Daylily - lily for the lazy
No wonder the breeders called these unpretentious and disease-resistant perennials "lilies for the lazy." And the statement that the more beautiful the flower, the more capricious it is, is not applicable to this plant. Daylily grows well in any garden soil, feeling comfortable both in the bright sun and in partial shade.

Not inferior in beauty to garden lilies and their closest "relatives" - daylilies, but unlike fastidious beauties, they are very easy to care for
Planting and caring for daylilies takes a minimum of time and effort. And the plant begins to delight with flowering already in the first year of planting. These perennials prefer neutral or slightly acidic soil. They are able to grow on depleted soils, but they show the greatest decorative effect on loose loams rich in organic matter. They are tolerant of infrequent watering, but, like lilies, do not tolerate stagnant water.
Perfectly combined with ornamental grasses and flowering annuals, they perfectly mask the slow disappearance of spring-flowering bulbs.
Daylilies can become a bright decoration for any flower garden. With the right selection of species with different flowering periods, the flowering of daylilies will not be difficult to stretch for the entire season.
>
 Among flower growers, daylilies are rightfully considered one of the most unpretentious and grateful perennials. If the garden is decorated with daylilies, planting and caring for them in the open field will clearly not be a burden to the owner of the site.
Plants that love the sun feel good in partial shade, the main thing is that the plants are actively illuminated for at least 6 hours. Daylilies do not impose special requirements on the composition of the soil and can grow and bloom for many years in one place, forming dense lush clumps.
Still, how do you create the best growing conditions for these spectacular flowers? When to plant daylilies outdoors, in spring or fall? How to care for plants at different times of the year?
Place for planting daylilies in the ground in spring
 When choosing a site for a daylily, you need to take into account that plants love the sun, are not afraid of the wind and thrive where other decorative perennials will feel oppressed. At the same time, daylilies need freedom for free growth. They do not like when there are large plants, shrubs and trees nearby, which become a kind of competitors for flowers for a place in the sun.
Experienced flower growers advise planting light varieties of daylilies in more illuminated places, and for purple, red, multi-colored varieties, for which color saturation is important, look for areas with slight shading.
To simplify the care of daylilies after planting them in open ground, places are chosen for plants that are not flooded in spring.In summer, the powerful rhizomes of plants should not suffer from the close occurrence of groundwater.
The best time to plant daylilies on the site
 Daylilies are a kind of centenarians. The most beautiful flowers, forming curtains decorated with multi-colored corollas, they can grow up to one and a half decades without transplanting. This should be taken into account when choosing a place for plants in the garden, and also know that the maximum flowering will be only 5-7 years. Then peduncles among dense foliage appear less often, and the flowers on them are much smaller than before. Therefore, every few years the plants are transplanted, dividing adult perennials.
An unpretentious culture easily tolerates this procedure from early spring to autumn. But planting daylilies in the ground in the spring always goes without complications, the cuttings quickly take root and grow, blooming in the same season.
Spring weather is changeable, and if there is a danger of frost, it is better to postpone the planting. The planting material acquired or obtained after dividing its own plants can be stored for about a month by digging the root system of the plant into sand, peat-sandy substrate, or shifting it with a damp cloth. At the same time, the leaf plates of daylilies are cut in half or a third to reduce the plant's need for moisture.
If the summer is not hot, and for daylilies, when planting in the ground, like in spring, you can really create comfortable conditions, nothing prevents you from decorating the garden until autumn. But with an autumn planting, there is a risk that the plants will not have time to root well, and the next year, if they survive, they will be very weakened.
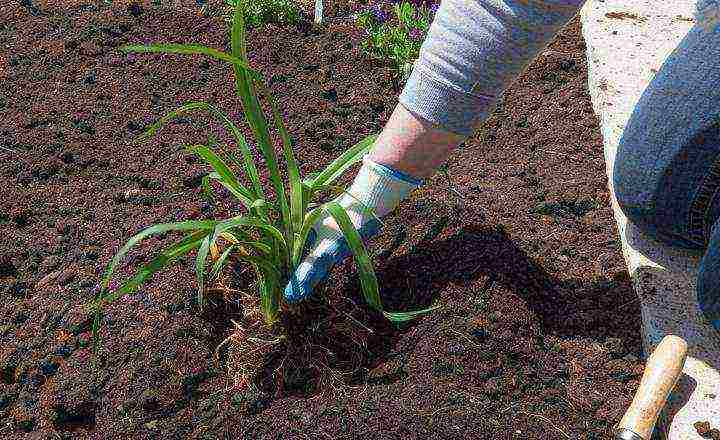
How to plant daylilies in spring
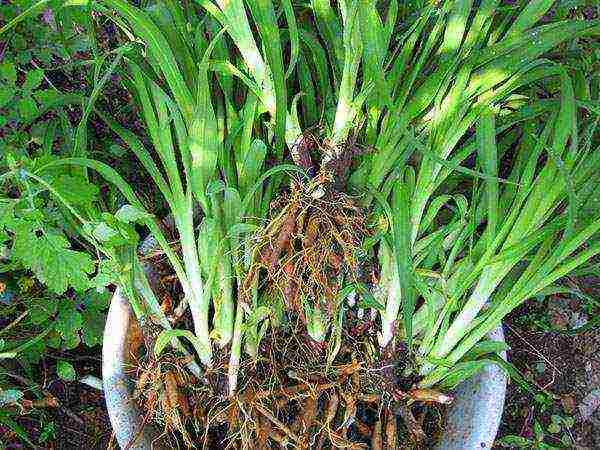 Before transferring the seedlings to the garden, they need to be prepared for planting:
- Daylily strips are examined, damaged, dry or rotten roots are removed.
- The sections are treated with charcoal or activated charcoal crushed to a powder consistency.
- If this has not been done before, the foliage is cut 10-15 cm above the base of the leaf plates.
Often, the planting material bought in the store has dried up by the time the daylily is planted in the open ground, and the care of such a plant begins with a 4-hour soaking of the root system in a growth stimulator.
The place has been chosen, the planting material is waiting for it to be transferred to the ground. It remains only to prepare the soil suitable for daylilies and start planting. Ornamental perennials prefer a loose, light substrate with a neutral or slightly acidic reaction.
 Before planting daylilies in the spring, the soil at their future place of residence must be dug up onto a full bayonet of a shovel. Next, make a planting hole sufficient to accommodate the rhizomes. For more convenience:
- a cone from a loosened substrate is poured at the bottom;
- a plant is placed on top of the ground;
- rhizomes are carefully laid out on the soil;
- sprinkle the underground part of the daylily with soil so that the root collar does not sink more than a couple of centimeters.
 After planting is complete, the soil around is tamped a little, and the daylily is watered.
To reduce the evaporation of moisture, the soil under the plants can be mulched using any available means, for example, rotted bark or needles, straw or specialized material.
Daylily care after planting in open ground
 Regular plant maintenance after planting consists of watering, loosening the soil and removing weeds.
In the warm season, actively growing and flowering perennials require a lot of water. If daylilies are thirsty, this can be seen by faded foliage, refusal to form, or dropping buds. Perennials respond excellently to additional humidification in summer. Therefore, daylilies can be planted near water bodies or use very shallow sprinkling;
- In hot weather, daylilies are watered abundantly, so that the soil under them is 20-30 cm wet, that is, to the depth of the root system.
- If the summer is not hot, you can reduce the frequency of watering, but you need to monitor the standing of the foliage.
The best time to water daylilies is early morning or evening, when there is no risk of sunburn on the flowers.
With proper planting and care, the flowers of daylilies, as in the photo, appear in the same summer. In the first year, the plants are not additionally fed. The introduction of complex fertilizers for flowering ornamental crops begins next spring. When choosing a product, it is better to give preference to formulations with a moderate nitrogen content, causing foliage to proliferate to the detriment of flowering. During the summer, perennials are fed twice, and closer to autumn, the plants receive potassium-phosphorus fertilizers for better preparation for winter.
Plants are hardy, but can suffer when there is too little snow on the site. Therefore, in snowless winters, it is better to cover daylilies with spruce branches, needles, straw and other materials at hand. As soon as the massive melting of the snow begins, the daylilies are released, otherwise pret develops on the root collars of the plants.
It is seen about the cultivation of daylilies in the country


