Content
- 1 Choosing a landing site
- 2 Soil for hosts
- 3 Landing hosts in open ground
- 4 Taking care of the host in the country
- 5 Description of the hosta plant
- 6 How to grow a host?
- 7 When to plant hosta outdoors?
- 8 Planting in open ground with seeds
- 9 Propagation by cuttings and dividing the bush
- 10 Proper care of a shade-loving plant
- 11 Growing hosts in the garden - diseases and pests
- 12 Hosta in landscape design
 Liven up your garden with colorful greenery, and take a host as your assistant. It is unpretentious in planting, care and cultivation. This plant is popular in landscape design, because its leaves have different shapes and colors, depending on the variety.
Description, varieties and varieties
The beauty of this plant is in the leaves, not the flowers. From green to gold and white, from long to rounded and heart-shaped - this is what the hosta is. Planting and caring for it in the open field is very simple - another reason to pay attention to this perennial.
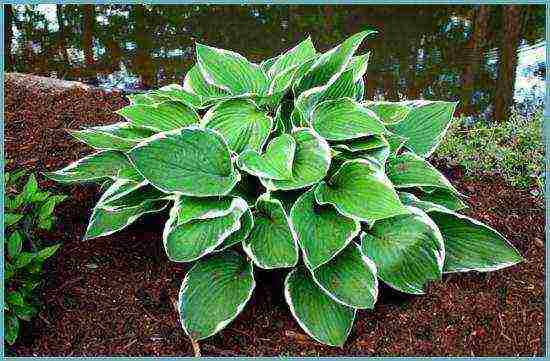
Hosta will be a wonderful garden decoration from early spring to late autumn.
Having decided to start growing hosts, see how she looks in the photo. Choose from about 3000 varieties of your choice. According to the colors of the foliage, they are combined into 5 groups:
- green;
- blue (with a bluish tint);
- yellow;
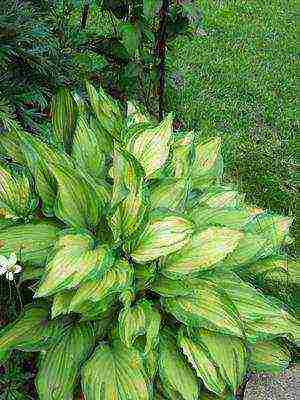
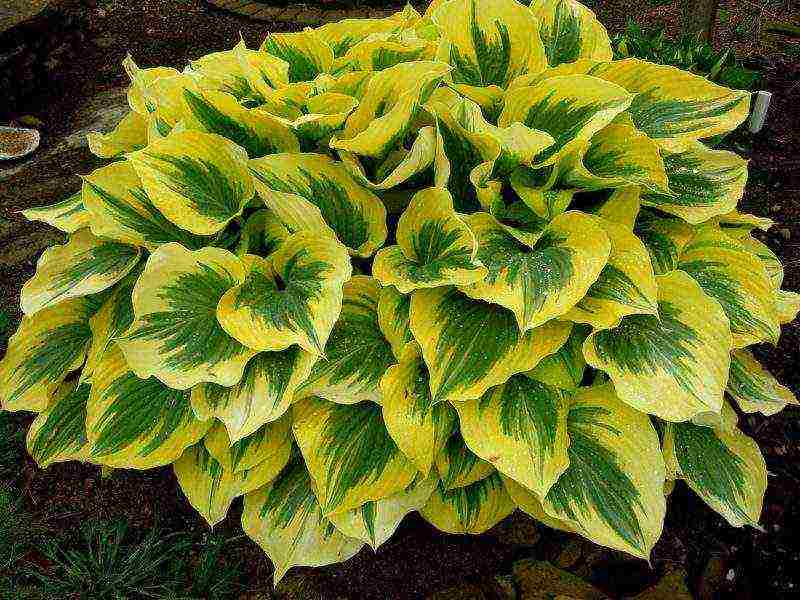
- variegated (this includes hosts motley and bordered with light color);
- mediovariegata (leaves are light, with green edges).
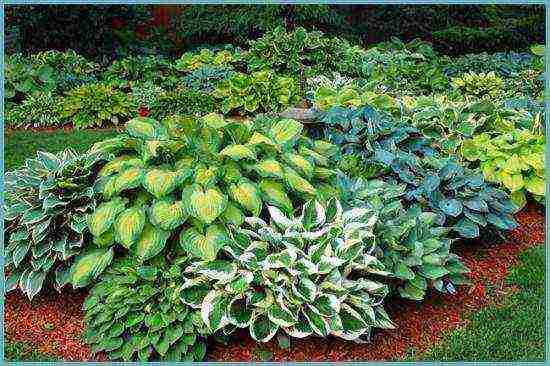
There is a huge variety of hostas.
For those who grow hostu in the open field, the classification of varieties by size is also familiar:
- dwarf (up to 10 cm);
- miniature (10-15 cm);
- small (16-25 cm);
- medium (30-50 cm), the most numerous group;
- large (55-70 cm);
- giant (from 70 cm).
The main species, which are also used for breeding:
- Wavy. It looks like a ball of dense wavy green-white leaves.
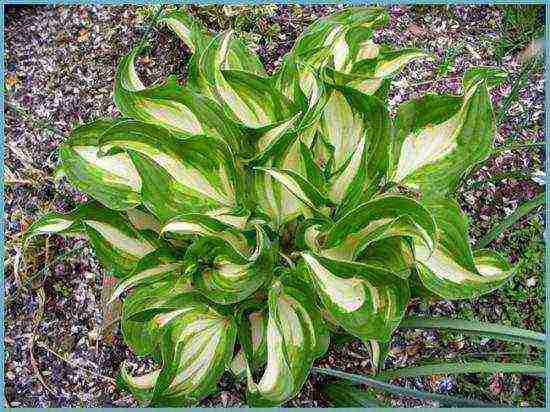
Hosta wavy
- Bloated. Looks especially good in garden landscaping. Light green round leaves are lined with stripes.

The host is bloated
- High. It grows up to 90 cm. It has large green leaves.
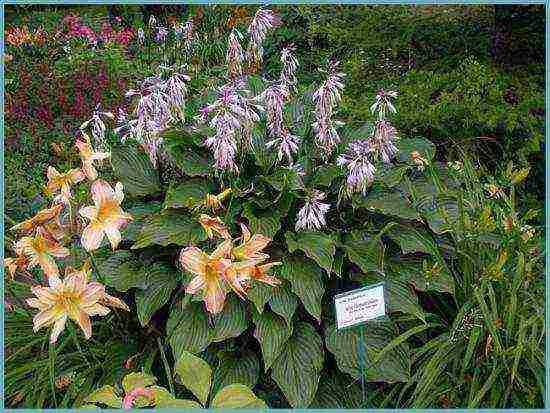
Hosta high
- Curly. Her leaves are wide, with a white edge.

Khosta curly
- Plantain. Up to half a meter high, the leaves are bright green, glossy.
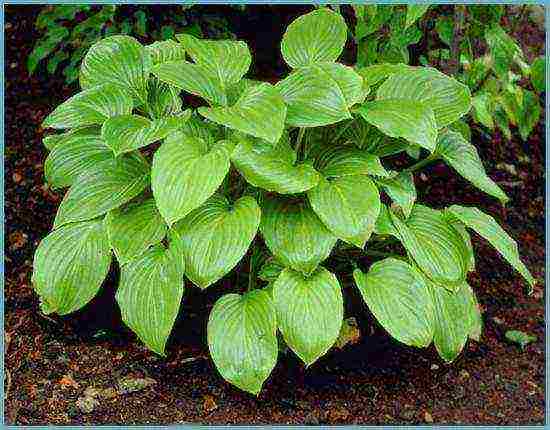
Khosta plantain
Among the host are chameleon varieties that change color during the summer season. Some species of this plant are difficult to classify because their leaves are blurred in color. And foreign breeders have bred tricolor hybrids. There are plenty to choose from!
Landing hosts
The optimal time for planting hosts in the open field is early spring or late August or early September. It is not worth postponing to a later time. Choose the material for planting carefully. The roots should be elastic, 10-12 cm long. It is best if the sprout has 2-3 buds.
Advice. If you bought a hosta, but it is too early to plant it, store the sprouts in a cool and dark place at t + 5-10 ° C. A basement, a lower shelf of a refrigerator or an insulated balcony will do.
Hosta is traditionally considered a shade-loving perennial. But there is a pattern: the lighter the foliage, the more sun the plant needs. Dark green and blue varieties must be planted in the shade. For growing light hosts, partial shade or even a sunny place is suitable. Make sure that the plant is not in direct light, otherwise burns on the leaves cannot be avoided.
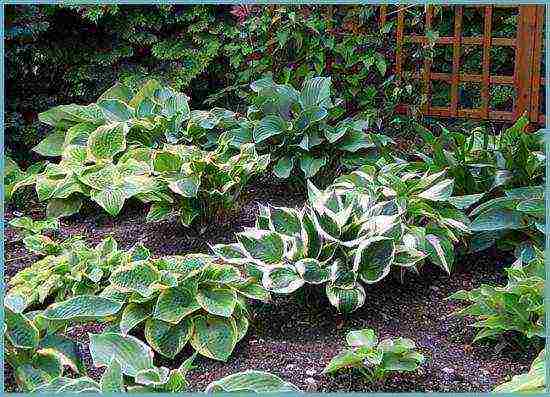
The host can be planted in the shade or partial shade
Light, well-drained, moist soil is good for planting and propagating outdoors. The holes should be made wide, about 30 cm deep. The distance between them should be from 30 to 100 cm (depending on the size of the plant).
Fill each hole about 2/3 with compost, peat, form a mound. Place the roots of the seedlings on it, but so that there are no empty spaces. Spread them out, cover them with fertile soil, compact. Finish planting with abundant watering. Mulch the roots with chopped bark or peat. This will help retain moisture. Repeat the watering procedure several more times every 3-4 days.
Advice. The buds of the plant during planting should be at ground level. If necessary, add additional soil under the root.
Plant care
Although not a demanding host, planting and caring for her requires adherence to the rules.
- Weed and periodically loosen the soil.
- Remove old leaves and young flower arrows. This will make the bush look neater. The exception is well-flowering varieties.
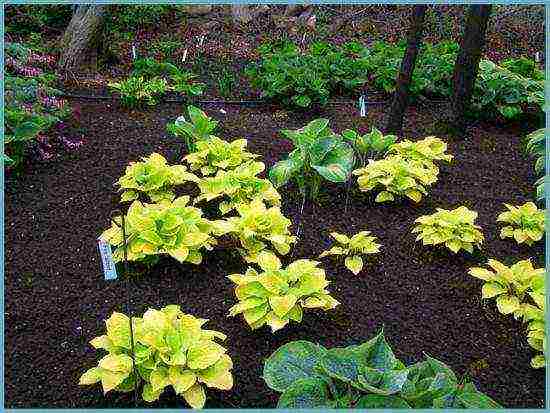
If you remove the flower arrows, the hosta bush will be more luxuriant.
- The host loves moisture, so it needs regular watering, about 2 times a week.
- This perennial is frost-resistant. But if the winter is too cold, take extra care by covering the plant with, for example, agrofibre.
- In one place the host can grow up to 20 years. However, after 3-4 years, young daughter roots should be separated from the bush so that it does not grow too much.
Fertilizing and feeding hosts
How the plants look in your garden depends on the care, including the intensity of fertilization. The hosta looks more decorative, which is fed 3 times per season:
- during the growth period;
- during flowering;
- after him.
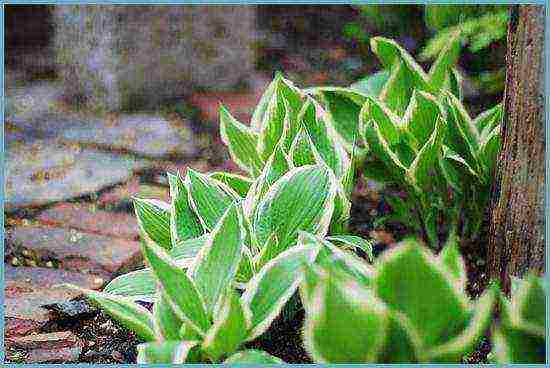
The host needs feeding several times a season.
For these purposes, fertilizers with nitrogen, potassium, phosphorus are most often used. Compost and humus are also useful for hosts. It is better to bring them in in the fall. Organic fertilizers are preferable to mineral fertilizers. The "golden rule" of leaving is not to overdo it. Too frequent or abundant feeding can provoke a burn.
Plant propagation
There are 3 ways to propagate hosts:
- division;
- cuttings;
- growing from seeds.
The bushes are usually divided in May or late summer. The smaller the split off part is, the more time it will take for its growth. Another method of propagation, cuttings, involves the separation of a sprout with a part of the rhizome from an adult bush. Cuttings are planted in open ground immediately, watered and shaded.
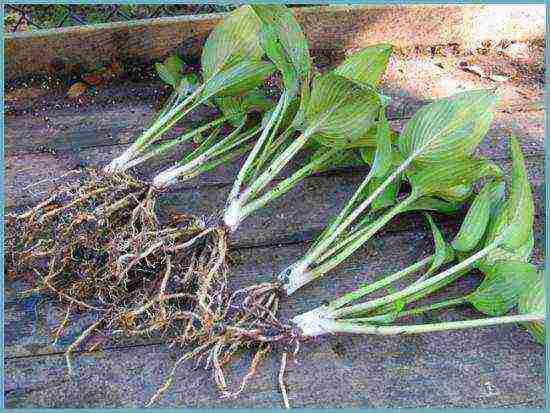
Dividing the hosta bush
Growing hosts from seeds is a laborious and time-consuming process. The germination rate of the material is 70-80%, therefore, before sowing, it must be treated with growth stimulants. Another way is to keep the seeds in the cold for 30 days. It is also important to ensure that the soil and planting containers are sterile. Before sowing the hosts, the pots must be disinfected with potassium permanganate or alcohol.
Seed propagation should start in April or May. Pour drainage into containers, then soil mixture, water it. Spread the seeds, sprinkle them with soil on top (layer thickness - 5-7 mm). Slightly press it, cover the container with glass or film and place in a shady place. Hosta germination temperature is + 18-25º C. In such conditions, seedlings appear in 2-3 weeks.
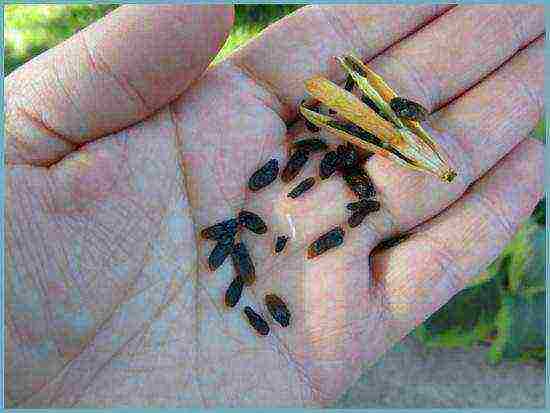
Hosta seeds
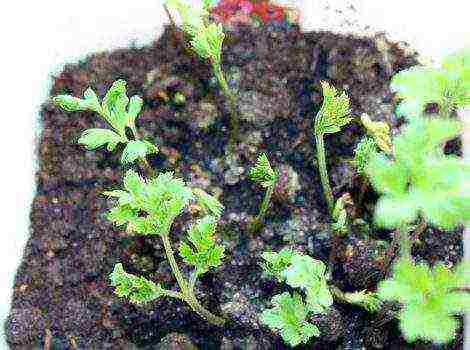
At this time, caring for young seedlings consists of moderate watering and removing condensation. Keep the sprouts in a lighted place, away from direct sunlight. When the first pair of leaves appears, dive the seedlings. The soil in new containers should be ¼ covered with sand. For watering, place the pots in a deep bowl and wait until the top layer is damp. Temper the sprouts: temporarily remove the glass or film, and after about a week, remove them altogether.
If the air temperature is already above + 18º C, leave the seedling containers in the fresh air for a short time. Experienced gardeners warn: despite proper care, the hosta develops very slowly. In addition, she often loses the characteristics of the variety.
Diseases and pests hosts
Khosta rarely gets sick, but one of the most typical ailments for her is phyllostictosis. Yellow-brown spots appear on the leaves. Affected plants need to be burned and the soil disinfected. If you notice gray rot or sclerotinia on the leaves, apply fungicides.
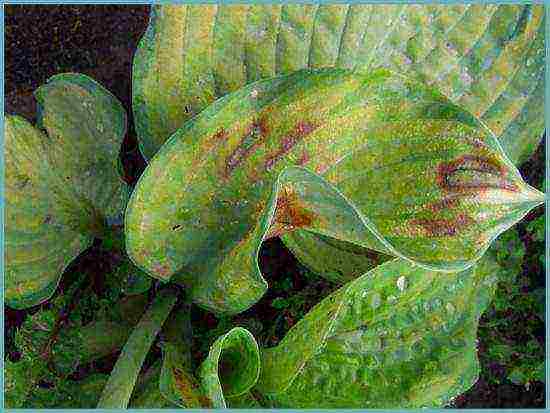
Phylostictosis hosts
Pests that make large holes in the beautiful foliage of hosts are slugs. To scare them away, cover the soil with something sharp: rubble or broken shells. Beer baits also help. Place containers with this drink around the bushes, and every other day, select slugs from them. Use insecticides to control insects (caterpillars, grasshoppers).
Hosta: Combination with other plants
Hosta leaves create harmonious combinations with brunner, heuchera and ferns. These plants look advantageous against the background of conifers. Also try compositions with primrose, geraniums, hornbeam. Make a beautiful landscape with lungwort, anemone, foxglove, astilba.
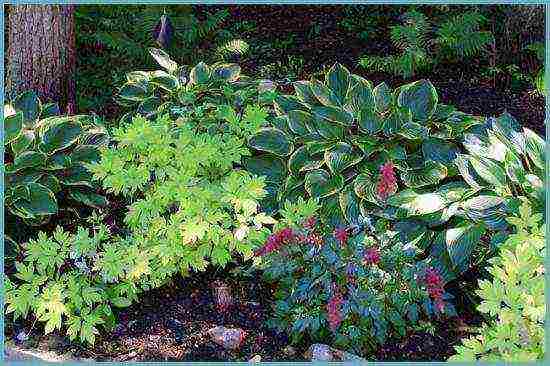
Hosta on a flower bed
There is an opinion that it is not necessary to combine the cultivation of roses and hosts. This is explained by the fact that they have different lighting requirements. However, in landscape design, this combination is quite common. In these cases, gardeners recommend planting the host on the north side of the bush.
Hosta in landscape design
There are many options for using this perennial in landscape design. First of all, the hosta is a ground cover plant for shady places. She creates coziness in gardens, stylized as nature. If you still decide to combine the cultivation of roses and hosts, decorate with them, for example, the shore of a reservoir.
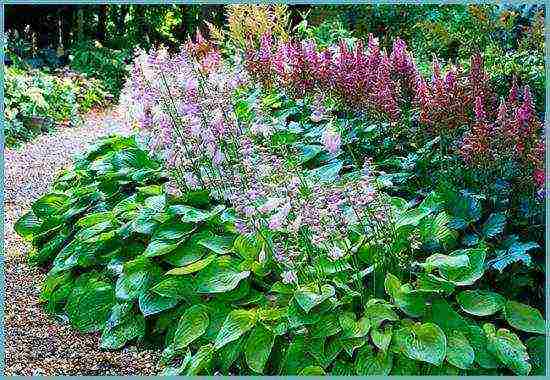
Hosta in landscape design
Use this plant to decorate garden paths, lawns framing. When growing hosta in pots, decorate your patio or gazebo with it. It is also good for vertical flower beds. Phlox or daylilies will be a good addition in this case.
Whichever way you choose to decorate your garden is unlikely to be disappointed by the host. Rather, on the contrary: seriously and for a long time will conquer with its charm and unpretentiousness.
Growing hosts: video
Hosta varieties: photo
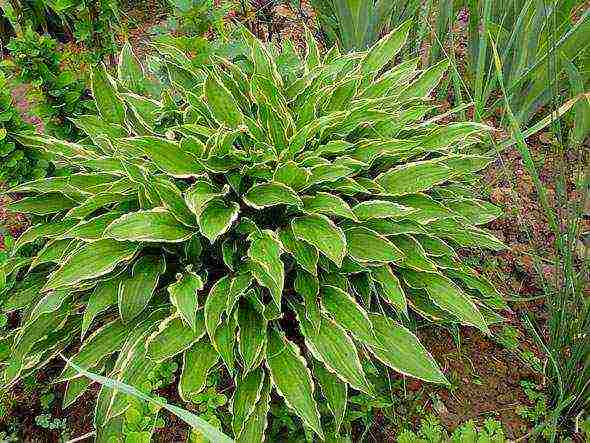
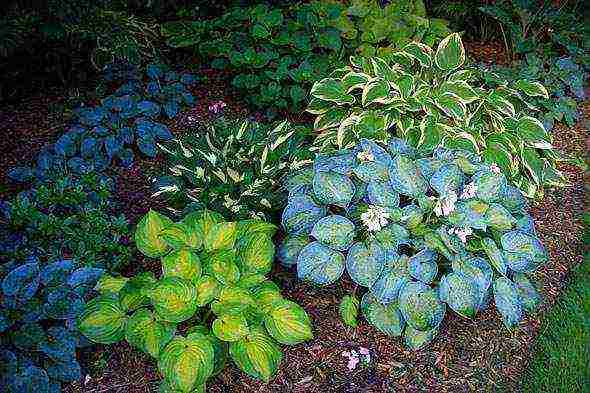
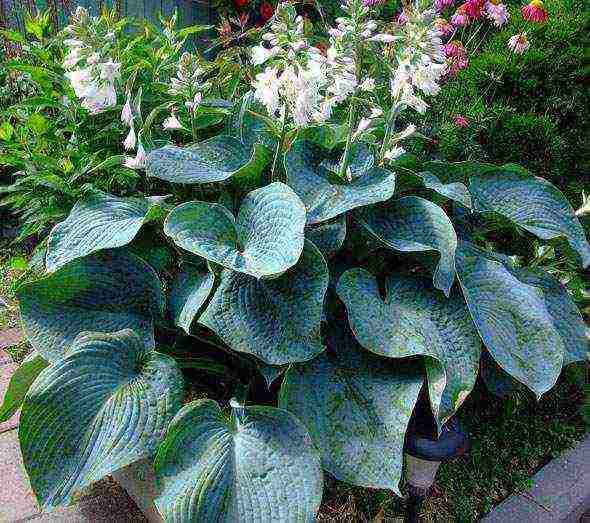
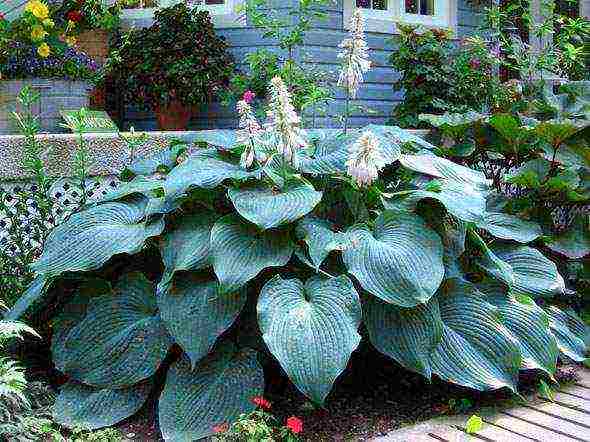
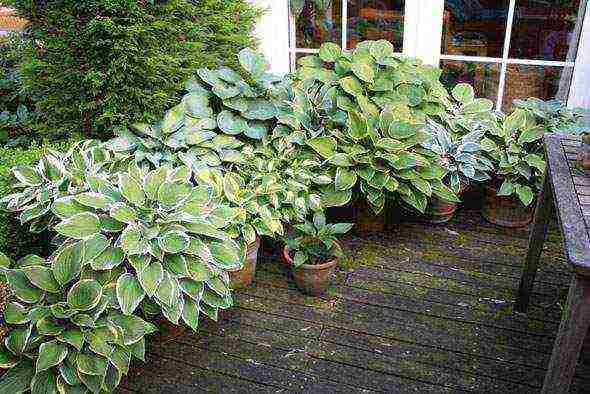
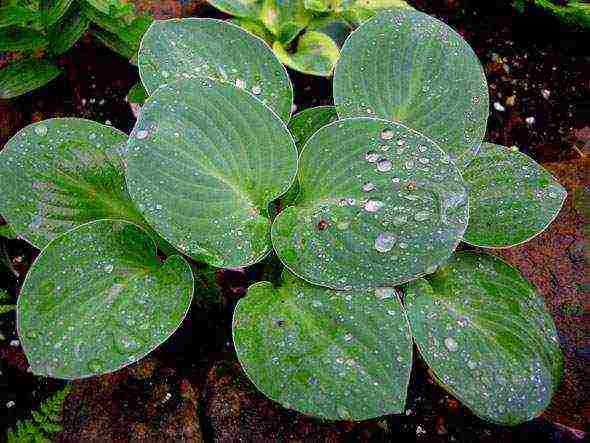
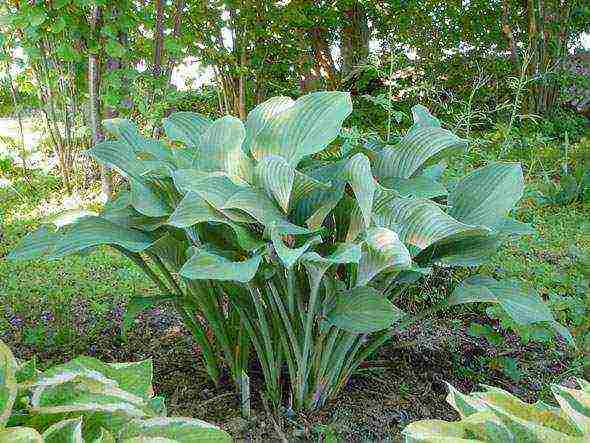
Hosta (aka function) is a popular perennial, which even a beginner can grow. But for this you need to know some rules for caring for this plant.
The main advantage of the hosta is its large, elegant leaves, which amaze with a variety of colors and textures. And no less attractive are racemose inflorescences of small funnel-shaped flowers. However, these plants only look spectacular when grown under certain conditions.
In some host varieties, the flowers are not very attractive, so the emerging peduncles are immediately cut off so that they do not overshadow the beauty of the leaves.
Hosts love moisture and shade, but at the same time they can easily tolerate drought. In the wild, they grow mainly along the banks of rivers and streams, on mountain slopes and forest edges. This must be taken into account when landing a host at a summer cottage.
In Japan, the hosta is considered a sacred plant. The stalks of its leaves are used as food as a delicacy.
Choosing a landing site
Hosts are also grown in containers, but still they are more often planted in the garden in open ground. After all, these plants are not afraid of frost and do not require special care.
Hosta can grow without transplanting for about 20 years, so the choice of a place for this plant must be taken responsibly. Hosta feels best in a semi-shady and wind-protected area (especially from drafts) - the north side of the house or the lowland near the pond will do. But keep in mind: the more variegated and brighter the color of the leaves of the plant, the more sun it needs. Otherwise, the foliage will be dull.
So, variegated hosts grow best in a place where there is shade at noon, and the sun shines in the morning and evening. And hosts of blue varieties are planted only in the shade: 2 hours of light a day is enough for them.
Blue Jay host prefers shady areas
The thicker the shadow, the slower the hosta grows, but at the same time its leaves are larger, and the bush itself is higher.
Soil for hosts
The hosta likes moist, humus-rich, neutral or slightly acidic soil with good drainage. But sand and heavy loam are not to her liking.
The most suitable time for planting hosts is spring, when the threat of frost has passed (usually at the end of April - first half of May). In this case, the soil is prepared in the fall: any organic fertilizer is scattered on the site (with a layer of about 10 cm) and the soil is dug to the depth of the shovel bayonet.
You can also plant hostu from late August to mid September. With a later planting, the plant may not have time to take root before the onset of frost. At this time, the soil is not prepared in advance, but only watered abundantly several hours before planting.
Landing hosts in open ground
Hosts (seedlings or delenki) are planted in holes 2-3 cm deeper than they grew before, the roots are straightened, sprinkled with soil and watered abundantly. After that, the planting site is mulched with bark or sawdust.
Before planting, do not forget to inspect the rhizome of the plant and remove all damaged, dry and rotten areas.
If hosts are planted in groups, the plants are placed at a distance of 30-80 cm (depending on the variety). And between the most spreading bushes they maintain a distance of about 100 cm.
Taking care of the host in the country
It is very important to water the hosts on time, as the soil around them should be slightly damp all the time. Please note: plants are watered with a small stream and exclusively at the root, since when water gets on the leaves, they deteriorate and become attractive to pests such as snails and slugs.
It is best to water the hosts in the morning before 11 o'clock. In exceptional cases - during the day, but only in cloudy weather. Otherwise, if water drops on the leaves, the bright sun can cause them to burn.
When watering, the soil should be saturated to a depth of 15-20 cm
Until the hosta grows, weeds are regularly removed around it and the soil is loosened. And when the bush becomes quite spreading (after 3-4 years), this will no longer be necessary. However, adult plants begin to lose their attractiveness over time, so their bushes are divided and planted.
If you planted the plant in fertile soil, then in the first 3-4 years you do not need to worry about feeding. And from the 5th year, in late spring and autumn, organic fertilizer is used in the form of mulch. To do this, use compost, decomposed manure, mowed lawn grass, straw or peat.
If adult plants begin to bloom worse or turn pale, granules of a complex mineral fertilizer are scattered under the host bushes into the loosened soil, in which nitrogen, potassium and phosphorus are contained in equal amounts. Then the plants are watered abundantly at the root. Such dressings are carried out 2-4 times per season, while the last dressing should fall on the first half of August.
Currently on sale there are special liquid water-soluble fertilizers with macro- and microelements for ornamental foliage plants. They are great for the host, as they not only help plants grow properly, but also improve the expressive texture and contrast of variegated leaves.
So that the hosts do not lose their beauty, they are fed during abundant watering or after rain.
After the end of flowering, the peduncles are promptly removed so that the bush does not become loose. In September, the host begins to prepare for wintering. At this time, the bushes can be planted. It is imperative to do this before mid-September so that the delenki have time to grow roots before the onset of autumn frosts.
For the winter, the entire ground part of the host is cut off (almost at ground level) as soon as its leaves turn yellow.This helps to remove the pests hidden in them. Additional shelter to protect against frost is not required, but plants can be mulched with leafy soil to preserve nutrients in the soil.
As you can see, it's pretty easy to take care of the hosts. Moreover, they easily multiply not only by dividing the bushes, but also by seeds. Read about the last simple method here.
 Hosta is a type of herbaceous perennial plants of the asparagus group, although before that it was considered a lily family. The plant is named after the botanist N. Host. There are about 50 varieties of this flower in total. The host's historical habitat is the Kuril Islands, the Far East and Asia.
Description of the hosta plant
The plant of this flower has many faces. Therefore, it will be able to fit into any garden design. This ornamental shrub can quickly grow into real plantations... The main decorative property of the hosta is its large leaves, which exist in various varieties, taking into account the type and variety of the plant. Hosta is drought-resistant and frost-resistant, unpretentious and versatile, it grows well in the shade and is an excellent background for other flowers. The host reaches its maximum beauty in five years of its growth.
Despite the variety of varieties and hybrids, all these plants are herbaceous, stemless, thickened small and short-branched roots have many filamentous processes that allow the hosts to securely anchor in the ground.
White, blue, purple and pink terry flowers of the plant are combined in brushes, beautifully rise on large peduncles. Unlike other shade-loving bushes, host flowers are truly beautiful: funnel-shaped, located in racemose one-sided inflorescences. Flower fruit presents a leathery box with many seeds that remain viable for up to one year.
Host leaves, cordate, lanceolate and basal, pointed, long-petiolate, with visible veins and striking a variety of colors, are still considered their main advantage.
The colors of the leaves can vary according to the plant variety: from any shade of green, all shades of blue, to white and red. At the same time, there are also a huge variety of color combinations on one bush: strokes, blotches, lines, etc. The texture of the leaves is also striking in its variety: wrinkled, compressed, waxy, with a steel tint, matte or usual glossy. The height of the bush is approximately 60-70 cm, but there are also miniature species that are no more than 17 cm, and giants are more than 130 cm.
How to grow a host?
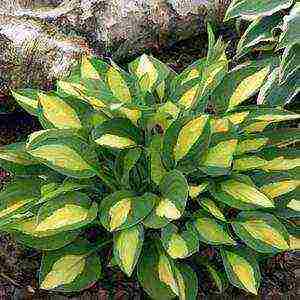 Cultivation of the host and its reproduction, possibly in the following ways:
- using cuttings;
- seeds;
- dividing the bush.
Those who prefer growing by seeds in the open field need to know that reproduction in this way will depend on the pre-sowing preparation of raw materials with growth activators, since the germination rate of the seeds of this plant is low - 65-70%. Many gardeners recommend using method of stratification.
The next important factor of success is the sterility of the earthen mixture, where there should be no fungi and other harmful organisms, otherwise the seedlings may grow sick, therefore it is advisable to purchase the land in stores. The land must include:
- Vermiculite;
- Peat;
- Perlite.
In the middle of spring, a drainage layer is laid in a pre-treated container with alcohol or potassium permanganate, the earth is poured and thoroughly moistened. After the seeds are scattered on top, they are covered with a soil layer of 4-6 mm, slightly sealed and, in order to save moisture, close the container with polyethylene. In the process of germination, the temperature of the earth must be 19-24C, in this case, seedlings are formed in a month. Protect seeds from direct sunlight, organize moderate watering, and remove condensation in a timely manner.Seeds do not need bright light, so store them in partial shade until shoots form, but then place them in a lighted place.
It is necessary to dive the seedlings into separate containers after the formation of several leaves: the seedlings are transferred to the ground, 1/4 covered with a layer of sand. To moisten the seedlings, you need to use the bottom watering: the hosta in a glass is placed in a deep container with water and is in it until the top layer of the earth is moistened. Then the seedlings must be hardened: remove the polyethylene for a couple of hours. After 7 days, remove the cover completely, and put the host on the street for a short time on the condition that temperature not less than + 17C... Do not forget that seedlings develop rather slowly, and by and large, any host that is grown from seeds often loses its varietal characteristics.
Disembarkation hosts
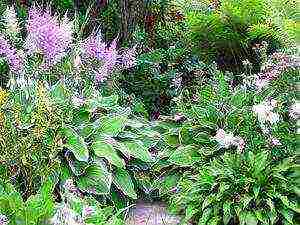 Before planting the host, it is necessary to select an area where the plant will be comfortable. Do not forget that the hosta will be able to grow on the site for up to 20 years without transplanting, and every year it will only look prettier. The ideal place is partial shade without drafts, but keep in mind: the more colorful the leaf of the plant, the more different patterns, the more light-loving the host.
It is best for bright hosts to grow in an area where there is shade at noon and sun in the evening. Blue views it is necessary to plant only in the shade, they have enough sun for several hours a day. The larger the shade, the longer the plant grows, but the larger the leaves and hosta.
Plants need soil rich in minerals, moist, with excellent drainage, slightly acidic or neutral. Only loam and sand does not like shrubs. It is advisable to prepare the ground for planting in the spring, even in the fall: spread organic additives over the selected area with a layer of 12 cm and dig up the ground to a depth of "bayonet". By the spring, the land will be ready for landing. The landing of hosts in the ground is carried out when the threat of frost passes.
How to drop off the host?
Seedling holes are made with a distance of 40-50 cm, taking into account the plant variety. For large bushes the distance is chosen 70-90 cm... If you are planting seedlings from pots in the ground, then water them a couple of hours before planting. If you combine the planting with the division of the bushes, then remove the dried, rotten or deformed roots from the divisions. Seedlings are placed in the pits from a pot with an earthen lump a few centimeters below ground level, the hosta roots are leveled, sprinkled with earth, tamped and watered well. The area near the root system is mulched with ground bark.
Hosta care
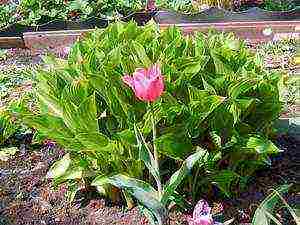 When the hosta is in fertile soil, then you can not feed it for 3-4 years. The main bait for plants is manure and humus, they are added in the fall in the form of mulch. You should not get carried away with mineral additives, but if you think that they are required when leaving, pour granular additives near the host after watering. Liquid additives hosts are fed every 14 days August, and then stop, otherwise the bush will continue to grow leaves and will not be able to prepare for wintering.
The ground near the bushes must be constantly moistened, especially near young plants, therefore it is necessary to water the flowers in a timely manner, while watering is done under the rhizome, and not on the foliage, which rots from water. In addition, after planting and when leaving, the jet should be weak so that the earth does not ram, but can absorb water as deeply as possible. A signal that there is not enough water in the host is the darkening of the edges of the leaves.
If you want the bush to look neat, then you will need to break out new flower stalks, otherwise the plant will "fall apart" after flowering. It is necessary to weed and loosen the soil only in the first stages, when the bush grows, the weed is no longer afraid of it. 3-4 years later the bush needs to be divided, as it will grow significantly. Dig up the plant and remove young shoots from the main root.
Diseases of hosts
The hosts are unpretentious, but gardeners say that the more species of this shrub you have in your collection, the greater the chance of getting an infected shrub. Plants that are often weak or strongly cooled by spring frosts are infected with the following diseases:
- Phylosticosis is a fungal infection that manifests itself in the form of yellowish merging blotches on the leaves.
- Sclerotinia is a fungus that negatively affects the root system.
- Gray rot - infects leaves.
These diseases removed by fungicides and dichlorane.
Insects
 The main pest of hosts is a slug. A sign that the plant has attracted these pests is huge holes in the foliage. Fighting slugs is very easy: place containers with beer near the host, and the next day, walk around and collect the pests that have crawled onto the bait.
In addition to slugs, nematodes are not indifferent to this plant. Signs of their life can be identified by visible yellow spots spreading between leaf veins. Identify nematodes A simple test can help: put finely chopped hosta leaves in a plastic cup, add water and leave for 30 minutes, and then examine the contents under the light. If nematodes are present, you will see worms floating in the water. It will not be possible to remove nematodes, since no drugs will destroy the eggs of the worm, and they will again give new offspring. Bushes will need to be destroyed within a radius of several meters from the infected hosts.
Caterpillars have a danger, appearing unexpectedly, they can completely destroy the bush overnight, as well as various bugs, after which the leaves look like Dutch cheese. Only insecticides can remove insects.
Hosts after flowering
 Then when the flowers wither peduncles need to be removed... At the beginning of autumn, the plants are prepared for dormancy. At the same time, you need to plant the bushes. First, 30 minutes before planting, you must thoroughly water the area where you will need to work. Then the bushes are dug up and separated so that all parts have at least one deciduous rosette. They are planted with a distance of 20-30 cm between themselves, digging in to the same depth at which the plant was originally.
The host's root system grows horizontally, so the pits need to be made wide before planting. After planting, the plants must first be watered abundantly. It is necessary to complete the separation and planting of the host before the beginning of October, so that new plants have time to take root before the arrival of the autumn frosts. To take root, new hosts will one month is needed... With the onset of spring, these "splittings" will grow rather quickly: after a few years they will be full-grown and full-fledged bushes.
In the fall, they carry out work on warming the territory. Why a place with hosts is mulched with leaf humus. Moreover, it is necessary for the plants that are under the trees: due to the mulch, the pieces will not have a lack of nutrients that are absorbed by the roots of the tree. In addition, mulch raises the level of the flower bed, which improves the drainage system.
Hosta is a long-term, colorful and undemanding plant for lazy growers. There are no difficulties in breeding and growing hosts from seeds. Cultivating hosts in this way, it is an opportunity to organize the original decor of the infield with your own hands.
Planting and caring for the host
The host is called the "queen" of shady areas and seating areas in the garden. This is a real emerald in the front garden, in any flower bed. Planting hosts and leaving in the open field will not cause much trouble for gardeners or summer residents. The flower can be propagated by division, cuttings and seeds.
When to plant a host in open ground?
Planting begins in August and ends in September. These dates may shift depending on the weather and location of the region. It is necessary to calculate the planting time so that the hosts take root before frost. With the early onset of cold weather, young plants must be covered.
Most of all, the root zone needs winter shelter, on which brushwood or other suitable material is laid.
The host is divided and planted in the spring, before the leaves bloom. A plant with a root ball, purchased in a store or donated by friends, takes root better. Hosta can be stored briefly in the basement or vegetable section of the refrigerator until planting. They are planted in open ground when the threat of late frosts has passed.
Planting in open ground with seeds
Sowing hosta seeds is an opportunity to get a lot of seedlings and seedlings for landscaping a large area. The laborious procedure requires certain knowledge and skills. Unfortunately, seed-grown hosts do not always inherit the characteristics of the parent plant. This is especially true for variegated varieties.

Sowing procedure description:
- Seed propagation is carried out in early spring.
- Use a container, pot, or plastic box for germination.
- Drainage is poured at the bottom, the container is filled with a light fertile substrate.
- Water, spread the seeds, sprinkle on top with a layer of soil 0.5 cm thick.
- Cover with glass or foil, germinate in the shade, at a temperature of 20-23 ° C.
- The soil is often sprayed with water from a spray bottle.
Germination time varies from 7 days to 3 weeks. Usually shoots appear in 2 weeks. Seedlings are dived into other containers, quenched in the fresh air, but protected from direct sunlight. Seedlings develop slowly at first, acquire the characteristics of the variety only after 3-4 years.
Propagation by cuttings and dividing the bush
The most common methods for obtaining new plants are used when there is at least one bush at the age of 3-5 years. Propagation by cuttings and division is not recommended 1-2 years after planting. During this period, they give the opportunity to strengthen the underground and aboveground organs.
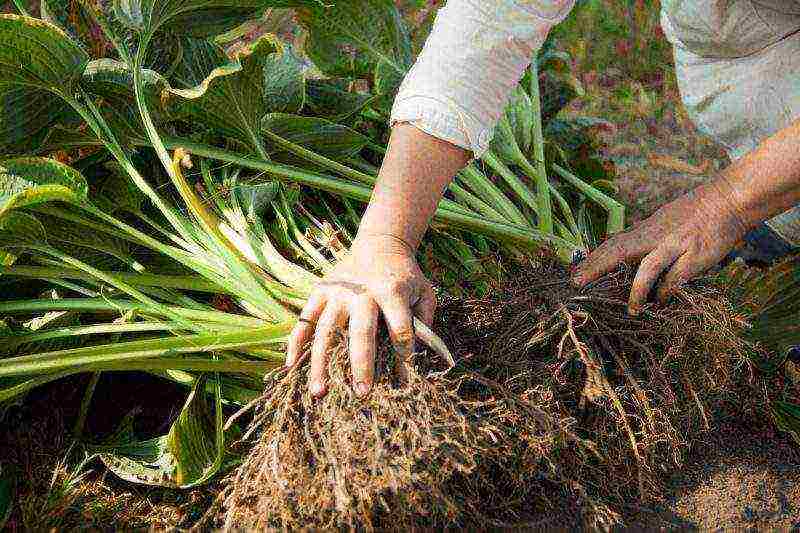
Dividing the bush and grafting allows you to get hosts of the same variety as the mother plant.
The best time for vegetative reproduction is in the spring, when shoots appear. The mother plant is carefully dug up, large lumps of soil are shaken off the rhizome, old and decayed parts are cut off. Cut the hosta with a shovel or sharp knife. Parts of a split bush must have buds and pieces of root.
Tips and Warnings:
- Only healthy plants are divided for planting.
- In the first few weeks, water is often watered, but without stagnant water.
- Hosts grow slowly after transplantation, especially variegated varieties.
- Young leaves in most cases have a solid green color.
- The characteristics of the variety are fully manifested after 2 years.
Cutting - the separation of a part with buds and a piece of rhizome - can be carried out from spring to autumn. Sometimes the procedure is unsuccessful, almost no roots remain, but there are buds, or there is no rosette, but there is a rhizome. Even such defective planting material is not thrown away. The cuttings are planted in the shade, covered with a cut plastic bottle. The missing organs gradually grow back, and full-fledged leaves are formed.
Proper care of a shade-loving plant
The hosta flower, in its homeland in Asia, is found in meadows, along the banks of rivers and lakes, on the shady edges of humid forests. It is recommended to create conditions for plants in the garden and in the flower bed that resemble their natural habitat.
Requirements for soil and location
You need a well-drained soil rich in moisture and nutrients. There are no special requirements for pH, moderately acidic and alkaline substrates are suitable. Variegated forms require shading at midday. Colored stripes and spots disappear in direct sunlight. Varieties with blue foliage also change color. Only monochromatic green forms retain their characteristics in the sun, but subject to good soil moisture.
Watering and fertilizing
The plant does not need frequent watering with sufficient rainfall and placement in a shady place. In the dry season it is necessary to water 2 times a week. The soil under the hosts should not dry out even in winter. In summer, you can pamper the leaves with an evening shower. Top dressing is also best done in the evening.
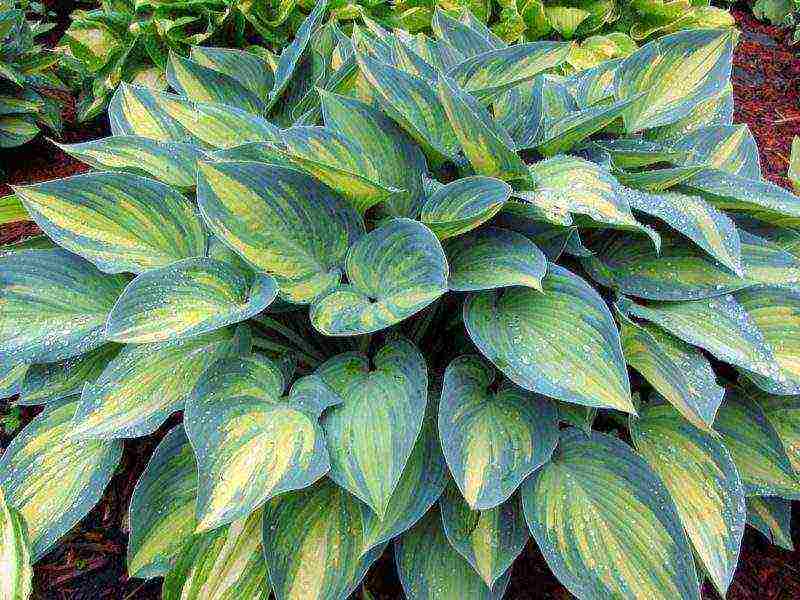
A young plant needs more care and nutrients, so fertilize it 2-3 times. In the spring, top dressing is carried out at the very beginning of the growing season. The next time they fertilize the soil during flowering. The third feeding is needed for plants after flowering. It is advisable to alternate the introduction of compost and complex fertilizers. Be sure to mulch the soil immediately after watering and feeding, but only without damaging the lower leaves of the plant.
Loosening, pruning, replanting
Hosta rhizome is located in the upper loose soil layer. Loosening is performed carefully so as not to damage the roots. Sometimes it is replaced by mulching after watering, then the soil retains moisture for a long time.
Peduncles are usually removed, but in beautifully flowering varieties, they are left and cut before the seeds ripen (if there are no hostas in the seed reproduction plans). Dry and damaged leaves are pruned throughout the season. Experienced growers recommend leaving the foliage in the fall to protect the roots from frost.

The best material for transplanting is plants with 2-3 buds and well-developed roots 10 cm long. The planting pit is made wide, because underground organs grow in a horizontal direction. The depth should be at least 30 cm. A mixture of compost, garden soil, peat and sand is poured onto the bottom. Can be sprinkled with a handful of wood ash to normalize pH and disinfect.
The planting hole is filled with a substrate at 70% of the height, and abundantly moistened. The host is positioned so that the roots are on the surface of the moist soil, the growth buds are at ground level. Sprinkle with soil, compact and watered again. Finally, a layer of mulch up to 2 cm high is poured. Peat or sawdust is used as a mulching material.
Care at different times of the year
During the summer, the hosta is regularly watered, cut off dry parts, weeds are weeded. In the fall, after the first frost, the leaves begin to wither. You do not need to cut or pluck them. The foliage protects the soil above the roots from freezing. Additionally, you can cover the plant with agrofibre. In the spring, the remaining leaves must be removed (plucked).
Growing hosts in the garden - diseases and pests
The plant is little susceptible to disease, but it becomes infected with phyllostictosis (brown spot) from horticultural crops. A heavily affected hosta must be destroyed, the soil must be disinfected with a fungicide. Against pathogens of fungal and bacterial diseases, they are sprayed with biopesticides.
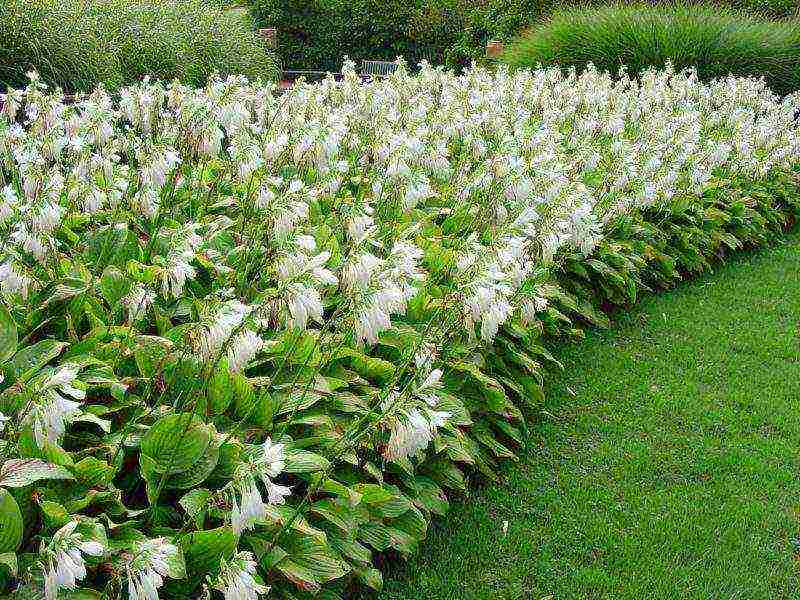
Slugs gnaw holes in the leaves, they become less decorative. Regular inspection of plants and removal of pests is recommended. If you can't fight, you can find planting material of resistant varieties in nurseries or flower shops. Slugs prefer soft tissues and are less likely to attack hosts with leathery foliage. Another option for fighting is to mulch the soil around the hosta with fine rubble or crushed shell rock. With good care, the plant remains healthy and attractive for 10 years.
Hosta in landscape design
A shade-tolerant plant with beautiful leaves helps out in cases when it is necessary to decorate the resting corners in the garden, the entrance to the gazebo. Blooming annuals and perennials look great against the background of lush greenery: bells, primroses, phlox. Varieties with bicolor and tricolor leaves are especially appreciated in landscape design. It is advisable to place such plants singly on the lawns, in small groups along the paths.
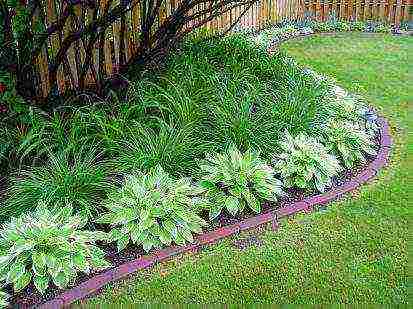
It is better to start growing hosts with varieties that have green foliage. They are less demanding in terms of conditions and care, they are easier to tolerate bright lighting and transplantation.
The host is great for mobile landscaping of the entrance to the house, terraces, gazebos. Plants in pots and containers are watered more often because the soil heats up and dries out faster. In the fall, remove old leaves and cover the container. At the beginning of spring, the protective layer is removed, the container is installed against the wall of the house.
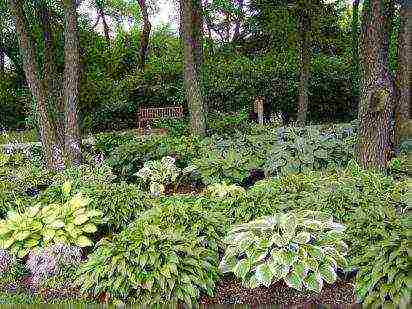
Any use of hosts in landscape design should be considered in terms of the conditions that will be created for the plant. With proper care, the "queen" of the shade will not disappoint her fans, she will attract attention with a magnificent view of leaves and bell-shaped flowers.

