Content
- 1 How to prepare gladioli for planting
- 2 Growing conditions and choice of planting site
- 3 Preparing the soil for planting gladioli
- 4 Inspection and preparation of gladiolus bulbs before planting
- 5 Planting gladioli in open ground
- 6 Care of gladioli after disembarkation in open ground
- 7 When to dig up gladioli
- 8 Preparing the bulbs for storage
- 9 Diseases and pests
- 10 Gladiolus varieties with photos and descriptions Colors of gladioli of Russian selection
- 11 How to choose gladiolus bulbs and prepare them for planting
- 12 Technology of planting gladiolus in the open ground in spring
- 13 How to care for gladioli after landing in the garden
- 14 Digging gladiolus bulbs for storage: timing and processing technology
- 15 How to store gladiolus bulbs until next spring
- 16 How to choose the right landing site
- 17 Preparing the soil for planting gladioli
- 18 Cooking bulbs for planting
- 19 When and how to plant gladioli outdoors
- 20 How to care for gladioli
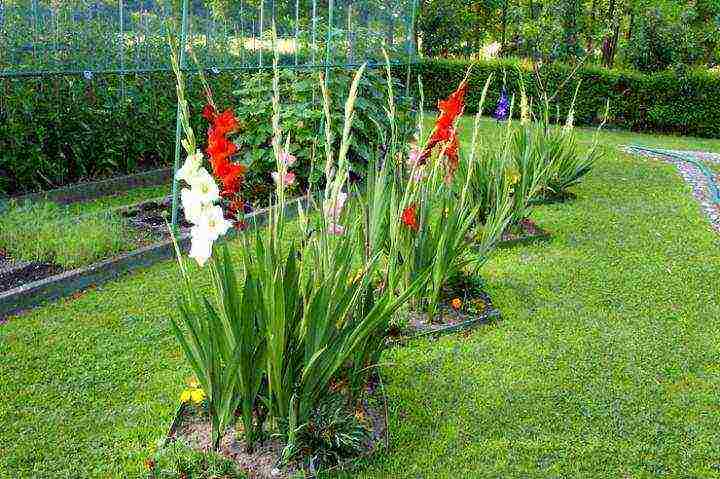
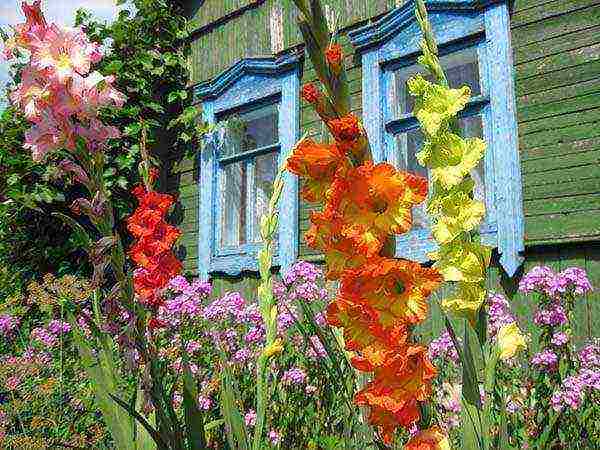
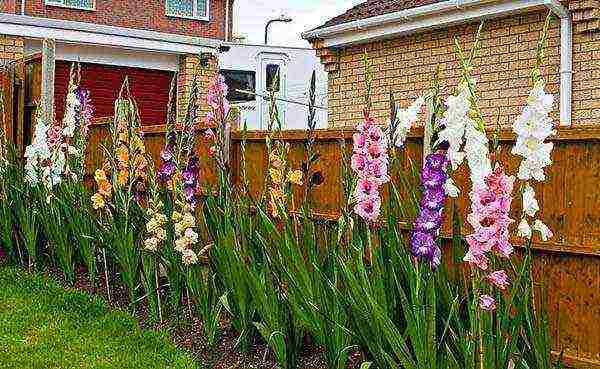
Gladioli look beautiful both in bouquets and in flower beds. The only thing that stops flower growers from purchasing bulbs is complex agricultural technology. But planting a gladiolus and leaving in the open field is not so problematic if you know certain secrets. Let's take a closer look at the nuances of planting a flower - where and how to plant gladioli, preparing the soil for planting, leaving and feeding.
Where to plant gladioli
The preservation and reproduction ability of bulbs, the strength of the stems and the size of the inflorescences depend on the choice of location. In unfavorable conditions, children should not be expected from gladioli. In addition, they may die without presenting beautiful bouquets.
The natural habitat of the plant is the South African prairie. It is used to bathing in sunlight and always being warm. Therefore, in the southern regions, gladioli develop better than in middle latitudes. But if you follow the basic rules for choosing a planting site, you can grow a beautiful flower even in Siberia.
-
The plot must be well lit, but it is advisable to cover the plant from the midday sun.
-
Important avoid waterloggedflooded by groundwater soils... In such conditions, the roots do not get enough air, suffocate and rot. If there are no other places, you can prepare drainage, make raised beds.
-
The drop-off location must be protected from strong winds... Otherwise, the stems will break and fall. Buildings or trees, bushes can be a shield from the wind.
-
It is recommended that you choose your neighbors carefully. The distance between gladioli and trees or shrubs should be at least 4 m. It is undesirable to plant a plant near peonies. Their root system is more aggressive and takes nutrients from the soil faster.
-
It is undesirable to plant gladioli on the same site annually. For several years, the soil is depleted and does not contain the necessary microelements. In addition, it becomes a habitat for diseases and pests that are dangerous to the plant.
Flowers love black soil, prefer loose, fertilized soils. But compacted, poor soils are destructive for them.
Bulb planting time
The timing of planting gladioli is very important, since it depends on them whether a particular variety will have time to start up a powerful root system, form inflorescences, and overgrow with children. The suitable period lasts from early April to early June. There is no specific time, as much depends on climatic and weather conditions.
-
In the southern regions, disembarkation is carried out in the 1st or 2nd decade of April, until the land is dry.
-
In the middle lane, it is desirable to plant in open ground in the 3rd decade of April or 1st decade of May. Light frosts are not harmful to the plant.
-
In the Urals, in other northern regions, they are planted in the 1st decade of June, when the danger of the resumption of severe frosts passes.
Optimal soil temperature for planting bulbs - + 4-10 ° C. In such conditions, gladiolus starts up a powerful root system, develops well, blooms in a timely manner and manages to form a large, strong baby.
It is not recommended to place planting material in cold soil, as the bulbs can deteriorate. It is also not worth waiting for the warming up to + 15-18 ° С, because the stems and leaves will grow, without giving the opportunity to build up the root system. As a result, the plant turns out to be weak, sick. If flowers are needed for a certain period, it is better to plant early, medium or late varieties rather than experiment with timing.
Autumn and spring soil preparation for planting
Preparation for planting should be carried out a season before the landing of gladiolus. The best predecessor of a flower is legumes. They improve the quality of the soil, prevent the appearance of the wireworm. In the fall, it is necessary to dig up a site to a depth of about 30 cm, remove the roots of all weeds. It is advisable to fertilize depleted soils with nitrophos at the rate of 30 g per 1 m2.
During the winter, the earth will fluff up, saturated with moisture. In the spring, the soil needs to be dug again, but shallowly. At the same time, remove all organic parts of the plants. Before planting bulbs, you should improve the composition of the soil, for example, with nitrogenous fertilizers - urea.
Flowers prefer neutral soils. Therefore, an alkaline medium must be acidified, and an acidic medium must be alkalized. In the first case, you can add peat, river sand, humus, peat compost. In the second - dolomite flour, lime, eggshells, chalk. Everything is added at the rate of 150-200 g per 1 m2.
Preparation and processing of planting material
Start cooking the bulbs 2-3 weeks before planting. First stage - inspection of planting material, rejection of shriveled, rotten, spoiled copies. To diagnose all diseases, you need to carefully clean the bulbs from dry scales.
There is no room in the flower bed for dry, rotten, black-stained tubers. Taking pity and not throwing away one of them, you can infect other flowers. With minor damage, experienced flower growers scrape off rot and mold, cut out damaged areas, disinfecting them with activated or charcoal, brilliant green. It is important to prepare both adult tubers and children in this way after winter.
Yaring planting material

Spring preparation involves the germination of the bulbs. To do this, the planting material is laid out in one row on sawdust or paper with the bottom down. Placed in a warm and bright place - about +23 ° C. These conditions help to awaken the apical buds. In no case should the tubers be soaked in water. Moisture stimulates the appearance not of the kidneys, but of the roots. Correct vernalization gives rise to a small sprout in the area of the apical bud and tubercles around the circumference of the bottom.
Germination of gladioli
In this case, a full-fledged seedling is obtained, which is quickly included in the vegetative development when planted in open ground. Cultivation is carried out in wet sawdust, straw or wood shavings. You need to prepare a plastic bag, add a layer of sawdust 2 cm wide and moisten it with water. Lay the onions on top.After that, exhale the air 10 times in the bag, since carbon dioxide accelerates the growth of plants, and, having tied it, place it on the windowsill.
When large sprouts appear, the seedlings can be opened and watered, fed. If it is far away before landing in open ground, and the length of the arrows exceeds 5 cm, it is recommended to place gladioli in pots with ordinary soil. To simplify the method of growing seedlings, it is better to place each bulb in a separate 0.5 liter plastic glass. It is imperative to put drainage on the bottom.
Disinfection of tubers
Immediately before planting, the bulbs are treated with disinfecting, growth-stimulating agents. To enhance the resistance of the planting material to diseases, pests, negative environmental factors, it is recommended:
-
Soak the tubers in a weak solution of potassium permanganate for a couple of hours. Any fungicidal preparations can be an analogue. This is necessary to protect against fungi, thrips.
-
Process the bulbs thermally. To do this, soak them in hot water for 15-20 minutes (approximate temperature 55 ° C).
-
Place in biostimulant solution. This will accelerate the growth of the plant, improve the decorative effect of the inflorescences.
You can do without chemicals. Garlic solution has a strong disinfecting property. Proportions of 300 g of garlic in 10 liters of water. The bulbs are soaked for 2 hours. In the same solution, only with a stronger concentration (500 g per 10 l), it is recommended to disinfect the planting material in the fall, after digging.
Features of planting gladioli
Planting of all varieties is carried out according to the same scheme:
-
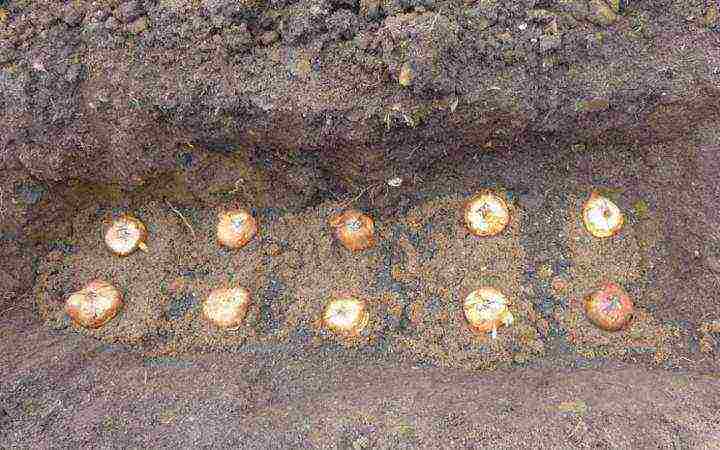
Make furrows... Just before planting the tubers so that the soil does not lose moisture. The approximate depth is 3 bulb diameters. Usually no more than 10 cm.
-
Cover the bottom of the furrow with sand - layer thickness no more than 2 cm. It will protect young roots from damage.
-
Germinated adults bulbs and babies need to be planted in a row... The distance between them depends on the size of the planting material, the desired size of flowers.
-
After the arrangement of the tubers, they need a little sprinkle with sandand then the ground.
-
Above Recommended mulch a plot peat, grass or sawdust.
Florists practice a different arrangement of bulbs. It all depends on what kind of flower bed they want to get in the end. The most common schemes are:
-
20x20 cm is ideal for many varieties. Every plant gets enough nutrients. It turns out a dense, beautiful flower bed. The stems support each other, preventing bending.
-
20x30 cm is a suitable planting method for large, elite varieties. These parameters should be adhered to when growing cut flowers.
-
20x15 cm - dense planting suitable for reproduction of tubers. In this case, it is recommended to cut the inflorescences before dissolution, so that they do not take away nutrients.
-
10x10 cm is a suitable option for children. During the season, they manage to develop, but the flowers must be cut off, otherwise the planting material will turn out to be weak.
Plant resistance is influenced not only by the distance between the bulbs, but also by the planting depth. The smaller it is, the worse the root system is. When planting tubers at a shallow depth, one should expect lodging, curvature of the stems.
The main rule of flower growers is that we plant only flowers of the same size and strength next to them. Otherwise, strong specimens will oppress those that are weaker. When decorating small flower beds, varieties of different sizes must be planted in such a way that tall plants are on the north side, and undersized ones on the south. With this planting, all gladioli will have access to the sun.
Mulching the soil, although not a prerequisite, should not be neglected. It prevents rapid evaporation of moisture, protects the area from weeds. In addition, mulch improves aeration and prevents overheating of the soil. From it, the second layer of roots takes nutrients, which may not initially be in the soil.
In practice, it has been proven that in mulched areas the plants are powerful, the inflorescences increase by several buds. They are more resistant to diseases, pests, please with long flowering. Bulb growth is increased by 25%.
Gladioli care
Although the planting of planting material is preceded by a large amount of work, worries will be added after the first shoots appear. To admire the long inflorescences in the summer, you need to work hard. Obligatory care involves regular watering, loosening the soil, applying top dressing, spraying with drugs for diseases and pests.
Watering gladioli
Plants are demanding on the moisture content in the soil. On the one hand, they do not tolerate stagnant water, but on the other hand, drought negatively affects budding. To understand how often to water flowers, you need to know at least a little about the structure of their root system.
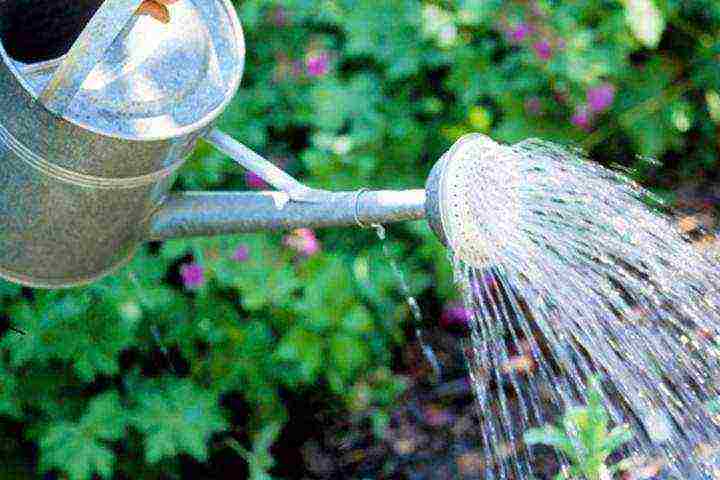
The first layer of roots goes deep into the ground, about 40-45 cm. It is from there that the plant takes the main amount of moisture and nutrients. The second layer of roots lies at a depth of 15-20 cm and feeds from the surface layer of the soil. After the emergence of shoots - in the southern regions it is in May, and in the middle lane in June, it is enough to water once a week in the amount of 2 buckets per 1 m2.
During the period of active growth, the beginning of budding and throughout the entire flowering, the need for water increases. In conditions of prolonged drought, it is advisable to water the flower bed 2-3 times a week. If it rains periodically, you need to moisten the soil as the top layer dries. Waterlogging negatively affects the bulb, children.
To water gladioli desirable under the root... Avoid getting drops on leaves or inflorescences. To reduce the frequency of watering, it is recommended to mulch the area. Compost or mowed grass is stacked about 5 cm thick. Mulch retains moisture and feeds with useful elements released as organic matter decomposes.
Top dressing
For normal development, it is enough to fertilize the plant 3 times during the entire season:
-
During the germination period. When forming 2-4 leaves, it is advisable to add nitrogen fertilization. Calculation - up to 30 g / m2. You can also make an organic fertilizer from dry chicken manure or horse manure. The first is diluted with water in a ratio of 1:15, and the second - 1: 7. It is better not to use mullein.
-
During the formation of 6 leaves. Complex feeding is recommended. The composition should contain nitrogen, phosphorus, potassium. Concentration - 60 g / m2.
-
During the budding period. The plant needs phosphorus and potassium. It is allowed to add potassium chloride, superphosphate at the rate of 20-40 g per 1 m2.
These fertilizers are enough to make the gladiolus grow like in the photo. Overfeeding is also not advisable, since the plant can direct force into building up green mass and not produce flowers.
Protection of gladioli from pests
All planting material must be etched. This saves from many pests and diseases. If a whitefly appears on the site, the gladioli should be additionally sprayed with an insecticidal preparation.

Also, flowers are often attacked by thrips. In this case, the appearance of dry bald spots, yellow spots on the leaves is observed. To combat them, it is better to choose insecticides with an acaricidal effect. It can be metaphos, karbofos.
General care of gladioli
Periodically, the area with flowers needs to be weeded to remove weeds and loosen the ground. This is especially important to do after watering, when the top layer dries up and does not allow air to reach the roots. Although if mulching is done, this point of care is excluded.
The stems of gladioli are tall and thin, so they need support. You can make individual props for each bush, tie it to the pegs. If perennial flowers grow in one group, a coarse mesh can be pulled before the formation of peduncles. Then just help the plants get into the cells.
Gladioli are usually cut. To strengthen the bulbs, it is advisable to cut the arrow off as soon as the first flower has blossomed. All other buds will open in a vase. If there is a desire to leave flowers in the flower bed, it is recommended to remove dried buds in a timely manner so that the bush does not waste energy on the formation of seeds.
Gladioli are good in a bouquet and in a flower bed. Knowing how to properly care for them, you can grow any varieties on your personal plot. For more information on germinating and planting plants, you can watch the video.
The African and Asian continents are considered the birthplace of Gladiolus. You'd be surprised if you find out which flower is called a skewer .. that's right, it's a gladiolus! It is hard to believe that such a noble plant was once just a field weed. The cultivated plant "Gladiolus" appeared in the Middle Ages. Now there are up to 5,000 of its varieties and hybrids, bred specifically for various zones, including those with cool climatic conditions.
When to plant gladioli outdoors?
Gladioli should be planted in the ground when the soil temperature reaches + 10 ° C. This is the month of April-May (depending on the region).
How to prepare gladioli for planting
There are special rules for growing this garden crop. Therefore, some gardeners who do not like to tinker with something for a long time dislike this flower. Although if you follow all the nuances associated with storage, purchase, planting and care, you can get a very good harvest.
The choice of planting material
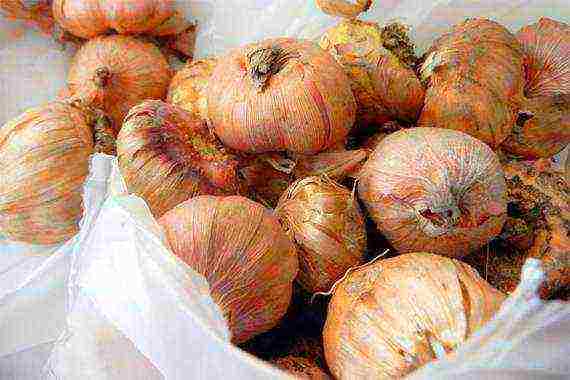
A gladiolus bulb for planting can be either grown by yourself or bought in specialized stores. When buying, first of all, you should pay attention to the condition of the corm. If it is large, flabby, and has wormholes, then this is not the planting material that will bring you pleasure over time and should not be purchased. This is an old onion. When buying, pay attention to small young "kids" who, not this year, but in the next 4 years, will delight you with lush flowering.
Only healthy planting material, without signs of any diseases, can be chosen for planting. In addition, it is necessary to clarify whether this variety of gladiolus is zoned to the region of your residence or not. Otherwise, you can be left without flowers. This is especially true in the northern regions, where cultivation in open ground is associated with certain risks. And the flowering of Dutch bulbs is generally focused on a period of no more than 1 year.
Growing conditions and choice of planting site
To create the best conditions for plant growth, it is necessary to take into account that gladiolus does not like low-lying, with stagnant moisture, soils. Oversaturation with moisture contributes to rotting of the bulb. Slopes with hummocks will also be unacceptable. Only a flat, dry place, which will not only be well lit, but also protected from the wind, will be suitable for planting gladioli. But you can not also overdo it with this, since complete calm can contribute to the development of diseases of a fungal nature.
Semi-shady places are suitable for growing only early varieties of gladioli... If late flower varieties are planted in such a place, then they will not bloom at all. And the reason will lie in the lack of lighting. It should also be borne in mind that this is a very thermophilic flower.
Before planting, remember what kind of crop was cultivated on this plot of land last season. If these were flowers from the genus of dahlias, marigolds or plants from the legume family, strawberries and tomatoes, then feel free to use this piece of land to grow gladioli. Be wary of the area where potatoes, carrots or cabbage grew last season, as well as all those plants that were fertilized with manure. But it is very important that every 2 years the gladiolus is transplanted to a new place.
Preparing the soil for planting gladioli
When to plant gladioli in open ground in spring Planting and care photo
For gladioli, soil structure is very important. Therefore, sandy loam or loamy soil is quite suitable for planting a plant. With a planned transplant of a flower (and this is every 2 years), you also need to change the soil.
- The optimal PH-environment for the soil is slightly acidic, it should be in the range from 6.5 to 6.8. Overly acidic soils negatively affect the flowering of the plant. The appearance of a disease such as fusarium (the fungal nature of which is manifested by yellowness on the leaves, root rot and thinning of the stem) is also associated with increased acidity of the soil.
- The alkaline nature of the soil will cause the leaves to turn yellow due to the slowed-down formation of chlorophyll. This is caused by the intake of an insufficient amount of iron from alkaline soils.
To prepare the ideal soil for the growth of gladioli, it is necessary to add sand to the clay soil, that is, dilute the clay with sand. After you have decided on a site for planting, dig it up. The soil in a drier region should be prepared in the fall by digging it 15 centimeters deeper than if you did this procedure in the spring. At the same time, apply dry fertilizers (potash and phosphorus). This approach will maximize the preservation of moisture and before planting the gladiolus, all that remains is to loosen the soil.
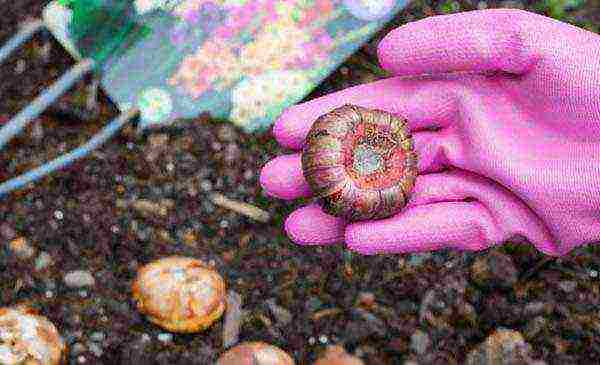
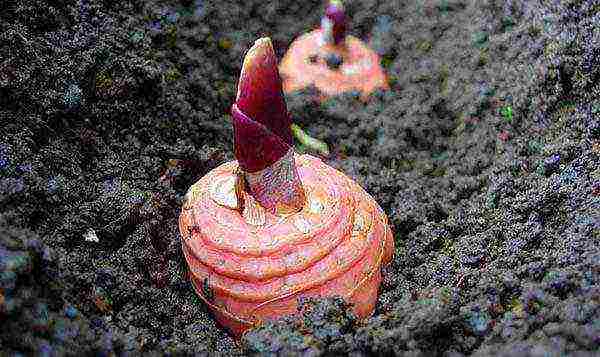
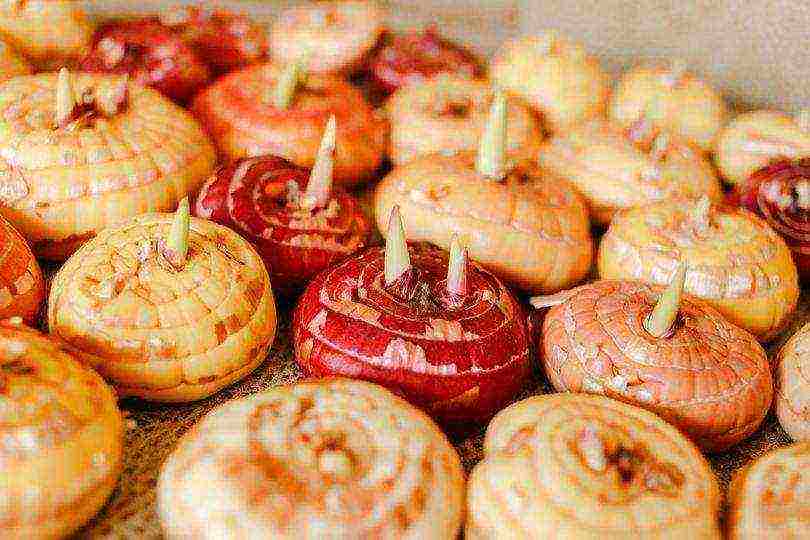
Inspection and preparation of gladiolus bulbs before planting
At the initial stage, all bulbs are thoroughly examined. The scales that cover the corms must be carefully peeled off so as not to damage the young shoots. In case of damage to the bulbs with scab or sclerotinia, it is necessary to remove the affected area (cut off) and burn the resulting cut with green paint. This operation is done 1 month before planting. The prepared bulbs are simply left in a small tray, sprouted up in a warm place, so that they germinate a little.
- Before planting, the bulbs are subjected to antifungal treatment. They are placed in a solution of potassium permanganate for a couple of hours or in a solution of foundationol for an hour.
- Biennial (so-called juvenile) bulbs with pronounced root tubercles, the diameter of which does not exceed 8 mm, are subjected to special processing. Having laid them in one layer, they are placed under diffused light.
- Immediately before planting, the onions are placed and kept in a solution of potassium permanganate for 9 hours.
- The planting material prepared in this way is transferred to peat pots, which help to avoid breaking the delicate root during transplantation. And also it is a very convenient container for transferring the plant to a cooler place, if you notice that the flower has begun to grow rapidly ahead of time. This is especially true of early varieties of gladioli. If for one reason or another you have not stocked up on peat pots, then simple containers can be used.
Planting gladioli in open ground
How to plant gladioli When to plant gladioli photo
How to plant gladiolus bulbs in spring? Some rules will help to avoid common mistakes and protect plants from diseases, increasing their vitality and directing them to abundant flowering.
To prevent gladioli from falling
- It is necessary to consider the structure of the land before planting in order to know how deep to plant gladioli... If clay prevails in the soil, then the depth during planting should be no more than 3 diameters of the bulb. If the bulb is deepened too deep, then the gladiolus simply will not bloom.
- In lighter, sandy soil, the depth of setting should be equal to four diameters of the bulb. In this case lack of bulb setting can cause the plant to slope to the ground and there will be a need to tie it up.
Anyway do not mix the bulbs of young and adult gladioli... The reason lies in one thing: large corms will take food from younger ones, depleting them.Therefore, it is better to plant the young growth separately.
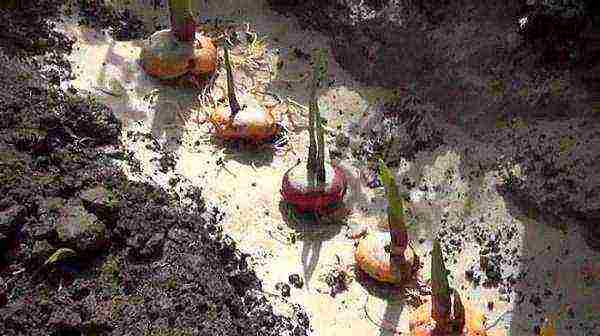
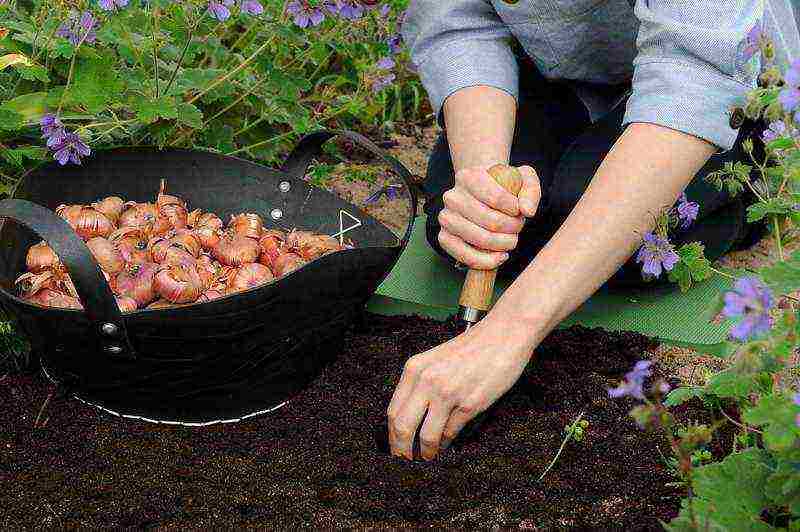
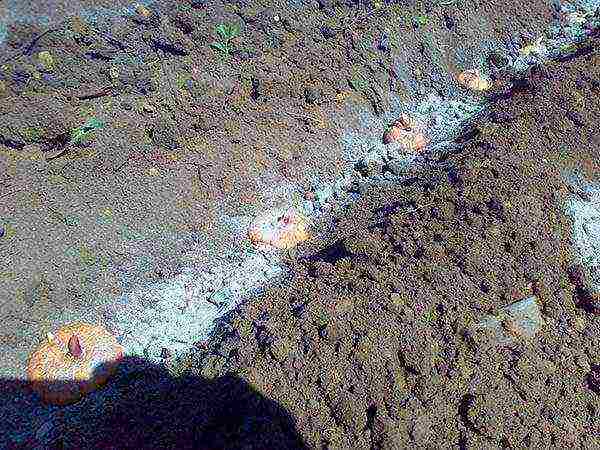
Planting the bulbs is very simple: a groove of the appropriate size is dug, the bottom of which is sprinkled with sand or lined with sphagnum, all this is moistened and the bulbs are placed on this base. The distance between them should be at least 15 cm. Sphagnum will retain moisture and prevent fungi from developing. Everything is lightly covered with earth. As soon as the sprouts begin to sprout and appear on the surface of the soil, sprinkle them with earth again.
An interesting way of planting gladioli is shown in the video:
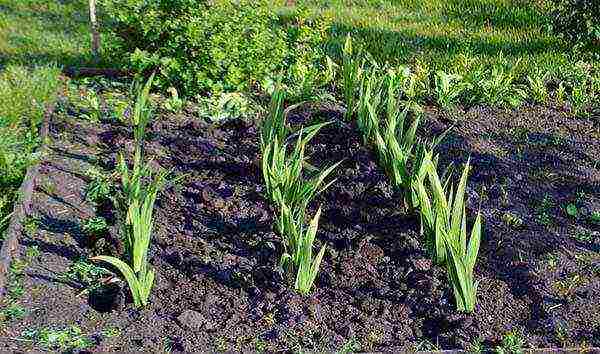
Care of gladioli after disembarkation in open ground
In order for the gladiolus to have a beautiful, even stem, the flowers in the arrow were presentable, it is necessary to make efforts for the next 2 months after planting in order to get the most positive result at the exit.
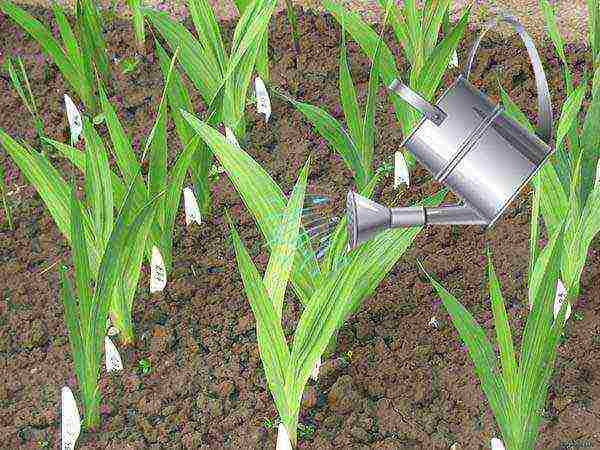
How to water
Gladiolus after planting should be watered every other day so that the peduncle is fully formed. This will require 8-10 liters of water per 1m². If dry weather is established, watering should be carried out at least 1 time per day in the evenings.
After that, it is advisable to loosen the earth in order to accumulate moisture inside and prevent it from quickly evaporating. In the case of the opposite, that is, when rainy weather is established, watering is either stopped completely, or limited to 2 times a week. In this case, the water must be well settled. It is not worth pouring it directly under the bulbs, as this contributes to their decay. It is necessary to pour in the aisle, then the soil near the roots is moistened. Gladiolus leaves tolerate spraying well.
Feeding gladioli
- When the sprouts reach 10 centimeters in length, it is necessary to fertilize the soil around the plant with humus. This is done in order to protect the soil from overheating and reduce the amount of moisture evaporated.
- During the formation of the first 3 leaves, fertilizing with fertilizers is necessary, which include mineral nitrogen. These fertilizers include urea and ammonium sulfate. It is introduced at the rate of 2 tablespoons per 1m² in order to form the green mass of the plant.
- Then they are fed twice with a mixture of complex potassium-phosphorus fertilizer: the first stage falls on the period of appearance of 5-6 leaves, the second - at the time of laying the buds. During potassium-phosphorus feeding, you can add a few peas of urea.
Four times during the entire growing season, during watering, organic fertilizers can also be applied under the plants.... It is better to use bird droppings for tincture (animal manure should be excluded) at the rate of: 1 bucket of droppings for 2 buckets of water. Organic fertilizer is infused for a decade, then it is diluted in a ratio of 1 to 10, where 1 share falls on the infusion and 10 on water. The quality of the flower depends on the regularity of feeding. Fertilization is usually applied after watering, which is repeated after fertilization.
Simple disease prevention
For gladioli cultivated on sandy loam, it is good to carry out foliar feeding, the essence of which is to spray the leaves with a special solution. For 1 liter of water, take 0.15 g of potassium permanganate or 0.15 g of boric acid or 0.2 g of Bordeaux mixture. This solution is used as a prophylactic agent against diseases and harmful insects.
Processing is carried out at least 3 times during the entire growing season: the first - during planting, subsequent - during the appearance of the arrow and during the formation of buds. If you add soap to the solution and process the gladiolus leaves on both sides, then this will be a very useful procedure for him in the fight against spider mites.
Loosening the soil and weeding
The roots of absolutely all plants, including gladioli, love oxygen. Loosening will help provide access. To avoid the appearance of a crust on the soil surface, loosening should be carried out after watering.If you do not weed the flower bed, then the weeds will take nutrients from the soil, which will negatively affect the quality of the gladiolus flower. Therefore, weeding is simply necessary once a decade.
How to tie gladioli
The garter is necessary for those varieties of gladioli that reach more than 1.5 meters in length. To provide the stem with support, which over time begins to bend, you can attach a peg to each free-standing flower.
Many gardeners use a different method: they stretch the wire along the row with gladioli and
each flower is neatly tied to it. At the same time, the stems are spud to give them even more stability.
How to cut a flower correctly
In order not to damage the plant, the bulb of which will remain in the ground for some time, and to ensure that the stem is cut worthy of a bouquet, the following rules must be observed: leave a part of the stem with 4 leaves above the ground so that the bulb does not deteriorate. You can cut a flower only when the bottom 3 flowers are completely dissolved. Ideal varieties of gladioli are those whose ability to dissolve up to 10 buds at once is the norm. Cutting flowers is best done in the evening or early morning. The remaining peduncle stem is hidden deeper into the leaves.
When to dig up gladioli

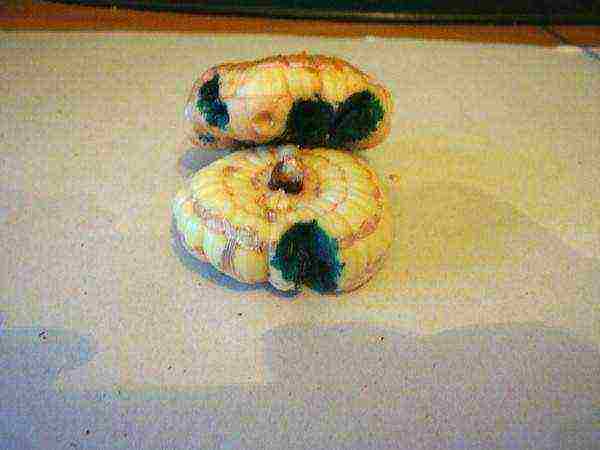
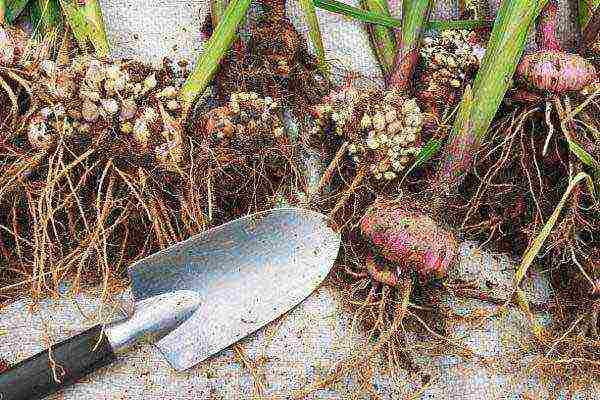
Baby gladiolus photo bulbs
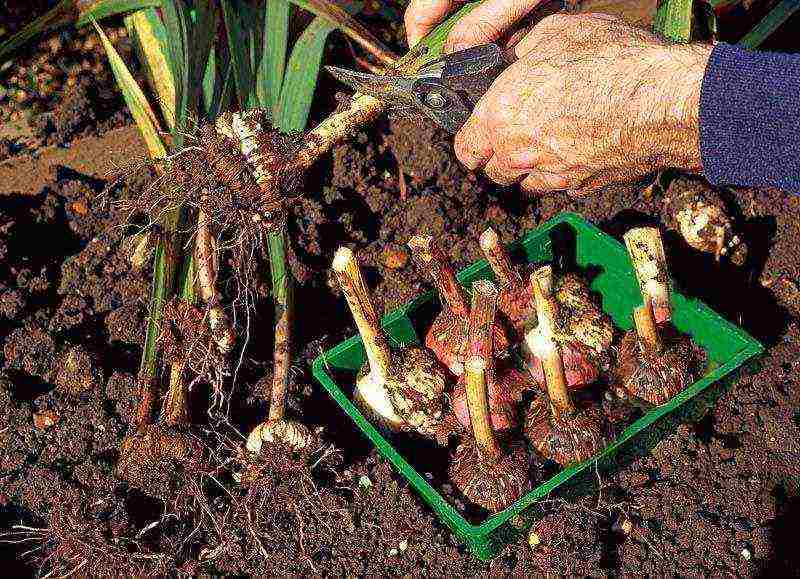
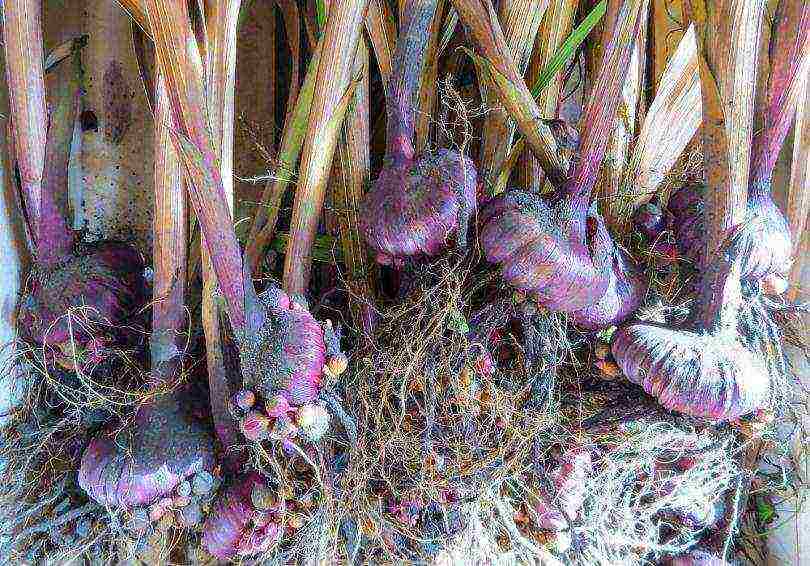
To dig up the bulbs and store them until next year, you need to make sure they are ripe. Therefore, take into account the timing: the bulbs are dug up in September-October, in warm, dry weather. At least a month is required for the bulb, free from the peduncle, to accumulate the necessary juices in order to safely endure the winter. But it is better to give even more time, up to 45 days.
When digging up gladioli, remember that they give babies, and try not to damage them. The sides of the old corms can be literally covered with little "children", which we certainly want to grow and plant in the spring.
Preparing the bulbs for storage
How to store gladioli in winter photo
- First, the bulbs are dug up only in dry weather. They start with early varieties of corms. When cutting off the stem, it is necessary to leave the stem 2-3 cm long from the beginning of the bulb.
- After shaking off the ground and pruning the roots, it is necessary to carefully examine the bulbs to exclude those specimens that may be carriers of diseases.
- The bulbs of each variety are individually washed under running water, dried and subsequently treated twice with an antifungal solution of foundationol.
- Further drying is carried out in the sun, in a well-ventilated place for a month.
How to store gladiolus bulbs in winter
How to store gladiolus bulbs in winter photo
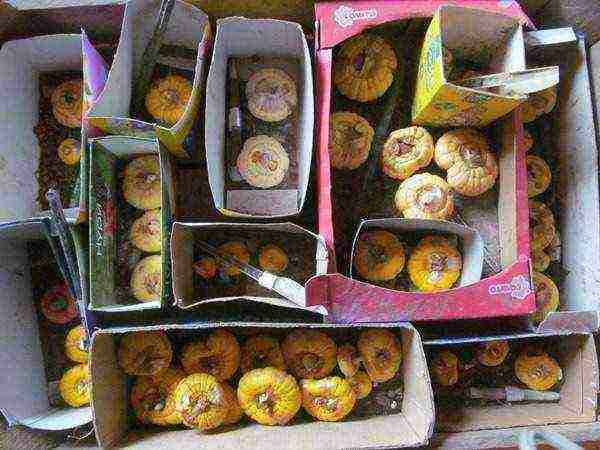
After drying, each onion is separated from each other (this applies to the old, new replacement and "babies"), wrapped in paper for storage and the variety is signed.
- All bulbs are folded into a cardboard box and stored closed to retain maximum moisture during wintering.
- You can store them on the bottom shelf of the refrigerator. Small "children", up to 1.5 cm in diameter, are kept in paper bags under the same conditions as their parents.
- During the rest period, and this is the first 1.5-2 months, there should be no problems with the bulbs at all. After this time, they begin to look after the gladioli bulbs in order to avoid early germination and to exclude the occurrence of diseases.
- Garlic cloves, which act as a natural air decontaminant, are added to the onion containers and placed in a well-ventilated, cool place.
Diseases and pests
Diseases in gladioli can occur both on their own due to the carelessness of the owner, and due to the spread of infection from other crops. Common diseases: botrytis, rust, septoria and fusarium.All of them are of a fungal nature, which they begin to fight against even during the treatment of the bulbs with foundation.
- The preparation "Horus" and "Falcon" is used at the stage before the flowering of the plant in the presence of 3 formed leaves.
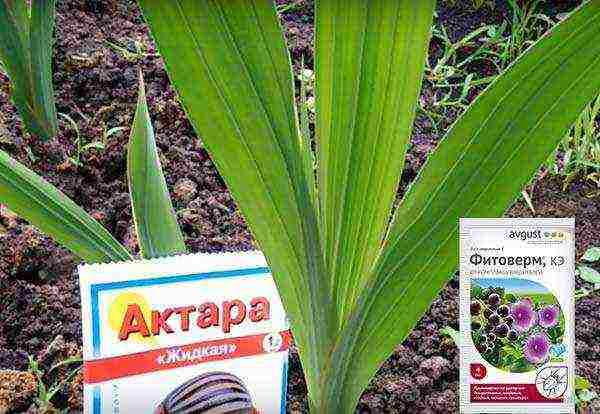
- Against insect pests, such as bulb mites, thrips are used "Balazo", "Agrovertin", "Aktara", "Confidor-maxim". Only regular check-ups will help prevent serious illness. An attentive attitude to gladioli will surely be rewarded with its unique lush flowering.
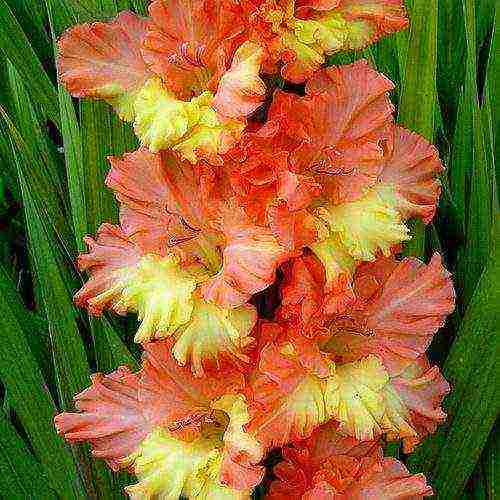
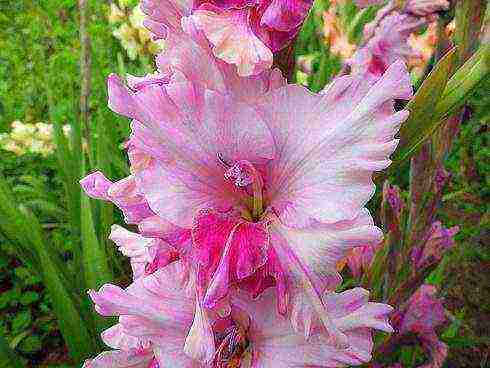
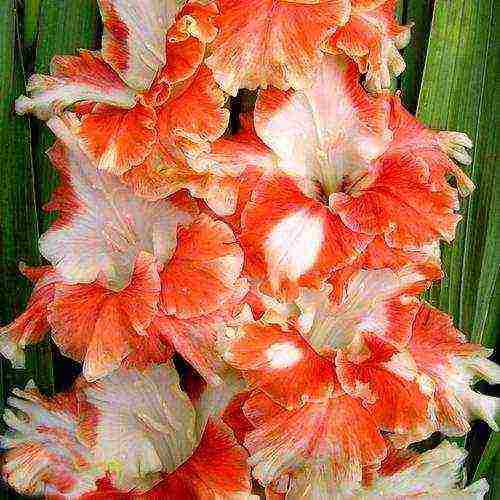
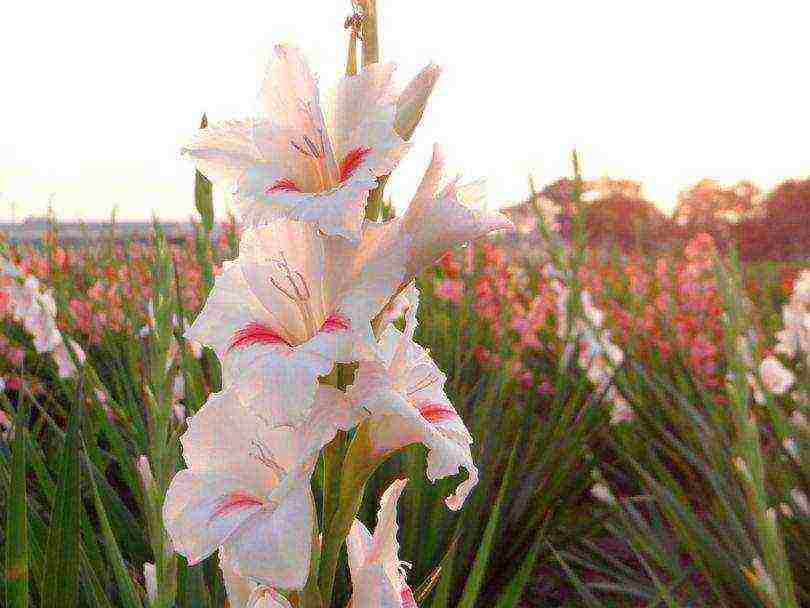
Gladiolus varieties with photos and descriptions Colors of gladioli of Russian selection
Gladiolus is a very popular flower among those who are cut. It looks amazing in a bouquet, perfectly tolerates transportation and pleases the eye for a long time when standing in a vase. Due to the varietal variety, you can choose any shape and size, color shade and structure of the petal, flowering time and cultivation characteristics. For example:
Annushka variety can reach a height of more than 1.5 meters. The most delicate, with reinforced corrugation, flowers of an orange-pink unsaturated color can reach 13-15 cm in diameter. After planting, the first flower should be expected in 2.5 months.
Orange-yellow gladiolus Annushka photo of flowers
Arina variety - with corrugated, delicate in color, but dense in structure, raspberry-lilac flowers. Its distinctive feature is a rich, bright crimson spot in the middle of the flower.
Pink gladiolus Arina photo of flowers
Variety Eternal Call... It grows up to 140 cm and also belongs to large plants. The main color of the petals is pale pink, in the middle there is a red spot. The originality of the petals is given by their jagged structure along the edges, the structure embossed with veins and the density of the texture.
Orange and white gladiolus Eternal call of flowers photo
Blue butterfly variety speaks for itself: the most delicate blue color of a dense, large petal with a richer blue edging along the edge not only attracts attention, but also makes this gladiolus variety a leader in both exhibition exhibits and sales. It should be added that the flowering of a 145 centimeter plant begins 2-2.5 months after planting.
Gladioli of Russian selection, Blue butterfly variety, photo of flowers in the garden
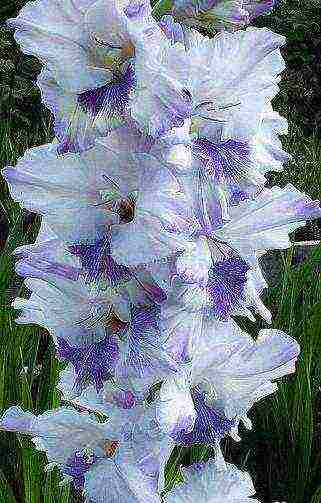
Variety Sky and Stars... Very easy to grow and beautiful in bouquet. It has a large (up to 14 cm) corrugated blue-violet flower. Each petal of the flower is riddled with white rays and star-like spots, which gave the name to this variety.
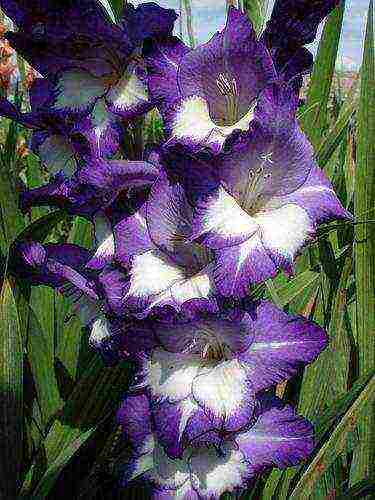
White-purple gladiolus Sky and stars photo of flowers
Snegurochka variety possesses small, but strongly corrugated, bubbly white flowers. Looks amazing in a bouquet after cutting. It also blooms 80-85 days after planting.
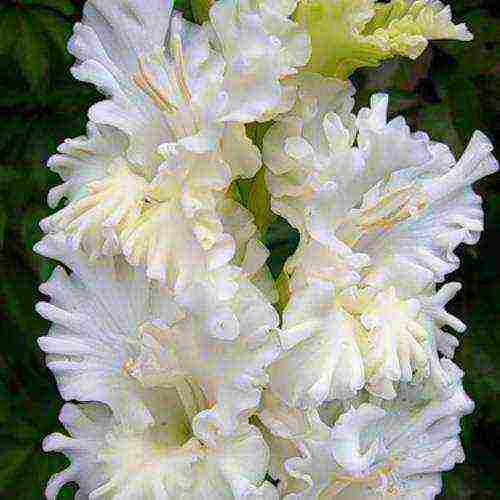
White gladiolus Snow Maiden photo of flowers
Spartak variety refers to the mid-early, the height of its stem reaches 160 cm. Flowers - large brown-red with a smoky dark tint. At the bottom of each petal there is a white moire pattern. The neck has a silver coating.

Red gladiolus spartacus photo of flowers
Variety Golden ten with bright yellow large inflorescences of double flowers amazes the imagination. A perfect decoration for any flower bed and luxurious cut flowers.
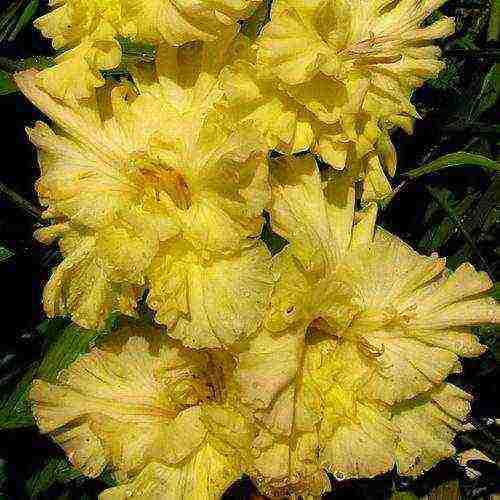
Yellow gladiolus Golden ten photo of flowers in the garden
Gladiolus is as decorative as labor-intensive. After all, they must not only be planted and carefully looked after all summer, and then properly dug up and processed in the fall, but also preserved in winter. Further, you can learn in detail about all the nuances and secrets of growing gladioli in the open field, from the choice of planting material to its collection and subsequent storage.
How to choose gladiolus bulbs and prepare them for planting
To start growing gladioli in your summer cottage, you must first either purchase them in a specialized store or at a garden fair, or order them online (in which case they will be sent to you by mail). The first option is preferable because in this case, you can personally verify the quality of the purchased bulbs.

Several recommendations for choosing gladiolus bulbs:
- It is advisable to buy bulbs with one fairly powerful sprout in the middle (maximum two). If there are 3 or more sprouts on the bulb, then most likely it is sick with such an incurable disease as grassiness.
- Do not pay attention to specimens that are too flat.
- The root tubercles should be already formed and always light in color, but not brown.
- As for the size, you need bulbs with diameters of 2 to 4 centimeters, the diameter of the base should be from 3 to 7 mm. You definitely don't need large ones with a strongly concave bottom. This is a clear sign that they have already been planted more than once, which means they can hardly give powerful inflorescences and good offspring.
- Naturally, the bulbs should not show even the slightest signs of disease.
Video: an overview of popular gladiolus varieties
How to prepare bulbs for planting
The first thing to do in the process of preparing the bulbs for planting is to get the gladiolus bulbs from storage or refrigerator (or purchase in a store) about a month and a half before the expected date of planting in open ground.

Now they need to be cleaned of the upper dry scales, while assessing the condition of the bulb: it should be clean and smooth, without damage and without signs of any diseases. It should have 1 shoot or even 2 that has slightly moved into growth, as well as slightly outlined root tubercles and roots that have begun to grow slightly.
Note! If you notice small spots on the surface of the bulbs, then most likely it is some kind of disease, for example, bacterial scab. However, this does not mean that they will have to be thrown away. It is recommended to cut off the affected areas well, and then grease with brilliant green or sprinkle with Fundazol. Of course, it is advisable to plant such bulbs separately due to the fact that they can infect healthy specimens.
The peeled onions should be laid out in a bright place without direct sun. Exposing the bulbs to light stimulates faster rooting and flowering.

It is imperative that before planting gladiolus bulbs, they should be treated with a growth stimulant (for example, sodium humate or Immunocytophyte), as well as against fungal diseases and pests. To do this, you need to soak the planting material in Fundazol, Fitospirin or Oxyhom for 30 minutes. You can also pickle in potassium permanganate for 2-3 hours, diluting 1 gram of the product in 1 bucket of water. After that, it is necessary to put the bulbs on wet sawdust and hold it for 3 days.
Video: preparing gladiolus bulbs for planting
Technology of planting gladiolus in the open ground in spring
When to plant in open ground: optimal timing
The optimal timing for planting gladioli in the spring in open ground is the end of April and until the first days of June, depending on the climatic characteristics of the region. So, in the Central lane (Moscow region), it is advisable to plant in mid-May, and in the South, you can already at the end of April. The general rule that determines the time of planting gladioli in open ground (for all regions, including the Leningrad Region, the Urals and Siberia) is the moment when the soil at a depth of 1/2 shovel bayonet (12 cm) warms up to 10 degrees. Naturally, by this time the threat of possible return spring frosts should have passed.
People's omen! As soon as the birch leaves look like a five-kopeck coin, it's time to start planting gladioli on a garden bed in open ground.
Place and necessary soil
To plant gladioli, you need to choose the most illuminated and sunny place in the garden.At the same time, gladiolus, of course, can be successfully grown in a shaded flower bed, but the flowering will not be as abundant as with constant sunlight.
Advice! Experienced flower growers do not recommend planting gladiolus in the same place for more than 3 years. It is much better if you change its place of growth every year.
Vegetables are good predecessors for gladiolus.
Gladiolus cannot be called a whimsical plant in relation to the land in which it is grown, so virtually any soil is suitable for planting it. You just need to remember that if you have light and airy soil, then you will have to do watering more often, heavy - you will need regular loosening.
Gladioli do not tolerate excessive waterlogging of the soil, so they need good drainage. If the soil in your garden is heavy, it is recommended to add compost or rotted manure to it. Also, experts do not advise making a garden bed in a place where water often stagnates. Without a doubt, a slightly raised flower bed is more suitable for him.

By the way! If you introduced organic matter into the soil when you grew vegetables in the same place, then you do not need to do this before directly planting flowers.
Landing on the garden
Planting gladioli is very similar to planting potatoes, so if you have the appropriate experience, then there should be no difficulties with planting them in spring.
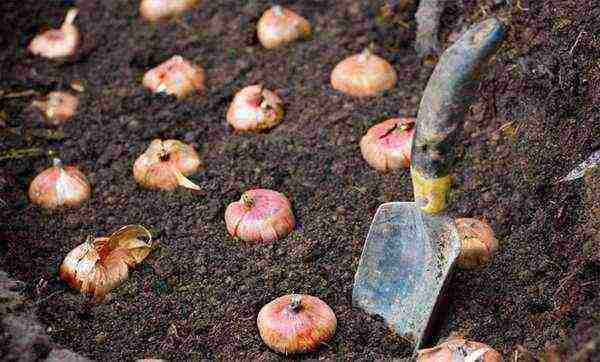
It is very convenient to plant gladioli in pre-prepared trenches (or separate holes) 3 diameters deep, therefore it is recommended to select bulbs of the same size (for example, if your gladiolus bulb is 3 cm in diameter, then the planting depth should be 9 cm).
Note! The deeper the bulb is planted, the more beautiful and magnificent the flower will be. The higher, the more children there will be. But it is impossible to deepen more than 12-14 centimeters, because the ground there no longer warms up, and the bulb will develop poorly.
Before planting, the trench must be shed with water, into which you can add a little extracts from horse manure, and you can also treat (disinfect) the soil with Fitosporin solution.
Important! Many gardeners recommend pouring 1-2 cm of sand into the trenches (grooves), and then lightly sprinkle them, in other words, create a so-called sand capsule.
After the water is absorbed, you can begin to spread the bulbs in the trench (sprout up, bottom down). The optimal distance between the onions should be about 15-20 centimeters, and between the rows it is worth keeping a distance of 25-30 centimeters.
Now it remains only to sprinkle the plantings with earth. And it is also advisable to mulch the bed, for example, with rotted mullein or sawdust so that the plant breathes well, the earth does not dry out around it, but is always loose, and moisture remains.
Video: how to plant gladioli correctly
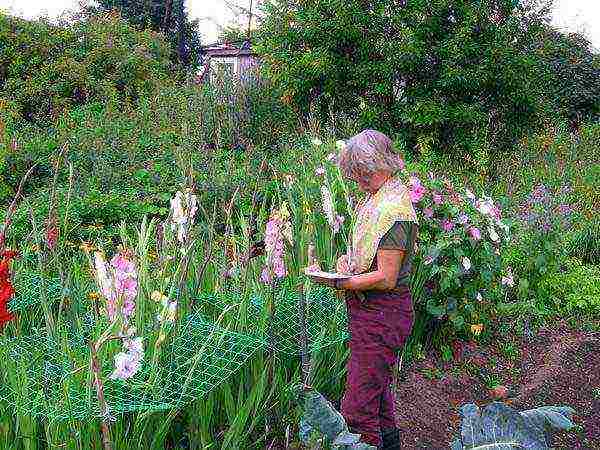
How to care for gladioli after landing in the garden
To grow beautiful gladioli, they need proper care, which must include the following garden manipulations: regular watering and loosening, hilling, timely feeding, as well as prevention and active fight against diseases and pests.
It usually takes 2 weeks from the moment of planting to the appearance of the first shoots of gladiolus. At this time, no attention is required to the planted bulb. As soon as the green sprout comes out, it's time to start leaving.
Gladioli are needed often and abundantly to water (approximately every 5-6 days) so that the earth does not dry out. It is advisable to do this so that the soil is soaked 2-3 cm deep. It is best to do this in the evening after sunset. It is especially important to water well and moisten the soil around the flower when the plant has 3-4 true leaves, because inflorescences develop during this period.
It is necessary in a timely manner loosen soil, weed the beds and remove weeds so that the flower bed does not overgrow with harmful and spoiling the whole species.
Video: weeding beds with gladioli
As the gladiolus grows up, you need spud.
Advice! If you planted gladioli in already fertile soil, which every year before was well flavored with all kinds of nutritious fertilizers, then feeding is not necessary, unless, of course, the flowers themselves "do not ask."
To have beautiful flowers, gladioli shouldfeed throughout the season. At the beginning (in May-June), it is advisable to feed with ammonium nitrate or other fertilizers with a high content of nitrogen and potassium, and then (in July) with fertilizers containing all the main elements (nitrogen, potassium and phosphorus) in approximately equal amounts, for example, nitroammophos ... At the end of summer (in August), you can already feed only potash-phosphorus fertilizers. It is advisable to combine top dressing with watering.
Video: feeding gladioli
Important! Fresh manure should not be used as top dressing.
Like any flowers, gladioli can be affected by different diseases and pests.
The main diseases affecting the flower are rot of various origins, that is, it can be scab, mosaic, jaundice, bacterial cancer. When they appear, it is worth spraying with such fungicides as Oxyhom, Hom, Copper sulfate, Bordeaux liquid and other similar preparations.
The most vicious pest of gladiolus is thrips. From it you can use Fitoverm, Antara, Mospilan, Decis, Confidor and other drugs.
Naturally, it is much more practical to carry out preventive measures in advance, that is, to process plants and protect them even before diseases and pests appear. This is especially true if you have had a rainy summer. When the flowers get sick, it will be too late to save them. It will only be necessary to get rid of them as quickly as possible so that the infection does not spread to healthy specimens.
Experienced gardeners recommend carrying out preventive treatment against the main pest of gladiolus thrips, when the first 3-4 true leaves appear on the flower.
Video: mandatory processing of gladioli from thrips
If you do not want to use chemicals, then various decoctions and infusions, for example, tobacco, celandine or yarrow, are suitable for processing. But let's make a reservation right away: they are noticeably less effective, so a much larger number of sprays will have to be done.
As you grow, it is worth exercising garter gladioli in order to prevent negative consequences in case of strong wind. After all, a flower can simply break off, so gladioli should be tied to supports, and a net can be put on top.
When the gladioli bloom 2-3 flowers, it's time to cut them (preferably in the early morning or late evening). The rest of the flowers will open themselves a little later in the water.
Cutting should be done as follows:
- Dip the cutting knife into a strong solution of potassium permanganate.
- Count 5 pairs of leaves.
- Make a puncture.
- Unscrew the stem of the gladiolus carefully.
Video: cutting gladioli
Video: how to care for gladioli
Digging gladiolus bulbs for storage: timing and processing technology
When do you need to dig up gladioli?
There are early and late varieties. Accordingly, the ripening of the bulb can occur early and late, depending on the variety.
The shortest time for the bulb to somehow get stronger and ripe is 2 weeks after flowering, and even 3-4 is better. As a rule, this time occurs around the second half of September. It is advisable to remove all gladioli bulbs until mid-October.
Tips for digging and processing gladiolus bulbs before storage in the form of step-by-step instructions:
- Digging is required very carefully.You do not need to put a shovel close, otherwise you can damage the children, which sometimes grow in the form of a kind of nest around the bulb.
- After you get the bulb out of the ground, try to shake off the soil from it as much as possible and separate the children, and then rinse it additionally in water to free the roots.
- Now you need to get rid of the old bottom, which is no longer needed. But if the bulb is not ripe, then this will be difficult to do. Therefore, it is better not to rush, but to let the onion dry out a little so that the old onion will then go well. Otherwise, you can simply damage the new bottom, where new roots are already being formed, which will not contribute to subsequent growth next year.
- The turn has come to remove the roots. It is better to tear them off with your hands, and not cut them off, so as not to leave stumps that can rot during storage.
- Rinse the onion in water again.
- Now you need to prepare a solution for treating gladiolus bulbs before storing them. For this, the preparation (insecticide) "Maxim" is perfect (1 ampoule of 4 ml per 2 liters of water).
- It is necessary to keep the onion in the preparation for 10 to 30 minutes.
- After the expiration of time, the bulb must be taken out (always with gloves) and the stem must be cut off from it.
- Everything can be stored.
Video: cleaning and storing gladioli
How to store gladiolus bulbs until next spring
At first, gladiolus bulbs should be stored at a sufficiently high temperature, preferably 25 degrees. Accordingly, the garden house is not suitable for storage. Therefore, it is better to take the bulbs home and store them in the kitchen, somewhere near the stove, for 2-3 weeks. During this time, they will dry out properly.
After the expiration of time, they can already be stored in a cooler room. It is good to store it near the balcony door or even on the windowsill, transfer it to the basement or cellar, and also use the refrigerator. The main thing is that the place is dark, ventilated and not with sub-zero temperatures. The ideal storage temperature is 3-6 degrees, humidity is 65%.
It must be admitted that at home at room temperature it is possible to keep gladiolus bulbs until next spring.
Video: how to dig up and store gladioli
Thus, now you know what to do in order to grow a wonderful magnificent gladiolus flower in your summer cottage without any problems. Isn't it true that even a novice florist is able to cope with all the requirements for flower care.
Video: planting gladioli bulbs
Translated in Latin, gladiolus means "sword". The flower received this name because of the vertical stem with a height of 50 to 150 cm. It is believed that growing gladioli is easy and simple - you just need to plant a gladiolus bulb in the ground in spring. However, this is not entirely true - after all, the plant came to us from southern countries and is sensitive to heat ...
For many, the gladiolus flower is associated with the beginning of the school year - September 1. Probably everyone was standing with a huge bouquet of bright gladioli on a ruler. But in order for the plant to have time to please us with bright colors by the beginning of autumn, it is best to plant gladioli in the spring.
Observing certain rules for planting and caring for gladioli, you can achieve longer flowering and effective reproduction.
How to choose the right landing site
Gladioli are thermophilic plants, so they are best planted in sunny areas. In the shade, flowers do not develop well, their flowering is delayed, and excessive moisture can cause the development of various diseases.
Preparing the soil for planting gladioli
Correct planting of gladioli should be carried out in soil with a slightly acidic reaction (pH 5.5-6.5). In case of high acidity, it is recommended to add quicklime or chalk to the soil.
It is best to dig up the soil in the fall and add phosphorus-potassium fertilizers to it, and before spring planting it must be loosened and all weeds selected.
Some growers, before growing gladioli, plant legumes on the site the previous year. They improve soil structure and prevent wireworms from appearing.

Cooking bulbs for planting
Adult tubers for two to three weeks must be carefully (so as not to damage the sprouts) to remove scales in order to eliminate the parasites living in it. In addition, it is easier to detect various diseases on peeled bulbs and to disinfect them. Babies are cleaned immediately before planting so that they do not dry out.
After cleaning, the gladiolus bulbs must be disinfected. Garlic is a good remedy for the prevention of various diseases.
Peeled garlic cloves can be stored with gladioli planting material.
Before planting, you can water the ground with infusion of garlic. You can prepare it as follows: for 10 liters of water, take 50 g of chopped garlic, leave for a day, then strain. You can also protect plants by planting garlic between the rows of gladioli.
You can disinfect the tubers with an infusion of marigolds, nasturtium or calendula (take 2.5 liters of water and 250 g of dried flowers, leave for three days). Many growers use a manganese solution (soaked for 1-2 hours before planting) or copper sulfate (5 g per 1 liter of hot water) for processing bulbs.
When and how to plant gladioli outdoors
Planting gladioli in the ground should be carried out when the soil warms up to + 8-10 degrees. As a rule, this is the end of April. It is not worth delaying the planting, since the soil can dry out and the lack of moisture will negatively affect the development of the gladiolus bulb.
Planting corms and babies is initially better in sand. It will protect their young roots from contact with the soil. To do this, sand is poured into the hole with a layer of 1-2 cm, an onion is planted, sprinkled with sand, and only then with earth.
To make it easier to care for gladioli, it is recommended to plant gladioli in rows. Moreover, the greater the distance between them, the more nutrients the plant will receive and the less likely it is to be infected with various diseases from neighboring plants.
If the bulbs for planting are large, then it is recommended to make a distance of 15 cm in a row, and 20 cm between rows.
The depth of the fossa also depends on the size of the planting material. The larger the bulb, the deeper the planting depth.
Before planting, the hole or furrow is moistened with water and nitrophosphate is applied 3-4 cm below the bottom of the corm.
To enjoy the beauty of plants as long as possible, plant gladioli in spring at different times.

How to care for gladioli
The health of plants and their flowering duration largely determines the quality of their care:
- Watering gladioli is necessary once every seven days, while trying to prevent water from getting on the leaves. Once every ten days, loosen the soil around the plant and eliminate weeds so that they do not drown out flowers, especially young ones. Tie tall flowers so that they do not break, and remove dry flowers in a timely manner;
- Gladiolus flowers need regular feeding with organic and mineral fertilizers;
- Minerals are applied three times per season. The first complementary food is applied when a pair of true leaves has formed. The second, when 6 true leaves appeared, phosphorus and potassium fertilizers are added to nitrogen. The third time, the fertilization of gladioli is carried out only with phosphorus and potassium (as soon as the peduncle appears);
- From organic fertilizers, you can use a liquid infusion of chicken manure. It is brought in every 15-20 days. From mid-August, feeding is stopped;
Flowers are cut only in the early morning and evening. It is better not to prune at other times.
- Examine gladioli regularly for pests.If you notice that their leaves turn yellow or dry out, then most likely one of the diseases has appeared: damage to the bulb by wireworm, gray rot, scab.
As you can see, planting gladioli in the spring and caring for them is not at all difficult. By adhering to our recommendations, you will definitely grow a healthy and strong flower.