Content
- 1 What caused the interest?
- 2 Varieties of wood
- 3 Is it possible to grow a plum from a stone?
- 4 Several recommendations
- 5 Preparatory stage
- 6 Planting in a pot
- 7 Transfer to the ground
- 8 The second option for growing a seedling
- 9 Site selection
- 10 Required soil
- 11 Third landing method
- 12 How can you grow a plum at home: the necessary steps
- 13 Transplanting a seedling into open ground
- 14 Seed collection
- 15 Video "How to grow a plum yourself"
- 16 How to germinate a seed correctly
- 17 From seed to tree
- 18 Video "Plum in a cold climate"
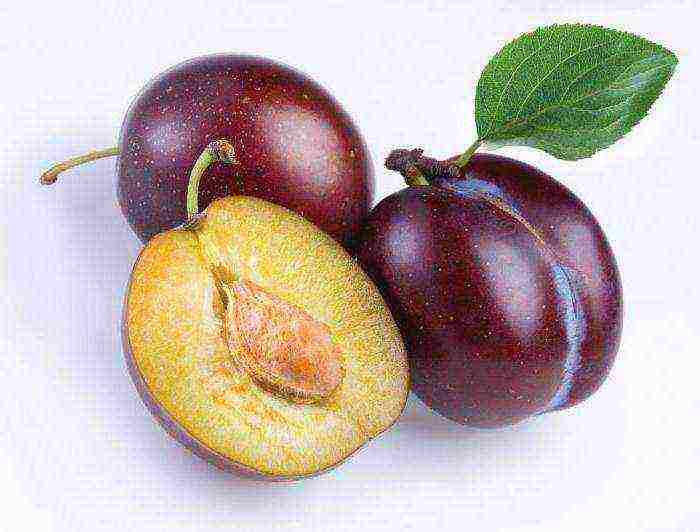
Plum is one of the first fruit trees cultivated by man. And this is not surprising, because the branchy graceful tree has rich green foliage. In early spring, it shakes with beautiful flowers and allows you to enjoy an exquisite aroma. Truly, the plum is the decoration of any area. Do I need to talk about delicious fruits?

Every gardener tries by all means to plant this tree in his area. And only a few know how to grow a plum from a stone. Let's consider how such a process takes place.
What caused the interest?
Surprisingly, many summer residents are wondering how to grow a plum from a stone. Why are they interested in this particular tree?
This desire is due to several reasons:
- Plum easily adapts to our climate. However, she is not "capricious". Even minimal care is enough for an amazing tree to delight you with a delicious and bountiful harvest.
- In addition, it should be said about the benefits of fruits for the human body. The concentration of nutrients in the plum is quite high. In terms of their content, the tree takes an honorable second place, second only to raspberries.
- Plum is widely used in a wide variety of dishes. Juicy fruits are the basis for excellent sauces. Delicious desserts are prepared from them. Plums are used to make stewed fruit, jellies, juices, and jams. In addition, delicious fruit is one of the favorite treats of children.
Such factors make people look for ways to grow a plum from a stone.
Varieties of wood
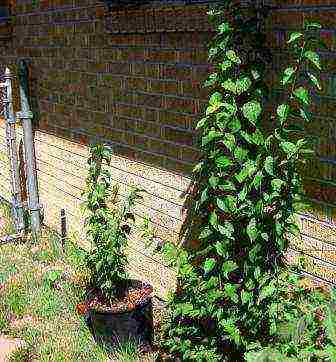
If you are serious about growing a pitted plum (the photo shows a beautiful tree that you can get), there are a few things to consider.
One of them is choosing the right variety. The tree from which you take the seed must necessarily grow in your climate zone. Only in this case the seedling will be able to please you with wonderful fruits.
If the parent tree grows in warm climates, then it is difficult to count on the success of the venture. Most often, a "wild" grows out of such planting material. But even if this does not happen, the plum will "freeze". This means that you will not see a wonderful bountiful harvest. Therefore, we will consider which varieties are better to use so that a stone plum appears in your garden.
The following varieties can be grown in the middle lane:
- "Belorusskaya";
- "Minsk";
- "Vitebsk Late";
- "The Volga beauty".
In a sharply continental climate and arid regions, varieties will take root perfectly:
- "Egg blue";
- "Morning";
- "Eurasia".
For warm areas, the following types are suitable:
- "Kuban comet";
- "Victoria";
- "Crooman".
Is it possible to grow a plum from a stone?
This question is often asked by novice gardeners. Sometimes experienced specialists face this dilemma as well. After all, from time to time there is a desire to plant a completely different variety from those that are available on the site.
Initially, we note that there are 3 ways to get a tree:
- Reproduction by green cuttings.
- Use of shoots of roots.
- You can grow a plum from a stone.
The last method is of the greatest interest. However, before considering this method, you should learn about some of the features:
- The planting process is quite laborious. It will require a lot of patience from you.
- Not every seed-grown tree will bear fruit.
- Sometimes plums taste different from their "parent".

However, don't be in a hurry to despair. Is it possible to grow a stone plum with excellent characteristics? Experienced breeders say yes. After all, it is from the seeds that new varieties are derived. And, perhaps, you will be the second Michurin.
Several recommendations
As you can see, a stone drain may well appear on your site. Even novice gardeners can grow a tree at home.
You just need to heed the advice of experienced specialists:
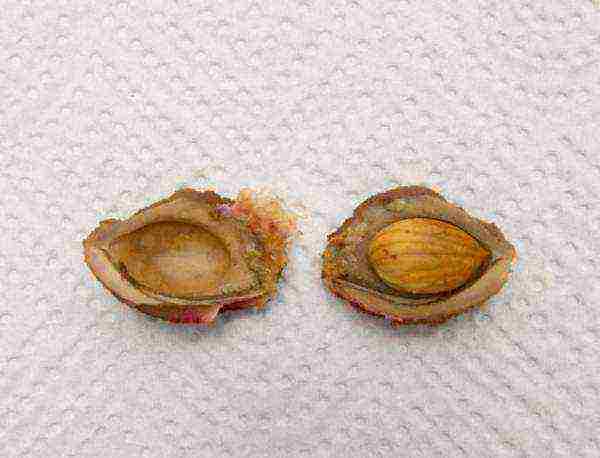
- Planting material should be taken from ripe juicy plums.
- It is best to take a few seeds. Since in the first year, some seedlings may not withstand frost and die.
- It is recommended to plant the seedling initially at home - in a pot. And only in the fall, transfer it to open ground. Such conditions will ensure that the seedling is more likely to take root and begin to bear fruit.
Preparatory stage
Now let's look at how to grow a plum from a stone. Initially, the planting material must be prepared.
This procedure is as follows:
- Each bone should be wrapped in a damp cloth.
- Place these seeds in a cool place. Use a cellar or basement. Excellent conditions can be provided even in an ordinary refrigerator. The wrapped seeds are placed on shelves or in drawers for vegetables. The lower the temperature, the more chances that the planting material will sprout. This is how the necessary stratification process is performed. Or, in other words, natural cold treatment, which allows the plant to start the growth mechanism.
- The fabric in which you wrapped the bones should be constantly damp. In no case should it dry out. Therefore, it must be periodically moisturized.
- In this state, the planting material should be stored for about six months. Typically, this is the period from October to March.
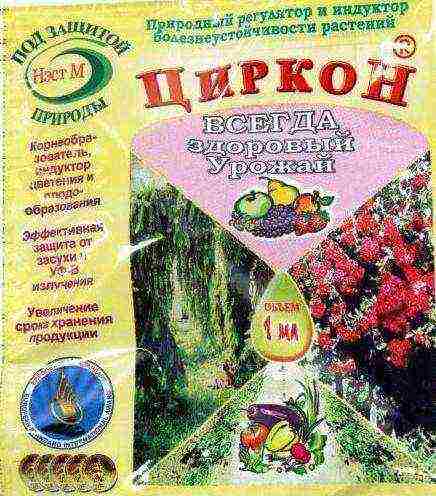
- For better germination, special stimulants can be used. Fertilizers are excellent for such a procedure: "Ecosil", "Epin", "Zircon". Both "clothes" and a bone are poured with a stimulant. Use fertilizers as directed.
- Make sure that the bones do not grow moldy. If you notice such a process, you need to get rid of it right away. To do this, unfold the bone and rinse it. It is recommended to use warm water, but not hot.
- You can use another method. According to him, they use not fabric, but river coarse sand or sawdust. The selected material is poured into a box, in which holes are pre-drilled for water drainage. Bones are placed in such a "soil". The boxes are taken out to a cold place. Do not forget about watering. Plum is very much in need of moisture.
Planting in a pot
Having considered the initial stage, which makes it possible to understand how to grow a plum from a stone, let's move on to the next.
Now your planting material needs such activities:
- Around February-March, you will notice a change in the condition of the "seeds". The bones will swell, their protective cover will crack. This is evidence that the preparatory phase was carried out correctly.
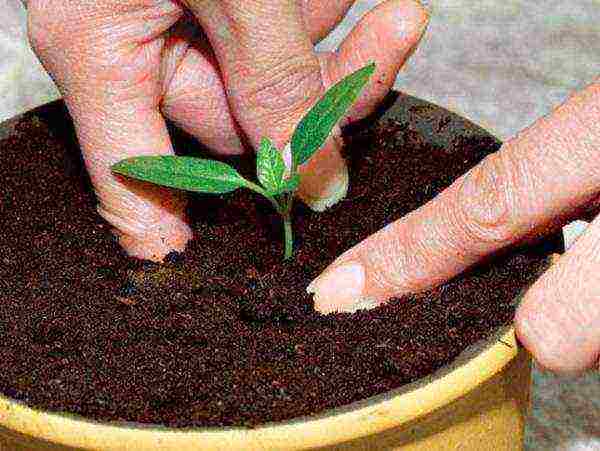
- These bones are ready for planting. However, do not rush to plant them in open ground. It is recommended to germinate seedlings at home. An ordinary flower pot is suitable for these purposes.
- The seeds are planted in moist soil. Be sure to provide care for the seedling during germination. Plum needs watering, feeding.Be sure to monitor the condition of the seedling and remove pests in a timely manner.
It should be noted that the tree does not need special conditions. If you provide it with the same care as any houseplant, then the plum will quickly please with its sprouts.
Transfer to the ground
If you have provided proper care for the growing plants, then by the fall, medium-sized seedlings will form from your seeds. They can already be planted on the site.
Dig a small hole. It is recommended to add compost and sand to it. A future tree is planted in such soil.
Insist that the growing process will take approximately 4 years. And the tree will please the fruit only after 5-6 years. Initially, the plums will be small enough. However, year after year, their size will increase.
The second option for growing a seedling
If you are confused by such a long process, it can be significantly accelerated.
Consider another method of how to grow a stone plum at home:
- Prepare the soil first. You will need equal parts of perlite and sand. They must be mixed. By the way, perlite is a natural volcanic rock that has a beneficial effect on plant growth.
- Now let's get to the bone. Take a hammer and hit it. However, calculate the strength correctly. The bone should crack slightly, and not turn into fragments. This process disrupts the sleep that the seed is in. And, therefore, the time has come for the seed to germinate.
- Plant the cracked seed in the prepared soil to a depth of 6 to 9 cm.
- The soil must be constantly moistened. However, do not fill it. Since the plum will not withstand abundant moisture.
- It is recommended to place the container or container with the planted bone in a cool place. But keep in mind that frosts are completely contraindicated for the plant. You can store the container in the garage if it is not warming up. Alternatively, place the container in the refrigerator.
- After a few weeks, transplant the seed into organic soil. Such seedlings should grow for 1 year.
Site selection
When thinking about how to grow a tree from a plum stone, it is necessary to take into account a few more important points:
- It is best to plant the seedling on a small hill. Plum is a sunshine lover. Therefore, to get a great harvest, provide her with a bright area.
- It is recommended to plant trees along the fence. Like many plants, plums do not like drafts. It is along the fence or shed that it is easier to find windless places.
- Northern areas are preferred for plums. Since it is on them that the snow lingers longer.
Required soil
Now let's talk about soil.
Gardeners, explaining how to grow a plum from a stone, are advised to adhere to the rules:
- The tree grows best in moisture-rich soil. Therefore, if your area is prone to drought, be sure to provide timely watering.
- Plum loves light loamy soil, which contains lime and calcium.
- Clay should be added to soil that is overly enriched with sand. This will create the necessary soil for the plum.
- Heavy clay soil is diluted with sand and peat.

- Acid soil is extremely difficult to tolerate plums. In such conditions, the tree begins to ache and wither. Therefore, with increased acidity, fertilizers should be added to the soil: chalk, dolomite flour, wood ash, fluff lime.
- In order for the plum to take root, it is recommended to add rotted manure or compost during planting. As a rule, 1-2 buckets of such fertilizer are applied.
- Eggshells are very useful for the tree. It should be poured into the bottom of the hole. Such feeding will provide the plum with the calcium necessary for the development.
Third landing method
Experienced gardeners do not use lengthy preparatory steps. They plant the seeds directly into the open ground.
However, the seed needs to be protected with this approach. Therefore, mouse poison is spread around the planting. After all, rodents are very fond of sprouted seeds.
Unfortunately, it is impossible to predict the weather conditions. And, therefore, there is no guarantee that seedlings will appear in the spring. Sometimes the first shoots sprout from the seeds after 1.5 years.
Grow from seed a healthy and fruiting plum is possible. It is a fun process with many details that determine the success of the event.
It is important to choose the right planting material. and properly prepare it for planting, mimicking the natural conditions of development as much as possible.
How can you grow a plum at home: the necessary steps
Selection of planting material
It is important to immediately determine for yourselfthat planting a stone of your favorite plum and growing a fruit tree with similar fruits is difficult. This is possible only with vegetative reproduction.
The reason for this is cross-pollination by insects, during which pollen of different varieties is mixed. This changes the genetics of the fetus and the bone.
Often such planting materials give the most unexpected results. Instead of a cultivated plant, a gardener can grow a wild plum with sour and unsuitable fruits in the country. In some cases, fruiting is completely absent.
The varieties and hybrids of plum species differ in the necessary qualities:
- Ussuriyskaya;
- Canadian;
- Chinese.
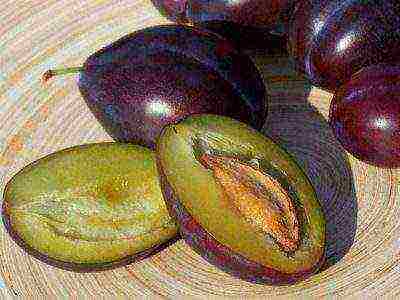
 For growing plums, seeds of ripe fruits, trees adapted to local climatic conditions are selected from the stone
If the purpose of planting a seed is to grow a frost-resistant scion for thermophilic crops, you can plant a stone of any zoned plum variety.
Only when the fruits are fully ripe, a full-fledged embryo is formed in the seed, on which the germination and strength of the plant in the future depends. therefore seeds of ripe fruits are selected for planting, trees adapted to local climatic conditions.
It is better to select a few seeds, so you can guarantee maximum germination and choose a strong seedling for planting in open ground.
How to germinate a seed: stratification
An important stage in the propagation of stone plums is stratification... This is the keeping of the planting material in cold and humid conditions, which allows the seed to germinate, provokes the growth of the embryo and the subsequent rupture of the shell for its access to light.
As a substrate for stratification, you can choose:
- shredded moss;
- sawdust;
- coarse river sand;
- perlite;
- low-lying peat.
 Stratification - keeping the planting material in cold and humid conditions, which allows the seed to germinate
After choosing the substrate, it is moistened and treated with a solution from potassium permanganate and water (5 g / 1 l). The moisture content inside the substrate must be at least 60%.
You can squeeze it in your hand to test it. If everything is normal, a small amount of moisture will be released, and the substrate will retain its shape.
Before placing in the substrate, the bones are kept in water for 3 days.filling them in half the height.
During this period, it is necessary to change the water every day and turn the bones over. When the seeds are completely immersed in water, oxygen access to the embryo is disrupted, which can lead to its death.
Soaking promotes swelling of the membranes and washes out inhibitors - substances that delay the germination of embryos.
In the tank for stratification, it is necessary to make side holes for air exchange, this will prevent the appearance of fungal diseases. For the same purpose, the bones are placed at a distance from each other. The surface is covered with polyethylene or glass.
Correct stratification - maintaining a certain temperature for periods. These are the stages:
- Warming up... Excerpt of seeds in the substrate for 15 days at a temperature of + 15 ° - + 20 ° C. It is optimal to place the container in any warm place.
- Cooling... The temperature drops to + 1 ° - + 5 ° С. This period lasts 60-80 days. The container with bones is removed to the lower shelf of the refrigerator.
- Pre-sowing... The temperature is lowered to 0 ° -1 ° C for 20-35 days. The container can be stored in a cold basement. The level of germination strongly depends on the observance of this stage.
In this period it is necessary to control moisture... When mold appears, the substrate is sprayed with a 3% potassium permanganate solution.
The readiness of the bone for planting can be judged on the cracked shell. It is important to plant it as quickly as possible in a comfortable place of temporary development.
Growing a seedling
To plant seeds for seedlings, you need prepare a convenient pot with a diameter of at least 20 cm. The containers are disinfected with a 3% formalin solution.
At the bottom, a drainage layer of expanded clay or broken brick with a layer of 3-5 cm is required, a thin layer of coarse sand and charcoal is laid on top. Thus, the drainage of excess moisture and aeration of the roots is ensured.
An ideal soil mixture is a combination of components that create all the conditions for a favorable development for the roots of seedlings. This is an optimal air exchange, moisture capacity and balance of trace elements, which together suppress the growth of fungi and mold.
These properties are possessed by a substrate of components mixed in equal parts:
- humus;
- leafy earth or peat;
- vermiculite.
0.5 part of calcined river sand or perlite is added to the soil mixture.
The substrate is placed in a pot and watered abundantly. The bone is placed in the center of the container., deepening by 5 cm. After that, the pot must be wrapped in polyethylene. This creates a mild greenhouse environment and the sprout will emerge within 45 days.
 For the correct development of the seedling at home, it is necessary to maintain optimal conditions for lighting, watering, feeding
During this period, the container must be ventilated every day, lifting the covering material. Moistening is done with a spray bottle every other day.
For the correct development of the seedling at home, it is necessary to maintain optimal conditions:
- Lighting... The container is placed on a well-lit windowsill without direct sunlight on the seedling. The ideal option is the southwest direction. In darkened rooms, it is advisable to install fluorescent lamps or enhance the reflection of sunlight by side mirrors.
- Microclimate... The optimum temperature for the seedling is + 20- + 25 ° С. It is important to monitor the humidity of the air. In dry rooms, the air around the pot should be sprayed more often.
- Watering... Abundant but rare. It is enough to moisturize twice a week. The water should be at room temperature and must be settled. A tray of water can be placed under the pot until the substrate is completely saturated with moisture.
- Top dressing... From the moment the first shoots appear until the end of the growing season, it is necessary to make three additional fertilizing with nitrogenous fertilizers. To do this, you can use a solution of ammonium nitrate and water (30 g / 10 l). Approximate consumption per plant is 100 ml.
- Picking... In the period from the cotyledon state to the appearance of two true leaves, you need to pinch 1/3 of the root length. This activates the formation of a strong and branched root system. After that, the seedling is planted in a new nutrient substrate, watered abundantly and shaded.
So that a wild culture does not grow from a seedling, it is transplanted into a new soil mixture and into a wider container every three months. A young tree can be transplanted into open ground one year after planting the seed.
Pre-hardening... A week before planting, the seedling is kept in the fresh air for 3-5 hours every day.
Transplanting a seedling into open ground
Ideal for planting plums a well-lit area with a gentle slope facing south or southwest. In such an area, there is good aeration and stable heating of the soil.
On a low-lying area, you will need to form a hill 50 cm high and a base width of 100 cm.
Groundwater should be below 3 m, otherwise anaerobic conditions are created for the roots, which lead to rot and impede full development.
 A plum sapling can be transplanted into open ground one year after planting the seed
Preparing a site for a future tree
If a seedling transplant is planned for the spring, the plot for the fruit tree is prepared in the fall.
For autumn planting, this must be done at the beginning of summer.... During this time, the soil will settle, structure, and complex compounds of minerals will take easily digestible forms.
The site must be dug up 35 cm and fertilized per 1 m2:
- manure or compost 6 kg;
- superphosphate 60 g;
- potassium salt 30 g.
After that, a planting pit is formed, the quality of which determines the first 2 years of development of the seedling. The optimum depth of the pit is 60 cm, and the diameter is 80-100 cm. To minimize the strong shrinkage of the soil, the pit walls are formed vertical.
The upper part of the soil removed from the pit is deposited separately; it will be needed to form the substrate. At a distance of 30 cm from the center of the pit, a stake is inserted, a seedling will be tied to it.
Soil mixture for filling the hole:
- manure 2 buckets;
- river sand 2 buckets;
- superphosphate 30 g;
- potassium sulfate 20 g
The rest is complemented by deposited sod land. At high acidity, 300 g of limestone is added to the soil.
How to plant a seedling correctly
At the bottom of the landing pit form a hill from the prepared soil mixture. During the placement of the seedling, it is necessary to spread all the roots over the surface of the substrate. Bends in the upward direction should be avoided.
By adjusting the height of the location, you need to focus on the root collar, it should be 5 cm above the soil level... This prevents its subsequent deepening under the influence of shrinkage.
 When planting a plum sapling, you need to focus on the root collar, it should be 5 cm above the soil level
When falling asleep plum roots it is important to prevent the formation of voids... To do this, it is necessary to periodically shake the stem of the seedling.
After planting, the surface of the soil is compacted, the seedling is watered abundantly and tied to the stake with soft material. The trunk circle is mulched with sawdust or peat.
Care after landing in the country
In the first two years of development of a young plum, fertilizers are not needed.... For proper nutrition of the tree, there are enough elements that are introduced into the planting pit. The trunk circle must be kept in a constantly loose state, removing all weeds.
Young trees react especially painfully to damage to the bark. Therefore, it is not necessary to allow friction between the barrel and the stake.
It is important to monitor the appearance of overgrowth at the level of the trunk or from the roots. Excess shoots take away a lot of nutrients and the ability of the seedling to develop fully, so they are immediately cut out.
Young trees are especially attractive to caterpillars and aphids. Their activity is strongly reflected in the growth of the seedling. In case of moderate damage, the plum can be washed with an ash-and-soap solution.
If the defeat of the seedling is large-scale, you need to apply chemicals: "Karbofos", "Actellik", "Aktara".
The seedling needs provide regular hydration... Water must penetrate up to 40 cm deep. The frequency of watering must be adjusted based on climatic conditions. It is important not to allow severe drying out, to which the plum reacts very painfully.
 A young plum requires care: watering, protection from insects, preparation for winter
Young plums must be carefully prepared for the first winter.... A layer of mulch is laid at least 30 cm. All branches of the seedling are grouped and tightly fixed to the stake.
Until December you need wrap the plum stem with warm and breathable material... This will prevent the appearance of frost cracks - cracks that appear under the influence of temperature changes. Additionally, the sapling will warm up by pulling up the snow.
Young trees are attractive to rodents, which are especially activated in the winter season in search of food.To protect the seedling, it is covered with spruce branches from all sides. Additionally, they are treated with a mixture of mullein and clay (1: 1), the pungent smell of which repels pests.
Plums planted from a stone begin to bear fruit 5-6 years after planting. Fruiting and the quality of the fruit also depends on the attentive attitude to the tree during all periods of its development.
Therefore, it is important to follow all the rules of care, periodically carry out preventive work and inspect the tree, the appearance of which always signals internal problems.
Plums are used for making jams, compotes, baked goods, main courses, as well as fresh, so this plant is sure to be in the collection of every amateur gardener. Below we will tell you about how to grow a plum from a stone and into what stages this laborious process is divided.
Seed collection
In order for an event with the cultivation of a plum tree at home to be successful, you first need to select and properly prepare seed material. When buying plums for sprouting, pay attention to the origin of the product. Imported fruits are unlikely to work in an unfamiliar climate. It is best to buy ripe and soft plums from local residents in the markets in order to immediately increase the survival rate of the future tree.
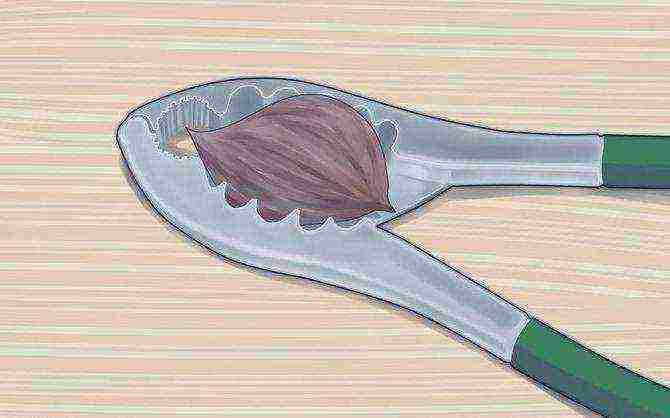
Use the pulp of the fruit as directed, and leave the bones. They will need to be thoroughly rinsed and completely cleaned of pulp residues. Then place the bone on a windowsill or any other place where it is sunny, dry and warm. The knuckles will dry out for several days. Now it's time to get the core, the seed itself. Use a nutcracker to do this. Be careful not to crush the seed.
In order for the plum from the seed to germinate with a high degree of probability, the seeds will need to be checked for suitability. Take a glass of water at room temperature and place the seeds in it. Fertile seeds will fall to the bottom, while the pacifier will remain floating on the surface.
Video "How to grow a plum yourself"
How to germinate a seed correctly
The first step in germinating plum tree seeds at home is called stratification. This is a slow germination method at low temperatures. It is necessary to carry out the procedure before winter, no later than November, so that the seeds are ready at the time of planting in open ground. Take a tight plastic bag, container, or glass jar and fill the container with fertile compost.
The soil should be moist, but not wet. Now put the seeds in the jar and shake it well. Such manipulation will help to make the soil loose and evenly distribute the seed in the ground. The prepared container with seeds is sent to the refrigerator with a temperature of + 2- + 4 ° C. Thus, future plums should be stratified for 5-6 months. Prepared seeds are planted in mid-May.
Now you need to correctly select and prepare a site in the garden. The place should be comfortable, sunny and quite spacious so that it is convenient to mulch and cover young shoots with burlap or foil in case of frost. It should be noted that temperatures below 0 ° C have an extremely negative effect on tree sprouts.
The land must first be fertilized to a depth of 30-40 centimeters. For 1 square meter of land, you will need 50 grams of superphosphate, 50 grams of potassium salt and 2-3 kilograms of humus. The sowing depth should be about 6-7 centimeters, and the distance between the seeds should be at least 5-6 meters.In the prepared holes, carefully place the seeds that were stored in the refrigerator all winter. Until the moment of disembarkation, they should already have elastic white roots. Fill the holes with soil and water well. In the future, make sure that the landing does not dry out and is protected from all kinds of negative external factors.
From seed to tree
First of all, it should be noted that at least 4-5 years will pass from the moment of harvesting the seed to the receipt of the tree. The grown plant will begin to bear fruit only for 5-6 years. That being said, the first harvest will most likely not impress you with its quality. In the first year of fruiting, plums grow small. But if they did appear, then in the coming years the tree will certainly delight you with juicy and sweet fruits.
When the first shoots appear on the surface of the earth, it is important to ensure that the plant forms an even trunk. Shoots, which are still growing by autumn, are pinched at the beginning of September so that the tree can more easily endure the winter. In cold weather, a young plum must be insulated. It is better to postpone the formation of the crown until the first bountiful harvest appears.
When growing a plum from a stone, there is always the possibility that it will not turn out to be a fruitful cultivated tree, but a wild game with small and sour plums. To prevent this from happening, experienced gardeners recommend germinating seeds first in a pot and carrying out several transplants throughout the year. Only after that, the strengthened tree is planted in open ground.
Video "Plum in a cold climate"
This video will show you how to grow plums and other fruit trees in cold climates.
.
Man was one of the first to domesticate the plum tree. Growing plum from stone is a fascinating process. The main thing is to choose the right planting material and follow the rules of care.
The seed for planting must be taken from fully ripe plums.
Selection of planting material
Reproduction of plums in a vegetative way allows you to get the same daughter tree, and when grown from a seed, the same fruits as in the mother plant cannot be obtained. The reasons for this phenomenon lie in cross-pollination. Insects carry pollen from other plant varieties, which alters the genetic characteristics of the plum.
Whether it is possible to grow a plum from a stone so that it gives full fruits will depend on the planting material. Sometimes, planting a seed from a sweet large fruit, you can sprout a wild plum completely unsuitable for eating, and sometimes it does not bear fruit at all.
In order for the plum from the stone to delight the gardener with tasty juicy fruits, it is necessary to give preference to planting material from parent plants that are capable of suppressing all the genetic characteristics of other varieties during cross-pollination. Ussuriyskaya, Chinese and Canadian plums have such features. In cold regions, it is better to give preference to any zoned variety.
The germination rate of the planting material depends on the degree of maturity of the fruit. Only when fully ripe, embryos are formed in the bones that can give strong shoots. Better to choose two or three bones. This will guarantee the most productive germination: it will allow you to grow the strongest seedling for subsequent planting in open ground.
Bone stratification
Before growing a plum in the country, you need to stratify. The stratification process involves keeping the seed in a cool, humid environment over a period of time. This allows you to increase the plant's resistance to temperature extremes and quickly germinate the culture. The seed will tend to the source of light, so it will break through the protective shell faster.
To carry out the manipulations, you will need to select the soil. It is recommended to give preference to low-lying peat, sawdust or coarse river sand. Then you need to bring the moisture level inside the substrate to 60%. For this, the soil is treated with a weak solution of manganese and moistened.
To check if the soil is wet, squeeze it in the palm of your hand. If a small amount of liquid is released, and the substrate retains its shape, then you have managed to achieve the desired effect.
The bones must be kept in water for 72 hours until they are placed in the ground.The seed should be half covered with water. It must be turned over regularly. This process removes growth inhibitors and increases the volume of the membranes.
In the stratification pot, drainage holes must be made not only from the bottom, but also on the sides. This will improve air exchange and prevent the seed from becoming moldy. The bones should be placed at a distance from each other, and the vessel should be covered with polyethylene.
Stratification is divided into 3 stages.
- Warming up.
- Cooling.
- Presowing treatment.
For 15 days the seeds are kept at a temperature of 15–20 ° С, 60–80 days at a temperature of 1–5 ° С, for 20–35 days the temperature is kept from 0 to –1 ° С. Remember to control humidity. If mold appears, treat the soil with a 3% manganese solution. When the shell is cracked, the seed must be repotted quickly.

After pinching, the seedling is transplanted into another pot with fertilized soil
Growing a seedling
Before planting a plum seed at home, you need to prepare an appropriate pot. Its diameter must be at least 20 cm. The containers must be disinfected with a fungicidal agent. Don't forget about the drainage layer. For this, expanded clay or crumbled brick is suitable.
How to grow a plum from a stone:
- lay a layer of coarse sand on expanded clay;
- followed by a layer of soil mixture of humus, peat and vermiculite;
- the seed should be deepened into the soil by 5 cm;
- after that, it is necessary to create a greenhouse effect by wrapping the pot with plastic.
In order to get a full-fledged sprout after 45 days, the container is installed on a well-lit windowsill. The ideal temperature range is 20–25 ° С. Watering 1-2 times a week, focusing on the humidity of the room. Use water at room temperature, separated. It is better to water by means of soldering. To do this, place the pot in a container filled with water and hold it there for 20 minutes.
When the first shoots appear, you can start feeding the plants with nitrogenous fertilizers. Until the end of the active growing season, you need to carry out 3 dressings. One plant will need 100 ml of ammonium nitrate dissolved in water. Alternatively, wood ash can be used.
At the moment of appearance of two defective leaves, pinch the sprout. This will improve the branching of the root system. After that, the seedling must be planted in a new, pre-fertilized soil, slightly covered from the sun to allow it to recover.
At home, the transplant is carried out every 90 days. Hold the pot 2-3 fingers wide each time. The tree can be transplanted to an open area after a year.
Transplant to open ground
A plum tree is best planted in a well-lit area with good soil aeration. The ideal option is the southwest slope. If you are going to plant a tree in a lowland, then form a preliminary hill 50 cm high, with a base width of 1 m. It is not recommended to plant a plum in places where groundwater accumulates close.
Preparing a site for a future tree
After growing the sprout at home, the transplant can be carried out in open ground in the spring or autumn. The land on the site must be prepared in advance, 4–6 months before the transplant.
Dig the ground 35 cm deep. Then add organic fertilizers, superphosphates and potassium salt.
Start shaping the hole. Its depth should be at least 60 cm, diameter is about 1 m. Form sheer walls in the hole to reduce the risk of soil shrinkage. At a distance of 30 cm from the hole, place a peg to which you will tie the seedling.
You will need to mix the earth to fill the hole. Components:
- compost;
- coarse sand;
- superphosphates;
- potassium sulfate;
- soil taken out of the hole during digging.
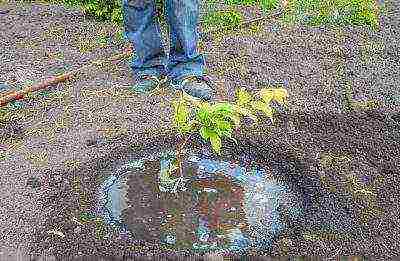
After tamping the earth into the hole, pour the soil abundantly
The correct planting of the seedling
Before transplanting, for a week, you need to harden the culture so that it does not die from the temperature drop outside. To do this, periodically expose the pot with the sprout to the street, first only during the day, then in the evening and at night.
It is also necessary to properly transplant the plant into open ground so that it can develop a strong root system and bear fruit in the future. Make sure that all the roots are straightened and not wrinkled when immersed in the hole.
Focus on the position of the root collar. It must be placed 5 cm above the level of the soil mixture. When filling the hole with soil, periodically shake the stem to avoid the appearance of voids at the roots. Compact the surface of the soil and sprinkle with plenty of water. Then tie up the sprout. Mulch the soil around the trunk with fresh grass or peat.
Care after landing
For the first two years, the tree does not need to be fertilized. He will have enough of those nutrients that you introduced into the soil before planting. Loosen and mulch the soil after each watering. Remember to remove the weeds. Watering is carried out depending on the dryness of the climate, moisture should penetrate into the soil by 40 cm. Do not allow it to dry out, otherwise the plant will not be able to bear fruit in the future.
An insecticide is used to control caterpillars and aphids
Protect young trees from mechanical damage. If the bark is damaged, the plant begins to ache and may dry out. In time, carry out pinching of excess shoots that break through at the root or at the level of the trunk.
If caterpillars and aphids appear in small quantities, treat with soapy water. If there are more pests, use products such as Karbofos or Aktara.
Before wintering, the plum must be carefully prepared. Lay sawdust around the trunk, the thickness of their layer should be 30 cm, cover with dry leaves on top. Wrap the trunk with a warm cloth that allows air to pass through well. If there are snowy winters in your region, a snow mound will help to additionally insulate the plum.
Conclusion
Growing a plum seed in your home is a painstaking job. But, if everything is done correctly, the tree will bear fruit abundantly and delight the eye with its greenery. The culture is quite finicky, so decide in advance on the landing site and take care of reliable insulation for the winter.
Subscribe Be aware of new products on our site


