Content
- 1 Basic requirements for growing
- 2 Kiwi - growing at home
- 3 Features of vegetative reproduction of kiwi
- 4 How to get a big harvest?
- 5 Kiwi at home
- 6 Planting and transplanting procedure
- 7 How to plant a kiwi stalk
- 8 Pruning guidelines
- 9 Other important nuances of caring for a vine
- 10 Diseases and pests threatening kiwi
- 11 Reviews about growing kiwi
- 12 Step one - preparing the seeds
- 13 Step two - planting seeds
- 14 The third step is planting germinated seeds in the ground
- 15 Home care for kiwi
- 16 Watering and lighting
Almost all growers seeking to improve their own skills at one point decide to grow fruit-bearing crops, such as citrus fruits, coffee or vines. And many are wondering if it is possible to start growing kiwi at home. In reality, this is quite possible, however, certain requirements must be observed in the process.
How kiwi appeared: an interesting fact
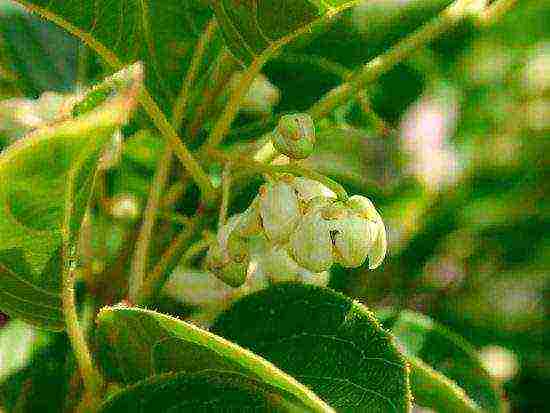
Kiwi is also known as Chinese gooseberry. And in order for this culture to begin to bear fruit, you need to simultaneously grow two varieties of plants - male (required for pollination) and female. If you plan to grow with seeds, then be prepared to wait for the flowering period, because that's when you can determine the gender of the vine. In most cases, kiwi blooms in the sixth year of life.
We grow kiwi at home
Basic requirements for growing
So, the growing process is not difficult, but you will have to show accuracy, care and patience.
How kiwi is grown
You can grow kiwi:
- cuttings;
- seeds;
- accessory buds of the roots.
All methods have their own nuances, advantages and disadvantages, which we will get acquainted with a little later. However, there are a number of general rules that apply to kiwi breeding.
Kiwi is a distant relative of grapes, and therefore uses a similar cultivation technology here. The described culture is warm and light-requiring, therefore it must be located in a well-lit place (preferably without drafts). It should be remembered that the direct rays of the sun can lead to burns of foliage, therefore, the light should fall from the side. An even better option is vertically directed artificial lighting.
Kiwi from seed
In the process of development, the pots should be periodically scrolled clockwise (every two weeks, 10-15 °). This will provide the plants with a straight silhouette, and the crown will turn out to be dense and uniform.
Note! There are many varieties of kiwi, but, characteristically, almost all of them are suitable for growing at home.
Kiwi varieties
Yellow kiwi
It should also be remembered that kiwi is a dioecious crop, and therefore one male and at least two or three female plants are required for normal fruiting. If kiwi is grown from seed, then about 80 percent of the seedlings are male, so there should be as many of them as possible.
Now let's look directly at the workflow.
Kiwi - growing at home
It is better to start growing kiwi in early spring, because then the highest germination of seeds is observed. This is a very important point, so do not delay sowing. Also consider the fact that kiwi naturally grows in regions with long and warm summers, so the conditions for the plant should be as comfortable as possible.
Traditionally, the process begins with the preparation of everything needed.
If you really want to grow kiwi at home, make sure you have enough free space.
Stage one. We prepare everything you need
To grow vines, you must prepare:
- one ripe kiwi fruit;
- neutral or slightly acidic soil intended for citrus crops (you can purchase it at any specialized store);
Citrus primer
- thoroughly cleaned river sand;
- mini greenhouse (you can use PET film instead);
Mini greenhouse
- fine-fraction expanded clay - it will be used for drainage.
"Shop" soil can be replaced with a self-prepared soil mixture consisting of peat, sand and black soil (in equal proportions). By the way, when you dive seedlings into pots, this soil mixture will also work well, only there should be less peat in it.
Stage two. Preparing the seeds
Cut the fruit in half
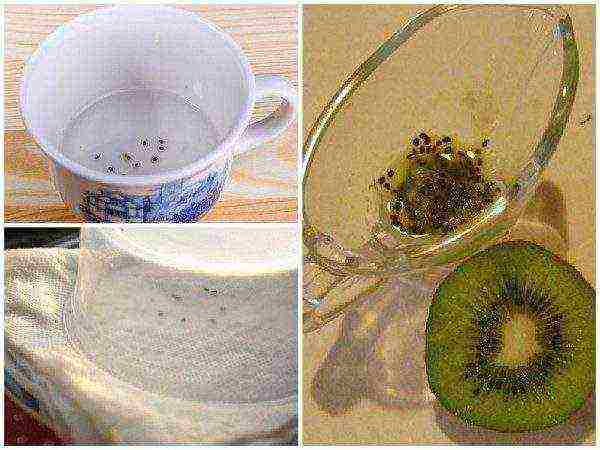
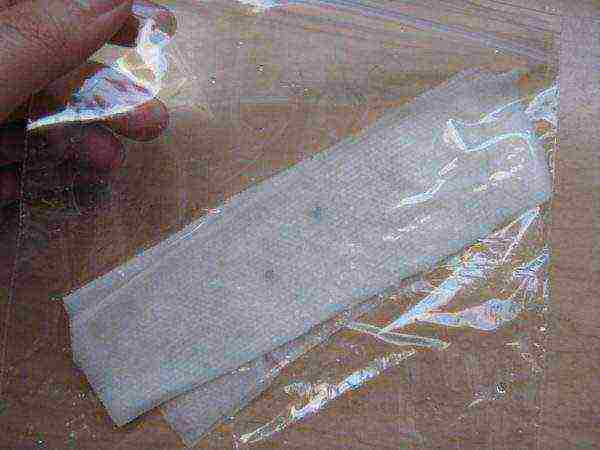
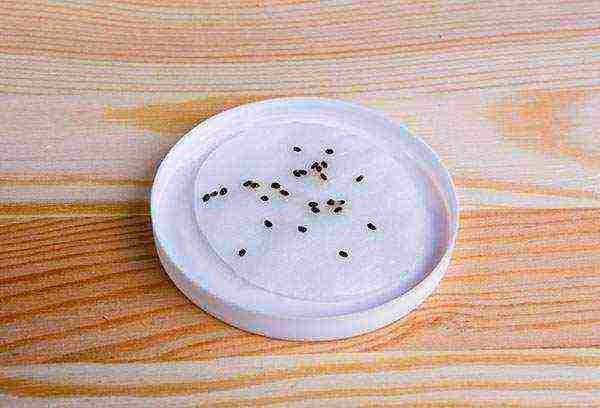
Take a ripe fruit and cut it in half. You can eat one part, and extract about 20 grains from the other. Peel the pulp from the grains (otherwise they will rot in the ground), but do it carefully, do not damage the shell. To simplify the procedure, you can throw the seeds into water, mix them well and leave to settle for a while. Repeat the process two to three times to minimize the risk of seeds rotting.
Then spread the seeds on a napkin and dry for four hours.
Collection of kiwi seeds
Stage three. Germinating seeds
Step one. Place a piece of cotton wool in a saucer and pour boiling water over it. There should be enough water so that the cotton wool is saturated with it, but the saucer should not be poured.
Step two. Cover the saucer with a piece of plastic and place in the lightest spot in your home.
Step three. Remove the film every evening, and return it the next morning, adding a small amount of water (the cotton wool should be wet all the time).
Soak the seeds
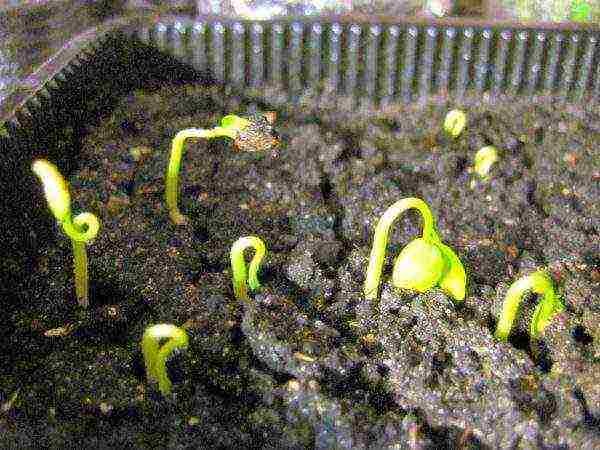
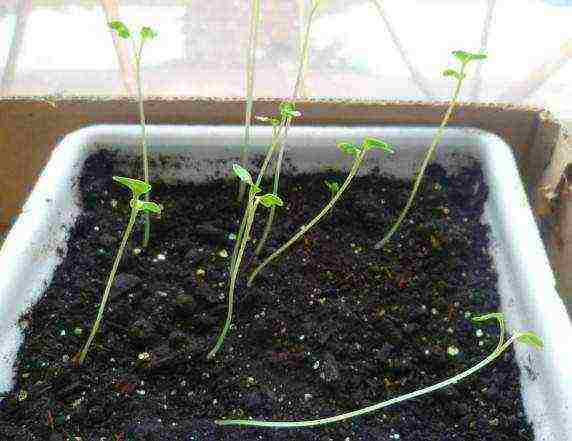
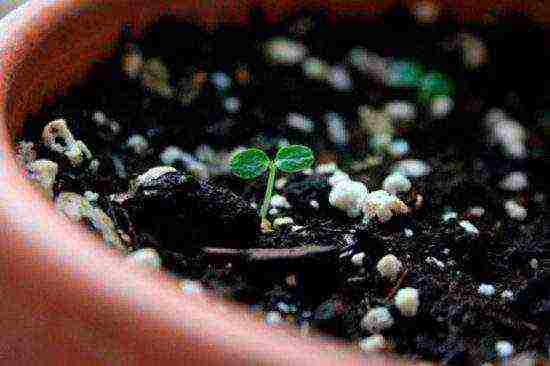
Step four. After about a week, when the first shoots appear (in the form of thin white roots), you should plant the seeds in the soil.
Germinating seeds
Stage four. We transplant seeds into soil
As for the soil, then it should be the same as indicated in one of the previous paragraphs. Pour it into prepared containers or pots (the bottom must be previously covered with expanded clay drainage layer) and make small holes on the surface (the depth should not exceed one centimeter). Place the seeds in the holes, sprinkle lightly with soil, but do not tamp.
Cover the containers with foil or glass and place in a warm place. Alternatively, you can put them in a mini greenhouse. Thereafter, water the ground daily. It should not dry out, otherwise the sprouts will simply die. When watering, you can use a spray bottle, or you can place the pots in a sump and pour water there.
Seed-grown kiwi sprouts
Note! When the first shoots are formed, start accustoming to fresh air. To do this, remove the glass / film daily, increasing the ventilation time over time.
Stage five. Making a pick
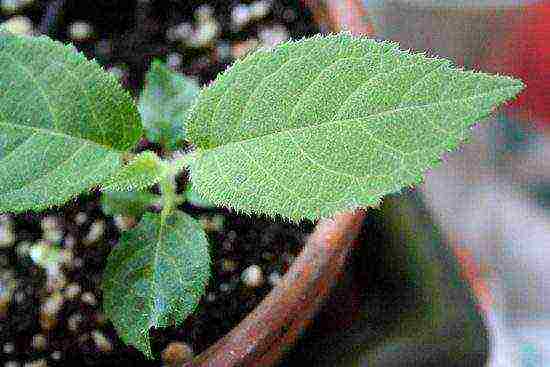
About four weeks after planting the seeds, when there are several true leaves on the seedlings, perform a pick, that is, transplant the plants into individual pots. The soil at this stage, as noted earlier, should already contain less peat, while more sod soil can be used.At the same time, act very carefully, because the root system of vines is extremely delicate and located on the surface, which means that it is easy to damage it.
Kiwi after a dive
What is a transplant for? The fact is that this plant has rather wide leaves, which, as they develop, will shade each other.
Sprouts with large leaves
How to grow kiwi at home
Stage six. Further care
To ensure that conditions are as close to natural as possible, you must adhere to a number of rules. Let's consider these rules in more detail.
Growing kiwi from seeds
Table. Key Requirements
| Humidity | The earth, as we have already found out, should not dry out, so take care of uniform watering. It is preferable to use a spray bottle rather than a watering can - this will moisten the entire soil surface at once, and the plants will not be damaged. It is also advisable to count the number of sprinkler clicks so that each time the amount of moisture introduced is the same. |
| Pinching | Pinch the upper part of the vine from time to time - this will stimulate the formation of lateral processes, and the plant itself will turn out to be stronger. |
| Lighting | Kiwi needs a long day of light, which means, if possible, place containers on windowsills on the south side. If this is not enough, extend the lighting time artificially with a fluorescent lamp. In winter, the lighting should be horizontal. |
| Feeding | Use organic fertilizer - compost or vermicompost. Apply it every year, digging a small trench around each plant beforehand. In this case, when watering, the top dressing will gradually flow to the root system, so that the vines will grow healthy. |
Note! In the summer, additionally apply a complex type of mineral fertilizer. Do this about once every seven to ten days.
Features of vegetative reproduction of kiwi
Seedlings of this culture are grown using the same technology as described above. The only difference is that the seed must be sown in January. Two years later, a kiwi of one or another variety is grafted onto a seedling, which by that time will grow up and get stronger.
Kiwi seedlings
Seedlings before planting in soil
Grafting can be done in the same ways that are used for other plants; in particular, these are:
- budding;
- cleavage with a green handle;
- a similar process, but with a lignified cuttings.
The vine can then be planted in open soil. If the kiwi will be grown indoors, as in our case, then you should take care of a container of sufficient depth (the roots should have a lot of room for further growth).
You can also grow seedlings from rooted cuttings. The disadvantage of this method is the low germination rate in indoor cultivation - there are either few or no plants at all. As for further care, it is the same as when growing by seeds. When the cutting / seedling enters a period of active growth, it will no longer be afraid of low temperatures and can easily adapt to any conditions.
Planted kiwi seedling
How to get a big harvest?
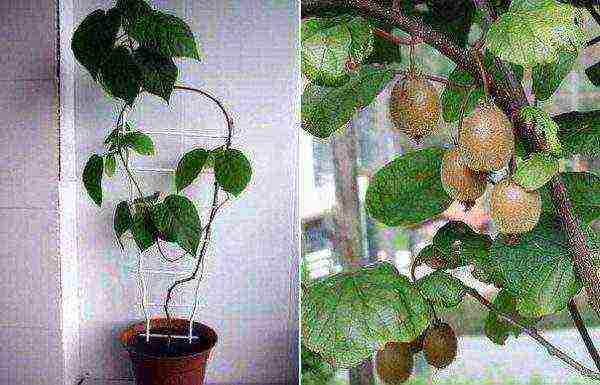
Liana needs to be placed correctly. It needs a lot of space, so it is better to grow it on an insulated balcony. Also organize a support along which the plant will climb, or make a beautiful and original balcony frame out of it. The length of one liana, by the way, can reach seven meters.
Kiwi on the loggia
Note! Pollination should be taken care of to obtain fruit. In natural conditions, insects are engaged in this, in our case, you must do everything with your own hands.
If there are too many male vines, you can plant "eyes" on them from female vines, which will allow you to get fruit. Ideally, five or six females should fall on a male plant, and if the proportions are not correct, then it is better to vaccinate.The “eyes” take root well, thanks to which the yield will increase significantly.
Video - Kiwi inoculation
Also, periodically inspect the kiwi leaves, and for two reasons at once.
- This will allow you to detect the fungus in time and clean the leaves.
- Liana can "become infected" with various pests from neighboring plants, so in addition to inspection, try to place kiwi as far away from them as possible.
With the onset of autumn, cut off old shoots: those branches that have already borne fruit are recommended to be removed. This will free up space for new shoots, and the vine itself will not age and will bear fruit for many years.
Kiwi harvest
If the vine grows on the balcony, then in winter you will have to additionally protect it from frost. To do this, remove the shoots after scrapping and wrap them up. When spring comes, they will sprout more young shoots.
And in conclusion - one more useful advice. For some reason, cats love the branches and foliage of kiwi, so if you have such a pet, then take care of protecting the plant - you can, for example, enclose it with a net. Otherwise, the kiwi may die.
How to wean a cat from walking according to flowers? Ordinary toothpicks will help you.
Seedlings in a cage
Video - Features of growing kiwi
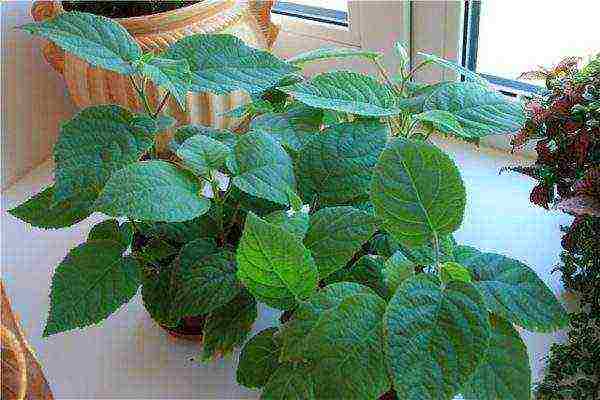
Lemons and oranges grown on the windowsill have long been a surprise. Therefore, amateur flower growers are constantly trying to "domesticate" new crops. You can grow "in captivity" and kiwi. If you set a goal, you can get stable fruit-bearing plants from seeds in a few years.
Kiwi at home
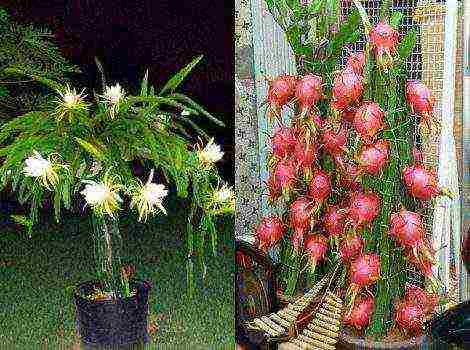
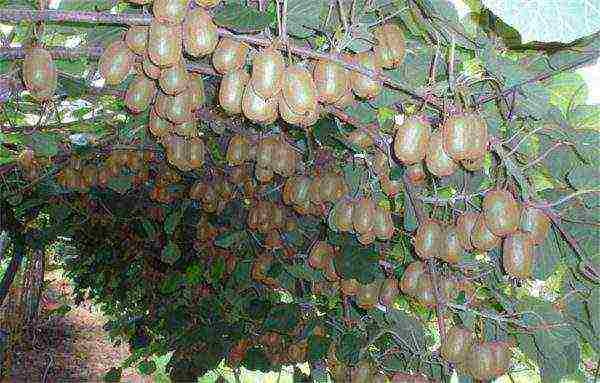
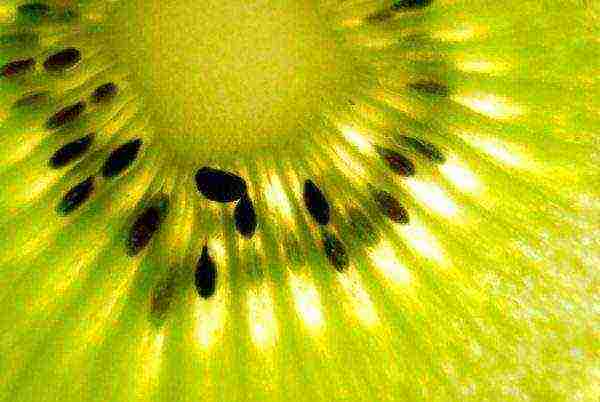
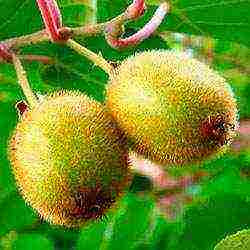
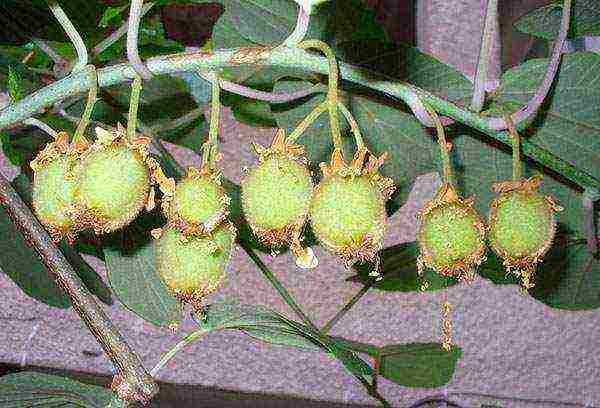
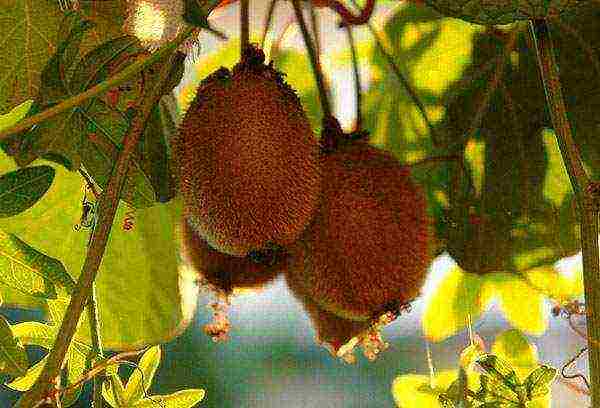
In nature, the kiwi (the plant is known to botanists under the name actinidia chinensis) is a tree-like vine that prefers a tropical or subtropical climate. At the tops of the shoots, whole clusters of large fruits ripen, in appearance similar to very large gooseberries. Depending on the type, they can be smooth or rough to the touch.
In nature, the kiwi vine reaches 7-10 m in length
In principle, there is nothing difficult in creating a microclimate for kiwi that is close to optimal. But the plant is classified as dioecious. This means that for fruiting, you need at least two specimens - male and female. You can distinguish them only during flowering. The former, acting as pollinators, lack a pistil, but there are many stamens. One male plant is enough to pollinate five to six females. Jenny is the only self-pollinated kiwi in existence. But even in this variety, the presence of a number of male plants has a positive effect on productivity.
The presence of a male plant is useful even if the variety is self-pollinated.
Video: how to determine the gender of a kiwi plant
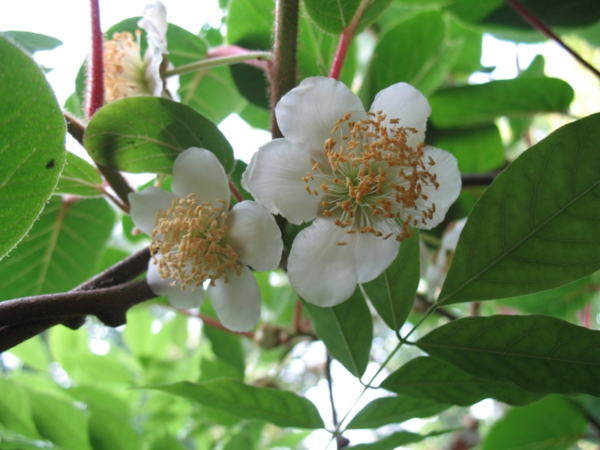
Kiwi flower growers are valued not only for fruiting, but also for flowering, long and abundant. Large five- or six-petalled flowers gradually change color from snow-white to yellowish-cream, lemon or lime.
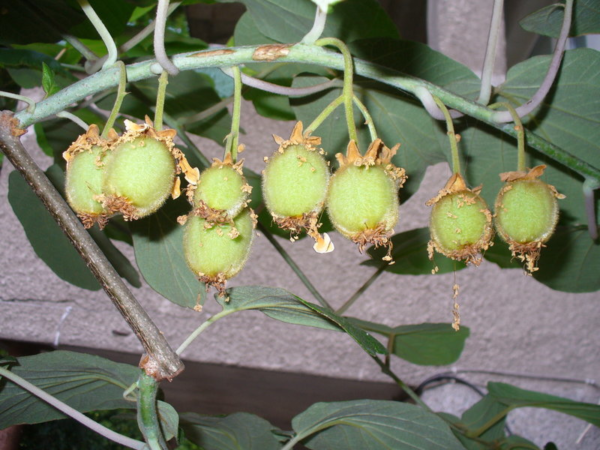
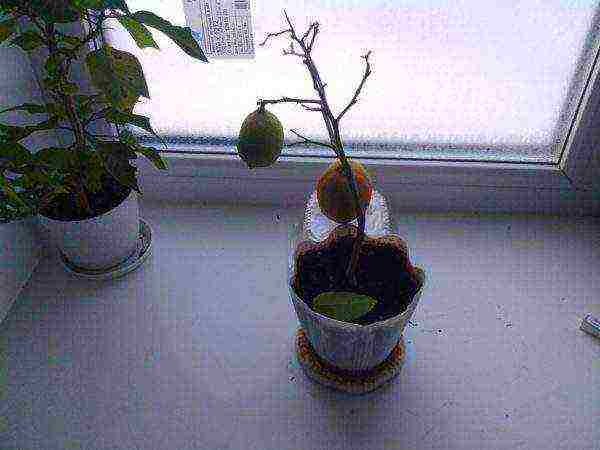
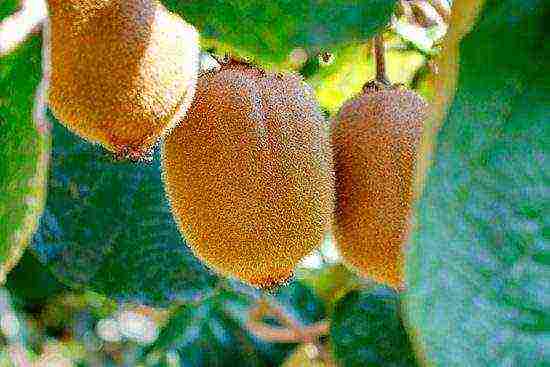
Fruits at home, as a rule, ripen less than the description of a particular kiwi variety promises. But in terms of the content of vitamins, macro- and microelements, taste, they are in no way inferior to those grown in the open air. Ripe fruits are easily separated from the vine. They are stored in the refrigerator, the approximate "shelf life" is one and a half to two weeks.
Homemade kiwis are small but very tasty
There are no problems with obtaining kiwi seeds at home. They can be taken from any store-bought berry. But seedlings grown in this way very rarely inherit the varietal characteristics of the "parent", and the palatability of the fruit leaves much to be desired. Therefore, they are most often used as a rootstock, and any seedling of a certain variety purchased in a specialized nursery acts as a scion.

Viable seeds can be obtained from the kiwi fruit, which can be purchased at any grocery store
Harvesting from seed-grown kiwis will take a long time. As a rule, such plants bloom for the first time not earlier than six years after planting.
It is desirable to obtain planting material from mature and healthy-looking fruits.
For the correct development of kiwi, warmth and sunlight are vital. Therefore, the pot is placed in the brightest place in the apartment, for example, on the southern or southwestern windowsill, periodically (every 2–2.5 weeks) turning it so that the heat is evenly distributed. Cold drafts are categorically contraindicated. Regular feeding (preferably organic) and proper watering are equally important.
In nature, kiwi is a liana, so you need to take care of the support for it in advance.
For some reason, actinidia juice has an effect on cats (and, to a lesser extent, on cats), similar to that of valerian tincture. Therefore, it is worth removing the pot where the cats will definitely not get to it, or surround the plant with a net.

Cats do not eat kiwi leaves and shoots, but they can severely damage the plant, trying to get to the juice, to which for some reason they are very partial
Planting and transplanting procedure
Kiwi cultivation starts with getting the seeds. The fruits must be ripe and without the slightest traces of rot, mold, pest damage. The collected seeds are sown immediately after harvest, the most suitable time for this is spring.
Getting seeds
Kiwi variety does not matter for this. The main thing is that the fruit is mature and healthy in appearance. Ripe berries can be identified by their characteristic delicate aroma. Each kiwi contains over a thousand seeds.
The seeds are prepared for planting as follows:
- Wash the kiwi thoroughly, cut it into 4–6 pieces. Peel off the peel, gently knead the pulp with a fork, turning into a puree
- The resulting gruel is laid out in a deep plate or bowl, poured with water at room temperature. Stir constantly, separate the seeds with your fingers. To completely get rid of the pulp, the water will have to be changed 4–5 times. At the end of the procedure, only seeds should remain in the container. You can wrap the gruel in several layers of gauze or place it in a fine mesh sieve and rinse under running cool water.
It is very important to completely separate the kiwi seeds from the pulp - its remnants can provoke the development of rot
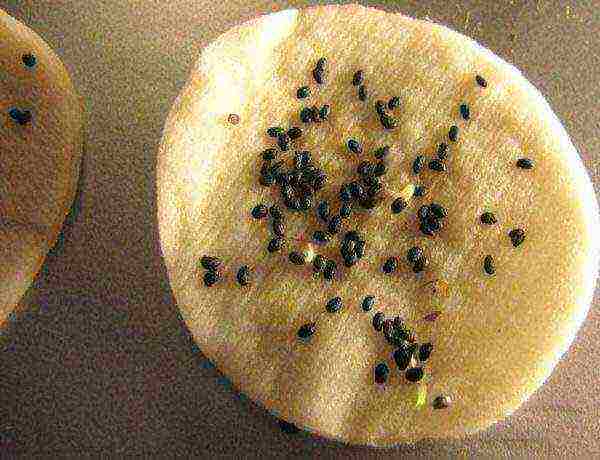
- The seeds are laid out on a paper napkin or cotton towel to dry. After a few hours, they finally dry out, changing color from black to grayish brown.
- A small piece of cotton wool or gauze is moistened with hot water. Instead, you can use a pale pink solution of potassium permanganate (for disinfection) or any available biostimulant (to increase germination). Suitable, for example, potassium humate, Kornevin, Zircon, Heteroauxin, succinic acid, aloe juice.
Pre-germinated kiwi seeds sprout faster
- The seeds are wrapped in damp gauze, put on a saucer, which is covered with plastic wrap. Every day at night it is removed. In the morning, the gauze is moistened again and the "shelter" is restored. After about 7-10 days, the seeds will germinate and can be planted. Another option for pre-planting preparation is stratification. The seeds are placed in the refrigerator for 2-3 weeks. Then they are kept for 10-12 days in the warmest place in the apartment.
For convenience, you can use special bags with a fastener - it is easier to remove the "cover" from the gauze without risking spilling the seeds
Sometimes another method is recommended - for a week during the day, kiwi seeds are kept warm, at night - in the cold.
Preparing for landing
The root system of kiwi is quite developed, strongly expanding in width, but superficial, fibrous. Therefore, there is no point in acquiring a deep pot, shaped like a bucket. The best option is a container that looks like a bowl or salad bowl. A prerequisite is the presence of drainage holes.Of the materials, it is worth giving preference to natural ceramics - it allows air to pass through better, preventing moisture from stagnating.

A bucket-shaped pot can greatly inhibit the growth of vines, so a wide and shallow pot is the best option so that the roots have room to unfold.
Kiwi soil prefers light and loose, but nutritious. A mixture of peat chips, coarse river sand and black soil in a ratio of 1: 2: 3 is well suited for it. You can add 8-10 g of sifted wood ash and powdered eggshells for each liter of finished substrate. Another version of the soil is vermiculite or perlite, peat and humus in approximately equal proportions. If you do not want to prepare the soil mixture yourself, you can look in specialized stores for a substrate designed for any tropical vines.
Peat is an essential component of the soil for kiwi
Planting seeds in the ground
There is nothing complicated in the procedure itself. But there are also some nuances that you need to familiarize yourself with in advance.
- Expanded clay or other drainage material is poured onto the bottom of a clean pot, creating a layer at least 3-4 cm thick. Above is a disinfected substrate, filling about 2/3 of the container. It can be steamed, heat or cold to sterilize.
- The soil is well moistened by spraying from a spray bottle and leveled. When the water is absorbed, the seeds are sown as evenly as possible. Some growers recommend leaving them on the surface, others advise covering them with a thin (1–1.5 mm) layer of fine sand.
- Once again, the plantings are moderately moistened, the pot is covered with glass or covered with plastic wrap to create a greenhouse effect. To place the container, choose the warmest place in the apartment (temperature not lower than 25–27 ° C). It is also desirable to have at least 12-14 hours of daylight hours and bottom heating. To avoid the appearance of condensation, the "greenhouse" is opened daily for 3-5 minutes for ventilation. As it dries, the soil is sprayed from a spray bottle. It should be slightly damp at all times, but not wet.
- Seedlings appear massively and quickly enough. 2-3 weeks after this planting is thinned out, getting rid of the weakest seedlings.
- When the kiwi seedlings reach a height of 10–12 cm (after 4–6 weeks), they are planted in individual containers. Such plants already have 2-3 pairs of true leaves. A suitable soil is a mixture of peat, turf and sand in approximately equal proportions. In the process of picking, you need to try to injure the roots of the plant as little as possible. They are very delicate and fragile in seedlings. At the same time, you need to take care of the support. If you stick it into the pot later, again there is a risk of damaging the roots.
Kiwi seeds are distinguished by good germination, but then many sprouts may die, it depends on the conditions of their maintenance
Since the kiwi vine differs in its growth rate, and the purchase of pots "for growth" is not recommended for any indoor plants, young specimens will have to be transplanted quite often, every 5-6 months. For the first few weeks after the procedure, it is recommended to rearrange the plant from the windowsill, removing it where it will definitely not be exposed to direct sunlight. For adult kiwi, the heat is quite comfortable, but young vines can greatly slow down growth.
A kiwi transplant is carried out as needed. As a rule, once every two years is sufficient. The diameter of the pot is increased by 3-5 cm. It is carried out by the transshipment method, trying to destroy the earthen lump as little as possible and injure the roots. They are very fragile in the plant.

Home-grown kiwis (especially young specimens) need frequent transplanting - the vine grows fast enough
Video: collecting kiwi seeds and planting them
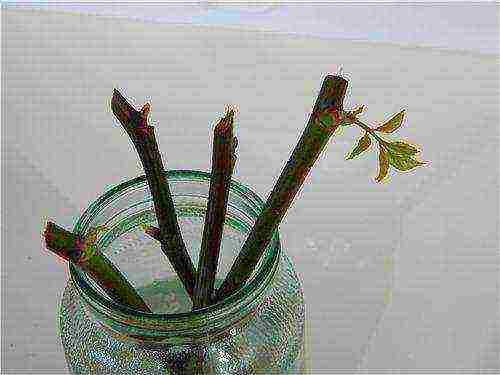
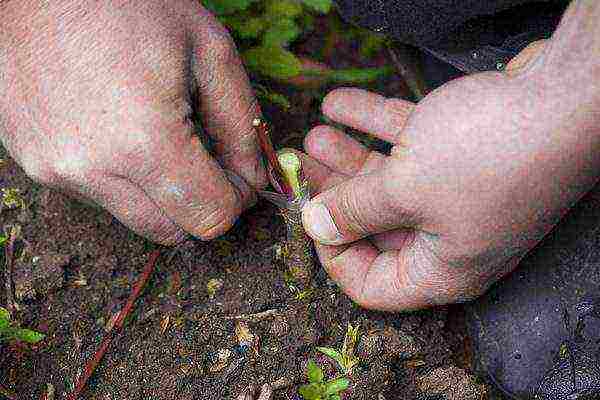
How to plant a kiwi stalk
Most often, kiwi plants grown from seeds at home are not used for harvesting, but as a rootstock for "cultivated" varieties. Only seedlings aged three years and older are suitable for this. You can plant kiwi in any way. The results are good in each case.
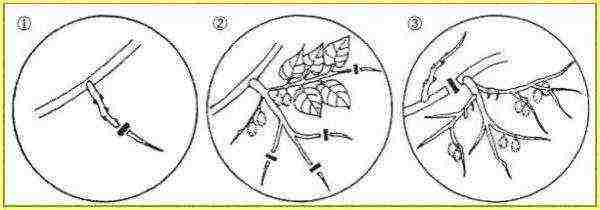
Cleavage grafting
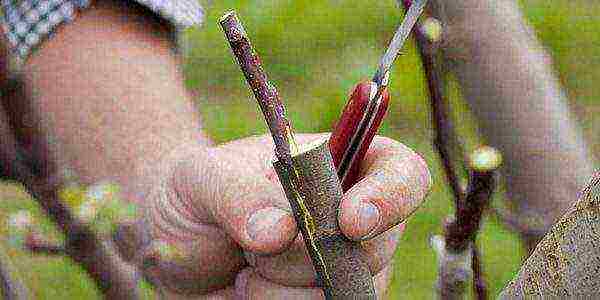
A lignified kiwi stalk is part of an annual shoot, cut from an adult vine of a certain variety in winter. For a plant, such pruning is a mandatory procedure. Green cuttings are obtained by cutting off the tops of the shoots formed in this season in the summer.
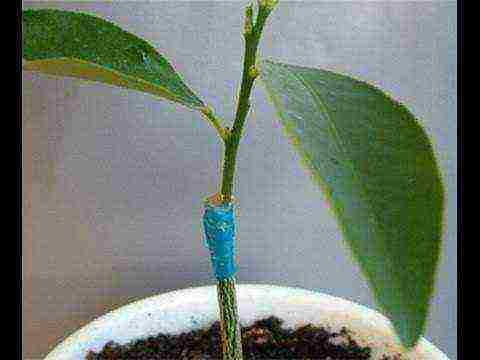
It is very important to securely fix the entire structure during the grafting process.
The optimum length of the cutting is 8–12 cm (2-3 pairs of leaves), the thickness of the shoot from which it is taken is 7–10 mm. It should be absolutely healthy, the bark should be smooth, uniform, elastic and intact. The best time of day for cutting a cutting in summer is early morning.
To obtain planting material, a sharply sharpened disinfected tool is used - scissors, a knife, a pruner. The latter option is preferable, since it minimally traumatizes the shoot tissue, the bark does not crack or crumple. The lower cut is made at an angle of approximately 45º, the upper (straight) cut is 8–10 mm above the last kidney.
The easiest way is cleft vaccination. In this case, the cuttings are harvested in the fall and buried in the snow for the winter. The procedure is carried out in mid-spring.
- The bases of the cut cuttings are placed in a container filled with water at room temperature for about a day. Their tops are covered with a damp cloth or plastic wrap. After a day, the cuttings are transferred from the water to a solution of any root formation stimulator prepared according to the instructions. After 18–20 hours, they are ready to be vaccinated.
Parts of the shoots should be submerged in water about half.
- The seedling rootstock is shortened to a length of 3-5 cm, making an even horizontal cut. In the middle, perpendicularly with a scalpel or razor blade, cut a gap 2.5–3 cm deep (the so-called split).
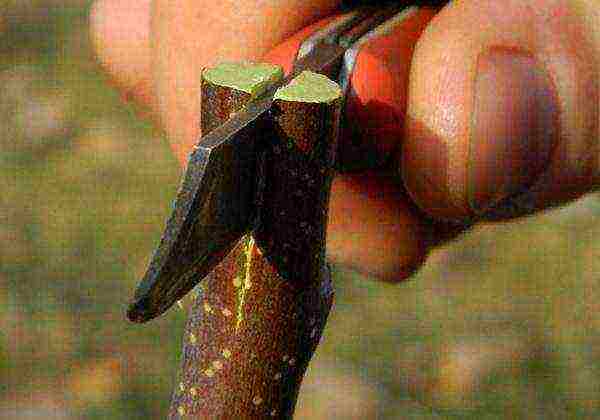
It is necessary to ensure that the split is not too wide - the stalk should enter it with some effort
- A 12–15 cm long stalk, approximately the same thickness as the rootstock shoot, is cut from the bottom on both sides at an angle, forming something like a wedge 3–3.5 cm long. It should start as close to the lower bud as possible.
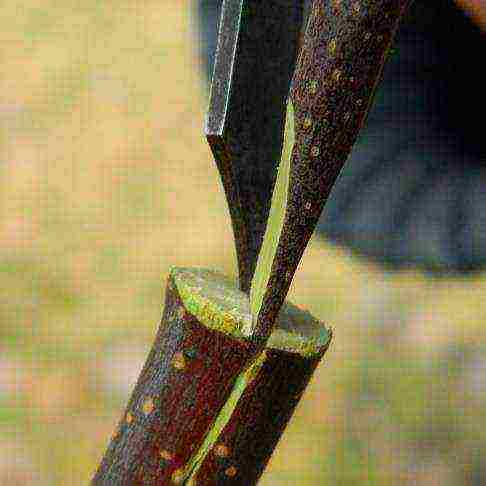
The wedge shape is necessary for the most convenient entry of the scion into the stock
- The graft is inserted into the rootstock split. Part of the cut on it should remain in the open air. The cut off part of the cuttings promotes faster accretion of the scion and rootstock.
It is very important to carry out the procedure with clean hands, otherwise the cut may become infected.
- The junction of the shoots is wrapped with plastic tape in several layers. When the callus appears, the winding is removed.
Electrical tape or cling film will help protect the junction from negative effects.
Video: how to graft a stalk correctly
Another common method is budding. This is essentially the same vaccine. The difference is that in this case, not a whole stalk is used, but only one growth bud, removed from it along with a thin layer of wood. The simplest option is budding in stock. The bud cut from the scion plant is combined with the bark-cleared area on the rootstock vine. Some growers argue that in order for the parts to grow together, a cruciform incision with a depth of 2–4 mm is generally sufficient.

The budding procedure is fundamentally no different from vaccination
Video: budding process in stock
Pruning guidelines
Liana kiwi is distinguished by its growth rate, so pruning for it is a mandatory procedure. Such plants look much more aesthetically pleasing and neater, bear fruit more abundantly. If the growth of a vine is not limited in any way, it can stretch up to 7-10 m in length. Keeping such a plant in an apartment is completely impossible.
For seedlings that have grown to a height of 25-30 cm, pinch the top, removing 2-3 last buds. This stimulates the plant to branch more intensively.But an overabundance of green mass is harmful to the plant - all its strength goes to its nutrition, so the fruits are not tied at all or fall off long before ripening.
An adult kiwi plant at home should consist of 5-7 shoots, starting at a distance of about 45-50 cm from the base of the stem. A dense growth is constantly formed on them, which will have to be shortened throughout the growing season. It is impractical to preserve it, since only the lower 5–6 “eyes” of each one-year shoot bear fruit.
There is no point in leaving very long shoots on the kiwi vine: only the lower 5-6 buds bear fruit
Old branches are gradually removed, replacing them with replacement shoots. Usually, a kiwi needs rejuvenating pruning every 5-6 years. If carried out correctly, the productive lifespan of the vine stretches for 40-50 years.
Pruning is especially important when there are several plants close to each other. If it is not carried out, one of them may simply "strangle" the neighbors. Also, removing excess foliage and weak shoots improves air exchange in the crown, minimizing the risk of spreading diseases and pest attacks.
A different method of formation is more often used when growing vines in the open air, but at home such plants look pretty.
- An annual seedling is shortened to a height of 30 cm.
- A year later, to the point of growth, all formed lateral shoots are cut off, except for two (the so-called shoulders).
- When they reach a length of 1 m, their tops are pinched. From all the shoots formed on the "shoulders", 3-4 lateral branches are left, located at an approximately equal distance from each other. They are shortened by cutting off after the fifth or sixth bud.
- During the active growing season, all shoots on these branches and new side shoots on the "shoulders" are immediately removed.
- Having collected the harvest, the fruiting shoots are pinched so that 6-7 new leaves remain above the last berry. The branches on which there were no fruits are shortened to the fifth leaf bud.
- The branches at the age of three are pruned to the point of growth. Soon a new shoot will begin to form from it, which is pinched after five leaves have formed on it.
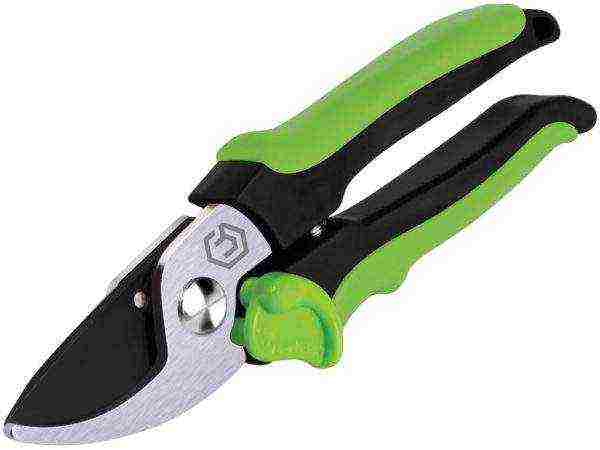
The pruner, like any other tool used to prune kiwi, must be sharpened and sanitized.
A heavily neglected or old kiwi vine can be rejuvenated by radical pruning in the spring. Unlike most indoor plants, kiwi normally reacts to the loss of a significant part of the green mass, quickly recovering and starting to grow after such "stress".
Other important nuances of caring for a vine
Those who are going to grow kiwi, first of all, should remember that this is a southern subtropical plant. This is what you need to focus on, creating an optimal microclimate for it. In the wrong conditions, the vine will most likely simply refuse to bear fruit.
Creating a suitable microclimate
The most important requirement of a vine is sufficient lighting. The pot is placed on a windowsill facing south or southwest. In winter, natural light is not enough, so you will have to use fluorescent or special phytolamps, extending the daylight hours to 12-14 hours. It is better to place them so that the light falls on the plant in a horizontal plane.
Kiwi vitally needs a lot of light, with this in mind, they select a place for the pot
At the same time, kiwi must be protected from direct sunlight during the hottest hours. They cause serious burns, especially if the vine was watered shortly before. You can apply kiwi with tulle, a paper screen, several layers of gauze.
With a lack of light, the stems of the creepers become ugly thinner, the leaves turn pale and shrink, the gaps between them increase. Flowering and, moreover, fruiting in such conditions can not be expected.
Kiwi will most likely react negatively to any changes in the conditions of keeping. The plant especially does not like sudden temperature changes and cold drafts. Therefore, a place for him is chosen once and for all, approaching this procedure with all responsibility.
Plant care
Caring for kiwi at home is simple. Basically, it comes down to regular watering and feeding. This is enough for the vine to feel good and bear fruit.
Kiwi prefers natural organic fertilizers. It is best to alternate it with mineral fertilizers. The liana spends quite a lot of energy on the growth and formation of fruits, therefore, fertilizing is applied every 12-15 days, from mid-March to October.
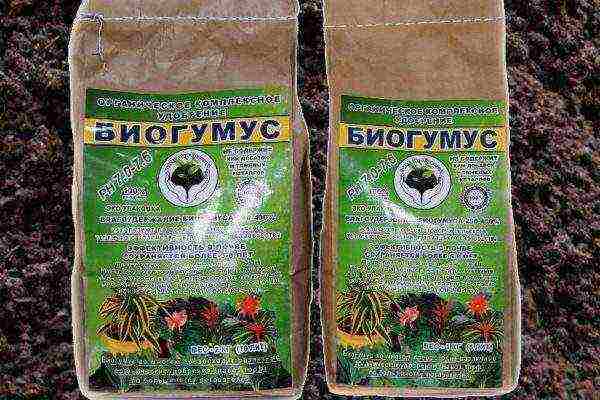
Vermicompost is an absolutely natural fertilizer
The very first top dressing is vermicompost, humus or rotted compost (nitrogen source). An annular groove is made in the pot around the plant and fertilizers are applied there. During the season, along with water, nutrients will gradually flow to the roots. Then you can alternately use a complex mineral fertilizer and infusions of nettle leaves, dandelion, wood ash, bird droppings.
Kiwi needs frequent and abundant watering, but at the same time it does not tolerate stagnation of moisture in the pot. To avoid this, after 30-40 minutes after the procedure, it will be necessary to drain the excess liquid from the pan. Watering is carried out at least once every 3-4 days. At the same time, the earthen lump is moistened as evenly as possible. It is best to use a watering can with a splitter attachment for this.

A watering can with a splitter helps to evenly wet the earthen ball in the kiwi pot
In extreme heat, in addition to watering, it is advisable to spray the liana from a finely dispersed spray bottle. In both cases, water is used warmed up to room temperature. You can also use a dedicated humidifier. Or just place pots with cool water next to the kiwi, organize the liana "company" from other indoor plants, place wet expanded clay, sphagnum moss in the pot tray.
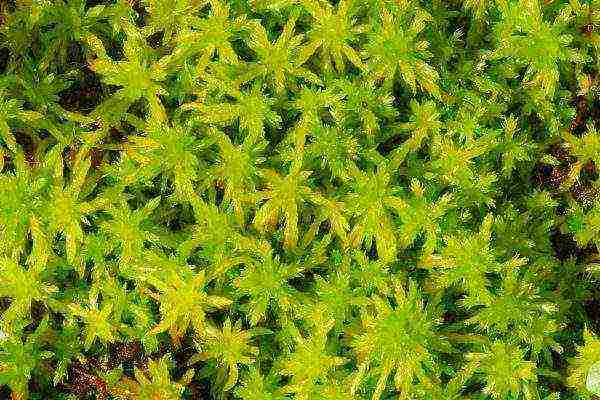
Sphagnum moss retains moisture well, which is very useful for indoor plants in the heat
For the winter, the vine sheds its leaves, this is a natural process for it. As soon as this has happened, feeding is stopped altogether, and the number of waterings is reduced to once every 10–12 days. During hibernation, it is advisable to transfer the plant to a cool, light room, where the temperature is maintained at 12-16 ° C.
Kiwi, like most fruiting tropical plants (lemons, pomegranates, pineapples) at home for the winter sheds leaves
Diseases and pests threatening kiwi
Like any actinidia, kiwi rarely suffers from diseases and pests. This also applies to home grown specimens. But at the same time, you should not neglect the regular inspection of the vine. The earlier the problem is noticed, the easier it is to deal with it.
Often, the florist himself is to blame for the deterioration of the appearance and condition of the kiwi. The mistakes made by him in the care provoke problems with the plant.
Table: how kiwi reacts to improper care
Due to the lack of light, the kiwi vine is ugly stretched out - this applies to both adult plants and very young seedlings
In addition to the so-called non-infectious diseases, the symptoms of which most often disappear when the microclimate is normalized and the correct feeding is carried out, kiwi can also suffer from fungal diseases. Most often, with waterlogging, various types of rot develop. Also, the plant is not ignored by such "universal" pests of indoor plants as aphids and scale insects. They are distinguished by their rare “omnivorousness”.
Table: diseases and pests that can threaten kiwi when grown at home
Photo gallery: diseases and pests dangerous for kiwi
Reviews about growing kiwi
Kiwi or Chinese actinidia is another culture successfully "domesticated" by amateur flower growers.If you create optimal or close conditions for it, this vine feels good in captivity, delighting the owner with its growth rate and regular fruiting. It rarely suffers from diseases and pests - this is an undoubted advantage of the plant.
27 years old, higher education in law, broad outlook and interest in a variety of topics. Rate the article:
(0 votes, average: 0 out of 5)
 Is it possible to grow a kiwi tree indoors? Experienced gardeners say yes! Moreover, even a beginner can get a house plant on the windowsill that will bear fruit. Its cultivation is quite painstaking, but many people call the process fascinating for this. Description and photo instructions will help you understand the algorithm.
Home growing kiwi: what you need to know before planting
In the wild, the Chinese gooseberry kiwi, like apples or pears, is a small 30-gram fruit. The habitual large fleshy fruits from 100 g and heavier were received by breeders of New Zealand. Today fruits with a refreshing delicate taste are popular all over the world. In addition, they are very useful and are used in cosmetology, as well as for the prevention of a large number of diseases.
Kiwi grows on beautiful, tree-like vines that resemble a vine. At home, the fruit tree is grown from seeds. Key points to consider before boarding:
Kiwi needs plenty of sunlight
- Kiwi is a dioecious crop. To grow fruits at home, you need at least two plants. You can only determine which specimen is female and which is male only during flowering. Therefore, it is better to plant several vines at once.
- Under optimal conditions of maintenance and care, you will receive the first flowering and fruits no earlier than after 4-6 seasons.
- Any varieties are suitable for growing in a room setting.
- The plant needs about the same conditions as the grapes. For example, in the abundance of sunlight.
If your home does not have south-facing or adjacent windows, a normally developed plant may not come out.
Attention! There are special frost-resistant varieties that are suitable for growing in the open field of the middle lane. The conditions and care in this case are similar to those in the room. Only for the winter should the plant be wrapped. It may take up to 10 years to wait for fruits from such vines.
Planting kiwi: technology and features
Gardeners recommend starting all kiwi planting procedures in early spring. This time is considered optimal to obtain maximum germination. Kiwi seed is not difficult to find. Buy a fully ripe fruit that is soft and crumbly. Without peeling, cut it in half.

Take seeds from ripe juicy fruit
Then proceed like this:
- remove about 20 seeds, carefully remove the pulp from them;
- wrap the material in cheesecloth and rinse several times with tap water;
- Spread the seeds on a saucer and leave to dry for a couple of hours under normal room conditions.
Attention! At the stage of harvesting seeds, you need to completely get rid of the pulp. Otherwise, the material will start to rot.
The next step is to germinate the seeds to speed up germination:
- Place cotton wool, moderately soaked in hot water, on a saucer. Place the seed on it.
- Place the plate on a well-lit windowsill and cover with plastic wrap. The mini-greenhouse should be opened at night. But make sure that there are no drafts at this time. In the morning, wet the cotton wool again with hot water and stretch the film.
Under these conditions, the seeds should form seedlings in 7-10 days. Maintain the regimen until you see delicate white roots. Now the germinated seeds should be transplanted into the soil:
Kiwi sprout
- Mix equal parts humus, peat, turf and sand.
- Fill small pots with soil.In each, right on the surface, put a few seeds. Sprinkle them on top with a thin layer of soil. You can't ram the ground.
- Spray the planting daily, keeping the topsoil moist. Use only a spray bottle, simple watering cannot be carried out.
Advice. Moistening the earthy coma during this and subsequent stages of growing is extremely important for the plants. Therefore, other methods are suitable for these purposes. For example, installing a mini greenhouse with half plastic bottles above each pot. However, an excessive amount of water for the root system of the plant will be detrimental.
Growing kiwi: caring for young plants
For fruit tree care to be effective, bring the growing conditions as close as possible to their native, natural ones. Kiwi grows in a climate of long, warm and humid summers. In addition to low humidity or an excess of water, the plant does not like:
- cool climate, temperatures below +20 ° C;
- a sharp drop in temperature even in warm weather;
- wind;
- lack of sunlight.
Advice. If these features are taken into account, you can take the plant outside in summer, and at other times of the year - on a warmed loggia or balcony.
Other nuances of kiwi care:
Fertilize your kiwi fruit regularly
- The key to the health and beauty of the tree is feeding with organic fertilizers: vermicompost or compost. The mixture is applied in the spring, no more than 2-3 times. You can add the entire composition of fertilizers and one-time, dry, in a trench dug around the stem. In the process of watering, the substances will gradually flow to the roots.
- In summer, gardeners recommend fertilizing kiwi with mineral complexes. Frequency - 3-4 times a month.
- Pinching the top from time to time will help to strengthen and make the vine more branched.
- A month after rooting in the ground, the plant will need a new transplant.
- Each plant needs a separate pot. It is important that wide leaves do not block the access of light to each other.
- Room conditions will not limit the growth of vines. An adult plant can grow up to 7 m in length. For vines, you need a support (for example, trellises), along which the kiwi will climb to the ceiling.
How to get a kiwi harvest at home
The optimal ratio of male and female plants for a good harvest is 1 to 5-6. It is very likely that by blooming you will find that this is not the case. Often there will be more male specimens than necessary. In this case, grafting of female twigs-eyes on their stems is effective.
The gardener will have to pollinate the plants on his own. Transfer pollen from male flowers to female flowers with clean and disinfected tweezers.
Flowering kiwi
To prevent the plant from degenerating, remove old branches in the fall, especially if the shoot has already borne fruit. This will make room for young vines and keep fruiting at the same level.
Attention! Kiwi is not very resistant to pests and diseases of indoor flowers. Keep it away from other plants. In cases of infection, use standard methods of control and prevention of a specific ailment.
Kiwi is surprisingly easy to grow in your home. Attentive owners will be able to enjoy the exotic taste from their own windowsill.
Growing kiwi at home: video
Even inexperienced growers can plant this overseas fruit at home. The whole process can be divided into three stages, which do not require special skills or special knowledge.

Step one - preparing the seeds
Seed preparation for planting is as follows. The seeds must be removed with a spoon, then placed in a fine sieve (you can use gauze) and rinsed under a stream of warm water, carefully separating them from the pulp of the fruit.
Important!
Fragments of pulp should not remain on the seeds, the further health of the seedlings depends on this.
The number of seeds should be determined on the basis that many of them may not germinate. It is best to start germination with 20-30 pieces, leaving the strongest ones as they grow.Growing kiwi from seeds at home does not require much time or money. The main thing to remember is that this plant is a rainforest inhabitant. He needs warmth, good lighting and regular moisture (both of the soil and its aboveground part).
Step two - planting seeds
There are three ways you can start germinating your seeds.
- Peeled and washed kiwi seeds are placed in a tank with settled (or boiled) water at room temperature. A vessel with planting material is placed in a warm room, it is possible near heating appliances. The most "live" seeds will hatch by the end of the first week, but if germination is delayed, you should replace the water with fresh water and wait a few more days.
- The second method is similar to the first, but differs in that the kiwi seeds are placed in a napkin or cotton wool soaked in warm water. The water should completely soak the cotton wool, but it should not fill the entire area of the plate. Next, a plate with seeds is tightly covered with cling film and placed on a warm windowsill. At night, it is better to remove the film, allowing the seeds to breathe. In a week, the most active of them will be revealed.
- The third method is fundamentally different from the previous ones. It consists in sowing kiwi seeds directly into peat without presoaking. The peat should be well and evenly moistened, the seeds are sown to a depth of no more than 5 mm. For early germination, it is necessary to create a kind of greenhouse at home. The container with seeds is covered with cling film and placed in a place with an air temperature of at least + 25 ° C. Watering should be done regularly, the soil should not dry out.
Advice
It is better to moisten the soil with a spray gun, so as not to erode the soil and not wash the seeds on its surface.

The third step is planting germinated seeds in the ground
When the soaked seeds opened and small roots appeared, it's time to continue growing kiwi in specially prepared soil. The soil can be mixed at home on your own, or you can buy ready-made soil mixture for vines. The main thing is that it should be well aerated, with a high content of coconut fibers and vermiculite. Seeds are placed in prepared pots in several pieces. In the future, only one, the strongest sprout is left, the rest are removed at an early stage (in the presence of two or three leaves).
Important!
The plant needs to provide a full-fledged drainage system, since the health of the root system depends on it.
A thick layer of expanded clay is poured onto the bottom of the pot, which will become a permanent "home" for a still young plant, which will prevent excess moisture from stagnating at the roots, and will also provide soil respiration. As a material for drainage, not only expanded clay is suitable, but also calcined pebbles, broken tiles, pieces of foam.
The pot with future seedlings is covered with glass, transparent plastic or film. The best place for such an impromptu greenhouse is the southern window sill in a warm room. Growing kiwi at home requires adherence to a certain temperature regime. Before the first shoots appear, the air temperature should be at least 25 degrees Celsius, bottom heating of the pot is allowed.
The greenhouse is aired daily. The soil is regularly moistened with warm, settled water using a spray bottle. In no case should it be allowed to dry completely. When the sprouts reach 1–1.5 cm, the greenhouse is completely opened.
Home care for kiwi
It should be noted that kiwi is a fast-growing vine that needs strong support for growth. In nature, the plant uses nearby trees for these purposes. In indoor conditions, these should be well-fixed nets, artificial trunks and other suitable supports available in the house.
According to the principle of growth, kiwi resembles grapes.Under natural conditions, its length can reach 8 meters, in culture - about 3. Starting from tiny seeds, it is difficult to imagine that in the coming years an exotic liana will bear fruit at home.
Important!
Kiwi is a fast growing plant that actively consumes nitrogen. Every spring (at the beginning of the growing season), it is imperative to feed the plant, replenishing the lack of essential minerals in the soil. First of all, it is worth remembering the saturation of the substrate with nitrogen. In no case should such events be carried out in the autumn-winter period.
Watering and lighting
Since the kiwi is a native of tropical rainforests, it is necessary to create the appropriate conditions for it to feel "at home." First of all, this applies to high humidity. It can be created using special air humidifiers, as well as by regularly spraying the plant (which is extremely important). A good result is given by placing the pot in a pallet with expanded clay and water.
Drying out the soil is very dangerous and can destroy the plant. With a lack of moisture, the leaves droop, and if measures are not taken in time, they begin to dry at the edges and subsequently fall off. Water the plant so that the water completely moistens the soil and goes out through the drainage holes into the pan.
Lighting for a plant, both in nature and at home, needs bright, which is an indispensable condition for the full growth and fruiting of vines. In this case, direct sunlight can leave burns on the leaves.
Advice
In summer, at home, you should create the effect of diffused sunlight during the hottest hours of the day. Tulle works well for this.
The lack of light has an extremely negative effect on kiwi - the plant stretches out, the leaves become smaller and brighter, the flowers do not develop, and fruiting does not come.
Planting a kiwi at home is not difficult at all, and growing it is not a hassle. All that needs to be done is watering, fertilizing and pruning in a timely manner (this process is practically no different from pruning grapes). The plant, in turn, will certainly thank you with its vitamin fruits!