Content
- 1 When do you need a transplant?
- 2 Choosing and buying a pot
- 3 Substrate, soil
- 4 How to transplant phalaenopsis - step by step instructions
- 5 Video: transplanting and watering phalaenopsis at home
- 6 Before starting a transplant
- 7 Transplant stages
- 8 A few tips for caring for phalaenopsis
- 9 Here we have a video that will help you in the process of phalaenopsis transplant
- 10 What kind of pot is needed for an orchid?
- 11 Plastic Orchid Pots
- 12 Clay Orchid Pots
- 13 Choosing and buying a pot
- 14 Substrate, soil
- 15 How to transplant phalaenopsis - step by step instructions

Phalaenopsis is a delicate and graceful flower that requires special care. Like other indoor plants, the orchid needs replanting. This process has its own characteristics. Our tips will help you carry out the procedure yourself, without causing too much trouble for the sissy.
When do you need a transplant?
Phalaenopsis transplant process is not so time consuming. Consider the cases in which you need to transplant an orchid:
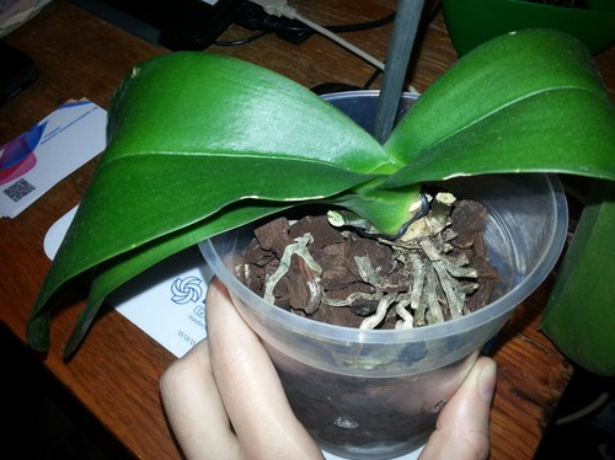
- If the roots have grown so much that the orchid has already begun to crawl out of the pot.
- When the substrate needs updating (every three years). Or, for example, the soil is of poor quality, as a result of which pests or diseases appeared in it.
- If the roots are shriveled, pale, or rotten.
- When the kids have grown and the orchid needs to be divided.
After purchase, provided that the plant is planted in a high-quality substrate, replanting the orchid is not required. But if it was sold in a bag, an unsuitable pot, or the container is too small for it, then the phalaenopsis must be moved to a new container with nutrient soil.
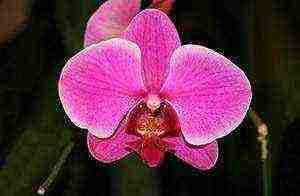
Can a blooming orchid be transplanted? Yes, but as a last resort. In this case, it is better to shorten the peduncles after the fourth or fifth bud. Orchids that have flower stalks with buds can be transplanted, but always with a part of the old substrate.
The best time to transplant is after flowering ends.
Choosing and buying a pot
You need to plant only in a transparent pot! Orchid roots need light.
The color of the flowerpot can be any. The new container should be 1–2 cm larger in diameter and taller than the old one.
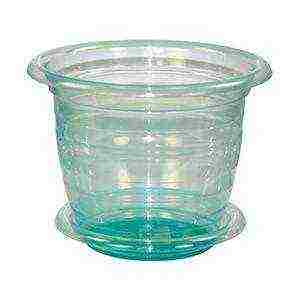
On sale there are special pots for orchids with planters. The inner part is with slots, and the outer part is one-piece. Experienced orchid growers do not recommend the use of such pots, as well as glass pots. They are poorly ventilated. But if there are holes on the outside, then such a container is perfect for growing phalaenopsis.
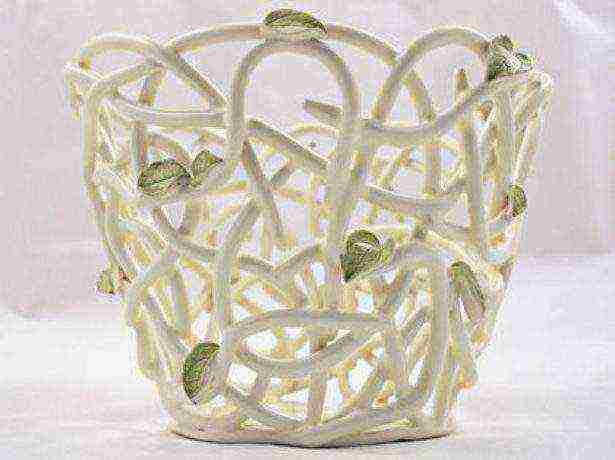
A beautiful planter with holes perfect for an orchid
On sale there is a cache-pot "Crown". Never use it as a pot! At home, an orchid planted in such a container will dry out. Phalaenopsis substrate should be constantly moist (but not waterlogged).
The habit of spraying or lightly watering the substrate leads to a chronic lack of moisture. There is also a latent lack of moisture after an accidental strong overdrying of the substrate. Such a substrate does not perceive water well, and it, without being absorbed, flows down the surface and along the walls of the pot.
With a constant lack of water, the roots shrivel, turn gray and may even die.

Do not use the Crown planter as a pot
There are orchid pots that have drainage holes in the bottom or on the sides. There are options where the holes are at the bottom and on the sides. The bottom slots should not be too small and the side slots too large.
Which option should you choose? It depends on the humidity in the room where your phalaenopsis is kept. If the humidity is high, then it is better to take a pot with slots at the bottom and sides. If the indoor air is dry, use a container with drain holes located at the bottom.
Do not use a pot with only side slots... It is correct not to water the orchid, but to “soak” it in a bowl of water so that the substrate absorbs water well. If the slots in the pot are only on the sides, the water will not absorb well into the substrate. For the same reason, never use Styrofoam for drainage (it can also push the plant out of the pot).
You can make the pot yourself. To do this, you need to take a plastic bucket and carefully drill the holes with a drill or burn them with a hot screwdriver.
Options for the correct orchid pots - photo gallery
Substrate, soil
When transplanting, it is not recommended to completely change the entire substrate so that the orchid does not get sick... With a complete replacement of the soil mixture, there is a sharp change in the microchemical composition to which the roots of the flower are accustomed, so it is better to leave a small part of the old soil (if, of course, it is not diseased) and add fresh bark.
A high-quality substrate does not smell like mold, is breathable, moisture-absorbing and consists mainly of bark.
The peat-containing substrate is not suitable for orchids. The roots in it can easily rot. Moss, which is often added to the soil mixture, is also superfluous, since it retains moisture for a long time. It needs to be added a little on top and replaced with a new one three times a year.
Moss should be placed on the surface of the substrate
You can prepare the substrate yourself. For this:
- Take Pine Bark Pieces (you can buy it). A prerequisite: it must be resin-free and wood-free.
- Use a knife to remove unsightly and rotten areas from the bark. The size of the pieces should be 1–1.5 cm. Cut large pieces with pruning shears.
- Boil the bark for 2-3 minutes (stirring). Then drain the water, add fresh and boil again.
- Drain and dry the bark in the oven at low temperature (do not burn!) Or on parchment. If you apply the bark straight away, you do not need to dry it completely.
- Add birch charcoal to the bark (you can also buy it). Proportion 4: 1.
Do not use polystyrene and cork recommended by some, these are completely superfluous elements! If you want to "dilute" the substrate, then it is better to use expanded clay.
Even if you plant phalaenopsis in bark alone, it will be better than in many commercial substrates that are too overloaded with peat, moss and all sorts of small fractions. Purchased substrates of this kind are more suitable for growing milkweed. From ready-made soils, the mixture "Seramis" made in Germany has proven itself very well.
How to transplant phalaenopsis - step by step instructions
Prepare in advance:
- Pruning shears or scissors treated with rubbing alcohol.
- Substrate.
- A small amount of sphagnum moss.
- A pot washed with a baking soda solution.
- A stick for pushing the substrate between the roots.
- Antiseptic for processing sections. For example: crushed coal, green stuff, ground cinnamon.
- A little expanded clay on the bottom of the pot.
- Preparations Fitosporin-M and Epin.
- Cotton buds.
- Sticks and clips for peduncles.
- If you suspect a pest, an insecticide or acaricide. For example, Fitoverm, Aktara.
The stages of transplant are as follows:
- Prepare a solution for soaking Phalaenopsis two hours before transplanting. This is necessary for the prevention of diseases and strengthening the immunity of the orchid.
- Dilute Fitosporin in warm water (1/5 teaspoon of powder in 2 liters of water). Dissolve in a little water first. Then bring the solution up to two liters.Add 10 drops of Epin to it.

Fitosporin is an excellent biological product for the prevention of fungal and bacterial diseases
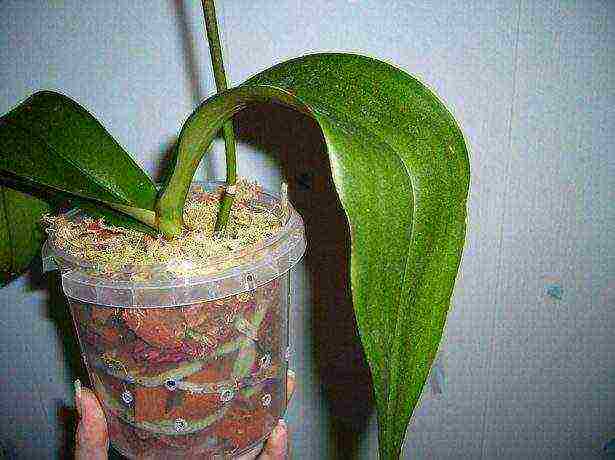
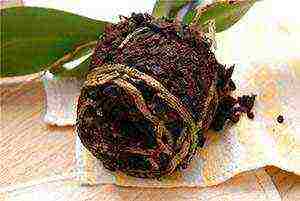
- Remove the orchid from the old pot. Hold it by the base and pull it out by lowering the pot upside down. If the roots have grown so that the flower cannot come out, then carefully cut the container. Trim the roots that have emerged from the lower drainage holes.
Remove the orchid carefully from the pot
- Gently free the roots from the substrate. They are quite fragile in the orchid, so proceed with caution. If some healthy root turns out to be broken during transplantation, it's okay. It will heal.
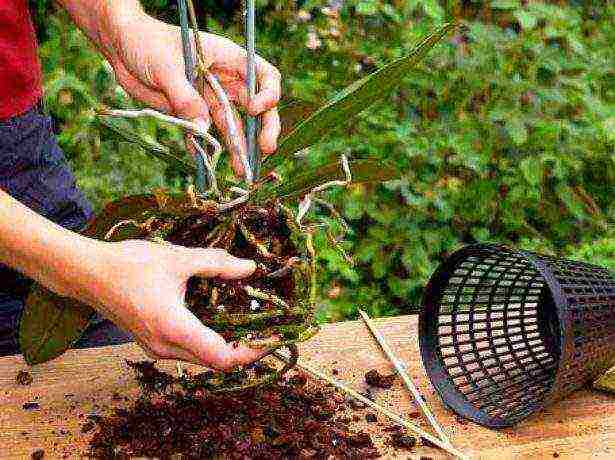
Be careful when freeing the roots from the substrate, as they are very fragile.
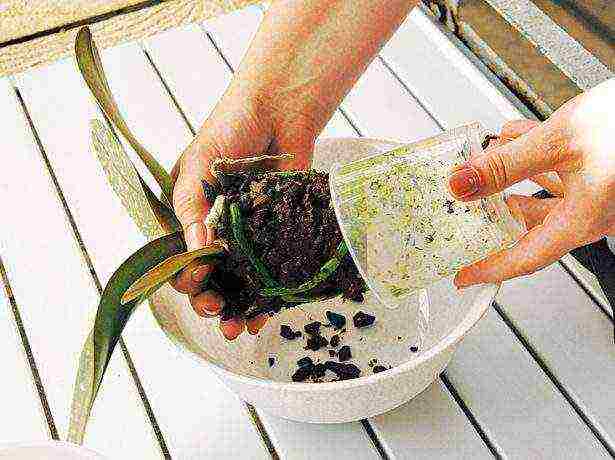
- If the substrate is very difficult to pull out, then rinse it from the roots in a basin with warm water. After water enters the leaf axils, it must be dried. Wipe off moisture well with a cotton swab.
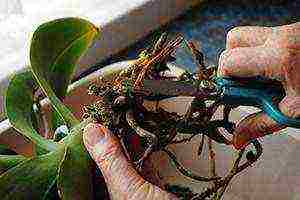
- Examine the roots, leaves, rosette, and substrate. If you find rotten, dry, shriveled, or blackened roots, you need to cut them off. A healthy root system is firm, clean, green or gray-green in color.
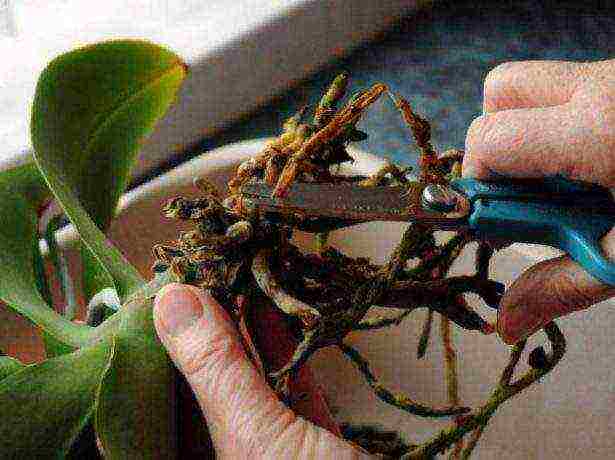
Any rotten, dry, shriveled or blackened roots must be cut off
- Remove diseased and yellow leaves. It is better to break them off so as not to leave pieces that will rot later. Tear the diseased leaf in half lengthwise and gently break out of the socket first one part, then the other.
- If you notice rotten spots on the outlet (they are slippery and dark), then clean them up to healthy tissue.
- Leave some of the good old substrate. If you spot any pests, soak it in the insecticide solution for 20 minutes. Dry the soil afterwards. Add insecticide to Fitosporin solution.
- Dip the phalaenopsis roots into the Fitosporin solution. Soak the plant in it for 40 minutes. After that, treat all sections with an antiseptic. Dry the roots for three to four hours.
- Place drainage in the bottom of the pot.
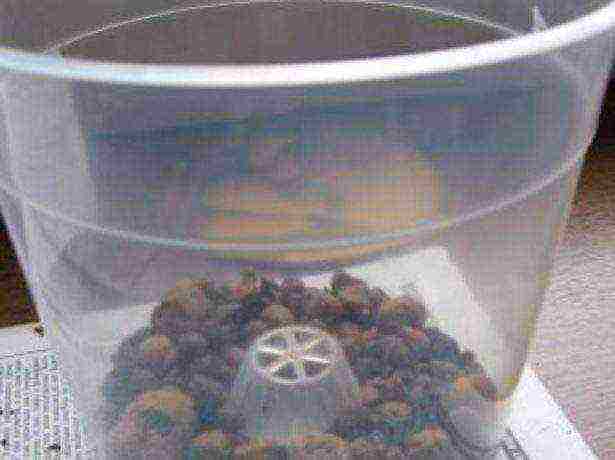
At the bottom of the pot, you must put a layer of expanded clay
- Place the orchid in the center of the pot.
- Cover the roots with the substrate. Use some of the old soil first and then add fresh soil. If the orchid has flower stalks, place a stick next to each before filling the roots.
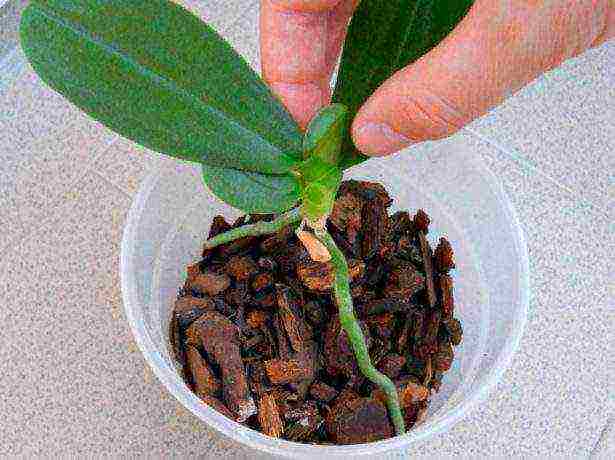
Cover the phalaenopsis with the substrate, keeping the flower in the middle
- Now gently push the bark between the roots to fill in any empty spaces. You can shake the pot a little so that the substrate is better tamped between the roots.
- The roots that are on top do not need to fall asleep completely. When phalaenopsis grows up, just add bark.
Leave some of the roots not covered with substrate
- Place moss on top of the substrate.
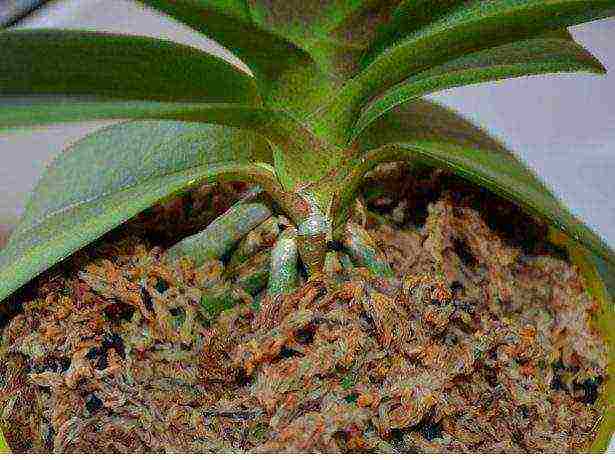
Lay moss on top of the substrate
- Since the bark was pre-soaked, there is no need to water the orchid yet.
- Place it in a shady, cool place for 10 days. The temperature is needed no more than +22 oC.
If you did everything correctly, then there will be no problems after the transplant. If the phalaenopsis is a little lethargic, then evaluate the conditions in which it is located. It may be too hot in the room, very dry air. Check for accumulated water in the leaf axils.
Video: transplanting and watering phalaenopsis at home
Phalaenopsis, planted in the correct substrate and pot, will not hurt. Provided the plant is properly cared for, it will delight with frequent and abundant flowering.
Ksenia, 39 years old. By education, a pastry chef, but had a chance to work in many other areas (sales, office, renovation). I love to cook and plant flowers.
 Experienced flower growers know that caring for an orchid is a responsible and difficult business. And any mistake can cost too much and lead to the death of a beautiful flower.
And a phalaenopsis transplant at home can be compared with a real surgical operation in terms of complexity and responsibility.
However, if you follow the rules, you can easily cope with such a task, and your orchid will continue to delight you with its beauty.
Before starting a transplant
How do you know when it's time to transplant an orchid?
Phalaenopsis transplant must be timely. The flower will not forgive you if you disturb it for no apparent reason. How can this reason be seen? How to know when to transplant?
The substrate in which orchids are grown, over time, loses the properties necessary for the flower: air permeability, optimal acidity, balanced salt content. Therefore, phalaenopsis must sometimes be transplanted, changing the substrate to a new one. The frequency of such transplants should not be more often than 1 time in 2-3 years.
Transfer after purchase
When buying a flower, be sure to consult with the seller about how soon you should transplant an orchid for the first time. It is generally accepted that after purchase, phalaenopsis is transplanted immediately after it fades, or within one year after purchase. Most often, a flower is in this substrate from its very birth, and if it was transplanted, it was only with the aim of replacing a small pot with a larger one.
When buying phalaenopsis, be sure to check with the seller when the flower needs to be transplanted
Spring is considered the most suitable time for transplanting an orchid: the roots and leaves begin to grow actively during this period. Correctly chosen time of transplantation is the key to the success of the operation, since during the period of the beginning of growth, the orchid is able to quickly adapt to the new substrate, having fixed roots in it.
Shouldn't we plant Fortune's euonymus?
Read here what subtleties the autumn planting of thuja has.
Selection of pot and soil for Phalaenopsis orchid
Another important task. It is best to buy the substrate in a specialized store. To avoid contamination of the substrate by fungi or pests, it can (but not necessarily) be disinfected. This is definitely worth doing if the soil has a pronounced smell of forest mycelium.
The substrate can be boiled for 3-4 minutes or just pour boiling water for 10 minutes. Then the water must be drained, and the substrate is rinsed under running very hot water and dried (not in an oven or on a battery!). You can also leave the substrate damp: this will not harm the dried out roots of the orchid.
The orchid pot must be transparent
When choosing a pot, focus on the volume of the root system of your phalaenopsis. Carry out a "fitting": place a plant in an empty pot, and if 1-2 cm of free space remains on the sides, the pot "in good time." Also, the pot should be transparent: the root system needs sunlight, since these flowers generally live in nature on the trunks of trees, and the roots twine around these trunks and hang in the air. Also, thanks to the transparent pot, you can always understand when it is time to water the flower, and when it is worthwhile to wait.
Immediately before planting, the pot must be washed, for example, in a dishwasher, choosing a temperature of at least + 70 ° C, or with a cleaning agent, applying it for 20 minutes and then rinsing with warm water.
Transplant stages
Compliance with the sequence of the stages of transplantation is an important condition: this will help to avoid wrong actions and unnecessary fuss.
-
We get it out of the pot
 Since the orchid lives in a plastic pot, it should first be crumpled a little. This will simplify the process of removing the flower from the container.
If the flower is still stubborn, you do not need to loosen or pull it. Better to cut or break the pot and set the beauty free.
We put the orchid in a basin, get rid of the old substrate and pot.
-
We flush the root system
In general, the condition of the root system can say a lot about the health of a flower.
If the roots are densely overgrown and intertwined, then everything is in order with your orchid.True, it will be extremely difficult for you to separate the substrate and untangle the ball from the roots, it will take a lot of time and patience.
If there are few roots and you can easily remove the orchid from the pot, you should worry: this may mean that the flower is sick or weakened.
-
We process the roots
Cutting off rotten and dry root areas
After the substrate is soaked, it can be removed from the roots without removing the orchid from the water. It is best to change the water periodically, and you can also help yourself with a shower.
Some of the most stubborn pieces of bark can be left on to avoid damaging the root system.
Then carefully examine the roots of the orchid: cut off rotten and dry hollow areas (not the whole root!) From them to healthy areas - dense and hard, with a rich green or white color. The knife or blade must be sharp enough, and it must also be disinfected with alcohol or fire.
We also disinfect the cut sites. For this purpose, cinnamon, crushed activated charcoal, garlic solution, or alcohol-free antiseptics are suitable. It is not recommended to treat "wounds" with iodine or brilliant green: the alcohol contained in them can adversely affect the health of the plant, and the remaining root can die.
-
Removing old leaves
Sometimes new roots grow by breaking through old but green leaves, which can get in the way during transplanting. You have two options:
- Leave the leaves, and then the roots will be in the air;
- Remove leaves.
Both yellow and green orchid leaves are removed according to the same scheme: they need to be cut along the lobar vein, pulled by the ends in opposite directions, as if removing a leaf from the stem.
Together with excess leaves, it is recommended to remove dry peduncles, leaving a small stump of 0.5-1 cm. All cut sites must also be disinfected, and in this case, it is allowed to use iodine, brilliant green or alcohol.
-
Drying the plant
The duration of this stage depends on the air temperature: with warm or medium temperatures, it is at least 2 hours. It is best to transplant in two steps: in the evening, all the above stages are carried out, and at night the plant dries out: the resulting "wounds" should "heal", in the morning the transplant can be continued.
Before leaving the flower overnight, you need to make sure that there is no excess water on it: neither in the axils between the leaves, nor in the core of the plant. Otherwise, it can cause the orchid to rot. Therefore, these areas must be wiped with a paper towel or cotton swabs.
-
We transplant into new soil

Do not immerse the phalaenopsis deep - the leaves can rot
It is very important to choose the right position of the flower in the container. For phalaenopsis, this is the middle of the pot.
A stem that grows to the side, in no case should you try to straighten it by tying or supporting it. This may be a structural feature of the phalaenopsis that should not be corrected.
It is not recommended to bury the plant deeply: with prolonged contact with a moist lower substrate, the leaves and stem can rot.
The upper roots should be slightly covered with bark. It is not necessary to bury them forcibly into the substrate: if they remain "free", it will not harm the plant in any way. Remember the features of the growth of orchids in their natural environment.
-
We make initial watering
When - it all depends on the transplant process. If the orchid has been drying all night, then after transplanting the flower can be placed in a bath and poured from the shower with warm water (30-45 ° C), at the same time tamping the substrate in a natural way.
If the plant has not been dried for long, it is worth watering it for the first time after 3-4 days (in winter) or 1-2 (in summer when the air temperature is 25-30 ° C).
For the first time after transplanting (7-10 days), it is better to put the orchid in a dark place or in a place with medium illumination so that it does not suffer from intense sunlight.
Planting and Caring for Lilacs - Decorate your garden.
Do you know why the chubushnik is called that way? The answer is here.
Perennial Flowers Reference Table -
A few tips for caring for phalaenopsis
- Growing temperature: 32 ° C (day) to 16 ° C (night). The optimum daytime temperature is 20-22 ° C
- The lighting is moderate. No direct sunlight!
- Watering is a very important part of the care. You need to water in the morning and only the soil; on average - once a week with water at room temperature and acidity (pH) 6-7. The pot can be placed in a bucket of water for 1 minute, then removed and allowed to drain
- Special soil should be loose, feeding is carried out 2 times a month from March to October inclusive
- Flowering will repeat more often if, after flowering, you cut off a branch just above the second "eye" - a kind of bulge on the stem
Here we have a video that will help you in the process of phalaenopsis transplant
Watch the video about how the professionals transplant
I wish you success!
Oct 18, 2013 by Viktor Sergeev
 Among the thousands of orchid varieties, only a small part settle on the ground, the rest prefer to climb tree trunks, rocky ledges with the help of powerful roots and settle down in places where there is practically no soil. Therefore, pots for orchids grown at home are very different from the usual flower containers.
What should guide a florist when choosing a container for tropical beauties? How to find a suitable pot?
What kind of pot is needed for an orchid?
Epiphytes and lithophytes are plants that do not tolerate waterlogging of the roots. And when choosing a pot for an orchid, it is important to build on this basic, but not the only requirement.
 Specialized containers for a plant of this family should provide:
- good moisture outflow;
- active aeration of the root system and substrate inside the pot;
- safe extraction of juicy, long rhizomes, which often diverge far beyond the container;
- temperature regime acceptable for the orchid.
Among orchids, there are species in which the roots not only absorb nutrients and moisture, but also actively participate in the process of photosynthesis.
What kind of orchid pot is needed in this case? Strange as it may sound for novice lovers of this culture, for such orchids it is necessary to purchase a completely transparent container.
 How to choose an orchid pot made of clay, colored or clear plastic? Epiphytic plants do not need a large volume of substrate, therefore a large pot is not needed. The main thing that:
- there were drainage holes on the bottom and bottom of the walls;
- the height of the container was equal to the width of the neck;
- the volume corresponded to the size of the root system.
Most often, you can see an indoor orchid in a pot, as in the photo, made of plastic or ceramic. There are also breathable baskets for free root growth.
It is better to refuse a glass pot. It can injure not only the flower, but also the person, and besides, it does not allow the roots to breathe. It is better to use such a container as a spectacular planter for an orchid planted in transparent plastic.

Plastic Orchid Pots
This is the most common and preferred orchid pot. Plastic containers do not allow the root system to dry out, they are easy to maintain and can serve more than one plant.
 In addition, the design of such an orchid pot provides several holes for draining excess moisture, which means that there is no need to worry about moisture retention in the substrate. If the existing drainage holes are not enough, the florist can independently, without the risk of destroying the container, make new ones.
Plastic easily tolerates being on a brightly lit windowsill and in the shade, reliably protecting the flower's root system from hypothermia or overheating.
Sometimes, when transplanting, orchid lovers are faced with a situation where the overgrown roots through the drainage holes have come out, and it will not be possible to remove the leaf rosette without damaging the pot or plant. In this case, the plastic can be easily cut with household scissors without damaging the roots at all, which is impossible if a ceramic or glass orchid pot is used.
 For species whose roots are involved in the process of photosynthesis, transparent pots are offered. However, such containers are convenient to use not only for planting phalaenopsis and similar plants. You can clearly see through the plastic:
- how the root system develops;
- how moisture is consumed;
- how the substrate dries.
Therefore, such containers can be recommended for flower growers without much experience in keeping orchids. For a room orchid in a pot, as in the photo, it is easy and interesting to observe. Even the slightest damage to the roots or signs of overflow will not be hidden from a careful look.
Clay pots for orchids
A significant advantage of pots for orchids made of doused or unglazed ceramics is their excellent permeability to moisture and air. Irrigation moisture does not accumulate in one place, but effectively spreads throughout the earthen coma, the roots do not dry out for a long time and do not overheat.
 But with a lot of advantages, this type of container also has disadvantages:
- rhizomes are firmly adhered to the porous surface of the ceramic, which is fraught with injury to the flower during reproduction and transplantation:
- the porosity of the pot decreases over time from salts penetrating into the material, which negatively affect both the clay and the condition of the orchid roots.
When planning to use a clay container, a florist must know how to properly plant an orchid in a pot.
 Before planting the plant, clay orchid pots are disinfected, properly warmed up in the oven, and then soaked in clean irrigation water for a couple of hours. If a previously used vessel is used, it is useful to immerse it in acidified water. This will help get rid of any salt stains on the ceramics.
Video about the selection of a pot for an orchid
Phalaenopsis is a delicate and graceful flower that requires special care. Like other indoor plants, the orchid needs replanting. This process has its own characteristics. Our tips will help you carry out the procedure yourself, without causing too much trouble for the sissy.
Phalaenopsis transplant process is not so time consuming. Consider the cases in which you need to transplant an orchid:
- If the roots have grown so much that the orchid has already begun to crawl out of the pot.
- When the substrate needs updating (every three years). Or, for example, the soil is of poor quality, as a result of which pests or diseases appeared in it.
- If the roots are shriveled, pale, or rotten.
- When the kids have grown and the orchid needs to be divided.
After purchase, provided that the plant is planted in a high-quality substrate, replanting the orchid is not required. But if it was sold in a bag, an unsuitable pot, or the container is too small for it, then the phalaenopsis must be moved to a new container with nutrient soil.
Can a blooming orchid be transplanted? Yes, but as a last resort. In this case, it is better to shorten the peduncles after the fourth or fifth bud. Orchids that have flower stalks with buds can be transplanted, but always with a part of the old substrate.
The best time to transplant is after flowering ends.
Choosing and buying a pot
You only need to plant in a transparent pot! Orchid roots need light.
The color of the flowerpot can be any. The new container should be 1–2 cm larger in diameter and taller than the old one.
On sale there are special pots for orchids with planters. The inner part is with slots, and the outer part is one-piece. Experienced orchid growers do not recommend the use of such pots, as well as glass pots. They are poorly ventilated.But if there are holes on the outside, then such a container is perfect for growing phalaenopsis.
A beautiful planter with holes perfect for an orchid
On sale there is a cache-pot "Crown". Never use it as a pot! At home, an orchid planted in such a container will dry out. Phalaenopsis substrate should be constantly moist (but not waterlogged).
The habit of spraying or lightly watering the substrate leads to a chronic lack of moisture. There is also a latent lack of moisture after an accidental strong overdrying of the substrate. Such a substrate does not perceive water well, and it, without being absorbed, flows down the surface and along the walls of the pot.
With a constant lack of water, the roots shrivel, turn gray and may even die.
I.V. Belitsky
Orchids, pp. 63.64
Do not use the Crown planter as a pot
There are orchid pots that have drainage holes in the bottom or on the sides. There are options where the holes are at the bottom and on the sides. The bottom slots should not be too small and the side slots too large.
Which option should you choose? It depends on the humidity in the room where your phalaenopsis is kept. If the humidity is high, then it is better to take a pot with slots at the bottom and sides. If the indoor air is dry, use a container with drain holes located at the bottom.
Do not use a pot with only side slots... It is correct not to water the orchid, but to “soak” it in a bowl of water so that the substrate absorbs water well. If the slots in the pot are only on the sides, the water will not absorb well into the substrate. For the same reason, never use Styrofoam for drainage (it can also push the plant out of the pot).
You can make the pot yourself. To do this, you need to take a plastic bucket and carefully drill holes with a drill or burn them with a hot screwdriver.
Options for the correct orchid pots - photo gallery
An orchid pot can be not only transparent, but also painted in a bright color.
Pot with a picture - interior decoration
A colorless pot with slots at the bottom and sides is an excellent option for planting phalaenopsis
A colorless pot with drainage holes in the bottom is the best option for planting phalaenopsis
Substrate, soil
When transplanting, it is not recommended to completely change the entire substrate so that the orchid does not get sick... With a complete replacement of the soil mixture, there is a sharp change in the microchemical composition to which the roots of the flower are accustomed, so it is better to leave a small part of the old soil (if, of course, it is not diseased) and add fresh bark.
A high-quality substrate does not smell like mold, is breathable, moisture-absorbing and consists mainly of bark.
The peat-containing substrate is not suitable for orchids. The roots in it can easily rot. Moss, which is often added to the soil mixture, is also superfluous, as it retains moisture for a long time. It needs to be added a little on top and replaced with a new one three times a year.
Moss should be placed on the surface of the substrate
You can prepare the substrate yourself. For this:
- Take Pine Bark Pieces (you can buy it). A prerequisite: it must be resin-free and wood-free.
- Use a knife to remove unsightly and rotten areas from the bark. The size of the pieces should be 1–1.5 cm. Cut large pieces with pruning shears.
- Boil the bark for 2-3 minutes (stirring). Then drain the water, add fresh and boil again.
- Drain and dry the bark in the oven at low temperature (do not burn!) Or on parchment. If you apply the bark straight away, you do not need to dry it completely.
- Add birch charcoal to the bark (you can also buy it). Proportion 4: 1.
Do not use foam and cork recommended by some, these are completely unnecessary elements! If you want to "dilute" the substrate, then it is better to use expanded clay.
Even if you plant phalaenopsis in bark alone, it will be better than in many commercial substrates that are too overloaded with peat, moss and all sorts of small fractions. Purchased substrates of this kind are more suitable for growing milkweed. From ready-made soils, the mixture "Seramis" made in Germany has proven itself very well.
How to transplant phalaenopsis - step by step instructions
Prepare in advance:
- Pruning shears or scissors treated with alcohol.
- Substrate.
- A small amount of sphagnum moss.
- A pot washed with a baking soda solution.
- A stick for pushing the substrate between the roots.
- Antiseptic for processing sections. For example: crushed coal, green stuff, ground cinnamon.
- A little expanded clay on the bottom of the pot.
- Preparations Fitosporin-M and Epin.
- Cotton buds.
- Sticks and clips for peduncles.
- If you suspect a pest, an insecticide or acaricide. For example, Fitoverm, Aktara.
The stages of the transplant are as follows:
- Prepare a solution for soaking Phalaenopsis two hours before transplanting. This is necessary for the prevention of diseases and strengthening the immunity of the orchid.
- Dilute Fitosporin in warm water (1/5 teaspoon of powder in 2 liters of water). Dissolve in a little water first. Then bring the solution to two liters. Add 10 drops of Epin to it.
Fitosporin is an excellent biological product for the prevention of fungal and bacterial diseases
- Remove the orchid from the old pot. Hold it by the base and pull it out by lowering the pot upside down. If the roots have grown so that the flower cannot come out, then carefully cut the container. Trim the roots that have emerged from the lower drainage holes.
Remove the orchid carefully from the pot
- Gently free the roots from the substrate. They are quite fragile in the orchid, so proceed with caution. If some healthy root turns out to be broken during transplantation, it's okay. It will heal.
Be careful when freeing the roots from the substrate, as they are very fragile.
- If the substrate is very difficult to pull out, then rinse it from the roots in a basin with warm water. After water enters the leaf axils, it must be dried. Wipe off moisture well with a cotton swab.
- Examine the roots, leaves, rosette, and substrate. If you find rotten, dry, shriveled, or blackened roots, you need to cut them off. A healthy root system is firm, clean, green or gray-green in color.
Any rotten, dry, shriveled or blackened roots must be cut off
- Remove diseased and yellow leaves. It is better to break them off so as not to leave pieces that will rot later. Tear the diseased leaf in half lengthwise and gently break out of the socket first one part, then the other.
- If you notice rotten spots on the outlet (they are slippery and dark), then clean them up to healthy tissue.
- Leave some of the good old substrate. If you spot any pests, soak it in the insecticide solution for 20 minutes. Dry the soil afterwards. Add insecticide to Fitosporin solution.
- Dip the phalaenopsis roots into the Fitosporin solution. Soak the plant in it for 40 minutes. After that, treat all sections with an antiseptic. Dry the roots for three to four hours.
- Place drainage in the bottom of the pot.
At the bottom of the pot, you must put a layer of expanded clay
- Place the orchid in the center of the pot.
- Cover the roots with the substrate. Use some of the old soil first and then add fresh soil. If the orchid has flower stalks, place a stick next to each before filling the roots.
Cover the phalaenopsis with the substrate, keeping the flower in the middle
- Now gently push the bark between the roots to fill in any empty spaces. You can shake the pot a little so that the substrate is better tamped between the roots.
- The roots that are on top do not need to fall asleep completely. When phalaenopsis grows up, just add bark.
Leave some of the roots not covered with substrate
- Place moss on top of the substrate.
Lay moss on top of the substrate
- Since the bark was pre-soaked, there is no need to water the orchid yet.
- Place it in a shady, cool place for 10 days. The temperature is needed no more than +22 oC.
If you did everything correctly, then there will be no problems after the transplant. If the phalaenopsis is a little lethargic, then evaluate the conditions in which it is located. It may be too hot in the room, very dry air. Check for accumulated water in the leaf axils.