Content
- 1 How to choose a dill variety?
- 2 Soil preparation
- 3 Selection of containers
- 4 Preparing seeds for planting
- 5 Dill planting technology
- 6 Dill care on the windowsill
- 7 Growing dill on a windowsill in winter
- 8 What you need to breed dill
- 9 Variety selection
- 10 Seed preparation
- 11 Soil preparation and container selection
- 12 Sowing seeds
- 13 Additional lighting
- 14 Comfortable temperature and humidity
- 15 Success secrets

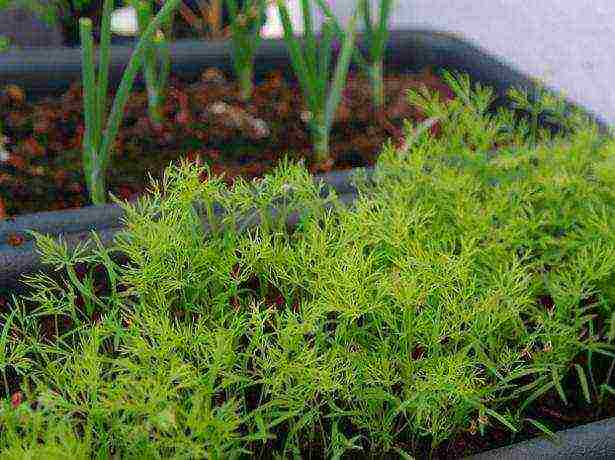
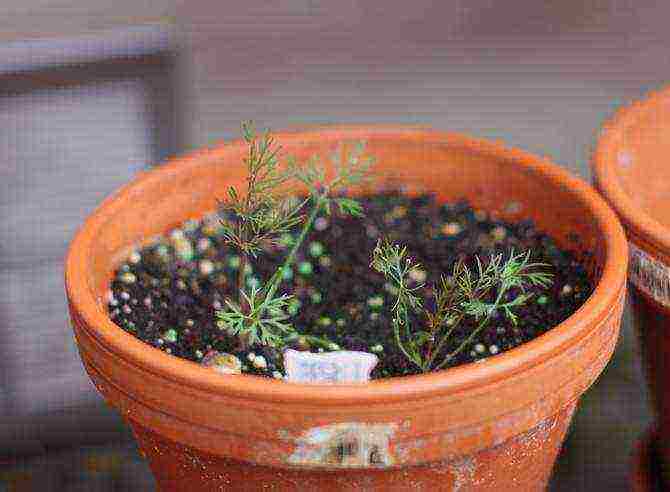
It is convenient when there is always fresh greens at hand - the prepared dishes with it become more aromatic and tastier, so you can often find dill on the windowsill among prudent housewives. At home, this unpretentious plant feels no worse than in the garden, and with good care it gives a lot of lush greenery.
Choosing the right dill variety is the first step to a good harvest
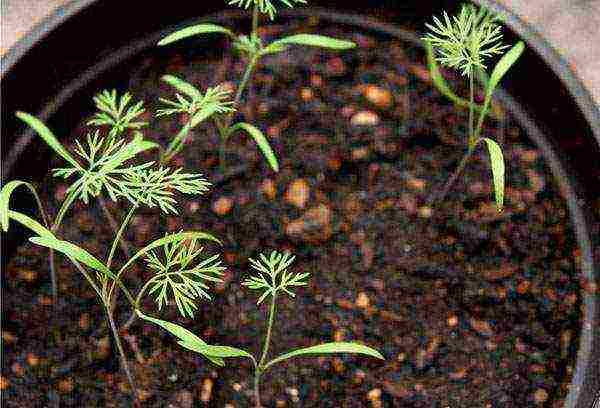
It would seem that even inexperienced gardeners should not have any questions about how to grow dill at home: after all, you just need to sow seeds in a pot with soil and do not forget to water the seedlings, removing the weeds. But in fact, instead of the expected dense thickets of fragrant dill, thin pale blades of grass, practically without aroma, sway sadly in the pot. What's the secret? How to plant dill at home and get greens that are no worse than those that are sold on the market all year round?

For the purpose of growing dill at home, gardeners most often choose the early ripening variety Gribovsky
To grow dill at home, you will need:
- seeds of a fruitful unpretentious variety of dill;
- soil for indoor plants;
- fertile garden land;
- suitable containers (pots, containers);
- fluorescent lamps;
- complex mineral fertilizers.
Video about growing aromatic dill
For the purpose of growing dill at home, gardeners most often choose the early ripening variety Gribovsky. This variety of dill is not picky about care, resistant to temperature extremes, high yield and disease resistance. Its greenery has a strong aroma. In order for Gribovsky dill to produce a good harvest at home, it is enough to sow it in fertile soil and prevent weeds from appearing.
The following varieties are also suitable for growing on a windowsill: early-ripening Grenadier, mid-ripening Richelieu with bluish-green fragrant leaves, late-ripening Kibray with beautiful wide leaves. Gardeners are also cultivated at home and southern varieties, which have a more spicy taste, but are more finicky.

And late bush varieties do not have time to ripen in the beds over the summer.
Since there is no special variety of dill intended for growing on the windowsill, when choosing a seed, the main attention should be paid to the ripening time. It is important not to be mistaken here: although early varieties give green mass in a very short time, they quickly stretch into flower stalks and are worse leafy than late-ripening varieties. And late bush varieties (Gourmet, Salute, Russian size) do not have time to ripen in the beds over the summer, but they are great for growing at home. Such dill on the window forms dense, well-leafy bushes, from the axils of which all new shoots are formed.
Instructions on how to grow dill on a windowsill
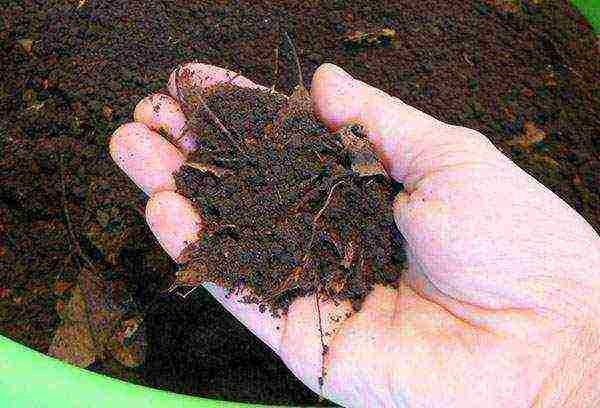
In the garden, dill can grow on almost any soil, but successful cultivation of dill at home is possible only in a fertile soil mixture, which must be prepared in advance. To do this, in the fall, you should prepare loose garden soil and mix it before sowing with purchased neutral soil for indoor plants.Select a container for crops of a sufficient size so that the dill is not cramped, and do not forget about the drainage layer at the bottom of the container.
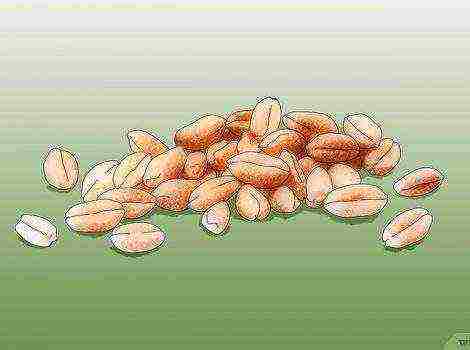
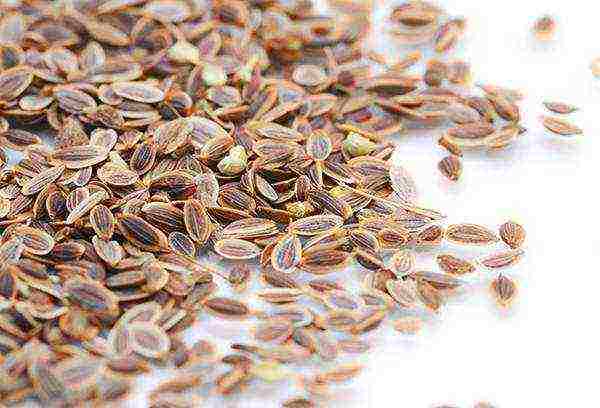
Since dill seeds germinate for a long time due to the high oil content, they must be soaked for 20 hours before sowing in warm water through which oxygen is continuously passing (for example, using a compressor from an aquarium). Another option is to simply place the seeds in warm water for two days and change it to fresh water every six hours.

For best results, you can make grooves a centimeter deep in the ground, spill them with water and lay the prepared seeds on the bottom.
Seeds can be sown directly on the surface of the moistened earth, without grooves and pits, sprinkling with peat mixed with humus on top. Sufficient seeding rate - 0.3 g per 1 square decimeter of soil. For best results, you can make a centimeter deep groove in the ground, spill them with water and place the prepared seeds on the bottom. From above, dill seeds are sprinkled with dry earth from the edges of the grooves, so that a dense crust does not form on the soil surface, which prevents the emergence of seedlings. Cover the container with crops with cellophane and put it in a dark place with a temperature of about +20 degrees for a week.
After cutting, the stems and leaves of dill do not regrow: in order to continuously cut fresh greens, sow seeds on the vacating area of your micro-garden every three weeks.
Growing dill on the windowsill - the secrets of success
Growing dill at home, first of all, you need to remember that this plant is very fond of light. Place the crops on a light windowsill, and in winter, provide additional lighting for the dill by installing fluorescent lamps at a height of 50 cm above the plants. On the windowsill, it is enough to turn on the lamps in the morning for five hours, but if the boxes with dill are in the back of the room, the lighting should last at least fifteen hours.
Video about growing dill on a windowsill
Dill care rules at home:
- dill must be watered regularly, especially paying attention to watering during seed germination and when young shoots appear;
- once every two weeks, it is recommended to feed the plantings with complex mineral fertilizer;
- it is best to grow dill at a temperature of +18 degrees, but even on a glazed balcony when the temperature drops to +8 degrees, the plants will feel quite comfortable;
- if the temperature in the room is higher than +20 degrees, you need to increase the illumination, otherwise the dill bushes will turn out to be elongated, sluggish and light;
- in the first week, as the shoots seem to appear, it is advisable to lower the temperature in the room at night by opening the window, or to carry out the crops to the glazed balcony so that the dill does not stretch out.

The dill needs to be watered regularly, especially paying attention to watering during seed germination
Growing at home can be more or less hassle depending on what time of year you plant the dill. The easiest way to grow dill on a window is from March to August, since planting without additional lighting forms lush greenery, provided there is fertile land and a light windowsill. In the autumn-winter period, without additional illumination, the plants will stretch and fall, which means that you will have to pay more attention to them, and the costs of growing will increase due to the consumed electricity.
Rate the article:
(16 votes, average: 4.1 out of 5)
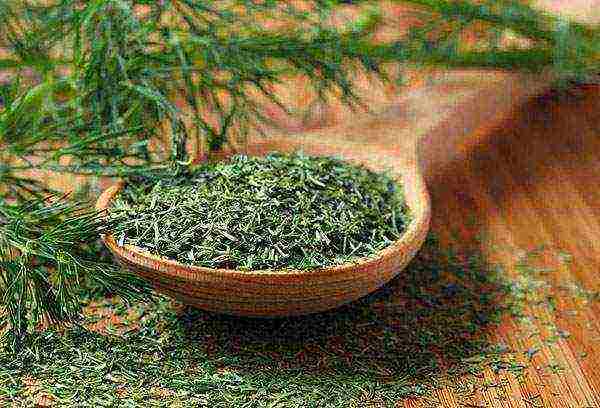
It is very convenient to grow fresh greens on the windowsill: the dishes cooked with them become tastier and more aromatic. Dill is often used in salads and seasonings, which is useful in summer and winter. Dill greens are rich in vitamins, trace elements, essential oils that help to heal the body.
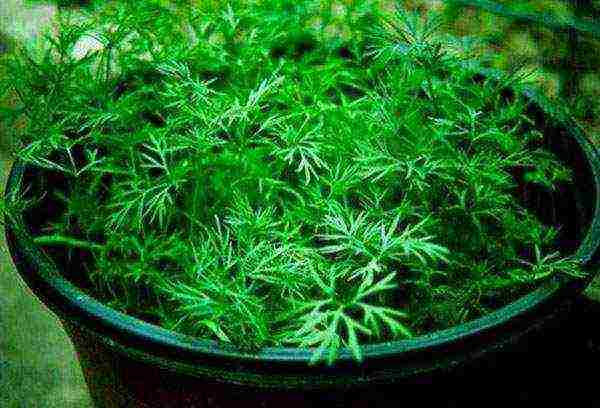
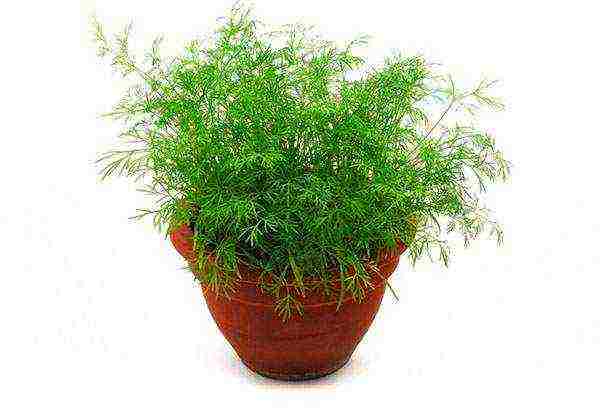
This unpretentious plant grows beautifully on a balcony or windowsill all year round. Growing dill from seeds on a windowsill is a fairly simple process. The main thing is to provide the plants with light and water. Green fluffy dill bushes will delight your eye all year round.
How to choose a dill variety?
At first glance, it is not difficult to grow dill at home: it is enough to sow seeds in any container with soil, water the seedlings and remove weeds as necessary. But in fact, instead of thickets of green, fragrant dill, in a pot, pale thin blades of grass with little or no aroma often sway lonely.
The secret to getting a good harvest is in choosing the right type of dill. Experienced gardeners at home most often opt for the early ripening variety Gribovsky.
They are attracted by undemanding care, high productivity, resistance to diseases and temperature fluctuations. The cheerful greens of Gribovsky dill with a strong aroma will show off on the windowsill within 1-1.5 months after planting in the ground. To get a good harvest of this variety at home, there is enough fertile land and weed control.
Other varieties are grown on the windowsill: Grenadier (early ripening), Richelieu (mid-ripening with fragrant bluish-green leaves), Kibray (late ripening with wide beautiful leaves). At home, gardeners also cultivate southern varieties with a more spicy taste, which are more finicky.
Late-ripening varieties have their own advantages: they bush more strongly, produce more greenery. They ripen longer, greens grow for a longer time. There will be even more greenery if you sow the seeds of bushy varieties. Its abundance will look great on a windowsill or balcony. Growing dill on a windowsill has not only a utilitarian but also a decorative function: it perfectly decorates the interior.
There is no special type of dill intended for growing on the windowsill. When choosing a seed, you should focus on ripening timing.
It is important not to make a mistake here: although the early varieties give green mass very quickly, they are worse leafy and quickly stretch into flower stalks than late-ripening ones. Late varieties of the bush type (Salute, Gourmet, Russian size) do not have time to ripen in the beds over the summer, but they are perfect for growing at home.
On the window, such dill forms well-leafy dense bushes with new shoots emerging from the sinuses. For growing at home, late varieties are ideal.
Soil preparation
In a vegetable garden, dill grows on almost any soil. It is possible to successfully grow it at home only in a fertile soil mixture, which must be prepared in advance.
To do this, in the fall, prepare loose garden soil and mix it with purchased neutral soil intended for indoor plants before sowing. For sowing, it is recommended to select a container of sufficient size so that the dill is not constrained, and do not forget to make a drainage layer at the bottom of the container.
Dill seeds take a long time to germinate due to their high oil content. Before sowing, they must be soaked for 20 hours in warm water, through which oxygen is passed with the help of an aquarium compressor. A more affordable option is to place the seeds in warm water for two days and change it to fresh water every 6 hours.
Selection of containers
For growing dill, you can use wooden or plastic boxes or ordinary flower pots with a volume of 1-2 liters. To ensure the drainage of excess water, holes must be made in them. A drainage layer of any small pebbles, broken brick, expanded clay or pebbles is placed on the bottom of the containers.
After sprinkling it with sand, soil is poured on top. It should be nutritious and neutral. You can mix garden soil with peat and compost, or buy a ready-made special compound.
Preparing seeds for planting
Before sowing dill, you should prepare the seeds. They are soaked in warm water for at least 8 hours, and the water is changed several times. Some growers recommend soaking the seeds even for 24 hours.
After that, dill seeds are soaked for another 3-5 hours for disinfection in a 0.5% solution of pale pink potassium permanganate. The prepared swollen seeds are dried before planting by spreading them on fabrics. Those that did not sink to the bottom during soaking can be thrown away immediately: nothing will grow out of them.
Dill planting technology
Dill seeds can be sown directly on moist soil without making holes or grooves. From above they are sprinkled with peat mixed with humus. For one square decimeter of soil, it is enough to sow 0.3 grams of seeds.
To provide future plants with conditions for comfortable growth, it is recommended to leave a few centimeters between seedlings. The grown plants will not shade each other.
To get the best result, you can make grooves 1 centimeter deep in the ground, spill them with water and place the prepared seeds on the bottom. From above they are sprinkled with dry earth from the edges of the grooves so that a dense crust that prevents the emergence of seedlings does not form on the surface of the soil.
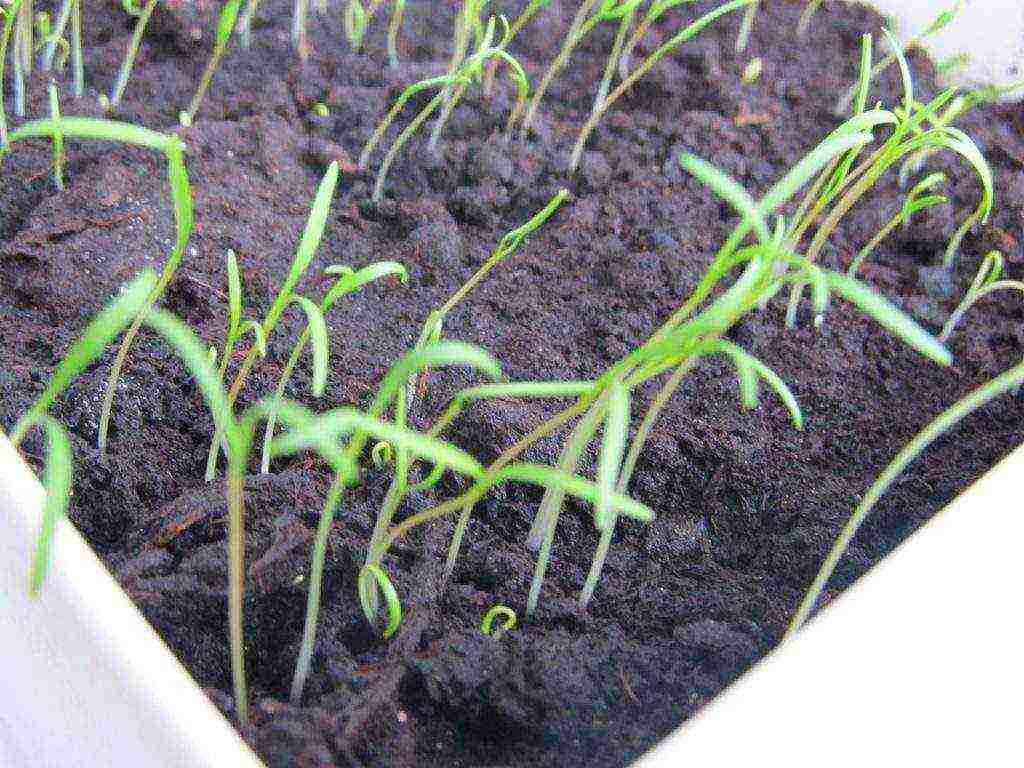
It is recommended to cover the container with crops with cellophane wrap and remove for a week in a dark place with a temperature of about 20 ° C. The first shoots will begin to appear in a week. In 10-12 days, all the seedlings will crawl out of the ground.
Dill care on the windowsill

Basically, caring for dill grown on a windowsill or balcony consists in the timely removal of weeds, watering and spraying.
Temperature and humidity
It is best to grow dill at a temperature of + 18 ° C, but even when the temperature drops to + 8 ° C, for example, on a glassed-in balcony, the plants will feel quite comfortable. If the temperature in the room is above + 20 ° C, it is necessary to increase the illumination so that the dill bushes do not turn out to be light, elongated and lethargic.
In order for the plants to gain strength, and not stretch up, in the first week after the emergence of seedlings at night, it is advisable to lower the temperature in the room by opening the window. To prevent the dill from stretching, you can take out crops to the glazed balcony. Excessive dryness or high humidity have a detrimental effect on dill.
After cutting, the leaves and stems of dill do not grow back. To cut fresh greens continuously, it is recommended to sow seeds every 3 weeks on the vacated area of your micro-town.
Lighting
When growing dill at home, do not forget that this plant is very light-loving. From March to August, it is easiest to grow it on a window: on a light windowsill in fertile soil, plantings form lush greenery and without additional lighting.
Plants grown in the autumn-winter period will stretch and fall without additional illumination. Due to the consumed electricity, the costs of cultivation will increase. During this period, planting will have to pay more attention.
Watering
Dill needs regular watering, which should be given special attention during seed germination and the emergence of young shoots. For irrigation, use clean, settled water.
In moist soil, dill grows well, but there should not be too much water: this will lead to mold on the soil. It is advisable to spray greens in a dry room more often. It is recommended to turn the pots 180 degrees daily so that the dill grows beautifully and does not stretch too much.
Top dressing
Planting once every 2-3 weeks should be fed with a complex mineral fertilizer. Some owners simply practice periodically adding vermicompost. If the dill was sown in fertilized fertile soil, fertilizing will not be required immediately, but after massive re-planting.
Growing dill on a windowsill in winter
Not every greenery can grow well indoors.Some plants prefer colder months and may even flower at home. Dill loves cool weather, so it's relatively easy to grow it at home. On the windowsill, you can sow it from mid-autumn to early spring.
This process does not require special skills and efforts. Dill sprouts quickly, its leaves are ready to be harvested within 6-8 weeks. Do not just forget that in winter, greens must be regularly watered and additionally illuminated.
Excessive dryness or high humidity is detrimental to dill. Powdery mildew affects greens at high humidity. Normally, the air humidity should be in the range of 40-50%. If the windows are cold to the touch, the foliage of the plants can freeze, the greenery can die.
An excess of fertilizers is more negative for dill than a lack of them. At the same time, it must be borne in mind that indoor greenery grows slowly during the winter months. From mid-October to mid-March, it is not recommended to reduce the amount of fertilizer. As a top dressing, you can use any liquid fertilizer intended for indoor plants.
After the formation of flower buds, feeding of greens is stopped. Plants can be pruned at the base of the stem. After 6-8 weeks, the aromatic greens are ready to harvest. Dill is usually used fresh, so it is harvested periodically to add to dishes.
Homemade greens saturate the body with vitamins, give dishes an appetizing look and unsurpassed aroma. Growing dill on a windowsill is a simple matter. The main thing is to follow the recommendations for breeding it at home, and then a fresh fluffy crop will appear in the flower pot.
What you need to breed dill
To grow a mini-garden on a windowsill or balcony, you will need:
- choose a variety of spices, prepare seeds;
- prepare a flower pot (container) of the required size, 15-20 cm deep and always with drainage holes at the bottom;
- collect garden soil and purchase land for indoor plants;
- when growing a house in winter, additionally use backlighting;
- the use of complex mineral fertilizers.
As you can see, the preparatory cultivation of dill at home will require minimal investment, effort and knowledge.
Variety selection
Seed material for breeding fresh greens from seeds must be selected based on the timing of its ripening.
Varieties are divided into categories, each of which has its own characteristics.
- Early - you will not have to wait for the seedlings of the harvest for a long time, usually the greens appear 3-4 weeks after planting, but there will be few stems and leaves. After the first leaves, dill of this species begins to bloom. These include the variety Gribovsky, Carousel, Early miracle, Aurora and Grenadier.
- Mid-ripening - greens will appear at home 10 days later than early ones, but there will be more bushes. This variety includes Umbrella, Richelieu, Smelly and Kibray.
- Late ripening - the spice in the mini-garden will grow later, but there will be much more fragrant thick dill. Such high-yielding varieties are Gigant, Alligator, Buyan and Russian.
In order for fresh spicy grass to always grow in a pot on the balcony, you can choose several varieties with different ripening periods. You can take an elongated container, divide it into three parts and plant early, late and mid-season varieties of dill at the same time.
Seed preparation
To harvest a high-quality and lush harvest at home, you need the seeds to germinate quickly and well in the soil. They must be soaked in warm water for 1-2 days, changing the liquid once every 12 hours. Those that are left floating on the surface are not suitable for planting, so they should be collected and discarded. The rest of the seeds remaining at the bottom of the container are good. They need to be drained and dried well.
Some experienced vegetable growers who are engaged in growing dill on the balcony, after removing bad seeds, soak the remaining seeds for 3-5 hours in a weak, light pink solution of potassium permanganate. This is how the seed is disinfected.
Soil preparation and container selection
As for the open air, spicy greens grow on any kind of soil, but at home it is better to plant them in fertile soil, but not acidic. A mixture of garden soil and soil for indoor plants prepared from last year is perfect. You can mix the substrate with humus, peat. The earth should be loose, breathable.
At the bottom of the container for growing dill on the balcony, it is necessary to lay a two-centimeter drainage layer (broken brick, expanded clay). It will help drain off excess liquid when watering the plant and protect potted greens from overflow. Prepared soil is laid on it.
When growing greens from seeds, any container will do: a plastic container, a wooden box, or a flower pot. The main thing is that the dishes are not small, because dill has a pivotal root system.
Advice
A container of 1.5-2 liters in volume is ideal for these purposes. A prerequisite is the presence of small drainage holes at the bottom of the container.
Sowing seeds
When growing fresh grass on the balcony, the soil must be irrigated with water from a spray bottle, shallow grooves must be made in the ground. The depth of the pits should be no more than 1-1.5 cm. Sow seeds into the holes, do not sprinkle them too tightly on top with earth, moisten the contents of the pot with water from a spray bottle.
Next, cover the container with a plastic bag (plastic wrap) to achieve the effect of a mini-greenhouse, put it to germinate for 7 days in a dark place with an air temperature not higher than 18-20 ° C. The film retains soil moisture.
When shoots appear from the seeds (after about a week), you need to remove the extra shoots so that an interval of about 3 cm remains between them. Place the container on the windowsill.
Additional lighting
Dill is a light-loving herb. Adequate lighting for fragrant greenery is more important than warm air. When breeding her at home in the spring and summer months, the sowing container should be placed on a lighted windowsill.
Important!
In the warm season, the greens should be fed by the sun's rays for at least 6 hours a day. In cloudy weather, it is better to supplement the dill with lamps.
When growing a mini-garden on a balcony in winter, it must be additionally illuminated. For this, fluorescent lamps of the white spectrum are suitable. Artificial lighting in cold months should work for at least 12 hours at a height of 50 cm from crops.
Comfortable temperature and humidity
When planting greenery at home, it is important to observe the optimum air temperature and humidity. Dill is quite hardy to cold weather, but 17-20 ° C is considered the best temperature for a good harvest. Boxes and containers with herbs can be stored on the balcony until the first autumn frosts.
Air humidity should be kept within 40-50%. Otherwise, with high humidity, the leaves of dill can be struck by a fungal disease, and excessive dryness can simply destroy the plant.
Success secrets
There are a few tricks for making your home grow fluffy and bushy.
- Water the dill when the top layer of the soil dries up with settled water. The first time, until the seedlings have grown stronger, it is better to irrigate them from a spray bottle.
- Plant feeding should be carried out with nitrogen fertilizers 1-2 times a month.
- Turn the sides of the container over to the light every day. So when grown on the balcony, dill will grow evenly.
Growing fresh dill at home is not difficult. Greens will give the room their aroma, saturate the body with vitamins all year round and decorate any hearty dishes.
The main thing when growing greenery at home is to choose the right seeds, prepare fertile soil, maintain a comfortable temperature, monitor air humidity and lighting.
 Fresh herbs are always at hand - it's very convenient. And in winter, it's also useful. So, for example, cultivating dill at home, you can provide yourself with an additional "portion" of vitamins for the winter. Therefore, we will devote this article to how to grow dill on a windowsill in your apartment or house.
 It would seem that it is not difficult to grow such a fragrant herb indoors. However, if you do not know the peculiarities and subtleties of this process, you can get not very rosy results. Like every crop, dill has individual properties. And you can grow it on your windowsill in the cold season (and not only), knowing the skills of agricultural technology and having prepared in advance. So, for example, growing fresh fragrant dill greens involves choosing planting material, properly sowing seeds and caring for plants as they grow.
 Having decided to grow dill (or parsley) in the house, you should take care of the seeds of the culture in advance. It is the right variety that will be the key to a successful harvest. There are no visual differences in the seeds. The main feature is the ripening time of the seasoning. This feature is a criterion for the classification of varieties of dill, which are early, middle and late.
So, for example, early maturing varieties are suitable for a "indoor garden":
Although, some greenery lovers prefer late-ripening varieties.
If you are going to grow parsley and spinach along the way, then their seeds, like dill, should be soaked in water for about 5-8 hours. Use warm water. After this time, the water must be drained and the seeds must be poured with a weak solution of potassium permanganate. It should be pink and at room temperature. This solution is used to disinfect seeds. Seedlings should be in it for about 2-3 hours.
 While the planting material is in the disinfecting solution, you can start pre-planting preparation. In order for the cultivation of dill to be carried out with maximum comfort for you and for the crop, you must immediately prepare containers, substrate and drainage.
For containers, you can take wooden boxes or ordinary flower pots. Depending on how much dill you plan to grow on the windowsill, the capacity of the vessels will change. On average, a 1-2 liter pot is sufficient. Only the main condition will be the presence of drainage holes at the bottom of the box or pot, in order to provide a drain of excess water during watering.
The substrate can be taken purchased. Vermicompost must be an obligatory component of the soil. Ideally, if you manage to make a mixture of 1 part vermicompost and 2 parts coconut fiber. The substrate can be poured into a container on top of the drainage layer and started for sowing and growing.
 Seeds that did not sink to the bottom during swelling in water and being in a solution of potassium permanganate are considered not of high quality. Therefore, it is worth using for sowing only those that are at the bottom. Then they must be removed and dried. The easiest way to do this is by laying them out on a piece of cloth or cotton pad.
As for sowing, there is no special scheme. You can grow dill in pots as you like - in bunches and in rows. Therefore, the sowing of seedlings can be done in the order you like. After sowing is carried out, the seeds must be sprinkled on top with additional soil. A layer of 1-2 cm will be enough. After that, the surface of the earth should be slightly moistened and all this should be covered with plastic wrap. For convenience, some housewives use food to achieve a greenhouse effect.
Containers with dill plantings can be sent to the lightest windowsill in the apartment. The optimal temperature regime will be considered readings close to +18 degrees.And in this state, plantings are left until the first manifestations of sprouts.
Dill, sowing and cultivation of which was carried out correctly, will sprout after a week. 100% of seedlings should appear 10-12 days after sowing. Clarification for those who grow parsley in the house, their shoots appear much later than dill - after 2-2.5 weeks. Little tricks of growing greens on the windowsill in the video.
> So, as you can see, sowing and growing the first shoots of fresh greens is not difficult. The main work must be invested in the further cultivation and care of plants.
Immediately, as soon as all the seeds have hatched, and all the sprouts will rise en masse, the film should be removed from the room greenhouse. For those who grow dill not in the cold season, care will consist in timely watering, spraying, abundant lighting and turning the pot (box) once a day so that the sprouts stretch upward, without bending.
For those who want to pamper themselves with a fragrant seasoning in the cold seasons, we will tell you how to grow dill on a windowsill in winter. In general, growing a spicy dill crop in winter consists of the same procedures as for conventional cultivation. Only in this case, more attention should be paid to the lighting. Indeed, with a short daylight hours, dill will not have enough natural light. As a result, dill will "stretch" and will not please with fluffy bushes. Therefore, the cultivation, which lasts from September to March, involves the installation of additional lighting. As a rule, it is necessary to use a fluorescent lamp, which is recommended to be installed at a height of about 50-60 cm above the dill. The sprouts located on the windowsill will have enough illumination for 5-6 hours daily in the morning. If the containers are located in the back of the room, then they need to be provided with illumination for 15 or more hours.
 Also, containers with dill seedlings must be constantly rotated 180 degrees. This procedure should be carried out once a day so that the sprouts do not stretch out or bend over.
Dill should be watered regularly, but in moderation. You can feed plants once every 2-3 weeks. You can use complex mineral fertilizers.
The optimum temperature for growing dill at home is considered to be +17 - +19 degrees. Although dill will tolerate slight drops in temperature.
Growing dill in your home will be more or less troublesome, depending on which time you choose. So, for example, the process will be less troublesome if dill is grown from March to early September. During winter and autumn, dill can be grown on the windowsill only if you pay more attention to it.