Content
- 1 Mistake 1: using low-quality seeds
- 2 Mistake 2: poor planting soil
- 3 Mistake 3: inappropriate container for seedlings
- 4 Mistake 4: lack of seedbed preparation
- 5 Mistake 5: Attempting to "improve" seed-treated seeds
- 6 Mistake 6: failure to meet growing dates
- 7 Mistake 7: over-burying seeds
- 8 Mistake 8: thickening crops
- 9 Mistake 9: watering after sowing
- 10 Mistake 10: violation of growing conditions
- 11 Mistake 11: underestimating the role of seedling feeding
- 12 Mistake 12: ignoring seedling diseases and not preventing them
- 13 Mistake 13: late picking of seedlings and its consequences
- 14 Mistake 14: neglecting hardening
- 15 Mistake 15: overgrown seedlings
- 16 Good home seedlings - the secrets of growing
- 17 Preparing the soil for growing seedlings
- 18 How to plant seeds in the ground for seedlings?
- 19 Setting the correct lighting for seedlings
- 20 How to place seedlings in an apartment?
- 21 How to place seedlings on the windowsill?
- 22 How to place a lot of seedlings on a windowsill
- 23 How to prepare a window sill for seedlings
- 24 Seedlings: home care
- 25 Seedling care after germination
- 26 How light affects seedlings
- 27 Air humidity for seedlings: how it affects
Growing
seedlings
- an exciting process, and it causes a lot of emotions. Some gardeners are delighted with it, the second treat it as an obligatory stage of growing plants, others cannot stand it and avoid it in every possible way, but all together understand: in our latitudes, it is simply impossible to grow many beautiful and useful plants on your site without seedlings.
Growing seedlings is a fun process
Seedlings should be beautiful and healthy: strong and stocky, with a well-developed root system and a thick, sturdy stem. Everyone can grow this, and for this you do not need any special skills, the main thing is desire and a little knowledge. If you already have all this, then the only thing that can get in the way is the mistakes made by summer residents when growing seedlings.
And these mistakes can cost you seedlings: it can stretch out, get sick and eventually die. Then the time, and even the money for the purchase of seed, will turn out to be a pointless waste. Better, let's learn together from other people's mistakes and draw appropriate conclusions.
Mistake 1: using low-quality seeds
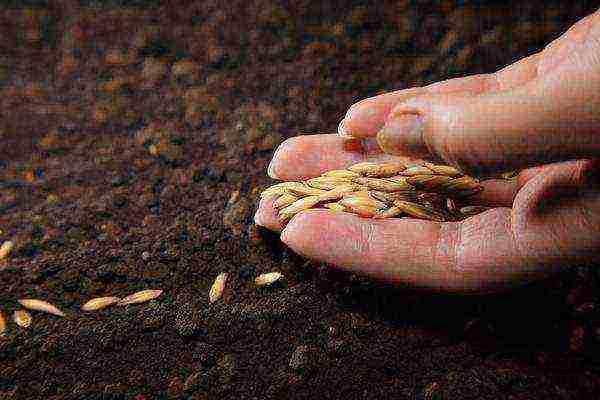
Buying poor quality seeds is the first, most significant and common mistake when growing seedlings. after all, the result will first of all depend on the quality of the seeds. The desire to save money is understandable, but be careful: it can let you down! At best, poor-quality seeds will grow weak plants, but at worst, nothing will grow at all.
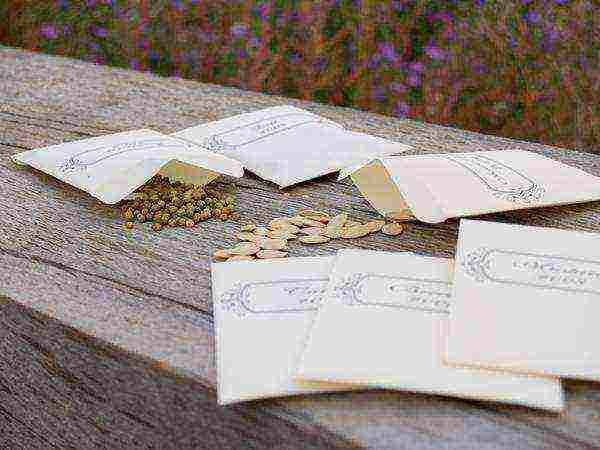
Seeds must be of high quality
Therefore, save wisely - buy seeds from reputable companies from trusted suppliers. The packages must indicate the number of seeds inside - in grams or pieces, their expiration date and batch number. For comprehensive information on how to choose quality seeds, see article 7 essential rules for choosing seeds.It is also helpful to find out which 10 mistakes in seed selection are the most common, and avoid them.
You can find answers to other important questions in the articles:
- Top 5 Questions and Answers About Seeds
- What every summer resident should know about seeds
- Your seeds: how to grow, collect, save
- 10 rules for buying seeds
- How to buy seeds online
- Discussing seed producers. Top 5 at the end of 2017
- Terms of storage and sowing, conditions for germination of vegetable seeds
- Plasma, inlaid and 6 more types of unusual seeds
- 3 common seed myths among gardeners
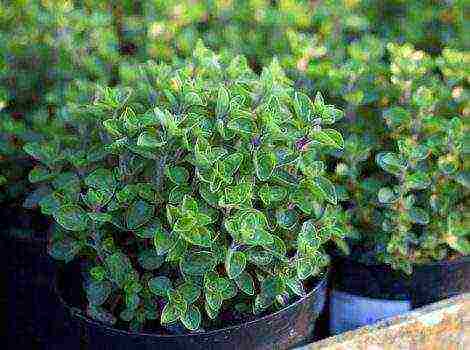
Mistake 2: poor planting soil
The use of soil mixtures of poor or unsuitable quality for growing seedlings can slow down its development and even lead to death. You can't just go to the garden, collect land and sow seeds in it - this is thoughtless and wrong. After all, for example, for seedlings
cabbage
you cannot use the land on which Cruciferous plants were previously grown: that it probably contains infections characteristic of cabbage crops, and you can destroy your seedlings already at the initial stage of its cultivation. How to be?
Seedling soil is very important
You can prepare the seedling potting mix with your own hands, you can purchase a ready-made product - the main thing is that it is suitable. That is, made up of a number of special components: sod land, peat, humus, and so on, taken in the right ratio, which depends on the selected crops. The components of the mixture (as well as ready-made purchased soil) are necessary cold treat, to destroy pathogens, and - to awaken beneficial microflora - with the drug "Baikal". The article How to prepare the soil for growing seedlings will tell you about the different methods of tillage and the composition of soil mixtures.
Mistake 3: inappropriate container for seedlings
Using unsuitable containers for seedlings - too heavy, loose; too large or, conversely, tight; poorly drained and other poor-quality or poorly selected containers can also kill plants. Not having time to sprout, the seeds will rot, and even if you are lucky and some of the seedlings still sprout, it is not a fact that they will be able to develop normally when the root system is in unfavorable conditions. 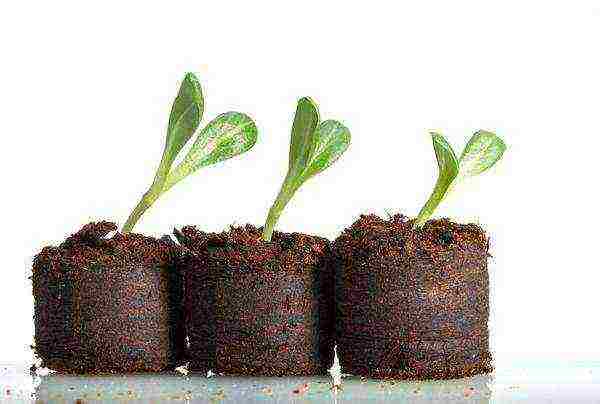
The result depends on the correct choice of container for seedlings.
You can read about what containers can and should be used to grow healthy and strong seedlings in the article Paper honeycombs, peat tablets and 13 more options for seedling containers). And this video will teach you how to make your own peat tablets:
Mistake 4: lack of seedbed preparation
Preparing seeds for sowing is an important point that farmers often do not pay enough attention to, but in vain. Sowing unprepared seeds can also cause the death of young seedlings. This is especially true for seeds of our own production, but it is also true for purchased untreated seeds.
Before sowing, the seeds should be treated
What is the reason for this? A significant part of infectious diseases, for example, the same vegetable crops, is transmitted not only with soil, but also with untreated seeds... The lack of preparation directly affects both germination and subsequent development of plants. You can familiarize yourself with the rules and procedures for pre-sowing preparation in detail by reading the article How to carry out pre-sowing preparation of seeds and watching a selection of videos on the same topic. We talked about seed germination and how to check it in this article.
Mistake 5: Attempting to "improve" seed-treated seeds
An attempt to "improve" the sowing quality of seeds already treated by the producer can lead to very sad consequences. At the very least, it will negate all the benefits of your purchase. In the worst case, as a result of such diligence, the seeds may lose their germination.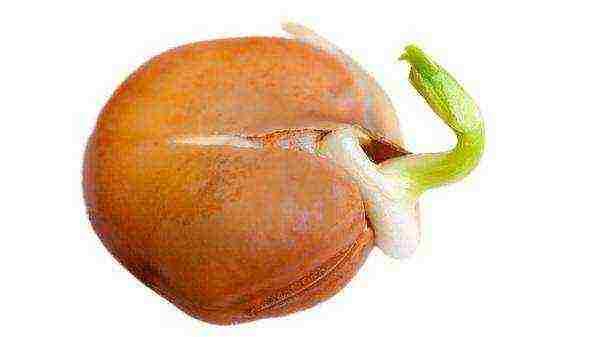
Attempting to improve the treated seed may result in a loss of germination. Information on the seedbed preparation performed can be found on the back of the seed package. Some types of processing (for example, pelleting) can also be identified visually. You can learn more about the methods of industrial processing of seeds, about their features and benefits from the article Plasma, inlaid and 6 more types of unusual seeds.
Mistake 6: failure to meet growing dates
Many novice farmers mistakenly believe that there is no need to comply with the terms of sowing and growing seedlings: just think, three weeks earlier or two weeks later - what, it would seem, is the difference when to sow seeds? Nevertheless, there is a difference, and it is significant.
It is very important to sow seedlings on time Failure to meet the deadlines will lead to the fact that the plants will turn out to be underdeveloped and may not take root after transplanting to a permanent place. The approximate time for sowing seeds for seedlings is always indicated by the manufacturer on the back of the package., so be guided by it. You will find a universal method for calculating the sowing dates for vegetable crops in the article When to sow vegetables for seedlings.
Mistake 7: over-burying seeds
Burying more seeds in the soil than required can cause them not to germinate at all or only a few will germinate, so don't overdo it when sowing! The seeding depth for most species is equal to 2 seed diameters... Do not forget that there are light-like seeds - they cannot be sprinkled with soil at all, because light is an important condition for their germination. Manufacturers, as a rule, also indicate information on the depth of planting seeds on the packaging.
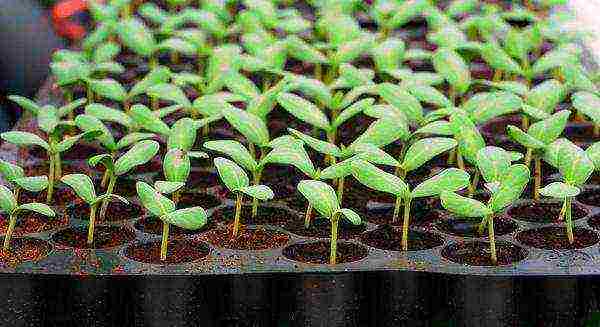
Mistake 8: thickening crops
Another common mistake many gardeners make is thickened sowing of seeds, the consequences of which will be weak, elongated seedlings and not only. Thickened crops are much more likely to be affected by diseases. In addition, the seedlings simply do not have enough space for normal development, they lack nutrition and, as a result, develop unevenly, become very fragile, and stretch out.
You should not thicken crops if you want to get good seedlings.
Therefore, it is necessary to sow seeds at a sufficient distance from each other, so that the emerging plants have enough area for nutrition and during growth they do not compete with each other, constantly fighting for food, light and moisture. Of course, this distance will be different for each culture, therefore, in order not to be mistaken, take into account when sowing the seeding rates and agricultural techniques.
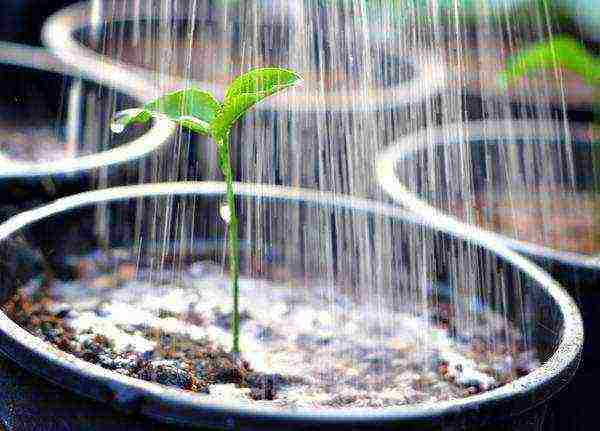
Mistake 9: watering after sowing
Watering the seeds, or rather the soil in which these same seeds are located, immediately after sowing, leads to the fact that the seeds, along with the water, are drawn into the depths of the soil. This means that they will germinate much longer, if they germinate at all (we have already talked about how important the correct sowing depth is).
The soil in boxes for growing seedlings must be watered with water before sowing seeds, while using room temperature water... If you need to moisten the soil after sowing, do it with a spray bottle. You can read about other irrigation devices and devices in the article Features of watering plants in a home garden.
Mistake 10: violation of growing conditions
One of the most serious mistakes in growing seedlings, the consequence of which is their death, is a violation of growing conditions: temperature, lighting, watering, and so on. You can read more about the conditions necessary for seedling in this useful article, but now we will consider only the results of violating some of them.
Watering
Insufficient watering will cause overdrying of the topsoil, as a result, swollen seeds will not be able to sprout, and those that have already sprung up will die.Therefore, it makes sense to cover containers with plants with foil or glass, which will prevent moisture from evaporating from the surface layer of the soil. After the emergence of seedlings, having removed the film, do not forget to water the seedlings in time, not allowing the earth to dry out.
It is necessary to water the seedlings on time and in moderation. Excessive watering, in turn, can cause root rot and damage to young plants by various diseases: black leg, root rot, and so on. Will lead to the death and development of various diseases and watering the seedlings with excessively cold, unsettled water... Water for irrigation should always be at room temperature - approximately + 20 ... + 24 ° С.
Lighting
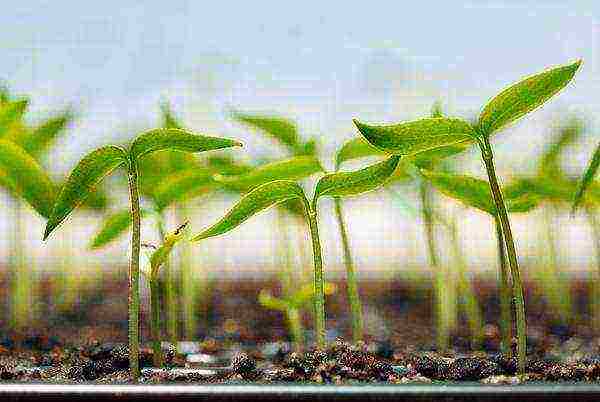
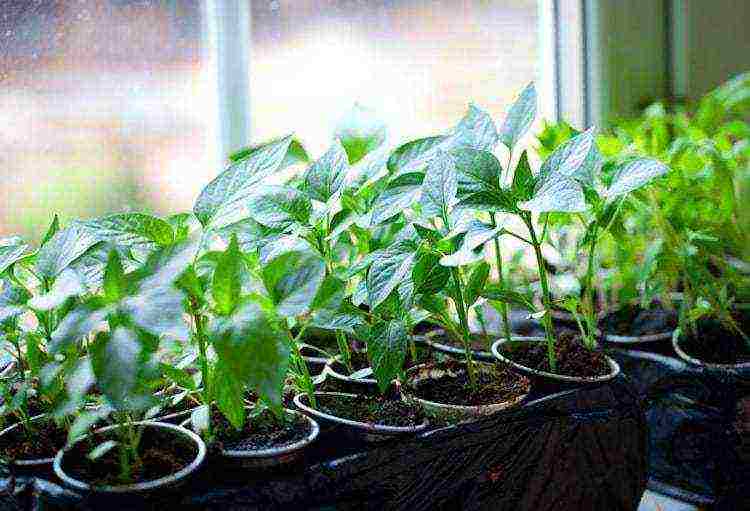
Growing seedlings in low light, you run the risk of ruining it. The plants will become very fragile and elongated.
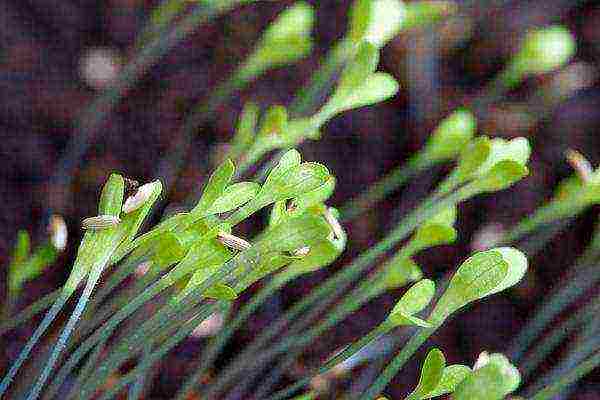
If the lighting is insufficient, the seedlings stretch out and weaken.
To ensure sufficient lighting, the seedling containers must be placed on a sunny - ideally southern - windowsill. Considering that the duration of daylight hours required for normal growth and development of plants is 12-14 hours, the seedlings need to be illuminated using phytolamps or fluorescent lamps for this. This is especially true for early sowing of seeds, even if containers with them are located on the southern windows.
To increase the effect of lighting, in containers with seedlings opposite the window, you need to install reflective foil screen - for example, made of thick cardboard covered with ordinary food foil.
Temperature
Too low a temperature, at best, will entail a slowdown in the growth of seedlings, but at worst - its death, if the seeds sprout at all. Therefore, the container with seedlings is better do not install on a cold windowsill, especially immediately after sowing, because the temperature inside this container will be about 10 ° C lower than the temperature in the room itself. It is because of the low temperature that you can never wait for seedlings.
How to be? Install the container with seedlings not directly on the windowsill, but on some kind of support so that there is at least a small gap between this container and the windowsill. Keep in mind that too high a temperature will also negatively affect the seedlings, which, under the influence of excessive heat, will stretch out.
Ideal temperature for seed germination cold-resistant crops are considered + 18 ... + 25 ° С, and for thermophilic crops - + 25 ... + 30 ° С. For the further normal development of most seedlings, a temperature of about +20 ° C is sufficient, therefore, after the seedlings have appeared, the temperature in the room where they are grown must be slightly reduced.
Mistake 11: underestimating the role of seedling feeding
Regardless of what kind of seedlings you grow, they need feeding. This is especially true for seedlings grown in small containers - for example, cassettes. To feed the seedlings, you can use various solutions of fertilizers at a low concentration.
Plants not only need water, but also fertilizer.
Before feeding, the soil in containers must be lightly watered with ordinary water so as not to burn the fragile roots with fertilizers.
Mistake 12: ignoring seedling diseases and not preventing them
Ignoring seedling diseases - root and root rot, black leg and others - will inevitably lead to the death of plants, therefore, it is impossible to hope for a miracle, that everything will go away by itself. As soon as you notice that something is wrong with the seedlings - it has become frail, its leaves fall off, the trunk darkens, other signs of trouble have appeared - it is necessary to stop the disease as soon as possible.
First, they diagnose, look for the causes, and then take measures to eliminate the problem. It is not possible to fully disclose the topic of seedling diseases and methods of dealing with them in this article - it is too extensive. Publications and comments on the questions of summer residents will help to understand it:
- Black leg of seedlings: we use folk remedies
- What are tomato seedlings sick with?
- What about tomato seedlings?
- What killed tomato seedlings?
- Why is there no growth point for tomato seedlings?
- The leaves of tomato seedlings are twisted "into a knot". Tell me, is this a disease?
- The leaves of the pepper turned white after being planted in the greenhouse. Should you worry?
- What is a pest or disease in eggplant and pepper seedlings?
And for prevention, try to take care of the seedlings in advance: prepare an infection-free soil mixture with the addition of "Trichodermin", "Glyokladin" or their analogues, treat the seeds before sowing, and regularly water the seedlings with the same "Trichodermin" or similar preparations, observe the growing conditions seedlings.
Mistake 13: late picking of seedlings and its consequences
Tightening up with a dive of seedlings, you contribute to the fact that the plants are stretched, become more fragile and frail, especially with thickened sowing. Most seedling plants it is necessary to dive when they have a second real leaf... This is done in order to increase the feeding area and give the plants the opportunity to evenly develop the aboveground part.
It is important to dive the plants in time.In the first 2-3 days after the dive, young seedlings must shade, protecting from direct sunlight... When diving, the plants are deepened to the cotyledons and (if possible) shorten their roots by about 1/3 of their length. It is not necessary to shorten the fleshy thick roots, damage to which will lead to the death of plants. For the first time, you can water the plants after picking for about 5 days, and feed them only after they begin to grow.
Of course, some plants should not be dived - this procedure will only slow down their growth. First of all, this concerns seedlings of cucumbers and peppers, which are sick for a long time after the pick. The seeds of such plants are necessary sow immediately in separate containers or, as needed, transfer more in containers along with a clod of earth, without violating the integrity of the root system.
Arguments "for" and "against" picking seedlings will help you understand this issue in more detail.
Mistake 14: neglecting hardening
Ignoring such an event as hardening can lead to the fact that your seemingly healthy and strong seedlings in the open field simply do not take root or the very first small frosts will destroy it. therefore a few days before planting in a permanent place, the seedlings must be hardened... Note that this should be done gradually, every day slightly increasing the time during which the plants are outdoors.
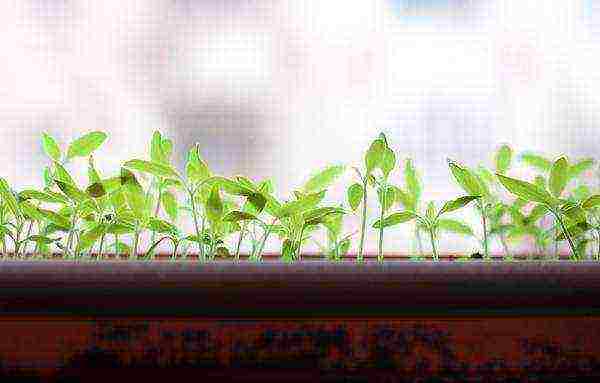
Mistake 15: overgrown seedlings
Overgrowing, the seedlings stretch out and weaken. But the problem of overgrown seedlings is not even that it is more difficult to transplant it to a permanent place (especially for tall tomato seedlings, which, outgrowing, begins to break down during transplantation), but that it does not take root well.
It is very important to plant seedlings on time.If the time for planting seedlings in the ground has approached, and due to some circumstances, you cannot plant them in a permanent place,limit watering... Of course, you don't need to completely abandon it - just try to reduce the frequency of watering and the amount of water, making sure that the soil does not dry out. It is also possible to suspend the growth of seedlings by hardening, because a decrease in air temperature also causes delays in plant growth.
You may also find the following resources helpful:
- 7 questions and answers about healthy seedlings
- Once again, briefly about seedlings
- Reproduction and planting: growing seedlings
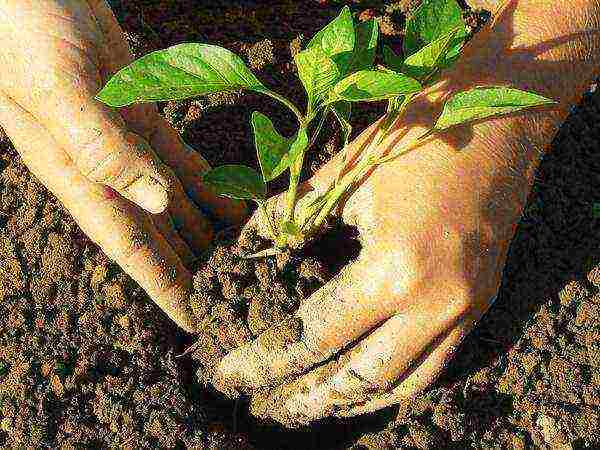
- How to properly plant seedlings in open ground
- When to plant vegetable seedlings in the ground and in greenhouses
- How to water seedlings when planting in the ground
- Useful tools for growing seedlings
Well, that's all, probably)) Have you ever made mistakes when growing seedlings? What conclusions did you draw from them, what did you learn? It is not for nothing that they say that it is better to learn from other people's mistakes - let's share our experience in order to warn each other against possible failures.
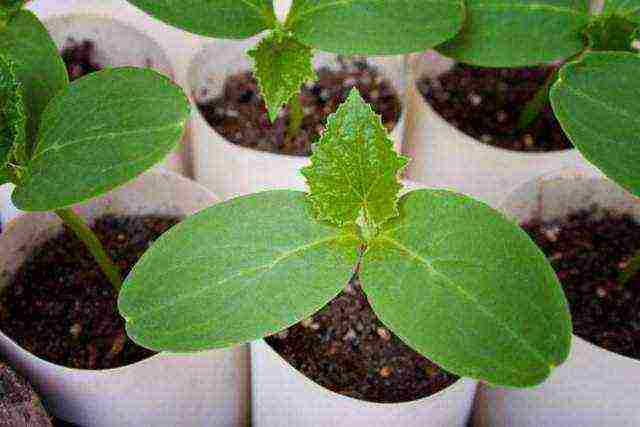
Strong home seedlings of vegetables and flowers are the key to a rich harvest. How to grow good seedlings with your own hands at home, we will tell you later in this article.
It will take quite a bit of time and the first - home seedlings - will begin to appear on the windowsills of houses here and there.
What gardeners do not plant - amateurs at home !!!
These are cucumbers with tomatoes, cabbage, sage, eggplants, flowers and much, much more ...
Nevertheless, the expectations of gardeners are not always gifted with generous future harvests.
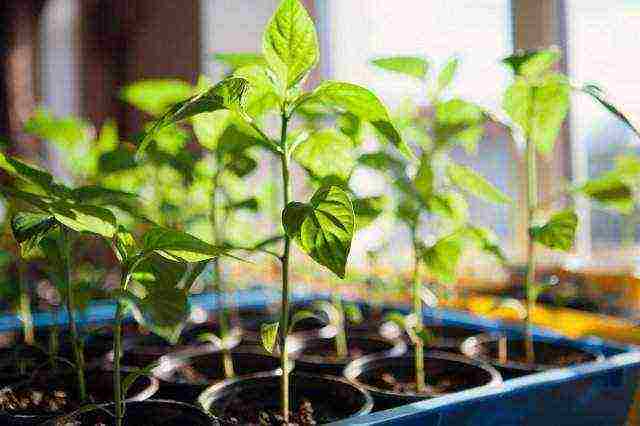
Sometimes the seedlings grow, stretch out, and become completely frail ..
How to provide the necessary conditions for seedlings to create healthy seedlings?
After all, this is the key to a solid foundation for a future high-quality and generous harvest!
How to grow seedlings correctly in order to get the expected positive result that you could happily share with your neighbors in the country?
This will be the topic of this article.
Good home seedlings - the secrets of growing
What may be needed to grow seedlings?
As a rule, the following items are used for growing seedlings:
- boxes, special containers for sowing, cassettes, peat cups and tablets, cups for picking (they can be replaced with transparent containers with and without lids from the supermarket, dark disposable cups, bags for juices and dairy products, plastic bottles for lemonade and water; jars of yoghurt and other suitable containers)
- rakes and shovel,
- watering can and pulverizer,
- lamps for supplementary lighting of seedlings,
- PE film or covering material.
Note!
When using plastic cups for growing seedlings, do not forget to make a drainage hole in them. To transplant such seedlings into the ground, you need to cut a glass and plant a plant with a lump of earth.
How to choose seeds?
In order to get good seedlings, you need to choose the right seeds.
Firstly, they must be of high quality, secondly, one must not be mistaken in the selection of the variety, and thirdly, it is advisable to immediately correctly calculate the required number of seeds.
What is meant by quality seeds:
- When buying seeds, first of all look at the manufacturer. It is better to buy seeds from companies with which you have already dealt and have been convinced of the quality of products through experience.
- It is best to purchase seeds in bags with a layer of foil and plastic wrap, such seeds are stored better. Their implementation period is 2 years, and for seeds in simple paper bags - 1 year.
- Carefully read what is written on the package: description of the variety, planting recommendations, shelf life of seeds. The% germination rate, the number of seeds in grams can also be indicated.
Choose a variety according to your personal taste, someone likes the early varieties more, someone later, etc.
It is important to distinguish between pure varieties and hybrids.
It is important!!!!
Hybrids can have various unique qualities - increased fertility, disease resistance, etc. But these qualities will not be passed on to the next generations of plants. That is, you acquire such seeds for only one season. But in pure varieties, all qualities are passed on to the next generations. In addition, these seeds are purchased only once, and then you can collect your own seeds.
Also, you should not buy seeds for stock, buy exactly the amount of seeds that you can plant in the current year.
Note!
Read more on how to choose seeds in this
article
.
Seed preparation for sowing
Before planting seeds in the soil, you need to properly prepare them. Then the seedlings will start to develop well right away!
Preparation includes several stages:
- Disinfection of seeds before planting
To avoid the risk of damage to seedlings by various diseases, seeds are recommended to be disinfected or pickled before planting.
This is done in order to exclude the possibility of seed contamination by pathogenic microorganisms.
At home, seeds are usually etched with a solution of potassium permanganate (soaked for 45 minutes in a 1% solution of potassium permanganate):
- tomato seeds,
- Luke,
- radish,
- celery,
- peas,
- beans,
- beans,
- physalis,
- corn,
- salad,
- annual flowers
Seeds that must be soaked for 20 minutes in a 2% solution of potassium permanganate:
- Cabbage seeds,
- pepper,
- cucumbers,
- eggplant,
- carrots,
- dill,
- pumpkin crops
How to prepare a solution of potassium permanganate for disinfecting seeds
For a 1% solution, you need to take 1.0 g of potassium permanganate and dissolve in 100 ml of water, to prepare a 2% solution - 2 g in 100 ml of water.
After disinfection, the seeds are washed with running water.
Currently, there are many modern preparations for seed disinfection. When using them, you must carefully follow the instructions on the package.
- Soaking seeds before planting
Dry seeds germinate much worse and slower than wet seeds.
Therefore, before planting, it is recommended to soak them in water or in special solutions-stimulants for germination.
This must be done correctly so as not to ruin the seeds.
In no case should you keep them in a large amount of water - so the seeds suffocate and you can ruin all the planting material.
What kind of water is used to soak the seeds?
For soaking, it is better to use melt water or still mineral water. Ordinary tap water for seeds can be hard.
How long should the seeds be soaked?
Seed soaking time depends on the crop. On average, 18 hours are enough for this. The exceptions are: carrots, dill, green onions, parsley, celery - they need to be soaked for 48 hours.
How to soak seeds before planting?
Place the seeds between damp cloths and place them in a lidded container or plastic bag to prevent moisture from evaporating too quickly. Place the container in a dark place (for example, a closet), at room temperature (20 -25C)
Important!!!
Dragee, gel, plasma, laser seeds do not need to be soaked before planting !!!
Also, to stimulate the rapid growth of seeds, methods such as stratification (cold stimulation) and scarification (artificial violation of the integrity of the upper shell of the seed) are used.
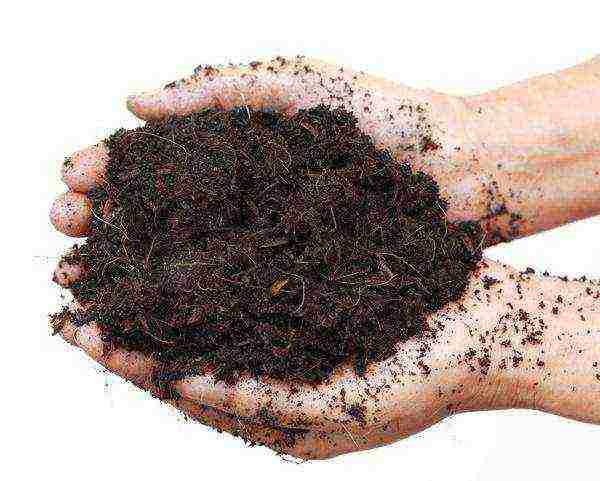
Preparing the soil for growing seedlings
It is difficult to overestimate the importance of preparing the soil for planting seedlings, since the correct selection is already half the success in growing seedlings.
The choice of substrate for different plants is different, however, there are uniform rules that apply to all plantings.
The seedling soil should be light, loose, and porous, this will allow oxygen to easily penetrate to the roots of the seedlings. It is best to purchase seedling soil in specialized stores.
- Nutrient value of the substrate
The composition of the soil should include organic matter, macro- and microelements. Moreover, they must be contained in an easily digestible form.
When preparing the substrate, it will not be superfluous to remember that the measure should be in everything, you should not make it too nutritious - the composition of the soil should be balanced.
Important!!!
If the nutrient content of the substrate is increased, the seedlings will receive more fertilizing than is required, therefore the seedlings will grow vigorously, with a lack of light, the result will be as follows - the plants will turn out frail and elongated, this can hardly be called a desirable result.
- Moisture content and neutrality of the substrate
Soil acidity should be close to neutral with minor deviations in the pH range 6.5–7.2.In addition, the soil must absorb and retain moisture well.
The universal composition of the soil for seedlings is as follows:
- Humus - part 1
- Coarse sand - 1 part
- Sod land - 2 parts
- Wood ash - 2 cups per bucket of this mixture.
Also, these organic and inorganic components can be added to the seedling soil: leaf and turf soil, moss, husks from seeds and nuts, eggshell and banana peel powder, peat, expanded clay, slaked lime, perlite, river sand.
- Freshness and safety of the substrate
If you use your own soil for planting seedlings, before sowing seeds, sift it first through a sieve, and then steam it.
How to steam the earth
One of the simple and affordable ways of steaming is carried out using the oven: pour the earth into a baking sheet and moisten, then keep it at a temperature not higher than +80 ° C for 2 hours.
How to plant seeds in the ground for seedlings?
The algorithm for planting seeds for seedlings is as follows:
- Fill the box with prepared soil and use a sprinkler to moisten it well with water or a solution of a bio-preparation that stimulates germination (for example, Shine - 2)
- Make grooves in the ground with a depth of 1.5 cm, you can do this with a stick or ruler.
- Further, the seeds are placed in the grooves, the distance between the seeds should be at least 1.5 cm.
- If the seeds are large, they are slightly pressed into the soil and sprinkled on top with a 1 cm layer of soil. If the seeds are small, they are slightly pressed and the soil is compacted.
- Next, the container with seedlings is covered with PE transparent film and placed in a warm place until germination.
Temperature regime for growing seedlings
The optimal temperature regime that you can create for seedlings will ensure good germination, growth and development of young seedlings.
The average temperature for plants during the day should be: +20 ° С, in the daytime the temperature should be increased to + 23-25 ° С.
In the first week after germination, it is better to keep the temperature within: + 17-18 ° С.
Plant crops are divided into three groups in relation to heat:
- 1st group - cold-resistant (all cabbage)
- 2nd group - moderately heat-demanding (potatoes, beets, lettuce, onions, leeks, lettuce)
- 3rd group - thermophilic. (annuals, pumpkin seeds, tomatoes, beans, peppers, eggplants)
After sowing the seeds, the temperature for germination should be high enough - for the first two groups it is 20–25 ° С, for the third - 25–30 ° С.
After the appearance of the first shoots, in order to stop the pulling out of seedlings, the temperature must be reduced to 10 ° С for the 1st group, to 12 for the 2nd group, to 15 ° С for the 3rd group, 15-17 ° С for melons.
2 weeks before transplanting into open ground, the seedlings must be hardened. For the first two groups, the temperature is maintained at 6–8 ° С, for the third group - 12–14 ° С.
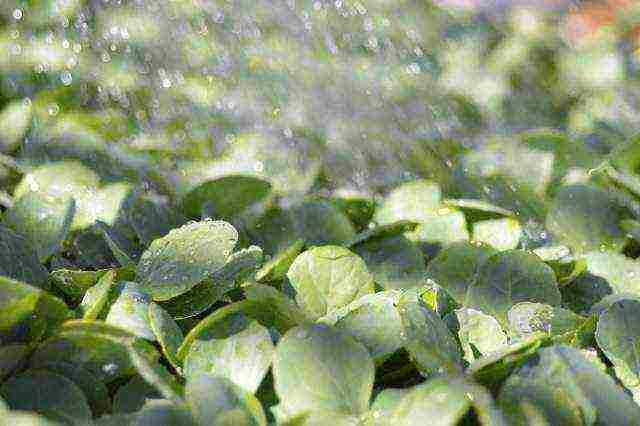
Optimal air humidity for seedlings
Optimum air humidity ensures fast germination of planted seeds and good development of seedlings.
A beneficial percentage of air humidity is 60-70%.
But peppers and eggplants prefer a moisture content of 60–65%, while cauliflower and zucchini prefer 70–80% moisture.
One of the ways to maintain humidity is to spray them, but spraying alone will not be enough, since this measure is very short-lived.
Try to take a plastic wrap by placing it under the pots, folding the edges so that the edges are about 30 centimeters higher than the pots. This will provide a greenhouse effect, thereby increasing the humidity in the room.
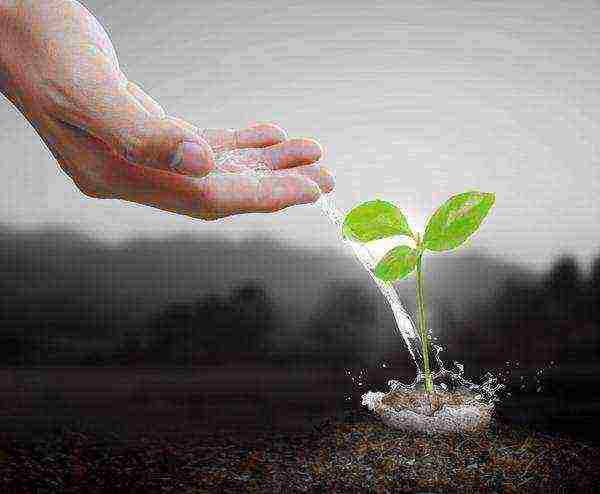
How often to water the seedlings?
The importance of watering can hardly be overestimated, since plants constantly need water, drying out the soil leads to harmful consequences.
Watering can be done from a regular watering can.
If the seeds are slightly covered with earth, then watering them must be done very carefully - with a pultilizer or a pipette.
What kind of water is used to irrigate seedlings?
Water for irrigation is used settled, at room temperature.
How often to water the seedlings?
Watering should be done 1-2 times a week. However, the frequency of watering is largely determined by the type of container in which the seedlings are grown. Watering time: any, but sunny in the morning is better.
In boxes and plastic cups, seedlings are watered less frequently than in peat cups and peat tablets.
In 2-3 hours after watering, it is necessary to remove excess water from the sump, if it appears there.
Setting the correct lighting for seedlings
It is good if the windows of your house are facing the sunny side, but this warmth is hardly enough to provide sufficient conditions for the growth of young plants.
The time required for plants to illuminate should be at least 12 hours a day.
For growing seedlings, choose the lightest window in your apartment.
One way or another, you will have to think about the lighting, not to mention when the windows of the house overlook the shady side.
Remember !!!
The first 2-3 days after the emergence of seedlings, the seedlings are illuminated around the clock, then 12-16 hours a day.
There are various lighting options, more or less expensive, let's talk a little about them:
- Incandescent lamps
One of the simplest ways to illuminate the garden on the windowsill is to use conventional incandescent lamps, lamps are usually selected within 40 watts. The backlighting method is not the best, because excessive heat is generated, which leads to stretching of the plants and leads to a high probability of leaf burns. In general, the pros are dubious, but the cons on the face.
- Fluorescent lamps (fluorescent lamps)
In general, in terms of their characteristics, these lamps are close to the required spectrum, they give off light well, do not heat up, and therefore do not overheat the plants and are quite economical. Most often they are combined using 250 W lamps: warm - 3000 K and cold - 3500 K colors.
- Discharge lamps
Such lamps are most often used in large production greenhouses or greenhouses. At home, such lamps can only be used in unwanted rooms due to the strong brightness of the lamps. Mercury lamps emit less light than sodium lamps, so they are not suitable for seedlings. Sodium lamps are the most suitable of gas-discharge lamps, since they are more suitable for the spectrum by the sun's rays, of which metal halide are most suitable for vegetative growth of seedlings.
- Phytolamps (LED lamps)
Such lamps emit streams of the necessary light, are well suited for the growth of seedlings and occupy a leading position in this direction. These luminaires are economical, ecological and energy efficient, while at the same time having a long service life. The disadvantage of such lamps is the high price and lack of moisture protection. They can also be used as LED strips.
What kind of lighting to choose for your home garden is up to you, at the same time remember, if your windows face the shady side, then turn on the lights every day.
If the windows are located on the sunny side, turn on the lamps on cloudy days.
When installing lamps, the distance from the lamp to the plant should be no more than 10 centimeters; with the growth of seedlings, the distance increases.
Possible seedling diseases
During the growth period, young plants are susceptible to various diseases such as black leg or root rot and others, consider the listed ones:
- Blackleg
A very dangerous disease in which the plant quickly withers and dies. Typical signs of the disease: the stem near the ground turns black, the cotyledon leaves wither and turn yellow. If this disease is found, remove the affected areas, and do not water the remaining sprouts for several days. Also remove the topsoil from diseased plants by adding ash instead.
- Root rot
This disease has characteristic signs: yellowing of the lower leaves, after their darkening and falling off, the appearance of dark stripes on the stems, fragility of the roots.
Alas, there is no way to treat this disease; plants such as cabbage, tomatoes, peppers, eggplants, sage, cloves, and allspice are most susceptible to this disease.
Note!!!
Most of all, plants planted in soil with an acid reaction, or if there is too much organic matter in the soil, are predisposed to such diseases. One way to prevent root rot is to use a fresh and loose substrate.
Top dressing of seedlings
During the entire growth period, seedlings must be fed.
Top dressing happens:
- root - fertilizers in liquid form are applied to the soil.
- foliar - a solution of fertilizers is sprayed with a spray bottle on the aboveground part of the plants.
The first root feeding is done 10 days after germination.
Then the seedlings are fed once a week, until they are planted in a permanent place.
Foliar dressing is done from the moment the first true leaves appear, once every 2 weeks.
As fertilizers, universal complex balanced fertilizers for seedlings are used.
Seedling picking
Picking is the transplanting of seedlings into separate containers.
It is necessary in order to provide the seedling with sufficient nutrition, as well as to exclude excessive thickening of the planting.
The pick is carried out at the stage of the first 2-3 leaves.
When to plant seedlings - features of seedling care
As a rule, it is better to plant seeds for seedlings on favorable days of the lunar calendar, more details here
| the culture | sowing time | where to sow | additional lighting period |
| Cucumbers | 20 . 04 — 10. 05 | In cups, peat pots or peat tablets, do not dive | 2-3 days around the clock, then 14-16 hours a day |
| Tomatoes |
Early varieties and hybrids - 3rd decade of March, middle and late varieties and hybrids - 2nd decade of March. |
In boxes or peat tablets. |
2–3 days after germination around the clock, then 14–16 hours a day. |
| Annual flowers | 25.03-15.04 | Into boxes with subsequent picking, separate containers | 12-14 hours a day. |
| Perennial flowers | Depends on the variety | Directly in separate containers, large seeds with a dense shell require germination |
at least 12-14 hours a day. |
| Pepper | 2nd decade of March | Peat cups or pots require pinching over the 7-8th leaf. | The first 2-3 days after germination around the clock, then 14 hours a day, after the appearance of 3-4 true leaves - 10 hours. |
| Eggplant | 3rd decade of March | Directly into separate containers | The first days and after germination 16 hours, after the appearance of 2 leaves - 10 hours. |
| Watermelon | second half of April | In cups or peat pots | The first 2-3 days after germination around the clock, then 12-14 hours a day |
| White cabbage | end of March or 1st decade of April | Straight into tall cups | The first week is 14-16 hours, then 12-14 hours. |
You can find more details on the timing of planting seeds for seedlings and in open ground in this article.
We hope, following our advice, you will grow strong seedlings!
Have a nice harvest!
Save the article to your favorite social network so as not to lose:
 How to grow seedlings at home - after all, our apartments are not the most suitable place for this.
Plants do not have enough sun, length of daylight hours, space on the windowsill. However, all of this can be fixed. Here are some tips on how to grow seedlings at home to keep plant stress to a minimum.
How to place seedlings in an apartment?
For many summer residents, the answer to this question is obvious - on the windowsills. But is it suitable for any windowsill for growing seedlings?
The most illuminated are the southern windows. It is best to place seedlings on them. In case your windows face north, west or east, use special reflectors to help compensate for the lack of sunlight.
A mirror is perfect for this purpose. It is installed on the edge of the window sill with the front side to the window. You can also use a sheet of plywood or cardboard covered with foil.Just be careful, because the mirror and foil reflect the sunlight too brightly. Adjust the tilt of the reflector so that the reflected diffused light falls on the plants, otherwise you cannot avoid burning the leaves.
How to place seedlings on the windowsill?
The quality of seedlings depends on how much area the root system occupies and how much living space is allocated to each plant.
Eggplants and tomatoes require the most space. For normal growth and development on an area of 100 × 10 cm, no more than 14 seedlings of eggplant or tall tomatoes of 8 weeks of age will fit.
A little more in the same area, you can place low-growing tomatoes - up to 18 bushes 5-6 weeks old.
Cabbage and peppers are more compact, on an area of 0.1 square meters, 30-36 bushes of 6-7-week-old cabbage seedlings and 20-30 pepper bushes can be placed without damage.
| Culture | Number of seedlingsby 0.1 sq.m | Number of seedlings perwindow sill (100 × 30 cm) |
| Tomato (tall varieties) | 10-14 | 30-40 |
| Tomato (medium and low growing varieties) | 15-18 | 45-50 |
| Pepper | 20-30 | 60-90 |
| Eggplant | 10-14 | 30-40 |
| Cabbage | 30-36 | 90-100 |
How to place a lot of seedlings on a windowsill
If the size of your window sill is not enough for all the seedlings, increase the usable area with the help of simple devices. For example, put a piece of plywood 40-50 cm wide on it. This will increase the usable area of the windowsill by 1.5-2 times and protect the seedlings from the dry and hot air of the radiator.
At a height equal to the middle of the window, you can make an additional shelf from boards, plywood or any other available material that can withstand a load of at least 10 kg. If the window is large, you can make a rack in several tiers.
Some particularly adventurous gardeners hang containers with seedlings in the air.
To do this, they take a strong thread or rope, fix one end of it on a cornice or a specially attached bar above the window, and tie the other to a pot with a plant. It turns out something like hanging pots.
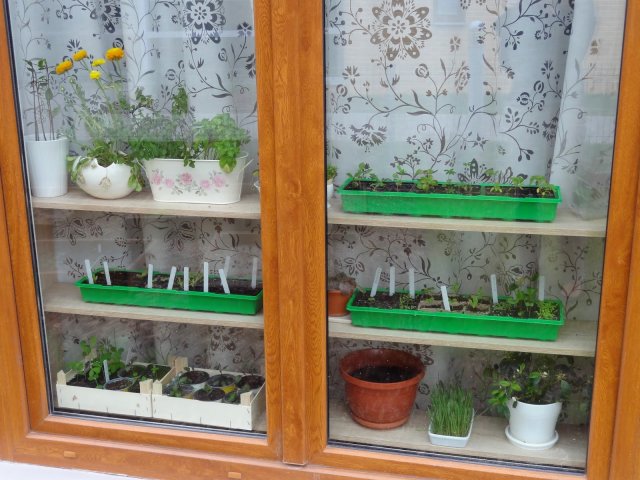
How to prepare a window sill for seedlings
Before placing containers with crops on the windowsill, create the necessary microclimate for the plants:
- close up all the cracks so that there is no draft that is detrimental to young plants;
- put a piece of plywood or any other handy material on the radiator to protect the seedlings from dry air coming from the battery;
- wash the window well - this will improve the illumination of the plants several times.
Seedlings: home care
Until the shoots appear, the light is not needed. During this period, crops most of all need high temperature and humidity - this contributes to better seed germination.
To ensure such conditions, place the containers in the warmest place in the apartment and cover them with plastic wrap, glass or other available material. To maintain high humidity, spray the substrate daily with a spray bottle. But do not overdo it - the ground in the container should not float.
| Culture | Temperature up toemergence (° С) |
| Tomato | 20-25 |
| Pepper | 25-30 |
| Eggplant | 25-30 |
| Cabbage | 18-20 |
| Cucumber | 25-28 |
Seedling care after germination
As soon as the first shoots loops appear, the containers with seedlings should be transferred to a more illuminated and cooler place (with a temperature not higher than 17 ° C). If the weather permits, they, for example, can be placed on an insulated balcony or loggia. Under such conditions, the growth of the aboveground part of plants stops and the root system begins to develop. After 5-7 days, the containers with crops are again transferred to a warm place.
| Culture |
Temperature for 5-7 daysafter emergence (° С) | Subsequent temperature (° С) | |||
| Day | Night | Sunny | Mainly cloudy | Night | |
| Tomato | 12-16 | 8-10 | 20-26 | 17-20 | 8-10 |
| Pepper | 13-16 | 8-10 | 20-27 | 17-20 | 10-13 |
| Eggplant | 13-16 | 8-10 | 20-27 | 17-20 | 10-13 |
| Cabbage | 10-12 | 6-10 | 14-18 | 12-16 | 6-10 |
| Cucumber | 15-17 | 12-14 | 19-20 | 17-19 | 12-14 |
Care of tomato seedlings after germination
It is not recommended to water the seedlings for the first 2-4 days after the emergence of seedlings. Subsequently, tomato seedlings are rarely watered (once a week in the morning), but abundantly. 15-20 days after the emergence of plant shootsdive in separate containers, deepening to the cotyledon leaves.
8-12 days after the pick is carried out first feeding... Infusion of bird droppings is best suited for this purpose. To prepare it, dry droppings (you can buy it at a garden center) are diluted in hot water in a ratio of 1:20 and insisted for 2 hours. Then the infusion is filtered and the seedlings are fed to them after the next watering.
Second feeding spend 2-3 weeks after the first. But this time they use complex fertilizers - Kemira-universal, Solution, Rost-II or nitrophosphate (1 tsp for 5 liters of water).
To protect against diseases, tomato seedlings are recommended to be sprayed with a milk solution every week (0.5 cups of skim milk is diluted in 1 liter of water). This will save the plants from viral diseases.
Care for seedlings of pepper and eggplant after germination
These crops are not watered at all for the first few days after germination, and then they begin to water abundantly, but not often (once a week). In the phase of two true leaves, plants dive in a container of larger volume - practitioners claim that large seedlings of pepper and eggplant take root better than those cut down in the phase of cotyledonous leaves.
The first time the seedlings are fed 10-15 days after the pick. For this, 5 g of urea and 30 g of superphosphate are dissolved in 10 liters of water.Second feedingspend 3-4 days before planting plants in open ground. In this case, another solution is prepared - 50 g of superphosphate and 25 g of potassium sulfate (or potassium salt) are diluted in 10 liters of water. The amount of top dressing is the same as for regular watering of plants.
Seedling cabbage care rules
Seedlings begin to be watered from a watering can with a thin spout after sprouting. This is done as needed, when the soil in the containers begins to dry out. The room where the seedlings are grown is periodically ventilated to reduce the risk of fungal diseases.
First feeding carried out when 3 true leaves appear in cabbage seedlings, they are fed with a solution of complex fertilizers (Solution, Kemira-universal, nitrofoska, etc.), using 0.5 tsp. preparation for 1 liter of water.Second feeding carried out immediately before planting seedlings in the ground (in 7-10 days), but they are already using another solution - 1 tsp each. urea and potassium sulfate per 5 liters of water. If desired, you can add boric acid and copper sulfate to it at the tip of a knife.
Care for seedlings of cucumbers + at home
If both sprout in containers of two sown seeds, remove the weaker sprout. Just do not pull it out of the ground (this will damage the roots of the second seedling), but simply cut it off at the very level of the soil. Water the seedlings regularly, every 1-2 days (it is better to do this in the morning), and only with warm water. Also, make sure that there is no draft in the room - this can destroy the seedlings.
To prevent the seedlings from stretching and being stocky, provide them with good lighting (if necessary, supplement the plants on cloudy days) and add soil 1-2 times during growing (when the seedlings begin to stretch). When the plants have 2 real leaves, they can be fed with a solution of nitrophoska or nitroammofoska (1 tsp per 1 liter of water).
Some gardeners use magnetized water for watering seedlings. It is very easy to get it - just put a piece of magnet in a watering can, fill it with water and let it stand for a while.
How light affects seedlings
Light is the most important factor when growing seedlings. The frequency of watering and the temperature in the room depends on how illuminated the plants are.
So, in sunny weather, seedlings should be watered more often (every 1-2 days). And if the room is also hot - up to 2 times a day. On cold and cloudy days, watering, on the contrary, is reduced.
The distance between the seedlings on the windowsill also depends on the degree of illumination. If there is enough light, the seedling containers can be placed closer to each other.Well, if your windows face the west or north side, the seedlings should be placed further away so that they do not compete for light and do not stretch out even more.
More than others, tomato seedlings are prone to stretching. A signal to enhance the growth of shoots for it is the shading of the lower leaves by larger young ones. To prevent this, as new ones grow, the lower leaves can be cut off. This is done about 2 weeks after picking the seedlings. After another 2 weeks, the operation can be repeated if necessary.
In cloudy weather and at night, it is best to transfer containers with seedlings to a cooler place. Cold-resistant cabbage seedlings can be taken out on a glazed balcony, and containers with tomatoes, peppers and eggplants can be placed closer to the balcony door.
"Why is this necessary?" - you ask. The fact is that photosynthesis takes place in plants in the light - a process as a result of which plants accumulate starch, glucose and other substances necessary for their life, as well as absorb carbon dioxide and emit oxygen. Photosynthesis stops or slows down significantly at night. Plants store energy for growth and development.

What happens if the seedlings remain in a dark, warm room at night? Since the temperature remains high, the plants will continue to breathe, consuming the substances accumulated during the day (photosynthesis will no longer take place because there is no light). It turns out that instead of accumulating nutrients, plants consume them at night.
In good light, photosynthesis in plants is very active. They form 10 times more organic matter than they burn during respiration, and due to this they develop well, have short internodes and a rich color. If there is not enough light, little organic matter is formed, and the plants have enough strength only to breathe. Such seedlings are pale in color, grow poorly and often get sick.
Air humidity for seedlings: how it affects
The growth and development of seedlings is also greatly influenced by the air humidity in the room. If it is excessively dry, moisture evaporates from the surface of the leaves. In this mode, the roots (even if the soil is wet) cannot provide the plants with moisture to the fullest, which causes the plants to experience stress and stop growing.
Another negative consequence of dry air is the accumulation of excess salts in plants and soil, which provokes the emergence of all kinds of diseases (especially for cabbage seedlings).
Therefore, in the room where the seedlings are grown, try to maintain optimal humidity:
- pepper and eggplant - 60-65%;
- cucumbers, zucchini and cauliflower - 70-80%;
- all other crops - 70%.
Determining the humidity in a room is very simple. Measure the air temperature in it with an ordinary mercury thermometer (these will be the readings of a dry thermometer). Then wrap its head with a wet cloth and after 10 minutes take the reading again (this will be the reading of a wet thermometer). Subtract the second from the first digit and determine the humidity in the room using the table.
| Indications dry thermometer, ° С |
Difference between dry and wet bulb readings |
|||||||||
| Relative humidity,% | ||||||||||
| 15 | 100 | 92 | 80 | 71 | 61 | 52 | 44 | 36 | 27 | 20 |
| 16 | 100 | 90 | 81 | 71 | 62 | 54 | 45 | 37 | 30 | 22 |
| 17 | 100 | 90 | 81 | 72 | 64 | 55 | 47 | 39 | 32 | 24 |
| 18 | 100 | 91 | 82 | 73 | 65 | 56 | 49 | 41 | 34 | 27 |
| 19 | 100 | 91 | 82 | 74 | 65 | 58 | 50 | 43 | 35 | 29 |
| 20 | 100 | 91 | 83 | 74 | 66 | 59 | 51 | 44 | 37 | 30 |
| 21 | 100 | 91 | 83 | 75 | 67 | 60 | 52 | 46 | 39 | 32 |
| 22 | 100 | 92 | 83 | 76 | 68 | 61 | 54 | 47 | 40 | 34 |
| 23 | 100 | 92 | 84 | 76 | 69 | 61 | 55 | 48 | 42 | 36 |
| 24 | 100 | 92 | 84 | 77 | 69 | 62 | 56 | 49 | 43 | 37 |
| 25 | 100 | 92 | 84 | 77 | 70 | 62 | 57 | 50 | 44 | 38 |
| 26 | 100 | 92 | 85 | 78 | 71 | 64 | 58 | 51 | 46 | 40 |
| 27 | 100 | 93 | 85 | 78 | 71 | 64 | 58 | 52 | 47 | 41 |
| 28 | 100 | 93 | 85 | 78 | 72 | 65 | 59 | 53 | 48 | 42 |
| 29 | 100 | 93 | 86 | 79 | 72 | 65 | 59 | 54 | 49 | 43 |
| 30 | 100 | 93 | 86 | 79 | 73 | 66 | 60 | 55 | 50 | 44 |
If the air in the room is too dry, you can increase the humidity using a simple and effective technique. Place a long pot for balcony flowers or any other similar container on the floor near the battery. Wet a piece of thick, porous cloth, dip one end of it into the flowerpot, and place the other on the radiator. You will get a kind of "wick" through which the water will rise up and evaporate. This will not only increase the humidity in the room, but also slightly lower the temperature.
To grow healthy and strong seedlings, consider all the points described above and carefully follow our advice. Then you are guaranteed a good result.