Content
- 0.1 Step 1. Seed preparation
- 0.2 Step 2. Preparing the soil
- 0.3 Step 3. Sowing seeds
- 0.4 Step 4. create additional lighting
- 0.5 Step 5. Taking care of the harvest
- 0.6 Growing parsley from seeds
- 0.7 How to plant parsley with root vegetables
- 1 Dill
- 2 Parsley
- 3 Planting parsley and dill
- 4 Growing dill and parsley in eggshell
- 5 How to grow greens on a windowsill?
- 6 Growing greenery at home. Onions, Dill, Parsley, Celery.
- 7 Preparing for planting dill
- 8 Planting process
- 9 Secrets of caring for the culture on the windowsill
- 10 How to grow parsley on a windowsill?
Dill and parsley are the most favorite and familiar herbs on our table. If you want to always have fresh greens at hand, be sure of their quality and just have a pleasant hobby, then we suggest creating your own mini-home garden.
In this resource, you will find 3 step-by-step instructions on how to grow dill and parsley on a windowsill.
How to grow dill at home
Dill is an annual plant, so you won't be able to quickly get a harvest by planting roots or bulbs.
- It takes 5-8 weeks to grow dill from seed at home.
But you can plant it in an apartment at any time of the year. True, from October to early spring, dill requires additional lighting with fluorescent lamps. The best time to grow dill on the windowsill is from March to August. At this time, it is easier to care for the plant, and there is no need to create additional lighting for this.
What we need:
- A pot or container 15-20 cm deep with drainage holes at the bottom.
- Soil for indoor plants and preferably garden soil.
- Spray water.
- Fluorescent lamps (if you grow dill in the winter).
- Seeds.
Which varieties are more suitable for growing dill at home: early ripening, mid-ripening or late-ripening?
- If you want to quickly get greens or umbrellas and seeds for conservation, then choose the early varieties Gribovsky or Grenadier. They will give a crop quickly, but, unfortunately, it will not turn out to be rich (4-6 leaves), and soon after the leaves appear, the early ripe dill will begin to bloom.
- Mid-season varieties (Richelieu, Umbrella, Kibray) will produce greens about 10 days later, but there will be more (6-10 leaves).
- Late-ripening bush varieties of dill (Alligator, Russian Gigant, Buyan) give a harvest later, but the richest in leaves (more than 10). Perhaps this option is most suitable for obtaining fresh greens.
Step 1. Seed preparation
In order for the seeds to germinate faster and better, they must first be soaked in warm water for 24-48 hours, changing the water every 12 hours. Then the seeds that remain on the surface of the water must be selected and thrown away, since, most likely, they are not suitable for planting. All other seeds that have fallen to the bottom must be removed with a sieve or spilled through cheesecloth and dried on it.
Step 2. Preparing the soil
While the seeds are soaking, you can start preparing the soil. To get started, fill the bottom of the pot or container with a 2–3 cm thick expanded clay drainage layer. As a soil for dill, a mixture of garden soil (it is better to prepare it in the fall) and soil for indoor flowers is suitable. If you do not have the opportunity to purchase good garden land, season the purchased soil with vermicompost in a ratio of 1: 4. Another suitable option is a mixture of vermicompost with cocoa fiber in a 1: 2 ratio.Keep in mind that the better and looser the soil, the more likely you are to get a good result.
Step 3. Sowing seeds
Now you need to irrigate the ground with water from a spray, dig small grooves 1-1.5 cm deep in it, sow seeds in them, then lightly sprinkle them with earth from the edges of the grooves and again moisten the ground with water from a spray bottle.
- It is important that the grooves are shallow and the seeds are not sprinkled too tightly.
Now it remains to cover the pot with plastic wrap or a bag and leave to germinate for a week in a dark place where the air temperature does not exceed 18-20 degrees. When shoots appear, pull out the extra shoots so that there is an interval of 3 cm between the remaining shoots, and then place the pot on the windowsill.
Step 4. Create additional lighting
Dill is a plant native to the sunny Mediterranean and cannot grow without light. Moreover, light for him is much more important than heat. When growing dill at home from March to August, the seed pot can simply be placed on a well-lit windowsill.
- The dill should get enough sunlight for at least 6 hours a day. On cloudy days, it is advisable to supplement the plants with lamps. If in the room where your mini-garden grows, the air temperature exceeds 20 degrees, it is also advisable to highlight it.
To grow dill on a windowsill in winter, you need to provide it with additional lighting with white-spectrum fluorescent lamps, setting them at a height of 50 cm above the crops.
- In winter, artificial lighting of plants with fluorescent lamps should last at least 12 hours a day.
Step 5. Taking care of the harvest
Well, that's all, it remains only to provide the plant with proper care and wait 30-40 days before harvesting the first harvest. Here are some rules and tips that will come in handy during this period:
- In summer, dill should be watered often, preventing the soil from drying out, and in winter - moderately, waiting for the soil to dry out after the last watering.
- To make the dill juicy, spray it with water every day.
- For watering, use only settled water at room temperature, otherwise the dill will get sick and turn yellow. In winter, you can use the water melted from the snow.
- The ideal temperature for growing dill on the windowsill is + 15- + 18 degrees. Minimum allowable: +8 degrees. Maximum allowable: +25 degrees.
- If the soil in which you planted the dill was not of good quality, it is recommended to feed it with Agrolife fertilizers (1 r. / Month, 1 tsp. In the top layer of the earth) or Vermicompost (add in the aisle or around the stems 1 time in two months at the rate of 2-3 tbsp. l per pot).
- Since the leaves and stems of dill do not grow back after cutting, in order to regularly get a harvest, you need to plant seeds every three weeks.
Below is a video instruction on how to grow dill on a windowsill in winter.
Also see our other materials:
How to grow parsley on a windowsill
So, we figured out the dill, it's time for instructions on how to grow parsley on the windowsill. In many ways, the rules for their sowing and care are similar, but still different, since parsley, although it sprouts later, is less demanding on light and soil quality than dill.
In addition, there are two ways to grow parsley at home:
- By sowing seeds.
- By sowing root crops.
Growing parsley from seeds
First you need to select the seeds. What varieties to choose? To grow parsley on the windowsill, home gardeners most often choose early-maturing varieties that yield 10-14 days earlier than others.
We recommend planting the following early varieties:
- Curly parsley: Moscaruse and Astra.
- Flat parsley: Irinka, Italian hero, Laika, Russian feast, Plain.
Step 1. Wrap the seeds in damp gauze, leave them to germinate for 2-3 days in a warm place, and then squeeze the gauze and dry the seeds.If desired, after squeezing the gauze, you can put it in the freezer (at a temperature not lower than zero) for a month, then the seeds will germinate faster.
Step 2. Prepare the soil according to Step 2 of the instructions above and moisten it well.
Step 3. Then start planting: "dig" grooves 0.5-1 cm deep, sow the seeds (quite often), sprinkle them with earth from the edges of the grooves and moisten the ground with water from the spray.
Step 4. Next, you need to leave the crops warm (at a temperature of 19-20 degrees) until the first shoots appear, that is, for about 14-20 days. At this time, you need to water the sowing every other day in moderation. It is not necessary to cover the container with plastic at this stage.
- Water the parsley with settled or boiled water.
Step 5. When the first shoots appear, pull out the extra shoots so that an interval of about 4-5 cm remains between the remaining ones.
Parsley shoots
Step 6. Now that young shoots have appeared, watering can be slightly increased, but not to allow the soil to dry out or, conversely, overflow. However, when growing parsley on a windowsill in winter, water it sparingly, waiting for the soil to dry out.
- Ideally, at this stage, the temperature should be lowered to + 15– + 18 degrees, for example, by opening a window. At night, the window can be opened completely in order to lower the temperature to the optimal 10-12 degrees Celsius.
- If the land was purchased, then the plants can be periodically fertilized with complex mineral fertilizers or solutions 1 time in one to two months according to the instructions.
- In summer, parsley can be grown on the balcony until the air temperature drops to 0 degrees.
Step 7. From early spring and in summer, parsley growing on the windowsill has enough sunlight (at least 4 hours a day), and in winter it needs to be illuminated with a fluorescent lamp. The lamps can be installed at a height of 50-60 cm, and they should shine for at least 8 hours a day.
Step 8. The first crop can be harvested 2 months after the first shoots appear. You need to cut off the branches not at the root, but leaving 5-centimeter petioles.
Parsley slice
When the parsley is old enough, you can cut it off. It is believed that the optimal "maturity" is twigs 10-12 cm high. Disadvantages of this method: a lot of trouble. In addition, the first harvest will only take place in 1.5 months. But such parsley will grow for more than a year!
How to plant parsley with root vegetables
Why growing parsley on a windowsill from root crops is better than the first method? First of all, the fact that you do not need to wait 2 weeks before germination of the first shoots.
To do this, you need to prepare a container with a depth of 15-20 cm and soil according to Step 2 from the first instruction. Then you just need to transplant the parsley rather tightly into the moist soil, and so that only the heads remain visible. And finally, pour with settled water. It is advisable in the first days after transplanting parsley from the garden to keep it cool on the glazed balcony, and when shoots appear, transfer the mini-garden to the windowsill.
- The best time for forcing garden parsley in a pot is at the end of October, but you can also at other times. The ideal size for root crops is 5 cm in length and 2-4 cm in thickness.
- If you don't have your own parsley garden, you can buy root vegetables at the store.
- Water the parsley in moderation, waiting for the soil to dry.
- When the parsley starts to grow actively, water it more often and abundantly.
We suggest looking at a visual instruction on how to grow parsley on a windowsill (root) in the next video.
(Rate the material! Already voted: Average rating: out of 5)
Read also:
- How to grow green onions at home
- How to grow basil on a windowsill
- Indoor flowers and plants for the kitchen - we choose unpretentious, useful and beautiful
- How to get rid of midges in flowers
- 8 questions and answers about honey storage
In winter and at the beginning of spring, a person really needs vitamins: fruits and vegetables have practically ended since last year, and it is still far from harvesting a new crop. And there is only one way out in such cases - to grow fresh herbs right on the windowsill. This is not only useful, but also pleasant, especially since you can grow both green onions and celery, dill, parsley, cilantro and various salads in winter. And today we will tell you just about how to plant dill and parsley on the windowsill.
Growing dill and parsley on a windowsill
Let's start with a brief description of these cultures.
Dill
It is known primarily for being a strong antioxidant, and it also removes toxins from the skin due to its high content of ascorbic acid. In addition, regular consumption of dill enhances gastrointestinal motility, increases appetite, normalizes metabolic processes, reduces blood pressure, and so on.
Growing dill
If dill grows in the garden on almost any type of soil, then for cultivation on the windowsill you will need a fertile soil mixture, which you need to prepare yourself (more details on this will be discussed later).
Parsley
Parsley is another rich source of vitamins and minerals. The plant is kept frozen for a long time (about one year), but it does not lose its useful properties. Parsley is not only eaten, but also used for cosmetic purposes, due to the high content of vitamin A.
Parsley on the windowsill
Despite the fact that the growing procedure for both parsley and dill is practically the same, it is recommended not to sow the first one in winter, but to grow it with the help of root crops. Instructions for sowing both plants will be given below, but in fairness, now we will briefly consider the features of growing parsley from root crops.
You can also grow parsley from root vegetables
You can get root vegetables in one of two possible ways:
- purchase them in the market or in a specialized store;
- dig up in the garden in the fall, and then store in the refrigerator in a plastic bag on a vegetable shelf.
Note! It is very important that the root diameter is at least two to three centimeters. If the roots are too long, then they should be cut off, wait a while (the cut off part should be hardened) and only then start planting. Otherwise, the roots will simply rot.
The roots are planted in specially equipped boxes, always in rows (the distance between the latter should be nine to ten centimeters). The distance between the plants themselves should vary within three to four centimeters. If desired, instead of boxes, you can use flower pots 13-14 centimeters high - in this case, several root crops should be planted in each pot at once. It is also important that the top of the head is not covered with earth during planting.
Selection and planting of root crops
Parsley should be watered only once a week, since this culture cannot stand an excess of moisture. The water used for irrigation must be settled and always at room temperature.
Seedlings require regular watering
After each application of moisture, the earth is loosened. Containers with parsley should be placed on light windowsills - in this case, the first greens can be cut off after three to four weeks.
Light must suffice for parsley
Actually, that's all. Now let's get acquainted with the peculiarities of planting these crops on the windowsill.
Planting parsley and dill
Is it worth growing dill in an apartment
Let's make a reservation right away that there are no special varieties intended specifically for "window-sill" cultivation in nature, therefore, when buying seed, you should pay attention, first of all, to the ripening time. It is very important not to be mistaken with the choice: of course, early varieties quickly give green mass, but they also stretch quickly into flower stalks, moreover, they are not as leafy as early ripening crops. As for the late varieties, they do not ripen in the beds during the summer, but they are excellent for home cultivation. Now - directly to the workflow.
Stage one. We prepare everything you need
You should start by preparing everything that is required for cultivation. For the convenience of visitors, the information is given in the form of a table.
Table. What is required in the work
|
Boxes or pots |
These are simple containers (made of ceramic or plastic), the same ones used for flowers. If pots were chosen, then their volume should be one to two liters (the specific figure depends on how much greenery will be grown). The bottom of each container must necessarily have holes to drain excess liquid. |
|
Drainage |
Expanded clay drainage, for example, can be easily purchased at any specialty store. |
|
The soil
Coconut pills |
It is desirable that it contains vermicompost. There is an alternative - the use of coconut tablets, but this method is more expensive. |
|
Potassium permanganate |
With its help, you need to pickle the seeds. Yes, today it is far from everywhere possible to purchase potassium permanganate, therefore, several alternative options will be given in the text. |
After preparing everything you need, you can start pickling the beans.
Stage two. Seed preparation
Planting dill includes proper seed preparation, it begins a few days before sowing
Dill Gribovsky
If the seeds are more than two to three years old, then they should be soaked in warm water overnight. In the morning, the water must be drained, and the seeds themselves must be soaked in a heated solution of potassium permanganate (the color should be bright pink) for about two hours. This is necessary in order to disinfect the grains - the plants after processing will not hurt.
Soak the seeds
If it was not possible to purchase potassium permanganate, then you can use one of the following methods.
Method one... Use a 2 or 3 percent hydrogen peroxide solution. It should be preheated to a temperature of 38-40 degrees, after which the seeds should be soaked in it for about six to eight minutes.
Hydrogen peroxide
Method two... Use of boric acid. In this case, you need to dilute ½ teaspoon of acid in a glass of water. The seeds should be soaked in the resulting solution for two to three hours, while the temperature should vary within 25-30 degrees. After dressing, the seeds are thoroughly rinsed under the tap.
Boric acid
Stage three. Sowing seeds
While the seeds are pickling, you can start preparing the pots. The algorithm of actions should be as follows.
Step one... Expanded clay drainage is poured to the bottom with a layer of two to three centimeters.
Backfilled drainage
Step two... Soil is poured over the drainage, not reaching the upper edge about three or four centimeters. The soil is abundantly watered with pre-settled water. Everything, the containers are ready for further sowing.
Step three... After dressing the seeds, the potassium permanganate is drained, and they themselves are laid out on a piece of gauze to drain the remaining liquid.
Note! It is necessary to leave for sowing only the seeds that sank to the bottom during soaking. The fact is that the seeds left afloat will have a low germination rate.
Step four... Dried seeds are sown in pots. This can be done in the usual way, that is, simply sprinkle them with a pinch, or plant them in any convenient order - in a checkerboard pattern, in rows, etc.
Sowing dill
Step four. A layer of soil with a maximum thickness of two centimeters is poured over the seeds, after which you can additionally water a little.
Step five... The pots are covered with cling film or PET bags to create a greenhouse effect. Then they are placed on the windowsill. It is important that the optimal temperature for germination is maintained in the room - it is about 18 degrees.
Cover the container with the sown seeds with foil
The pots can now be left alone until the first shoots are formed. For parsley it takes no more than two weeks, for dill it takes from seven to ten days.
Stage four. Further care
When shoots appear, the film must be removed.
Dill seedlings
Further care for plants is to comply with standard requirements.
- Water should be moderate but regular during the first month.In summer, watering should be abundant, and in winter, again moderate.
- Dill "loves" spraying with a spray bottle, even with ordinary tap water.
- Plants need to be provided with enough sunlight - at least three to four hours a day. It is for this reason that the seeds are best sown in the spring (around March).
- Growing temperature should be 18 degrees (+/- 2). Although dill can withstand a drop in temperature up to eight degrees, which means that this culture can be bred on a balcony (that must be glazed) until late autumn.
- Rotate the pots 180 degrees daily, otherwise the stems will stretch to one side.
Further care for dill
Note! Three to four weeks after germination, it is advisable to add soil a few more centimeters. Such a simple action will replace picking, that is, germinating seeds in small cups, followed by transplanting them into larger pots.
Actually, this is all you need to know about caring for parsley and dill. Now all that remains is to wait for the harvest, which will appear after 1.5 months (for parsley) and five weeks (for dill) after the introduction of seeds. As for overseeding, in our case it is not required, since the described crops yield a harvest throughout the year.
Not only beautiful, but also delicious greens in the house
Video - Growing dill in the winter
Growing dill and parsley in eggshells
Eggshells, which account for thousands of tons of waste annually, are 95-97% calcium carbonate. In addition, it contains nitrogen, calcium and phosphoric acid - everything that plants need for development. For this reason, the shell is actively used in horticulture. It can also be used to grow parsley and dill on a windowsill.
You can grow greens right in the eggshell
The procedure itself is not complicated and consists of several simple steps.
Step one... First, the shell is prepared - it needs to be washed and dried.
We wash the shell
Step two... A small hole is made in the lower part of the shell, through which excess liquid will be removed.
Step three... The shell is ½ filled with soil.
We fill the shells with soil
Step four... A few seeds are placed inside, on top of which a little more soil is poured.
Step five... On the shell, you can write with a marker which plant is planted there.
Step six... The shell is placed in an egg tray, which is placed on the windowsill. From time to time, plants need to be watered with a small amount of settled water.
Don't forget to water the sprouts
In this case, of course, it is not worth waiting for large bushes, but the shell will play the role of additional fertilizer and provide plants with useful elements.
Useful Tips
Video - Growing parsley on a windowsill
" How

Not only indoor plants can be grown on the windowsill. If you want to have fresh herbs, you should set up a small vegetable garden in the window. At home, sprout parsley, dill, mint and other plants.
All plants that you plan to plant for fresh greenery should be early maturing, with a short ripening period and undersized.
Growing salad at home
Lettuce greens are easy to obtain, but the seeds of this crop are very small, so later, when the feeding area increases, it is necessary to pick. For this, cassettes are suitable, in which seedlings are planted in the phase of 1-2 real leaves with a clod of earth, one per cell. The salad will grow over time. Plant several different varieties at once, and you will be pleasantly surprised by the assortment of greens.
Growing onions at home
Fresh greens of this culture are very useful. Even 80 g of onions covers a person's daily need for vitamins A and C, while there are fewer of them in a resting onion.The simplicity of its cultivation also captivates.
Growing dill and parsley in winter
Dill forms greens on the 40-50th day after germination. The germination time of seeds is from 15 days to a month, since they are saturated with essential oils and swell poorly. Dill can be sown in a continuous random way or in rows, leaving row spacings 5-10 cm wide.
Growing arugula
Arugula is a very unpretentious plant, it can be easily grown from seeds in a pot on a windowsill. Arugula must be watered every other day. No other care is required. Then you will be able to enjoy its unusual taste for the whole summer and autumn.
Conditions necessary for forcing greenery at home
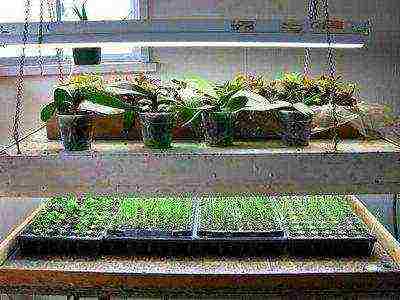
How to grow greens on a windowsill?
Table of contents
In winter, our body is sorely lacking vitamins, which are contained in greens. You can buy greens at any time of the year, you should visit a supermarket where you can find neat and beautiful greens and vegetables. But how useful are they? Most of them contain nitrates and other substances that do more harm than good to our body. These vegetables have a completely different taste, and there are practically no vitamins. What can you do, because in winter you really want fresh herbs that can decorate any dish, give it summer freshness. There is a way out, you can grow greens on the windowsill. It is unlikely that it will be possible to harvest a large harvest, but this will be enough to decorate your favorite dishes, and the process itself is quite interesting. How pleasant it is to watch how fragrant and fresh greens grow at home when it's winter outside. You can grow only those greens on the windowsill, but also some fruits and exotic fruits. It is not at all difficult to grow greens on the windowsill, but this requires not only time, but also some knowledge.

Growing greenery on a windowsill
What greens can be grown on the windowsill?
Of course, greens are much easier to grow in comparison with fruits, they are not so whimsical. In addition, it can be grown not only in winter, but also at other times of the year, when there is no garden or suburban area. If you have a spirit of gardening in your blood, you can safely start laying your home garden on the windowsill. Unfortunately, there is not much room on the windowsill to plant a lot of plants, so you have to choose. If you are new to planting greenery at home, you can start with simple plants. On the windowsill, you can grow green onions, parsley, dill, spinach and others. Such plants are not whimsical at all - the main thing is that they receive enough moisture and light, so a windowsill is an ideal option.
What do you need to grow greenery?
In order to create a mini-vegetable garden on the windowsill, you will need:
Growing parsley
Parsley is an irreplaceable and aromatic seasoning for dishes, which contains many vitamins useful for health. On the windowsill, parsley can be grown in two ways: sowing seeds or growing root crops.
Growing greenery at home. Onions, Dill, Parsley, Celery.
Is such a miracle possible? Yes! This is a necessity, especially in winter, when our body suffers from a lack of vitamins and minerals.
It is not difficult to grow a small garden bed with bushes of useful, fresh greenery on the windowsill at home, just follow the following tips.
First you need to choose the seeds of those plants that suffer little from a lack of sunlight, these are green onions (batun, chives), parsley, dill and celery. But for an optimal harvest, window sills should be equipped with fluorescent lamps.
It is very easy to get fresh green onions at home, as they are not whimsical enough. To do this, cover the dishes with clean water on top with a mesh or plywood with a hole in the shape of an onion. To prevent decay, the water should barely cover the bottom of the onion head, and change, after the first feather of greens appears, every day.The germination of greens can be accelerated as follows, for this the dry tail is removed from the bulb, and the cut site is soaked in warm (30-35 ° C) water.

Dill is a plant that is most resistant to cold and lack of sunlight, at the same time, it is difficult to imagine our dining table without its fragrant greenery. The land for planting is better to take peaty. Dill is sown into a 15 x box. 40 cm, after germination, is thinned out at the rate of 1 plant per 2 cm. Watering is required abundant and after 40 days the greens can be eaten.
Parsley is sown, pre-soaked in water, as is the case with essential oils, which are rich in seeds, interfere with rapid germination. To do this, they should be kept for about half an hour under a stream of warm water (wrapped in several layers of thin cloth), and then left in a bowl filled with water for a day. Seeds should be planted in loose and moist soil (preferably a peat mixture) to a depth of no more than 1-2 cm.
Before the first shoots, the boxes of the house should be in a dark, cool place. Also for growing parsley, a distillation method is used, i.e. root crops weighing 30-70 g and a diameter of 1.5-3 cm are rooted into the greenhouse soil.The distance between them should be at least 6 cm.
Watering should be done frequently, as parsley loves moisture very much, and therefore care must be taken to keep the ground constantly moist. After germination of greens, the planting should be thinned out. After the first cut, the plant needs to be fed with mineral fertilizer, for better growth of subsequent greenery.
Celery prefers fertile, moist soil with the addition of organic fertilizers. Transplant for growing, celery, should be before the first frost. Any varieties are suitable for this, but petiole plants should be preferred.
Roots dried and peeled from leaves must be treated with slaked lime, then planted in boxes with a depth of at least 20 cm.
It is important to ensure that the soil does not fall on the apical bud, as this can lead to rotting of the growing leaves.
For the first week, the grown greens should be kept in a dark place, where the temperature does not exceed + 14 ... 16. ° С, after sufficient growth of leaves, the box is transferred to a bright place. Watering is moderate.
Maybe the first time you will not harvest a bountiful harvest, but the excitement of the emergence of shoots, and then a table set with your own greens grown at home, will turn you into an avid gardener.
And just the simplest plants. Onions, Dill, Parsley and Celery.
Sources:
No comments yet!

If you want to get fresh parsley and dill on the windowsill, you will definitely need to know how to grow from seeds. Such plants are considered unpretentious, so they feel great at home. But you still need to know the intricacies of caring for this greenery so that it delights its owners for as long as possible.
Preparing for planting dill
Growing dill at home begins with the choice of seed. The quality of the crop depends on a good variety. The first thing to pay attention to is the timing of the ripening of the culture. According to this criterion, dill is early, medium and late. For home cultivation on the window, you should choose the Richelieu, Gribovsky or Grenadier varieties.
 Dill kernels
First, the seeds must be poured with warm boiled water and left for 6-8 hours. After the specified time has elapsed, the liquid should be drained, and a solution of potassium permanganate should be added to the seed. It should be light pink in color. The use of this drug contributes to the disinfection of seeds. This procedure will take about 3-4 hours.
Then you should proceed to the preparation of containers for planting dill. It is best to use flower pots or small wooden boxes for this. The size of the vessels depends on how much dill you plan to grow.Usually, for such a procedure, a container with a volume of 1-2 liters is sufficient. The main condition is the presence of drainage holes, which will ensure the removal of excess water. For this purpose, pieces of broken brick or expanded clay are often used. The prepared material should be used to cover the bottom of the vessels.
The substrate is most often used purchased; vermicompost must be present in its composition. The acquired soil must be poured into containers over the drainage layer. After the performed manipulations, it is allowed to proceed directly to planting the culture.
Planting process
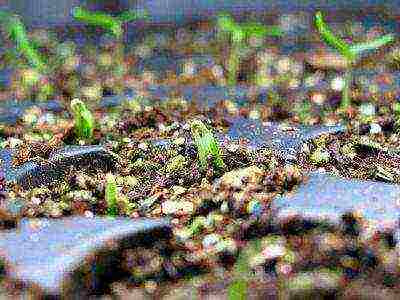
Before starting the process of planting dill, it is necessary to select and discard those seeds that did not sink to the bottom, since they are not considered to be of high quality. Good planting material must be removed and dried with a paper towel or cotton pad.
 Dill on the windowsill
Experienced gardeners believe that there is no special scheme for sowing dill. You can grow greens on the windowsill both in rows and in bunches. It depends on personal preference or convenience. In both cases, holes should be made, the seeds should be evenly spread in them and sprinkled with soil. The optimal soil layer is 1.5 cm. At the end of this process, the soil should be slightly moistened and the container should be covered with polyethylene. To achieve the same effect as in a greenhouse, it is allowed to use cling film as a covering material.
Containers with planting greenery should be placed on the lightest windowsill. It is very important that the room temperature is + 18-19 ° C. Until the first shoots appear, dill can be left alone. On average, greens break through in 11-12 days from the moment of sowing.
Secrets of caring for the culture on the windowsill
After the first shoots appear, it is required to remove the film from the containers. When growing greens in spring or summer, care will consist of:
- timely watering;
- regular spraying;
- providing abundant lighting.
Dill on the windowsill
To get dill at home in winter, you should adhere to special rules for caring for the crop. In cold weather, it is recommended to pay a lot of attention to lighting. Since during this period there is a short daylight hours, the sun's rays alone will not be enough for dill. Because of this, the greens will begin to grow upward, and will not be able to bush. For this reason, additional lighting for dill should be installed. For this purpose, a lamp is used, which is placed at a height of 55 cm above the crop. In general, 5-7 hours of artificial lighting in the morning will be enough for dill sprouts. But this option is only suitable if containers with herbs are located on the windowsills. If the dill is far from the window, then it is illuminated with a lamp every day for 15-17 hours.
To keep the plants with even greenery, you need to regularly rotate the pots 180 °. This procedure is carried out once a day. It is recommended to water the crop frequently, but in moderation. Also, experts advise periodically (once every 14 days) to feed the dill. For this, complex fertilizers are most often used. It is very important that there is a suitable air temperature in the room where such greenery grows. The best option is + 17-20 ° С. If this figure is 3-4 ° lower, then the dill will tolerate it quite normally.
It should be noted that the leaves and stems of the crop do not grow back after cutting. Therefore, it is recommended to regularly plant seeds in areas where there is no longer any greenery. This will allow you to have a fragrant seasoning on hand at all times.
How to grow parsley on a windowsill?
Dill and parsley on the windowsill are the most affordable greens at any time of the year. These crops can be sown together or in different containers.
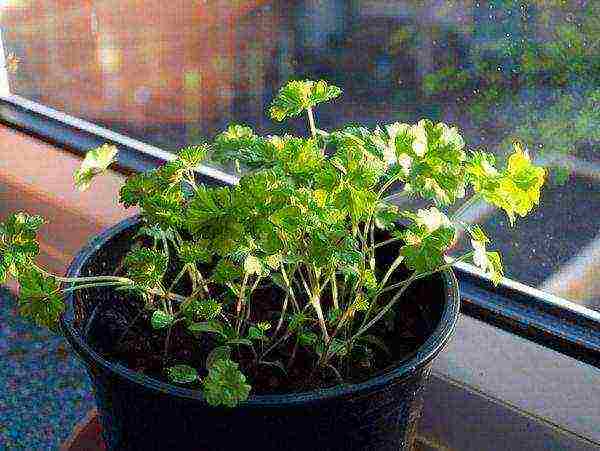 Parsley at home
Growing technologies are not very different, the main thing is to choose good varieties. Most often they buy the following seed:
- Gloria;
- Morning freshness;
- Fitness;
- Vorozheya;
- Fragrant alley;
- Green pearls.
You can choose both curly parsley and regular parsley. The seeds must be soaked in water for 3 days, and then the liquid must be changed to potassium permanganate. A drainage layer should be laid in boxes or pots, specially prepared or purchased soil should be added, tamped a little and sprinkled with hot water. Then you need to wait 60-90 minutes, make holes, plant seeds (depth - 0.5 cm) and cover with earth. But there is also 2 option for growing parsley. It consists in sowing seeds in plastic cups (the volume of which is 100 ml). Then, after the appearance of the first shoots (usually after 14-15 days), it will be necessary to pick the seedlings and move them into permanent containers.
In order for the greens to grow, you should regularly moisten the garden bed. The number of waterings depends on how quickly the soil dries. Temperature conditions are also considered to be an important part in growing parsley. The optimal indicator is + 15-20 ° С. If you deviate from these norms, the culture may grow slowly or dry out altogether. In winter, the pots should be supplemented with phytolamps, lengthening the daylight hours by 4-5 hours. It is allowed to cut greens after it reaches a height of 11-13 cm.
If you want to grow dill and parsley on the windowsill, you must adhere to all the recommendations. Only in this case will the fragrant spices of seasonings delight you all year round.