Content
- 1 What you need to know about him
- 2 Cooking seedlings
- 3 Landing
- 4 Care
- 5 Video "Growing hot peppers at home"
- 6 Description and characteristics of hot red chili
- 7 Beneficial effect on the body when eating hot peppers
- 8 Harm and contraindications to health from use
- 9 Growing chili peppers from seeds on a windowsill at home
- 10 Choosing a variety
- 11 Seed preparation
- 12 Requirements for the composition of the soil
- 13 How to plant chili peppers from seeds at home
- 14 Seedling care
- 15 Transferring peppers to pots
- 16 Formation and pollination of the bush
- 17 Feeding rules
- 18 Chili peppers fruiting
- 19 Useful materials
Not all garden crops are suitable for growing at home. But there are those that, with due diligence, it is quite possible to grow at home on the windowsill. Spicy lovers often grow a plant like chili at home. This article will tell you how to do it correctly.
What you need to know about him
Chili pepper or, as it is also called, cayenne pepper is one of the most ancient plants. This species belongs to the nightshade family. Its cultivation as a cultivated plant began as early as 6-7 thousand years BC. NS. This type of pepper is native to Bolivia. But in Europe it appeared much later.
Initially, chili pepper was used as a delicious spice for various dishes, but then scientists found out its useful properties. Pepper fruits are rich in vitamins C and A. Therefore, this plant has found wide application in folk medicine. Medicines made with the addition of this type of pepper are used to treat the following diseases:
- headache;
- arthritis;
- colds;
- poisoning.
Therefore, having such a plant will not only be beneficial from the gastronomic side, but also useful in terms of having a "folk healer" in the house.
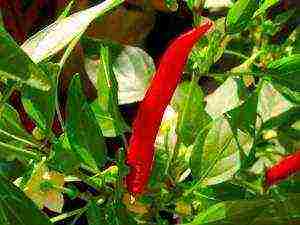
The fruits of this plant can be green or red in color. The color depends on the type of pepper. The fact that hot chili peppers (red and green) can be grown at home, few people realize. At the same time, the pepper itself, grown at home, can have fruits of different colors (red or green), as well as different shapes. Here again, everything is determined by the variety chosen for cultivation.
Each fruit (red or green) obtained in this way will contain a large amount of seeds inside, which can be stored and used later for seedlings. The seeds of this pepper are round and yellow in color. Their diameter is about two millimeters.
Home-grown peppers produce fruits that have a bright flavor. They can be used to prepare various culinary masterpieces, where it can act as a seasoning or ingredient. It can also be preserved or used as an alternative medicine in the form of tinctures and lotions. Among other things, such peppers (red or green) can be stored at home. If you store its fruits correctly, then in winter you will have a delicious hot seasoning for holiday dishes.
In addition, it should be said that the pepper grown at home has an excellent appearance, it can be used for decorative purposes to decorate the house.
As you can see, growing hot peppers at home will be an excellent solution.
Cooking seedlings
Very often, people who grow hot chili peppers (red or green) at home use seedlings for this. Of course, you can always just plant a seed in a pot of earth. But in such a situation, it will take much longer to wait for the first shoots, and the end result may be far from your expectations.
Therefore, in order to grow chili at home, you need to get seedlings.The first step is to properly plant and germinate the seeds.
For chili seeds to germinate, they must not only be properly stored, but also planted. To do this, the following manipulations are carried out over the seeds:
- The seeds are placed between moistened napkins and left in this form for 4-5 days. These actions will speed up the process of germination of planting material.
- After the specified period, you need to get the seeds. They should look swollen and start to germinate. This means it's time to sow them.
- Sow the sprouted chili seeds into a shallow box.
- Planting material must be planted at a distance of 5 cm from each other. This will prevent strong pulling of the seedlings.
- Seeds should be planted in fertile soil to which vermiculite has been added.
- It is recommended to immerse the planting material shallowly into the ground, about 0.5 cm.
- After planting is complete, the soil should be watered with water.
Note that each variety (red or green) has its own germination timing.
This must be taken into account when growing a plant in seedlings, since this period can take up to 3-4 weeks.
Observing the germination of seedlings, it is necessary to periodically check the condition of the soil. If it starts to dry out, then you need to sprinkle water on it. In this case, the water regime for chili must be observed according to the principle of the golden mean. This means that the soil must remain moist, but in no case be flooded with water. The germination of seeds is equally badly affected by both high humidity and dryness.
In addition, in order for the cultivation of hot pepper seedlings to be successful, here, just like for tomatoes, a certain thermal regime should be observed. It should be remembered that each type of chili (red or green) requires a certain level of heat at which its seeds can be stored and grown. On average, the temperature regime for these plants grown at home should be maintained in the range of 22-25 degrees. Such a temperature indicator must be maintained constantly.
When the first green tongues of future seedlings appear on the surface, it is necessary to change the conditions for its cultivation. An important point at this stage is to save the obtained result. In order for the seedlings to be able to further develop and grow, they need to create the necessary level of illumination. If there is little light, the seedlings will begin to stretch strongly, which will lead to its thinning and discoloration.
The most reliable and effective way to illuminate hot pepper seedlings is artificial light. Lamps should be located above the sprouts at a distance of 25-30 cm. In this case, the daylight hours for chili should be 18 hours. To maintain accuracy, the lamp can be equipped with a timer.
Having created all the necessary conditions for germinating seeds, you just have to be patient and continue watering and caring for them until the formation of strong seedlings, which can be planted in a permanent place of growth - a flower pot.
Landing
Planting of hot pepper seedlings occurs only after it has formed two pairs of leaves. Their presence serves as a signal for a transplant. This procedure is as follows:
- The planting container should have a diameter of 8-10 cm and be shallow. The most suitable container is plastic pots. You can use those that have been preserved from other indoor plants. But ceramics are not recommended.
- At the bottom of the container, we form a drainage layer with a thickness of at least 3 cm.
- After that, pour a potting soil mixture into the pot, suitable for growing peppers.
- We plant the seedlings to a depth of 0.5 cm, without deepening the stem.
- After that, sprinkle the sprout with soil.
After the seedlings have been planted, in order to retain moisture in the soil, they should be crushed near the sprout. Then we water the plant with water. The next watering of the planting should be carried out in a week.By this time, the root system of the seedlings will have time to adapt and take root. Until this moment, it is forbidden to moisten the soil. This is due precisely to the underdevelopment of the root system. If you water the seedlings earlier, they will start to rot. It is necessary to keep the planting from excess moisture during the entire growing time. But in order to achieve an excellent harvest, some care is needed for the pepper.
Care
Hot pepper care begins from the moment the germinated seeds are planted. At this stage, the most important point will be to create an optimal light regime for the plant. If at night the lamps are responsible for additional illumination of the plants, then during the day the boxes with seedlings should be placed in a bright place, avoiding direct sunlight.
When the seedlings form 2-3 true leaves, they are cut at a distance of 10-12 cm. In this situation, it is necessary to pinch off the main root by a quarter. This is necessary in order for the root system to begin to build up its mass. A pick is carried out for each individual plant. If this is not done, then the seedlings can stretch very much.
When making a pick, it is important to remember that it is not recommended to deepen the sprouts below the level that was at their emergence.
Care for seedlings and already transplanted shoots involves periodic watering, which should not lead to excessive waterlogging of the soil. If the air humidity at home is less than 50%, the pepper leaves should be sprayed with warm water. Keep both seedlings and adult plants from waterlogging.
The beginning of the growth of the transplanted shoots and their final rooting begins approximately 15–20 days after planting.
Please note that peppers that are grown on the windowsill are not pinched. In addition, props are not placed here, since the stem will be strong enough to support the entire bush and fruits.
During flowering, the branches of the bush need to be shaken slightly for pollination to occur. It is also recommended to turn the pot to the window with the other side every day. Then the bush will develop evenly. Home-grown hot peppers need to be fed regularly every 2-3 weeks. If the care was correct, then the fruits obtained from the bush can be stored at home.
As you can see, there is nothing difficult in growing chili peppers. Stick to the above rules and you will succeed.
Video "Growing hot peppers at home"
Thanks to this video, you will receive practical tips and tricks on how to grow hot peppers at home in a flower pot.
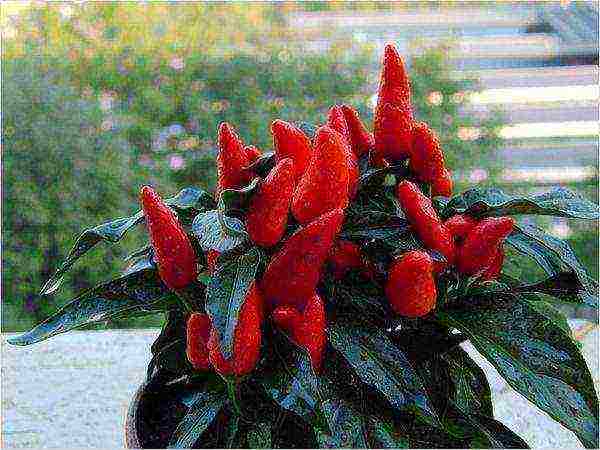
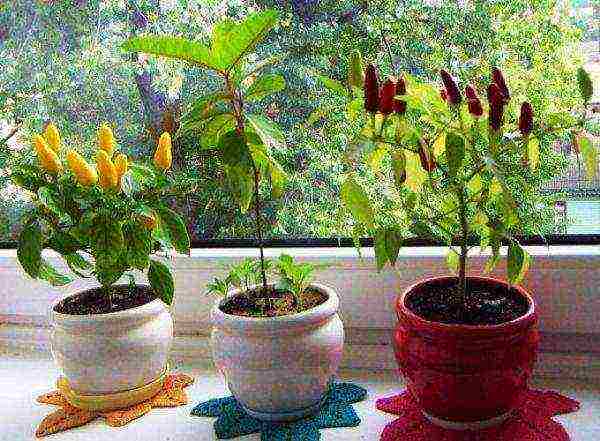
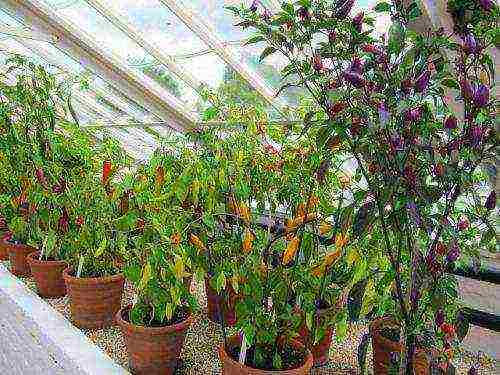
Chili pepper is not only a very tasty seasoning, but also an amazingly beautiful ornamental plant that can decorate the windowsill of any apartment. The bush perfectly decorates the interior with pods of different colors. It does not require much hassle and maintenance costs, but it looks very elegant and fun, giving a good harvest.
Description and characteristics of hot red chili
The name of the pepper has nothing to do with the country of Chile, since the homeland of this hot vegetable is America. From it, the pepper spread to all countries and other continents. India and Thailand are famous for the largest harvests.
The hot vegetable got its name from the Mexican word "chilli", which means red. Capsaicin gives the pepper a pungent taste, the more its content in the product, the sharper the taste.
Capsicum frutescens, or chili pepper, is a tropical bushy plant with fruits with a pungent, pungent and sometimes bitter taste.
The pepper bush is 60 centimeters high and is covered with small green elliptical leaves.
 The chili bush has elliptical leaves
The seeds of the plant have the greatest pungency.
At indoor home conditions, you can sow or plant a plant and get a large yield of high-quality fruits. To do this, it is necessary to master the features and agricultural techniques of cultivation. In general, this is not a very painstaking business.Indoor plant bears fruit well, produces small, high-quality fruits.
Most comfortable varieties for growing in an apartment and planting on a windowsill are the following types of plants:
- Christmas bell;
- Light;
- Naga Jolokia;
- Explosive Amber;
- Big fireworks.
Pepper is constantly mutating. Therefore, now you can find several hundred varieties of it. All new types of plants appear. They differ in fruit color (from bright red to yellow or green), their shape and pungency.
In many ways, the taste of pepper depends on the place of growth and type. All types and varieties of such a vegetable are combined into one general group - Cayenne pepper.
Beneficial effect on the body when eating hot peppers
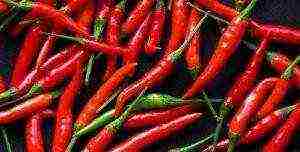
Chile is commonly eaten fresh, dried, like powder... It is used in salads or vegetable dishes. It perfectly sets off the taste of meat, fish or first courses.
The main advantage of chili is determined not by its special taste, but by its rich mineral and vitamin composition, which has a positive effect on the work of the whole organism as a whole.
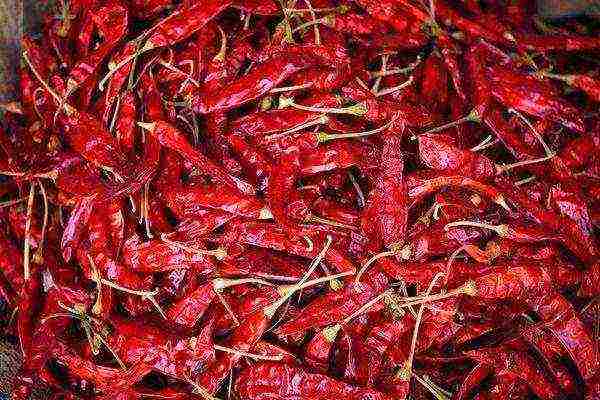 Peppers are often consumed dried.
100 grams of chili contains 2 times more vitamin C than the same amount of lemon.
Chile contains the following vitamins:
- Beta carotene (vitamin A);
- Thiamin (vitamin B1);
- Riboflavin (Vitamin B2);
- Pantothenic acid (vitamin B5);
- Pyridoxine (vitamin B6);
- Folic acid and other nutrients.
Also, the vegetable has a unique mineral composition - zinc, iron, manganese, selenium and copper bring many benefits to the human body. The positive effect is achieved with moderate consumption of it in food - no more than one pod per day.
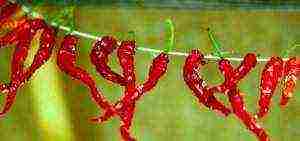
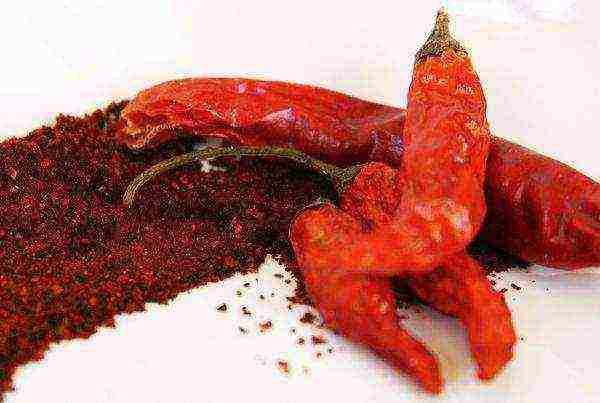 Powdered seasoning should be used sparingly.
This seasoning is great for treating the following conditions:
- Diarrhea... Ready-made tablets or decoctions of fresh chili or its powder are used;
- Stretching of muscles and ligaments... The spicy powder is mixed with castor oil and rubbed into the sore spot;
- Loss of sensitivity in the arms and legs... For treatment, ointments and oils based on it are used;
- Heart attack... Since the spice is able to reduce blood cholesterol levels, the risk of developing this terrible disease decreases;
- Diabetes;
- Scurvy;
- Oncological diseases;
- Headaches... Can be used sparingly for food or rubbed into the temporal region of the head with an ointment based on it;
- Increased body temperature;
- Treatment of colds and SARS;
- Obesity.
The component capsoicin, which provides the pungent taste of pepper, slows down the growth of cancer cells.
 Medicinal ointments and creams are made from chili peppers.
Harm and contraindications to health from use
While this hot seasoning, when consumed in moderation, can treat or prevent certain diseases, there is a huge difference with the group of people who it is categorically impossible to apply it in no way.
Diseases and contraindications for health, in which you can aggravate the condition or harm the patient:
- Cholecystitis;
- Pancreatitis;
- Ulcer, gastritis and any inflammatory processes of the mucous membrane;
- Haemorrhoids.
The use of food for children under the age of 14 is prohibited. It is not advisable to abuse this hot seasoning for pregnant and lactating women. They are better opt for sweet pepper, which has an equally useful vitamin and mineral composition.
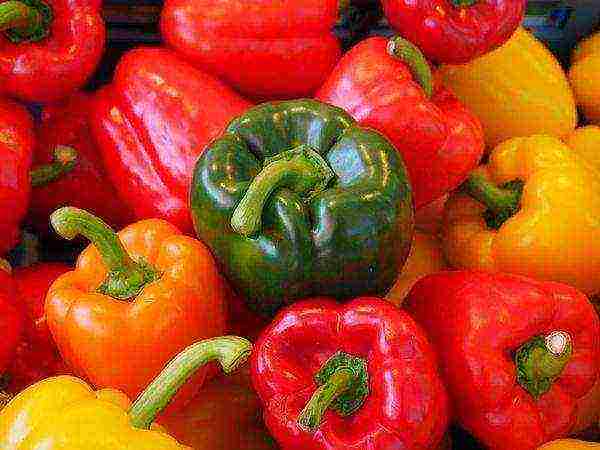 It is better for pregnant women to use bell peppers.
The overuse of spicy pods can harm even a perfectly healthy male body. Heartburn, inflammation of the mucous membrane of the stomach and intestines appears. The product should not be consumed by people using blood thinners, since chili has the property of enhancing the effect of their effect.
When eating seasoning, possible food allergies, expressed in edema of the mucous membrane and skin rashes.
Food allergy occurs precisely on the components of hot peppers. Bell peppers can be eaten without any risk.
You need to know exactly how much chili pepper can be used for the listed diseases and before preparing a dish, be sure to consult with your doctor.
Growing chili peppers from seeds on a windowsill at home
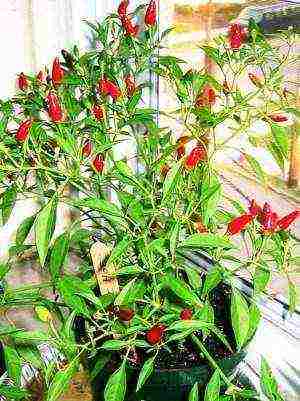
It is not at all difficult to grow paprika at home, the main thing is to choose the right variety. The smallest variety - Salute will give a bush no more than 20 centimeters high. Variety "Tabasco"- gives a large yield of fruits no more than 5 centimeters in size. It is appreciated for its early maturity and especially pungent taste.
 Red Tabasco peppers produce a large harvest
The main thing when choosing a variety is to take into account the possibility of using the fruit for food, since varieties are found only for decorative purposes.
Before planting seeds, you need to prepare containers. Perfect option - peat pots... A separate container is required for each adult plant.
At the bottom of the pot with pepper, it is necessary to place a drainage of charcoal or expanded clay.
The containers are filled with soil. You can buy potting soil from specialized stores.
Growing pepper on a windowsill goes through the following stages:
- Germinating seeds... For a week, the seeds should be wrapped in a paper towel or gauze soaked in water. The seeds should swell properly;
- Planting seedlings... Pour soil into the peat boxes, make small depressions of 7-10 ml in it, moisten and lay the seeds, sprinkle them with earth. We wrap the box with foil. The first shoots should appear in a week. Then the film should be removed and the seedlings should be exposed to a good light;
- Transfer to a permanent place... When the seedlings get stronger, they should be transplanted into a plastic or ceramic pot. To do this, the plant in a peat container is properly poured with water so that a lump of dirt forms around the root. This is important because the root cannot be damaged during transplantation. In the main pot, a recess is made into which the seedling is placed. The leaves should be 2 centimeters from the ground surface.
 To grow chili peppers in a pot, you need to choose the most lighted windowsill
The plant loves sunlight. For him, you need to choose the most brightly lit window sill.
The seedling is watered as soon as the soil begins to dry out with settled water at room temperature. The foliage should be moistened with a spray bottle. once a week.
Twice a month, fertilizing is carried out with mineral fertilizers containing nitrogen, calcium and phosphorus. Chile is a perennial plant that can bear fruit for five years or more. In order for the pollination to take place better, the pots with flowering plants must be shaken once a day.
The best fruiting is observed in the second and third years of life... Some plants can form up to hundreds of peppercorns per season. They must be removed from the tree as it ripens.
Chile is a perfect crop for growing at home on a windowsill. Thanks to simple care, you can get not only a beautiful plant with a pleasant aroma, but also a constant source of tasty and healthy spice.
Chili is a hot, aromatic fruit that is found in many dishes.
In order to always have it fresh on hand, it is quite possible to grow chili peppers on the windowsill.
And so consider all the nuances of how to grow chili peppers at home.
…
Choosing a variety
The following varieties are suitable for growing in the house:
- Treasure Island;
- Martin;
- Sweeties;
- Firstborn;
- Firstborn of Siberia;
- Boss peppercorn.
All these varieties are small-leaved, and therefore they feel great when grown on a windowsill, where, unlike open air, there is little sunlight.
In addition, the listed varieties are self-pollinated, which means they can form fruits in the room.
Seed preparation
Before sowing, it is necessary to carry out seed treatment potassium permanganate solution or growth stimulants... The seeds are immersed in the solution for 20 minutes, then the water is drained through a fine sieve.
Sowing the prepared material is not recommended immediately.
- The seeds are placed in a damp cloth and left to germinate for a week in a warm place.
- The fabric must be wetted periodically.to prevent the seeds from drying out.
- As soon as the seeds show sprouts, sowing is carried out.
IMPORTANT. Do not unroll the cloth to check the condition of the seeds. Earlier than in 6-7 days, the seeds will not hatch, but when opened, they will cool.
Requirements for the composition of the soil
 For sowing chili, a mixture is prepared clays, sand and humus (1X1X2). The thoroughly mixed mixture is moistened with water.
When using ready-made soil, it must be kept in the room for a couple of days to be enriched with oxygen and warmed up.
Specials will do. soil for peppers and tomatoes.
ATTENTION. For the purpose of disinfection, it is recommended to spill any soil with a solution of potassium permanganate.
How to plant chili peppers from seeds at home
- Seedlings are planted in wide shallow containers. at a distance of 5 cm in a row.
- Seeds are laid out on the surface, then sprinkled a small layer of soil (0.5-1cm).
- From above, the crops are moistened with a spray bottle.
- Seed boxes are covered with foil or glass to create greenhouse conditions. For seed germination need a temperature of 22-25 degrees.
IMPORTANT. During germination, make sure that no direct rays fall on the surface, otherwise a greenhouse effect will be created inside the box and the seeds will weld.
The first shoots will appear in 10-15 days... The film must be removed immediately, and the air temperature lower to 18 degrees for several days.
Seedling care
 Daylight hours for pepper sprouts should be not less than 12 hours... Therefore, during winter cultivation, illumination with special phyto or fluorescent lamps is necessary.
The boxes are placed on a light but no sun hit, a place.
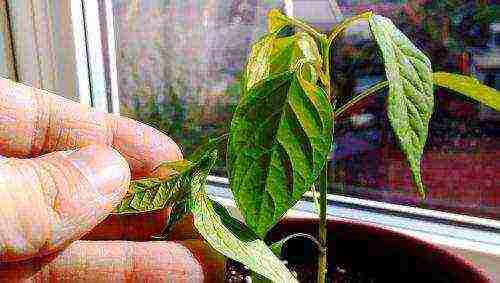
In the phase of two or three true leaves, pepper is necessary unfold at a distance of 10-12 cm... When diving pinch off the main root by a quarter... This technique helps to build up a powerful root mass of each plant.
Pepper pick before the formation of two true leaves is not recommended, because at this time the sprouts are not yet able to withstand the transplant.
It is also impossible to be late with a pick., because from a lack of lighting, the plants will stretch and weaken.
IMPORTANT. When diving, do not deepen the pepper sprouts below the level that was during the sprouting. Unlike tomatoes, the stalk of pepper does not form lateral roots, and when deepened, the roots will suffer from a lack of air.
You need to arrange chili seedlings on southeast or southwest windows, this is how you can ensure optimal lighting for the pepper. The lack of lighting can be judged by the color of the leaves. If they are dark green, then the sun is enough for the pepper. Lack of light is signaled by faded, light leaves.
IMPORTANT. If the sprouts suddenly begin to lose foliage, move the boxes to a brighter place or arrange a backlight. Blue-violet lamps are installed at a height of 25-30 cm above the crown of the plants.
Pepper should be watered separated water with a temperature of 22-23 degrees... When watering waterlogging of the soil must not be allowed, from this plant will get sick with a black leg.
If the air humidity in the room is less than 50%, it is necessary to spray the leaves with warm water.
Transferring peppers to pots
When the seedlings reach a height of 10-15 cm, the plants are placed in separate pots for growing and harvesting. Each specimen is planted in a separate pot.
REFERENCE. The sprouts can be planted in separate pots during the first pick.
The most suitable dishes are plastic containers that are quite wide, but not too deep. The use of ceramics is not recommended, as the soil in such a pot will dry out too quickly.
- At the bottom, it is necessary to lay a drainage layer of at least 3 cm.
- Then pour the potting soil mixture into the pot.
- The sprouts are planted at the same level as when growing seedlings, without deepening the stem.
- Each sprout with a lump of earth is placed in a cavity prepared in the soil and sprinkled with soil.
- After planting, the soil around the stem is well crushed and watered.
- The next watering after planting is carried out no earlier than 7 days later, when the roots begin to take root.
IMPORTANT. Before rooting, do not excessively moisten the soil, from this the root system, which is not yet able to absorb water, will begin to rot.
Formation and pollination of the bush
 Final rooting and start of growth of bushes starts in 15-20 days... At this time, the pepper will begin to actively form new shoots. Pepper grazing on the windowsill is not required.
His fruits are small and the bush has enough strength to grow them. There is also no need to put up any supports, the stalk of the pepper is strong enough to support a lot of fruit.
As soon as flowers begin to form on the bushes, branches need to be shaken slightly for pollination of buds. Daily turn the bushes the other side to the window for even development.
If this is not done, the shoots will stretch towards the light and the bush will begin to tilt to one side.
Feeding rules
Fruiting crops are demanding on the nutritional content during cultivation, so peppers need to be fed regularly. Every 2-3 water the soil for weeks with a universal fertilizer for vegetables or a special fertilizer for peppers and tomatoes.
IMPORTANT. It should not be used for feeding a mixture with a high nitrogen content, the plants from this will increase the leaf mass to the detriment of fruiting.
Chili peppers fruiting
As soon as the pepper begins to form fruits. Bushes, covered with flowers and fruits at the same time, acquire a special decorative effect. When sowing in winter, the first peppers appear in May - June... Depending on the variety, they have red, yellow or green color.
IMPORTANT. Be sure to select and dry some of the most beautiful specimens to get seed for next season.
Growing chili peppers indoors does not require any special effort. Give him a little attention and he will delight you with sharp, aromatic fruits.
Useful materials
Read other articles on pepper seedlings:
- Correct cultivation from seeds and should they be soaked before sowing?
- How to grow black peppercorns, bitter or sweet at home?
- What are growth stimulants and how to use them?
- The main reasons why the leaves of the shoots curl, the seedlings fall or stretch, and also why the shoots die?
- Planting dates in the regions of Russia and the peculiarities of cultivation in the Urals, Siberia and the Moscow region.
- Learn recipes for yeast-based fertilizers.
- Learn the rules for planting bell and hot peppers, as well as how to dive sweet?
In conclusion, we bring to your attention a video on growing chili peppers at home:
.
Some inexperienced gardeners may think that growing indoor peppers or outdoors at home is difficult, but in fact it is not. It is classified as a herbaceous plant that grows dark green leaves. The inflorescences are slightly white.
Chili peppers can be easily grown on a windowsill
Flower appearance
Chili fruits, grown at home with peas on the windowsill, in the process of leaving, can have a different shape and color. Each fruit contains a large number of seeds inside. The seeds are two millimeters in diameter, yellow in color and round in shape. Indoor peppers produce fruits that taste good.They are used to prepare various dishes. An ornamental plant is called due to its pleasant appearance at home at home, peas in the open field, the use of which has a wide range:
- cooking;
- canned food;
- medicines.
Collected chili berries can be used in various homemade dishes by adding them to a dressing or directly to a prepared dish. From the grown berries, tinctures are prepared with a healing effect. Tincture of ninety percent alcohol is used in the treatment of the digestive system, neuralgia and sciatica. It is used orally or in the form of rubbing and lotions.

Chili peppers can burn the skin, so use with caution.
Since the tincture is prepared with peppers, the qualities of which are obvious, external rubbing should be moderate to avoid burns and damage to the skin.
Capsicum is divided into two types:
- Small-fruited.
- Large-fruited.
The external characteristics of chili capsicum fruits are of the following types:
- Small.
- Big ones.
- Curved.
- Smooth.
- With an acute angle.
The shape of the fruit divides the indoor chili peas grown on the window into different varieties: A small bush growing up to sixteen centimeters in length called Blau; cone-shaped varieties. The chili fruit has dark blue berries.
Indoor decorative peppers grown with peas on the window belongs to the nightshade. The grown fruits are often used as spices.
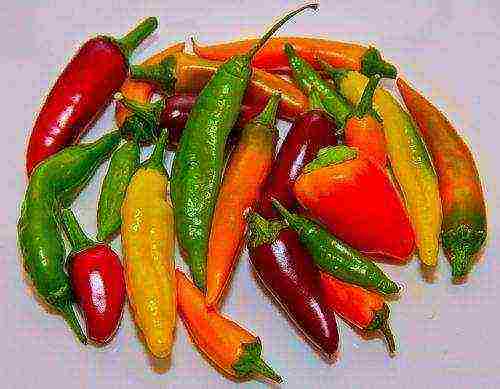
Chili peppers come in many shapes and colors
Growing pepper
This variety originated from South and Central America and Asia, the cultivation of the product is carried out on the territory of our country. Sowing of seeds is carried out in a loose soil structure with pre-laid compost.
Chili is grown on the windowsill, as is the pepper on the balcony. An indoor plant is grown at home, in a pot or outdoors. The composition of the soil should include porous peat, sand and earth. Chaotically scattering seeds, they are sprinkled on top with sifted soil. After two weeks, the first shoots should form. Pepper on the windowsill is grown at home with peas, planting on a window or in the open field.
The pepper on the balcony is adjusted according to the height. To prevent the bush from stretching, pinch its upper part. Leaving continues with a dive of the bush, which is carried out on the pepper on the balcony and other growing areas. Bush pruning is performed after a month of planting.
An indoor plant develops correctly if lighting, feeding and care are evenly balanced. In the process of growth and development of the capsicum, organic fertilizers are used: dung, mullein, etc.
The chili is pinched to prevent over-pulling
The duration of fruiting capsicum is four years, if you loosen the soil in a timely manner, fertilize and prune the pepper bush.
After harvesting, transplant the bush into new soil. The process is carried out carefully so as not to damage the roots of the bush. In planting a particular culture, certain mistakes are evident for the first time:
- you can not pour cold water, but only warm and infused;
- picking eliminates the pinching of the central stem of the plant;
- the plant is resistant to pests;
- it is treated with a solution of ground seeds and soap;
- pepper grows in fairly humid conditions;
- To preserve the pepper after it has been moved out of the greenhouse, it must be trimmed or there is adequate artificial lighting in the room.
Growing pepper with peas or in the open field at home is a simple task, provided that the standards for caring for the planting material are observed. Chili peppers are grown with peas, most often peas are grown for peppers, which are cared for in certain climatic conditions. Chili peas can also be grown in other climates.
Subscribe Be aware of new products on our site


