Content
- 1 Growing mushroom mycelium at home
- 2 A bit of history
- 3 Technological processes for growing mycelium
- 4 Compost and grain mycelium
- 5 Creation of sterile conditions in simple ways
- 6 Before you start growing mushrooms
- 7 Premises
- 8 Substrate
- 9 Mycelium
- 10 Champignon plantation care
- 11 Champignon cultivation technology
- 12 How to grow champignons at home (video)
- 13 Planting mushroom mycelium
- 14 How to care for planted champignons
- 15 How to grow mushroom mycelium at home (video)
- 16 What is the benefit
- 17 Reviews and comments
Mushroom pickers have long noticed that in the natural environment, fungi reproduce well not only by spores, but also by myceliums - fragments of fungal tissue.
This property was adopted and began to grow the mycelium of champignons and other mushrooms in laboratories and even apartments. We will learn how to grow "seeds" for planting ourselves, so that later we can grow home crops of such a useful and tasty mushroom.
Growing mushroom mycelium at home
Planting materials for obtaining mushroom harvests are necessary for both farmers and those who have decided to start cultivating champignons for their own consumption. You can, of course, plant the mushroom mycelium from a purchased mycelium, saving energy (but not money), but this does not guarantee the quality of the product. This is why some mushroom growers prefer to obtain compost or grain mycelium on their own.
To obtain material for planting, spores are sown or it is excreted from the fruiting body of the mushrooms, for which a special nutrient medium is used.
Culture medium options
Self-cultivation of champignon is carried out in the following substrates:
In wort-agar
- Mix a liter of beer wort with agar-agar (20 grams) and boil until it dissolves.
- Pour the composition into test tubes, occupying no more than a third, plug with cotton wool and keep it in an autoclave for 30 minutes at 101 degrees and 1.5 atmospheres.
- We arrange them in a very inclined form, leaving a distance of 3.5 cm to the corks, and wait until the wort hardens.
Usually mushroom pickers use this particular composition to make champignon mycelium with their own hands.
In oat agar
- Mix water (liter), oat flour (35 g) and agar-agar (20 g), boil for an hour, stirring regularly, and pass through a Gause filter.
- Pour into test tubes and wait for solidification.

In carrot agar
- Grind the carrots, mix with water in a ratio of 2: 5, cook for 30 minutes and filter - you get a carrot extract.
- We mix this extract (0.4 l), water (0.6 l) and agar-agar (15 grams).
- We pour into test tubes according to the first method and leave to solidify.
When the nutrient medium for producing compost with mushroom mycelium hardens, add particles of fruit bodies or spores to the test tubes (observe sterility!).
For this process, an inoculation loop is required, which, like the mushroom mycelium, can be easily created with your own hands by calcining a knitting needle or steel wire over a fire.
Hydrogen peroxide, which needs to be treated with mushroom tissues, and opening the test tubes over a flame will help to create sterile conditions. We must burn the corks with fire.
How to grow mushroom mycelium
Until the test tubes overgrow, we keep them in a dark room (thermostats) at 24 degrees of heat: after a couple of weeks, the myceliums will completely master the culture media and will be ready for planting.
Growing mushroom mycelium at home allows you to get grain and compost planting materials.
Types of mushroom mycelium
Compost mycelium
You can get compost with mushroom mycelium using the following technology:
- Place the mushroom substrate, made as described above, in 3 liter jars, filling them to 23.
- We seal it and make a three-centimeter hole in the middle.
- We roll up the jar with an ordinary steel lid, making the same hole in it, and plug it with a cotton and gauze swab.
- We heat the compost to 24 degrees and add the mushroom material there.
We immediately plug the hole in the lids of the jars to protect the mycelium from infection.

Grain mycelium
It prepares like this:
- We put 10 kilos of grain into the tank and pour water (15 liters).
- We put on low heat and cook after boiling for 30-60 minutes: it depends on the hardness of the product.
At the exit, we get soft, but not boiled grains.
- We drain the water and dry the boiled grain, sprinkling it with a three centimeter layer.
- We pour the dried substrate into liter jars with holes in the lids (we also make holes in the grain mass), plug it with gauze and cotton swabs and put it in an autoclave with a pressure of 1.5 atmospheres for an hour and a half.
- Cool the contents of the jars and add mushroom material to the holes made in the grain mass.
We keep the jars in thermostats at 24 ° C until the mycelium completely assimilates the nutrient medium.
So, you have learned how to prepare the mushroom mycelium with your own hands. Finally, we advise you to store grain mycelium in cellophane bags for no longer than 6 months, keeping the temperature no higher than 4 ° С, and the compost one - in a cold place at 0 ° С for no more than a year.
You can store planting material in a warm room with a temperature of up to 18 ° C for 20 days, no longer, and then planting the mushroom mycelium will bear fruit.
In the wild, fungi reproduce mainly by spores, but they can also reproduce in a vegetative way through pieces of mushroom tissue. This feature has long been noticed by mushroom lovers.

Back to content
A bit of history
Previously, wild-growing mycelium was widely used as seedlings. Initially, it was taken from a dump, and when the mycelium did not want to grow at all due to poor conditions, it was raised in so-called greenhouses, which were called "exploration". After a certain time, all the necessary soils were planted from manure, pre-processed and prepared by specialists.
Unlike the usual planting, in this case, the seedlings were not sprinkled with earth. This was necessary in order to properly make the mycelium. Otherwise, fruits could form, and this was unacceptable. After the mycelium grew and penetrated the substrate from beginning to end, it was used for planting. The resulting substrate was dried so that it could be stored for more than one year.

In the 30s of the last century, mushroom mycelium grown by this method was used. But in this case, the mushroom pickers faced several problems: the mycelium helped to achieve only a very small harvest, while it itself disappeared. During planting, a lot of foreign microorganisms were brought in, as a result of which the champignons had no chance to grow. In this regard, scientists have long thought about how to grow mushrooms in a different way, and looked for different ways and options.
Success was brought by the 94th year of the last century, when in France, researchers first received a pure culture. Its distinctive feature lies in the fact that it was created and grown from spores using certain extracts and in a more favorable environment. Thanks to this approach, the resulting mycelium became the "progenitor" of the modern one.The spore mycelium has shown excellent results. She felt great, took root quickly, grew well on compost, and began bearing fruit much earlier.
In a significant number of states that were actively involved in the production of champignons, laboratories already functioned in the 1920s, where they produced planting material using the invented technology. In the USSR, they also soon figured out how to grow a sterile mycelium.
Back to content
Technological processes for growing mycelium
Planting material is needed by everyone, without exception: mushroom growers and amateur mushroom pickers. But the question arises, where to get it? The first option is to purchase mycelium, the second is to grow mushroom mycelium at home. Buying seedlings will save energy, but will entail considerable costs. In addition, it is difficult to know under what conditions the mycelium was cultivated. Therefore, mushroom pickers often prefer to grow seedlings at home, then using them both for self-cultivation of mushrooms and for the purpose of sale.
To get a mother culture, you can carry out breeding work, sow spores or isolate it from the fruiting body of the fungus. Usually, for breeding champignons at home, it is recommended to use one of three nutrient media:
- Wort agar. To make such a substrate, you will need about a liter of beer wort and 20 g of a special jelly called agar-agar. These ingredients need to be mixed and cooked until the jelly is completely dissolved. The hot mixture should be poured into test tubes, filling them by a third, covered with a cotton-gauze swab, then sterilized for half an hour at a temperature of 101 ° C and a pressure of 1.5 atmospheres. After sterilization, the tubes should be placed on the table in a special way: tilt them as far as possible, creating a large solidification surface. But at the same time, it is necessary that a space of at least 3 cm remains between the cork and the liquid. Most often, wort agar is used for breeding mushrooms at home.
- Oat agar. This mixture contains 30/970/15 oat flour, water and agar. The preparation substance must be boiled for one hour, stirring occasionally. Then it must be passed through a filter invented by Gause.
- Carrot agar. In this case, 600 ml of water requires 400 ml of carrot extract and 15 g of agar. To obtain an extract, carrots must be chopped, mixed with water in a ratio of 2 to 5, boiled for half an hour, and the resulting mass must be filtered.
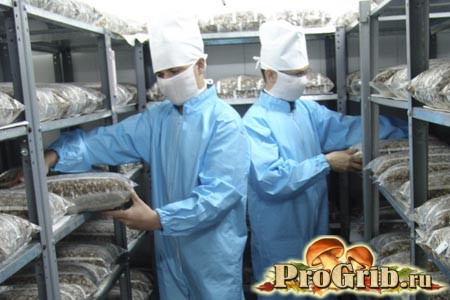
After solidification of the mycelium medium, spores or a particle of the fruiting body are introduced into a test tube under sterile conditions. This manipulation is carried out using an inoculation loop. How to make such a loop? It may seem difficult. But in this case, it is quite possible to do with a knitting needle or steel wire calcined over a fire. One of the most important issues is how to make the process sterile. For this, the mushroom tissue is treated with hydrogen peroxide, and the test tube containing the previously prepared substance must be opened over the burner fire. Only when these conditions are met can the mushroom tissue be placed on the substrate. You also need to take care of the sterility of the cork: burn it on fire and avoid touching the table during manipulations.
Back to content
Compost and grain mycelium
While the tubes are overgrown, they must be placed in a thermostat or a dark room where the ambient temperature is maintained at 24 ° C. Two weeks is usually enough for the nutrient medium to be assimilated by the mycelium. After that, you can use it for reproduction. For cultivation of champignon, grain or compost mycelium is usually used as seedlings. To prepare a compost mother culture, the mushroom compost prepared according to the previously described technology is placed in three-liter jars, which should be filled to 2/3.The substrate in the jar is compacted, and a 3 cm hole is made in the center of the compost. Then the jar is rolled up with a metal lid with a hole of the same diameter, which is plugged with gauze-cotton plug. The compost bottles are autoclaved for one and a half or two hours. Pressure - 1.5-2 atmospheres. The mushroom material previously grown on compost or grain is immersed in a jar after the substrate has cooled to 24 ° C. Cooling should take place when the germicidal lamp is on.
The prepared mycelium is placed in jars through the holes made earlier in the lids. If the inoculation is carried out with a culture grown in a test tube, then in order to detach the contents from the walls of it and the loop, it is necessary to hold it over the burner fire for a certain time. Without removing the test tube from the flame, tear off the stopper, and using an inoculation loop, the medium with mycelium is peeled off the glass. Immediately close the hole in the bottle cap.
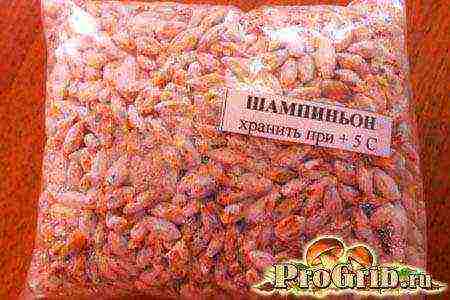
Correct harvesting of grain is one of the main points of preparation of grain mycelium. 10 kg of grain are poured into a large container and 15 liters of water are poured into it. This mixture is cooked over low heat from 30 minutes to 1 hour, depending on the degree of hardness of the grain, which should become soft, but not boiled. Then you should drain the water, and dry the grain on a clean surface, laying it in a layer 2-3 cm thick. All this is easy to do at home.
Next, you will need liter bottles, cans with a volume of one to three liters or polypropylene bags. The containers closed with gauze-cotton stoppers are placed in the autoclave for an hour and a half at a pressure of up to 2 atmospheres. Then the substrate is cooled down, and the containers are placed for an hour in the inoculation with the included bactericidal lamp. After 15 minutes after turning it off, a mother culture is introduced into the sterile grain using the same technology as in the case of compost mycelium. After that, the container with the culture is placed in thermostats that maintain a temperature of 24 ° C, and kept there until the mycelium has completely absorbed the substrate.
Back to content
Creation of sterile conditions in simple ways
It is easy to grow everything you need at home. However, not everyone will buy an autoclave, so an alternative sterilization method is needed. In this case, the cooked food is packed in special bottles (the ideal option is liter bottles), closing them with corks and aluminum foil. This container must be boiled in a saucepan with water (at least two hours). To achieve maximum results, you will need to repeat this procedure after 24 hours. The main thing is to pay attention to the fact that the plugs used for planting do not get wet.

The greatest difficulty can arise at the moment when the planting material will be introduced into the dishes. The fact is that thousands of microorganisms are constantly in the air. And in most cases, it will be incredibly difficult for an inexperienced person to avoid infection. Here the home mini-laboratory will come to the rescue. A novice mushroom picker cannot do without sealed boxes with glass, which is built into the top cover, and a household light bulb. If possible, it is better to get a germicidal lamp. They are attached to the side walls. Sleeves with elastic bands are installed on the front wall of the box.
With a desire and a set of knowledge, you can grow mycelium at home.
Growing mushrooms in a private household, in dachas and even in apartments is becoming fashionable today. Firstly, in the store, mushroom products are not sold at a low price. Secondly, the homemade mushroom, grown without the use of unknown chemicals, is environmentally friendly and safe for consumption. Thirdly, mushroom growing can be made a profitable business, or at least a good source of additional income. Fourthly, it is a very interesting and exciting hobby. Take a substrate, put mycelium in it, create conditions. And it starts to grow like mushrooms.
Growing champignons at home for beginners
Before you start growing mushrooms
You need to think well and weigh your desire and capabilities on two scales. If they are at about the same level, it is worth the risk. Information for beginners: growing mushrooms at home is a more laborious process than growing oyster mushrooms. But less long-term and more effective than growing porcini mushrooms.
It will take certain costs for the purchase of materials, arrangement of the premises, as well as patience and certain skills. Provided that you already have a suitable room and you only need to create favorable conditions in it.
Premises
It should be moderately cool, such as a cellar or basement. If neither one nor the other is not present, it is difficult to advise anything. Perhaps a garage or greenhouse will do (during the cold season). In spring and early summer, before the onset of extreme heat, mushrooms can be grown without a room at all. The main thing is that the air temperature is not higher than + 20 ° С. Indoors, in the case of year-round cultivation, the temperature should be constantly maintained in the range of + 12 ° С ... 18 ° С, and the humidity should be in the range of 65-85%.
Premises for growing mushrooms
Substrate
The most important item on the list of prerequisites for the successful cultivation of mushrooms is the substrate (or, as it is also called for its composition, compost). The following composition is generally recognized as a fruitful compost option.
- Horse or cow dung (or pork or bird droppings, which can be taken, but not desirable).
- Straw.
- Urea.
- Superphosphate.
- Gypsum.
- A piece of chalk.
- Alabaster flour.
Substrate for growing mushrooms
Table. The proportions of the components for making compost from mullein or horse manure.
Table. The proportions of the components for the composting of poultry manure.
By the way! To cover a one square meter area with mushroom compost, you need compost made from 40 kg of straw base (the rest of the components, according to proportions).
Video - How to disinfect mushroom substrate
How to prepare compost
It is better to carry out this procedure in the air or, in extreme cases, in a regularly ventilated area. As the compost matures in a heap, where the straw is layered with manure and watered with water, the heat can rise to + 70˚C. There is an intensive release of carbon dioxide, water and ammonia vapors into the atmosphere. Of course, a person should not breathe this mixture for a long time.
It is good to place the compost place in the sun (the higher the temperature inside this “puff cake”, the faster and better the compost will ripen). But it is worth providing shelter from rains, since heavy rain can wash out all the useful components necessary for the growth of future mushrooms from the compost.
Compost pit for preparing the substrate
Advice! If it is not possible to protect the compost heap with a canopy from atmospheric precipitation, cover it with roofing material or a thick film before the rain. Be sure to lift the film from the sides, leaving the sides open.
The straw for the substrate must be fresh, dry, free from mold and other defects. Before starting laying, the straw is soaked in a large tank of water for a day. If there is no such reservoir, spread the straw on polyethylene and water it abundantly several times a day, preventing it from drying out.
Laying the compost heap
Straw and manure prepared in this way begin to be laid in layers.
The first layer is straw. Then - manure or droppings.
Each layer of straw is sprinkled with ammonium nitrate, urea in the proportions indicated in the table.
Each layer of straw is watered abundantly with water.
In total, there should be at least 3-4 layers of straw and, accordingly, the same amount of manure.
You need to finish the laying with straw.
Water once again to keep the moisture content of the compost heap constant.
The heap must be at least one meter high. The length and width are arbitrary.
Preparing compost for cultivation
champignons
For a week, the multi-layered structure is basking in the sun. Then comes the moment of the first shaking up. The procedure is carried out with a pitchfork. Shaking up a compost heap is not easy. But they cannot be neglected, since for the speedy composting inside it is necessary to provide oxygen access.
During the first shaking, plaster of Paris is added. It will improve the structure of the compost.
The second shaking is carried out without waiting for the next week, 3-4 days after the first. This time superphosphate and chalk are added.
Important! If the pile is slightly dry in the sun, it is watered abundantly with water. It is impossible to dry out the compost, its formation will stop.
The third and fourth shaking is carried out in four consecutive days. After three weeks, the compost heap will lose its strong ammonia smell and will turn into a pleasant chocolate color. The straw in the compost will become soft and tear with your fingers.
Ready-made compost for growing mushrooms
High-quality compost substrate, completely ready to use, does not stick to the palm, bounces in the fist when squeezed, leaves a wet, but not dirty mark on the skin.
Advice! If you overmoisten the pile, and moisture literally flows out of the compost during compression, it should be decomposed to dry (but not dry, but only reduce the humidity to 60%), adding half the rate of chalk.
The finished substrate is filled in racks, boxes or other containers where mushrooms will be grown. The temperature of the substrate must be lowered before the introduction of the mycelium.
Germination composting process
Preparation of the substrate for further planting of the mycelium
If you plan to grow mushrooms in a room specially designated for this enterprise, for example, on the earthen floor of the cellar, the compost is poured directly onto the floor, in a layer of 70 cm, forming beds with an area of ½ m² or 75x75 cm.
- If in the basement you have equipped racks on which future mushroom crops will grow neatly, they must be equipped with bumpers, and then you can put the compost directly on the racks, with a layer of 45 cm.
- If cultivation is supposed to be in boxes that can be stacked in the same basement or cellar (no more than two meters stack height), because the mushrooms do not need light for development, the compost is poured into boxes. Backfill layer - 25 centimeters
- If you grow mushrooms in an open or greenhouse ground, the compost is rammed directly onto the surface of the ground, 25-30 cm high. The beginning of the laying is early spring, when the ground thaws. Sheds are made over the open ridge to protect from precipitation and sunlight that is too intense for shade-loving mushrooms.
- The compost is well compacted by hand, the surface is carefully leveled.
Racks for champignons
Mycelium
After the preparatory work, the most important moment comes - planting the mycelium. Mushroom mycelium can be planted at a soil temperature of no higher than + 28 ° C at a depth of 5 cm.Check the temperature with a thermometer. This is important because exceeding even two degrees will kill the mycelium.
The planting material for growing champignons, like other cultivated mushrooms, is a sterile mycelium, which is grown in special laboratories. Champignons for cultivation in culture are selected in two varieties:
- double-sided white;
- double-cornered brown.
Champignon mycelium
There are no significant differences in their taste and nutritional value. The only difference is in the color of the mushroom, according to the name, white or brown. Sell mycelium or mycelium in bags or jars. Packing is usually 1-2 kg. The mycelium of both varieties is grown in two ways - on manure and on cereals.
The first, dung mycelium, will be needed for planting 500 g per m² of area. Grain - not less than 100 g.
Planting mycelium
The dung mycelium is a fairly monolithic lump, which, before planting, must be divided by hand into small pieces, half a matchbox in size.
- The mycelium prepared in this way is laid out on a large tray in one layer. In the ground, a part of the upper layer is lifted with a wedge-shaped peg so that a piece of mycelium can be laid there.
- Planting is staggered with a cell distance of 20 cm.
- Part of the mycelium is covered with a substrate, no more than 3 cm thick.
Compost overgrown with mushroom mycelium
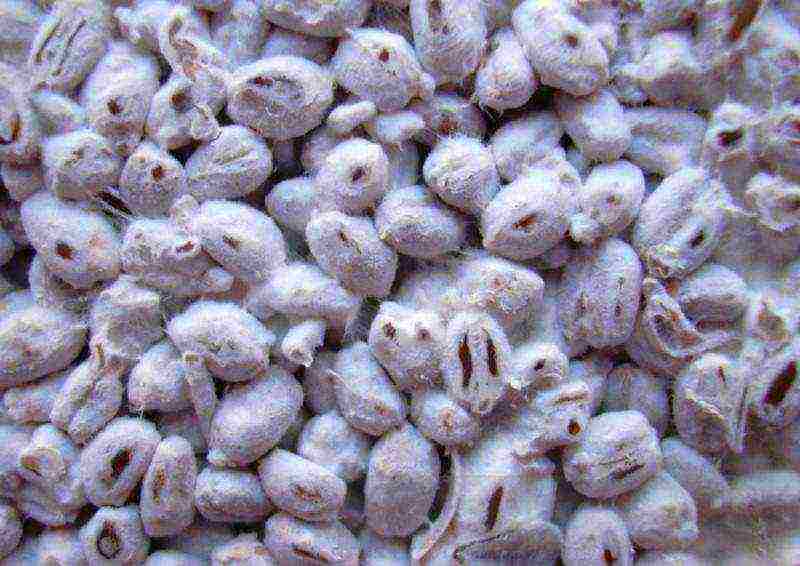
Grain mycelium is an ordinary grain on which the spores of the fungus are planted. It is sowed the way you would sow any cereal.
- The top layer of compost, 3 cm wide, is removed from the ridge or box.
- On the surface, "mushroom grains" are randomly scattered.
- The compost is poured back and slightly pressed down so that there is no void between it and the grains.
Grain mushroom mycelium
By the way! Wild mushroom mycelium is also suitable for growing homemade champignons. If you find a place where mushrooms grow, take a closer look at the soil. A land riddled with a web of whitish-gray mushroom spores is a good starting point for your mushroom plantation.
Champignon plantation care
After you have landed, the room temperature is kept high. This is a prerequisite - the germination of mycelium will not begin at below + 24 ° C and above + 26 ° C. At this time, at the initial phase of mycelium growth, do not expect immediate "shoots". Champignons are not vegetables. They grow deeper into the soil, gaining ground and forming the future harvest. At low temperatures, growth is insufficient, at high temperatures - weak formation of the fruiting body.
Rules for harvesting champignons at home
The moisture content of the compost must be constantly maintained in the range of 55-60%. As soon as it dries up, the mycelium "freezes" and stops growing. The compost is moistened superficially, from the sprayer, so that the water does not flood the mycelium, otherwise it will become moldy and die
It will take 12 days to grow deep into the mycelium. After that, the temperature in the room will definitely decrease. Either the heating is turned off, or the transoms and ventilation openings are opened - all methods are good to reduce the temperature to + 18 ° С… 20 ° С.
By this time, it is necessary to prepare the soil for backfill. Up the mycelium will grow no longer on compost, but from nutrient soil of the following composition:
- sod land;
- loam;
- sandy loam;
- fine-structured peat soil.
Any of the listed structural types will work. The main thing is that the soil is not heavy. To add "airiness" and ensure the penetration of air to the spores of the fungus, the soil is sieved on a coarse sieve.
Agricultural practices and terms of their implementation when growing mushrooms
Before backfilling, the soil is moderately moistened. And cover them with a layer of compost 3-4 cm.
Further, caring for the mushrooms is simple.
Maintaining the temperature within the specified limits. - + 16 ° С ... 18 ° С, plus - minus two more permissible degrees.
Maintaining humidity in the range of 65-85% (air) and not higher than 60% - of the earth layer.
Daily intensive ventilation of the room to remove accumulated carbon dioxide.
You can collect the first homemade mushrooms from your own plantation as early as 35-40 days. One fruiting cycle lasts about two months.
Agricultural practices and terms of their implementation when growing mushrooms (continued)
Despite all the seeming difficulties and conventions, the cultivation process, starting from the moment the compost is prepared, takes no more than four months. For two months of fruiting, the crop can be harvested 6-7 times. From a meter of a square ridge, from 5 to 10 kg of mushrooms are collected. The next crop ripens after 5 days.
Harvesting champignons
Important! Mushrooms must be collected at a stage when the film between the stem and the cap is not damaged and connects them tightly. Opened mushrooms with darkened (for white varieties) plates and damaged film, the remnants of which can only be seen on the stem, it is better not to eat
Champignons are not cut with a knife when they are collected. The mushrooms are twisted with a gentle movement of the hand.The holes formed after collection are sprinkled with soil and slightly moistened.
Video - Growing champignons at home (part 1)
Video - Growing champignons at home (part 2)
Video - Harvesting champignons
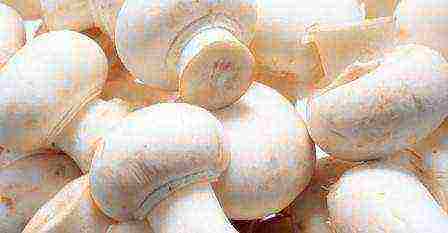 How to grow champignon mushrooms at home? Many people want to have a natural food in their kitchen. Champignons are unpretentious mushrooms and are easily cultivated in artificial conditions. Any darkened basement with good ventilation and a satisfactory microclimate will do. The method of growing champignon mushrooms at home is simple, and everyone can master it. The main thing is to create the necessary conditions and maintain the required air humidity.
Champignon cultivation technology
To grow champignons at home, you should take care of the availability of a cool room. For these purposes, a home basement, a cellar is suitable.
To grow champignons at home, you will need:
- basement or other darkened room;
- fans to create good air circulation;
- boxes made of plastic or wood (in extreme cases, bags are also suitable) for the substrate;
- thermometer for measuring the temperature of the substrate and air;
- hygrometer for monitoring air humidity.
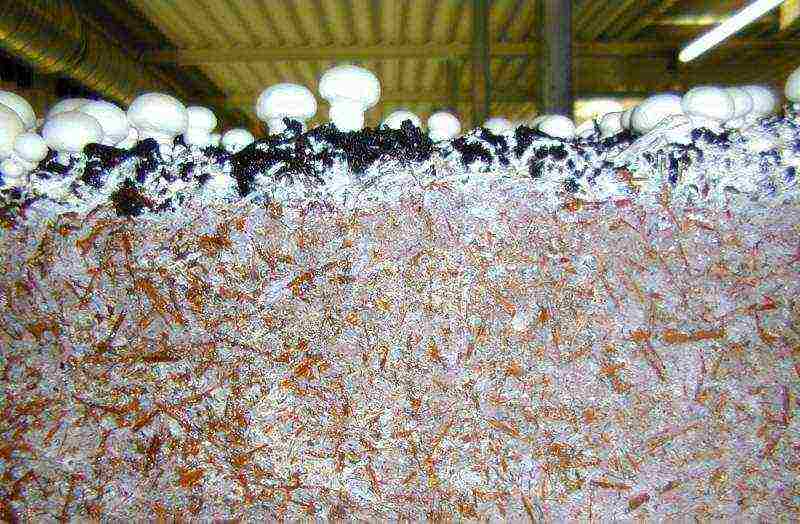
A properly prepared substrate is the key to success in such a business as growing mushrooms. The volume and quality of the product will depend on its useful properties. Well, if you managed to get horse manure, the so-called "mullein" will do. They are excellent ingredients for making a nutritional formula. In the absence of an opportunity to purchase these types of fertilizers, it is practiced to replace them with pig manure or chicken droppings, but in this case, one must be prepared for a reduced yield.
Also read: How to preserve porcini mushrooms correctly and for a long time
To create a small mycelium measuring 3 m² you will need:
- high-quality straw - 100 kg;
- manure - 200 kg;
- urea and superphosphate - 2 kg;
- gypsum - 8 kg;
- chalk - 5 kg.
At the end of the process, more than 300 kg of the finished product will be obtained.
The substrate should be made in a well-ventilated room, and even better in the yard or garden, since after combining the components, a complex reaction begins, which significantly increases the temperature in the pile. It is important to protect the substrate from factors such as rain and direct sunlight.
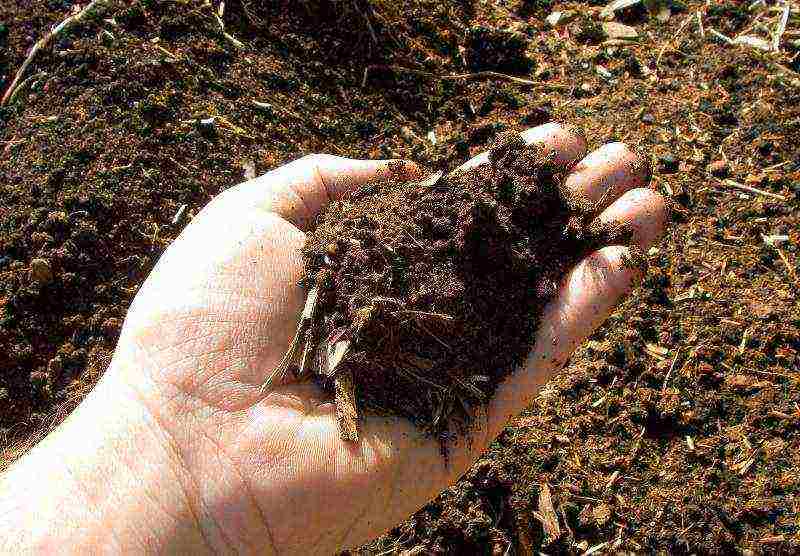
So, we find a suitable place. We water the straw with water, then give it 2-3 days to soak. Then we begin to prepare a mixture of the remaining components (chalk, gypsum, urea and superphosphate). Everything is well and evenly mixed into powder to a homogeneous structure.
Compost is prepared by overlaying one layer on top of another. Initially, in the chosen place, we smooth out the pre-soaked straw, then sprinkle it with the prepared mixture. Then we spread the manure and sprinkle with powder. We repeat this algorithm 4 times to get 8 layers. To ensure optimal fermentation of the components, it is recommended that the length and height of the stack be about 1.5 m and about 1.3 m wide.
The maturation process of the compost takes about 3 weeks. At this stage, it is necessary, at regular intervals, to carry out from 3 to 4 procedures for mixing the mixture, each time moisturizing it well.
Then the finished mixture is placed in special boxes or on racks.
With a lack of experience in the manufacture of nutritional mixtures, you can buy an already prepared product at special outlets.
How to grow champignons at home (video)
Planting mushroom mycelium
The finished compost is filled in wooden or plastic boxes, and bags are also suitable. Here it is important to observe the height of the laid out compost, which should be about 20 cm. For 2 weeks, the temperature of the substrate should be monitored so that it does not exceed 28-30 ° C. You also need to take care of air humidification.
So, the substrate has reached the required parameters and is in the selected room. Next, the mycelium of the fungus should be placed in the place of the future mycelium. Only specialized laboratories can grow it under sterile conditions. You can purchase this product in specialized gardening stores.
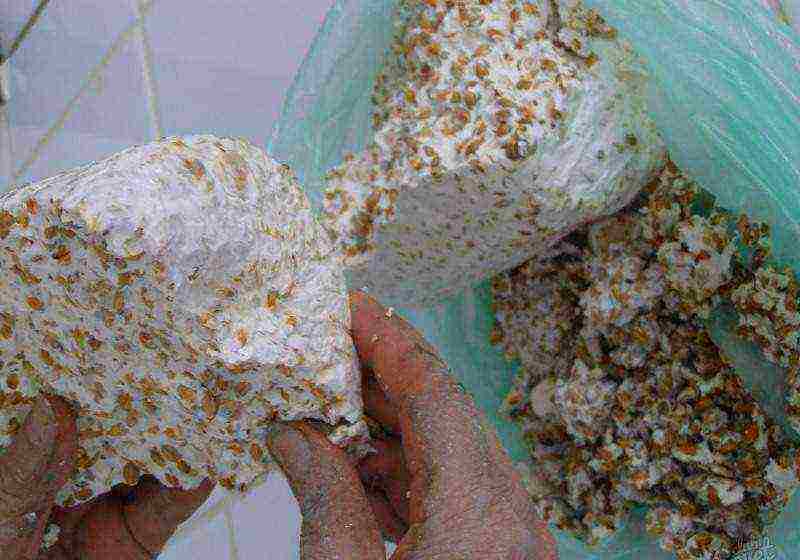
Depending on the method by which the cultivation was carried out, a distinction is made between grain and compost mycelium. Both of them are used as sowing material.
Seed consumption per 1 m² of substrate is 0.5 kg of compost mycelium or 0.4 kg of mushroom cereal spores.
For inoculation, put a small handful of mycelium 5 cm deep into the compost. The holes should be located at least 20-25 cm one from one. As for the champignon spores, they can simply be carefully scattered over the surface.
If all technological recommendations are followed, the process of growing mycelium will occur very quickly. It is important during this period to regularly moisten the soil. Carefully monitor the substrate temperature and avoid exceeding the 27 ° C threshold. Violation of the regime can lead to the death of the mycelium, and the idea of growing mushrooms will not come true.
After 2 weeks, when the mycelium has grown, you need to add a small layer of soil about 3-4 cm.This coating is prepared from a proportion of 50% peat and sod land to 50% chalk and loamy soil. The ingredients are treated with hot water to kill unwanted microorganisms, and then thoroughly mixed.
How to care for planted champignons
At the end of the incubation period, the growth of fruit bodies will begin in the mycelium overgrown and covered with a layer of soil. This is a crucial moment. It is important to keep the temperature in the room no higher than 13-16 ° C and the relative humidity no more than 65-80%. The substrate itself can have no more than 20-22 ° C. The room should be well ventilated, at least once a day.
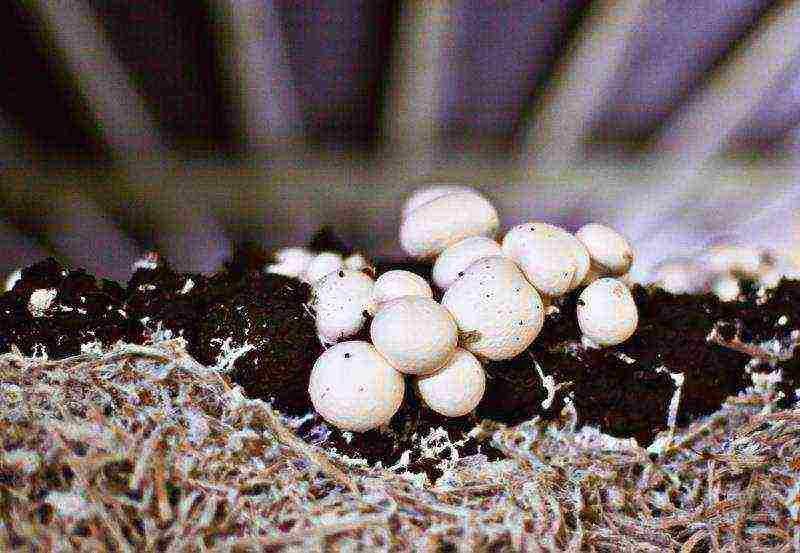
The first fruits can be expected in 3.5 months. The harvesting procedure begins with the mushrooms, the cultivation of which has ended, gently twisting the legs, but not cutting off. The fruiting process lasts about 60 days. Experienced mushroom pickers during this period manage to grow and collect up to 7-8 waves of harvest. It should be noted that the main yield falls on the period of the first two waves. 1 m² of mycelium area is able to give up to 12 kg of dietary product.
How to grow mushroom mycelium at home (video)
What is the benefit
So, having considered the question of how to grow champignon mushrooms, we can say with complete confidence that this is a worthy occupation. This way of growing makes it possible to have fresh mushrooms every day. It is no longer necessary to tell anyone about the beneficial properties of these delicacies. Even pregnant and lactating women can use them. Growing mushrooms at home, if desired, will work even in a city apartment. Providing this delicacy to your family, the leftover products can be easily sold on the market. For this, mutually beneficial cooperation is established with the nearest store. You just have to make the right choice.
Attention, only TODAY!
Reviews and comments
Did you find a mistake in the text? Please select it and press Ctrl + Enter. Thank you!
Rating:
(
estimates, average:
out of 5)
