Content
- 1 Preparation of planting material
- 2 Sowing seedlings
- 3 Seedling care
- 4 The nuances of growing celery
- 5 Description of the plant
- 6 Root celery varieties
- 7 Planting root celery
- 8 Outdoor cultivation
- 9 Is it possible to grow celery at home
- 10 Diseases and pests of root celery, prevention of the appearance and methods of treatment
- 11 Harvesting and storage
- 12 Preparing Root Celery Seeds for Sowing
- 13 Growing seedlings of root celery
- 14 Planting root celery in the ground
- 15 Root celery care and cultivation secrets
Celery is a very valuable product famous for its healing properties. Its aromatic and juicy roots are good in any form, but most useful in fresh salads. To provide themselves with vitamins for the entire season, many summer residents grow root celery in their plots in a seedling way. In the absence of experience, it is not easy to achieve good results, since agricultural technology has its own secrets.
Celery root
Preparation of planting material
Growing celery root seedlings
Selecting seeds for seedlings
When choosing seeds, you need to immediately determine the ripening time. As you know, the growing season for celery is one of the longest - from 150 to 220 days, while young plants are not resistant to cold. To get large and fully ripe root crops, it is recommended to choose early ripening varieties, for example, Prague giant, Snezhniy ball, Diamant, Yablochny, Gribovskiy.
Celery seed
You should buy seeds only in specialized stores, otherwise there is no guarantee that the contents of the bag correspond to the variety indicated on it. Be sure to pay attention to the germination time.
Sowing preparation
Photo - celery seeds, placer
The best time to sow celery seedlings is the first half of February, and the deadline is mid-March. Always start with the preparation of planting material. Seed germination is hampered by essential oils that envelop them from the outside, protecting them from adverse effects. To eliminate this problem, the seeds are soaked in clean water for a couple of days. The water must be changed three times a day. You can do it differently: take a shallow plate or saucer, lay on top of clean paper folded in several layers, or a piece of cloth and soak abundantly with water. Seeds are evenly distributed from above with a thin layer and placed in a warm, dark place until germination. Be sure to keep the paper damp all the time.
Seed preparation for sowing - soaking
Sowing seedlings
For seedlings, you can use any convenient containers - wooden boxes, plastic containers, disposable glasses or special cassettes.
Seedling cassettes
Show on page Open in full size
They take the soil mixture purchased or do it themselves: mix 1 part of sod land, 6 parts of peat, 2 parts of humus, 1 part of mullein. The second option is vermicompost and sifted sand in a 1: 1 ratio.Such mixtures are considered the most optimal for celery, since they contain all the substances it needs. The soil should turn out to be loose, moderately moist, homogeneous.
Celery planting soil
Sowing process it is quite simple and requires only great care, since the seeds are very small.
|
Step 1 |
The prepared soil is poured into containers, not reaching the top by 1.5-2 cm.The surface is carefully leveled, but not compacted |
|
Step 2 |
Small grooves are made with a toothpick with an interval of three centimeters or small depressions are made according to the scheme 2x2 cm |
|
Step 3 |
The hatched seeds are sown. So that they do not stick together and fall evenly, before planting, they are laid out on a dry, clean cloth and dried a little. |
|
Step 4 |
The grooves are sprinkled with soil no more than 0.5 cm, the boxes are wrapped with foil and placed in a dark, warm place |
|
Step 5 |
Periodically, the soil is moistened with a sprayer. Seedlings should appear in about a week |
Some gardeners sow celery in the snow: the grooves are made 5-7 mm wide and filled with snow along the entire length. Seeds are laid out on top of the snow, the boxes are covered with glass or foil and removed to a warm place. This method is convenient because the seeds are clearly visible on a white background, so they can be spread more evenly. In addition, when the snow melts, each seed will sink to the optimal depth, and the melt water will accelerate germination.
Sowing celery in the snow
There is another very convenient and practical way called "snail". It allows you to grow a lot of strong seedlings in a minimal area, and when plants are transplanted into a separate container, the roots do not get tangled with each other and are easily pulled out of the ground.
The method of growing seedlings "in a snail"
This method requires:
- a small round container with a height of 5 cm (you can use a regular mayonnaise jar);
- a piece of polypropylene backing 10-12 cm wide and 20 cm long;
- large tray;
- stationery elastic;
- soil mixture.
Place the tray on the table and lay the substrate on it so that one of its edges is flush with the side. A part of the soil is poured onto this edge and leveled over the entire width of the substrate 1 cm thick. Gently press down with your hand to compact, slightly moisten with water or a stimulating solution for seedlings.
Planting seeds
Seeds are laid out in a straight line along the side edge of the tape, departing from the cut about 2 cm. It is advisable to sow not thickly so that there is free space between the seeds. For celery, 0.5-1.5 cm is enough. When the piece of substrate on the tray is completely sown, you can start forming a "snail". To do this, the edge of the tape is gently lifted and, holding the ground with the palm, twisted into a roll. You do not need to press hard, but you cannot leave voids so that the earth does not spill out.
We fold the snail
Next, the roll is moved to the edge of the tray and held with one hand, while the other is poured onto the free edge of the substrate. All repeat until the tape is completely folded. The finished "snail" is fastened with an elastic band, carefully turned over with the seeds up and placed in a container.
Securing the roll with an elastic band
If the soil has spilled a little, you can add it on top and moisten it with water. After that, a plastic bag is put on the roll of seeds, the edges of which are threaded under the elastic around the entire circumference. It is in such a mini-greenhouse that celery will sprout. They put it in a warm place and periodically add water to the container.
Cover the roll with a package
When the first shoots appear, the container must be placed on the windowsill so that the plants receive more light. After 2-3 days, you need to remove the package and arrange additional lighting for the seedlings.
After germination, we put a pot on the window
Seedling care
The optimum temperature for seedlings is about 16 degrees.It is not always possible to provide such conditions for plants, but a light and cold window sill is considered the most acceptable option. When the temperature outside rises to 8 degrees, you can take out the seedlings to the balcony. Plants cannot be overcooled, as this leads to the shooting of celery. Moisten the soil during this period only by spraying; watering can damage thin and fragile shoots. Thickened crops must be thinned out, choosing the weakest specimens. If this is not done, the seedlings will stretch and weaken.
Densely planted seedlings are thinned out
Picking
Celery seedlings before diving
Plants dive after they have two true leaves. The day before the pick, the soil is watered abundantly, which reduces the risk of damage to both the roots and the aerial part. Each seedling is carefully removed from the ground, pinched by a third of the main root and placed in a separate container with fresh soil mixture. It is necessary to deepen the plant up to the cotyledons, leaving the growth point open.
Seedling picking scheme
Further care is quite simple: once the sprouts are sprayed with a weak weak solution of potassium permanganate, fed with a solution of humate every three weeks or infusion of bird droppings. You can also use mineral fertilizers, but in the smallest doses.
Video - Picking celery seedlings
Transplanting
Transplanting
Since celery is sensitive to cold, it should not be planted in open ground until mid-May. If forecasters promise frosts, it is better to wait one to two weeks. Plants are planted in a 30x30 cm pattern, with the growth point at ground level. If the root is deeply deepened, lateral roots begin to develop, the fruit will be bumpy, small in size and not so juicy. For planting celery, it is better to choose a cloudy, windless day - such weather conditions facilitate the adaptation of seedlings. At night, the beds should be covered with white agrofibre, which perfectly protects from the cold.
Covering agrofibre
In the absence of such material, ordinary plastic bottles, cut across, will do. In this case, each plant is covered separately.
Mini greenhouses
The nuances of growing celery
Root celery - the nuances of growing
Root celery requires a lot of moisture. Drying out of the soil, even a slight one, strongly affects the taste and size of the root crop. Water it at the root and maintain a stable soil moisture throughout the growing season.
No later than 10 days after planting the seedlings, celery must be fed with herbal infusion. For this, two weeks before feeding, fresh nettles, comfrey or chamomile are collected, and a plastic tank or wooden barrel is filled two-thirds of it. The grass is poured with water, the container is covered with a lid, and placed in the sun to wander. Mix the contents well every day, filling it with oxygen. When the foam disappears from the surface, the fertilizer is ready. It must be diluted with water in a ratio of 1: 9 and fed to the plants.
Making fertilizer from nettle, comfrey, chamomile
After another week, feeding with bird droppings or mullein infusion is recommended.
Chicken droppings as top dressing in a diluted form are poured into the aisles or grooves
In the middle of summer, feeding with superphosphate will give a good result, and during the period of root crop formation, experienced summer residents advise fertilizing celery with a solution of boric acid.
Superphosphates - photo
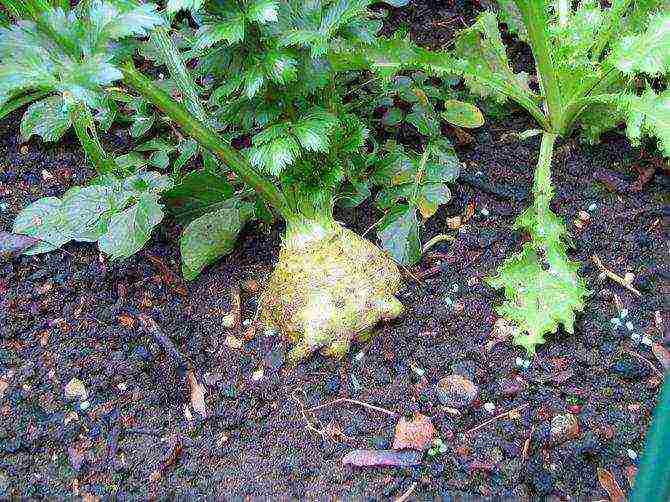
Celery responds well to loosening the soil, but this is often not worth doing. It is enough to loosen the beds every two weeks, until the plants are too overgrown. But you cannot spill this crop, otherwise you will have to forget about the harvest. On the contrary, having noticed a thickening of the root, you should shake off the excess soil a little, then the lateral roots will not be able to grow back and pull juices from the central part.And if you suddenly notice under a layer of earth the roots extending to the side, cut them off with a knife without regret.
Celery in the garden
At the beginning of autumn, it is advisable to remove all lateral leaves, and leave only growing vertically. The harvesting of the root crops themselves is carried out no earlier than October. The plant sits very tightly in the ground and often during harvesting its delicate skin is damaged, which leads to a decrease in the keeping quality of the vegetable. This can be avoided by spilling the beds with water before cleaning.
Harvesting celery
Video - Growing celery root seedlings
Root celery is rarely found in home gardens and summer cottages, since it has a long growing season, and it is not very easy to grow seedlings. But since celery has a high nutritional and dietary value, adherents of a healthy lifestyle try to allocate a garden for it and are rewarded with good harvests.
Description of the plant
Celery is a spicy vegetable plant that has three varieties: root, leaf and petiole. Root celery is interesting in that by the end of summer it grows a root crop capable of long-term storage, but during the summer young leaves are also used for fresh food. In the leaf, the main nutritional value is in the leaves, which are collected in a dense rosette on short hollow stalks, and the root system consists of many small roots. In petiole celery, strongly developed, thick (up to 4 cm) petioles are eaten.
All varieties are grown in most regions of the country, but they yield a good harvest only on nutritious and moderately moist soils. They do not tolerate cold and acidic soils. The plant is considered to be one of the most cold-resistant plants, tolerating frosts down to -6 ° C without damage. The optimum temperature for growth and normal fruiting is 16–22 ° C. It is known that specimens left for the winter under the snow most often remain intact, and in early spring they grow back and give abundant greenery, after which they begin to bloom.
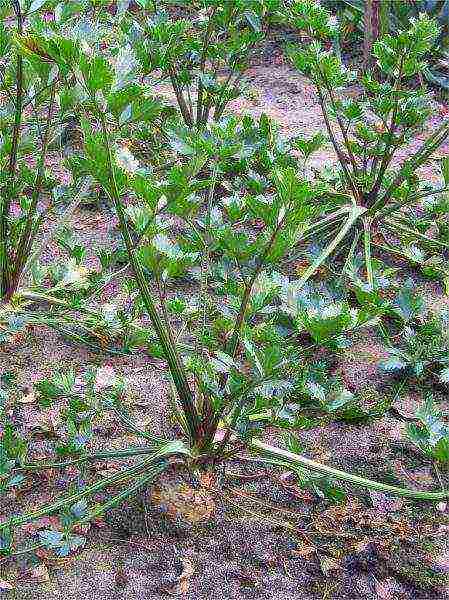 As an adult, celery is a powerful plant that is resistant to light frosts.
As a food plant, celery root is useful because its roots (and leaves) contain many minerals, vitamins and essential oils: about forty useful components, including potassium, magnesium and iron salts. They are a part of celery juice and phytoncides, as well as valuable amino acids. In cooking, the root vegetable is used for side dishes, seasonings for various dishes and for canning vegetables. It can be stewed and fried, but more often they try to use it raw, in salads, trying to preserve the maximum amount of vitamins.
The presence of potassium in celery has a beneficial effect on the cardiovascular system, and magnesium - on the nervous system. Iron is involved in the process of hematopoiesis. Celery is useful for gout, dermatitis, rheumatism. It enhances the excretion of slag from the human body and is recommended in case of rapid fatigue. Its roots stimulate appetite and improve digestion. Celery infusions have antiseptic, anti-inflammatory and wound healing effects.
The substances that make up celery facilitate the absorption of proteins, in connection with which one of the popular diets consists in the use of lean meat or fish at the same time as this root vegetable. It is believed to help with specific male health problems as well.
However, the use of celery is appropriate only in reasonable quantities, and even then not for everyone. It is a powerful diuretic, so people with any kind of kidney disease should not consume more than 80 g of the root vegetable per day. You should not lean on it for stomach problems, varicose veins, as well as for pregnant women. When working with celery, it should be borne in mind that on hot days it emits burning essential oils, which, when they get on the skin, cause irritation and sometimes severe burns.
Root celery varieties
There are about 30 varieties of root celery in the State Register of Breeding Achievements of the Russian Federation, and their use is not limited to certain regions. Of course, in addition to those available in this document, there are at least the same number of varieties. The most common, older varieties are:
- Apple - ripens on the 140-155th day after germination, has roots weighing 150-200 g. Inside they are white, there are few lateral roots. All parts of the plant are used. The variety has been known for more than half a century.
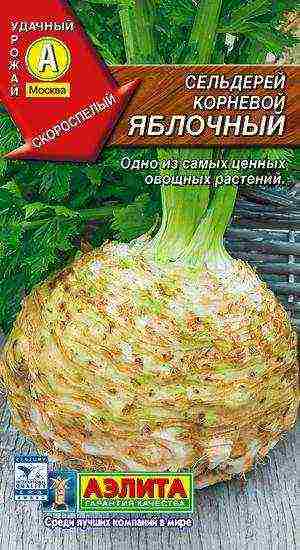 Apple has been known for a long time, but recently gardeners do not particularly like it.
 - Root Gribovsky - mid-season, with rounded-flat roots, slightly larger than those of Yablochny. The pulp has a good taste and high aroma. Ripens in 190 days. Suitable for long-term storage, can be dried in pieces.
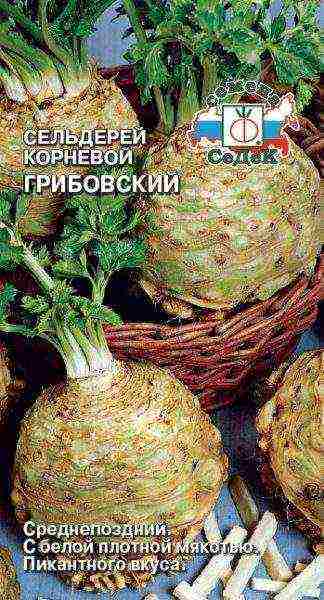 There are varieties of various vegetables under the name Gribovsky, and usually they do not let gardeners down
 - Diamant is a mid-early variety, with round massive roots (about 0.5 kg, and sometimes much more). High-yielding, disease-resistant, the first copies are ready for use in August. The crop is well transported and stored. When dried, the pulp remains white.
 Diamond is distinguished by particularly large root crops
Relatively new varieties include:
- Esaul - 150–160 days pass from the emergence of seedlings to the readiness of the crop for harvesting. Root crops of medium size, weighing 250-300 g, round, elongated on top, smooth. Productivity is high, the variety is not capricious to growing conditions.
 Esaul gives gardeners a minimum of trouble
 - Ivan Tsarevich - mid-season, round, whitish roots, weighing about 400 g. Inside, the root vegetable has an ivory color, excellent taste. Ripe root crops are immersed in the soil approximately to the middle, easily pulled out, well stored and transported.
 Ivan Tsarevich can be stored until spring
 - Egor is a mid-season variety, root crops are round, elongated on top, yellowish-gray in color, weight ranges from 100 to 600 g. Inside are white, with increased aromaticity and high sugar content. The lateral roots are low and easy to pull out. The yield is high.
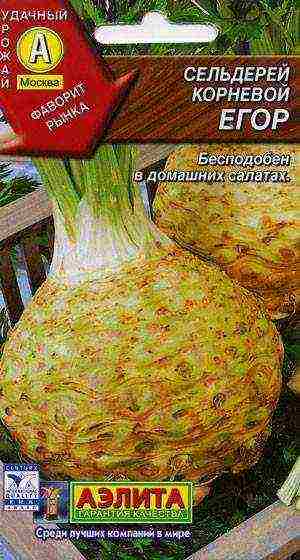 Egor grows up in various sizes, depending on the level of agricultural technology
 - Jupiter is a precocious variety (145-155 days). The root crop is round, medium in size (weighing about 300 g), grayish white outside, white inside. Stored for a long time without losing its presentation, resistant to diseases. A variety of universal use.
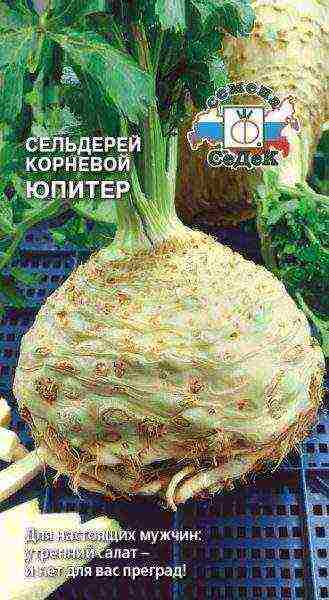 Jupiter is suitable for all kinds of dishes
Reviews of celery varieties
Planting root celery
Celery has a long growing season, so it is rarely grown by sowing seeds in the ground, usually through the seedling stage. If in the middle lane you try to sow a change directly into the garden bed, they will sprout, but even the earliest varieties, most likely, will not have time to give full-fledged root crops. Therefore, they begin to practice celery at the end of winter. Sprouted seeds are sown in mid-March. In the southern regions, direct sowing into the ground is also possible at the earliest possible date, as soon as the soil ripens, but more often all the same it is initially sown in seedling boxes, and then the seedlings dive into cold greenhouses.
Preparation of soil and containers for seedlings
There are different approaches to growing celery seedlings. Some gardeners prefer to sow seeds immediately in separate pots, others - first in a common box with subsequent picking. Both methods are equivalent, since this culture tolerates transplantation normally.
For a small amount of seedlings, you can buy ready-made soil in the store, but if we are talking about several buckets of soil, it is worth saving. There are various options for the composition of the soil for celery seedlings, but in any case, it should be light, loose, but moisture-consuming. For example, you can make a mixture of equal proportions of coarse river sand, turf, and good compost. Celery is also very good for peat in the composition of the substrate.
But for now we will assume that we have not purchased the tablets, then we will place the prepared soil in a small box with a layer of about 4 cm and disinfect it by watering it well with a pink solution of potassium permanganate or at least boiling water. The pots will not be required soon, more than a month will pass before the pick, but for now it is necessary to start preparing the purchased seeds.
Seed preparation
Celery seeds have a very limited shelf life: a maximum of two years, very rarely 3-4, so it is advisable to buy fresh in a specialized store every winter. The seeds are very small, sprout hard, as they are covered with a dense shell of essential oils. O. Ganichkina suggests sowing dry seeds. Yes, they will rise, although not soon, perhaps only after 3-4 weeks, giving the gardener the opportunity to worry. Therefore, it is better to prepare them a little for sowing.
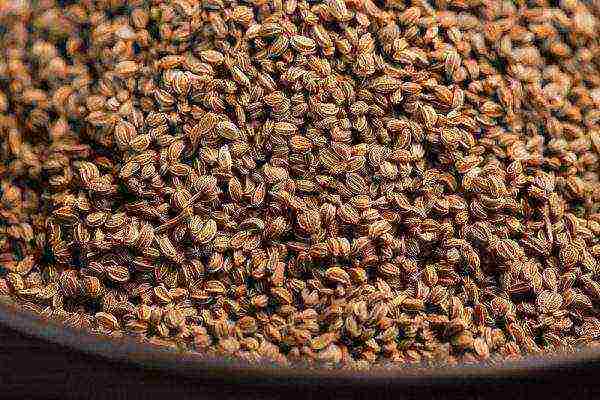 Celery seeds are very similar to parsley seeds.
After soaking, you can sow, such seeds will sprout in 10-12 days, but you can wait until they bite. This is done in a well-known way for gardeners: the seeds are placed in a wet cloth and, if available, put in a Petri dish. Or into any container, covering not completely hermetically. Make sure that the cloth does not dry out. Every day they carry out an audit, sowing only when at least part of the seeds bite, microscopic roots appear.
Sowing seeds for seedlings
If the preparatory work was started at the very end of February, before March 8, it will be possible to sow seeds in the box. The latest dates, when this can still be done, fall on the last decade of the month. Sowing is carried out with minimal deepening:
- If you need to sow some seeds, they are laid out on the surface of the moist soil, placed in a box, manually at a distance of 1.5-2 cm from each other (prepared seeds can be taken with small tweezers).
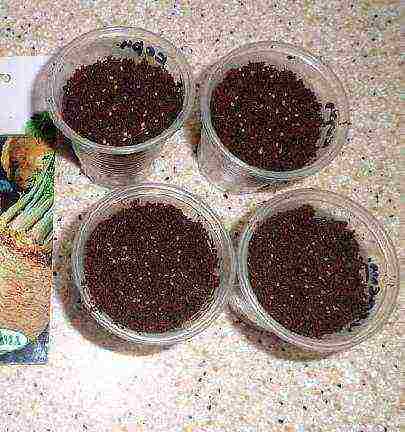 It makes no sense to make holes, the seeds can simply be spread over the surface
 - Armed with a toothpick, each seed is slightly pressed into the ground: the sowing depth should be only a few millimeters.
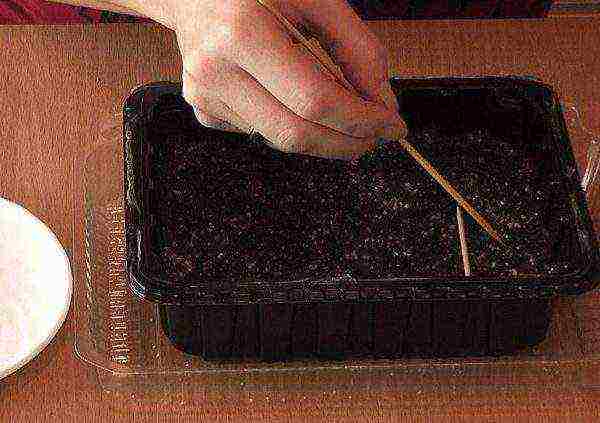 The toothpick has become a universal assistant for the gardener
 - From above, on the crops, snow is applied in a layer of 2-3 cm: when melting, it will pull the seeds into the soil a little more.
- Cover the box with glass or foil and put it in a warm place; light before germination is not required, and the temperature should be room temperature or slightly above it.
 The snow will melt in half an hour, and the film will create a greenhouse effect
Seedlings from prepared seeds will appear in a week and a half, but they can linger up to two weeks, or even longer, you need to worry about twenty days later. All this time, it is necessary to monitor the moisture content of the soil: even on the surface it should not dry out, it can only be watered by spraying from a spray bottle.
Seedling care
Often the emergence of seedlings is very extended: after the first sprouts have emerged, the next ones can appear within a week. But you should not wait for them, but immediately you need to lower the temperature to 12-14 ° C, otherwise the seedlings will stretch out. After a week, you need to raise the temperature to 15–20 ° C and keep it within these limits, at least until 3-4 true leaves are formed, and preferably before the plants are transplanted to the garden bed.
At first, watering the seedlings is only necessary from a spray bottle, avoiding waterlogging of the soil and trying not to break delicate seedlings. It is best to use snow water while you still have it. After the appearance of the first true leaf, you can carry out top dressing, then it is repeated about every 10 days. Use any complex mineral fertilizers according to the instructions for them.
When 2-3 true leaves are formed, the seedlings dive in separate cups. Better to take peat pots, medium volume, 150-200 ml. The composition of the potting mix is the same as in the general box. It must be borne in mind that the plants at this time are very fragile, and exercise the utmost care in handling them. The question of the possibility of pinching the central root is very controversial; rather, a compromise is needed here.
If the root is very long, it can be shortened slightly when transplanting, but if the seedling is placed in a glass with an intact root system, it is better to leave it that way.
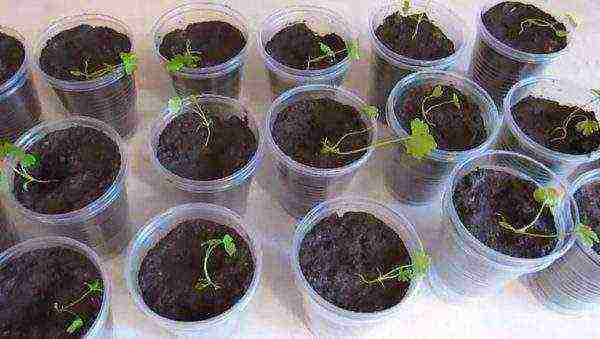 It is with such sissies that you have to deal with a dive.
The process of transplanting itself is simple, but very responsible: since the seedlings at this stage are miniature, and the tools have to be used very small, and the well for the transplant should be watered from a syringe. The temperature for the first week after the pick should be raised to 22–25 ° C, and no harsh light should be given. But then the illumination and temperature indicators should be returned to their original values.
A week and a half before planting in the ground, the seedlings are hardened: they are periodically taken out to the balcony, gradually increasing the time. Two days before planting, it is well watered.
Video: picking celery seedlings
Planting seedlings in the ground
Seedlings are planted in the garden at 60-70 days of age in mid-May. Root celery is assigned to a separate bed, where it is planted at a distance of 30–40 cm from each other, or placed as a sealant. On boggy soils, which celery does not tolerate, and with a close occurrence of groundwater and waters that accumulate in the area after precipitation, seedlings are planted on elevated ridges. The best are loamy soils with a high humus content, as well as fertile lowland soils and cultivated peatlands. The optimal precursors are potatoes and all types of cabbage.
Seedlings are planted in the ground when the average daily air temperature reaches 10 ° C or higher. Previously, celery cannot be planted: with prolonged exposure to low temperatures, it blooms in the first year of life, without forming a normal root crop. Seedlings should have at least 4-5 true leaves.
Root celery needs room. For the smallest varieties, the distance between plants can be about 20 cm, but the standard planting pattern is 30 x 70 cm or even freer. When planting seedlings in prepared holes, it is important not to deepen them.
Important! Planting may be a little deeper than the seedlings grew in pots, but in no case should the apical bud from which the leaves grow with earth.
Planting seedlings has no peculiarities and is well known to every gardener. Depending on the moisture content of the soil, the holes are watered before the seedlings are placed in them or they do without it, but after planting, watering should be done carefully and in sufficient quantity so that all the voids between the roots are occupied by moist soil. After watering, the wells must be sprinkled with dry earth.
 Already quite viable bushes are transplanted into the ground
Cucumbers, onions, carrots, beets, any kind of cabbage or salad can be planted next to the celery beds. Bad neighbors are tomatoes, potatoes, any legumes.
Outdoor cultivation
The main operations when caring for celery are the same as for most other vegetables: watering, feeding, loosening, weed control, etc. In this regard, there are no surprises for an experienced gardener.
Growing conditions
Celery is a long day plant and thrives well under prolonged and direct sunlight. In this regard, it succeeds very well in the northern regions and even beyond the Arctic Circle, subject to the timely preparation and planting of seedlings. It is unacceptable to plant it in the shade: it will only be possible to feast on leaves, it will not be possible to grow full-fledged root crops.
Since root celery also has edible leaves, the question often arises about how often they can be cut, whether this is harmful to the root crop, or whether it reduces the yield. Mass cutting of foliage, of course, is unacceptable, but from time to time you can take 1-2 branches from each plant for food without harm to it. It is better to cut off the outer leaves. In September, when the plant should already give all its strength to growing the root crop, it is permissible to cut a large amount of foliage.
Watering
Celery is a moisture-loving culture that requires abundant watering, especially in the first time after planting seedlings and their full survival. So that water is not wasted uselessly, mulching the beds with humus or peat is a good help. There are no definite rules for watering for it: the water does not have to be heated, you can water it not only at the root, but also by sprinkling, etc. It is only important that the soil never dries out, but also does not become waterlogged. Watering is required until the harvest itself. It is usually done every 2-3 days.
After each watering or rain, you need to loosen the soil: this is one of the important points in caring for root celery. As long as the leaves allow, it is necessary to loosen often. This is important for good root growth, and then for the filling of root crops.
The issue of loosening is related to the issue of hilling plants. For the root variety, hilling is not only unnecessary, it can even be harmful at a certain stage of development.
On the contrary, as the root crops grow and appear above the ground, the soil is gradually raked away from the plants with a hoe. With this approach, root crops grow smoother and larger. In the fall, in the process of performing this procedure, it turns out that small roots grow from the root crop. Those that are above the ground should be carefully trimmed with small scissors.
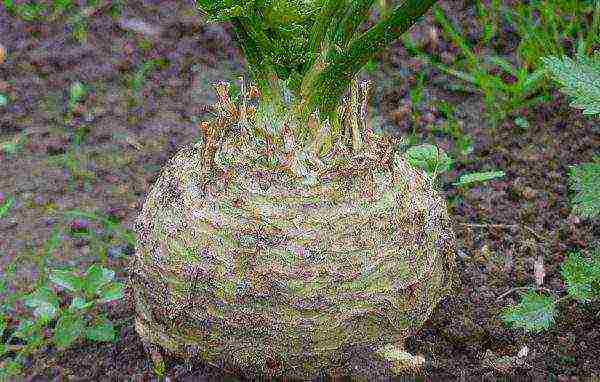 By the end of its life in the garden, the root crop is more than half sticking out of the ground.
Top dressing
After planting the seedlings in 12-15 days, it is fed with a solution of any complex mineral fertilizer according to the instructions, until August one or two additional dressings are carried out. The first feeding can be carried out with a diluted solution of any organic fertilizer, even with herbal infusion, which has the dissonant name of a stinker among gardeners.
It is better if the subsequent fertilizing does not contain nitrogen, instead of mineral fertilizer, you can simply take an infusion of wood ash.A handful of ash is insisted for a day in a bucket of water, then filtered, diluted 2-3 times and the garden is watered with this solution.
Video: a specialist's story about the secrets of growing celery
Is it possible to grow celery at home
Growing conditions
You can get celery leaves at home on an insulated balcony, if the temperature is at least 10 ° C, or on a lighted windowsill. For this, the root crop can either be bought in the store, or taken from your own summer harvest. It is important that it is not too small: at least 5 cm in diameter. No special conditions are required: you need a large pot, a place for it and a little effort, consisting in watering and maintaining sufficient light.
Landing
You can plant a root crop both in early spring (on the balcony, to get spring greens), and immediately after digging up the root crops in the garden (on the windowsill, for winter collection of vitamin products). However, it should be understood that the duration of the tender leaves will be short-lived: in two months the leaves will be, though fragrant, but very coarse, they can be used in cooking, but not in salads. This means that you will need to plant a new root crop.
Any flower pot or small bucket is suitable as a container. Several specimens can be planted in a large container, but not closely. It is advisable to place a small layer of drainage at the bottom, but there are no special requirements for the soil for distilling foliage: the earth of any usual composition will do. True, you can bring weed seeds from the garden with it, but this is not scary: weeding is not difficult, it is worse if it contains unpleasant insects. It is necessary to plant a root crop so that its crown is not covered with earth.
Care
Planting care is elementary. Potted celery should be watered frequently, preferably with settled water. Watering is required abundant, but without fanaticism: the soil should not sour, otherwise the root crop will simply rot. It is better to keep the pot on the southern windowsill: you need a lot of light. If we are talking about winter time, you will have to equip additional lighting: a short day will not provide an opportunity to obtain a bountiful harvest, even of green products.
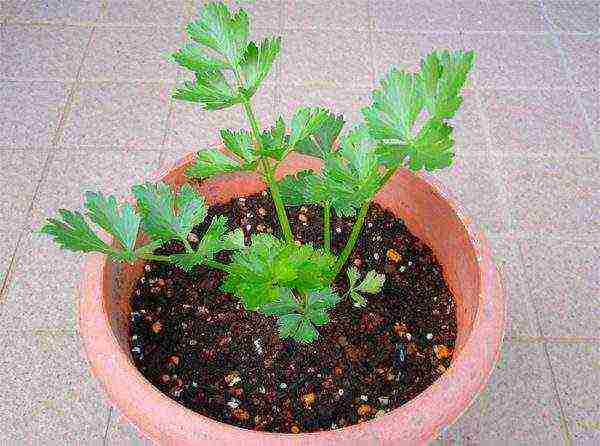 At home, we can only talk about getting green products.
The first leaves can be cut off in 2-3 weeks. To prolong the receipt of the crop, the soil in the pot must be periodically loosened. Should I give top dressing? It seems that it is better not to do this: as long as the root crop has its own strength, let it drive out the foliage as much. For your own health, it is better to get natural products, and after a couple of months, replace the soil and root crops in the pot.
Diseases and pests of root celery, prevention of the appearance and methods of treatment
With proper agricultural technology, celery is rarely visited by diseases and attacked by pests, therefore, in order to prevent problems, it is important to water, loosen and weed it on time and competently. The neighbors in the garden are also of great importance: they should not have the same pests. The following diseases are most common in celery.
Most often, celery is affected by the following pests.
- Celery (borscht) fly lays eggs in late spring, and hatching larvae gnaw the tissues of both stems and root crops. The yield and product quality are sharply reduced. The pest hibernates in the soil.Prevention is the fight against weeds, the fight in case of damage - the use of any available insecticides.
 Celery fly appears on poorly cleaned areas
 - The carrot fly also hibernates in the ground, lays small eggs on the first leaves of celery. The larvae gnaw through all parts of the plant. The fly is well scared away by pollination of the soil with a mixture of mustard powder and tobacco dust, which is carried out in early summer and early August.
 It's not difficult to drive carrot fly away
 - The carrot beetle is especially dangerous in the northern regions, where it hibernates in coniferous forests, and flies to vegetable gardens in summer. The flea sucks the juices from the green mass, as a result of which the whole plant lags behind in growth. The fight is the same as with the carrot fly.
 Carrot lice - a guest from the forest
 - The legume aphid differs from other aphid species: it is significantly larger, growing to an adult state in just two weeks. It is difficult not to recognize aphids, but when it appears, spraying with folk remedies helps well: infusions of dandelion leaves, tomatoes, potato tops.
 Bean aphids are one of the largest representatives of aphids.
Harvesting and storage
During the summer, root celery is used for food only selectively, after the formation of a root crop, and they begin mass digging in October. A sign of ripening celery is the yellowing of the outer leaves. However, since it easily tolerates frost, you should not rush to clean it: over time, it will only pick up more nutrients. Usually it pulls out easily, but when cleaning, you can help yourself with a pitchfork.
First, the leaves are cut off on the roots, the overgrowing roots are cleaned of soil, dried and then laid in baskets or boxes for winter storage. Store along with carrots, beets and other root crops. But several pieces selected for seed purposes are placed separately. If you plan to use root vegetables in the near future, you can put them in a plastic bag in the refrigerator. They are sent to the cellar for long-term storage. The temperature should be no higher than +1 oC.
Despite the fact that growing celery root is not as easy as some other vegetables, many gardeners try to do it. Agricultural technology has some nuances, but experienced vegetable growers can cope with the task, providing themselves with vitamin products for the whole year.
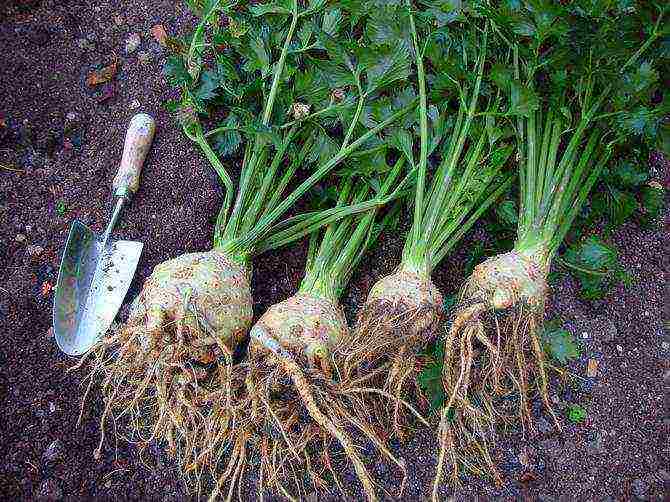
Celery is a root vegetable rich in vitamins and other nutrients. He is simply obliged to grow in our garden, then to delight us in the winter. Anyone can grow it. To do this, you need to learn the secrets and methods of growing it.
The first and important secret is the ripening time of celery. When buying seeds, you need to choose early maturing varieties. After all, celery fruits will be ripe and ready to eat only 4-7 months after planting. And it is better to grow it with seedlings.
Preparing Root Celery Seeds for Sowing
Capricious celery seeds lose their germination very quickly. Therefore, only freshly harvested seeds need to be planted.
The skin of each seed contains an essential oil that has a protective function. It protects the seeds from many unpleasant moments, but at the same time difficulties arise during their germination. That is why the seeds should not be immediately planted in the soil. First, they must be soaked in warm water and left for 48 hours.
Only germination of seeds can give greater efficiency than soaking. The method is standard for many seeds - in a small bowl you need to put a damp cloth and seeds on it. Until they hatch, you need to maintain humidity and change the water daily (or preferably 3 times a day).
Growing seedlings of root celery
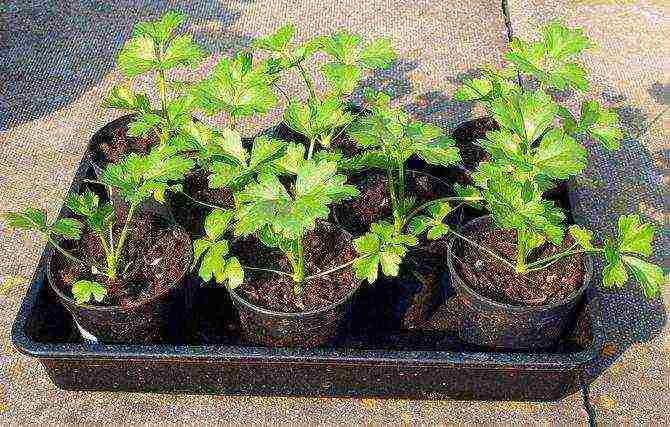
The best period for sowing hatched or wet seeds begins around February 5th and ends in mid-March.
A mixture of sand and vermicompost (in equal proportions) is suitable as a soil. But the best soil mixture would be the following composition: mullein and sod land (one part each), humus (two parts), peat (six parts).
The boxes are filled with the prepared soil mixture and the seeds are sown. Since the seeds are very small, you can make holes for them with a match. One seed is placed in each hole. From above, all the seeds are sprinkled with a five-millimeter layer of soil and covered with a transparent film. The boxes are transferred to a dark and warm room. It is only necessary to moisten the drying soil by spraying. Seedlings will appear in about 7-8 days.
The emerging sprouts need sun, light and heat (about sixteen degrees) for further growth and development. The boxes must be rearranged on the windowsills, and sometimes taken out into the sunlight (on the loggia or balcony). It is impossible to water fragile and delicate seedlings, you can only spray.
The next stage - picking - is carried out when two full-fledged leaves appear on the seedlings. When transferring plants to separate containers, it is necessary to pinch the main root by about a third. The growth point of the seedlings must remain on the surface of the soil.
Before transplanting plants to open beds, you can carry out a couple of dressings. Infusion of chicken manure or a weak manganese solution is applied by spraying.
Planting root celery in the ground
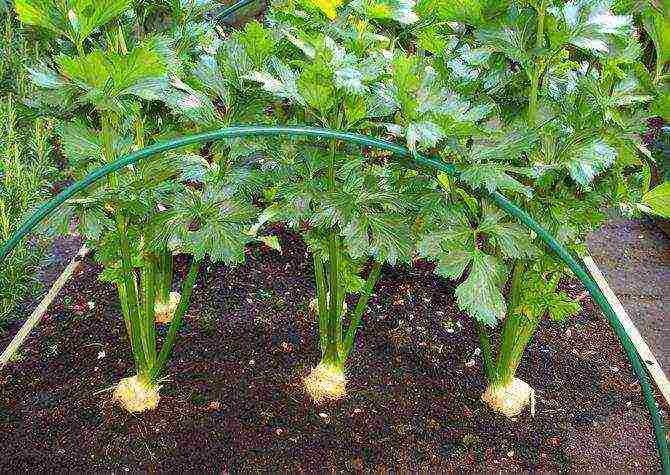
There is no need to hurry up with a transfer - wait for real warm weather. The optimal time is mid-May. In order for the root crop to grow healthy and large, two conditions must be met:
- The distance between the seedlings is at least 30 centimeters.
- The growth point must not be deepened.
Planting is best done in the morning, and even better in cloudy weather. On the day of planting, the plants need to be watered abundantly. If there is a risk of a significant nighttime drop in temperature, then each bush of seedlings can be covered with a glass jar or a plastic bottle.
Root celery care and cultivation secrets
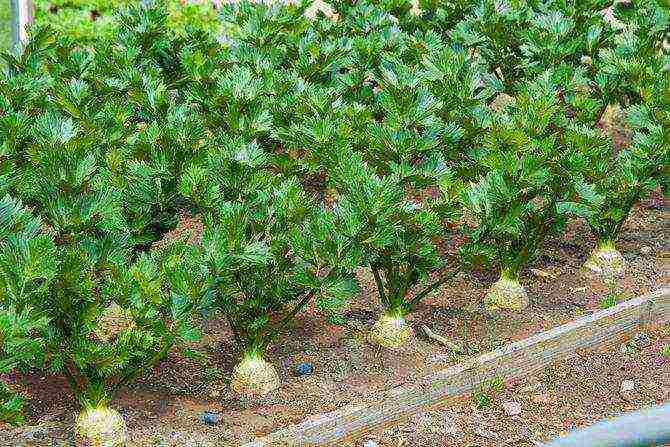
Watering rules
Watering is carried out directly under the root, abundantly. The soil should not dry out, keep it constant moisture. From the day of planting seedlings to harvesting, it is necessary to regularly water celery.
Fertilizers and feeding
At each stage of plant development, different feeding is needed. There are four such important stages in total. It is also necessary to feed the plants four times.
The first feeding is necessary for celery for good rooting and rapid growth. It is carried out about seven days after the transfer of seedlings to open ground. At this stage, it is best to use an organic fertilizer, such as herbal infusion.
For such an infusion, it is advisable to use comfrey or nettle, but other herbs are also useful (for example, chamomile, rape, horsetail, and others). Such feeding will give the plants the necessary potassium and nitrogen during this period of development.
The second feeding is carried out two weeks later. Experienced gardeners recommend using infusion of bird droppings or mullein as a natural fertilizer.
The third and fourth feeding is necessary for the plant to enlarge the root crop. Superphosphate fertilizer can be applied around mid-summer. And after a few weeks, feed the celery with a boric acid solution.
Loosening the soil
All plants (or rather their root system), including celery, need good air exchange for high-quality growth. Loosening the soil is one of the simplest ways to provide the plant with the necessary air. Therefore, it is occasionally recommended to loosen the aisles.
Hilling
Such a celery procedure is categorically contraindicated. As the root crop grows, on the contrary, you need to remove excess land from it. This will contribute to the enlargement of the fetus.
Pruning leaves and lateral roots
When the celery root grows in size, it is recommended to remove excess soil around it. In the process of this procedure, you can find lateral roots that have appeared on the root crop. They must be cut off. Such horizontal roots not only spoil the appearance, but also take away some of the nutrients from the main root.
Celery is a plant for which not only its roots, but also the leafy part are suitable for food. It can be used to make salads. It is better to cut celery leaves in September, when the plant should give all its strength to increasing the size of the root crop. It is recommended to cut only the outer leaves.
Harvest
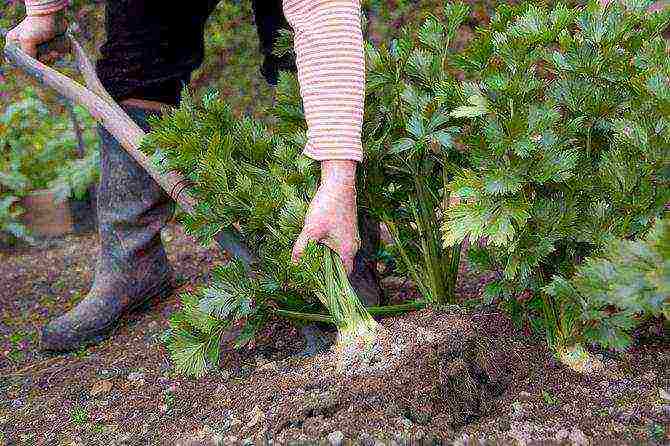
Since the ripening period for celery comes late, you will have to harvest the crop with the onset of October. This is one of the last vegetables to close the summer season. Root crops are not afraid of a significant drop in air temperature. They retain their quality characteristics even at low frosts. Even a three-degree frost, they endure with ease.
Probably, many now believe that growing root celery is really not difficult. It is only necessary to strictly observe the main points in the process of caring for this vegetable plant.

With the right agricultural technology, you can easily harvest a good harvest of large root crops, which will be much more fragrant and juicier than their store counterparts.
What should be considered when sowing seeds?
Whatever useful properties a fresh root vegetable may have, growing it scares many gardeners. After all, it is much easier to buy, if necessary, a packaged root vegetable in the store and not fiddle with the seedlings, wondering if it will turn out to be something worthwhile?

Be careful with your seed selection so that you don't get disappointed during harvest
The downside is that you cannot know what fertilizers and chemicals were used when growing store-bought root crops, and during storage on the counter, vegetables become flabby, losing their taste. Growing root celery isn't really that difficult.
Be careful with your seed selection so that you don't get disappointed during the harvest. The planting material of imported producers is considered to be of the highest quality, and among domestic seeds the seeds "Russian size" and "Aelita" deserve attention. Due to the peculiarities of the Russian climate, it is better to take only early varieties that can ripen in 120-150 days. For use in food, it is more convenient to grow varieties with large roots. Don't forget to check the expiration date of the seeds!
- The soil
The most successful harvest can be achieved under the condition of deep digging of the soil in the autumn months with the introduction of humus together with phosphorus, potash and nitrogen fertilizers. Before sowing, the soil should not be fertilized with fresh manure, as as a result, root crops can be affected by spotting. And if in the fall you have not been able to dig up the garden bed, you can dig it up in the spring with a Fokin flat cutter.
The optimum soil acidity is 7 pH. Root celery grows poorly on acidic and damp soils, and for heavy clay soil, it is imperative to provide good drainage.
- Sowing seeds
Since the root crop ripens for a very long time, the seedling method of growing is necessarily used. Sowing seeds for seedlings begins in the last decade of February. For faster germination, it is advisable to soak the seeds in water at room temperature for a couple of days and, after light drying, start sowing. To do this, in a box with soil mixture (from turf soil, humus and sand), grooves are made every three centimeters, slightly compacting the earth.

Sowing celery
An effective way of sowing celery seeds: put snow in the grooves, and sprinkle the seeds on top of it - this way they will be better seen, and when the snow melts, the seeds will be drawn into the ground to the optimal depth.In this case, you do not need to sprinkle it on top. Next, the crops are covered with glass or foil and removed to a warm place, where the air temperature is about +25 degrees.
- Seedling care
With the emergence of seedlings, the temperature will need to be lowered to +16 degrees. To prevent the seedlings from stretching out, supplement them with phytolamps. Air the crops daily by turning the film over, moisten the drying earth from the sprayer. In the conditions of such a mini-greenhouse, the seedlings grow strong and healthy. Dense crops need to be thinned out as the plants grow, removing the weakest specimens and giving the stronger seedlings more space.
A pick is made after the first true leaves appear on small seedlings. When transplanting into another container, it is important not to fill in the central celery bud, but to deepen it only to the base of the leaves.
Features of caring for root celery in the open field 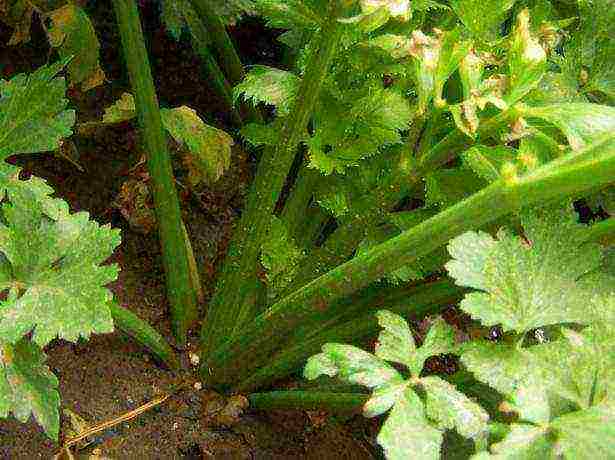
To prevent the root from being buried, the growth point must remain at the level of the soil
The grown seedlings can be transplanted to the garden bed when warm, dry weather is more or less established (about mid-May). Autumn frosts are not terrible for the root crop, but at the beginning of the growing season it is very sensitive to cold snaps - from hypothermia, the plant throws out a peduncle, and the root crop becomes unsuitable for food. Therefore, you should not rush to an early transplant, and for the first time you can prepare a shelter to save a fragile plant from the cold.
Be sure to make sure that the root is not buried - the growing point should remain at the level of the soil. This is an important condition for how to grow celery large and even, without a "lush beard" of adventitious roots. For the same purpose, leave a distance of at least 30 cm between the plants and between the rows.
Video about the secrets of growing and caring for celery
Growing will be more successful if you adhere to the following rules:
- all the leaves of growing celery cannot be cut off, otherwise the root crop will not ripen, cut off only the outer leaves;
- hilling in this case is contraindicated - it provokes the growth of lateral roots, as a result of which the roots lose their presentation;
- when the root crop begins to thicken, to give it evenness, scrape off the ground from the tops of the plants and carefully cut the side roots with a knife;
- in order for the root crop to turn out juicy, with a rich taste and aroma, the soil in the garden must be kept moist (not poured), watering is necessary not only throughout the summer, but also until October - this way celery heads will grow better;
- watering is done at the root;
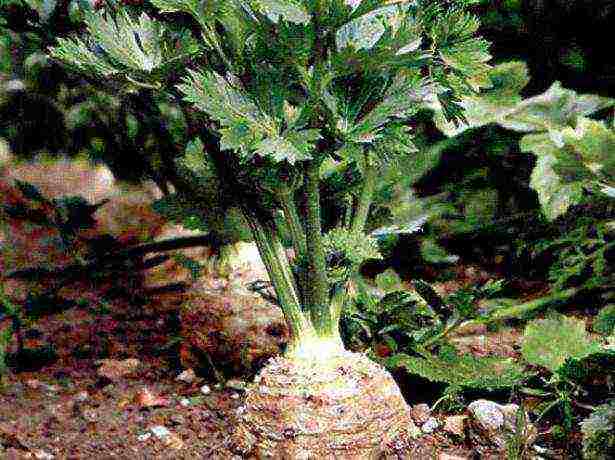
Celery grown according to all the rules can be harvested before the onset of autumn frosts
- until the foliage above the bed closes, you need to regularly loosen the aisles;
- for good growth, it is recommended to feed the plant with a herbal solution, when the seedlings in the open field start to grow, the second time they feed it with mullein infusion, the third time (until July 15) - Azofoska, the fourth time (from mid-July) - with monophosphate, and when the head is tied, spill boric acid solution;
- over the summer, two or three fertilizing with nitrogen fertilizers is required - it is no longer necessary, otherwise the plants may be damaged by scab and septoria.
Celery grown according to all the rules can be harvested before the onset of autumn frosts, in the first decade of October. To get root crops out of the ground more conveniently, first spill the ground with water. And try not to damage the delicate skin of the plant when cleaning.


