Content
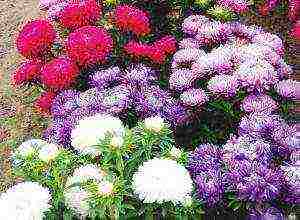 Multi-colored asters bloom for a long time in the fall, decorating the flower garden. This plant is not whimsical, so there are no difficulties in growing. Aster can be sown with seeds directly into the ground or its seedlings can be planted, then flowering will come earlier. Growing aster seedlings at home requires certain knowledge about caring for young seedlings. If agricultural technology is not followed, young plants can get sick and die, which often happens among inexperienced flower growers. Let's consider in detail the whole process of growing aster seedlings on the windowsill of the house: from sowing seeds to planting on the street.
When to sow asters for seedlings?
It is necessary to sow aster seeds in a timely manner, since overgrown seedlings take root worse, and later sowing of seeds does not make sense. Good, healthy aster seedlings can be obtained from fresh, last year's seeds, which are sown from late March to the second decade of April. Later sowing is already carried out directly into the ground at a permanent place of growth.
Growing seedlings of asters from seeds
For sowing work we need:
- Drawers with a height of at least 5 cm;
- A piece of glass, the dimensions of which correspond to the box;
- Soil from earth, humus and sand in equal proportions;
- Wood ash;
- Perlite;
- A weak solution of potassium permanganate;
- A packet of aster seeds.
 Many people ask themselves: how to grow good aster seedlings? In order for the flowers to grow strong, you must first sow the seeds in a nutritious soil. Any florist can do it on his own: mix humus, garden soil and sand in equal proportions, steamed in an oven or double boiler, and add wood ash at the rate of a glass of ash to a bucket of mixture. It is useful to add perlite to the finished soil, which improves soil aeration and allows the roots of the seedlings to develop better.
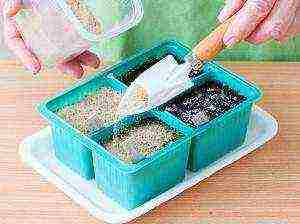 A plastic or wooden box for seedlings is filled with prepared soil, slightly compacted and spilled abundantly with potassium permanganate.
Seeds must be treated with any fungicide before planting. This is the most effective remedy against fungal diseases that often affect aster seedlings on the windowsill of the house.
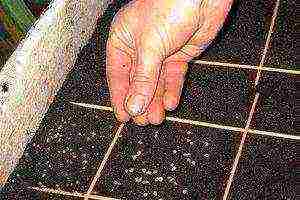
Shallow furrows (up to 2 cm) are made in the ground and aster seeds are laid out. Then they are sprinkled with soil on top, but no more than 2 mm. The distance between the grooves should be 2-5 cm.
Experienced growers advise sprinkling aster seeds with calcined sand 0.5 cm thick, which will avoid blocking during watering and the development of the "black leg" disease.
Crops are covered with a piece of glass to prevent rapid evaporation of moisture.
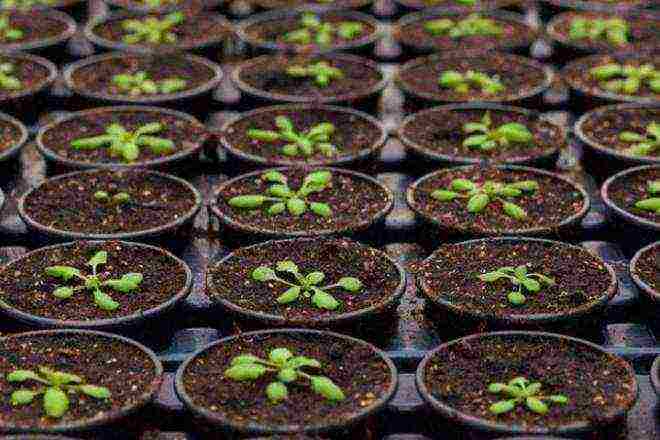
Aster shoots appear on the 5-10th day, after which the glass is removed from the box. The seedlings are moved to a windowsill with good lighting, but the temperature should not be higher than 15 ° C. This is an important condition when growing aster seedlings at home, otherwise it will stretch out.
As it dries, the soil is moistened with warm water from a spray bottle. It is important not to overdo it and not flood the plants, otherwise the black leg may hit the seedlings. As soon as the first signs of this disease are found, diseased sprouts are immediately removed with a small clod of earth. The hole is covered with earth and this place is spilled with a fungicide solution.
Picking up seedlings of asters
 This procedure must be carried out when 2-3 true leaves appear on the aster seedlings. The composition of the soil during transplantation should not differ, but an additional spoonful of complex mineral fertilizer is added to the finished soil. For an even distribution of fertilizer, the soil is thoroughly mixed.
The pots or cassettes are filled with soil and compacted slightly so that the soil does not settle too much after watering. A recess is made in the center of the pot with a stick, in which the roots of the seedling can be freely placed. A plant with a highly branched root system is pinched. When transplanting, the seedling is buried in the soil, but no more than 1 cm from the cotyledon leaves.
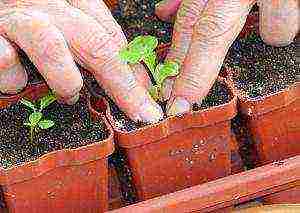 The soil around the sprout is compacted so that it does not wash out with water when watering.
Each pot is carefully spilled with warm water, and you need to water it from the edge of the pot, gradually moving towards the center. It is important to ensure that no water gets on the plant leaves. Dissected aster seedlings are exposed in a bright place, preventing direct sunlight. The optimum temperature for asters is + 20 ° C.
The subsequent care of aster seedlings is not difficult. As the soil in the pot dries up, the seedlings are watered with warm water; there is no need to feed it if the soil was originally filled with mineral fertilizers.
Additional mineral fertilization of plants will be required if planting is delayed due to cold weather. When 4-5 leaves are formed on aster plants, the seedlings need to be gradually hardened in the fresh air, for which the pots are taken out into the street in a slightly darkened place.
Video: caring for asters
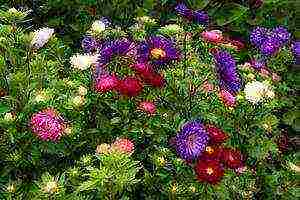 Often flower beds are decorated with colorful plants such as aster. They bloom in the fall, are unpretentious and usually do not have difficulties with them. The flower is sown with seeds directly into the ground or its seedlings are planted, then they begin to bloom earlier.
Growing a plant at home requires the necessary knowledge, otherwise young seedlings can get sick and die. Therefore, the process should be considered in more detail: from sowing seeds to planting them in open ground.
How to choose the right seeds for seedlings
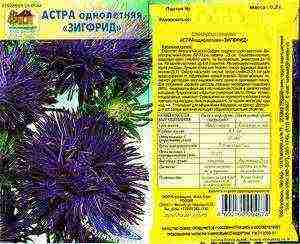 To be sure that the seeds will sprout, you should read the year of production and the expiration date on the bag. The best thing buy fresh seeds, as asters quickly lose their germination.
If the seed is in a bright package with a beautiful pattern, it is best not to buy it. Seeds in nondescript bags most often turn out to be better and fresher, since the colorfulness of the pattern and excessive brightness are a kind of advertising in order to sell a low-quality planting product.
To create beautiful flower beds, you should choose a mixture of asters. They usually contain up to 10 different colors. For a special design of landscape design, flowers should be purchased in separate bags.
The timing of sowing seeds. When to plant a flower for seedlings? So that their flowering does not fall on autumn frosts, it is important to correctly determine the sowing time. The best thing sow them in February-March.
It is these months that are optimal for flowering in September. In regions where snow falls a little later or does not happen at all, sowing is carried out in April or May.
Growing from seeds
 When to plant this flower, we have already figured out. How to grow good seedlings?
In order for the plant to be strong, the seeds should initially be sown plant in nutritious soil... You can do it yourself.
To do this, mix in equal proportions:
- humus;
- sand;
- garden land.
Then this mixture is steamed in the oven, after which wood ash is added to it. It is very useful to add perlite to the finished soil, which helps to improve soil aeration and allows the seedling root system to develop better.
A wooden or plastic box used for seedlings is filled with harvested soil, slightly compacted and generously watered with potassium permanganate.
Before sowing seeds, they should be treat with any fungicide, which is an effective remedy against fungal diseases that often affect seedlings. Sowing seeds is carried out as follows: grooves up to 2 cm deep are made in the soil, into which they are planted and sprinkled on top with soil no more than two mm.
Many flower growers recommend sprinkling the seeds with calcined sand, which allows them not to get wet when watering. There should be a distance of 2–5 cm between the grooves.
To prevent moisture from evaporating so quickly, crops should cover with a piece of glass... Seedlings begin to appear on the 5-10th day, and the glass is then removed.
Seedlings should be move to the windowsill, where there is good lighting, but the temperature should not exceed 15 degrees. This is important when asters are grown at home, otherwise they will start to stretch.
As the soil dries up, it moisten with warm water from a spray bottle. In this case, care must be taken not to flood the plant, otherwise a disease such as a black leg may occur.
At the first signs of such a lesion, it is necessary immediately remove diseased sprouts with a small earthen lump. After that, the hole should be covered with earth and this place is spilled with a fungicide solution.
Seedling picking
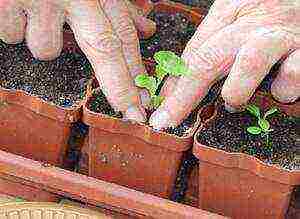 This procedure is carried out after 2-3 true leaves appear in the seedlings. The soil composition should be the same, only add a spoon complex mineral fertilizer... To distribute it evenly, the soil should be thoroughly mixed.
The pot is filled with soil and lightly tamped so that after watering it does not settle. In the center of the pot, using a stick, a recess is made in which the roots of the seedling will be placed.
If the plant has a highly branched root system, then do a pinch... When transplanting, the seedling is buried in the soil no more than one cm from the cotyledon leaves. The earth around it is compacted in such a way that when watering it is not washed out with water.
Seedling care
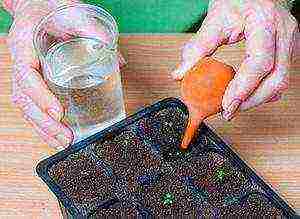 Asters should be watered abundantly, but infrequently. To avoid stagnation of excess water, the seedling containers should contain drainage done... It is also not recommended to fill the flower with water, otherwise it may be struck by a disease such as a black leg, and it will die.
Top dressing of seedlings... If a high-quality soil is prepared before sowing, then the seedlings do not need additional fertilizing. Poor soil a week after transplanting seedlings is watered with biofertilizer or ash infusion.
Do not get carried away with nitrogen fertilizers, otherwise only green bushes will grow, and the aster will begin to bloom late and not too abundantly.
Seed hardening... When 6-7 leaves appear, you can start hardening the seedlings so that in the future they can easily endure temperature changes and be frost-resistant.
For this purpose, boxes with seedlings are taken out into the street, for 3-5 hours. At first, the duration of stay in the open air should be about an hour, gradually increasing its duration.
Possible difficulties in growing seedlings
- The sprouts did not sprout or grow poorly. It is necessary to sow new seeds, before soaking them for a day in ash or aloe juice. The soil must be changed by disinfecting it with biofungicide or potassium permanganate.
- A disease such as fusarium has emerged. To prevent it, flowers should not be fertilized with manure. It is also not recommended to plant asters in a place where potatoes, physalis, tomatoes, as well as gladioli, tulips, and carnations were previously grown.
- Incomplete inflorescences have developed. This is possible if the plant is infected with a spider mite or aphid. Also, defective flowers may appear due to improper nutrition.
How and when to plant seedlings in open ground
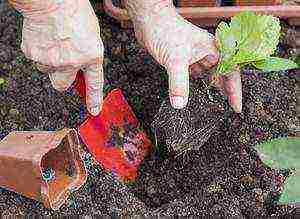 When the root part of the flower stem is 7 cm, the seedlings can be planted in the ground.The landing site is chosen in advance. These flowers are quite unpretentious to lighting and grow well. near fences, trees etc.
Too acidic soil is not pleasant to asters, therefore in the spring or autumn in the ground make lime... It is forbidden to add fresh manure to the ground when planting seedlings - this leads to their death.
It is best to plant flowers in loose soil, and in order for them to take root better, this should be done along with pieces of root soil. Plants should be located at a distance of 20 cm from each other.
The workpieces are planted in small depressions, and from above they are compacted with earth. If for some reason the seedlings are stretched out, they are buried a few centimeters. After planting the plant thoroughly watered, and so that after the earth dries up, a crust does not form, the soil is mulched with peat.
Caring for asters in the garden
These flowers are loved by many landscape designers or flower growers due to the fact that they do not require special care. But with enough attention, they are able to please with the richness of colors and abundant flowering. Thus, leaving includes the following points:
-
 Periodic watering - this contributes to the correct development and timely flowering of the plant.
 - Loosening the soil is a very useful procedure, thanks to which the roots of flowers receive oxygen in the required amount.
- Fertilization - potassium-phosphorus fertilizing contributes to the colorfulness of flowers and the profusion of flowering.
- You can water asters with solutions of liquid organic mixtures.
Thus, in order to grow a flower from seed, it is necessary adhere to certain rules... Failure to comply with them contributes to the emergence of various problems.
If everything is done correctly, then in the future the plants will delight their owner with abundant and colorful flowering.
Asters, the cultivation of which is described in the article, are some of the most beautiful, vibrant and lush annual flowers. They will decorate any flower garden with themselves, are suitable as a gift for a holiday, you can admire these beautiful plants for hours. Not every amateur gardener will deny himself the opportunity to have such bright and beautiful flowers in his garden. Therefore, for many, the topic of how to grow aster seedlings is relevant, so that it turns out to be healthy and strong.
 Growing involves both seedling and non-seedling methods, but it is still better to use the first one, as it gives more guarantees of getting really strong plants. Cultivation involves planting, watering, further picking, feeding and transplanting into open ground.
The seeds should be fresh, preferably from last year. It is worth sowing them in late March or early April in pre-prepared boxes. The containers should not be too high, they are suitable up to 10 cm high. You can put a drain on the bottom so that there is no stagnation of water, then fill the container with a nutritious light substrate. The day before sowing, the soil should be watered with a fungicide solution, and the seeds should also be treated with it.
You need to sow in grooves half a centimeter deep, and then sprinkle it with earth and pour it from a spray bottle with a manganese solution. Before growing aster seedlings, it is necessary to prepare a bright place for the boxes, because if there is insufficient light, the plants will stretch out and turn pale. For seedlings to appear faster, you can cover the soil with film or paper.
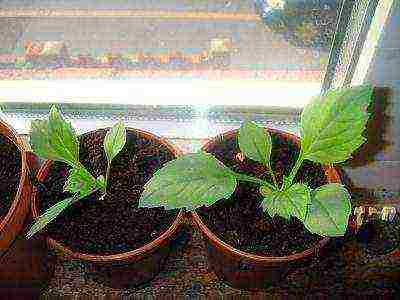 After the appearance of the first real two or three leaves, the seedlings can be dived, planted, removing sick and weak plants. The distance between flowers should be a couple of centimeters. The transplant is carried out using a picking fork, with which you need to carefully pry off the seedlings. The plant has one long root, if you want to get a luxurious and lush bush, then you need to pinch it by one third.
How to grow aster seedlings? An important point is the preparation of a lighted place without direct sunlight.A greenhouse is ideal in this regard, since it is light there for the plants, there is the necessary space, the conditions are close to open ground. An average pick is done three to four times, then you can be sure that asters will really please during flowering.
 The photo of amateur gardeners is confirmation that this flower can really be grown at home from seeds. This requires only a little perseverance and care. Regular moderate watering, periodic feeding, and diffused light are all that are needed for flowers. The question of how to grow aster seedlings does not cause any particular difficulties even for novice gardeners, because this is a rather unpretentious plant.
Young asters should be planted in a well-lit, level and pre-fertilized place. It is better not to use fresh manure, but to resort to humus or compost. In drought, it is recommended to provide the flowers with regular watering. The distance between the asters should be 20 - 40 cm, depending on the variety. The plant will begin to delight with the first flowers in the middle of summer, flowering continues until the very frost.
With the seedling method, perennial aster seedlings are grown in the same way as an annual one. Growing these flowers at home is not difficult, but you need to know and take into account some of the nuances. Let's look at it in order.
STEP 1
Collecting aster seeds

Of course, you can buy the seeds of any aster today in a store or on the Internet. However, if there is such an opportunity, we advise you to collect them yourself in the fall from the healthiest, strongest plants - so you will be sure of the quality and freshness of the planting material, which is important.
Aster seeds are stored for no more than two years, since their germination ability is quickly lost.
How to harvest aster seeds correctly? Depending on its type and variety, the seed collection period begins approximately 40-60 days after the beginning of flowering. Therefore, it is easiest to collect seeds from early-flowering asters, while late-flowering ones can “hold out” with flowering until the very frost and not have time to form full-fledged, ripe seeds.
In the first case, they simply leave the first few formed inflorescences "for seeds" and collect already dry baskets in sunny weather. In the second, the heads of the asters are cut off until the cold snap and stored at home, or (which is much better) one of the bushes is transplanted into a large pot and "brought to maturity" already at home with suitable lighting and temperature. The flowers are cut after the inflorescences have wilted, and, wrapped in paper, stored in a dry, warm place.
STEP 2
Soil preparation
Spring sowing of aster seeds can be carried out already in March, so take care in advance that by this time you have prepared the soil so as not to do this at the last moment.
As a suitable container, you can use shallow (8-10 cm) wooden or plastic boxes, pots, containers. Previously, they should be disinfected with any antiseptic (Ecobio, Biosept, Biotex) and dried.
Asters love light, fertile, non-acidic soil that allows water and air to pass through well. For sowing seeds, a mixture of garden soil, sand and humus in equal proportions is suitable. It must be steamed, and then add wood ash and perlite (in a bucket of soil, a glass of both).
Prepared containers are filled with this soil mixture, and just before planting the seeds, it is spilled with a solution of potassium permanganate.
STEP 3
Sowing aster seeds for seedlings

What do perennial and annual aster seeds look like? They are quite large, so there should be no problems with landing.
To protect against diseases, etch them in advance in any fungicide (Maxim, Baktofit, Klad, Fitolavin, etc.) according to the instructions.
In wet soil, make small grooves up to 2 cm deep at a distance of 3-5 cm from each other, where spread the seeds evenly. Sprinkle on top with a very thin layer of soil.Some gardeners recommend sprinkling the seeds not with soil, but with calcined sand to protect them from possible waterlogging during watering.
After that, cover the crops with transparent glass or plastic wrap and place in a bright place with a temperature of no more than 20 ° C. Remove the film after the emergence of shoots - this usually happens on the 5-10th day.
Move the seedlings to a cool room (up to 15 ° C) and regularly, as the soil dries, moisten with a spray bottle. Make sure that there is no waterlogging - aster seedlings are very sensitive to black leg disease.

STEP 4
Picking
Aster seedlings dive when 3-4 true leaves are formed on them. It is important not to allow the moment when the seedlings are too stretched upward.
Fill the pots for transplanting with the same mixture as when planting seeds (you can add a little ash or complex mineral fertilizer), and tamp. Make a depression in the center of each pot.
Transplant the shoots one at a time in each pot, so that there is about 1 cm left between the soil surface and the lower leaves. After all the plants have been transplanted, water them with water at room temperature without touching the leaves.
Place the containers in a warm (about 20 ° C) well-lit place without direct sunlight. Water moderately as the soil dries. A couple of weeks after picking asters, you can feed with a solution of ammonium nitrate (1 g per 1 liter of water).
As soon as new leaves appear, young plants can be "hardened" - regularly taken out into the fresh air in a shaded place or ventilated. Increase the hardening time gradually.
STEP 5
Transplanting seedlings into the ground
You can transplant aster shoots into open ground after the soil warms up well. By this time, they should have reached a height of 5-7 cm and have 5-6 well-developed leaves.
Before the procedure, the land on the site should be well loosened. Asters love soil light, non-acidic, sunny places. It is not recommended to plant asters on those places where nightshades (tomatoes, physalis, potatoes), as well as tulips or gladioli grew last season.
For planting, morning or evening hours without an active sun or cloudy weather are preferable.
Young asters with lumps of root earth are carefully transferred into prepared holes - the distance between them is made depending on the size and type of the future adult plant (from 20 to 50 cm). The soil around the shoots is lightly tamped and watered under the root. The land around the seedlings can be mulched with peat or sawdust.
In no case feed young asters with fresh manure - this will most likely lead to fusarium disease and plant death.
In the future, your task will be to properly organize the care of asters in the open field. It is simple - regular watering without water getting on the leaves and loosening the soil.
A week or two after planting aster seedlings, it needs to be fed with a complex mineral fertilizer (no nitrogen). It can also be introduced at the budding stage.
If winter is expected to be snowless or frosty, perennial asters should be covered with spruce branches.

A seedless way to grow asters from seeds
When are aster seeds sown? Most often it is in the spring - we described this option above. However, many gardeners today also practice open sowing of aster seeds in autumn soil. This method is also called reckless.
Sowing aster seeds before winter is best in October - early November, depending on the weather, in slightly frozen ground.
To begin with, a bed with well-dug soil is formed, where you can additionally add humus or peat (up to 3 kg per 1 square meter), as well as superphosphate (1 tablespoon). On the bed, with an interval of 15 cm, parallel grooves are made with a depth of about 2 cm.In them, at a distance of about 2 cm from each other, dry aster seeds are laid out, which must be sprinkled on top with soil with a layer of up to 2.5 cm.
This sown bed is securely covered with plastic wrap until spring. Approximately in mid-April, with the end of frost and the emergence of seedlings, the film is removed - young plants are in favorable conditions, when the temperature regime is already suitable, and there is a sufficient amount of moisture from the melted snow.
Florists like this sowing of asters in the fall because the resulting plants are usually stronger and stronger than seedlings. They get sick less and bloom earlier.
Growing aster seedlings at home and further caring for asters in the open field is a completely feasible task even for a novice gardener. We hope our algorithm of actions described in the article will help you with this.

