Content
Sprouts can be grown at home, it's very simple. They are obtained from the seeds of vegetables and cereals, legumes, as an excellent source of vitamins and minerals.
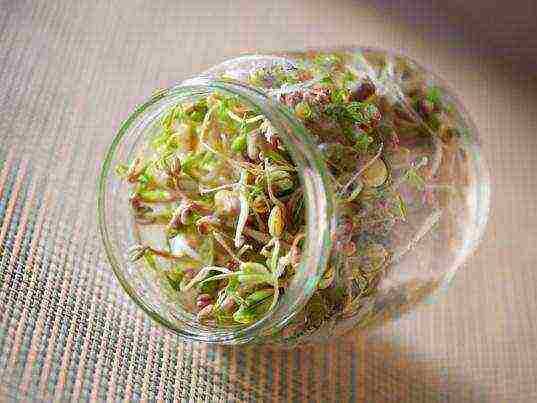
What you need:
• Clean glass jar
• Nylon fabric or gauze
• Rubber
•
Water
•
Seeds
and beans (
try to find natural seeds
)
Read also:Spring Planting: Lettuce on the WindowsillHow to Make Your Own Compost: A Guide10 Ways to Recycle Coffee Grounds14 Organic Foods Your Doctors Eat
Step 1. Wash and rinse the jar thoroughly and leave to dry. Then wash the beans / seeds you like. Clean them from foreign particles.
Step 2. Fill 1/3 of the jar with the seeds or beans of your choice, then fill the rest of the jar with room temperature water.

Step 3. Cut a piece of cheesecloth to cover the neck of your can so that it hangs down and secure with an elastic band.
Step 4. We leave the seeds to swell. This will take 3 to 8 hours depending on the size of the seeds. The larger the seeds, the longer it takes to soak. They must absorb water.
Step 5. Strain your sprouts through cheesecloth, then remove. Fill the jar with water and rinse all seeds / beans by gently shaking the jar, then drain again.
Step 6. Cover again, turn the jar over and support it at an angle so that air can circulate inside and the remaining water drains off.
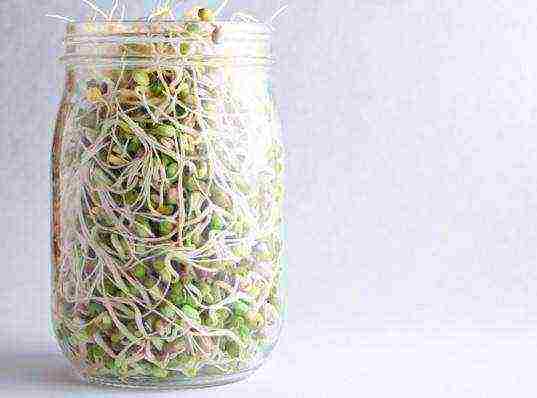
Repeat this process at least twice a day for several days and your sprouts will be ready to eat.
When the sprouts grow to a height of 5-7 cm, rinse them well and store in an airtight jar in the refrigerator. They must be eaten within 2 or 3 days.
If you want to grow more seedlings, use multiple jars rather than trying to pack too many seeds into one large jar. Beans need room for air to circulate, and if packed too tightly they can go bad. When in doubt, try fewer seeds first.

How to use Sprouts
You can eat them raw, or add them to a salad, or lay them on a sandwich, mix them into your favorite green smoothie.
Bon Appetit!
There are so many reasons why wheatgrass juice is called the nectar of the Gods ...
Perhaps you have already heard about the benefits of sprouted wheat more than once, haven't you?
But how to properly grow wheat germ at home?
It’s quite simple.
Today I invite you to get acquainted with our online guide - how to germinate wheat at home ... This post will tell you everything "inside and out" ...
Honestly, I had to sprout sprouts more than once. However, all the time we did not always manage to do it correctly, especially at first. They began to grow moldy with us and everything disappeared.
Therefore, I suggest that you, together with me, try to properly germinate wheat for consumption.
If you are new to healthy eating and are not entirely familiar with the health benefits of wheatgrass and their juice, be sure to pay attention to our article - 50 Reasons to Drink Wheatgrass Juice Every Day ...
In short, one thing can be said ... These mega beneficial wheatgrass can even prevent colon and stomach cancers.
In general, the history of sprouting and eating wheat began a long time ago, after one of the simplest experiments. It all began in the 1930s as a result of the experiments of the agrochemist Charles Schnabel, who fed sick chickens with wheat seedlings.
After eating wheat grass, the birds recovered. Moreover, Schnabel noted that they began to lay more eggs than their initially healthy neighbors. Impressed by the experiment, Charles Schnabel introduced wheatgrass into his family's diet.
When the experiment was repeated the next year, the result was reproduced, Schnabel noted a doubled egg production in chickens that consumed wheat germ as an addition to food.
After much research, wheat germ has been credited with a wide variety of properties, including protection against cancer and aging, as well as treatment for tuberculosis.
How to germinate wheat at home correctly
In general, you need to start by choosing a grain of wheat. You can order wheat grains in any online store.
But I made everything easier ...
Just took a house in the village. If you don't have this option, go to the nearest farmers' market and buy them.
Be sure to make sure that they are not pickled from rodents. This is often done by farmers to preserve their crops throughout the winter.
Step # 1: pre-germinate the sprouts
So, we have already selected a grain of wheat ...
Pure, home grown and pesticide free. This is the type of wheat I recommend for sprouting for maximum health benefits. It is these grains that will give you a little sweetness and a pleasant taste.
This wheatgrass juice of yours will contain many vitamins and minerals that will improve your health.
So, let's begin …
- Pre-germination is important to achieve a good harvest.
- Pick up a glass of wheat seeds. Or just fill the bottom in your planting mold with a single thicker layer.
- Rinse the seeds in clean water, strain, and then soak the seeds in filtered water in any container.
- Soak for 8-10 hours.
- After 8-10 hours, drain the water and then soak them again as in step 2 above and soak them in the water for another 8 hours.
- After the second soak for 8-10 hours, drain the water.
- Check the grains. They should put out small roots.
These sprouted seeds can even be eaten. Many adherents of a healthy diet eat them like that.
But, if you need a super healthy juice, move on to step two ...
Step # 2: Prepare the Wheatgrass Planting Tray
- If your tray has holes in the bottom of the tray, cover the bottom with a paper towel to prevent wheat roots from sprouting through the bottom.
- Fill the tray with pre-moistened soil or compost in a small layer. Make sure your soil is free of artificial fertilizers or chemicals. Always use organic supplements.
Step # 3: planting wheat grains
- Spread the sprouted kernels evenly and tightly in a single layer on damp soil in the tray. Squeeze the seeds gently into the soil or stir a little.
- Place the tray out of direct sunlight or just closer to daylight. It could be somewhere near a window and good ventilation. Remember, wheatgrass doesn't like hot, direct sunlight.
Step # 4: watering and tracking the sprouts
Young shoots should be watered at least twice a day to keep them slightly moist. If the soil becomes dry, young shoots can die. And of course, they don't like overflows either.
Therefore, we suggest that you use a simple spray (sprinkler) if you are afraid to overflow.
When the shoots become higher than 2 - 3 cm, it will take about five days for this, reduce the number of watering to once a day, for example, in the morning. But always make sure that the soil does not dry out.Once again, avoid over-watering.
Mold growth can sometimes occur. This is especially true in humid and hot climates.
But don't be discouraged, there are some good solutions:
- Try soaking your seeds overnight instead of just 8-10 hours as suggested above. This will allow the grains to absorb more moisture, they will grow even more, which will allow them to germinate better and reduce germination time.
- Arrange the seeds in the tray tightly, but in one layer. Try to prevent them from overlapping so that there is enough air for each sprout to breathe. This will definitely reduce mold.
- Do not over-spray the wheatgrass, use a spray bottle as we mentioned above.
- Finally, you can even try the following procedure. After your sprouts have taken root, substitute another tray or some form without holes for the wheatgrass, a tray with holes, so to speak, as a reservoir. Thus, instead of watering from above, the shoots will take the right amount of water for them. But this can also be mistaken.
But we failed several times, all the time the sprouts died from mold. But we still want to achieve the result we need and try all the same this elixir of youth and health.
Step # 5: collecting grown sprouts at home
When the wheat germ grows up to 15 - 20t cm, they are ready for harvest. Use scissors and cut the greens just above the grains.
If there is mold, avoid it and cut a little higher. You should cut off enough greens to make about 30 ml of juice to provide you with energy throughout the day.
Note:
You can keep watering the cut greens for a second or even a third crop, although they won't grow as high. But you get extra grams of the healthiest juice.
Otherwise, empty the tray and get a fresh, fresh crop.
Step # 6: Juice Wheatgrass and Enjoy
To make wheatgrass juice, you need a special juicer. You can refer to our guide to choosing the right juicer for the whole family and your healthy diet.
I can warn you right away that centrifugal juicers will not allow you to get juice from wheatgrass. It can even clog it up a lot, as they are highly fibrous.
Experts do not recommend taking more than one serving per day (that's about 30 grams). Wheatgrass juice is so powerful that it can help you cure the worst diseases.
How to grow wheat at home video
If you do not understand everything, I suggest you watch an interesting video. This is a very informative and enjoyable video to watch, made by the "gummy fox", as she calls herself ... 🙂 Cool? ...
Watch her YouTube channel ...
Finally
Now that you have a real plan of action, you can easily repeat these steps. As you can see, sprouting wheat at home is not difficult at all. This is not rocket science.
And if you are also a flower lover, for example, then sprouting wheat for food, I think, will not be difficult for you.
If you are not yet ripe for wheat germination, take a look at our list of benefits again in the article I wrote about at the beginning. Yes, science does not stand still and soon we can learn a lot more about the juice from wheatgrass.
There is even evidence that 30 ml. wheatgrass juice the content of vitamins and minerals are equivalent 1 kg of fresh vegetables! Super! ...
How do you germinate wheatgrass and what else do you know about the benefits of this juice? Drop me a line in the comments below! I always love reading other people's stories.
If the article became useful to you, share it with others.
How to grow wheat seedlings at home
It is most rational to purchase wheat for germination from summer residents who do not subject it to chemicals, or in special packages (grain for germination).
You can germinate wheat as follows.
Step 1. It is important to sort out the prepared seeds for germination first, discard bad, damaged or rotten seeds, leaving healthy seeds. After that, the grains are thoroughly washed under running water, all dust, dirt and excess debris are removed.
Step 2. Dishes are selected: it can be a glass jar, a bowl, a tray (you can take a container with a lid, but make holes in the lid first). The bottom of the dish can be covered with gauze, and then put on it grains of wheat 2-3 cm thick. Pour the wheat so that the top layer "peeks out" and only slightly contacts with water. In order for the wheat to be soft, it should be filled with water all over. From above, you can additionally cover the container with gauze. Thus, a certain effect of an air-water "cradle" is created. The grains receive water and air - the most essential ingredients for the formation of a sprout. The container is placed in a cool, dark place.
Step 3. Carefully observing the process, the finished result can be expected after a day. The grains will sprout small white sprouts that are ready to eat when they reach 3 mm. The water should be drained periodically, the grains should be rinsed and filled with new ones. The first water change is necessary within 2 hours after pouring, since all the harmful impurities contained in the grains float up. Further, after 8 hours of soaking, the wheat is washed again, but water is no longer added, since the grains have already swollen and took their toll. They just need to be rinsed three times a day. Wheat will be ready for consumption in two days. If, after 48 hours, the seeds have not sprouted, they are unusable. Before eating, ready-made seedlings are washed with running water. This product is called sprouted wheat. Store sprouts in the refrigerator for no more than 48 hours. Therefore, each time before filling a container, it is important to take into account the daily intake of the whole family.
Next chapter>
While living in Thailand we have become addicted to soybean sprouts. If you add them to salads, rice and noodles with vegetables with the right sauces, it turns out insanely delicious! It's delicious to just eat them with soy sauce, raking in more with a spoon. They are juicy, tasty, healthy and smell fresh. But ... But lately it is rather difficult to find them for a normal price and good quality. And from the shelves of some stores, they completely disappeared.
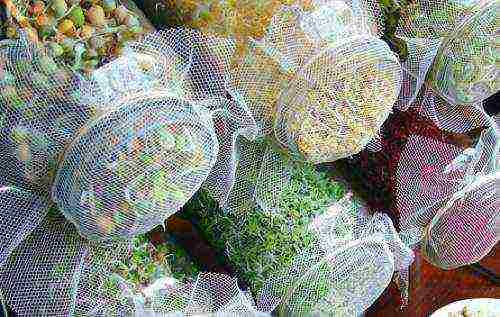
Therefore, for all lovers of Asian cuisine (and simply delicious and healthy food), I propose to recall school biology lessons and conduct a small experiment - to grow sprouts at home. And it can be not only soybeans, but also other legumes and wheat. This will not take much of your time and you do not need to care for the sprouts like a garden. The main thing is not to forget to add water 😉
So, three options - choose the one that seems the easiest!
Sprouting in a glass jar
It's very simple - you rinse the selected seeds, put them in a jar and fill them with water so that it covers them on top. Cover the neck of the jar with gauze or a fine mesh and secure it with an elastic band, leave the jar overnight. In the morning, drain the remaining water and rinse the seeds. After that, the seeds are laid out on a drainage net and washed several more times during the day. They are soaked again in the jar overnight. Harvesting in this way lasts from three to seven days. The duration depends on which seeds you choose to germinate. The easiest way is with wheat, radish, peas, chickpeas, lentils, mash, beans - they are ready to eat right after their sprouts have begun to unfold from seeds. But with cabbage seeds you will have to tinker a little, since they become edible only when the green part and the first leaves appear.
Germination of buckwheat
It turns out that buckwheat sprouts are very often used as an ingredient in salads. Although I have never tried buckwheat sprouts. Place the seeds in a jar overnight, as described in the first option. Then rinse the seeds and place them in a bowl or glass jar and cover with a towel. Leave in this position for several days. Buckwheat sprouts are ready to eat immediately after sprouting. Buckwheat releases a gelatinous substance that must be washed off well so that mold does not appear.
Growing sprouts in soil
Another option is to place the seeds in the soil. It is usually used for sprouts to be eaten with a green portion. Buy soil and soil trays. Soak the seeds for one night, drain the water in the morning and leave them under a towel for 1-2 days. After the seeds have sprouted, put them in trays on the soil, water and cover with a thin layer of earth on top. take care of it like a regular houseplant.
