Content
- 1 What you need to know about him
- 2 Cooking seedlings
- 3 Landing
- 4 Care
- 5 Video "Growing hot peppers at home"
- 6 Features of growing on a windowsill
- 7 Choosing a variety for planting
- 8 Features and conditions for planting at home - step by step instructions
- 9 Features of further care
- 10 Major diseases and pests
- 11 The timing of the emergence of seedlings and the first harvest
- 12 Choosing a variety
- 13 Seed preparation
- 14 Requirements for the composition of the soil
- 15 How to plant chili peppers from seeds at home
- 16 Seedling care
- 17 Transferring peppers to pots
- 18 Formation and pollination of the bush
- 19 Feeding rules
- 20 Chili peppers fruiting
- 21 Useful materials
- 22 How to get chili seeds?
- 23 Seedling preparation
- 24 Growing chili peppers at home
- 25 Growing chili peppers in soil
- 26 Diseases and pests
Not all garden crops are suitable for growing at home. But there are those that, with due diligence, it is quite possible to grow at home on the windowsill. Spicy lovers often grow a plant like chili at home. This article will tell you how to do it correctly.
What you need to know about him
Chili pepper or, as it is also called, cayenne pepper is one of the most ancient plants. This species belongs to the nightshade family. Its cultivation as a cultivated plant began as early as 6-7 thousand years BC. NS. This type of pepper is native to Bolivia. But in Europe it appeared much later.
Initially, chili pepper was used as a delicious spice for various dishes, but then scientists found out its beneficial properties. Pepper fruits are rich in vitamins C and A. Therefore, this plant has found wide application in folk medicine. Medicines made with the addition of this type of pepper are used to treat the following diseases:
- headache;
- arthritis;
- colds;
- poisoning.
Therefore, having such a plant will not only be beneficial from the gastronomic side, but also useful in terms of having a “folk healer” in the house.
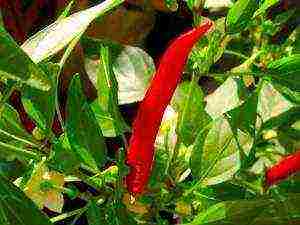
The fruits of this plant can be green or red in color. The color depends on the type of pepper. The fact that hot chili peppers (red and green) can be grown at home, few people guess. At the same time, the pepper itself, grown at home, can have fruits of different colors (red or green), as well as different shapes. Here again, everything is determined by the variety chosen for cultivation.
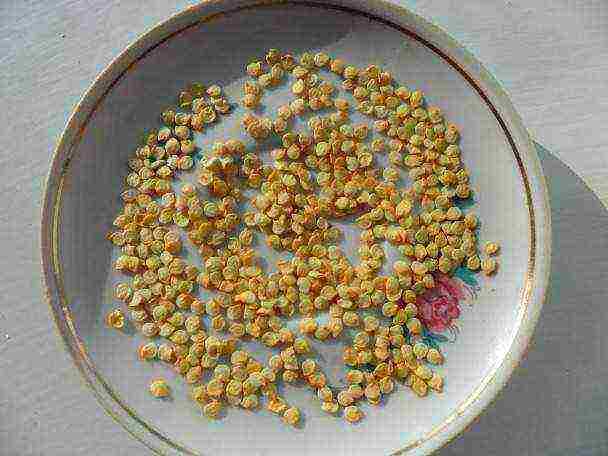
Each fruit (red or green) obtained in this way will contain a large amount of seeds inside, which can be stored and used later for seedlings. The seeds of this pepper are round and yellow in color. Their diameter is about two millimeters.
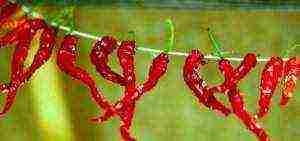
Home-grown peppers produce fruits that have a bright flavor. They can be used to prepare various culinary masterpieces, where it can act as a seasoning or ingredient. It can also be preserved or used as an alternative medicine in the form of tinctures and lotions. Among other things, such peppers (red or green) can be stored at home. If you store its fruits correctly, then in winter you will have a delicious hot seasoning for holiday dishes.
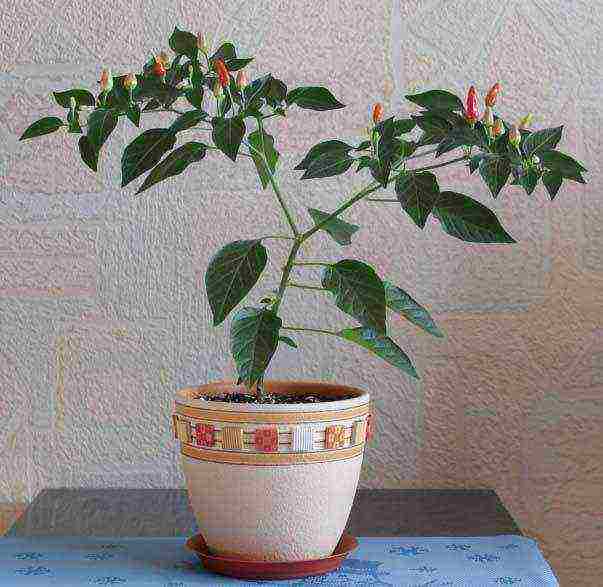
In addition, it should be said that the pepper grown at home has an excellent appearance, it can be used for decorative purposes to decorate the house.
As you can see, growing hot peppers at home will be an excellent solution.
Cooking seedlings
Very often, people who grow hot chili peppers (red or green) at home use seedlings for this. Of course, you can always just plant a seed in a pot of earth. But in such a situation, it will take much longer to wait for the first shoots, and the end result may be far from your expectations.
Therefore, in order to grow chili at home, you need to get seedlings. The first step is to properly plant and germinate the seeds.
For chili seeds to germinate, they must not only be properly stored, but also planted. To do this, the following manipulations are carried out over the seeds:
- The seeds are placed between moistened napkins and left in this form for 4-5 days. These actions will speed up the process of germination of planting material.
- After the specified period, you need to get the seeds. They should look swollen and start to germinate. This means it's time to sow them.
- Sow the sprouted chili seeds into a shallow box.
- Planting material must be planted at a distance of 5 cm from each other. This will prevent strong pulling of the seedlings.
- Seeds should be planted in fertile soil to which vermiculite has been added.
- It is recommended to immerse the planting material in the soil shallowly, about 0.5 cm.
- After planting is complete, the soil should be watered with water.
Note that each variety (red or green) has its own germination timing.
This must be taken into account when growing a plant in seedlings, since this period can take up to 3-4 weeks.
Observing the germination of seedlings, it is necessary to periodically check the condition of the soil. If it starts to dry out, then you need to spray it with water. In this case, the water regime for chili must be observed according to the principle of the golden mean. This means that the soil must remain moist, but in no case be flooded with water. The germination of seeds is equally badly affected by both high humidity and dryness.
In addition, in order for the cultivation of hot pepper seedlings to be successful, here, just like for a tomato, a certain thermal regime should be observed. It should be remembered that each type of chili (red or green) requires a certain level of heat at which its seeds can be stored and grown. On average, the temperature regime for these plants grown at home should be maintained in the range of 22-25 degrees. Such a temperature indicator must be maintained constantly.
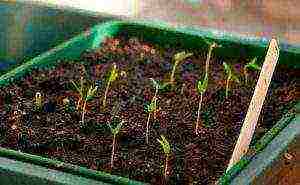
When the first green tongues of future seedlings appear on the surface, it is necessary to change the conditions for its cultivation. An important point at this stage is to save the obtained result. In order for the seedlings to be able to further develop and grow, they need to create the necessary level of illumination. If there is little light, the seedlings will begin to stretch strongly, which will lead to their thinning and discoloration.
The most reliable and effective way to illuminate hot pepper seedlings is artificial light. Lamps should be located above the sprouts at a distance of 25-30 cm. In this case, the daylight hours for chili should be 18 hours. To maintain accuracy, the lamp can be equipped with a timer.
Having created all the necessary conditions for germinating seeds, you just have to be patient and continue watering and caring for them until a strong seedling is formed, which can be planted in a permanent place of growth - a flower pot.
Landing
Planting of hot pepper seedlings occurs only after it has formed two pairs of leaves. Their presence serves as a signal for a transplant. This procedure is as follows:
- The planting container should have a diameter of 8-10 cm and be shallow. The most suitable container is plastic pots. You can use those that have been preserved from other indoor plants. But ceramics are not recommended.
- At the bottom of the container, we form a drainage layer with a thickness of at least 3 cm.
- After that, pour a potting soil mixture into the pot, suitable for growing peppers.
- We plant the seedlings to a depth of 0.5 cm, without deepening the stem.
- After that, sprinkle the sprout with soil.
After the seedlings have been planted, in order to retain moisture in the soil, they should be crushed near the sprout. Then we water the plant with water. The next watering of the planting should be carried out in a week. By this time, the root system of the seedlings will have time to adapt and take root. Until this moment, it is forbidden to moisten the soil. This is due precisely to the underdevelopment of the root system. If you water the seedlings earlier, they will start to rot. It is necessary to keep the planting from excess moisture during the entire growing time. But in order to achieve an excellent harvest, some care is needed for the pepper.
Care
Hot pepper care begins from the moment the germinated seeds are planted. At this stage, the most important point will be to create an optimal light regime for the plant. If at night the lamps are responsible for additional illumination of the plants, then during the day the boxes with seedlings should be placed in a bright place, avoiding direct sunlight.
When the seedlings form 2-3 true leaves, they are cut at a distance of 10-12 cm. In this situation, it is necessary to pinch off the main root by a quarter. This is necessary in order for the root system to begin to build up its mass. A pick is carried out for each individual plant. If this is not done, then the seedlings can stretch very much.
When making a pick, it is important to remember that it is not recommended to deepen the sprouts below the level that was at their emergence.
Care for seedlings and already transplanted shoots involves periodic watering, which should not lead to excessive waterlogging of the soil. If the air humidity at home is less than 50%, pepper leaves should be sprayed with warm water. Keep both seedlings and adult plants from waterlogging.
The beginning of the growth of the transplanted shoots and their final rooting begins approximately 15–20 days after planting.
Please note that peppers that are grown on the windowsill are not pinched. In addition, props are not placed here, since the stem will be strong enough to support the entire bush and fruits.
During flowering, the branches of the bush need to be shaken slightly for pollination to occur. It is also recommended to turn the pot to the window with the other side every day. Then the bush will develop evenly. Home-grown hot peppers need to be fed regularly every 2-3 weeks. If the care was correct, then the fruits obtained from the bush can be stored at home.
As you can see, there is nothing difficult in growing chili peppers. Stick to the above rules and you will succeed.
Video "Growing hot peppers at home"
Thanks to this video, you will receive practical tips and tricks on how to grow hot peppers at home in a flower pot.
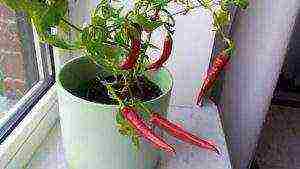
In the cold season, you want to create a special comfort in the house, and plants grown on the windowsill at home are ideal for this. Indoor pepper is no exception, it will not only add originality to the interior, but also give spicy food lovers an opportunity to spice up their dishes.
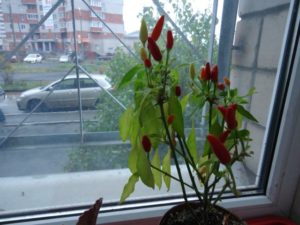
Features of growing on a windowsill
Important! With proper care and regular feeding, indoor peppers can grow fully and give a stable harvest for 5 years.
Growing pepper on a windowsill is not only an exciting experience, but also useful... Eating pepper in food, even in minimal quantities, can normalize metabolism in the body, reduce cholesterol and blood sugar levels.
For the successful cultivation of pepper on the windowsill, you need to create optimal conditions for its growth and development, because this culture is a little capricious.Therefore, it is necessary to familiarize yourself in advance with the features and preferences of the plant, as well as with the rules of planting and further care.
To grow peppers at home, you need to consider the following factors:
- seeds of a suitable variety from a trusted manufacturer or fresh cuttings;
- choosing the optimal place for plant growth;
- selection of planting containers and a suitable substrate;
- lighting and feeding features;
- knowledge of diseases and pests of pepper.
Important! With observance of all the rules of care from one plant, you can get one hundred or more fruits at the same time.
Choosing a variety for planting
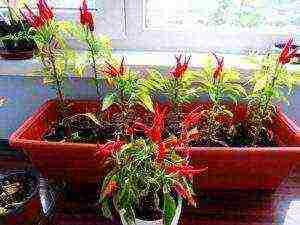
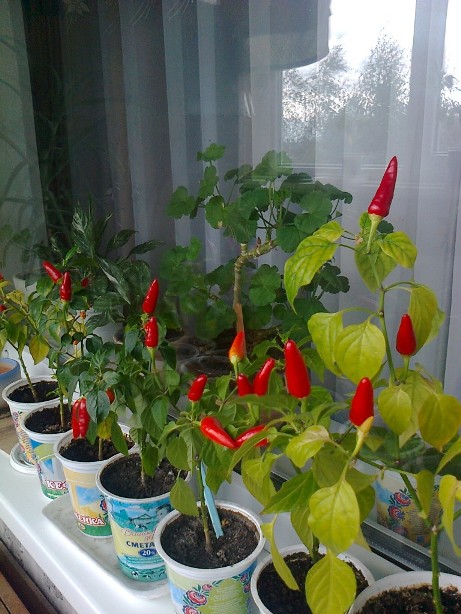
Before planting pepper, you need to decide on its variety. Having picked up several different types of plants, you can create a multi-colored vegetable garden on the windowsill, which will delight with its bright fruits.
The following varieties of decorative peppers are ideal for growing on a windowsill in an apartment:
- A twinkle. This variety has long been popular for its compact shrub, which grows to a height of 40 cm. It was developed by crossing chili and cayenne pepper. Forms fruits up to 5 cm, which at the base have a diameter of 1-1.2 cm. As they grow, they change their color: green, yellow, red. The fruits ripen within 120 days.
- Aladdin. Ultra-early compact variety, the height of the bush reaches 35-40 cm at home. Forms cone-shaped multi-colored fruits, the length of which does not exceed 3 cm. In the process of growth, the shade of the fruit changes: green, purple, red. Fruit ripening occurs within 105 days.
- Garda Firewoks. One of the new indoor varieties. Forms compact bushes with a height of 30 cm. The length of the pods is 5 cm. The peculiarity of the pepper is that the fruits stick out with their tips up. As they ripen, they change their color, so the plant can simultaneously have fruits of green, lilac, orange and red. Pods ripen within 115 days.
- Exploding amber. The peculiarity of the variety is that the foliage of the plant has a dark purple color. Forms cone-shaped small fruits 2.5 cm long. As they grow, the shade of the fruits also changes: purple, pink, scarlet. The bush is compact, 30 cm high. The variety is considered early ripening, fruit ripening occurs in 115 days.
Depending on individual preferences, you can pick up one or more varieties at the same time.
As a rule, the most popular variety for growing on a windowsill is Spark pepper.

Important! You cannot use seeds from a store-bought pod to grow pepper on a windowsill, since it is an industrial variety and needs completely different conditions.
Features and conditions for planting at home - step by step instructions
To grow Spark pepper on the windowsill, you need to prepare for the procedure by studying the preferences and features of growing this culture in room conditions. Only by observing all the stages of planting, you can achieve the desired result in the end.
Choosing a suitable location and creating optimal conditions
Hot peppers are very picky about light and heat, for its full growth and development it is necessary to choose south or east window sill. During the period of active sun in the spring, the plant needs light shading. In summer, the plant should be taken out to the balcony or loggia, but drafts must be excluded.
For full growth and development, the plant needs 12-hour daylight hours. In the period of short days from the beginning of October to the end of January, bitter pepper especially needs additional lighting with phytolamps in the evening and cloudy days.
Important! Lack of light is manifested by a light shade of foliage, which can eventually lead to leaf fall, in this case the duration of additional lighting must be increased.
For normal plant growth in winter air temperature should not exceed 18 degrees C, and starting from spring, the optimal temperature is 20-22 degrees C.
Hot peppers are very picky about soil moisture and does not tolerate watering with cold water. It is necessary to water the plant sparingly, with water at room temperature, as the top layer in the pot dries, but allowing it to absorb moisture from the pan. If water remains in the pan 1 hour after watering, then it must be completely poured out.
In conditions of low air humidity it is necessary to carry out additional spraying of foliage using a spray bottle.
Important! Pepper does not tolerate cold gusts of wind, therefore, when ventilating the room, it must be kept away from the open window.
Planting capacity
Indoor pepper forms a compact root system that is closer to the soil surface. For planting, it is recommended to select wide and shallow containers... The height of the planting pot should be within 10 cm.
A prerequisite is the presence of drainage holes in the bottom of the pot, which helps to remove excess moisture. Before planting on the bottom, it is necessary to fill the drainage with a layer of 2 cm, which will exclude stagnation of water in the pot.
Suitable substrate
For planting hot pepper seeds, you can purchase Seedling substrate in a specialist store. But you can prepare a nutrient mixture for planting yourself. This will require the following components:
- 2 pieces of leafy land;
- 1 part peat;
- 1 part river sand;
- 1 part coconut fiber
- 1 part perlite or vermiculite.
Immediately before planting hot pepper seeds, it is necessary to disinfect the soil by spilling it with the fungicide Previcur, which will prevent the development of fungal diseases.
Presowing seed preparation
For the friendly emergence of seed germination and disease resistance of young plants, it is recommended to carry out pre-sowing treatment of planting material. To do this, you can use the following drugs:
- Epin - dilute 3 drops of the product in 100 ml of water, soak the seeds for 2-4 hours before planting;
- succinic acid - make a working solution at the rate of 1.5 g of the product per 1.5 l of water, soak the seeds for 12-24 hours;
- Zircon - for the solution, add 3 drops of the product to 100 ml of water, soak the seeds for 2-4 hours before planting.
After processing it is necessary to dry the planting material to a loose state.
It is recommended to germinate pepper seeds in a humid environment before planting. To do this, you need to spread them in damp gauze and gently wrap the fabric.
For germination, place in a dark, warm place (25 degrees) for several days, periodically opening, moisturizing and examining for the presence of sprouts. Once most of the seeds have hatched, they must be planted in prepared soil.
Important! Seeds must not be allowed to dry out during the germination period, otherwise they will die.
In some cases, to preserve all view properties it is recommended to carry out cuttings of pepper. Cuttings must be cut from green young shoots without fruit, 7-8 cm long, and each of them should have 3-4 leaves.
Before planting them in the ground, it is necessary to soak in advance in a solution of zircon (3 drops per 100 ml of water) for 12-24 hours or powder the lower cut with root powder.
Step-by-step instructions for landing
To grow pepper on a windowsill, you must initially plant it correctly. Only if all the necessary conditions of the procedure are met, you can achieve the desired result in the end.
Step 1. Spill the planting containers with a strong solution of potassium permanganate.
Step 2. Fill the pots with the required substrate and level the surface.
Step 3. Moisten the soil abundantly with water and allow it to fully absorb.
Step 4. Place seeds on the surface and sprinkle with a layer of substrate 0.5 cm.
Step 5. Moisten the top layer with a spray bottle.
Step 6. Cover containers with glass or foil to maintain high humidity inside the landing container.
Step 7. Place containers in a dark, warm place (25 degrees) until shoots appear.
When planting cuttings pepper, the procedure takes place in the same order, only they must be planted to a depth of 1-1.5 cm. And after planting and covering with a film, the pot is placed on the window, shading it from direct sunlight.
Video: how to grow pepper on a windowsill from cuttings
Features of further care
After the appearance of pepper sprouts, the container with seeds must be rearranged on the windowsill and the temperature must be lowered to 18-20 degrees. To exclude warm air from heating devices, they must be covered with a layer of foam.
Daily container with seedlings it is recommended to ventilate and take away from the cover or film gathered condensate using a paper napkin.
10-14 days after the emergence of sprouts, it is necessary adapt seedlings to the external environment... To do this, on the first day, it is recommended to open the container for 30 minutes, increasing this period by 30-40 minutes with each subsequent day. After a week, the glass or film must be removed completely.
Pepper cuttings take root within 2-3 weeks. When young leaves appear on them, it is necessary to begin the adaptation of plants to the environment. It is carried out in the same way as for seedlings obtained from seeds.
When 2-3 true sheets appear it is necessary to plant the peppers in separate containers. During transplantation, it is not recommended to pinch the main root, since the plant painfully tolerates this procedure and significantly slows down growth. The first planting should be carried out in pots with a diameter of no more than 9-10 cm.
Video: how to plant indoor peppers
Further it is necessary to transplant young seedlings as they grow. As soon as the roots start crowding in the pot, it is recommended to transfer the plant, increasing the diameter of the pot by 2-3 cm. The container for an adult plant should be 30 cm high and 20-25 cm in diameter.
Pepper Ogonyok needs a 12-hour daylight hours, therefore phytolamps are located at a height of 50-60 cm from the seedlings.
Watering carried out regularly as it dries, the higher the air temperature, the more often the soil is moistened.
For the full growth of hot pepper on the windowsill, it is necessary carry out regular feeding. During the active growing season, preference should be given to mineral fertilizers with a high nitrogen content or organic fertilizers, and when forming buds and fruits, fertilizers with a large amount of potassium should be used. The plant should be fed once every 2 weeks.
Important! During the flowering period, it is recommended to shake the pot of pepper sometimes, which will improve the self-pollination of the flowers.
Major diseases and pests
Peppers, including indoor peppers, are susceptible to fungal diseases and various pests. Therefore, it is necessary to know in advance what problems may arise and how to deal with them.
- Aphid. This pest loves to feast on young shoots of pepper, therefore, it is on them that a large accumulation of pests is formed. To combat them, it is necessary to treat the plant with a phytoverm preparation.
- Spider mite. It is characterized by a stop of plant growth and curliness of young leaves, on which a small cobweb appears in the future. To combat the pest, it is necessary to spray with actellik, but after a week the procedure should be repeated.
- Whitefly. The accumulation of pests is observed on the back of the leaves, if you touch the shoots, then white flies fly over the plant. To eliminate the problem, it is recommended to carry out a complex treatment, which consists of spraying with actellik and irrigating with insecticide aktar, which is carried out on the same day. After 7 days, the procedure should be repeated.
- Decay of the stem at the base... It appears as a result of overflow of a plant, which leads to its death. It will no longer be possible to save the plant.
- Gray rot. Formation of wet spots with a gray bloom on any part of the plant. For treatment, it is recommended to use the biological product phytosporin.
- Blackleg. It affects the sprouts of pepper during the germination period. The stem at the base of the seedlings becomes thin and blackens. To prevent the disease, it is recommended to shed the soil and spray the shoots with the fungicide Previcur.
Video: how to care for and treat indoor peppers at home for diseases
Important! After treatment with drugs, it is necessary to adhere to the waiting period indicated on the packaging of each product; it is not allowed to use pepper during this period for cooking.
The timing of the emergence of seedlings and the first harvest
Seeds of hot pepper germinate for a long time, therefore this feature must be taken into account when planting. Seedlings appear within 14-21 days, subject to all planting recommendations.
The first crop of pepper on the windowsill ripens in 105-120 days from the moment the sprouts appear, depending on the variety chosen.
If you follow all the recommendations, it will not be difficult to grow hot peppers on the windowsill. But it is necessary to understand that further care of the plant must meet all of its requirements, since the pepper will grow and bear fruit only taking into account all the necessary conditions.
Choosing a variety
The following varieties are suitable for growing in the house:
- Treasure Island;
- Martin;
- Sweeties;
- Firstborn;
- Firstborn of Siberia;
- Boss Pepper.
All these varieties are small-leaved, and therefore they feel great when grown on a windowsill, where, unlike in open air, there is little sunlight.
In addition, the listed varieties are self-pollinated, which means they can form fruits in the room.
Seed preparation
Before sowing, it is necessary to carry out seed treatment potassium permanganate solution or growth stimulants... The seeds are immersed in the solution for 20 minutes, then the water is drained through a fine sieve.
Sowing the prepared material is not recommended immediately.
- The seeds are placed in a damp cloth and left to germinate for a week in a warm place.
- The fabric must be wetted periodically.to prevent the seeds from drying out.
- As soon as the seeds show sprouts, sowing is carried out.
IMPORTANT. Do not unroll the cloth to check the condition of the seeds. Earlier than in 6-7 days, the seeds will not hatch, but they will cool when opened.
Requirements for the composition of the soil
 For sowing chili peppers, prepare a mixture clays, sand and humus (1X1X2). The thoroughly mixed mixture is moistened with water.
When using ready-made soil, it must be kept in the room for a couple of days to be enriched with oxygen and warmed up.
Specials will do. soil for peppers and tomatoes.
ATTENTION. For the purpose of disinfection, it is recommended to spill any soil with a solution of potassium permanganate.
How to plant chili peppers from seeds at home
- Seedlings are planted in wide shallow containers. at a distance of 5 cm in a row.
- Seeds are laid out on the surface, then sprinkled a small layer of soil (0.5-1cm).
- From above, the crops are moistened with a spray bottle.
- Seed boxes are covered with foil or glass to create greenhouse conditions. For seed germination need a temperature of 22-25 degrees.
IMPORTANT. During germination, make sure that no direct rays fall on the surface, otherwise a greenhouse effect will be created inside the box and the seeds will weld.
The first shoots will appear in 10-15 days... The film must be removed immediately, and the air temperature lower to 18 degrees for several days.
Seedling care
 Daylight hours for pepper sprouts should be not less than 12 hours... Therefore, during winter cultivation, illumination with special phyto or fluorescent lamps is necessary.
The boxes are placed on a light but no sun hit, a place.
In the phase of two or three true leaves, pepper is necessary unfold at a distance of 10-12 cm... When diving pinch off the main root by a quarter... This technique helps to build up a powerful root mass of each plant.
Pepper pick before the formation of two true leaves is not recommended, because at this time the sprouts are not yet able to withstand the transplant.
It is also impossible to be late with a pick., because from a lack of lighting, the plants will stretch and weaken.
IMPORTANT. When diving, do not deepen the pepper sprouts below the level that was during the sprouting. Unlike tomatoes, the stalk of pepper does not form lateral roots, and when deepened, the roots will suffer from a lack of air.
You need to arrange chili seedlings on southeast or southwest windows, this is how you can ensure optimal lighting for the pepper. The lack of lighting can be judged by the color of the leaves. If they are dark green, then the sun is enough for the pepper. Lack of light is signaled by faded, light leaves.
IMPORTANT. If the sprouts suddenly begin to lose foliage, move the boxes to a brighter place or arrange a backlight. Blue-violet lamps are installed at a height of 25-30 cm above the crown of the plants.
Pepper should be watered separated water with a temperature of 22-23 degrees... When watering waterlogging of the soil must not be allowed, from this plant will get sick with a black leg.
If the air humidity in the room is less than 50%, it is necessary to spray the leaves with warm water.
Transferring peppers to pots
When the seedlings reach a height of 10-15 cm, the plants are placed in separate pots for growing and harvesting. Each specimen is planted in a separate pot.
REFERENCE. The sprouts can be planted in separate pots during the first pick.
The most suitable dishes are plastic containers that are quite wide, but not too deep. The use of ceramics is not recommended, as the soil in such a pot will dry out too quickly.
- At the bottom, it is necessary to lay a drainage layer of at least 3 cm.
- Then pour the potting soil mixture into the pot.
- The sprouts are planted at the same level as when growing seedlings, without deepening the stem.
- Each sprout with a lump of earth is placed in a cavity prepared in the soil and sprinkled with soil.
- After planting, the soil around the stem is well crushed and watered.
- The next watering after planting is carried out no earlier than 7 days later, when the roots begin to take root.
IMPORTANT. Before rooting, do not excessively moisten the soil, from this the root system, which is not yet able to absorb water, will begin to rot.
Formation and pollination of the bush
 Final rooting and start of growth of bushes starts in 15-20 days... At this time, the pepper will begin to actively form new shoots. Pepper grazing on the windowsill is not required.
His fruits are small and the bush has enough strength to grow them. There is also no need to put up any supports, the stalk of the pepper is strong enough to support a lot of fruit.
As soon as flowers begin to form on the bushes, branches need to be shaken slightly for pollination of buds. Daily turn the bushes the other side to the window for even development.
If this is not done, the shoots will reach for the light and the bush will begin to tilt to one side.
Feeding rules
Fruiting crops are demanding on the nutritional content during cultivation, so peppers need to be fed regularly. Every 2-3 water the soil for weeks with a universal fertilizer for vegetables or a special fertilizer for peppers and tomatoes.
IMPORTANT. It should not be used for feeding a mixture with a high nitrogen content, the plants from this will increase the leaf mass to the detriment of fruiting.
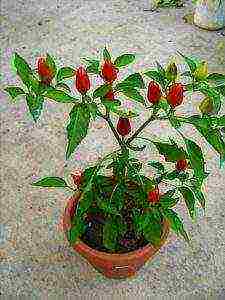
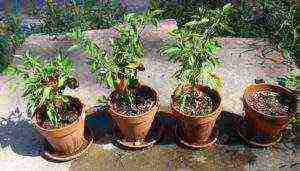
Chili peppers fruiting
As soon as the pepper begins to form fruits. The bushes, covered with flowers and fruits at the same time, acquire a special decorative effect. When sowing in winter, the first peppers appear in May - June... Depending on the variety, they have red, yellow or green color.
IMPORTANT. Be sure to select and dry some of the most beautiful specimens to get seed for next season.
Growing chili peppers indoors does not require any special effort. Give him a little attention and he will delight you with sharp, aromatic fruits.
Useful materials
Read other articles on pepper seedlings:
- Correct cultivation from seeds and should they be soaked before sowing?
- How to grow black peppercorns, bitter or sweet at home?
- What are growth stimulants and how to use them?
- The main reasons why the leaves of the shoots curl, the seedlings fall or stretch, and also why the shoots die?
- Planting dates in the regions of Russia and the peculiarities of cultivation in the Urals, Siberia and the Moscow region.
- Learn recipes for yeast-based fertilizers.
- Learn the rules for planting bell and hot peppers, as well as how to dive sweet?
In conclusion, we bring to your attention a video on growing chili peppers at home:
Chili pepper is one of the most popular spices in the world, which has found its place not only in cooking, but also in medicine, cosmetology, and, of course, home gardening. The benefits of this plant were well known to the Aztecs and Mayans - it was from these peoples that the Europeans received the first seeds "as a gift". Today, the cultivation of chili is a business that is quite within the power of even a beginner, and its beautiful bushes will become a real decoration of a windowsill or a garden, and will certainly delight their owner with sharp, piquant fruits.
Chili peppers: growing
How to get chili seeds?
First of all, it should be noted that the term "chili" unites a number of plants from the legume family: "bird's eye", jalapeno, anaheim, habanero and many others. They differ from each other in the appearance of the fruits, their color, as well as in sharpness, so it is best to make a choice based on your own preferences and the capabilities of the stomach. For example, jalapeños are considered the most harmless and non-burning of them, and habanero is considered the most spicy and "evil", although there are also exceptions to the rules.
Hot pepper seeds
There are two ways to get seed for growing chili peppers: buy seeds from a store or harvest them yourself. In the first case, it is very important to choose high-quality material that can guarantee good germination and productivity of the future plant.
Hot Pepper Fireworks
At the same time, experienced gardeners recommend following a number of rules.
- Before buying seeds, you should carefully evaluate their appearance: damaged, cracked or deformed seeds will most likely not germinate. In addition, they must be large enough - weak, diseased plants are usually obtained from too small seed.
- There should be no brown, orange or yellow spots on the surface of the seeds. This means that high temperatures were used for drying, which have a detrimental effect on the seeds.
- To avoid wasted time and subsequent frustration, seeds can be tested for germination. To do this, you need to put them in a container, pour a little water there, add special agents that stimulate plant growth, and wait a day. Then pour a little earth there, and wait for the roots to appear - it usually takes two to three days. If they are not there, then the material is of poor quality.
How to test seeds for germination
To avoid buying low-quality seeds, it is best to harvest them yourself.
Chilli seeds
The basic rule in this case is to let the fruits ripen well, and this time does not come when they are already edible, but much later.The timing of seed collection can be determined by the appearance of the peppers - the pods begin to dry out, and the tip becomes brown. The fruit must be carefully cut in half, shake the seeds out of it, and then grind them in your hands, blowing off the rest of the pulp. It is recommended to use goggles and gloves when doing this, as the contact of small particles in the eyes or on the skin can cause severe irritation. The seeds should be stored in a dry place, never subjecting them to heat treatment.
Extracted pepper seeds
Seedling preparation
Chili peppers can be grown both on a windowsill or loggia, and in an open field or greenhouse. In any case, it is better not to plant the seeds right away in a permanent place, but first grow seedlings from them, otherwise this process will take much longer. This is best done in February, especially if the plant will live in the open field - until spring, the sprouts are strong enough to be transplanted.
- To speed up germination, place the seeds between two damp wipes or paper towels, place them in a container, and leave them in a warm, well-ventilated place for several days. It is important that the seeds are in the same plane - this will ensure an even distribution of moisture. The "readiness" of seeds for planting can be determined by their swelling (some may develop small sprouts).
Chili Seed Preparation
- For sowing, it is recommended to use a large container, which should be thoroughly rinsed and boiled beforehand. Potting potting is best purchased from a store, as regular garden soil can contain bacteria and insect eggs. A little vermiculite is added to the mixture, and drainage is placed on the bottom of the container and soil is poured so that about 2.5 cm remains between its surface and the edge of the pot.
Preparing a pot for planting pepper seeds
- Seeds are planted in shallow holes (0.5 cm), located at a distance of at least 5 cm from each other, otherwise the plants will be cramped. Sprinkle them on top with a small layer of soil, sprinkle with water and cover with glass or polyethylene.
Plant the seed to a depth of about 1.3 cm
- The first shoots above the soil surface appear in about 5-7 days - after that, the container should be rearranged in a sunny place.
Plants should be transplanted into separate pots after the first true leaves appear on them, and for subsequent cultivation in the open field, it is better to choose peat pots. They allow you to transplant so as not to disturb the roots, so that young peppers will take root better.
When diving, take the seedlings by the "ears" so as not to damage the stalk
Water and top up the soil carefully, if necessary
Pepper seedlings
Chilli
Growing chili peppers at home
The main condition for the successful cultivation of hot peppers at home is a sufficient amount of light. With a lack of it, the plants will be too weak, and the fruits will be small and pale. For home cultivation, experienced gardeners recommend choosing those types of peppers that give bushes with small leaves so that the light absorption area is large enough.
Growing hot peppers
The ideal place for growing is a windowsill or balcony that faces southwest or southeast. The optimum temperature depends on the type of plant, but on average is 22-25 ° C in summer and 16-18 ° C in winter. Another important point is that the daylight hours of chili peppers in natural conditions lasts 18 hours, so in winter the place where it will grow must be equipped with artificial lighting sources. Blue-violet lamps, or a combination of fluorescent lamps with conventional incandescent lamps, are best suited for this. The distance from the top of the plants to the lamps should be at least 25-30 cm.
Chili Pepper Care
Growing hot peppers at home
For growing peppers at home, it is recommended to choose not too deep pots, otherwise the root system of plants will be better developed than the fruiting top. As for the material, it is better to settle for plastic pots with drainage holes. Clay or terracotta containers often draw the moisture needed for the shrubs from the soil, and they can simply dry out. In addition to maintaining the temperature and light conditions, caring for chili peppers consists of regular watering (the soil should be moist, but not too wet) and monthly feeding of plants - for this, mixtures that are used to fertilize tomatoes are suitable.
Watering and fertilizing peppers
As soon as the bushes reach a height of 20 cm, it is better to pinch the tops so that they branch well and form more fruits.
Growing hot peppers at home
Growing chili peppers in soil
The first question that many gardeners ask themselves is where is it better to grow chili peppers, in an open area or in a greenhouse? The answer to this question is unambiguous - in the greenhouse, you can maintain constant conditions of temperature and humidity, so the bushes can reach a meter in height, and give a good harvest. In the open field, where these indicators can change several times a day, pepper grows worse, but this option is also possible.
Agrotechnology for growing pepper
For planting, you must choose a well-lit place with nutritious, neutral or slightly acidic soil. Peppers have an extremely negative attitude towards stagnation of water, high humidity and sunburn, therefore, several weeks or months before planting seedlings, it is necessary to improve soil drainage by adding a little river sand and compost. Young plants should be transplanted into the ground after they take root well and grow up to 12-15 cm, and only when the last spring frosts have passed.
- Before planting, the peppers must be hardened so that the change of residence does not become too much of a shock for them. To do this, the pots are taken out every day to fresh air, gradually lengthening the stay of the plants outside - first 2 hours a week, then add one hour every day until they can stay outside for a full 24 hours.
Be sure to temper the seedlings
- In the selected area, dig holes slightly larger than the root system, at a distance of 30 cm from each other (for some varieties, a greater distance may be needed).
Digging holes
- Plant the plants in holes, covering the top of the roots with soil, but not tamping the soil too hard, since chili grows best in loose, well-drained areas.
Remove the plant carefully from the pot, being careful not to disturb the earthy ball.
Plant chili
- After planting, the bushes should be watered, but it is very important to ensure that the soil is moist and not wet through and through.
Water abundantly
Before the transplanted plants begin to bloom and bear the first fruits, at least a month will pass, during which the peppers require careful maintenance. Watering is regular, not too abundant, but also not meager: do not allow cracks or puddles to appear near the plants. The procedure is best done with warm water, in the morning or evening, when the sun is not too bright yet. It is better not to use the rain watering method - drops of water on the leaves can provoke sunburn. In addition, you need to regularly remove weeds, apply compost and fertilizers containing potassium monthly, and remove flowers and stems that grow inside the bush.
Red hot peppers in the garden
Diseases and pests
Most often, chili peppers are susceptible to a disease called "black leg", as well as wilting disease, with the former affecting mainly young plants, and the latter - adult bushes.To prevent such troubles, it is very important to maintain the temperature and humidity that are optimal for peppers. The black leg, as its name suggests, is manifested by darkening of the sprouts, and the signs of wilting disease are the browning of the stem and leaf fall, which ultimately leads to death. It is best to remove and destroy diseased plants, otherwise they can infect healthy plants.
Blackleg
As for pests, the greatest damage to peppers is caused by aphids and spider mites.
Spider mite
You can fight them with insecticides of organic origin or infusion of wood ash - pour half a glass of ash into an enamel bowl, pour 5 liters of boiling water, mix well and leave for 12 hours. This solution should be used to rinse the entire plant and lightly shed soil next to it.
One of the great benefits of chili peppers is that most types can be harvested at any time. Green peppers have a bitter taste, and after reaching technical ripeness, they acquire a pungent, pungent, spicy or sweetish taste.
Video - How to grow small-fruited bitter peppers on a windowsill?