Content
- 1 Plant species
- 2 Can you cultivate it like that?
- 3 Peculiarities
- 4 How do they look?
- 5 Where to buy, how much do they cost?
- 6 How to check the purchase for authenticity?
- 7 Photo
- 8 Problems and difficulties
- 9 Conclusion
- 10 How orchids grow
- 11 What you need to germinate orchids at home
- 12 Preliminary preparation
- 13 Step-by-step instruction
- 14 Possible problems
- 15 Choosing seeds
- 16 Preparation of sterile substrate and soil
- 17 Pot selection
- 18 Seed preparation and sowing
- 19 Seedling care
- 20 Growing difficulties
- 21 Video "Growing orchids at home"
- 22 What is this miracle orchid?
- 23 Orchid propagation by seeds
- 24 Step-by-step process
Plant species
On Chinese sites, most often you can order orchid seeds of the most popular type of Phalaenopsis, there are also types of Cymbidium, Dendrobium, Wanda, Cattleya of various varieties. These species are hybrid, created by breeders specifically in order to grow at home with the least labor costs and delight the owners with beauty.
Can you cultivate it like that?
If you are lucky enough to get real orchid seeds from a Chinese site, then theoretically you can grow an orchid from it. But, unfortunately, this is a very long and laborious process. You will have to purchase the necessary equipment and materials, maintain sterility and the desired temperature. Some growers, jokingly, call all this a real laboratory. In addition, the result will have to wait a long time.
REFERENCE: the planted seed will be able to turn into a full-fledged adult orchid flower in 4-6 years.
Peculiarities
 When ordering seeds from China, you can often come across unscrupulous sellers who pass off seeds of other plants and even seeds of lawn grass or weeds for orchid seeds. Many in this case feel sorry for the time and labor spent trying to grow, and they are disappointed in this idea.
But, fortunately, they are inexpensive and if there is a strong desire to try to grow them, you can order again. After all, if you manage to grow a flower yourself, you will get incomparable pleasure watching its growth, and then the most beautiful adult blooming orchid.
How do they look?
Orchid seeds are very small and can easily be mistaken for dust. Their size is 15 thousand times smaller than the size of a grain of wheat. In addition, they, unlike other seeds of most crops, which have a supply of nutrients or endosperm, have an insignificant amount of it in the embryo.
How do such vulnerable seeds exist in nature and enable orchids to reproduce? The point is their number. One orchid flower is capable of producing from 3 to 5 million seeds and due to their low weight and size, they are easily carried by the wind, settling on the bark of trees.However, not all of them will be destined to turn into adult flowers; only a few of those fixed on the tree will do this. This is harsh natural selection.
Where to buy, how much do they cost?
Orchid seeds can be ordered on popular Chinese online shopping sites in the sections "Home and Garden", "For the garden and vegetable garden", "Seeds" and the like. The cost of a pack of seeds is about 35 Russian rubles.
How to check the purchase for authenticity?
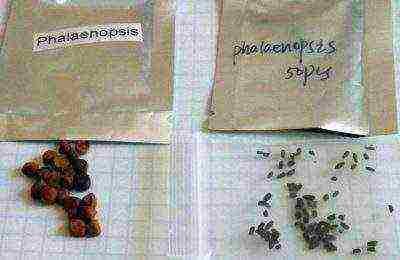
After receiving the seeds, open the package and study the resulting material before planting the shift correctly at home. Remember, real seeds must:
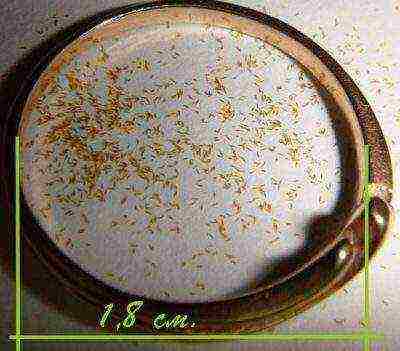
- be very small, resembling dust (their size ranges from 0.35-3.30 mm in length and 0.08-0.30 mm in width);
- cream, beige or light brown;
- have a narrow elongated shape.
- We boil 0.5 liters of distilled water.
- Add 10 g of fructose.
- 10 g glucose.
- 8 g agar agar. Cook over low heat, stirring constantly, until the agar-agar is completely dissolved.
 We heat another 0.5 liters of water in another dish.
- As soon as it boils, remove, add 5 drops of a root-forming phytostimulant, 1.5 g of complex nitrogen-phosphorus-potassium fertilizers, 1 g of activated carbon.
- Mix well, combine both solutions.
- We bring the acidity to the desired value.
- To lower the pH, you can use a solution of potash, to increase - phosphoric acid. Orchid seeds require acidity in the 4.8-5.2 pH range.
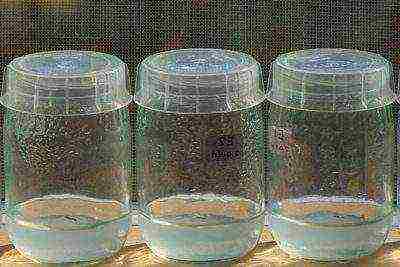
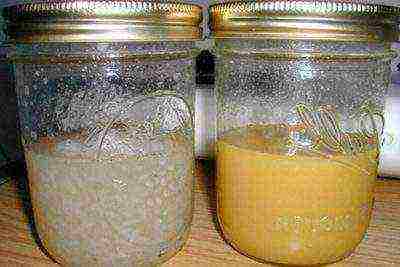
- We pour 30 mg of hot nutrient substance into sterilized flasks.
- We close the flasks with stoppers and sterilize the culture medium for half an hour.
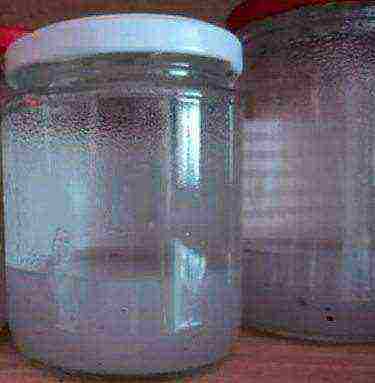
- We observe the flasks with the medium for 4-5 days. If mold has appeared in them during this time, they are not suitable for planting seeds.
Watch a video on how to prepare a seed growing medium.
Sowing
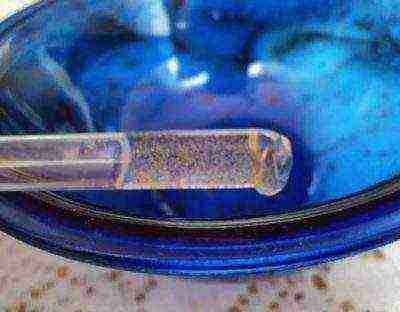
ATTENTION! The seeds also need to be sterilized. To do this, prepare the 10th bleach solution, shake, filter, hold the seeds there for 10 minutes and plant immediately.
For sowing, a device is used that additionally sterilizes the seeds.
Sowing is done like this:
- Place a grid on a container with water, on it - a substrate in a flask.
- After sterilization, suck the seeds out of the solution with a pipette and place them on the surface of the substrate.
- Next, close the flasks or jars with cotton swabs or lids, put on germination.
- The temperature should be monitored all the time: it should be 18-23 degrees Celsius, the length of daylight hours - an average of 12-14 hours.
Photo
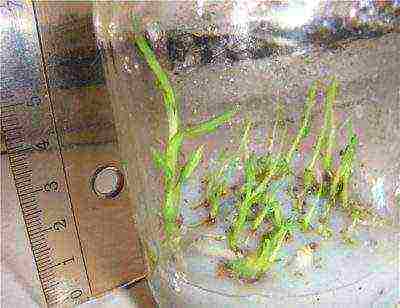
Next, you can see a photo of how the seeds look and what has grown from them:
Care
After a few weeks or months, changes begin to occur with the crops. Green balls appear on them, then the first leaves. After the appearance of two or three leaves, roots begin to appear. Only after a year can the seedlings be transplanted into a pot. A substrate of moss, fern roots and pine bark is suitable for filling the pot.
The soil should be as small as possible. The sprouts are removed from the flask with forceps as carefully as possible, washed in water and transplanted into a substrate, which is pre-poured with boiling water for 30 minutes. Plants need lighting and high humidity all the time.
Problems and difficulties
Problems in growing orchids from seed can await at any stage. However, the most common low-quality seeds, the slightest flaws in sterility are the reason for low germination, non-observance of temperature and humidity conditions. As a result, the death of seeds or seedlings and the absence of a result in the form of a beautiful flower. Starting this process, it is worth analyzing your conditions, the availability of time and money, as well as a lot of patience, so as not to be disappointed by the difficulties.
Conclusion
Many difficulties await those who decide to independently grow orchids from Chinese seeds.Starting from a huge number of fakes sold by enterprising traders from the Middle Kingdom, ending with a very painstaking period of their landing and growth. But still, if you have a great desire, it's worth a try!
It is difficult to find an amateur florist who is indifferent to orchids. This is a masterpiece created by nature itself. They are deservedly called "aristocrats of the plant world." Flowers simply fascinate with their tenderness and elegance, as well as a variety of shapes, colors and aromas. They can resemble tropical butterflies, birds, ballerinas, even slippers and lizards. Despite the fact that orchids are demanding to care for and are rather reluctant to breed at home, very few growers are ready to give up their pets. Until recently, it was believed that growing them from seeds was impossible in principle, but now there are chances, although the technology is complicated, and the procedure requires its exact adherence. But even in this case, success is not guaranteed.
How orchids grow
Orchids or Orchids (Orchidaceae) are a family of herbaceous perennials. They can be found everywhere, from the tropics to the forest-tundra, but, of course, the brightest varieties, captivating with exotic coloring and the shape of large flowers, live in tropical forests. It is impossible to calculate the exact number of representatives of the family - at the moment, about 35,000 different orchids are known, including natural hybrids (plants have the ability to cross, including interspecific) and varieties bred by breeding. The eight hundred genera that make up the family make up approximately 10% of all plants in the world.

"Cascades" of orchid flowers look very impressive
Humanity has been familiar with orchids for a long time. For the first time they were "domesticated" by the Chinese in about 2000 BC. NS. The name comes from the Greek orchis ("testicle"). The plant owes them the characteristic shape of thickened stems. The Greeks also own beautiful legends about the appearance of orchids on Earth. According to one of them, these are fragments of a rainbow that have fallen from the sky. According to another version, the first orchid grew where Aphrodite dropped her shoe.

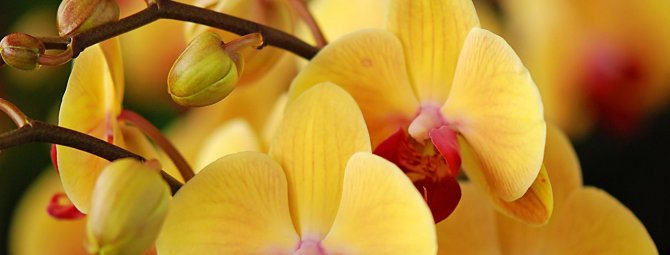
Blooming orchids amaze with a variety of shades
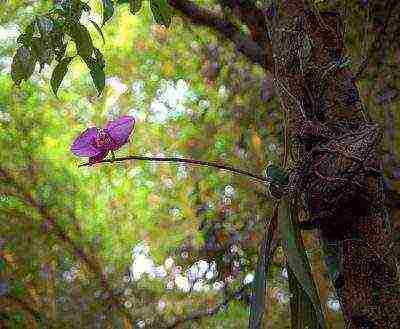
Orchids are very different in appearance. In many of them it is difficult to suspect "relatives", even distant ones. But most of them lead an epiphytic or semi-epiphytic lifestyle, living in trees. They use the "master" only as a support, without parasitizing on him.
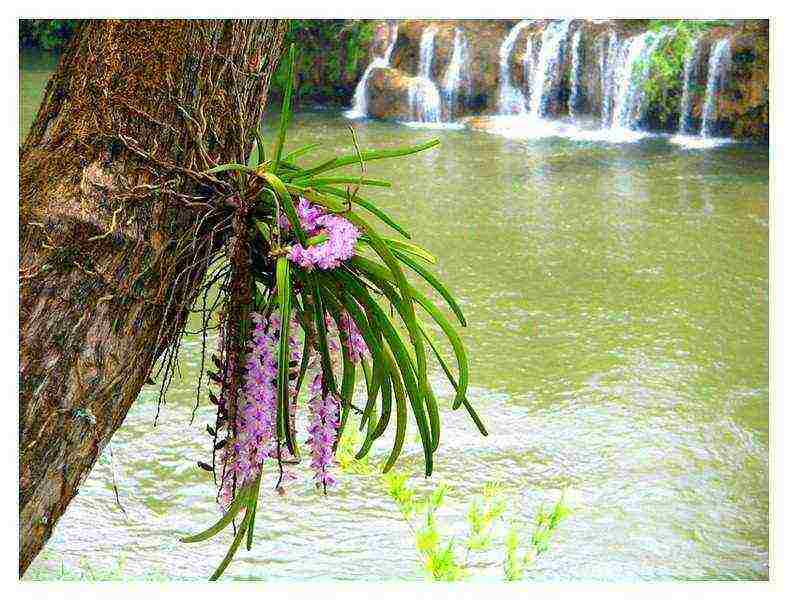
Most orchids in nature live on trees, but there are also those that grow on stones (the so-called lithophytes)
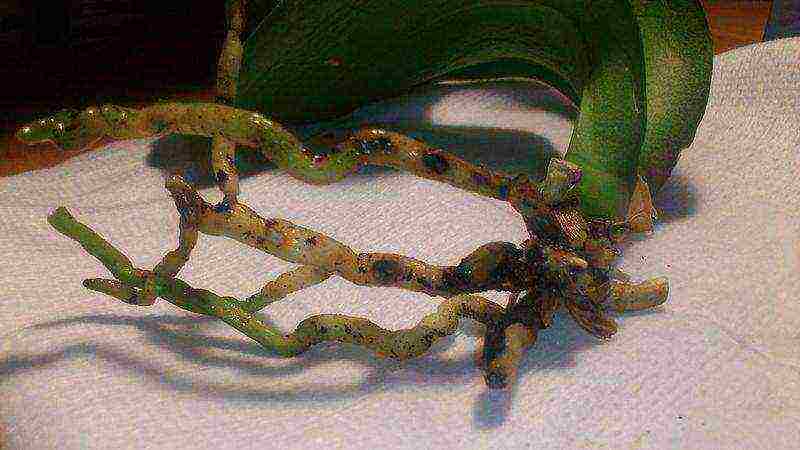
The orchid obtains the necessary moisture and nutrients from the atmosphere, sucking them in with the help of a developed system of aerial roots covered with a thick layer of a special fabric - velamen.
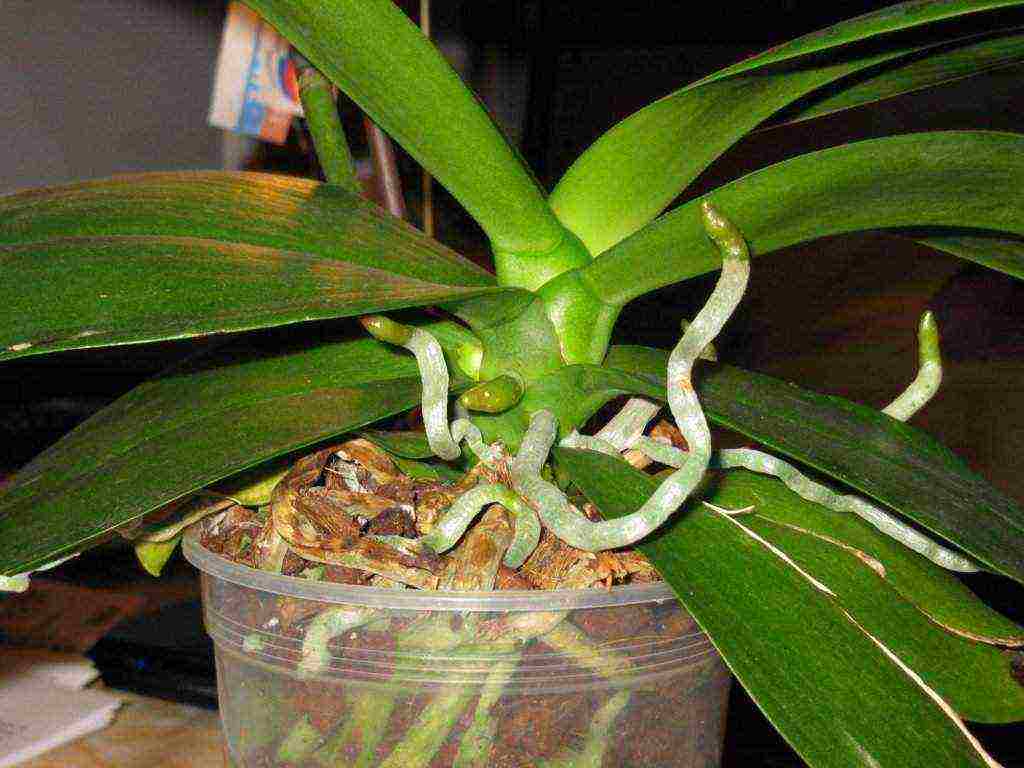
Orchid roots sticking out of the pot are normal, they participate in the process of photosynthesis and help absorb moisture from the air.
Based on the characteristics of growth, they are divided into two groups:
- Monopodial orchids. The growth point is the apical shoot bud. It persists throughout the life of the plant, disappearing only with aging or dying off. Such varieties stretch upward, peduncles and lateral shoots are formed from buds "hiding" in the leaf axils. Most often, adult plants resemble vines or their leaves are gradually collected in a rosette.
- Sympodial orchids. As soon as the youngest shoot is recognized by the plant as sufficiently developed, having reached a certain size, the growth point at its top dies off. At its base, the rhizome forms a new one, from which another shoot or peduncle appears. These orchids only grow in one direction.

Monopodial orchids grow mainly upward, sympodial - to the side
Orchid flowers are very different in size (from a few centimeters to almost a meter in diameter) and color (the expression "all the colors of the rainbow" does not even come close to describing this variety of shades and tones), but their structure is approximately the same. The upper part consists of three sepals, which often grow together to form one "petal". The lower one is two real petals of a smaller size, between which the third is located - the so-called lip, sharply contrasting in color with the general color of the flower. It contains a nectary. In shape, it resembles a bag, slipper or an elongated horn of a gramophone. Flowers are often collected in inflorescences (each with an average of 4-16 buds).

The structure of the flower is approximately the same in most species of orchids, despite the variety of petal colors.
When to collect seeds
If pollination is successful, the fruits ripen - capsules or pods filled with seeds. They are so light that they do not fall to the ground, but glide, caught by the currents of the wind. In order for the seeds to germinate, having reached the soil, the presence of mycelium in this place is necessary, which will provide them with the necessary nutrition.
Orchid seeds are very small, they cannot be examined without a microscope
Orchid leaves are simple, monocotyledonous, most often of a rich dark green color. Petioles are absent. On each stem thickened at the base (tuberidia, often called pseudobulbs), from one to three leaves are formed... In shape, pseudobulbs resemble cylinders, spindles, eggs. In them, orchids store a supply of moisture and nutrients.
Orchid leaves are devoid of veins, most often they are dark green
Video: popular varieties of orchids for growing
In the thickenings at the base of the stem (pseudobulbs), the orchid stores a supply of nutrients
What you need to germinate orchids at home
Mostly at home, orchids reproduce vegetatively. Until recently, it was believed that it was possible to grow them from seeds only in laboratories with special equipment. But now an amateur florist can try, thus gaining a unique experience. Success, of course, is difficult to achieve, but if the instructions are followed accurately, it is quite possible.
Collect seeds
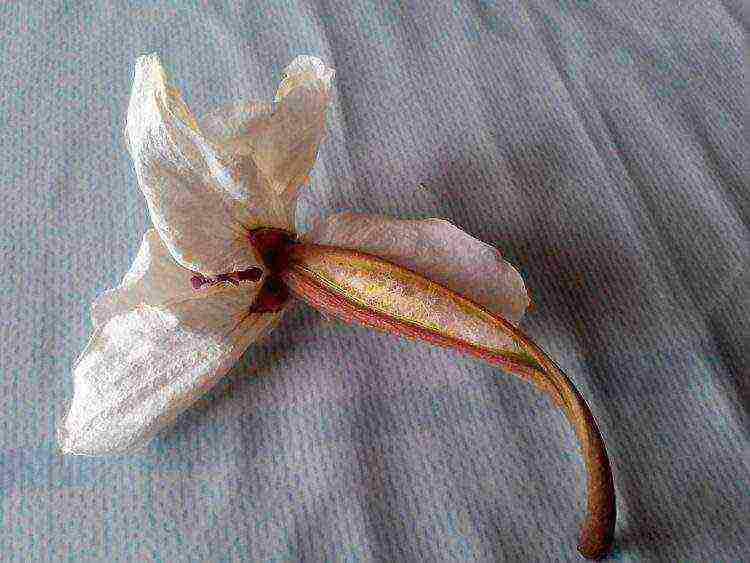
To carry out pollination by hand, you will need two orchids blooming at the same time. The pollen from the stamens of one of them is collected with a soft brush or cotton pad and transferred to the pistil of the other. The pollinated flower will wither, this is normal. If he fell out, then the procedure was not crowned with success. Otherwise, after about 1.5–2 weeks, positive changes will be noticeable - the fetus will begin to form.
Each orchid pod or boll contains over a million seeds. Accordingly, they are very small. It is impossible to see them with the naked eye, only through a microscope. The contents of the fruit resemble dust. Collecting seeds at home is problematic, although under the condition of artificial pollination (including interspecific pollination), the pods and pods can be tied quite easily. Therefore, most often the seeds are purchased in online stores. The main supplier is China.
In addition to size, orchid seeds have other physiological characteristics that make it difficult to germinate at home:
- Lack of endosperm (special tissue surrounding the embryo). In it, other plants store starch, amino acids, vegetable oils and other compounds necessary for it. Because of this, the future orchid cannot absorb nutrients directly from the soil. In nature, plants form symbiosis with fungi, attaching to their mycelium. It can be microscopic fungi, such as rhizoctonia or phytophthora, and well-known mushrooms or tinder fungi parasitizing trees.
- High susceptibility to any negative environmental influences. The reason is the same - the absence of endosperm. At home, the slightest violation of sterility leads to the death of seeds. They have no protection against pathogens and pests. Also, the seeds will not survive if you do not create an optimal microclimate for them, or with fluctuations in humidity, temperature, and changes in lighting.
It is rather difficult to create not just greenhouse, but "super greenhouse" conditions and absolute sterility at home, without special equipment. In addition, to see the result of your own labor, you have to be patient. Orchids grown from seeds bloom in at least 4-5 years.
Orchid breeding equipment
Regular pots or containers are absolutely not suitable for germinating orchid seeds. You will need specially designed transparent glass flasks or a narrow-necked chemical container with a volume of approximately 200-300 ml. A conical Erlenmeyer flask, for example, is a good choice. If none of this is available, regular glass jars with screw caps can also be used.
In specialized stores, you can buy flasks for germinating orchid seeds.
The containers must be completely sealed. Stoppers are most often included with the flasks. If not, you can make them yourself by twisting a very tight cotton or gauze swab and wrapping it in several layers of aluminum foil. Be sure to check how tight the homemade cork is against the neck. It is necessary to drill 3-4 holes with a diameter of several mm in the lids of the cans and fill them tightly with the same cotton wool.

In the absence of an alternative, containers for chemical reagents are also suitable.
Nutrient substrate for sowing seeds
Regular soil, even specially designed for growing orchids, is completely unsuitable for seeds. Some growers recommend sowing them in moist finely chopped sphagnum moss, but it is better to use a special nutrient mixture (it is very difficult for moss to maintain complete sterility, the necessary acidity and at the same time provide nutritional value).
It is based on agar-agar - a mixture of polysaccharides obtained from some varieties of brown and red algae. After extraction, it is a white or yellowish powder, but when dissolved in hot water, it turns into a jelly-like mass. The best option for an amateur grower is the so-called Lewis Knudson nutrient medium. The same "substrate" is used by those who grow orchids on an industrial scale. It allows you to grow flowers without creating symbiosis with fungi.

Agar-agar is the basis of any nutrient substrate for germinating orchid seeds
If there is no opportunity to purchase it, the mixture is prepared independently. Each flask should be approximately half full. Required components:
- distilled water (200 ml);
- agar agar (10-15 g);
- glucose and fructose (10 g each);
- potassium carbonate or potash solution;
- orthophosphoric acid.
The last two ingredients are used to help the medium acquire the necessary acidity. The optimum pH for orchid seeds is 4.8–5.2. You can find out the initial value using special indicator strips made of litmus paper. They are easy to obtain at any chemical store. Acid and alkali are added a few drops at a time and after each operation the acidity of the mixture is checked again.
She prepares like this:
- Pour agar over a glass of plain water. Leave to swell for a few hours.
- Boil distilled water, add glucose, fructose and agar-agar. Stir constantly in one direction (clockwise or counterclockwise).
- Continue heating over low heat or in a water bath until all the powder is dissolved and the mixture becomes jelly-like.
If there are a lot of seeds and there is a desire to experiment, you can try to germinate them in a more exotic "substrate" (ingredients are calculated per liter of distilled water):
- 0.5 kg fresh tomato puree (peeled, chopped in a blender, squeezed out), 0.5 l coconut water (not milk), 1–2 ml liquid fertilizer for orchids, 20 g agar-agar or 200 g potato starch;
- 450 ml of freshly squeezed potato juice, 40 g of icing sugar, 7 ml of fertilizer for orchids, a teaspoon of lemon juice, 15–20 g of agar-agar;
- 10 g of brown sugar and honey, 1 ml of fertilizer for orchids, 5 g of agar-agar;
- 200 g of peeled potatoes crushed in a blender into gruel, 15 g of granulated sugar, 1-2 ml of fertilizer for orchids, 1-2 g of peptone (hydrolyzed protein obtained from milk or animal meat) 10 g of agar-agar;
- 10 g of sugar and honey, 200 g of starch, 3 tablets of activated carbon, ground into powder, 70 g of banana puree, 2-3 ml of fertilizer for orchids.
When making these mixtures, half of the water is used to make agar jelly. The rest of the ingredients are placed in hot, but not boiling water (temperature about 95 ° C). Stir well for 2-3 minutes and pour in the resulting jelly. The components of the Knudson environment are added to it in the order in which they are located in the package.
Video: preparing a nutrient substrate
Preliminary preparation
The main preliminary preparation is to create complete and absolute sterility. Disinfection is applied to the dishes, the nutrient mixture, and the seeds themselves.
In laboratory conditions, special autoclaves are used to sterilize dishes; at home, you can do with an ordinary oven or pressure cooker. Flasks and jars are calcined for at least half an hour at a temperature of 130–150 ° C. Homemade plugs must first be heated by dipping them into boiling water.

Orchid seed containers can be sterilized in a conventional oven
Then the containers are sterilized again, along with the contents. Each of them is poured into 30-40 g of hot nutrient mixture per 100 ml of the total volume and tightly closed. The second procedure will take about the same amount of time. When pouring it into a container, make sure that it does not fall on the walls - this way you will create a breeding ground not for orchid seeds, but for bacteria.
You can also place the vessels in a pot of boiling water and hold them in a water bath for about 20 minutes. Let the vessels cool down, repeat the procedure twice with an interval of 24 hours.

The containers filled with the nutrient mixture are sterilized again
Finished cans are left closed for 4-5 days to check the quality of sterilization. If during this time the formula has not become moldy, disinfection was successful. The plugs must be additionally wrapped with a layer of foil. Do not tilt the containers until the jelly hardens. In the absence of seeds, the vessels can be stored in the refrigerator for 2-3 months. To make the jelly liquid again, it is melted in a water bath.
The seeds are sterilized in a solution of calcium hypochloride, also known as bleach (10 g of the substance per 100 ml of distilled water). They are left in the liquid for 10-15 minutes, shaking the vessel continuously. Then they are sown immediately.
Step-by-step instruction
Compared to everything else, the seeding itself is a relatively simple procedure. But here, too, complete sterility is required. The germination time, depending on the type of orchid, varies from a week or one and a half to 6-9 months.
The germination process of orchid seeds looks like this
At all stages of cultivation, the required conditions do not change. Orchids are provided with bright diffused light, placing its source about 30 cm above the plantings at a slight angle, daylight hours for at least 14 hours, temperature 25-28 ° C without sudden changes and humidity not less than 70%.

Seeds are sown over steam to maintain a sterile environment
- Place a wire rack or wire mesh over a wide pot of boiling water. Securely fix the container with the nutrient mixture on it. The lid from it should be located here, above the steam.
- With a sterile syringe or a special chemical pipette, remove the seeds in small portions from the solution in which they were sterilized, and spread them over the surface of the substrate without touching it. Everything needs to be done as quickly as possible.
- Gently shake the flasks to distribute the seeds evenly. Close the vessels tightly and place in the chosen location. A home mini-greenhouse, florarium or homemade "greenhouse" is suitable for them.
- The smallest green "balls" should appear first. They then form hair-like rhizoids (to absorb nutrients). Then leaves appear and, last of all, roots (when the plant will have 2-3 true leaves).
- After about a year, remove the seedlings from the jar using tongs in a circular motion, as if twisting, and gently rinse off the nutrient mixture from them. An alternative is to pour some warm water into the vessel, shake slightly in a circular motion. Pour the mixture with seedlings into a shallow wide container, add 2-3 ml of 0.5% Fundazole solution. Let stand for 10-15 minutes and remove the seedlings with a soft thin brush.
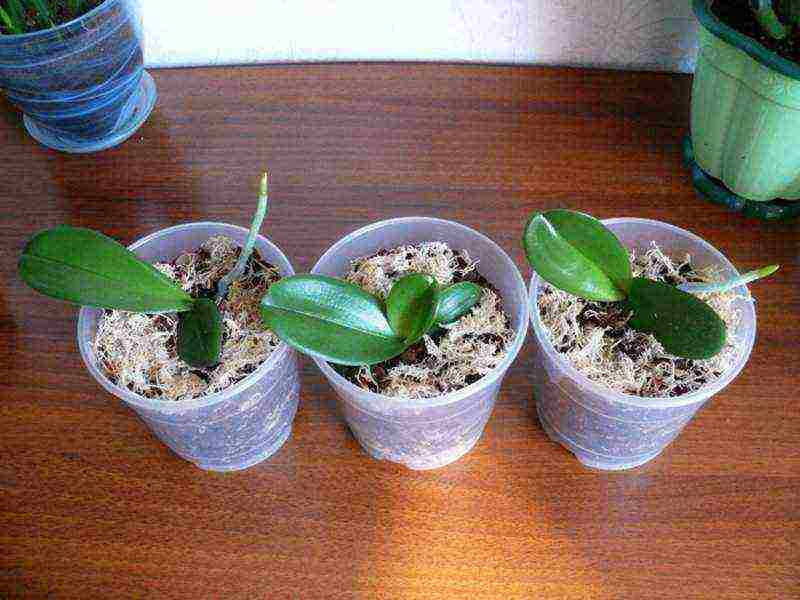
- Fill plastic cups with drainage material. The height of the container should be approximately the same as the diameter of the roots. It is better if they are transparent - this will make it possible to control the state of the root system.
- Transplant the orchids into a substrate of shredded sphagnum moss, fern rhizomes, and pine roots (1: 1: 1). The more uniform it is, the better. To prevent the development of mold, activated charcoal, crushed into powder, is added (10 tablets per liter of the finished mixture). Previously, all the components of the substrate must be poured with boiling water and left for half an hour.
- Do not water the seedlings, but spray regularly with soft water warmed to room temperature. Do not allow the substrate to dry out completely.
- After about 4–6 months, repot the matured orchids into adult plant soil again and take care of them as usual.
Photo gallery: germination of orchid seeds
Some orchidists recommend diving seedlings after the appearance of the first and each subsequent leaf, and when the plant forms four, plant them in individual containers. But with such frequent transplants, it is difficult to maintain the necessary sterility.
Orchid substrate bears little resemblance to soil in the usual sense of the word; the more homogeneous it is, the better
If you have not the seeds themselves, but the fruits of orchids, and they have not yet burst, wash them thoroughly in hot water with soap and a sharp disinfected scalpel, cut them over steam. There should also be a ready-made flask where you can sow the contents of the "box".
When the fruit is already cracked, pour its contents into a sterile container, fill with distilled water. Add a few drops of hydrogen peroxide and shake vigorously for 10-15 minutes. Then remove them with a syringe or pipette and sow immediately.
Seeds are sown without touching the substrate
Video: sowing orchid seeds
Possible problems
An attempt to grow orchids from seed at home ends in failure much more often than in success. The first problems may arise already at the stage of acquiring planting material. Since it is most often ordered directly from China, no instructions in Russian are included. Sometimes it is incomprehensible neither the time for collecting seeds (germination lasts no more than a year), nor the type of plant, nor even whether it is an orchid in general or a lawn grass.
Further, the main difficulty is compliance with complete sterility. If mold begins to develop in containers with germinating seeds, you can try to change the substrate:
- Prepare new agar jelly.
- Add some warm water to the flask, shake the liquid.
- Pour the contents of the vessel into a shallow bowl, add 2-3 drops of a 1% solution of any fungicide (Fundazol, Skor, Abiga-Peak), hydrogen peroxide and biostimulant.
- After 10-15 minutes, remove the seedlings and place them in fresh substrate as described above.
When young orchids have already been transplanted into the ground, they are often exposed to a pathogenic fungus that provokes the development of rot.Often the florist himself is to blame for this, being overly zealous with watering. If, at the same time, it is also quite cool in the room, it is almost impossible to avoid the appearance of pathogenic microflora.
Orchid rot is the most common disease affecting young plants.
Rot is treatable, but at a very early stage in the development of the disease. You need to start acting as soon as you notice the first black-brown spots on the roots and leaves. If they have already blurred, the soil has become moldy and spreads an unpleasant putrid odor, the orchid can only be thrown away.
- Remove the plant from the pot, clean the roots of the substrate.
- Examine them carefully, cut off all rotten areas to healthy tissue with a sharp disinfected knife. Do the same with the leaves.
- Soak the roots for half an hour in a bright pink solution of potassium permanganate or any fungicide (5–7 ml per liter of water). Sprinkle the "wounds" on the leaves with crushed activated carbon, chalk, colloidal sulfur or cinnamon.
- Sterilize the pot, prepare a new substrate. Disinfect him too.
- Transplant the orchid by adding granules of Glyocladin, Trichodermin to the soil during transplantation.
- Water it for 2-3 months, alternating between ordinary water and a solution of Baikal-EM, Alirin-B, Maxim. The dosage of the drug is halved compared to that recommended by the manufacturer.
To prevent the plant from dying, it must be properly taken care of, otherwise there is a real risk of losing orchids grown with such difficulty.
Video: how orchids are grown from seeds on an industrial scale
Before you plan to purchase orchid seeds for growing them at home, you need to soberly assess your own strengths and capabilities. This is a painstaking and time-consuming procedure that requires care, accuracy and strict adherence to all conditions. The result, and even more so for the flowering of new plants, will take a long time. On the other hand, all the inconveniences and difficulties are more than compensated for by the satisfaction of success, because it is so nice to realize that you succeeded in something that many did not succeed, and to be the owner of a truly unique flower.
27 years old, higher education in law, broad outlook and interest in a variety of topics. Rate the article:
(4 votes, average: 5 out of 5)
Orchid is a very beautiful, but at the same time, finicky plant. To grow an orchid from seeds, you will have to make a lot of effort at all stages of its development, follow every millimeter of soil in which it grows, accurately measure the amount of water and fertilizer applied. But the result is worth it: if you take care of it carefully enough, you will end up with a healthy and lush flower. He will delight both the gardener and everyone around him.
Choosing seeds
Let's start with the choice of seed. Several types of these plants are suitable for a home indoor "climate", but phalaenopsis orchid varieties are the most common, which are well adapted to our natural conditions. Gardeners also choose seeds of wanda, cymbidium, zygopatelum, dendrobium.
To choose high-quality material on the Internet, you can focus on the degree of recognition and scale of the manufacturing company. This is certainly not 100%, but large businesses are less likely to run the risk of selling counterfeits. The best option is to consult with other gardeners who will suggest reliable firms. Orchid seeds are often purchased by flower growers in China through special sites. This method is more reliable and less expensive in terms of money.
Although in reality, the seed looks more like dust, but after special treatment, it looks like ordinary garden seeds.Due to this, many dishonest sellers in the market can sell you regular grass for the price of orchids. In order not to fall for fake or low-quality raw materials, you must carefully choose a flower shop and, preferably, with a good reputation. You can also consult with other florists. In terms of reliability and price, this method is not much inferior to the first. In our country, unfortunately, Orchid seeds are very expensive, but the quality often does not match the price.
Preparation of sterile substrate and soil
Before growing orchids from seeds, you need to buy or prepare a special sterile soil. Only such a nutrient medium is suitable for germinating the seeds of a delicate plant.
So, to prepare the soil for the germination of Orchids, you need to take simple components: agar-agar (8 g), glucose (10 g), fructose (10 g), activated carbon (1 g), nitrogen-phosphate-potassium fertilizers (1.5 d), root-forming stimulant (5 drops), distilled water (1 l). All components are purchased from gardening stores and drugstores.
The recipe for soil for planting an orchid at home begins with boiling 0.5 liters of distilled water. Then glucose, fructose and agar-agar are added there. The whole is cooked together until the agar-agar is completely dissolved.
Then we take another half liter of water, boil and remove from heat. We add phytostimulant, fertilizer and coal. Mix and combine the two liquids. Now you need to check the pH, since the orchid only grows in an environment with pH 4.8-5.2.
Bringing the pH level to the desired mark, pour the hot solution into sterile flasks, 30 ml in each. After that, you need to sterilize everything again and seal it with a special lid (a piece of cotton wool wrapped in several layers of sterile gauze). Before planting an orchid with seeds in flasks, it is necessary to carry out a 4-5 day check - if mold appears, then this material is unsuitable for growing orchids there.
Pot selection
Before planting an orchid, you need to find a good place to germinate. For these purposes, a small glass flask, or a jar with a narrow neck, is well suited. It is important that this vessel can be sterilized and that it can be conveniently closed with a cotton lid.
Further, the seedlings are planted in disposable transparent cups, they are convenient not only for orchids, but also for any seedlings. They clearly show the development of the root system of a houseplant.
After that, it is best to use clay pots of different sizes, according to the parameters of the plant and root system. During growth, the flower is regularly planted in a larger container, as this contributes to its normal development.
To find out that a grown orchid already has little space in its current pot, you need to look at the hole below. If the roots are already peeping out decently from it, then perhaps it's time to find a larger habitat. The main thing in choosing a pot is to make the orchid comfortable.
Seed preparation and sowing
Planting orchids begins with preparing the seeds. First and foremost is sterilization. Before sowing, all future plants are treated with a solution of bleach. Liquid is poured into the container, seeds are added and gently shaken for 10 minutes.
Also, before planting orchid seeds, you must first prepare the substrate and tools. A pressure-cup is perfect, and a regular gas stove will do.
First you need to boil water and place a flask (jar) with a hot substrate in it and sterilize it at a high temperature. Then the treated seeds are sown into the resulting disinfected solution. This should be done with sterile instruments, for example, a pipette. Then the solution with the seeds is mixed and the jar is corked with cotton wool in gauze.
After about a week, orchid inflorescences, leaves and roots will begin to appear.
Seedling care
Growing from seeds is a laborious process, but the result is worth it. Especially when it comes to orchids. After the seedlings have grown sufficiently in the flasks (and this will happen no earlier than a year later), they are moved into the ground. But, before that, the sprouts need to be prepared.
The seedlings are carefully removed from the flask and washed out of the substrate with water. It also helps to separate the plants from one another. Then 2-3 drops of foundationazol are dripped, mixed again and planted with a brush into the prepared soil.
Soil that is suitable for orchids of this age can be prepared from such combinations of elements as: charcoal and pine bark; coal, sphagnum, pine chips; coal, pine bark, peat, humus. If moss is used, then it must first be soaked for a day, so that the insects float away. The bark and peat must be chopped, doused with boiling water and dried.
Breeding of orchids cannot take place without observing a certain "climate": humidity 60%, daylight 12-14 hours, temperature 18-23 degrees. At first, it is necessary to strictly observe such measures, since immature orchid sprouts cannot yet adequately cope with any fluctuations in environmental conditions.
Growing difficulties
Growing orchids from seeds at home is always accompanied by some difficulties. And the first is the need to keep everything in sterile (without exaggeration) conditions. Everything is subject to disinfection: flasks, seeds, tools, substrate. Therefore, before growing an orchid from seeds at home, you need to prepare well and qualitatively.
Video "Growing orchids at home"
In this video, you will learn how to properly grow orchids at home.
The blooming orchid is mystically beautiful and attractive. This plant has always been popular, despite the hefty price tag at the flower shop. Until recently, it was out of the question to propagate an orchid yourself at home, because this business seemed incredible due to the size of the seeds and their wayward nature.
What is this miracle orchid?
The history of the origin of the orchid has long been akin to mythological tales and legends. Some peoples considered the rainbow to be the foremother of this wonderful flower when it split into many pieces, while others are convinced that the orchid grew exclusively in the place where the beautiful Aphrodite lost her shoe. But no matter how they differ in opinions, both of them consider this plant a symbol of rebirth, beauty and great love.
The orchid loves to sprout right in the trees.
Care summary
If you do not take into account the myths and legends of the flower world and turn to the real world of science, you can find out that the very first orchids were discovered more than 130 million years ago, although they spread in China and Japan only 2 centuries BC.

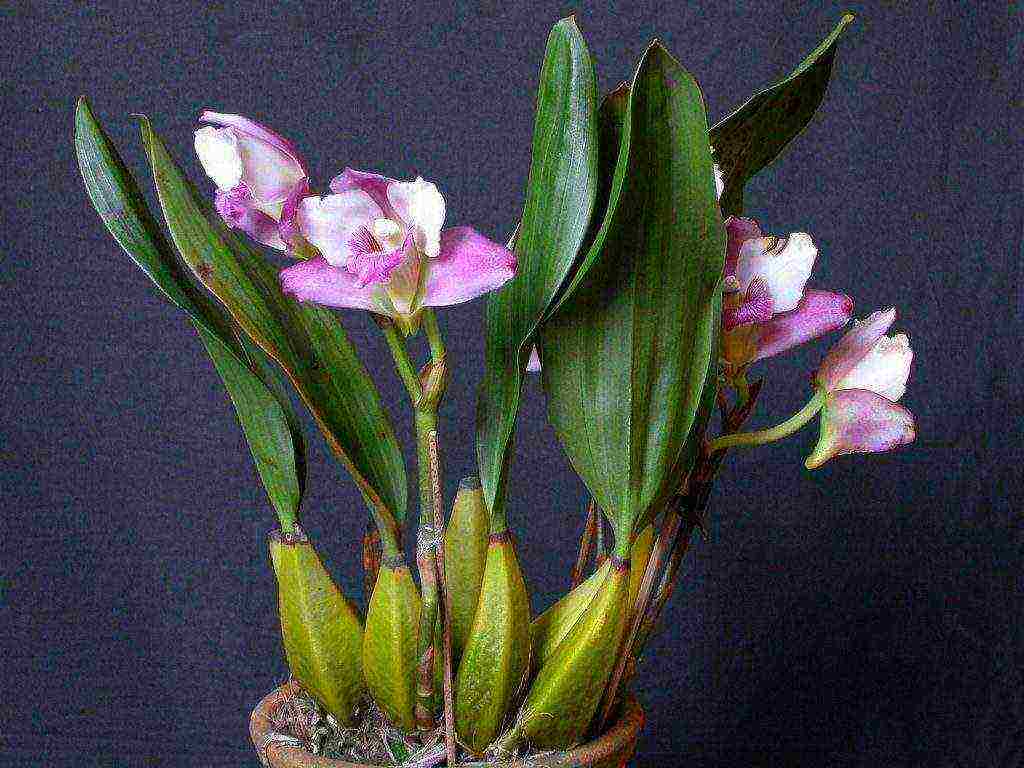
Orchid species number in the tens of thousands
In those days, orchids were considered a group of medicinal plants, and this was also mentioned by Confucius in his writings.... In European countries, the orchid appeared not so long ago, just a couple of centuries ago, but during this time the number of its species reached 30 thousand.
For the opportunity to grow this flower culture in indoor conditions, I must say thanks to botanical scientists. True, caring for an orchid can be a lot of trouble for a beginner, but amateurs and professionals promise a gratefully flowering plant if the needs of an orchid are met in time, applying special knowledge of caring for it.
Lighting is very important for an orchid, but it must be wisely chosen. This flower loves bright, but certainly diffused light.

The orchid should be able to shade from direct rays
Direct sunlight will not immediately destroy the orchid, but it will brighten and stretch the leaves without any prospect of blooming. If you shade the window a little with tulle or thin lutrasil, the orchid will regularly delight with color.
From autumn to spring, a period of dormancy begins and it no longer makes sense to shade the window, since solar activity will also come to naught. In this important period of time for a flower, shoots ripen and the plant lays buds for the next season. It is better to lower the ambient temperature for the rest period a little and keep it within 13 ° C-18 ° C, while in the summer season the upper limit can rise to 27 ° C, and the lower one is better left the same. This is due to the fact that under natural conditions the orchid tolerates good temperature drops and this contributes to its active flowering.

After a long and correct dormancy period, the orchid will delight you with abundant color
Orchids should be watered abundantly, especially in the most active phase of growth, but in winter the amount of moisture consumed is halved. It is worth noting that drought is not as dangerous for an orchid as a bay, so you need to water the flower carefully and it is better to do it under the shower, or leave the flowerpot in a container with warm water for 15 minutes, and then let the excess moisture drain.
Video: how I water an orchid
Orchid propagation by seeds
Growing an orchid yourself is a great temptation and additional stars on the florist's shoulder straps, but when faced with unexpected difficulties in the breeding process, many already at the initial stages abandon this business, not believing in their own strengths or simply ruining the material.
And all because orchid seeds are unable to germinate in the usual conditions for other plants - in the ground, and beginner growers with great enthusiasm sow orchids into ordinary earthy soil, dooming the seeds to inevitable death.

The structure of the seed, by the example of which one can understand what is lacking in an orchid seed
The thing is that the seed material of the orchid does not contain endosperm, in other words, it does not have any nutritional reserves and the embryo receives nutrition exclusively from the substrate, which must have a supernatural environment. That is why in the wild, orchids grow in symbiosis with fungi, including lower ones.
Where to get seeds
An orchid seed is about 15 thousand times smaller in comparison with a wheat grain, that is, it is completely indistinguishable to the human eye without the appropriate optics. That is, collecting orchid seeds is, in principle, difficult even to imagine, and even more so to germinate them. It is possible to harvest an orchid seed crop only in an equipped laboratory, and therefore, when asked whether orchid seeds are on sale, flower shop sellers only silently smile. But mother nature did not leave her orchid children without the opportunity to reproduce and compensated for the small size of the seed by its quantity.
Opened Orchid Seed Boll
One orchid flower forms a seed box, which contains from 3 to 5 million seeds, and due to their low weight, any breeze carries this dust around all the surroundings. The seeds settle on trees and undergo rigorous natural selection.
Video: seed capsule development (5 months)
Seeds are a set of identical cells that are unable to develop independently. Even in the right environment, few are lucky to make their way to the light, and by a miracle the germinated seed can be considered a nodule-like formation, which is also called proto-feed. The seed can stay in this state for a couple of years, if it is not specially stimulated in any way.
Video: Seed capsule development (8-9 months)
The seeds ripen for about eight months, the ripening period can be up to 90 days, but this depends on the size of the flower, the age of the plant, the intensity of light, the season and many other factors important for the development of the plant. Ludisia discolor seed, for example, matures within a month, but this is a rare species of orchid.
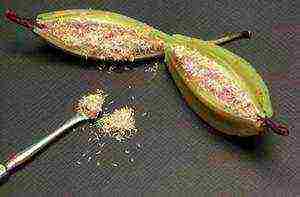
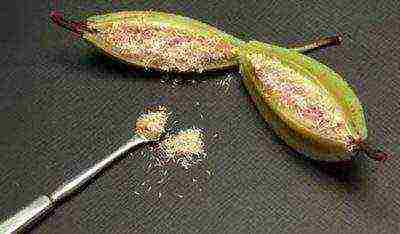
At that moment, when the seed pod is already fully grown, a napkin in the form of a pocket is tied to it from below so that the seed dust does not crumble when cracking.
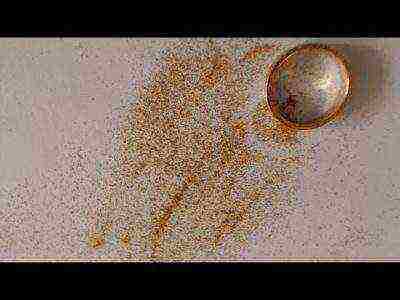
Orchid seed dust on white sheet of paper
When ripe, the capsule usually darkens and becomes brown in color, but sometimes it can remain green. When, by all indications, it is time to harvest the seed, carefully cut off the box and pour the seeds onto a clean sheet of paper.
Video: the seed box is ripe
How to germinate
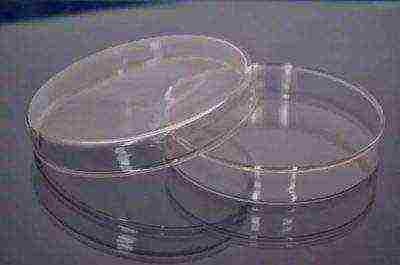
The safest way to germinate seeds is not to use flower pots or seedling containers, but glassware and, best of all, a special, chemical-type flask with screw caps. These containers must be re-released. To do this, use a pressure cooker or autoclave, if possible. Glass containers are boiled or poured over with steam for about an hour (in an autoclave this happens within 30 minutes, but the temperatures there also exceed the usual 100 degrees).
The germination substrate must also be sterile. As a substrate for the germination of orchid seeds, crushed sphagnum moss or a mixture of agar-agar polysaccharides, which are obtained from seaweed, is used, and it is known to everyone as a raw material for edible gelatin.

Agar Agar Raw Material Powder
It is enough to hold the moss in warm water with the addition of phytoverm, or you can quickly boil it, but then it will lose its bactericidal properties, and it will not be easy to maintain the acidity level in sphagnum, it should stay within 4.8–5.2 ph.
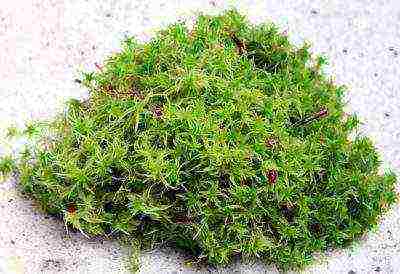
Fresh sphagnum moss
Agar-agar is brought to a boil and, after cooling, turns into a jelly-like form, but is poured into sterile flasks while still hot and liquid. A hot agar base with appropriate additives is poured into a container by 30% of its volume, closed with a stopper and boiled again for 30 minutes in a pressure cooker or in an ordinary saucepan on the stove.
Video: getting ready for seed germination
There are also special, artificial substrates in the form of hydrogels, which play the role of a base in the preparation of a nutrient mixture for germination.
The nutrient medium for germination must be rich in sugars and other elements.
This is how Knudson's nutrient medium looks like: jelly-like turbid mass
Under laboratory conditions, up to half of its volume of fructose and glucose is added to agar-agar per liter of water. And when preparing a mixture at home, Knudson's medium is often used, which can be bought in specialized flower shops, and its high productivity is noticed.
But in practice, they use its modified and simplified form according to the Cherevchenko method. To prepare it, you need to take a liter of water and dilute it in it:
- one gram of calcium nitrate;
- a quarter gram of potassium phosphate;
- the same amount of magnesium sulfate;
- half a gram of ammonium sulfate;
- 0.05 grams of iron chelate;
- the same amount of sodium humate;
- one gram of activated carbon;
- a tablespoon of sugar;
- 10 grams agar agar.
For the convenience of measurement, one gram of a loose substance can be taken as a standard as a third of an ordinary thimble, and 0.05 grams - at the tip of a knife. In the resulting mixture, orchid seeds sprout en masse, the main thing is to keep the mixture in a sterile and closed container at the correct temperature.
Often amateur flower growers prepare a nutrient mixture from improvised means, for example, for half a liter of unsalted tomato juice and the same amount of distilled water, dilute Vito fertilizer in liquid form and add a glass of starch with a tablespoon of sugar.
Before placing seeds in the mixture, it is important to pass the sterility control, namely, to leave closed sterile containers with the substrate sterilized inside for five days. If mold appears inside by the end of the period, then the sterilization process will have to be repeated.
If the mixture is ready for planting, then it remains to disinfect the seeds. For this, a calcium hypochlorite solution is usually used, in which you need to keep the seeds for 10 minutes, and then immediately transfer them to the substrate using a pipette.The solution is prepared simply: two teaspoons of bleach are diluted in half a glass of water and the mixture is shaken for half an hour.
Planting germinated material
So, after disinfecting the dishes and the substrate separately, and then again together, there is still a risk of bringing disease-causing spores into the clean environment along with the seeds, so the seeds treated with bleach are transferred to a sterile substrate only through steam treatment. To do this, a grate is placed over a pot of boiling water, on which containers with a nutrient mixture are placed for germination inside. Seeds are removed from the chloride solution with a sterile pipette and placed in flasks or jars directly above the steam. The whole procedure must be done very quickly.
Video: trying to plant
The seeded containers are carefully sealed with cotton swabs (sterile, of course) and left in a warm place (18-23 ° C) with a duration of illumination of at least 12-14 hours.
At home, even the most pedantic hostess has a bunch of sources for bacterial contamination of flasks. Therefore, before the procedure, it is necessary to disinfect all objects and tools that will be used in the process of preparing the mixture and placing seeds in their "greenhouses". It is recommended to use sterile surgical gloves and a gauze bandage on the face.
Video: planting seeds
We transplant seedlings
It is possible to grow sprouted orchid seeds on ordinary, that is, non-sterile, soil only after a year. Seedlings are pulled out of flasks or jars by washing out. To do this, a certain amount of water is poured into the container and shaken in a circular motion. Thus, the germination mixture is washed out with water and the seedlings can be easily separated from the substrate.
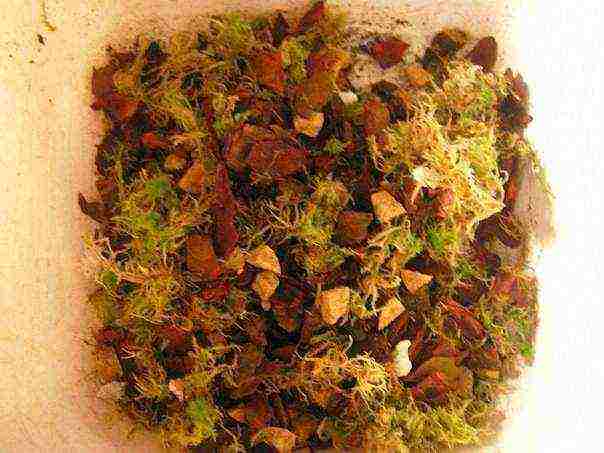
For the new "orchid bed", crushed tree bark, preferably pine, and sphagnum moss are used.
chemical vessel, very convenient for handling small parts and liquids
At the bottom of the container, a drainage layer of scrap material, pebbles or expanded clay must be laid out. The diluted mixture with seedlings is poured into a shallow transparent dish with sides, adding a couple of drops of a foundationol solution, and the seedlings are transferred to a new substrate using a brush. It is most convenient to use a Petri dish as a dish.
The air humidity in the area of a new orchid bed must be maintained at the same level as for adult orchids, about 60%. Temperature and lighting remain the same as during germination.
Video: orchid sprouts
How long to wait for an orchid?
As already noted, the seed pod can mature within three months, and this is the shortest period. Most often, it begins to crack only at 8-9 months.

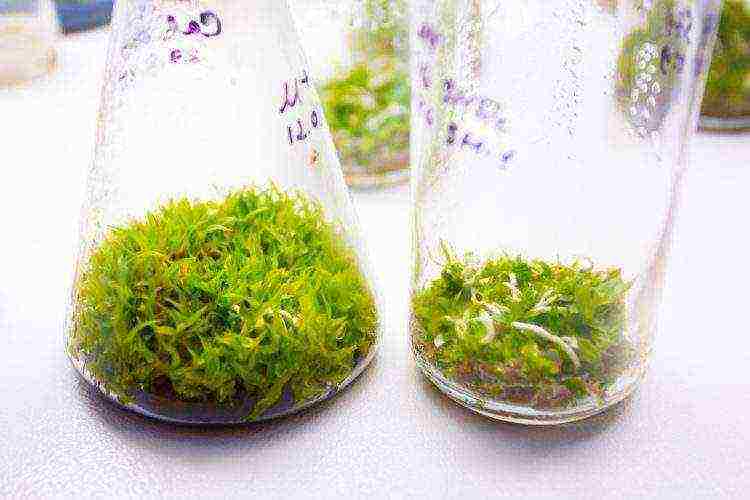
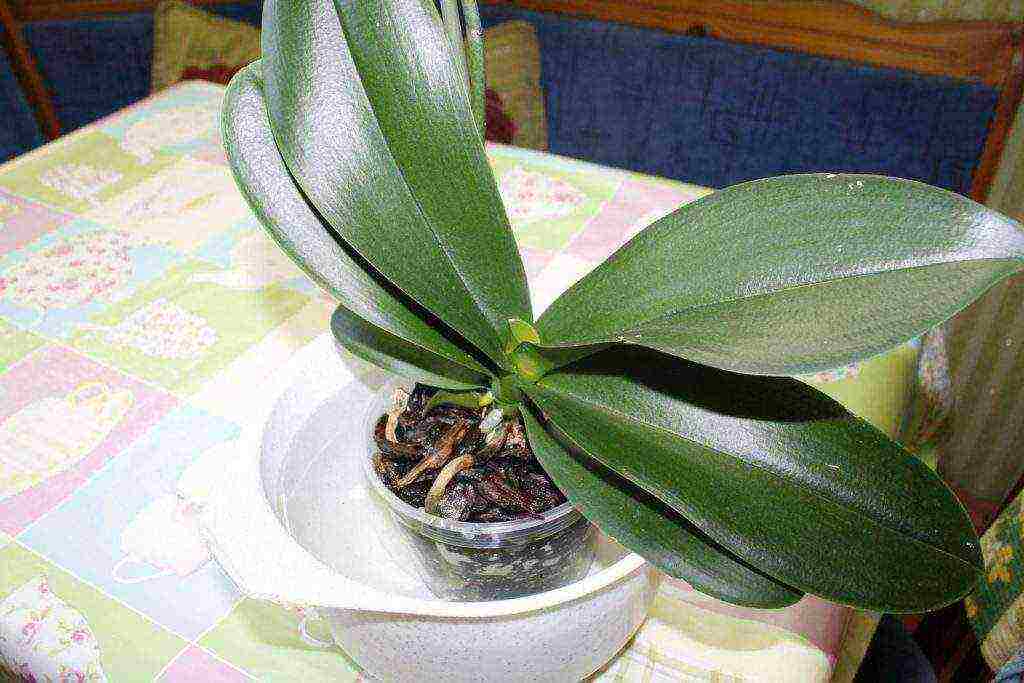
Orchid seedlings ready to be washed out of a sterile environment
The seeds sown in the nutrient mixture will also germinate from three months to a year, and the unpicked seedlings will wait for a separate pot for another couple of years. An orchid transplanted to a permanent place will bloom in the third year of its independent development.
If you take into account the entire process of reproduction, from the setting of the seed pod to the flowering of a new orchid, then it can drag on for seven long years. This is if you round up. But, subject to all conditions for the favorable development of each stage, the terms can be significantly reduced.
Possible problems
As it probably already became clear from the article, the first thing that can be done in order for everything to go wrong is to poorly process the sowing container, substrate, seed, or ignore the sowing point above the steam. Simply put, let the unfavorable bacterial microflora in, which will devour the nutrient mixture and the seeds will “die of hunger” or become food for the fungus.
The second most common mistake is impatience. Remember, if you checked the substrate for sterility and did everything according to the instructions, the only thing that remains is the most difficult thing - to wait. There were times when the flower growers did not have enough patience, and they filmed the process, as they believed that the idea had failed. Meanwhile, it was enough to leave everything as it is, because some processes are simply not visible to the human eye, but this does not mean at all that they do not proceed and do not move us closer and closer to the final goal.
Sometimes it happens that a person is faced with circumstances that are completely beyond his control and, having traveled all the way without hesitation, he is faced with curious facts. For example, it turns out that the orchid from which the seeds were removed has strong immunity and it simply is not able to become infected with the fungus, that is, the seeds will not be able to receive nutrition and will not germinate. Or a completely opposite situation may arise, when the immunity is weak and the fungus will simply absorb the seed.
It is important to create the necessary mutually beneficial balance of the two environments for a sustainable symbiosis aimed at results.

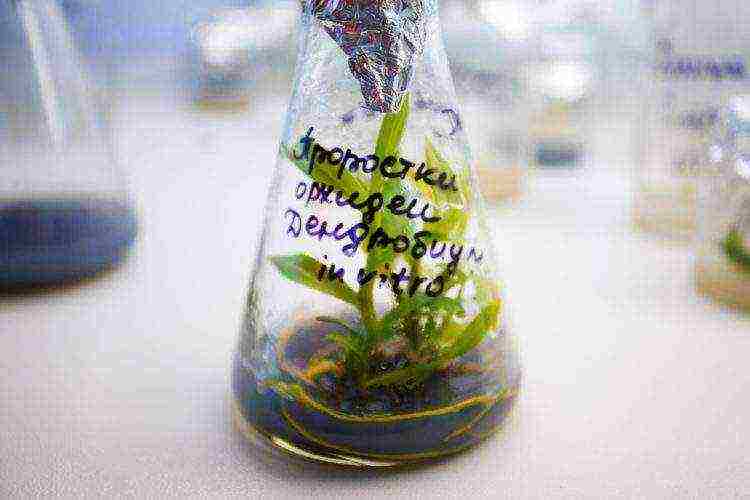
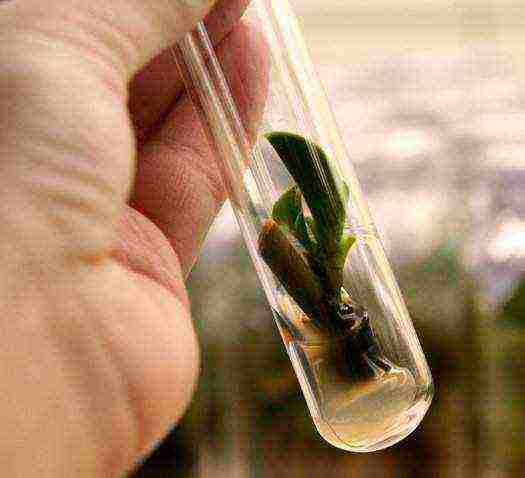
Orchid sprout in an ordinary test tube with a nutrient mixture
This is not easy to do, because even in nature, the chance of reproduction in orchids is very small, and in laboratory conditions, seed reproduction of an orchid also takes several years. Let the process not be started the first time, but sooner or later it will go on the right track and fragile, but charming orchid seedlings will appear.
Step-by-step process
- The first thing to do is to determine the maturity of the boll. It usually turns brown and begins to crack.

Ripe orchid seed pod, not yet cracked
- As soon as it became clear that the seed box is ripe, it is necessary to tie it with a napkin so that it does not lose the material during cracking.
- After cracking the seed pod, pour the seeds onto a sheet of paper in a bag or other convenient container.
Orchid seeds on white leaf
- Using the most acceptable recipe, prepare a nutrient mixture for germination or purchase it from a flower shop.
nutritious germination jelly mixture
- Glass containers for germinating seeds, together with lids, are disinfected by boiling or steaming.
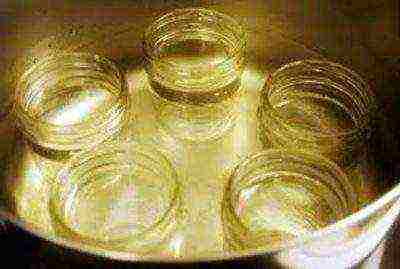
Sterilizing cans by boiling
- Places the substrate in the treated containers and heat treatment again
Any glass containers with a tightly screwed lid are suitable for germinating orchid seeds.
- We leave the sealed containers with the mixture for observation for 5 days in order to check for sterility. If the substrate in the container has passed the test, proceed to the next step.
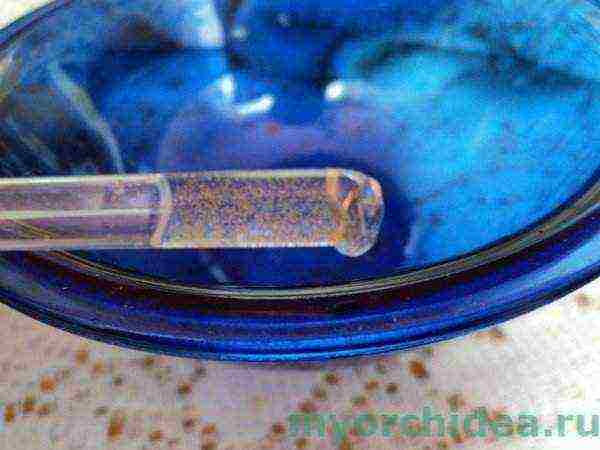
- In a chloride solution, we disinfect the seeds for several minutes and immediately plant them on a sterile substrate through hot steam using a pipette.
planting seeds through steam on a sterile substrate
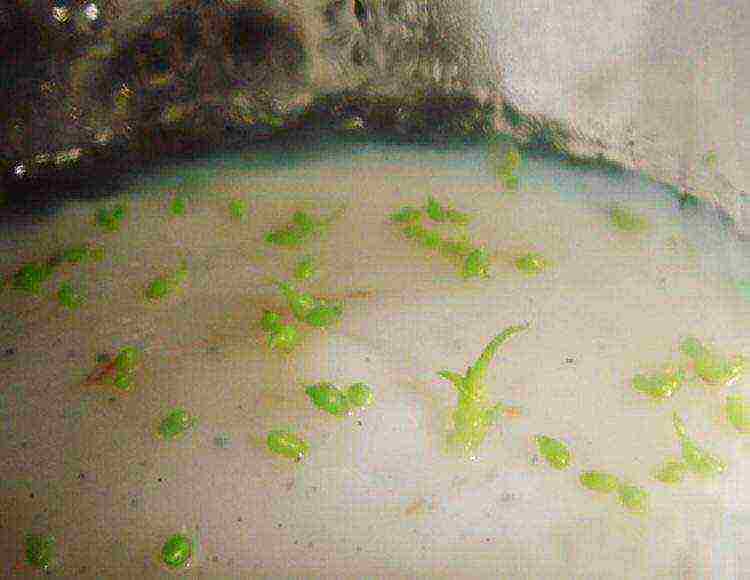
- Seeds in closed and sterile containers should be kept in the light at a temperature not lower than 20 ° C. seeds will begin to germinate no earlier than after 3 months.
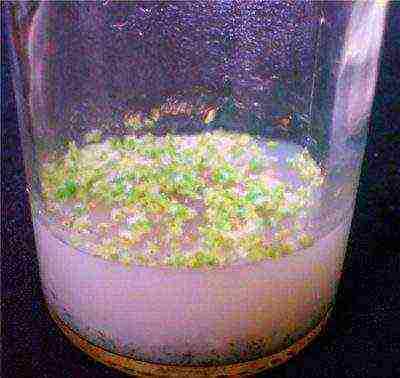
germinated orchid seeds in sterile solution
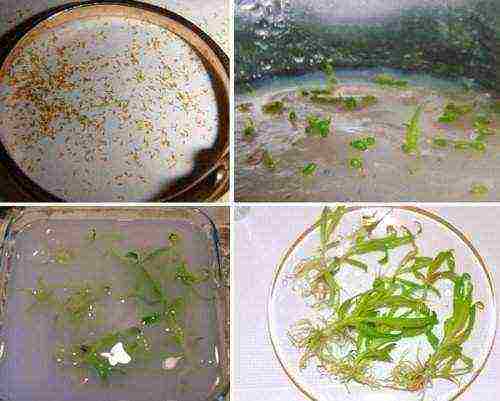
- Seedlings are transplanted from sterile containers into a spacious container with a bark substrate and installed over a hood to create the effect of a greenhouse.
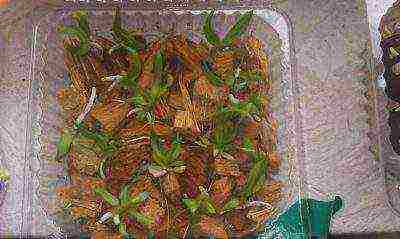
Grown orchid seedlings on a bark substrate
Video: how to grow an orchid from seeds at home
Seed reproduction requires maximum concentration of attention, one wrong step and you can start the whole process over again. It is necessary to be extremely careful and diligent in order to admire the flowers of those plants, which, before your eyes, have turned from seed dust into a gorgeous flower of the orchid family, only after five or even six years. But, leaving the irony behind, I would like to note that, despite all the seeming improbability of the process, the work invested will be rewarded without a doubt!
Rate the article:
(4 votes, average: 4 out of 5)