Content
- 1 Description of mushrooms honey agarics
- 2 Honey agaric cultivation technology
- 3 Growing honey agarics in a bank (video)
- 4 Technologies for growing home mushrooms
- 5 Preparing seedlings with your own hands
- 6 Growing summer honey agarics
- 7 Winter honey mushroom: growing in a bank
- 8 Growing honey agarics on stumps
- 9 Growing honey agarics on chocks
- 10 Growing honey agarics on sawdust
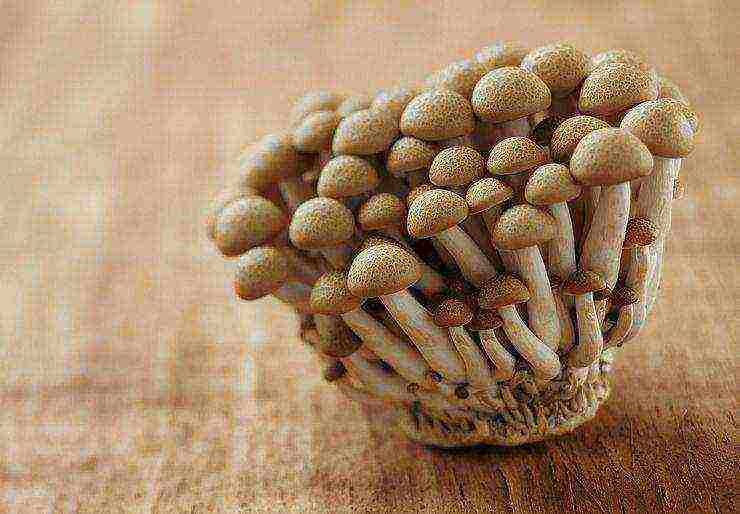
Not all varieties of these mushrooms can be grown at home in basements or on balconies. For such purposes, only a certain variety of honey agarics is chosen - winter honey agaric, which is very popular in Asian countries due to the presence in the composition of an impressive amount of nutrients that prevent the development of cancer. Young caps of such honey mushrooms can be eaten raw, added to any cold snacks without preliminary cooking. As for the legs of "wild" mushrooms, they are practically not used for food because of their rigidity. Honey mushrooms grown in an artificial environment, where certain parameters of humidity and temperature were strictly observed, turn out to be much tastier.
Description of mushrooms honey agarics
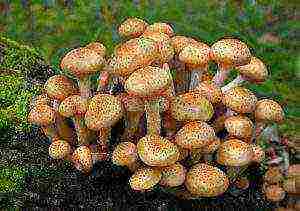
Winter honey agaric can be found in forests even in late autumn. These mushrooms grow well at low temperatures, so experienced mushroom pickers can easily find them right up to the first snow. This type of honey agaric has its own distinctive features. The cap is colored yellow or light brown and has a diameter of no more than 8 cm. The surface of the cap is slightly damp and sticky, shiny in the sun.
The leg of the mushroom is velvety to the touch and looks oblong. The stem color is usually orange or dark brown. The pulp of the mushroom is yellow or white in color. Old mushrooms taste tough and difficult to digest.
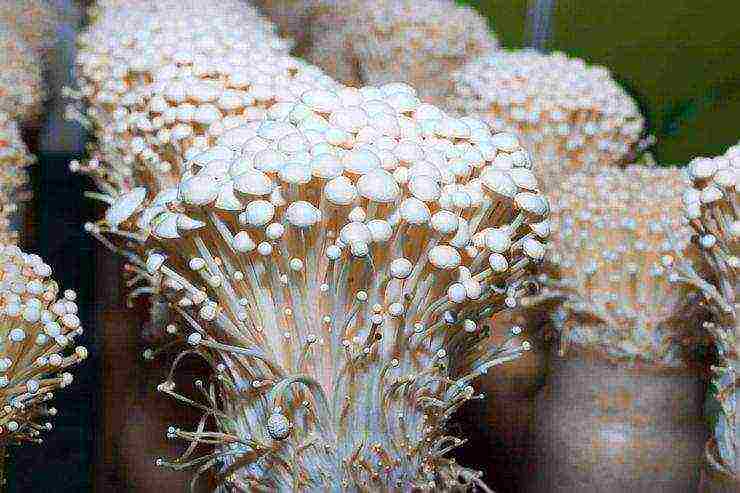
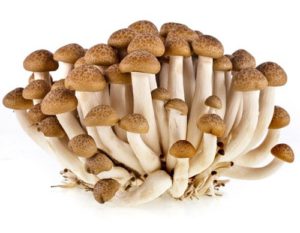
Home grown mushrooms can be pale in color if they do not receive enough light during growth. However, the nutrients in them are well preserved even after boiling. Honey mushrooms that grew in high containers are characterized by long elongated legs.
Honey agaric cultivation technology
Homemade mushrooms can be grown in greenhouses or basements, even under low light conditions. As a substrate block, you can use purchased containers from a store or make them yourself.
To make a two-liter block, you will need about 200 grams of sawdust of any tree species. Shavings from a planer are perfect, in which you can add sunflower husks, as well as small chips of branches. Then barley or pearl barley is added to this mixture. Sometimes grain is added. The resulting substrate is mixed with a small amount of lime flour or chalk.
The finished mixture is left to swell in water for about a few minutes, after which it is boiled for about an hour. This process creates an antibacterial environment in which all mold spores are killed. Excess water is drained, and the mushy mass is dried in the oven, while about 1/5 of the total volume of the original substrate is lost. Sometimes cooking is replaced by sterilization, which is carried out at a temperature of at least 90 degrees.
The processed mixture is packaged in ordinary glass jars or small plastic bags. The wrapped substrate is cooled to room temperature.
Crushed mycelium is poured into prepared packages with a substrate. They are tied with a rope and placed inside a cotton cork 3 cm thick.Measures for planting grain mycelium should be carried out strictly in a sterile environment. It is also necessary to leave a gap in the glass container in order to insert the cotton plug.
After sowing, the containers in which the mycelium is located are stored at a temperature of 12 to 20 degrees. The substrate will gradually change color, its density will increase. It will take about a month for the formation of the first tubercles of the fruiting bodies. Then the bags with mycelium are carefully moved to a place intended for future fruiting.
Winter mushrooms are grown at a temperature of 8 to 12 degrees, while the humidity in the room should be about 80%. If there is an elevated air temperature, then the containers with mushrooms must be immediately cooled. They are sent to storage in the refrigerator for several days. Shock chilling is sometimes allowed, in which containers are kept in a freezer for three hours.
In order for the mushrooms to actively begin to grow, the lids are removed from the cans and the corks from the cotton wool are removed. As a rule, the direction of growth of fruit bodies depends on the source of fresh air. Where it comes from, in that direction and mushrooms will grow. A mushroom bunch is formed in the substrate. In rooms with high air humidity, a plastic film is removed from the block, which allows mushrooms to grow in any direction. Over time, such a container with sown mycelium begins to resemble in its shape a cactus with needles.
Honey mushrooms with long legs are much easier and faster to collect. Their length can be adjusted during fruiting. To do this, special paper collars are attached to the blocks, which are easy to cut out of the remaining packaging from the store substrate. Honey mushrooms with short legs are grown under intense light without collars.
Winter mushrooms feel great at any time of the year on glazed balconies or loggias, while maintaining their high yield. However, in the summer months, additional air humidification is still needed.
From all of the above, we conclude that the cultivation of winter mushrooms can be done without much effort at home. However, the fruiting bodies of the mushrooms should not be allowed to enter the fruit trees. Honey mushrooms have the unique ability to grow not only on dead wood, but also to settle on the bark of living trees, which can pose a serious threat to your garden plot.
Growing honey agarics in a bank (video)
Honey mushrooms are delicious and outwardly beautiful mushrooms that are ideal for winter preparations, and are also used fresh in hundreds of different dishes.
Unpretentious mushrooms at home grow no worse than in nature, they are divided into two main types - winter and summer, and we will consider in detail the features of each. Self-cultivation of mushrooms is not only fascinating, but also very useful, at any time of the year this product, beloved by many, will be on your table.
Technologies for growing home mushrooms
Depending on the type of honey agarics (winter or summer), they are grown in several ways:
- On the stumps
- On chocks
- In sawdust
Growing summer honey agarics
Summer mushrooms are grown mainly outdoors: in gardens, summer cottages, vegetable gardens. There is no need to create any special conditions for them, nature itself takes care of the mushrooms.
Although, for cultivation on an industrial scale and for sales, large indoor premises are used so that no weather conditions will damage the crop. Namely:
- Hangars
- Barns
- Cellars
Growing winter mushrooms
For the winter look, banks are used, into which the substrate is poured. It is advisable to set aside a separate room for such mushrooms, not necessarily large.
Basement, barn, balcony - such premises are quite suitable for growing mushrooms.
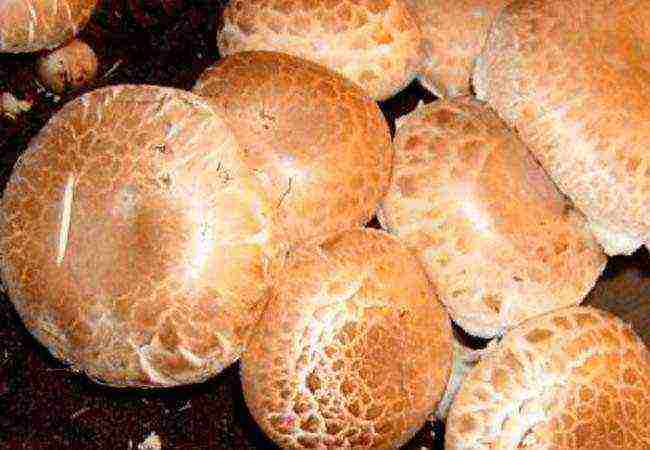 Growing honey agarics at home
The room should be kept at a temperature not higher than + 25ºC and not lower than +12 ºC with a constant air humidity of at least 80%.It is necessary that the room has good ventilation and is daily lit with natural or artificial, not too bright light. Mushrooms will grow healthy and in complete darkness, but they will look pale, nondescript.
Growing winter mushrooms is an activity that requires a little more attention, but it is justified by the fact that you can have these wonderful fresh mushrooms on your table all year round. Some people breed honey mushrooms right on the balconies of their apartments.
Preparing seedlings with your own hands
Regardless of whether you want to plant mushrooms in summer or winter, the seedlings can be bought in the store or prepared by hand. It is the last method that we will consider.
The most convenient material thanks to which you can plant mushrooms is mycelium, growing in this way is not at all laborious.
You can get mycelium like this:
- Find old myceliums on wood that have already fruited in the forest. They are easy to detect by their characteristic white or yellowish bloom, some clearly show mycelium filaments (hyphae). If you smell such wood, then you will smell a pronounced mushroom smell.
- Break off pieces from the stump, if it is not possible by hand, use a knife or other tool.
- Dry pieces need to be crushed, they will serve as seedlings.
Sowing material from fruit bodies
Collect ripe mushroom hats, preferably the largest ones. They should be intact, without any damage. The dark brown inner side of the cap will indicate the maturity of the mushroom.
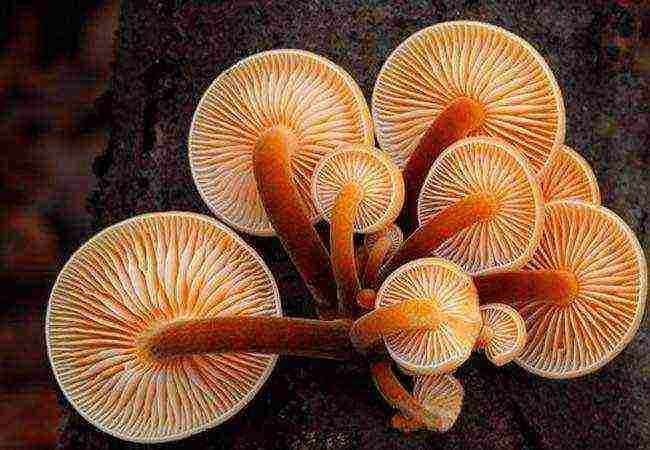 Ripe mushroom hats
Soak the caps in clean, non-chlorinated water for 24 hours. Then take out the mushrooms and mash them into gruel - this is your seed from the fruit bodies of the mushroom.
Growing summer honey agarics
Sowing of the summer species of honey agaric falls in May or the end of April, the last sowing can be done in August. If you live in the private sector or have a summer cottage, most likely you will be able to get most of the raw materials on the site and in its vicinity.
Growing honey agarics on stumps
This method is suitable for hobbyists. You can create hemp myceliums right in the forest or on your site. The planting technology is quite simple and does not require any financial investment.
Find the stumps of deciduous trees. Coniferous varieties are not suitable for this, the resins they contain inhibit the growth and development of fungi. Hemp of aspen, maple, poplar, birch are ideal, and trunks of fruit trees are also suitable. The stumps should be undamaged, rotten and not rotten.
Hemp should be checked for moisture, if they are completely dry, it is necessary to moisten them abundantly with water a couple of days before planting.
In such natural conditions, planting is best done in early May, at this time of the year the air temperature and its humidity are best suited for the rapid growth of the mushroom. How to grow mushrooms in the country from mycelium? - just like in the forest, of course, provided that there are not destroyed stumps from felled trees on your site.
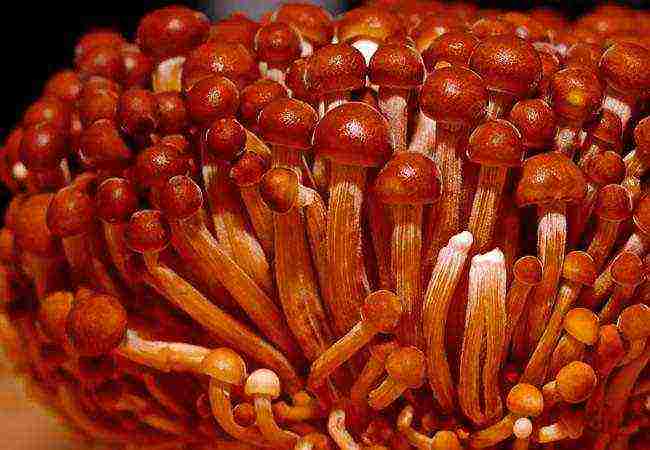 Growing honey agarics on stumps
Seeding technology
First, the mushroom mycelium or other seedlings are prepared. You will also need a small amount of sawdust.
- Small and not too deep cuts are made on the stump. For this, it is better to use a hammer and chisel. You can make holes with a drill. Depending on the size of the stump, there may be 6-15 such depressions. It is important not to overdo it, otherwise the stump will simply collapse after a short time.
- The seed is placed in the grooves and covered with wet sawdust. Some people advise covering the stump with plastic wrap to harvest faster. But in this case, it is necessary to ensure that there is no excess moisture inside and the decay process does not begin. Therefore, it is still better to throw sawdust and dry branches on the stump.
The timing of the first harvest depends on the climatic conditions of the region and the structure of the stump itself. Sometimes it turns out to collect seedlings in the fall, in other cases mushrooms appear no earlier than the next year.
Fruiting continues for 4-8 years.
Growing honey agarics on chocks
This method is best suited if you want to grow honey agaric in the country and in the garden, and not outside them. You will need deciduous tree chunks to mimic tree stumps.
It is desirable that the trunks be freshly cut, not yet dry. If you intend to store the lumps for some time, then water them from time to time with water, they should not dry out.
 Growing honey agarics on chocks
- For planting mushrooms, the chocks are buried in the ground 15 centimeters at a short distance from each other. To do this, it is better to choose an area where a minimum of direct sunlight falls.
- As in the case of stumps, grooves are made in the chocks, into which the mushroom seedlings are hammered.
- From above, the chocks are covered with wet sawdust.
- During the warm period, artificial hemp should be watered every few days to keep it moist at all times. There will be enough natural precipitation in winter.
For successful wintering and an early spring harvest, cover the chocks with the onset of cold weather with plastic wrap, make small holes in it to maintain air circulation. You can remove the shelter with the release of frost.
This is exactly how the cultivation of honey agaric occurs at home, in summer cottages and gardens. Usually, those who grow mushrooms for sale use chocks, covering the area where myceliums are located with a canopy or build something like sheds. But for amateurs, a few square meters are enough for digging in stumps in the garden. Honey agaric spores rarely affect living trees, but it is still better not to place chocks close to fruiting trunks.
Winter honey mushroom: growing in a bank
Winter honey agaric has the name "flammulina". It is smaller in size than its summer cousin. In the wild, such mushrooms grow from autumn to severe frosts. At home, they can be bred all winter. The most convenient amateur way is to grow in jars, the most common, glass, three-liter.
The jar is filled with a substrate, into which the seedling material is then laid.
How to prepare the substrate
- The sawdust of deciduous trees is mixed with the bran in a 3: 1 ratio. If there is no bran at hand, corn cobs, buckwheat husks, sunflower seed husks are suitable.
- The mixture is soaked in water for 24 hours.
- After the time has elapsed, the sawdust is squeezed out and placed in cylinders, they need to be filled a little more than half.
- It is advisable to sterilize the jars with the substrate. This will protect the mushrooms from harmful microorganisms. Sterilization is done in the usual way, as in preservation.
- When the jars and all the contents have cooled, small holes are made in the substrate (you can use a simple pencil for this) and mycelium is introduced into them. The total amount of mycelium per jar should not exceed 7-8% of the substrate.
- Then the jar is closed with a plastic lid and holes are made in it with an awl.
- The jar is placed in a warm (23-25ºC) dark place and kept there for a month.
- After this period, shoots should already be visible. As soon as the height of the mushrooms reaches the lid, it is removed, and the neck is wrapped with cardboard to raise it. The protruding mushrooms can be lightly sprinkled with water from a spray bottle every other day, they love moisture.
About two weeks after that, you should be able to harvest your first crop. The mushrooms should be removed along with the stems. In a couple of weeks, the next batch of crops will rise. After removing it, the substrate must be changed and done again, as described in the procedure.
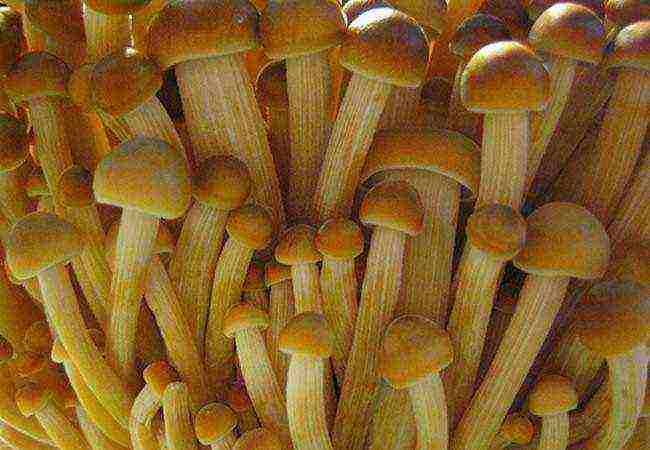 Honey mushroom winter cultivation
Now you know how to grow mushrooms in winter. Banks can be placed directly on the windowsills of the apartment, but on condition that the windows face the shady side. In a sunny room, it is better to put jars so that sunlight does not fall on them.If you want to get a big harvest and use a lot of cans, then it already makes sense to think about a separate room - a basement, cellar or non-residential balcony. Since mushrooms need high humidity, it will be difficult to maintain it in a living room in winter due to heating systems.
Wonderful, fragrant, mushrooms full of useful substances, mushrooms grow at home without whims, so more and more people are seating them. It is extremely difficult to fail here, because a minimum of materials and effort is required. The main thing is not to forget that these mushrooms love moisture and use high-quality seedlings. You can always buy it in the store.
 Honey mushrooms are very tasty and healthy mushrooms for the body. They help to achieve a balanced diet, and also serve as an excellent decoration for the table, both festive and everyday.
But not everyone can afford to buy them in a store or go to the forest, where, in addition to the healing air, you can pick up a basket of these wonderful mushrooms. For such people, the way out of the situation will be to grow mushrooms at home.
There are two types of honey mushrooms, the harvest of which, with a certain diligence, can be obtained at home: summer and winter, also known as flammulina.
In turn, the cultivation of summer mushrooms involves the use of three different technologies:
- on sawdust;
- on large wooden chocks;
- actually on the stumps.
Let's take a closer look at these methods.
Growing honey agarics on stumps
 The best time to start sowing activities is from May to the month of August. If there are suitable hemp of deciduous trees on your personal plot, then serious financial investments and labor costs will not be required. The only condition is for the stumps to be healthy (there were no bark beetles in them), with dense, not rotten wood.
This technique is closest to the growth of mushrooms in a natural environment, and a new mycelium can be formed in just two years, and then harvest from it for several years. Two days before planting, the selected stumps begin to moisturize abundantly. This must be approached with full responsibility. You can water with a regular garden hose, but long and at intervals, giving the water time to properly saturate the wood.
Stump preparation
The mycelium, the actual seed, can be ordered at a specialized store, or you can cook it yourself. To do this, you need to collect about two dozen completely overripe mushroom caps (select mushrooms very carefully, honey mushrooms are needed) with a diameter of 8-12 cm, with a dark brown bottom. They must be soaked in a bucket of water for 24 hours. Then the soaked hats are kneaded into porridge, mixed and filtered through cheesecloth folded in several layers.
After that, you can prepare the hemp. Small holes are selected on the sides. To do this, you need a chisel and a hammer. You should not make many such indentations - ten is quite enough. When the solution is poured into the niches, they should be sealed with sawdust or moss soaked in water. A standard ten-liter bucket is enough to handle ten stumps. If everything is done correctly, after 2 years you can harvest honey agarics.
Growing honey agarics on chocks
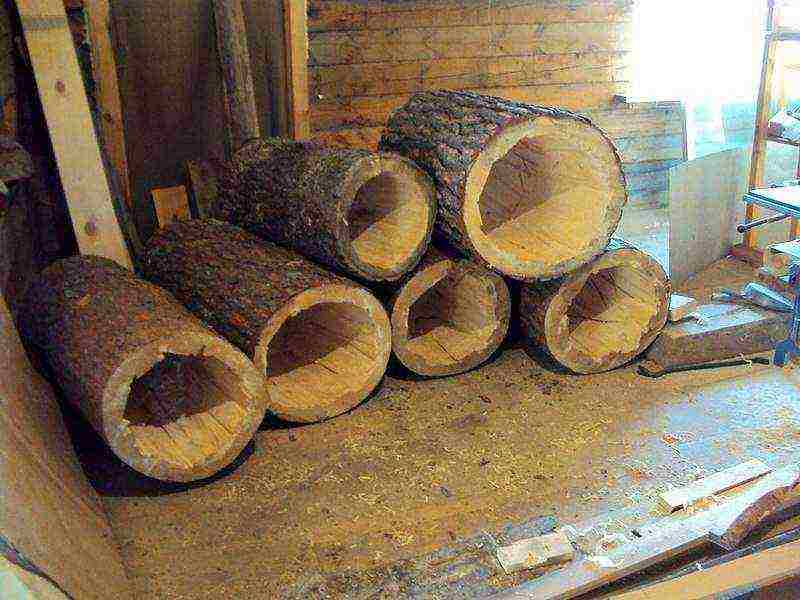
This method is very similar to the previous one, only in addition to the artificially created habitat and the hemp will not be quite real. Their role will be played by freshly cut deciduous chocks forty centimeters long and at least twenty in diameter. They are soaked in water, then buried in the ground up to the middle. Before that, you need to pour a bucket of water into each hole. Such artificial felling is organized in a place where little light falls. The entire space around the freshly made "hemp" is sprinkled with sawdust. They are treated with the same solution as natural stumps.

For a successful wintering, the chocks are completely covered with plastic wrap with holes that provide free air circulation.It will be possible to remove the film with the onset of summer heat. This method allows harvesting at the very beginning of summer and in the middle of autumn.
Growing honey agarics on sawdust
 Winter mushrooms are grown on sawdust. This does not require the presence of a backyard and specialized premises (if you do not plan industrial volumes).
If you have looked after houseplants and flowers, then you are quite capable of mastering the cultivation of honey agarics on the windowsill of your apartment. In their appearance, they will differ from those grown in the ways described above - a long leg and a small hat, no larger than five centimeters. This is because honey mushrooms will grow in three-liter glass jars. Within 45 days (the full period of the entire growing period), about one and a half kilograms of delicious mushrooms can be obtained from each container.
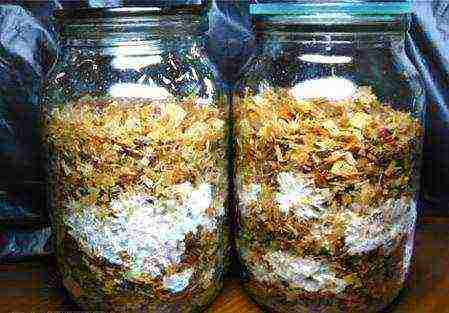
You should start by preparing the substrate. To do this, you can use:
- sawdust of deciduous trees and bran in a ratio of 3: 1;
- sawdust and finely crushed corn cobs or husks of sunflower seeds or buckwheat (3: 1);
- just the husks of seeds and corn.
Growing medium in the jar again
The mixture gets wet in water during the day, wrung out and laid out in banks. Each must be filled up to half. Then you need to make holes for the entire depth of the substrate. For this, a piece of wood with a diameter of 2 cm is quite suitable.
The jars are placed in a spacious container and pasteurized over low heat for an hour. The procedure is repeated the next day. It remains to wait for the contents to cool, 24 ° C is quite enough, and close them with plastic caps - the environment is ready.
Yes, it is necessary to provide ventilation holes in the covers, you can make them with an awl or a gypsy needle. Through them, the mycelium will be introduced into the substrate. Its volume should not exceed 7% of the amount of the contents of the jar. Infection is carried out with a common injection syringe.

Banks are kept at a temperature of 20-25 ° C for thirty days until the sprouting of the mycelium. After that, they are transferred to the windowsill. It is best to choose a dimly lit north side or arrange an artificial shade.
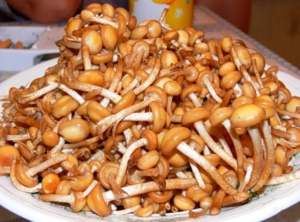 After waiting for the moment when the mushrooms grow up to the lid, it is removed and a strip of cardboard is attached along the edge of the neck. Your mushrooms will grow within this ring. Using a spray bottle, the caps are periodically sprayed, maintaining a humidity of at least 90%. The first harvest will be ready in 14 days from the moment the mycelium germinates. The mushrooms must be cut and the legs pulled out. The next batch will arrive in time in two weeks, after which the contents of the can must be replaced.
As you can see, there is nothing supernatural in growing mushrooms at home or on a personal plot. And in terms of their taste and nutritional value, they do not differ at all from those grown in the forest.
Therefore, buy mycelium in specialized stores, order online or harvest in the forest - and go for it. Mushrooms on your table can be not only from the forest or a store, but also grown by yourself.
Video: sowing mycelium honey agarics and growing in a jar

Sometimes I want to go out onto the balcony, like Jamie Oliver, pick up my own grown vegetables and herbs and stir something stunning out of them. And the balcony, by the way, looks much nicer if it does not store old pieces of iron that it is time to send to the landfill, but aromatic herbs and vegetables.
chose several interesting plants that take root well on the windowsill or on the balcony.
Pepper
On the windowsill, you can grow a hot pepper for diablo pizza. It will require a warm, bright place and varieties suitable for home cultivation: Carmen, Flint, Ogonyok, Ryabinushka, Bride, Indian Summer, etc.
The bushes are very cute and do not require large pots. Up to 50 fruits can be set on one plant. The optimum temperature is 25-27 degrees Celsius.
Carrot
For growing carrots at home, it is better to take mini-varieties such as "Parmex", "Sophie", "Vnuchka". They grow in 80-90 days and do not require a lot of space - they are quite satisfied with a pot or container. You can also take a funny round variety "Round baby".
The soil for the carrots should be light and well-drained. The vegetable can be grown in cut plastic bottles. The optimum temperature is in the range of 13-24 degrees Celsius.
Mint
Mint is a non-capricious and undemanding plant. It can grow on your windowsill or balcony, even in winter, if you arrange additional lighting. It can be grown from cuttings and seeds. If there is an opportunity to dig up a stalk in the country at home or from friends, it is better to use this method. Mint, grown from seeds, is not taken as actively, and it will take longer to wait for the harvest.
It is important to remember that the plant loves well-moisturized soil. And, when choosing a place for it, keep in mind that the lighting should be good, but it is better to avoid direct sunlight. The optimum temperature for mint is 20-25 degrees with a plus sign.
Green onions
Growing green onions at home does not require any special dexterity. But nevertheless, it is worth considering some nuances: the bulb that you will plant should be round, dense to the touch and free from rotting marks, the root cup should be well-formed.
Immediately after planting, it is worth putting the onion in a cool, dark place so that the root system is better formed, and only then the feather will need a lot of light. The optimum temperature is 18-20 degrees, you should not overheat, because then the growth of greenery will stop.
Basil
Any kind of basil grows well in flower pots and boxes. It is better for him to allocate a sunny place, water well, keep warm and provide good drainage. For planting, you can use both cuttings and seeds. At the same time, the cuttings will quickly give the first harvest, but they will not last long, since they will bloom quickly. You will have to wait longer to harvest from seeds, but such a bush will also last longer.
The optimum temperature for basil is 20-25 degrees Celsius. In winter, backlighting is required for about 3-4 hours to increase daylight hours.
Cucumbers
To grow cucumbers on a windowsill or on a balcony, you should take a closer look at the hybrid varieties that are marked with the F1 icon. If all conditions are created for a plant, it can give 3-4 dozen fruits. Here you will have to tinker a little with the seedlings, but after transplanting into boxes, you will only need to water and cut the antennae.
Plants are planted in containers with a volume of at least 5 liters. It is important to remember that cucumbers are large water loaves and the ground should always be moist. The optimum temperature is 21-24 degrees Celsius.
Tomatoes
Dwarf varieties are usually chosen as home-grown tomatoes: Minibel, Florida Petit, Balcony Miracle, etc. You will have to take the most illuminated place in the apartment for this miracle. You will need to start with seedlings, then plant them in containers, tie them up, feed them and protect them from the cold. This is one of the most troublesome balcony crops, but pride in the work done and gardening talent is attached to the crop.
It is important to remember that tomatoes, like all plants, love water, but they can be easily poured over. Therefore, water should be done carefully. The optimum temperature is 23-25 degrees Celsius.
Sorrel
Sorrel, in addition to its wonderful taste, is distinguished by the fact that it calmly tolerates shaded places. It can be grown from rhizomes of 2-4-year-old plants with buds or from seeds of such varieties as "Maikop", "Altai", "Odessa broadleaf".
It can grow at 5 or 20 degrees Celsius and even withstands small frosts. So on the balcony it can be kept until the last, and if the balcony keeps heat well, then it should not be cleaned for the winter. The leaves are cut at a height of 8-10 cm, this must be done carefully so as not to damage the growth buds.
Ginger
Ginger is not only a delicious seasoning, but also a beautiful plant.If you plant it at home, the shoots can grow up to a meter in height. Pieces of ginger root are planted, consisting of at least a couple of sections with live buds. If the root is dry, you can hold it in warm water for several hours to wake up the kidneys.
The root should not be planted very deeply, and until the first shoots appear, it should be watered very sparingly. Keep ginger in the light, but away from direct sunlight. The optimum temperature is 20-25 degrees Celsius.
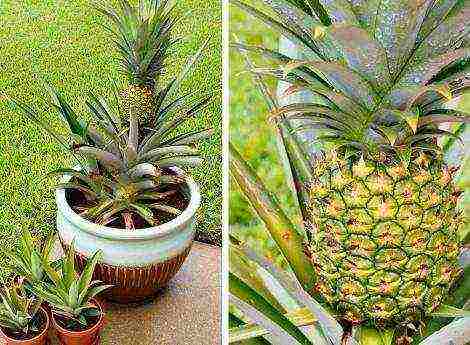
A pineapple
To grow pineapple at home, you need to be patient and find a suitable fruit - purchased in the warm season and with an intact tail. The tail is cut with a knife, preferably without pulp, dried for 3-4 days in the light, and then germinated in clean river sand. When the roots appear, after about a month, it can be transplanted into a pot of soil.
Pineapple loves light, warmth and spraying. The fruit will appear about 2 years after planting. The optimum temperature is 23-30 degrees Celsius.
Strawberry
Strawberries can be grown at home all year round, in winter you will need to arrange lighting. To do this, you should choose remontant strawberry varieties that bear fruit more than once a season, but constantly, for example: "Yellow Miracle", "Queen Elizabeth", "Mount Everest". You can grow strawberries from seeds, but the easiest way is to buy ready-made seedlings. After 3-4 months, a couple of bushes will give new rosettes, and your plantation will increase by 3 times. Meanwhile, as with the germination of seeds, you will have to tinker.
Strawberries are afraid of the cold, so they should be taken out to the balcony only when the weather is warm. The optimum temperature is 18-24 degrees Celsius. It is important to remember that since there are no insects at home, you will have to pollinate the flowers yourself with a brush.
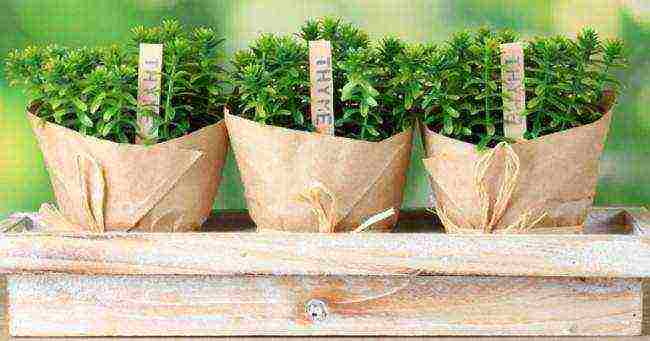
Thyme
Thyme is a wonderful herb. It is very fragrant, tasty and extremely unpretentious. Thyme naturally grows in dry areas with poor soil. Therefore, ruining it at home is not easy. The most important thing he loves is light. It is not afraid of direct sunlight, and it can be placed even where other plants will die. The only difficulty is watering: in the sun, the soil in a small volume of the pot dries quickly, and the thyme itself does not like waterlogging.
It also makes no sense to overdo it with fertilizers - thyme will not appreciate it. It can be grown both from cuttings and seeds.
What goodies grow in your home?

