Content
- 1 What can be germinated on microgreens
- 2 The benefits of microgreens
- 3 How to grow microgreens
- 4 A growing method of growing popularity
- 5 Substrate
- 6 What to grow?
- 7 Growing microgreens step by step
- 8 Green mini farm at home
- 9 What crops can be grown as microgreens?
- 10 How to grow microgreens - step by step instructions
- 11 What to cook with microgreens?
- 12 What are microgreens?
- 13 What is the taste of microgreens
- 14 How to choose and where to buy microgreen seeds
- 15 How to grow microgreens at home
- 16 Health Benefits of Microgreens
- 17 Contraindications (harm) of microgreens
- 18 The use of microgreens in cooking
- 19 Microgreens as a profitable business
Microgreens of cilantro, dill, basil, celery, etc. - all these plants, saturated with vitamins, can and even need to be grown at home. This is easy and simple to do, and most importantly, it will cost several times less than buying greens in the market or in a store. Therefore, it is high time to say goodbye to the stereotype that home gardening is exclusively the lot of grandmothers with seedlings in sour cream cans. Today you can buy not only seeds, but also all related products, up to stylish containers for germinating microgreens, which are now so loved by adherents of healthy eating.
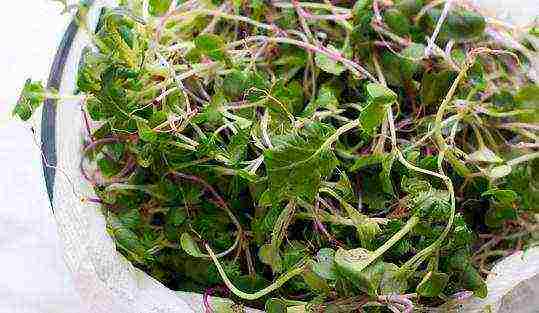
Microgreens are sprouts of greens, legumes, cereals, vegetables at the 2-3 leaf stage, which are extremely rich in vitamins and minerals. Nutritionists say that at the time of active growth, the plant contains the maximum amount of nutrients. For example, the content of vitamin C in wheat shoots significantly exceeds its concentration in the ears. And the composition of red microcale contains 40 times more vitamin E than in a mature plant.
Do you want fresh and organic greens on your table all year round? If yes, then it is recommended to make your own small "conveyor": choose 2-4 types of plants and sow them in turn. For many of them, even soil is unnecessary; gauze or cotton wool can be used instead.
Microgreens can be consumed as they are in their pure form, they are very juicy, or they can be added to salads, soups, smoothies, sandwiches and snacks, many are even used to make juices. Also, decorate your dishes with such an unusual product - your family and guests will love it.
What can be germinated on microgreens
For the purpose of growing microgreens, anything is suitable: greens, salads, legumes, herbs, cereals, onions, vegetables (for example, beets, cabbage). Beans are one of the few exceptions, as they contain toxic substances during growth.
The most common plants for sprouting are: broccoli, basil, peas, mustard, buckwheat, clover, coriander, red cabbage, watercress, flax, onion, alfalfa, chickpeas, oats, sunflower, wheat, radish, arugula, beets, celery, dill, garlic, lentils, spinach, barley.
The benefits of microgreens
Microgreens are very useful food for humans. It not only contains, as mentioned earlier, a large amount of vitamins and minerals, but also has a positive effect on the functioning of the whole organism.
- possesses bactericidal and antiparasitic properties,
- strengthens the immune system,
- protects against free radicals,
- cancer prevention,
- increases the level of hemoglobin,
- improves the functioning of the endocrine system,
- removes toxins, toxins,
- normalizes metabolism,
- restores acid-base balance,
- prevention of urolithiasis,
- increases lactation,
- accelerates the healing of wounds and ulcers,
- strengthens the nervous system,
- increases endurance and performance,
- has a rejuvenating effect,
- improves skin condition.
How to grow microgreens
Self-cultivation of microgreens has a huge plus - you are sure of the benefits of the product that ends up on your plate, since you yourself choose organic seeds for germination, a substrate and use high-quality water.
As mentioned above, today you can easily buy special containers, jars and trays for germinating sprouts. They greatly facilitate the task, since the microclimate inside them is as close as possible to natural conditions for seed growth. As a rule, on store shelves you can find goods made of glass, wood, clay and plastic. Lovers of natural products give their preference to the first three. Ordinary glass or ceramic baking dishes are also suitable for germinating microgreens.
The sprouts can be grown on organic cotton wool, sacking and, of course, on the ground. If you want to get really healthy greens, then the soil should not contain harmful fertilizers and additives. Use soil taken from a summer cottage or buy from a specialized store. This is not a problem now.
Of course, you must use drinking water, not from the tap. For these purposes, a spring or structured one is perfect.
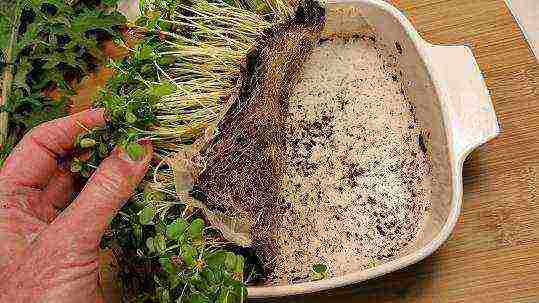
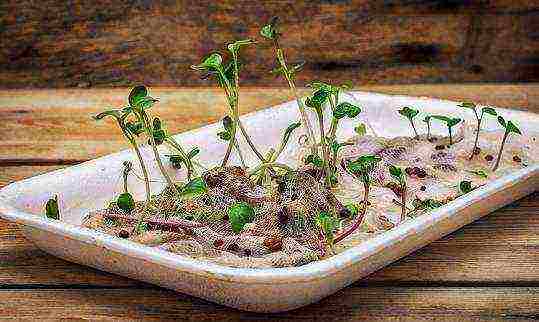
An example of growing microgreens using an oven mold.
1. Soak seeds in water for 8 hours. Many people skip this step.
2. Pour out the water, and rinse them.
3. Pour soil into the bottom of the container and distribute it evenly over the surface. The substrate layer should be 5-6 cm. Sprinkle it with water.
4. Sprinkle the seeds, then add a little earth on top of them and sprinkle lightly with water again.
5. Place containers in a bright and ventilated place. Moisten the ground from time to time, it must not dry out.
Finished microgreens are stored in the refrigerator for 1 week.
How to grow microgreens without soil
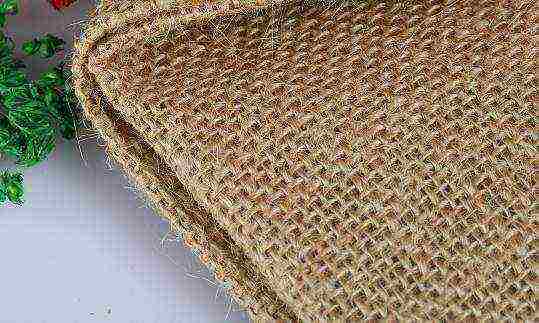
Agree that it is not very convenient to store land in large quantities in an urban environment. Therefore, we advise using linen or jute burlap for growing microgreens, as it is an environmentally friendly material. Unfortunately, it is not easy to find it on sale. The most readily available substrates are medical gauze and organic cotton wool, which can be purchased at specialty health stores and pharmacies.
1. Soak the required amount of seeds in water overnight.
2. Then rinse them thoroughly. This must be done so that mold does not form in the future.
3. Cut off a piece of cheesecloth (sized to fit your germination mold). It takes about 5-6 layers so that moisture is well absorbed and there is no sharp drying.
4. Place cheesecloth on the bottom of the container, and on top of it - soaked seeds. Spread them evenly over the surface so that all seeds receive oxygen, are well ventilated, and mold does not form.
5. After that, sprinkle them generously with water, but avoid the "swamp".
6. If you plan to use several containers of the same size at the same time, then stack them on top of each other. Pull cling film on the last tray and be sure to make 2-3 holes in it. This is necessary in order to create a greenhouse effect to retain moisture and air ingress. You can use a plate or tray instead of a film. Since they are not tightly adjacent, oxygen will enter the interior of the tray.
Leave the resulting structure for about 1 day, periodically look after your "harvest".
7. As soon as you notice the first shoots, then put the trays separately from each other in a lighted place.Do not forget to periodically spray them with water, do not allow the substrate to dry out.
Microgreens like a humid and ventilated room, t = 18-20 ° C.
Growing microgreens on the windowsill will diversify your diet in cold weather, as well as enrich your body with useful minerals and vitamins.
Are you interested in germinating seeds at home?
If you find an error, please select a piece of text and press Ctrl + Enter.
comments powered by HyperComments
Hello everyone!
Friends, today I want to continue the topic of growing microgreens. And this information will be doubly useful now, during the days of Great Lent, since it will be about growing microgreens at home. At this time, there is a lack of juicy greens from the garden and green vitamins.
There are, of course, greens in supermarkets. But who knows where and how it was grown? And who will guarantee that it is environmentally friendly? Indeed, in pursuit of the ruble, some entrepreneurs prefer quantity over quality. What to do? - you ask. There is an exit. Grow microgreens at home! It's simple, it's interesting, it's useful and beneficial!

A growing method of growing popularity
Let me remind you that microgreen is a plant that is grown to the phase of two cotyledons. It is in this phase that the plant contains the maximum amount of vitamins and minerals: micro and macro elements. Super healthy and will decorate any dish, and on fast days it is simply irreplaceable. There are many ways to grow microgreens. There are even special germinators. There are many of them on the market. For every taste and wallet. But this is a topic for a separate article. We organize everything with our own hands.
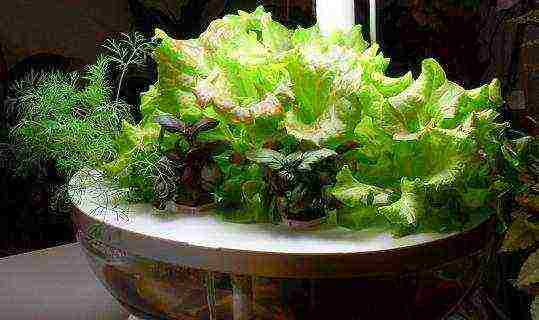
You can use soil as a substrate. But I propose to do without land. In the last article it was mentioned that there is such a thing as hydroponics... This is growing plants without land using an aqueous solution. The English scientist Sir Ulyam F. Guerick drew to a conclusion about such a method. It was he who became the founder and now this method is gaining popularity.
Substrate
So, we have decided on a way to germinate seeds. As a substrate (substitute for earth), you can use gauze (this is the most affordable option), ecowool (more expensive). But I recommend using burlap. Linen or jute. Experience shows that this is the best substrate. Why? This is the most environmentally friendly material.
TIP: boil the burlap and iron it with an iron.
After that, it is ready for use.
What to grow?
There are many options. As containers for microgreens, you can use plastic trays and containers, lids from plastic boxes from Ikea or other plastic dishes. But a more sustainable option is a glass or ceramic baking dish.
Growing microgreens step by step
Now about the seeds. What crops are used for growing? Most onions, cabbage, herbs. Start with simple ones like broccoli or radishes.
- Soak the seeds overnight or for 8 hours. After that, the seeds must be washed. This is to prevent mold from forming.
- Then we cut off a piece of burlap according to the shape of the container you have chosen. Do not spare burlap. Make 6 - 7 layers. This will allow moisture to be absorbed better and avoid drying out.
- Then we spread our seeds on a substrate and spread over the entire surface in one layer. It is important to place the seeds evenly. This will allow them to get enough oxygen and good ventilation. This will prevent the formation of mold.
- After that, we spray abundantly from a spray bottle. But without fanaticism. If you have several containers, you can stack them on top of each other.
- Pull cling film over the last form. Be sure to make several holes in it. The film will create a greenhouse effect and will not allow moisture to evaporate much.The holes will allow air to enter, as mold can form without air.
- We leave our seeds for a day. We periodically monitor the seedlings. As soon as green sprouts appear, the container can be opened and placed in the sun or in the most illuminated place. If you live in Murmansk, for example, an LED lamp may be suitable as a light source. Do not forget to spray. Drying should not be allowed.
- Spray 2 times a day. Temperature range 18 - 22 degrees. Be patient and in a week, maximum 10 days, you will get the result. Subject to all the rules.
Green mini farm at home
Given the increasing popularity of a healthy lifestyle, the demand for microgreens is growing by leaps and bounds. It is especially popular in megacities such as Moscow and St. Petersburg. Having installed several shelves in your apartment or loggia, and having created all the conditions, you can organize a microgreening farm at home. If you have achieved great success in this business, join, write on the blog in the comments or personally through the contacts section, I will help you create a video for social networks or open an online school.
Grow for yourself or for sale - choose yourself. But one thing is clear: microgreens are a useful thing, I would say irreplaceable. Especially in winter and early spring. Ask the questions you are interested in, share the article in the social. networks, subscribe to updates. Bye everyone, see you soon.
The cultivation of microgreens today is mainly practiced by adherents of a healthy diet. And for many people, even this name itself is perplexing. What is microgreens and how to grow them?
Microgreens are seedlings of plants that are eaten even before real leaves appear on them. A natural question arises: why are there shoots of, say, lettuce, a few centimeters high, if you can wait a couple of days and pick full-fledged greens? It turns out that the nutritional value of plants at this stage is considered the highest.
The maximum amount of vitamins and other substances useful for the body is contained in greens and vegetables at the time of their active growth. That is why young shoots are much more useful than mature plants.
The content of vitamin C in wheat seedlings exceeds its concentration in freshly squeezed orange juice.
What crops can be grown as microgreens?
Anything can be grown as microgreens: greens, salads, herbs, cereals, onions, beets, and cabbage. Plants are sown according to the principle: "in one container - one crop" or mix different types of seeds. If you doubt that you can independently choose the species suitable for the mix, purchase ready-made seed mixtures in stores.
| Culture name | Useful properties of sprouts |
|
They are rich in carotene and vitamin C. They contain a complex of healthy microelements. Broccoli sprouts are a natural source of sulforaphane, a detoxifying agent that has anti-cancer and antibacterial properties. |
|
|
Contains carotene, sugars, essential oils, vitamins C and PP. Good for digestion. It goes well with vegetable, meat and fish dishes. |
|
|
Rich in protein and phosphorus. Contain vitamins of group B, as well as vitamins C, PP, E, K. |
|
|
They contain rutin (useful for fragility of blood vessels), folic acid (helps hematopoiesis). People with diabetes can use buckwheat sprouts as a substitute for starchy foods. |
|
|
They have a high content of vitamins C and E. Suitable for adding to salads and sandwiches. |
|
|
Contains more than 10 types of essential oils, as well as acids, minerals, vitamins, tannins. |
|
|
Recommended for people with poor eyesight. They contain proteins, phosphorus, iron, magnesium, iodine and sulfur. Rich in vitamins B, E, PP, D. |
|
|
Alfalfa sprouts are a source of protein.They contain antioxidants, iron, magnesium, phosphorus, potassium, as well as vitamins A, C, E, K. |
|
|
Oat sprouts are rich in vitamins C, E, K, as well as magnesium, calcium and iron. Indicated for use in diabetes and anemia. Strengthens the immune system and the nervous system. |
|
|
Sunflower sprouts, like alfalfa, are considered a source of vegetable protein. They contain a large amount of vitamins, amino acids, antioxidants. |
|
|
They contribute to the normalization of metabolism and the elimination of toxins from the body. With constant use, they increase immunity. Contains B vitamins, as well as iron, calcium and phosphorus. |
|
|
They contain a large amount of vitamin C. The use of radish sprouts in food helps to improve the condition of the skin and hair, and the general strengthening of the body. |
|
|
Due to the high content of vitamins and minerals, they have a tonic effect. They help to strengthen the immune system. Have a positive effect on digestion. It goes well with salads and main courses. |
|
|
Sprouted lentils have a beneficial effect on the development of blood cells, which is why they are extremely useful for anemia and low hemoglobin. |
How to grow microgreens - step by step instructions
Growing microgreens is as easy as shelling pears. To do this, you only need special germinating containers, seeds and water.
Step 1
Soak the seeds of your chosen crop in water for several hours to swell and germinate better and faster afterwards. It is enough to take a plastic cup, place the seeds there (in our case, daikon) and fill it with water.
Step 2
Take the bottom of the sprouting container and fill it with water.
There should be a free space of 1 cm from the surface of the water to the edges of the container.
Step 3
Cover the container with the top, a plastic mesh divided into several sections. Containers intended for germination of several crops at once can be divided into sections with different diameters of holes in the mesh.
Spread the seeds of the chosen crop evenly over the wire rack.
Step 4
Spray the seeds with a spray bottle to add extra moisture and place in a warm, bright place.
Step 5
When the seedlings have germinated enough that their roots are stuck in the net, start rinsing the herbs under running water. This should be done 2-3 times a day. After rinsing, be sure to refill the container with water to keep the roots of the plants moist.
Step 6
Harvest young greenery. Depending on the rate of growth of the culture, microgreens are ready for consumption in 5-10 days. Usually, the sprouts are harvested when the seedlings are 4 to 7 cm tall.
What to cook with microgreens?
Cottage cheese with sesame seeds and microgreens
Would need:
- 50 g cottage cheese a,
- 50 g of kefir,
- 15 g celery
- microgreens (to taste),
- 4 g sesame seeds.
Mix cottage cheese, kefir, celery (finely chopped), microgreens (watercress, daikon or alfalfa) to taste. Sprinkle sesame seeds over the dish.
Salad with microgreens and shrimps
Would need:
- 1 carrot,
- 1 apple,
- 20 g chopped walnuts
- 200 g shrimp
- microgreens of radish,
- balsamic vinegar (to taste)
- olive oil (to taste)
Grate the carrots and apple on a coarse grater. Boil shrimps, cut in half. Add walnuts, season the salad with balsamic vinegar and olive oil. Put the radish sprouts on top for beauty. Stir the salad before use.
Cold Salad
Would need:
- toasts,
- 50 g of hard cheese
- 200 g chicken fillet,
- arugula or sunflower microgreens,
- 1-2 cloves of garlic
- sun-dried tomatoes or cherry tomatoes,
- olive oil (to taste)
Prepare toasts, drizzle lightly with olive oil, rub with garlic. Boil chicken fillet, cut. Also cut the hard cheese into small cubes. Place a serving of chicken and cheese on toast, add one sun-dried tomato (or grilled cherry tomato). Decorate the dish with a bunch of microgreens.
Young shoots are best eaten raw for the greatest benefits to the body. Microgreens can be added to salads, used as a side dish or as an independent dish. Its taste is most often unusual, but very pleasant. And also microgreens that grow on the windowsill will certainly become a decoration for your interior.
What are microgreens?
Microgreens are sprouted greens of vegetables and herbs in the phase of the first two true leaves, which are harvested about 1 week after germination and used in cooking raw.
These tiny, crunchy and very healthy green plants are ideal for salads, soups and sandwiches, and are often found as a garnish in restaurants.
In another way, microgreens are called "microgreen" (from the English word microgreens).
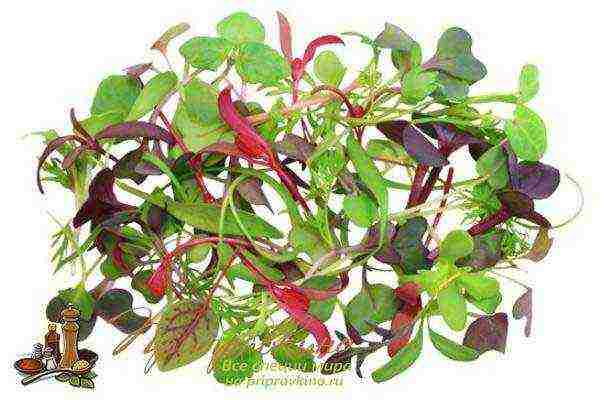
What microgreens look like - photo
Sprouts and microgreens are not the same
Seedlings are usually grown in water and harvested after 2-3 days, even before the leaves develop, and are eaten whole.
Microgreens are ready to be harvested in 1-3 weeks, when they reach about 5-10 cm in height, they do not eat the roots, but only the stems and leaves
When germinating seeds, the cotyledons first appear, which provide nutrition to the plant so that it has the strength to grow true leaves. Microgreens are the next stage in plant development.
Seedlings and microgreens share the same health benefits, but the latter has more nutrients.

What is the taste of microgreens
The taste of microgreens depends on the plant from which they are grown. It can range from mildly spicy to spicy or peppery.
| Mild spicy aroma. Dark purple in color. |
| Spicy taste. Attractive pink stems and green leaves. Adds bulk and volume to the microgreen mixture. |
| Mild aroma. Light green, gold, pink, orange, purple, red and white stems. |
| Clean, fresh scent. The taste is more subtle than that of mature cilantro. |
How to choose and where to buy microgreen seeds
Microgreens can be grown from the seeds of any herb or vegetable, most commonly:
- cilantro;
- amaranth;
- arugula;
- radish;
- basil;
- beet;
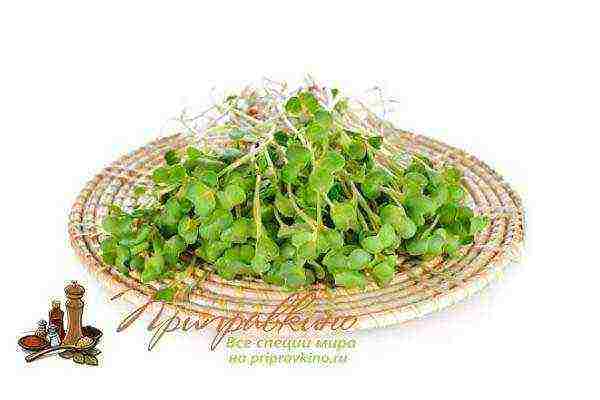
- broccoli;
- kale.
It is best to choose seeds that germinate quickly. So, very tasty beets need to grow a little longer than savory arugula.
You can buy microgreen seeds in almost any specialty store, and sometimes in simple supermarkets. If they are not available in your locality, then the easiest way is to order in the online store.
A mixture of seeds from different plants is often sold, and they usually germinate and grow at the same rate at the same time.
How to grow microgreens at home
Microgreens grow relatively easily in the cramped conditions of a city apartment and even in winter it feels great if there is a sunny windowsill. With good lighting and sufficient moisture, it grows very quickly from seeds.
Growing method in container with soil
To grow microgreens at home, you will need:
- tray / container 5-8 cm deep;
- organic microgreen seeds;
- spray;
- universal soil soil;
- paper towel / thin cloth in the tray.
Then follow these steps:
- Step 1. Prepare the seeds.
For seeds to germinate faster, pre-soak them, if they are large (eg, wheat, beets, sunflowers), in warm water for several hours or overnight. You don't need to do this for small seeds!
- STEP 2. Prepare the container.
If you are using a perforated tray, place a paper towel or thin cloth on the bottom. Fill the container with soil, but not completely, but leave about 2-3 cm from the top. The soil should not be too dry or too wet! Smooth the surface without tamping it.
- STEP 3. Sow the seeds.
Sprinkle the seeds generously all over the tray and press down lightly with the palm of your hand.Small sweats of a size can be sprinkled with soil evenly (about 0.5 cm) so that they are covered with a thin layer.
Sprinkle lightly with water using a sprayer, this will prevent the seeds from washing out and burrowing, and they will sprout together.
Place the container on a pallet or saucer and set aside a warm spot, such as on a windowsill in the kitchen.
Water as needed. Pre-check soil moisture by touching with your fingers. The seeds should never dry out. Avoid heavy watering.
If your apartment is cool, then to create a warm, moist environment for seeds to germinate, cover the tray with a transparent plastic bag, leaving holes for air to enter.
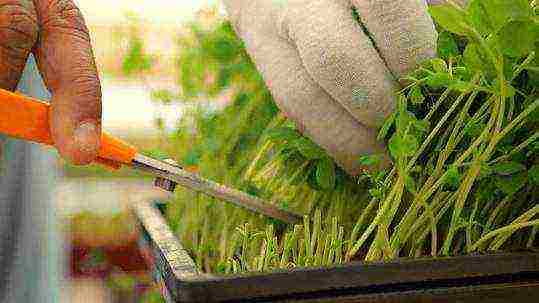
The tasty microgreens will be ready to harvest in 1-3 weeks, depending on the type of plant you choose. When the seedlings are 2.5-10 cm tall, use scissors to cut the stems just above the soil.
How to grow microgreens at home without land
Another easy way to grow microgreens that doesn't even need land.
- Use enough gauze so that you can lay it in 7 layers in your growing container of choice.
- Place the cloth in the tray, lightly dampening each layer with spray water.
- Sprinkle the seeds generously on the top layer of moistened cheesecloth, with very little space in between. Sprinkle lightly with water.
- Cover with plastic wrap to keep it moist until the seeds germinate. Place the container in a warm, dark place and check it every 24 hours.
- Spray with water as soon as the gauze starts to dry. When you see any sprouts, move the tray to a sunny windowsill.
Continue watering as needed, and within a few days, when the sprouts grow 2-3 true leaves, you will have microgreens ready for harvesting. Cut it off gently with scissors just before use.
Health Benefits of Microgreens
Due to their high antioxidant content, microgreens are considered healthy foods that promote health and prevent disease.
Eating all types of plant foods has been linked to a reduced risk of many diseases, such as:
- obesity;
- diabetes;
- cardiovascular diseases;
- high blood pressure.
Plant-based foods also support a healthy complexion, increase energy, help with weight loss and increase longevity.
No research has yet been conducted on the use of microgreens to treat or prevent specific diseases.
There is little scientific evidence for the nutritional value of microgreens, but laboratory tests have shown that it contains a higher concentration of many nutrients than mature, fully grown vegetables or herbs.
It also showed high levels of phytonutrients, antioxidants, vitamins and minerals. Microgreens are rich in enzymes that make them easier to digest.
The amount of these important substances varies greatly depending on the type of greenery. For example, the highest concentrations of four different vitamins and carotenoids are found in:
- red cabbage;
- daikone;
- radish;
- cilantro;
- amaranth.
Microgreens from red cabbage are rich in vitamin C, but low in vitamin E, and from daikon or radish, they are high in vitamin E, but low in lutein compared to cabbage, cilantro and amaranth.
Broccoli microgreens contain an abundance of myrosinase, an enzyme needed to form sulforaphane, which is a component of mature broccoli and is effective in fighting cancer. Mature broccoli also has a lot of myrosinase, but it tends to be degraded during cooking if you cook the vegetable for more than four minutes.
Often times, people do not get the RDA for fruits and vegetables for a variety of reasons, including unavailability, high cost, or simply because they feel they are not tasty enough.
Microgreens can be easily grown at home on a windowsill at low cost and provide enormous nutritional benefits.
Contraindications (harm) of microgreens
The only sprouts and microgreens that are not recommended to be eaten raw, as they can be harmful to health, are legume sprouts, because they contain natural toxins that are destroyed only when food is cooked in water.
These include mung beans, beans, peas, soybeans, lentils, chickpeas, and alfalfa sprouts.
For example, the toxin in alfalfa sprouts can harm the immune system, and since cooking turns these tender sprouts into mush, they should not be eaten at all.
The use of microgreens in cooking
Microgreens are now a fashionable trend in the food world. It is popular among people who monitor their well-being and follow a healthy lifestyle. Microgreens add color, flavor and add interesting texture to any dish, while enriching it with nutrients.
For chefs in restaurants, microgreens serve as a decoration when serving.
Here are some tips for using microgreens in cooking:
- Use it as an addition to salads and soups.
- Toss a small handful into a smoothie or juice before blending in a blender.
- Use as a side dish with any main course.
- Sprinkle microgreens on your sandwich or pizza after cooking.
- Add it to scrambled eggs or casseroles.
- Substitute microgreens for lettuce in your hamburger or sandwich.

Microgreens as a profitable business
Microgreens as a business involve low costs and high profits (depending on the market). Its fast growing yield and ease of growing made it popular as a source of income.
Here are some of the benefits of growing microgreens for sale:
- Grows quickly: from seeds to finished products 1-3 weeks depending on the selected variety.
- High Yield Ratio - An incredible number of plants can be grown in a small area. Many varieties are capable of producing multiple yields.
- The minimum cost, time and effort required to obtain organic greens for a “healthy diet” that is in high demand.
- Microgreens are undemanding to conditions. She needs good lighting, a suitable shallow container, water and a nutrient medium. Inexpensive fluorescent lights can be used.
- Low production costs. Since growing microgreens do not require expensive equipment, startup costs are quite affordable and can cost as little as tens of thousands of rubles.


