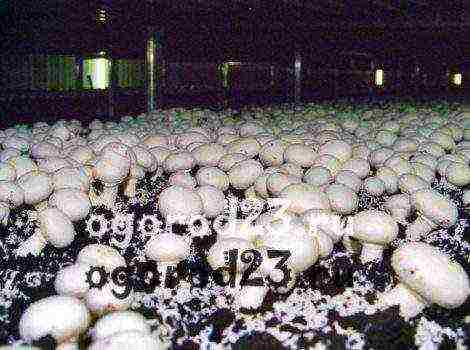
Content
- 1 One-year varieties: pros and cons
- 2 Preparation of planting material
- 3 Preparing containers for planting greenery at home
- 4 Soil preparation
- 5 Planting seeds and caring for seedlings
- 6 Outcomes
- 7 Growing a feather from an old bulb
- 8 Growing green onions "hydroponically"
- 9 Green onions from bulbs in soil
- 10 Growing a feather from onion sets
- 11 Pickling and warming up the set
- 12 Preparation of soil and containers
- 13 Planting seeding in the ground
- 14 Planting care
- 15 The best varieties for planting and the choice of bulbs
- 16 When to plant onion sets?
- 17 Soil preparation and site selection
- 18 Preparation of planting material
- 19 Step-by-step planting instructions
- 20 Planting seeds
- 21 Care
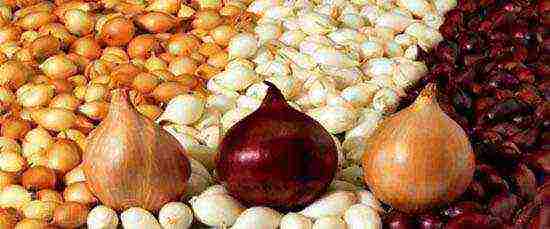
The rule has long become customary and almost canonical for temperate latitudes - good quality onions are sown with sevk. This is really correct, since the overwhelming number of varieties of onions grown by summer residents are intended for long-term storage - "so that it will last for the winter." But onions that can be stored at home until spring are, as a rule, spicy and semi-sharp varieties of local selection or zoned for a certain climatic zone. Almost all of them have a two-year growing season.
The problem is that the choice of onion sets is very limited. It is rare to find more than 5 varieties in one place. We have to take what we have. At the same time, there is almost no guarantee that the planting material is of high quality.
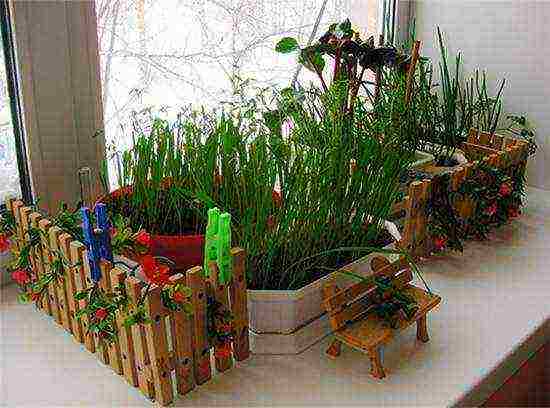
All this forces gardeners to independently grow onion sets from seeds at home - in a container on a windowsill or balcony.
One-year varieties: pros and cons
Having set himself the goal of growing sevok on his own windowsill or balcony, the gardener must clearly understand the feasibility of this event.
Within three months, all windowsills or the balcony of the house will be occupied by containers with onion seedlings. Another problem is that the overwhelming majority of onion varieties that yield a full-head crop are sweet or semi-sharp varieties that are not intended for long-term storage (salad). Therefore, think seven times, do you need such an amount of lettuce onions that cannot even last until the New Year?
The varieties of "Dutch" selection, actively advertised and popular with summer residents, are for the most part not adapted for cultivation in central Russia. The climate in Holland (Netherlands) is not the same. It is humid and warm there, and the air temperature in winter rarely drops below 0 ° C. The complete opposite of the sharply continental climate of central Russia. But the one-year-old onion grows successfully in the southern regions: Krasnodar and Stavropol Territories.
Although, if you nevertheless decided on your desire to have your own planting material grown at home, and trust the publications in the Russian Internet - then: Forward! Get down to business!
Preparation of planting material
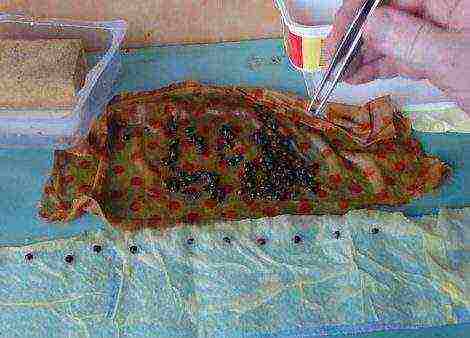
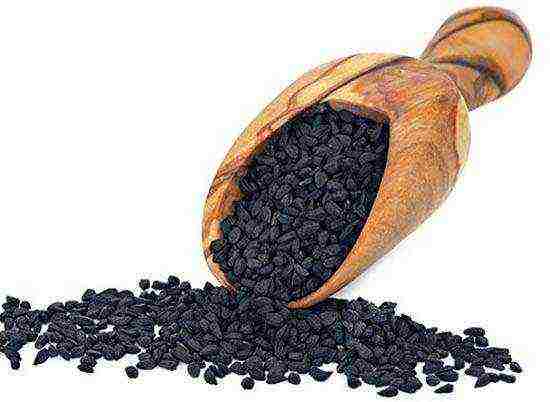
Seeds - "nigella" are the planting material for growing seedlings at home. The higher the quality of the seeds and the more reliable the supplier, the better. Having bought the varieties you like, we proceed to prepare them for planting. First, the seeds are processed for the purpose of disinfection. To do this, they are sorted by size, if possible, selecting the largest ones, then placed in a medical napkin (or a piece of bandage in 3-4 layers) and poured for 20-25 minutes with an aqueous solution of potassium permanganate (potassium permanganate) at a concentration of 1: 1000. The disinfection solution should be an intense purple color. After disinfection, the seeds are washed in a napkin in a large amount of water and placed in a solution of a biostimulator, which accelerates the process of germination and root development.Such stimulants can be "Zircon", "Epin", "Epin-Extra". The concentration of the solution is 1 drop per 100 ml. water. The duration of treatment with a biostimulant is 18-20 hours.
After processing, the seeds are washed again in water and, after gluing (tying) a tag indicating the variety and the date of processing, they are placed in a container in a warm shaded room for germination. During this period, it is necessary to ensure that the napkin in which the seeds are tied is constantly moistened, but not immersed in water - so that the seeds can breathe. The seeds are kept until they hatch - the appearance of tiny white tails - roots.
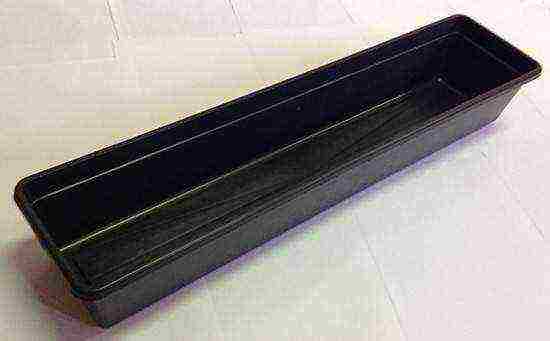
Preparing containers for planting greenery at home
The container in which the seedlings will be grown must meet a number of requirements:
- The size should correspond to the size of the window sill.
- It should be light so that there are no problems with moving it.
- Should be easily placed on the balcony, passes through the balcony doors without any problems.
- Be hygroscopic (waterproof).
- Have drainage holes.
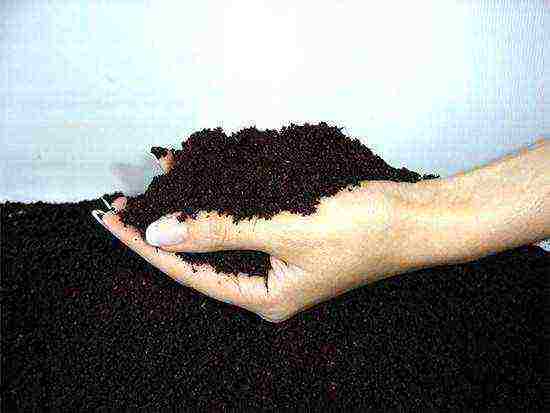
Soil preparation
The best soil option for growing seedlings, however, like any other greenery, is a purchased mixture "For bulbous crops", "For vegetable crops" or "Universal". The price depends on the manufacturer and ranges from 50 to 80 rubles for a package of 5 kg. It is advisable to add Agroperlit (2.5 kg - 50 rubles) or Vermiculite (2.5 kg - 80 rubles) to the purchased soil in the proportion of 3 parts of soil for seedlings - 2 parts of a baking powder-moisture retainer + fertilizer.
For those who prefer to do everything with their own hands, the composition of the soil for seedlings can be of the following composition:
- turf land - 1 part;
- leaf land - 1 part;
- humus - 1 part;
- low peat - 3 parts;
- river sand - 1 part.
Optimum pH: 7-7.5.
After compiling the soil for growing onion seedlings at home, fertilizers must be added to it: complex fertilizers for bulbous crops, for example, "Breadwinner", a solution of liquid organic fertilizer "Ideal" or "Fertility". The amount of fertilizer applied depends on the volume of soil used and the instructions for its use.
Better not to report fertilizer than to get overgrown mutants. An excess of fertilizers affects both the taste and keeping quality of the onion. They are significantly reduced.
Planting seeds and caring for seedlings
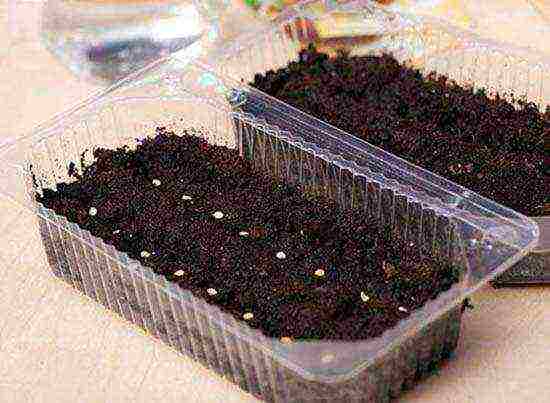
The prepared soil is poured into the container in a layer of 5-7 cm. Slightly compacted.
Planting small onion seeds, and even sprouted ones, is an occupation for very calm and diligent people. The work is very painstaking.
There are a lot of recommendations: and spread the seeds on a strip of toilet (soluble) paper, and glue them with gelatin to the thread at regular intervals, and dust them with chalk or talcum powder, mix them with dry sand and sprinkle them evenly over the marked groove. Many people prefer to drink this cup to the bottom and plant each seed separately, grabbing it with fine tweezers.
Here, as they say - everything is in your hands!
When planting is completed, the seeds are lightly sprinkled with sifted soil for seedlings (no more than 1 cm) and watered from a sprayer until the top layer of soil is completely moistened or a layer of snow is poured on top (3-4 cm). Cover with a lid with holes or plastic wrap (with small holes) and place the container on a windowsill or on an insulated balcony.
Beforehand, do not forget to spread a layer of polyethylene on the windowsill, during the cultivation of the seedlings, water will pour out through the drainage holes, and the window sill can be hopelessly damaged.
After the emergence of shoots - the most delicate green needles, the film or cover must be removed from the container.
Daily care during the cultivation of onion seedlings on the windowsill or balcony at home consists in spraying water as needed.
With an interval of 2-3 weeks, it is necessary to feed and fertilize, preferably in liquid form.
In case of insufficient lighting when growing a house, reflectors made of white polymer film or corrugated foil are installed opposite the window. At the same time, they will protect the seedlings from excessive overheating from the heating batteries.
Outcomes
Growing onion sets at home on a balcony or windowsill is not difficult. At home, it is possible to grow high-quality strong seedlings, in which there will be no surplus of fertilizers, and the use of annual varieties will not only bring a bountiful harvest of bulbs, but will provide greens (feathers) for the entire spring-summer period.
It is profitable to grow at home and from an economic point of view. The cost of buying seeds, soil, fertilizers, containers is incomparably lower than when buying ready-made onion sets in the same quantities that you can grow at home.
Green beds for you!
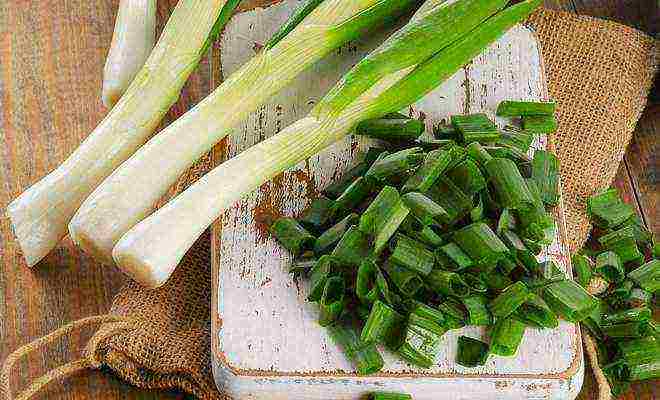
Why does every person need to grow onions in the house, even if he has not yet acquired a dacha? Only in this way you will always have your favorite green plant at hand, without chemicals and impurities.
Green onions are very “grateful” greens for growing at home. He does not need a special soil composition, nor a temperature level - enough good lighting and moderate heat. That is why green onions are successfully grown all year round on window sills and balconies of apartments, even in the center of huge cities.
To learn how to grow green onions in an apartment, you should explore the most popular ways to grow them.
Growing a feather from an old bulb
This is an old and proven method that gives 100% results and is very beneficial from an economic point of view. It often happens that a turnip bought for future use begins to deteriorate in a warm apartment, becomes soft and germinates. It is no longer suitable for food, but it can become an excellent "supplier" of healthy greens.
How to grow green onions from an onion to get as much fresh feathers as possible? There are two ways - to put the onion on a container of water, as in the days of our grandmothers, or to plant it in the ground. Each method has its own advantages and disadvantages.
Growing green onions "hydroponically"
This is a very simple and the cheapest way. They use "junk" onions, which are not suitable for food, that is, in fact, green onions are obtained free of charge. If not for distillation, the sprouted bulbs would definitely go to the trash can. Water is also not purchased on purpose, and almost any container for planting can be used.
A feature of the method is also the fact that such a receipt of green onions can become a decorative element of your kitchen.

Water in a hydroponic system needs to be grown every day.
If you choose different colored or transparent bottles as containers for water, then the composition of the bulbs "sitting" on them with a bright bunch of fresh green feathers will look very modern and attractive.
For planting the bulbs on the water, you can also use special containers for water distillation of flowering bulbous plants. They are small glass "cones" of various shapes with a narrow neck, expanding upward and forming a special container for the bulb.
The key to growing green onions is in the form of these forcing tools. If you are interested in how to grow green onions at home from a bulb without losing planting material, remember that the bottom of the "turnip" should not be submerged in water. If this is allowed, the old onion will rot very quickly and die. If the water just touches the bottom, the onion will give good healthy roots that will sink into the water and nourish the greens. The bulb itself will remain dry and give a maximum of feathers.

When the roots appear, you need to change the water every 3-5 days
To avoid "blooming" of water in a warm room, you can add 1 - 2 crystals of potassium permanganate to it, until the liquid turns pale pink.Potassium permanganate does not harm the quality of the feather, on the contrary, feeding with manganese contributes to the formation of healthier and healthier greens. To extend the life of one bulb, it is better not to cut the feather, but break off one at a time as it ripens.
Green onions from bulbs in soil
Old sprouted bulbs can also be planted in the ground, but this method is more costly, since it will require the acquisition of special land for seedlings, drainage and planting containers.
The most rational way is to plant onions by bridge, that is, close to each other. This will hold many bulbs in a small, flat container. They do not need to be completely immersed in the ground, maximum by a third. Successful cultivation will require good drainage so that water does not stagnate.

Sowing is carried out to a depth of 2-3 cm (deeper on light soils, shallower on heavy soils)
Caring for such plantings is exactly the same as for bulbs on the water. The advantage of this method is space saving. If you have a small window sill, it is more profitable to put a tray with a dozen bulbs on it than five separate vessels.
Growing a feather from onion sets
How to grow green onions on the balcony? Very simple. You will need onion sets. These are small bulbs obtained from seeds last year. They are planted in the spring in the ground for growing a full-fledged turnip. At home, you can get a lot of high quality green onions from the set.

Before planting, treat the heated seed with a growth stimulant.
For planting, high-quality material without signs of disease is selected. Bulbs should be medium in size, even, smooth and shiny. It is best if they are covered with a uniform and sufficiently dense husk - such a set will last longer than "naked". In addition, high-quality seedlings are the least susceptible to disease and produce a lot of greenery. Check that there are no black spots on the onion, and that there are no traces of mold in the form of bluish or gray lumps on the roots and base.
Such bulbs are chosen and immediately thrown away, as otherwise they will infect the entire "colony" and your green onion plantation will die without having time to give a crop. A soft bow is also thrown out, when pressed on which, its surface noticeably bends under the finger. Most likely, this onion has already begun to rot inside.
Pickling and warming up the set
This procedure is carried out in the same way and with the same purpose as when planting seedlings in open ground. The high temperature awakens the growth point, and all the onions begin to actively sprout and develop together. Etching kills possible pathogens, as well as existing pest egg clutches.
Onions are usually heated in water with a temperature of no higher than 50 degrees. You can combine heat treatment with etching and stimulation by adding potassium permanganate, aloe juice or succinic acid to the water. The most common and effective method of combating diseases and pests is a dark purple solution of potassium permanganate.
Onions for growing in the house are not treated with chemicals.
Preparation of soil and containers
To disinfect the soil and containers in which green onions will grow, they must be carefully prepared and processed.
Plastic trays are washed with hot water if new. Used containers can be cleaned with baking soda or chlorine disinfectant. After such treatment, it must be rinsed under running water and filled with cool water overnight. This is to ensure that the remaining detergent dissolves and rinses out completely.
Wooden containers are cleaned of old soil, washed and scalded with boiling water.
Soil cultivation is equally important. It can contain eggs and larvae of pests, various pathogens and fungal spores. Most often, the following methods of soil disinfection are used:
· Steaming;
· Warming up;
· Treatment with a disinfectant solution.
For steaming, you need a container with a good drain and boiling water. The earth is watered with water that has just boiled, trying to evenly process the entire volume. Excess water is allowed to drain freely, and the soil is thoroughly dried. With this exposure, most spores and viruses, as well as pests with a soft shell, die. Those with a hard shell or shell of eggs may not be harmed.

To warm up the soil, the temperature in the oven should be 85-100 ° C
Heating is most often done in the oven. The earth is scattered in a thin layer on a baking sheet and placed in a well-heated oven for 20 - 30 minutes. With this treatment, 99% of pests and sources of diseases die.
Treatment with a disinfectant solution is extremely simple and consists in abundant watering with a bright crimson solution of potassium permanganate, followed by drying the soil. It is important to ensure a good drainage of the water. With this treatment, fungal diseases are well destroyed.
Planting seeding in the ground
If the soil and containers are prepared, and the sevok is processed, you can start planting. Sows are planted in the same way as large old bulbs. This is a bridge method in which the bulbs are planted in rows as close to each other as possible. To save space, especially if you do not know how to grow green onions at home on a small windowsill, the bulbs are slightly offset from each other. So they will fit much more in a relatively small area.

Sowing is planted in rows with a distance of 8-10 cm from each other, the distance between the rows is no more than 4 cm.
The planted set is carefully watered and placed in a bright and warm place. Until the onion sprouts, it does not need a lot of light, high temperature is much more important for rapid germination. It must be at least 22-25˚С. When growth begins, the bulb trays can be moved to a windowsill or balcony. You need to choose the most illuminated area - in the dark, the greens will stretch out, will be pale and stunted.
The easiest way to grow green onions is on closed balconies and loggias. There is enough warmth and a lot of light. Multiple trays can be accommodated by custom-sized wall shelves. A wide window sill or a table attached to it will also help with placement.
The balcony and the kitchen with the grown onions must be periodically ventilated, choosing the warmest non-frosty days for this. If the plants are on the windowsill, they are removed away from the open window during airing.
Planting care
Since the onion grows in a fairly short time, it simply does not have time to completely deplete the soil. No feeding is needed for home greens, as they may contain too many toxic chemicals due to the use of fertilizers.

To protect plants, spray the onions with Volaton, Zolon or Acrobat
All care consists in regular moderate moisture and timely cleaning of the green feather. When it becomes clear that the strength of the bulb is exhausted and there will be no more harvest, the old "spent" seedlings are thrown away, the land is either re-prepared or replaced with fresh ones. The growing process can be started over.
Mixed landings
Onions grow well "in the company" of other greens. If you have free space or don't need a lot of green onions, but have an interest in getting a variety of greens, you can do mixed plantings.
To do this, seeds of the desired spicy herbs are sown in one container - dill, parsley, watercress, cilantro and many others. The choice of herbs depends only on the preferences of the owner. You can plant a basil bush or some celery plants. Since many plants germinate for a very long time, for example, dill and parsley can "sit" in the ground for up to 40 days or even more, the seeds are germinated before sowing. Sevok can be planted after areas with parsley or dill are outlined. This way you can get a good harvest of greenery almost at the same time.

Onions can grow next to beets, lettuce, strawberries, spinach, cucumbers, radishes, carrots.
***
Such a micro-garden on a windowsill or balcony will require a little more attention, but the return will increase several times. Almost the entire cold winter, you can delight your loved ones with delicious soups, main courses and salads, abundantly sprinkled with fragrant fresh herbs, which are also grown by your own hands.
Of all the vegetables that amateurs grow at home - on the windowsill or on the balcony - the most popular is the onion, its green feathers. The product is tasty and healthy, the technology is extremely simple, it seems that there are no secrets. But this is not so, in the cultivation of this culture there are subtleties that not everyone knows about. How to plant onions at home - read the article.
Green planting material
Growing onions at home to get fresh herbs - onion feathers can be grown at any time of the year. There are varieties bred specifically for this purpose. They belong to the types of chives, batun and give a good harvest of high-quality greens. These varieties are grown in soil, sown with seeds.
There are several ways to get green onions at home, depending on what material is taken for planting. The method of distillation from a mature bulb (turnip) on water or in soil is very common in everyday life. Most often, large, full-bodied specimens are chosen for this purpose. The smallest ones, up to 3.5 cm in diameter, the so-called onion samples, can also be used on a feather and even with some advantages. They, in particular, are less likely to show an arrow than large specimens.
Bulbs obtained from seeds are planted the next year in the soil to obtain full-fledged food bulbs. This small material, up to 2 cm in diameter, is called sevok, it is not used for food, but it can give a good harvest of greens at home. From the point of view of saving space on the windowsill, sevok is the best solution. A large number of small onions are planted tightly, as a result, getting a rich harvest of dense growth at home.
back to contents ↑ How to prepare onions for forcing?
The bulb lowered into the water by the bottom will surely put out the roots, and then it will give greens, but in order for the wait to be not long and the "harvest" rich, the planting material must be chosen correctly and competently prepared. If the onion has not yet begun to sprout, it must be removed from the dormant period, awakened. For 2 - 3 days they are kept in warm, about 30 °, water. At home, in winter it is convenient to use a heating battery for this. Some practices, before putting the seedlings on soaking, keep it for about 8 hours at a temperature of 40 °, after such treatment, germination begins five days earlier.
The bulb is freed from the softened excess scales, because they contain substances that prevent germination. The top should be cut off by about 1 - 1.5 cm in order to open up oxygen access to the inner layers, you can draw a few more small cuts down, then the feathers will appear faster and more abundantly. The turnip bulb is placed above the water in such a way that the bottom touches the surface, the roots may appear within a day, after which it can be planted in the soil or left to germinate in the water. Sevok is prepared in the same way, but it is driven out onto greens only in the soil.
back to contents ↑ How to plant an onion correctly?
If the onion on the feather is grown in the ground, then the container is chosen not very deep, 6 cm is enough, preferably narrow and rectangular, so that it is convenient to place it at home on the windowsill. A low wooden box with a pallet will do, good beds are obtained from two halves of a large non-circular plastic bottle, cut lengthwise, with drainage holes made in the bottom. The area of the "vegetable garden" is calculated, implying that a large turnip should be planted in a row at intervals of about 1 cm, and sevok - almost close.Ripe bulbs are almost completely left on the surface, pressing only the bottom with roots into the soil, the seedlings are immersed in the soil by 1.5 - 2 cm.
Known economical planting method that allows you to use onions for food and at the same time have winter greens at home. The bottom, which has barely given roots, is carefully trimmed around the circumference, one by one, all layers except the inner ones are removed and planted on the ground for rooting. The rest of the onion is enough to distill one good bunch of greens.
to the content ↑ Conditions for obtaining greens
There are a number of conditions, observing which you can get a decent harvest.
Soil and fertilizers
What should be the soil? The main requirement is looseness and moderate moisture. This state must be maintained by regular loosening and light irrigation with settled water at room temperature every 3 to 4 days.
As for fertilization, it must be borne in mind that a rich supply of all necessary nutrients has been accumulated in the bulb, this is its purpose. Therefore, sevok, the crop from which is cut only once, is simply enough to plant in a nutritious soil.
When forcing a turnip, additional feeding is required, since it is used repeatedly and after each cut, stocks should be restored. Otherwise, the feather will become paler and tastier every time.
Small onion samples should also be fed. Every 7-10 days, the garden should be watered with a weak solution of urea or nitroammophos (1 g per 1 liter). A good result is given by watering with a solution of wood ash at the rate of 5 g per 1 liter of water. Instead of an earthen substrate, some practitioners plant onions in sand, fine gravel, vermiculite and pour abundant water.
back to contents ↑ Light
Good lighting is required in the first 10 days after sprouting for rooting. Subsequently, the bulbs can be kept at home even on the northern window, freeing up space for more light-loving plants, if necessary, the greens will still grow quickly enough, although in the light it turns out to be more juicy.
It is recommended to keep the seedlings planted in the soil in a dark place at a low temperature before germination and only then put them on the windowsill.
In terms of temperature, onions are unpretentious, the optimum temperature range for it is quite wide - from 12 ° to 26 °. At lower temperatures, growth is somewhat slower, but the quality - juiciness and taste - is better.
back to content ↑ Harvesting
A large turnip can be cut for the first time 2 weeks after planting, the feathers by this time have grown to 15 cm. It can be used at home for no more than two months, having collected 3 - 4 bundles during this time. It is recommended to cut off the outermost feathers first, leaving the middle ones for further growth.
Sevok spends all its reserves already at the first regrowth, in order to use them completely, the feathers grow up to 30 cm, after which the bulb is removed, replaced with a new one. The seedlings germinate more slowly, its advantage is that, unlike a mature turnip, it is not inclined to release arrows that reduce the quality of the crop.
Thus, onions do not give a green harvest for long, in order to have a product at home all the time, you need to create a conveyor: plant a “vegetable garden” in several containers with such a time interval so that the end of the harvest in one batch coincides with the beginning of the other.
Similar articles:
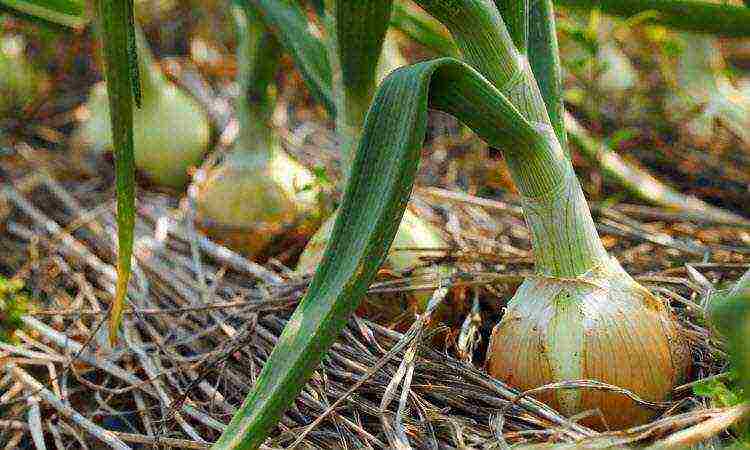
Not a single housewife can do without onions in the cooking process, so every gardener wants to have a rich and high-quality harvest of a popular crop. For the successful cultivation of onion sets, you need to know some of the nuances that significantly affect the quality of the resulting crop. How to plant onion sets?
The best varieties for planting and the choice of bulbs
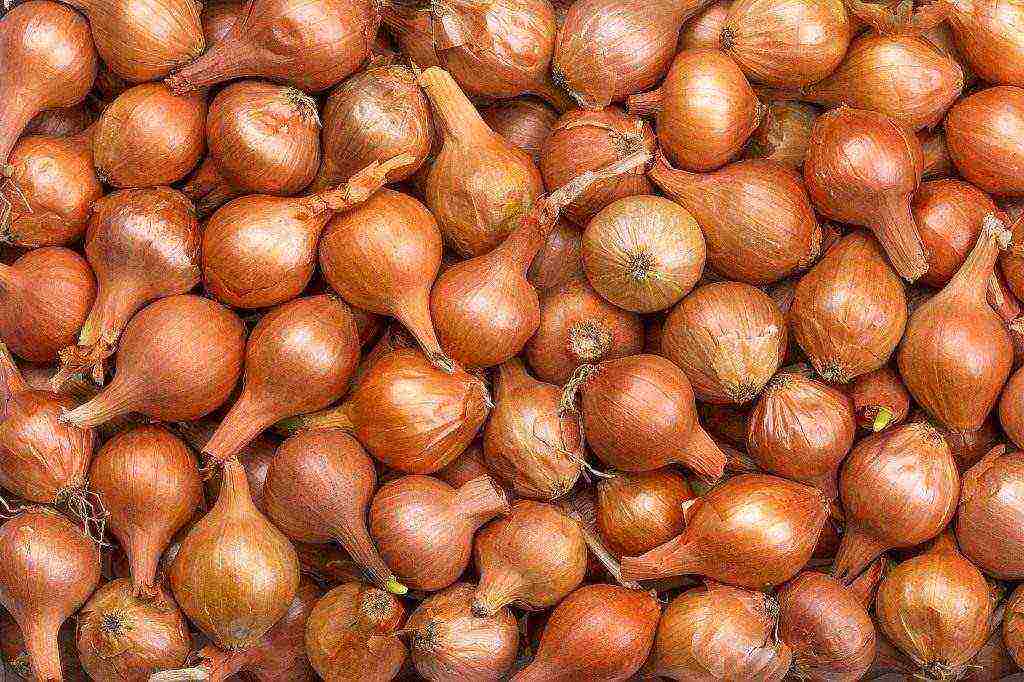
The cultivation of onion sets is characterized by a number of advantages. The crop matures earlier, needs less fertilizer and is more resistant to disease, such as powdery mildew.There is only one minus when growing - it lies in the high probability of the appearance of arrows.
For planting, specimens are selected that have a diameter of one or two centimeters, since such bulbs ripen earlier and germinate better. According to well-known recommendations, sweet varieties are advised to be grown using seedlings.
An excellent variety is considered to ripen very early "Stuttgarter Riesen" with a spicy taste. You can choose the "Centurion" variety for planting, which has a sharp taste and is well kept.
If you plan to plant in winter, it is recommended to grow onion sets of varieties:
- "Radar";
- "Hercules";
- Troy.
The amount of harvest and the taste of the onions depend on the quality of the planting material, so carefully select the bulbs for future cultivation. Pay attention to the appearance. The surface of the bulb must be free from stains and free from traces of mold or rot, and the specimen must be healthy in appearance.
Sowing material must be dry (if the bulbs are wet, sprinkle them and wait until they dry completely). At the time of purchase, the degree of dryness can be checked with a handful, which you need to shake. If the planting material is dry, you will hear a loud rustling sound. The best time to buy planting material is the period when the temperature arrow froze above zero.
After purchasing, the bulbs must be sorted out and sorted by size. Small and large bulbs are planted separately to make caring for the plant easier. A small onion will grow from small specimens, and large plants can give arrows.
When to plant onion sets?
The ideal planting time varies from region to region due to climate conditions. Onion sets are planted in spring, it is best to navigate by the weather. If an early and warm spring has come, and according to forecasts, return frosts are not expected, onions can be planted after warming up the soil.
If spring comes late, the planting process stretches throughout April and affects the beginning of May. It is very important not to miss the landing time, that is, it is not recommended to wait too long. Otherwise, if you plant a set late, it will start producing a lot of feathers, slowing down the development of the lower part.
After a while, the green mass will wither, but the bulbs will no longer grow. Planting too early, when the frosts have not yet completely gone, can also affect the yield: the bulbs will suffer from prolonged exposure to the soil without signs of growth. The first shoots may appear in a few days or in a week, it all depends on the degree of soil warming.
Soil preparation and site selection
 It is necessary to correctly approach the choice of the site. Onions require a well-lit and open area, as they are light-loving cultures.
Although onions love moisture, they should not be planted in areas with close contact with groundwater, which can cause rotting of the root system. For this reason, do not choose low-lying areas.
The onion sets feel most comfortable on fertile soils with moderate humidity and good air permeability. Non-acidic loamy or sandy loam soil is ideal. If the selected soil turns out to be acidic, add lime to the soil. Onions should not be grown in the same place for two seasons in a row, because in one season many bacteria accumulate in the soil, harming this particular crop.
When choosing a site, do not forget about the rules of crop rotation. Onion sets will feel comfortable in the soil on which tomatoes, beans, pumpkin, zucchini, potatoes, peas and cabbage were previously grown. Do not place onions in areas where garlic and cucumber seeds have previously grown. The culture is returned to the old place only after three years. Carrots are good neighbors for onions as they help each other in pest control.
Site preparation begins in the fall.
The culture needs nutritious and loose soil, so the gardener must perform the following manipulations:
- dig up the ground to a depth of 15 to 20 centimeters;
- add fertilizer, for example, rotted manure or peat compost.
The soil must be fertilized at this very moment, it is forbidden to feed the plant before planting, otherwise the green mass of the plant will start intensive growth and weeds will appear. You can not bring chicken droppings and humus before planting.
Preparation of planting material

The onion sets must be thoroughly prepared before planting.
Several methods of processing planting material are known:
- The acquired planting material is dried, and the collected bulbs, which were stored in a room with a temperature below 18 degrees, are warmed up. Warming up onions is a multi-stage process that takes a lot of effort. At the first stage, onions are stored in a room where the air temperature is kept at 20 degrees. This period lasts 15 to 20 days. After that, the bulbs are kept for 10 hours at a temperature of 30 to 40 degrees Celsius. At this stage, it is important to strictly monitor the time so as not to forget about the onion and not leave it at this temperature for a longer time. Immediately before planting, the heated onion is immersed in a growth stimulator.
- In some cases, long-term preparation in several stages is impossible. Then another method helps out. For ten to fifteen minutes, the seedlings are soaked in hot water (temperature 45-50 degrees Celsius), then dipped in cold water for the same period of time, and at the last stage, the seedlings are left in a solution of mineral dressing for five or six hours.
- Some gardeners use the old method. Onion sets are dried for a week at a temperature of 20 to 25 degrees. Immediately before planting, the bulbs are placed for three hours in a salt solution (two tablespoons of the product are added to two liters of water), then they are washed and kept in a dark solution of potassium permanganate for two hours, after which they are washed again.
- Gardeners are frightened by the appearance of "arrows", the so-called hard stems with flower ovaries. If few arrows grow on one bed, this is not so scary, but a large number of flower ovaries significantly reduces the amount of harvest, since the plant spends energy on growing stems. In this case, the bulb turns out to be small, inconspicuous and with a solid center, which does not survive until spring, but begins to dry out and rot. Most often, "arrows" appear on large bulbs that have been grown from seed. Tough stems can be prevented even before planting. To do this, large onions are dipped in hot water (50 degrees) for one minute. After that, large specimens are placed in a warm, moist material for one day, and then kept in water at room temperature for two days.
Before planting, the bulbs must be disinfected by treating with a solution of potassium permanganate or copper sulfate.
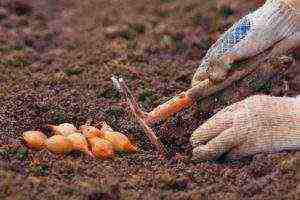
Step-by-step planting instructions
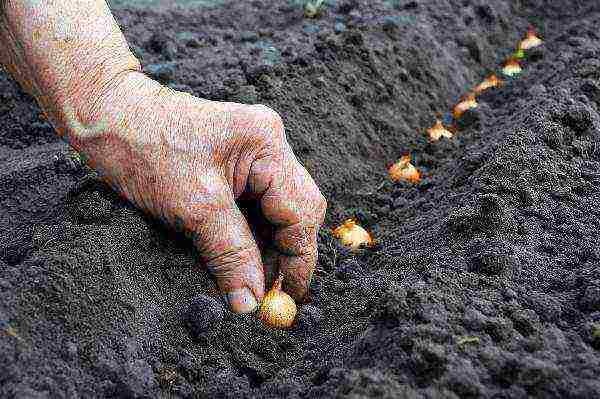
After you have prepared the soil and planting material, you can start planting:
- The bed is rolled lightly to get a flat surface.
- At a depth of 2-4 centimeters and at a distance of 20 to 25 centimeters, using a hoe, we make grooves. Be careful about the depth, as planting too deep will result in an elongated onion, and planting too shallow will poorly develop the root system and the crop will be unpleasant and small. Choose the optimum depth for large bulbs.
- We make holes at a distance of 7 - 8 centimeters.
- We plant small onions (up to a centimeter in diameter) - they will not have “arrows”.
- After one or two weeks, we continue planting, placing larger specimens in the ground (diameter from a centimeter to two).
- We cover the bulbs with earth, making a layer of 2-3 centimeters.
Planting seeds
Initially, onions are grown from seeds. For planting, the time is chosen after the winter frosts leave and a warm temperature is established outside, at which the earth will warm up.
Onions are most often sown in early May. Before cultivation, the seeds are soaked, and the earth is loosened and dug up. In the selected area, several rows are made with a distance of 20 - 30 centimeters and holes are dug. The seeds are sown into the soil and sprinkled with earth on top. You can organize a greenhouse and cover the seedlings with foil.
Care
At the beginning of growth, that is, in May and June, plantings are watered a maximum of 2 times a week, if there is no precipitation. When the greens appear and the bulbs develop, the culture needs abundant watering, but it is reduced in July. As soon as one month remains before harvesting, the irrigation procedure is abandoned.
Loosening plays an important role, which is carried out about 6 times per season. It is not recommended to penetrate the soil deeper than 5 centimeters. Weeds should be regularly removed around plantings, because they are breeding grounds for pests and retain moisture.
The plant is fed with bird droppings or mullein. Sluggish growth, pale color signal a lack of nitrogen, and a grayish tint of the leaves - a lack of potassium. You can harvest after the neck dries up and the feather wilts. This must be done before the onset of rains, which can provoke a new round of rooting of the bulbs.