Content
- 1 What do clematis seeds look like?
- 2 Stratification and sowing of clematis seeds
- 3 Picking and planting a clematis seedling
- 4 Clematis seeds: size and sowing time
- 5 Growing clematis from seeds
- 6 Sowing seeds at home
- 7 Care of young plants
- 8 Planting clematis in the spring
- 9 Highlights of clematis planting
- 10 How to care for clematis in the spring
- 11 Top dressing of clematis
- 12 Hello dear readers!
- 13 We plant correctly
- 14 Flower care
- 15 Pruning Clematis
- 16 Spring awakening
- 17 Dangers to Clematis
- 18 How flowers are propagated
Growing clematis from seeds at home is not easy, because the seeds of this plant require special preparation. But if you follow all the intricacies of sowing, you can get beautiful vines in your garden.
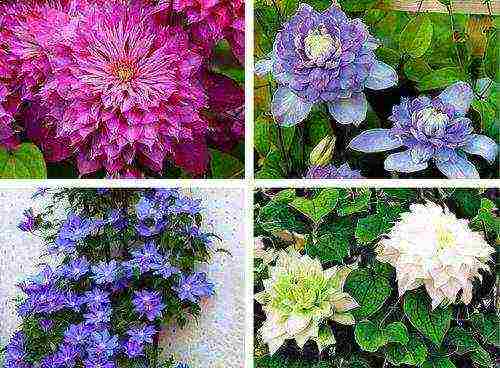
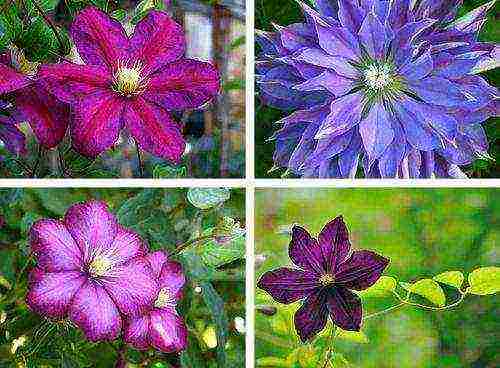
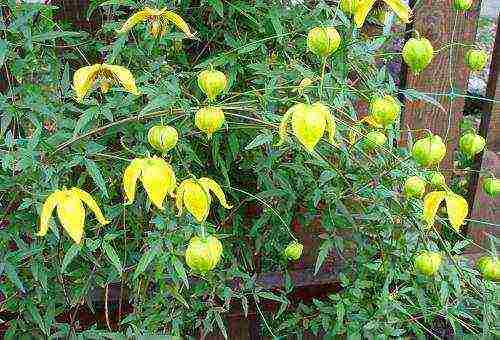
Some types of clematis (clematis) are very different from each other. Among the representatives of this genus are herbaceous plants, shrubs and vines. The latter are the most popular. Clematis flowers differ in shape and color. Therefore, the seeds of this plant are not the same. Their appearance depends on the type and variety.
What do clematis seeds look like?
Clematis seeds can be:
- Small (in size from 1.5x3 to 3x5 mm). They sprout from 2 weeks to 4 months. Such seeds are found in clematis hogweed, Tangut (popular varieties - Helios, Locator of Love), Farges.
- Average (from 3x5 to 5x6 mm) - in Manchurian clematis, whole-leaved, grape-leaved, etc. Seeds sprout from one and a half to 6 months.
- Large (from 5x6 mm to 1x1.2 cm) - in purple clematis (Viticella), straight, burning, Siberian, Alpine, etc. Such seeds can germinate for about a year. Many growers do not have the patience to wait for the shoots to appear, so these clematis are often grown from cuttings.
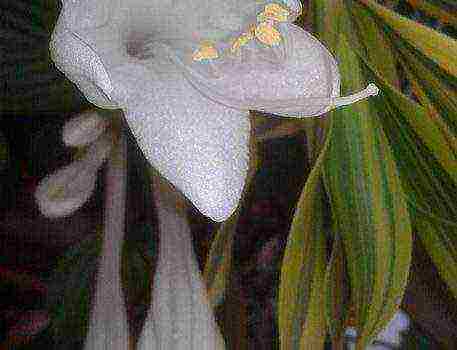
Clematis seeds have a bizarre shape: a long tail leaves a round or oval seed
Stratification and sowing of clematis seeds
Since medium and large seeds of clematis germinate for a rather long time and uncommonly, they must first be prepared for sowing - stratified.
In early spring, sow seeds (large - to a depth of 2 cm, medium - 1 cm) in a container with a soil mixture of equal parts of peat, sand and garden soil and keep for several months at a temperature of 0 to 5 ° C (for example, in a refrigerator or in the garden under the snow with a layer of about 20 cm). It is enough to stratify medium seeds within one month, and for large seeds it will take at least three.
After cold stratification, seeds emerge 10-20 days after sowing
If you decide to stratify your clematis seeds in the snow, be sure to protect them from rodents with a fine mesh or a sturdy plastic container.
When there is no time for stratification, the germination of clematis seeds can be increased by soaking (for 5 days), while the water must be changed every 3-4 hours. After that, the seeds must be bubbled for a week. And small seeds of clematis just need to be soaked before sowing for several days.
At the end of the preparatory work, place the container with clematis seeds in a room with an air temperature of 21-25 ° C on a lighted windowsill and water it regularly.
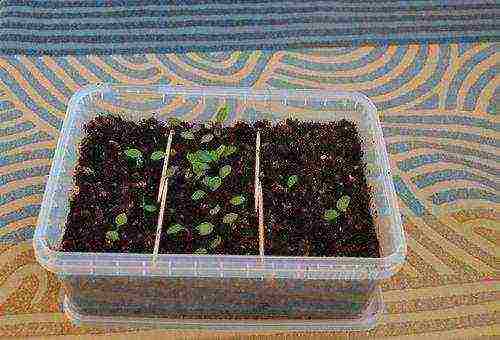
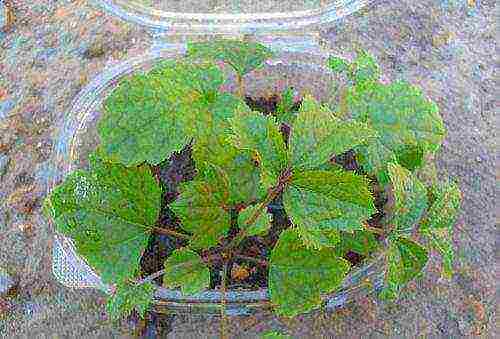
Picking and planting a clematis seedling
In the phase of 2 true leaves, cut the seedlings into separate containers or in a bulk container so that the distance between the shoots is 15-20 cm. After transplanting, continue to water the clematis regularly, but moderately. When doing this, protect the plants from direct sunlight and drafts. When it gets warmer outside (in regions where return frosts are possible - not earlier than summer), transplant clematis into a flower garden.
If there is a heated greenhouse, seedlings can be cut into it. And with the onset of stable warm weather, transplant it into open ground.
Choose a place for clematis with deep groundwater and good drainage, dig a planting hole deep enough (so that the root system can fit there). Lower the seedling into it, straighten the roots, set a support next to the plant.
The distance between clematis seedlings should be 40-50 cm
Fill the voids with fertile soil so that not only the neck of the clematis is 5-10 cm underground, but also the stem of the shoot up to the first internode. At the same time, 8-10 cm should remain to the edge of the pit. Water the plant well and mulch with peat.
As clematis grows, add soil to the root collar regularly. To stimulate the regrowth of new shoots, it is recommended to pinch the plant periodically.
Clematis of small-flowered varieties grown from seeds, under favorable conditions, bloom in the first year after planting in the ground, and the rest - only in the next season.
If you don't want to mess with picking, sow clematis seeds in separate containers. And to make it completely easier for yourself, try sowing in the fall immediately into open ground. In the soil, the seeds will be stratified naturally and will sprout in the spring. However, in regions with an unstable climate, immature plants often freeze out, so it is better to grow clematis in the middle lane by seedlings.
Clematis are decorative flowering plants from the Buttercup family. The first planting of clematis from seeds began in Japan, where flowering and spreading clematis was cultivated for a long time as a houseplant. Both species were imported from China. In Europe, they appeared in the 16th century: first clematis violet took root, after which clematis, burning, straight, evergreen, spread. In the 18th century, the list expanded, and new species appeared: virgin, curly, forest. Their flower was very large, up to 5 cm in diameter, and care and cultivation did not cause much trouble.
Clematis seeds: size and sowing time
The popularity of clematis began to grow rapidly with the advent of large-flowered species from Asia: spreading, flowering and woolly clematis. The range of species has expanded, and active work has begun on the development of new varieties. Species plants reproduce vegetatively and by seeds, varietal ones only vegetatively, most often in summer, but they can be grafted onto a rootstock grown from seeds, which will be frost-hardy and more hardy than the mother plant, and it will be easier to care for it. But some varieties, such as the popular The President with large purple flowers, are able to retain their specific characteristics.

Caring for clematis is quite simple, with a high decorative effect. The Tangut clematis is most easily propagated by seeds, with small white flowers that completely cover the bush in summer. The size of the seeds varies from species to species, which has a strong influence on the cultivation of a particular variety. The time at which the seeds are planted depends on the size: the first group is sown as soon as the seeds are collected from the plant - in the fall, the second - in February, and the third - in the spring, in March - April.
It is common to cultivate such types of clematis from seeds as Tangut (Radar Love variety) and Manchurian; the President variety reproduces well through seedlings, which is easier to care for than for most varieties of the Florida group.Most small-flowered hybrids are grown by this method - planting material can be purchased in stores or obtained independently, from your own plants, choosing the largest ones.

The following groups of clematis are distinguished, depending on the size of the seeds:
- Species with large seeds are hybrids of Jacqueman, Durand, a representative of Florida hybrids - The President variety, straight, spreading, woolly and purple clematis. They germinate for a long time - up to a year.
- Species with medium-sized seeds are Manchu, Chinese, curly, whole-leaved clematis. They can germinate for up to six months, but some varieties emerge after 6 weeks.
- Species with small seeds are Tangut (Radar Love variety), grape-leaved, gray-gray, erect clematis. They germinate quickly, sometimes after two weeks. Maximum - up to three months.
Growing clematis from seeds
Large seeds can be stratified within 3 months at temperatures up to + 5 ° C at home, for example, in the refrigerator. They need to be planted in the spring. When planting in the open field in autumn, the seed is covered with snow for a period of 3 months. Small seeds are sown in the spring directly into the ground or in a greenhouse. For better germination, they can also be stratified. In the southern regions, where the air temperature does not drop below -14 ° C, clematis is usually sown directly into the ground in mid or late winter. Planting material of burning, Chinese Manchurian and paniculate clematis is pre-soaked for 7 days, periodically changing the water.
The cultivation of clematis begins with the selection of the soil mixture. A properly selected substrate will greatly facilitate plant care. It is better if it is a mixture of sand and nutrient soil in a 1: 2 ratio. The selected container is filled with it and the seeds are sown superficially, sprinkling with a small layer of sand, after which the soil must be rolled. Maintenance consists in regular watering through the sump. If the seeds are planted directly into the ground, the beds must be properly prepared for them: the distance between the rows should be at least 30 cm.
Seeds are sown to a depth of 1-3 cm, sprinkled with sand, mulch the soil with sawdust, rolled up and covered with light shields. Seedlings appear in spring. Some of the clematis species grown in this way, such as Tangut, Violet and Whole-leaved, may bloom one year after planting. Large-flowered varieties such as The President can bloom for 2-3 years. If they develop correctly, they quickly build up a powerful root system, and it becomes easier to care for them.
Tip: large seeds are often attacked by rodents, therefore, if boxes with them are planned to be left outside, it is better to protect the crops with a metal mesh or cover with glass.

Sowing seeds at home
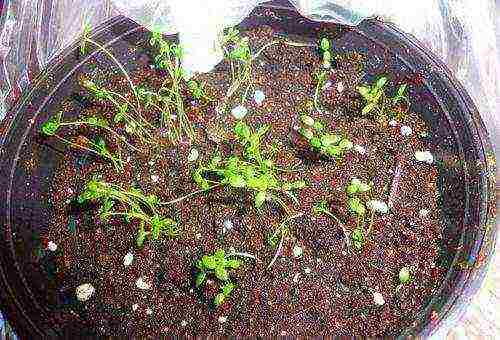
Planting and growing clematis from seeds at home begins with cold stratification in the freezer for half an hour. Then they need to be removed, left for 2 hours at room temperature, put back in the freezer, and the process must be repeated three times. Then the seeds are soaked in a growth stimulator for 2 hours, washed, laid out on a saucer, covered with a bag or glass and placed in a dark place. After 3-4 days, they begin to remove the package for a short while, airing the seedlings. Clematis germinate from seeds for 10 days, the temperature should be at least +25 ° C. After that, they can be sown into a container.
There is another way: the seeds are sown in December in boxes or pots with a moist fertile substrate. They are placed on a glassed-in balcony or in an unheated greenhouse. In the spring, the boxes are brought into a warm room and placed on a light windowsill. Crop care consists in regular watering. The first shoots will appear in 20 days, but sometimes this process can take the whole summer, so you need to be patient.
Care of young plants
When the seedlings grow up to two pairs of leaves, they are dived in separate pots or planted in the ground at a distance of 20 cm from each other. Caring for them consists in periodically pinching the shoots when they begin to grow back - this will make it possible to actively develop the root system, and not build up the green mass. The land between the rows is loosened and mulched after each irrigation with humus and ground cover and perennial plants are planted around for shading so that it does not overheat and dry out.
The aboveground part of the plant develops slowly - first, the root system grows, and then the green shoots. Growing and caring for young clematis from seeds differs from the agricultural technology of adult vines. They need to be watered and sprayed, weeds weeded, fed regularly and correctly: about once every 2 weeks. Ash mixed with rotted mullein and superphosphate is used as fertilizer. With this method of propagation, plants usually bloom in the second or third year, depending on the variety.
Sometimes seedlings are grown before planting in open ground so that they get stronger and acquire a powerful root system. Only after this is clematis planting from seeds to a permanent place - these plants do not like transplanting. It is better to choose it in advance so as not to disturb the roots later. Further care of the vines is simplified: now it is necessary to water the seedlings abundantly only in dry periods, in summer. Bushes are fed once a month, alternating mineral and organic fertilizers. Most clematis need pruning: depending on the species, it can be complete or partial. Shelter for the winter will also be required.
It is important to plant clematis correctly, choose a bright place, sheltered from the winds, with suitable nutritious soil. They do not like stagnant water, and, if the groundwater is close, drainage from broken brick, expanded clay or crushed stone is poured at the bottom of the planting pit. You can fill a small hill, raising the root system so that there is no high humidity, and maintenance becomes easier. Planting begins with an examination of the roots: the patients remove it by sprinkling the damage with charcoal, straighten the roots in the pit and cover it with earth, leaving a small depression to add fresh soil as clematis develops. It is better to tie the shoots to a support immediately so that they are not broken by the wind.
Conclusion: Clematis can be propagated vegetatively or grown from seeds. The easiest way to use this breeding method is for small-flowered clematis. The easiest to grow are the Tangut (Radar of Love) and Manchurian varieties, as well as the large-flowered The President. Seeds can be of different sizes, the sowing time depends on it.
Planting large seeds should be done after cold stratification. It is important to properly care for the seedlings: water through a pallet and shade from direct sunlight. It can be planted directly into the ground when the snow falls - after 3 months shoots will appear. Caring for young plants consists of watering, regular feeding and proper pruning of shoots. Clematis will need shelter for the winter. Plants bloom from seeds in 1-3 years.
Clematis - one of the most popular plants of the genus lianas.
Both the form and the variety of sizes and colors surprise with their splendor.
Flowers come in large and very small sizes, luxurious velvety and simple, yet graceful.
…
They are divided into 3 groups: blooming in spring from April to May, blooming in early summer, and blooming in July and later.
There are also several types in height: growing less than 1 m - herbaceous, over 3 m - climbing, grape-leaved and their types - up to 10 m. (See the varieties of clematis varieties here.)
It is for this reason that clematis should be planted correctly, since they are able to live for more than one year in one place.
The rules for growing snapdragon at their summer cottage, read on our website.
You can find out the features of caring for petunia at home here.
Growing graceful zinnia:
Planting clematis in the spring
For planting clematis, the most favorable seasons are autumn and spring. Saplings can go through the survival period much worse in the first year if the planting of the flower is delayed.
This is due to a failure in the life cycle of the plant, since clematis has an early growing season. This means that you need to plant on time in the spring.
If clematis is planted in the autumn, then you can be sure that it will take root quite well. You just need to know that by the onset of the winter cold, the flower needs to be allowed to take root properly. Thus, the topic of timing becomes relevant again.
As soon as the buds begin to swell or have not even begun to grow, from about April or early May, you can safely plant clematis.
For the correct planting of the plant, wide and deep enough holes for planting should be made - 60 cm each.
It is recommended to make drainage from rubble or broken brick 10-15 centimeters thick, if there is groundwater nearby.
After that, a fertile top layer and such fertilizers as: 2-3 handfuls of ash, 50 g of superphosphate, humus from 5 to 8 kg are added to the planting pit. Add 50g of slaked lime to acidic soil.
On the soil, which is scattered in advance in the form of a mound, it is necessary to spread the roots of clematis evenly.
As one of the options, the mound can be made of sand, and at the end of planting, the root collar is also covered with sand. Thanks to such manipulations, rotting of the plant will be prevented.
If the vine is old, the root neck is deepened by 10-12 cm, if it is young, then the root neck should be deepened by about 5-11 cm.
Thus, not only will new shoots form, but also in summer it will serve as a protection against overheating, and in winter against freezing.
When planting clematis, it is necessary to adhere to a distance between seedlings of 1-1.5 m. Immediately after the planting process, the plants should be watered abundantly with water, and then mulched.
Find out the peculiarities of planting irises and decorate your site with them.
Rules for planting and caring for decorative onions:
Highlights of clematis planting
1. The plant transplantation tolerance is excellent, which allows you to plant them on a simple bed to grow and strengthen, and after a year or two, plant them in permanent places.
2. A clematis seedling is disinfected in a weak solution of potassium permanganate before planting.
3. After planting, it is imperative to put a support and tie the clematis (temporarily).
The support should be no more than 2 cm in diameter. In general, in the process of growth, the vine needs a two- or even three-fold garter of shoots that have grown.
This should be done so that the plant does not suffer from diseases and to reduce the risk of mechanical damage.
4. Active growth of only one stem is observed in large-leaved clematis species in the first year of planting. And in the year when the plant is planted, the top should be pinched, so the lateral processes will begin to grow. The pinching procedure itself can be done again.
5. Clematis is very fond of light, but not overheating of the root system. That is why it is very good to plant flowers such as marigolds, peonies, phloxes and others near it.
6. Since the liana plant is at risk of overheating and drying out the soil, in the spring, after loosening and the first watering, it is necessary to mulch with humus in northern places, sawdust in the southern regions or peat. And in order to close the shoots at the bottom and avoid overheating, it will be enough to "knock out" the flyer.
7. If the plant is to be planted against a wall, the best side would be the southwest or south side of the building. The distance for good plant growth should be at least 50 cm from the wall. Under no circumstances should water from the roof fall on it.
Where you should not plant a vine plant called clematis:
- in places where there are drafts;
- where there is deep partial shade or absolute shadow;
- in the lowland, namely in those places where the accumulation of moisture and its stagnation is likely;
- it is also not advised to plant clematis close to buildings.
How to care for clematis in the spring
If you grow clematis correctly, then you need to remember about frequent and abundant watering for several years after planting.
After three years, it will be enough to water several times a week 2-3 buckets of water under the bush.
Luxurious and beautiful blooms are the result of proper watering.
To keep moisture in the right amount, you should mulch and loosen the ground near clematis. For the mulching procedure, you can use rotted sawdust, peat or humus.
During the first year of growth of the liana plant, roots are actively developing and, in total, about 3 shoots are added.
Therefore, in order to develop many tens of clematis shoots and obtain a lush shrub with more than one hundred charming flowers, you need to properly and carefully take care of the plant for about 5-6 years. For this, flowers that grow in a single quantity are best cut off.
Already starting from 3 years of growth, clematis is gaining strength, many shoots begin to appear on it. The timing of the flowering of clematis can be well controlled with procedures such as pinching and pruning.
Then the flowering will be completely different and longer, unlike plants without pinching and pruning.
Read on our website how to grow a violet.
Growing and caring for lavender at home:
Top dressing of clematis
Clematis are very sensitive to feeding. Therefore, they need fertilization, preferably once a week. For top dressing, a complete fertilizer from minerals is used - for 10 liters of water 30 grams of fertilizer, calculated for a volume of 2 sq.m. soil.
In addition to mineral dressing, 1 glass of wood ash for one separately taken plant is also suitable. Another very good fertilizer is mullein (manure).
This top dressing is recommended to be diluted with one part of the fertilizer per ten parts of water.
When the cold comes it is necessary to cover the root system of the plant, but at the onset of spring, you should not rush to open clematis.
Such a precaution is associated with the fact that the vine is afraid of still intermittent frosts and the sun, which shines brightly, which can lead to kidney damage.
As soon as the spring frosts recede, you can safely remove the shelter from the plant.
After feeding should be done nitrogen fertilizer. One of the good options would be urea - 40 grams for 10 liters of water. If the soil under clematis is acidic, then the best watering agent will be milk of lime in a proportion of 1 square meter of soil - 200 g of slaked lime for 10 liters of water.
The process of undressing the plant is best done in less sunny, better cloudy weather. It is recommended to even make them a little shade so that clematis gets used to the sunlight gradually.
The main points of caring for clematis immediately after planting:
- it is necessary to immediately shade clematis and make protection from the wind;
- water the plant abundantly, but in no case pour it!
- regular weeding and loosening of the soil;
- do not feed immediately after disembarkation!
Hello dear readers!
Let's continue our conversation about our proud handsome man - clematis. Many growers love it, but not everyone dares to plant clematis on their site.
They are afraid that both planting and caring for clematis will require significant time and attention. And completely in vain!
Clematis is quite independent and not capricious. Like every plant, it has its own preferences, knowing which, we can find a common language with our king of vines. And he will delight us with his lush and long flowering.
What determines the attractiveness of clematis?
Planting and care, performed competently and with knowledge of the matter, guarantee good health and life expectancy of the beautiful flower. A hastily planted liana will not please the owner with a rich flowering.
We plant correctly
The flower begins to grow in early spring. The buds wake up already when the air warms up to + 4-6 ° С, shoots actively begin to grow at + 7-13 ° С.
For gardeners in central Russia, the ideal planting time will be April-May, and for gardeners in the southern latitudes, September-October.
- These rules do not apply to flowers sold in containers (with a closed root system). These plants can be planted at any summer time convenient for the owner of the site.
♦ Clematis planting and care, soil preparation. The earth for handsome men should be light or medium density, rich in organic matter.
Flowers grow well on loams, well loosened and fertilized.
Unsuitable! Clematis will feel bad on clay, peaty, damp and acidic soils. If your garden differs in this type of soil, you need to improve its structure.
With spring planting, work to improve the soil is carried out in the fall, with autumn planting, processing is done a month before the event.
To do this, at the same time as digging, the following is introduced into the soil:
- Clay soil. Peat, sand and leafy soil in equal amounts.
- Peaty. Sand and garden soil in equal parts.
- Sandy. We need to dilute it with clay.
- Acidified soil. We lime at the rate of 300 g of lime per m².
♦ Preparation of pits. We clean the selected areas of weed residues. Planting holes should be 50x50x50 cm (for light soil) or 70x70x70 cm (for heavy soil).
If the soil of your site is too wet, we put a layer of drainage on the bottom of the pit (construction debris, broken brick, gravel or pebbles).
We fill the pits with a nutrient mixture:
- Humus (2-3 buckets). Rotted compost or manure will do.
- Granular superphosphate (200 g).
- Dolomite flour (150-200 g).
- Wood ash (2-3 glasses).
A small trench should be dug from the prepared planting pit at a distance of 10-15 cm - along it, excess water will leave the plant, preventing overmoistening of the roots.
♦ Preparation of seedlings. Take a close look at the young seedlings before the event. If you notice a damaged root, cut it off, and treat the cut with a weak manganese solution, then sprinkle with ash or crushed coal.
On the aerial part of the plants, before planting, all shoots located above the first / second bud are cut off.
♦ How to grow clematis, planting. In the central part of the prepared hole, fill in a small mound of enriched soil (we will do this so that the delicate seedlings do not burn the sensitive roots).
- We put a seedling on a mound and straighten the roots.
- We carefully deepen it to the place of the root collar.
- Sprinkle with a small amount of moistened nutrient mixture.
For younger clematis, the deepening will be about 5-10 cm, for adults 10-12 cm. If the plant is deeper, its growth and development will slow down.
To further reduce the possibility of soil overheating at the roots, the following plants can be planted with beauties: lavender, calendula, subulate phlox, tagetes.
After planting, we will mulch the soil (we use peat or humus). Don't forget the supports!
They must be installed when planting seedlings (to avoid accidental injury to delicate roots). In this case, the diameter of the support should be no more than 2 cm.
Flower care
♦ Watering. Clematis are very fond of drinking (their root layer must be constantly kept hydrated). The older the flower, the more moisture it needs. The lack of moisture will immediately affect the size of the flowers, they will become much smaller.
- First-year seedlings in spring, in summer we water once every 5-10 days (in hot, dry weather, 3 times weekly).
When watering, make sure that the stream does not hit the central part of the vine.
Clematis do not like frequent and shallow watering. The ground should get wet enough deep (60-70 cm) so that the water reaches the roots, and does not spread over the surface.
To ensure such watering, dig in several pieces of plastic pipe (3-4) immediately during planting, directing them slightly obliquely to the center of the plant.
And then, if watering is necessary, we fill them with water. So we will know for sure that every drop of moisture will reach the goal.
You can also use plastic bottles for watering (best of all 5 liter). We cut off their bottom and dig in near the clematis bush with the neck down. It is very good to feed the plants through this structure.
After the procedure, be sure to loosen the soil. At the same time, remove the weeds that have appeared.
♦ Top dressing. The kings of the flower world need to eat a lot and well, because: firstly, they bloom for a long time and magnificently, and secondly, they renew almost the entire above-ground mass every year.
They need to be fed twice a month. It is better to feed the flowers with liquid fertilizers and always in small portions after watering.
- Clematis must be fed in the spring during the regrowth of the shoots. For fertilizers, we use ammonium nitrate (20 g of substance per 10 liters of water), chicken manure (proportion 1x15) or mullein (1x10). Consumption of 10 liters of feed for 1-2 bushes.
- Then food should be alternated (organic with mineral).
- During the budding of plants, we combine organic matter and mineral supplements.
- In the summer, every month it is necessary to give the flowers a weak solution of potassium permanganate (2-3 g) and boric acid (1-2 g) in a bucket of water. At this time, spray the clematis with urea (for 10 liters of water ½ tablespoon).
- At the end of summer, the plant needs additives that activate the ripening of shoots (ready-made dressings "Kemira Autumn", "Autumn" are suitable). You can dilute the flower diet during this period with ash.
- Preparing for winter time during digging, you should add mineral (granular superphosphate 20-50 g per m²) fertilizers or organic matter. During this period, it is necessary to add potassium magnesium or potassium sulfate (10-30 g per m²).
- Sprinkle a mixture of charcoal, ash and sand at the location of the tillering unit.
♦ Garter. Many varieties of clematis require assistance in directing the growth of long vines. To do this, in the spring, the plant is tied up on a support, placing it in the required direction.
Otherwise, flexible shoots can become tangled and damage the flower. Over time, our handsome man will braid the support himself and grow.
- The only plants that do not know how to twine around the supports are the Clematis of the Integrifolia group. These flowers require constant help from a gardener. Such crops need to be tied up every summer.
But even an adult flower must be regularly adjusted on the support, directing the vines in the right direction.
Otherwise, flexible shoots can intertwine so that it will be very difficult to untangle them without damage later.
♦ How to cover clematis for the winter. Delicate and very sensitive flower beauties must be covered before the onset of the winter cold.
We will hold such an event with the onset of the first frost due to dry weather.
- Dry peat, sand, loose earth are suitable for the plant as winter protection. The layer to be rolled up should be 15-20 cm high.
How to cover clematis in another way? The aerial method of shelter has proven itself very well.
To do this, low wire frames are erected over the plant; wooden boxes without a bottom can be used. Layers of roofing material, films or roofing felt are applied on top of them.
But do not wrap them up too tightly, otherwise the plants may vanish.
Pruning Clematis
Pruning clematis is an important step in plant formation. The first pruning is carried out before planting, the next - in the middle of the summer season (at these times, the shoots are cut to ½ of their length).
The third pruning takes place in the fall - during the event, clematis will need to leave only 1-2 nodules. This will stimulate active root development.
- At this time, pruning of plants is also carried out, focusing on the group of Clematis' belonging.
If the flowers are formed on young shoots that have appeared in the current year, they should be shortened to 2-3 buds in the fall.
When flowers form on last year's shoots, we cut off all the leaves in the fall, put these shoots on the ground covered with spruce branches, cover them on top with the same mulch material that we used to cover the base of the bush. Put spruce branches on top.
In addition to the main pruning throughout the season, clematis need to carry out decorative pruning for a beautiful bush formation.
Spring awakening
In the spring, do not rush and wake up the plant, removing the covering material from it. Liana is very afraid of unexpected frosts and too bright spring sun - it can burn young buds.
In early spring, shelter can only be lightened slightly.
- Covering materials should be removed from plants only after the termination of possible spring frosts. It is better to wake up Clematis in cloudy weather.
We immediately feed the plants with nitrogen fertilizers. Urea (40 g per 10 liters of water) is perfect.
If the soil of your site is sour, use lime milk for the first watering (dilute 200 g of lime in 10 liters of water for each m²).
Don't forget to loosen up the ground.
Dangers to Clematis
♦ Diseases. The most common ailments of a gentle handsome man are powdery mildew, rust, wilt (wilting), gray rot, brown spot and fusarium.
The most dangerous condition for a plant is wilting.
- Suddenly, young shoots, sometimes the entire aerial part of the flower begins to fade rapidly. It is an infection that invades lesions near the base of the shoots.
It is necessary to cut off all affected parts of clematis and burn them. Treat the rest of the plant and soil with one of the following preparations:
- Foundation solution.
- Weak manganese solution (light pink).
- Soap-copper emulsion (20 g of vitriol, 200 g of soap per 10 liters of water).
For the prevention of other diseases of our beauties (in early spring, also before leaving for the winter), it is necessary to spray with foundation (20 g of substance per 10 liters of water).
Spraying is carried out at the base of the shoot, it is also necessary to treat the soil.
♦ Pests. Of the parasites, our flowers are threatened by spider mites, aphids, caterpillars, snails, slugs, mice and bears.The most dangerous is the root-knot nematode (small worms that live in the roots of a plant). Swellings (galls) appear on the root system, the growths merge and form a continuous shapeless formation.
- Diseased plants develop poorly, stop growing, flowers become smaller, roots dry. This condition can lead to the death of the entire vine.
Plants affected by nematodes must be completely destroyed, the ground must be carefully treated with nematacides.
Additionally, you can protect plants from nematodes by planting calendula, watercress, dill, coriander, marigolds or parsley next to them.
- Mulching the soil with finely ground mint or wormwood will be very useful. You can add various mineral additives containing ammonia (ammonium sulfate or ammonium nitrate).
How flowers are propagated
Breeding clematis is easy, there are many ways, the easiest of which are:
♦ Seed propagation. Many varieties of clematis bear fruit successfully (especially those growing in southern gardens).
The ripening time and the number of seeds are not the same (indicators depend on weather conditions and plant varieties).
- The seed method is not suitable for breeding large-flowered hybrids (flowers grown in this way lose their properties). This method is ideal for small flowered varieties.
Seeds are harvested on their own, given that clematis with small seeds form them after flowering after 1-2 months, and large-seeded ones after 3-4 months.
The seeds should be stored in paper bags at a temperature of + 18-23 ° C.
Clematis are classified into three seed groups:
- Large seeds (6-10 mm). They germinate unevenly and for a long time (sometimes it takes more than a year).
- Medium size (5-6 mm).Such seeds germinate more amicably, within 2-3 months.
- Small seeds (3-5 mm). The most germinating seeds. They germinate after 3-4 months.
Seed propagation of clematis with small seeds is recommended to be done in April-May, in large ones in autumn or winter.
If large seeds are stratified, they can also be sown in spring. To do this, place the seeds in one layer in boxes with a mixture of sand and earth (in equal parts).
Sprinkle them with sand on top with a layer equal to 2-3 diameters of the seed itself.
Sowings are watered as needed using a fine sieve and weeded. Cover crops with mesh or glass.
As soon as the seedlings give 1-2 pairs of true leaves, they are dived into ridges or boxes and at first they are shaded with shields.
The tint must be removed as soon as 2-3 pairs of fresh leaves appear on clematis.
Seedling care is the same as for adult plants. Clematis are transplanted to a permanent place after a year.
♦ By dividing the bush. If clematis has long and firmly established itself in the garden, it can be propagated by division. To do this, choose healthy, strong plants up to 6-7 years old.
- Dig up the vine and shake off the soil from the roots.
- Cut the plant carefully, leaving a basal bud on each part.
This procedure is best done in the spring or fall. If the vine has grown very much, it is enough to simply dig it up on one side and separate part of the culture.
♦ Growing by layering. Using this method, you can get up to 10 new seedlings. The method is especially good for autumn propagation of culture (over the summer, clematis get stronger and well formed).
This method is very simple:
- Make grooves 8-10 cm deep around the bush.
- Select mature shoots and place them there (after removing all the leaves).
- Fix the internodes with a wire arc.
- Top up the shoots with nutritious soil.
Ultimately, only the tops of 20-25 cm should look out of the groove. They should be tied to a small support.
Water and feed grooves with shoots regularly. The next year, in the spring, vertical shoots are separated from the donor bush.
♦ Cuttings. The best time for grafting is the budding process. During this period, shoots accumulate a large amount of biostimulants.
And the lateral short shoots that appear after complete pruning have the best rooting abilities.
- The cut shoot is divided into several shoots with one node. Cuttings are best cut from the middle of the shoot. The lower cut is made obliquely, the upper one is straight.
It is recommended that the cutting area (above the knot) be 1.5-3 cm long, the lower one 3-10 cm long. Remove one leaf (or leave two leaves, but shorten their plate by 2 times).
The cuttings are rooted in water (you can use a substrate) at a temperature of + 18-22 ° C and an air humidity of about 85-90%.
- To do this, the cuttings are planted in a greenhouse or the boxes are covered with glass / film. Sprinkle the leaves with water periodically.
After 1.5-2 months, the plant takes root. As soon as this happens, remove the film / glass or remove the clematis from the greenhouse.
Young plants must gradually get used to the light in order to endure winters later.
Advice. When cutting from one plant, do not cut more than a third of the shoots. So that new ones are formed as soon as possible - after cuttings, feed the plant with a mineral complex fertilizer.
The flower can be propagated in the fall (after the growing season) with lignified cuttings. The process is the same as with green cuttings.
The cuttings are placed in boxes, where they give roots after 90 days. In the spring they are planted in pots, and the next fall for permanent residence.
Now we know how to properly plant and care for clematis. As you can see, there is nothing complicated about this.
If you do not yet have this wonderful plant growing, then I advise you to plant it by all means, because the flowering of clematis is an unforgettable sight.
It often happens that flower shops start selling seedlings long before the time when they can already be planted in open ground. And you could not resist and still bought the variety you liked. What to do in such cases? You will find the answer to this question in the next video.
See you soon, dear readers!You can also read on this topic:
Tags: clematis