Content
- 1 Growing methods, their pros and cons
- 2 Mycelium selection
- 3 Growing on stumps
- 4 Preparing for growing in the basement
- 5 Basement landing
- 6 Planting care
- 7 Conclusion
- 8 Features of growing oyster mushrooms: necessary conditions and premises
- 9 How to grow oyster mushrooms at home: growing technology
- 10 Oyster mushroom diseases and pests: control measures and precautions
- 11 Growing oyster mushrooms intensively
- 12 Growing oyster mushrooms extensively
- 13 Before you start growing mushrooms
- 14 Premises
- 15 Substrate
- 16 Mycelium
- 17 Champignon plantation care
- 18 What is needed for successful mushroom cultivation
- 19 Bag cultivation technology
- 20 Growing oyster mushrooms on chocks (i.e. stumps)
- 21 Folk tricks: DIY mycelium
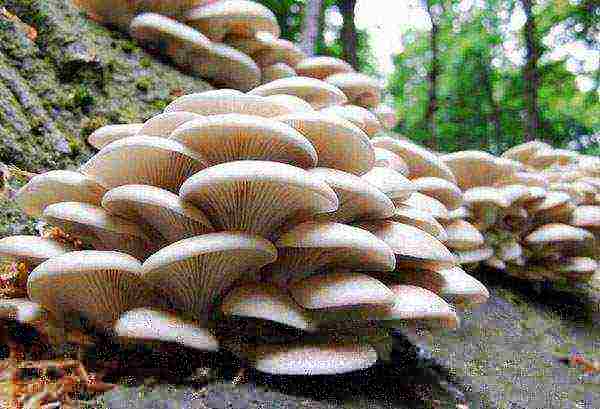
If you decide to grow mushrooms on your own, it is better to start with oyster mushrooms. Growing these mushrooms at home does not require the study of complex theoretical information or special skills. Oyster mushrooms are not as demanding as other types (for example, mushrooms). Another argument in their favor will be the high yield. You can cook many delicious dishes from them, the taste of which will not leave anyone indifferent. Let's figure out what are the ways of growing oyster mushrooms and how to cope with the difficulties arising for beginners.
Growing methods, their pros and cons
There are two ways to grow oyster mushrooms at home - extensive and intensive.
Positive aspects of the first method:
- it does not require the creation of special conditions, since a natural environment is needed for maturation;
- for the same reason, the extensive method does not have to spend a lot of money;
- in addition, the mushrooms do not need constant observation in this case.
But there are also negative aspects:
- the appearance of the crop depends entirely on the season and suitable weather;
- ripening period is quite long;
- due to the impossibility of control, it will not be possible to turn this hobby into a business and grow mushrooms at home for sale.
With intensive technology, the growing conditions are created by the mushroom grower himself at home.
Pros of the intensive method:
- the ability to control the time of harvesting;
- You can also regulate the amount of harvest - when using this method, it will be more;
- thanks to this, there is the possibility of selling mushrooms and compensating for costs.
Some cons:
- you will have to make more effort and spend a lot of time doing landings;
- cash investments will also be required - to create the necessary conditions at home.
In the intensive method, the mushrooms are ripened in a cellar or other suitable room.
Mycelium selection
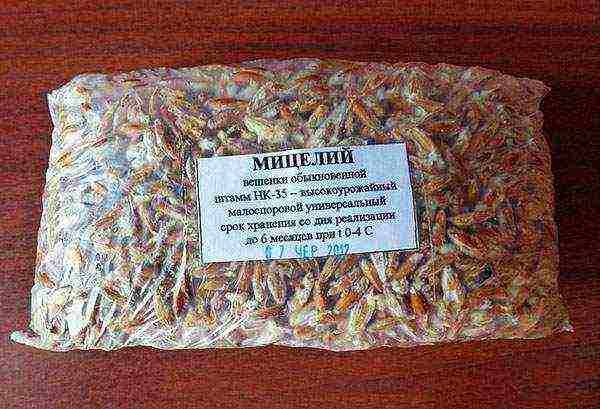
First of all, you need to purchase "seeds" - in mushrooms they are called mycelium. Recently, it has become much easier to do this - there are many online stores with mail delivery throughout the country. But there are also local companies. For beginner mushroom growers who fear failure, it is enough to purchase one kilogram of mycelium.The result will be about three to four kilograms of mushrooms. You can purchase the material in advance. Mycelium is stored in the refrigerator for up to two months, but it cannot be put in the freezer. It is not allowed to get mycelium on the skin, therefore, when opening the package, do not forget to wear gloves.
When buying, pay attention to the following recommendations.
- Check reviews for a store or individual seller.
- Even if you are an experienced mushroom grower, purchase a small amount of planting material from a new supplier for the first time.
- Learn all the information about the selected variety, the time of mycelium growth, mold resistance.
- Check the expiration date on the packaging.
- Check the temperature of the mycelium immediately after delivery - it should be about +20 degrees Celsius.
- The mycelium should be free of black and green spots.
- The color of the "seeds" is bright orange, interspersed with yellow.
Growing on stumps
If you are a beginner and are not yet ready to invest a lot of effort and money in growing mushrooms, try the extensive method.
To plant oyster mushrooms in this way, you do not need a lot of materials.
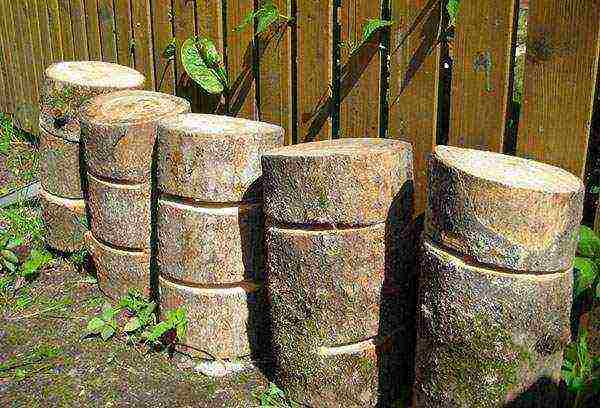
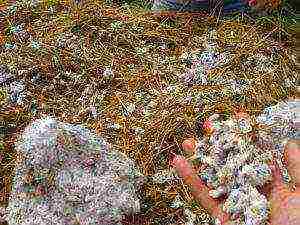
- Hemp that is on the site of your house. But they can be sown only in late April or early May, when a constant high temperature is established.
- Pruning from deciduous trees such as beech or aspen. They should be no more than half a meter in height and fifteen centimeters in diameter.
Check every stump carefully - they should be free of mold.
Advice
If the wood is dry, soak it in water for several days. Only in such conditions will mycelium be able to develop.
The technology is as follows:
- drill or cut out six centimeters in the stumps (they should be staggered);
- mycelium is placed in these holes;
- then they need to be covered with moss;
There is another way - you need to saw off a disk two centimeters thick from the top of the stump. Apply a layer of mycelium to the cut. Cover with a disc. For strength, nail it down.
After sowing, stack the logs on top of each other in a room where the temperature is maintained at +15. Leave them there for three months, covered with plastic wrap or thick cloth. By the end of the term, a white bloom will appear on the stumps. This means that it is time to "plant" them. To do this, they dig holes in the ground at a distance of half a meter and fill them with wet leaves. Hemp is placed in them - to a depth of fifteen centimeters. The soil around them must be constantly moist.
The harvest will appear at the end of summer. You can collect it throughout the fall. For the winter, the planting must be protected by sprinkling with straw.
Preparing for growing in the basement
To grow oyster mushrooms in an intensive way at home, you will need to prepare a basement that meets the following requirements:
- it must maintain a temperature of +15 degrees;
- a good ventilation system is needed in the basement;
- its depth can reach five meters;
- you need to create bright lighting;
- there must be a source of clean water in the basement.
Other types of premises are also suitable:
- cellar;
- poultry house;
- greenhouse;
- garage;
- cowshed.
The main condition is that this basement should not be adjacent to the living rooms of the house, since spores can cause allergies.
The next important condition for harvesting is a good substrate. This is a breeding ground, thanks to which mushrooms will grow. To prepare it, you can use:
- buckwheat husk;
- wheat straw;
- barley straw;
- cobs of corn.
Grind one of these materials or a mixture of them. Fill it with warm (up to twenty-five degrees) water for twenty minutes. Stir the workpiece periodically. Drain this water and fill a container with hot water (not boiling water). Cover with something heavy and let sit for five hours. Drain, squeeze out the substrate (liquid residues can cause mold) and add nutrients (urea and superphosphate) to it.
Basement landing
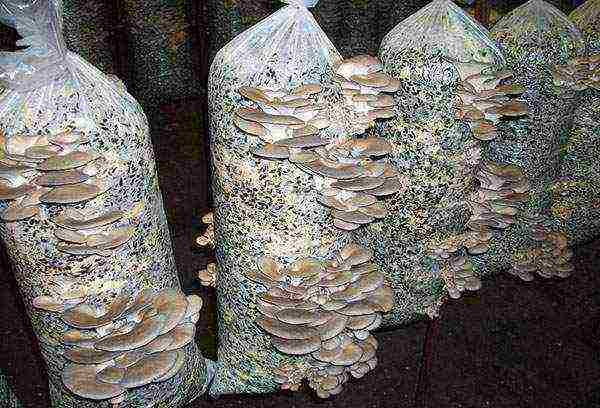
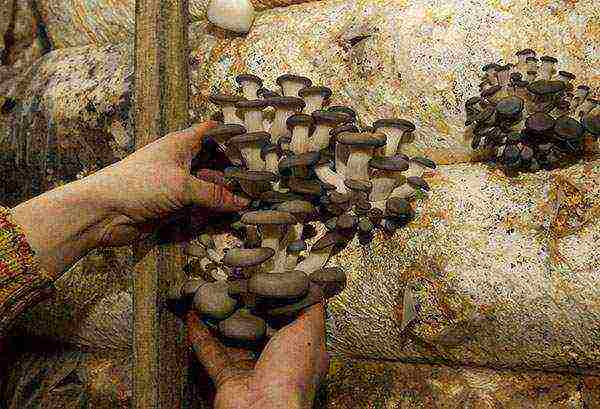
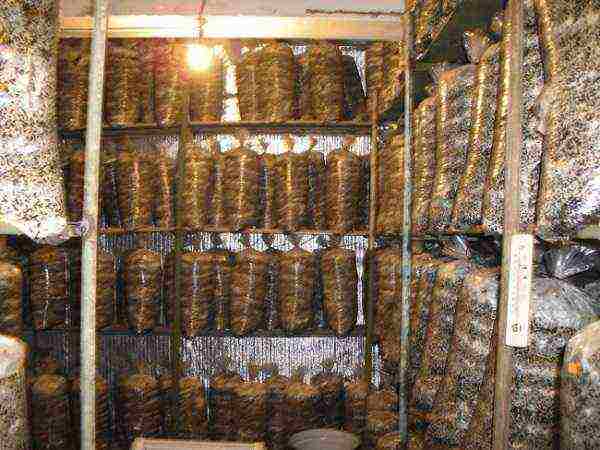
In this growing technology, it is not only the place and the basis for planting that are important. The vessels must also be prepared. Oyster mushrooms are usually grown in bags. At home, ordinary garbage bags as large as possible are also suitable.
Punch holes in them at intervals of twenty centimeters. Through these holes, the mushrooms will break out.
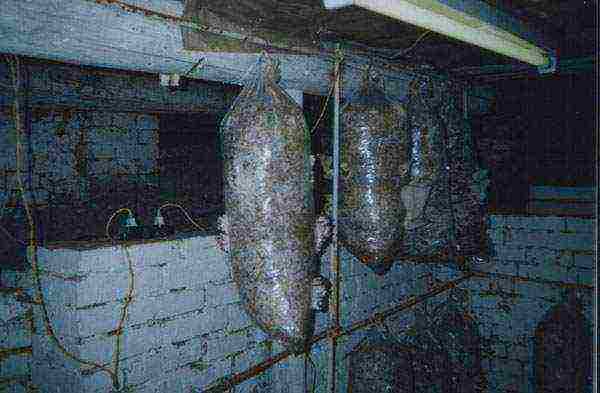
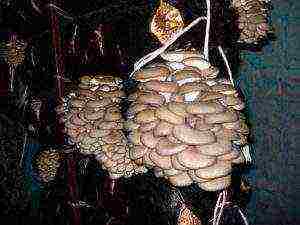
The bags need to be filled with substrate and mycelium. The bottom layer should be the substrate - pour fifteen centimeters of the mixture. Sprinkle it with a layer of mycelium. Alternate them, filling the volume of the vessel by 2/3. The bags should be moved to the basement and placed on top of each other or hung from the ceiling.
Planting care
In the early days of growing oyster mushrooms, it is most important to maintain suitable conditions.
- The temperature in the bags will rise, but it is important to ensure that it does not reach +30 degrees (when growing at home, in a small basement, it is enough to use a fan for this).
- Keep flies out of the basement.
- The lighting can be switched on after three days.
- The humidity in the basement should be about 95% (for this you need to spray the walls and floor with water, but not the oyster mushroom plantings themselves).
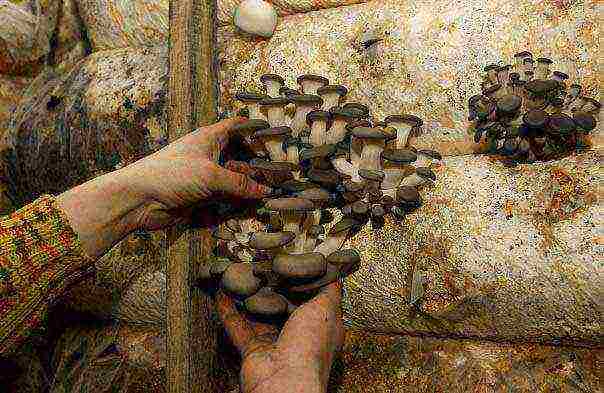
When collecting oyster mushrooms, you also need to follow some rules.
- They do not need to be cut off, but unscrewed from the substrate.
- After the first harvest, it is important to maintain the same conditions in the basement for two weeks, then another batch will appear soon.
Conclusion
Oyster mushrooms are the most suitable mushrooms for growing at home. They don't need much care. The conditions for their development are easy to maintain even at home.
There are two ways to grow them. One of them requires less effort, but the result will be a long wait for the harvest. For another, you need to prepare the room, but thanks to this you will quickly get a large amount of mushrooms.
Choose the method that seems to you the most successful, and feel free to start planting. In this case, you will be satisfied with the result.
Growing mushrooms at home allows you to pamper yourself with this tasty and healthy product all year round, and can also become an excellent source of additional income. Oyster mushrooms are one of the simplest types of mushrooms of their kind. Anyone who has decided to try their hand at mushroom growing can feel like a master growing oyster mushrooms. This variety is very unpretentious and does not require special care. Where is the best place to grow oyster mushrooms at home and what is needed for this? Let's try to figure it out!
Features of growing oyster mushrooms: necessary conditions and premises
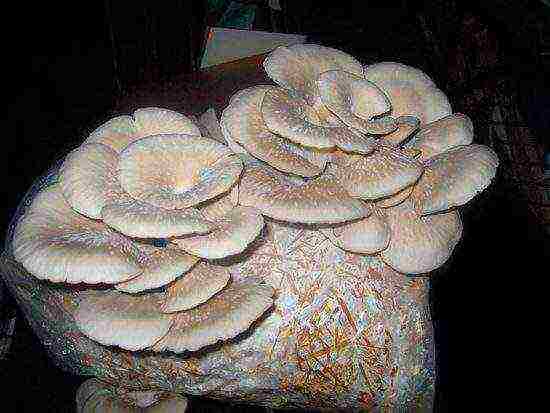
Oyster mushrooms or oyster mushrooms are a unique species that can sprout on any soil, be it dry grass, thyrsa, coffee grounds or even cotton fabric. This stunted plant is able to extract nutrients from everything in its environment. Another advantage of the species is its fast growth rate. Already two weeks after sowing, the first crop can be harvested.
Growing oyster mushrooms does not require any special knowledge and skills. The best place for growing oyster mushrooms will be the basement or cellar of a private house. Oyster mushrooms are not thermophilic and do not need a lot of light. If you do not have a basement, they can be grown in a greenhouse in a country house or shed. Despite the simplicity and the absence of excessive maintenance of mushrooms, the growing room must be properly prepared.
The following equipment should be installed in the room and special conditions for growing oyster mushrooms should be created:
- Growing equipment (bags). The choice of equipment depends on the method of growing oyster mushrooms. The most convenient and economical option is bag growing. To do this, you need special supports with hangers on which the bags with the substrate are suspended. It is best to use plastic equipment, it does not corrode and is much cheaper. By the way, oyster mushrooms can also be grown on stumps.
- Room temperature. This mushroom does not need high temperatures, so there is no need to create a greenhouse. It will be enough to insulate the room and carry out thermal insulation to retain moisture. Naturally, elementary heating devices must be present so that the temperature does not fall below 13 ° C. An elevated temperature is necessary only at the initial stage after planting the mycelium (22 ° C - 25 ° C). Infrared lamps can be used for additional heating.
- Humidity. Oyster mushrooms are very fond of moisture, so the air in the growing room must be constantly humidified. It is very easy to do this using nebulizers or special electronic humidifiers. The humidity level should be around 70-90%.

- Ventilation and lighting. All mushrooms grow in the fresh air and oyster mushrooms are no exception. The room must be systematically ventilated. This can be done manually, or you can install special hoods that will deliver fresh air. Again, purchasing such equipment is expensive, so unless you plan to grow large quantities of oyster mushrooms for sale, it won't be cost effective. When it comes to lighting, you need to install fluorescent garden lamps. You won't need a lot of them, since this type of mushroom does not require a lot of light.
- Cleanliness and pest free. To grow a large, and most importantly, a healthy crop, the premises must be clean. If the basement is heated by groundwater, and there is fungus or bloom on the walls, this can seriously affect the yield. Mushrooms will hurt, light spots will appear on them, mushrooms will lose their density, become soft. To protect future plantings, it is necessary to disinfect the premises. First, they thoroughly clean the walls, ceiling and floor, remove all dirt and mold. Then, all surfaces are sprayed with a solution of sulfate, and the walls and ceiling are covered with a solution of lime and copper sulfate.
Video: a room for growing oyster mushrooms in the basement
Note! If there is a fungus in the room, it is better not to use it as a greenhouse. High humidity, which is necessary for growing mushrooms, will only aggravate the situation, the disease will affect crops, they will become inedible and poisonous.
How to grow oyster mushrooms at home: growing technology
Having decided on the location of the mushroom greenhouse, after thoroughly disinfecting the premises and installing the necessary equipment, you can proceed to the very process of growing the mushrooms. The technology of growing oyster mushrooms involves several stages.
Video: step-by-step instructions for breeding oyster mushrooms at home
Substrate preparation
The key to a rich harvest is a high-quality substrate. Although it is generally accepted that oyster mushrooms are indiscriminate in this regard, the soil should still be fertile.
The best substrates for breeding oyster mushrooms are:
- dry straw of wheat, barley and buckwheat;
- hardwood sawdust;
- sunflower seed husks;
- dried stalks and cobs of corn.
Choose the amount of substrate according to the amount of mushrooms you want to grow. So, one bag for growing oyster mushrooms is designed for 5 kg of substrate. All components of the substrate must be clean and dry, they must not have mold or rot, and they must not be rotten. It is best to disinfect the selected substrate by heat treatment. Next, you need to grind these components to a fraction of 4-5 cm and mix. Repeated heat treatment for two hours and squeeze out.
Actually, the substrate for growing oyster mushrooms is ready.
Selection and purchase of mycelium
For growing oyster mushrooms at home, it is best to use grain mycelium. It is very convenient to sow and does not require additional processing.
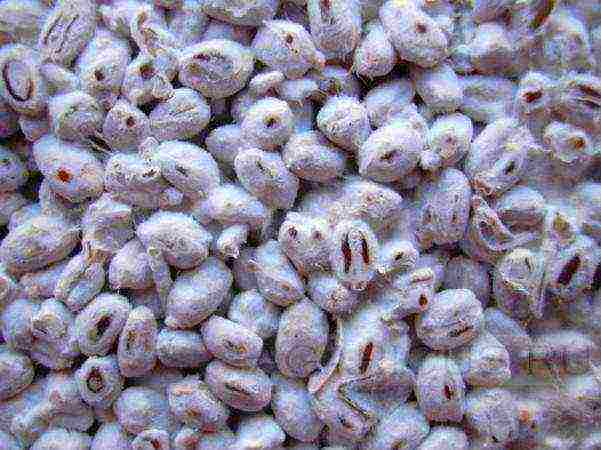
When buying mycelium, pay attention to its appearance. The grains should be yellow with a slight orange tint.It is strictly forbidden to buy mycelium, on which dark spots are visible - this is the first indication of the presence of mold. You can also determine the quality of the planting material by smell, it must be fresh and smell like mushrooms. If you smell a slight ammonia smell, it means that the mycelium was stored incorrectly and has deteriorated.
Be sure to pay attention to the manufacturer's company, it is better if it is a well-known and large producer in the seed market, read reviews of gardeners on the Internet. Do not buy large quantities of mycelium at once, take a trial batch. If the mycelium germinates without problems, forms good and healthy mycelium, you can purchase a large batch.
If you want to make your own oyster mushroom mycelium, then read this article.
Landing
Before proceeding with planting, the mycelium must be placed in a room where oyster mushrooms will grow for a day. This is done in order to equalize the temperature and the mycelium does not die from shock.
To grow oyster mushrooms in bags, it is imperative that it first be disinfected or thermally treated. An effective way of processing is washing with a solution of bleach.
The optimal volume of the bag should be at least 5 kg.
Further, the planting of oyster mushroom mycelium or the formation of mushroom blocks is as follows:
- There is a layer-by-layer filling of the bag with a substrate and mycelium. For every 5 centimeters of the substrate, there should be about 0.5 cm of mycelium. The top and bottom layers in the bag should be substrate.
- At the end of the filling of the mushroom block, the bag is tightly tied at the neck.
- Then small holes are cut at a distance of 10 cm from each other, with a diameter of no more than 2 cm. The cuts are best done in a checkerboard pattern.
Attention! The planting of mycelium and the cultivation of oyster mushrooms are carried out in separate rooms, since there is a high risk of infection of myceliums.
Video: how to make a perforation of a mushroom block
Further care
In the period from planting to the formation of myceliums, temperature room air should be 18 ° C - 20 ° C. As soon as they are visible first fungi formations, the temperature is lowered to 13 ° C - 15 ° C. This is the optimum temperature for growing all types of oyster mushrooms.
It is very important to maintain humidity air. Watering the substrate is strictly prohibited, since in wet soil the mycelium begins to rot. Even if the myceliums survive, all the mushrooms will hurt, rot and dark spots will begin to appear on them. To achieve optimal humidity in the room, you can hang wet sheets or any other wet cloth. Open containers with water are left near the heating devices, in this way the moisture evaporates faster and saturates the air.
Harvesting
The fruiting period for oyster mushrooms is only 30 - 35 days, which is a very short period. The thing is that these mushrooms have a very high frequency of fruiting: every 7 to 9 days. That is, already 9 days after planting the mycelium, you can harvest the first full harvest.
It is customary to cut the mushrooms with a knife carefully so as not to damage the main root attached to the mycelium. When collecting mushrooms, absolutely all fruits cannot be cut from one mycelium. It is necessary to leave 2 - 3 of the smallest mushrooms on the stem, otherwise the mycelium may dry out and stop bearing fruit.
Video: how to properly harvest oyster mushrooms
Important! After the last crop of mushrooms has been harvested, the substrate and bags must be disposed of. They are not recyclable. The room is well cleaned, ventilated and disinfected. It will be possible to re-breed mushrooms only 2 weeks after all harvesting work.
Video: technology for growing oyster mushrooms
Oyster mushroom diseases and pests: control measures and precautions
It happens that during the fruiting period, the mushrooms begin to hurt. A variety of factors can be the cause of such diseases.If all disinfection work has been carried out in the room, diseases should not disturb the crop.
The main number of fungal diseases lies in the substrate... As a rule, bacteria enter along with wet and rotten straw.
Important! If you are not sure about the quality of the substrate, it heat treatedbefore planting the mycelium. It is placed in a large container and poured with boiling water, after which it is boiled for 2 hours, then squeezed and dried.
In a damp substrate, the mushrooms begin to rot, the legs darken and become soft. This disease is called dark rot. If, nevertheless, she overtook the plantings, it is necessary to remove all diseased plants along with the substrate.
Very often oyster mushrooms are attacked mushroom flies, a little less often - ticks. These parasites are also born in the mycelium when the air is too humid and the room is not ventilated. Light pits appear on the mushrooms, like small bites. Naturally, such mushrooms must be removed immediately, and the room must be disinfected. Do this with smoke bomb, which is left for a day in a hermetically sealed room, and then thoroughly ventilate it.

It is necessary to carefully monitor the state of the mushrooms from the formation of the mycelium to the last fruiting. If one of the myceliums is infected, the entire bag will have to be thrown away, and this will significantly reduce the yield increase.
Summarize. Based on all of the above, it can be understood that growing oyster mushrooms at home is a very simple but time-consuming process. To do this, you will need to purchase special equipment, prepare the premises and fertile soil, and purchase high-quality mycelium. Further, it all depends on your patience and hard work. With proper care, up to 9 kg of mushrooms can be harvested from one bag. Growing oyster mushrooms is a great option for getting your first experience in mushroom growing.
Video: how to grow oyster mushrooms at home
Growing mushrooms on your own plot is not only exciting, but also a profitable business. If you're new to mushroom farming, try starting with oyster mushrooms. These are unpretentious, but very prolific mushrooms. Someone grows them for themselves, and someone was able to make a profitable business out of oyster mushrooms. Indeed, with 1 kg of mycelium, up to 4 kg of mushrooms are obtained!
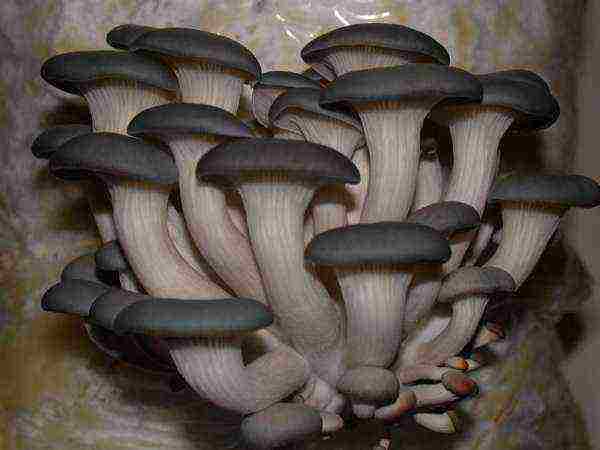
Oyster mushrooms
There are two ways to grow oyster mushrooms: intensive and extensive.
Growing oyster mushrooms intensively
This method involves growing mushrooms in artificially created conditions. The task of the mushroom grower is to provide a microclimate that will be most favorable for the growth of oyster mushrooms.
Mycelium preparation
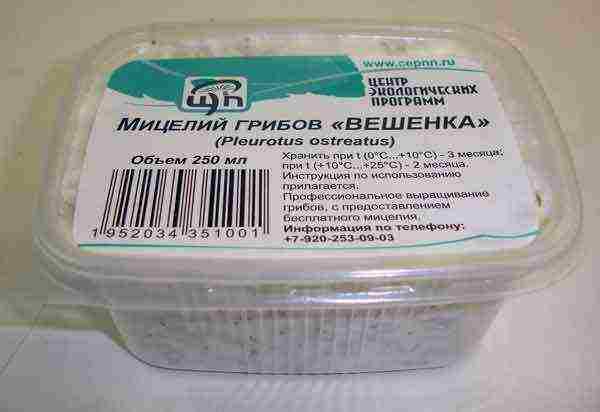
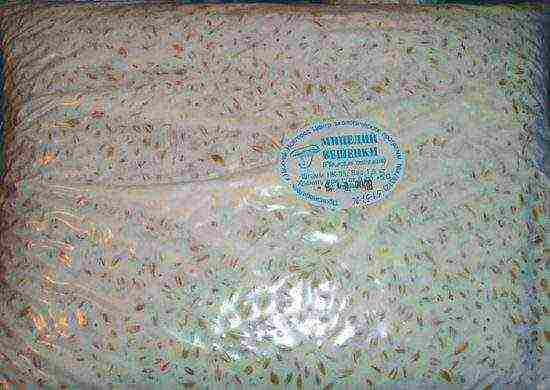
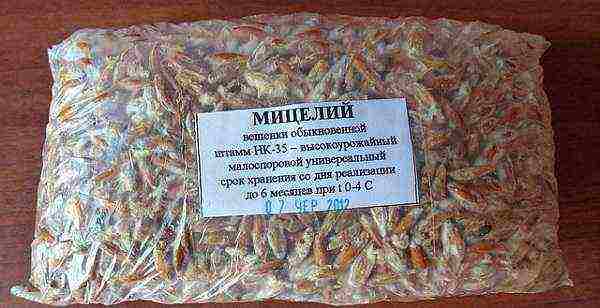
Purchased mycelium for growing oyster mushrooms
Ready-made mycelium can be purchased at the store. For the first growing experience, you do not need to acquire a lot of material - 1 kg is enough.
Oyster mushroom mycelium
Mycelium selection principles:
- buy from trusted sellers;
- look at the color: the mycelium should be white, interspersed with orange and yellow (green and black spots should not be);
- carefully read the information on the package (variety, shelf life, fruiting rate);
- check the temperature of the bag with mycelium: it should not exceed 20 ° C;
- sniff: the bag should not emit an ammonia odor.
After purchase, the bags with mycelium must be cooled slowly. Before planting, they are stored in a refrigerator at a temperature of 3-4 ° C. The maximum shelf life is 2-3 months.
Before laying in the substrate, the mycelium is removed from the refrigerator, warmed in a warm room to the temperature of the substrate (so that it does not die from thermal shock) and crushed.
Grinding the mycelium
Important! All work with mycelium is carried out under sterile conditions. The room and work surface are disinfected, the mushroom grower works with gloves.
Substrate preparation
The amount of substrate should be 10 kg of material per kg of mycelium.
Substrate preparation
Any plant waste is suitable for the substrate:
- wheat or barley straw;
- shredded leaves, stalks and ears of corn;
- cleaning from sunflower seeds;
- buckwheat husk;
- sawdust.
Important! The raw material must not be rotten or moldy!
To disinfect the substrate and saturate it with moisture, treat the material with water or steam. There are three processing options:
- digestion of dry material in hot water;
- steam treatment of dry material;
- steam treatment of wet material.
Heat treatment of the substrate
The first method is used most often. The raw material is placed in a tank, poured with water and boiled for 1.5–2 hours. Then the water is poured out, the substrate is sent under pressure and cooled to 25 ° C.
In order for the mycelium to develop comfortably, the moisture content of the substrate must be optimal.
Advice! How do I check the humidity level? You need to take a lump of material in your hand and squeeze it. If the material is springy, but water does not flow out of it, the humidity is ideal. If it gets too wet, you need to let the excess moisture drain.
After cooling, the substrate is crushed into pieces 4–5 cm in size.
Mycelium packing
The packing of mycelium and substrate in bags is carried out in a sterile room: in a room that is intended for incubation.
Step 1... The room is treated with chlorine. Work is carried out with gloves, all tools are wiped with alcohol. Grow bags must also be sterile. For disinfection, they are placed in a bleach solution for a couple of minutes.
Step 2... If you are growing oyster mushrooms for the first time, take 2 small bags, each of which will hold 5 kg of material, and put the mycelium with the substrate there.
We fill the bags with substrate and mycelium
Advice! There are two ways to put the mycelium in the substrate. The first option involves mixing the substrate and mycelium on a surface and then placing the material in bags. The second is a bookmark in layers. You need to take a bag, pour 5-6 cm of substrate into it, then 0.5 cm of mycelium. And so on to the very top.
Convenient bag filling tool
Step 3.Make holes on the bags through which the mushroom growths will grow. The incisions are made in a checkerboard pattern every 10–15 cm. The incision length is 1–2 cm. You can make perforations in the form of holes, "crosses" or "check marks" to obtain more compact splices.
In the photo there are holes for germination of oyster mushrooms
The bags must have holes for the germination of mushrooms
Step 4.The finished blocks are placed in the germination room in such a way that the notched sides have unlimited air access.
Bag arrangement option
Incubation
Incubation takes 10–20 days. At this time, provide the mushrooms with a favorable microclimate:
- indoor humidity - 70–80%;
- room temperature - no more than 25 ° C;
- the temperature inside the bags is not more than 30 ° C, otherwise the mushrooms will not sprout;
- reduce the temperature with fans, but never ventilate;
- do wet cleaning daily.
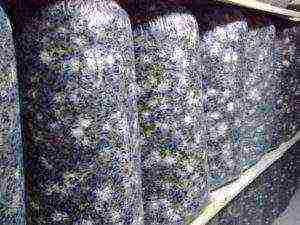
If everything is done correctly, after 3-4 days you will see that white filaments of mycelium begin to spread over the substrate. After 10–20 days, the mycelium will grow throughout the entire package. It will acquire a whitish color and a characteristic mushroom aroma. The incubation is over and the fruiting time begins.
Germination of the substrate
Video - Growing oyster mushrooms at home
Fruiting
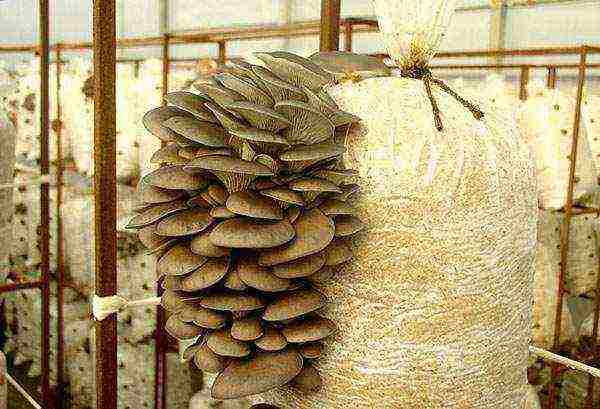
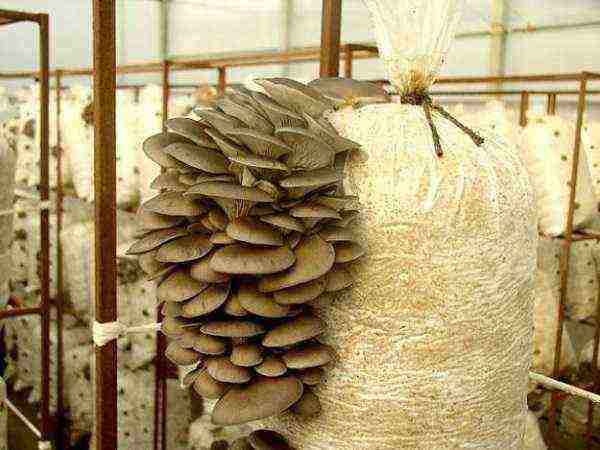
After the end of the incubation period, transfer the bags with the mycelium to the fruiting room.
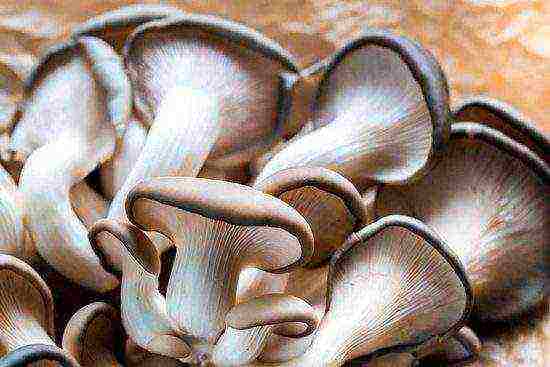
Oyster mushroom fruiting
Important! The cultivation room should be located away from the residential building. Growing mushrooms secrete spores, which are a powerful allergen.
Fungi require a favorable microclimate:
- temperature - no more than 10-15 ° C;
- humidity in the room - 90–95%;
- fluorescent lighting - 10-12 hours a day;
- put a humidifier in the room;
- irrigate the walls and floor with liquid, but in such a way that it does not fall on the mycelium;
- ventilate the room every 6–8 hours.
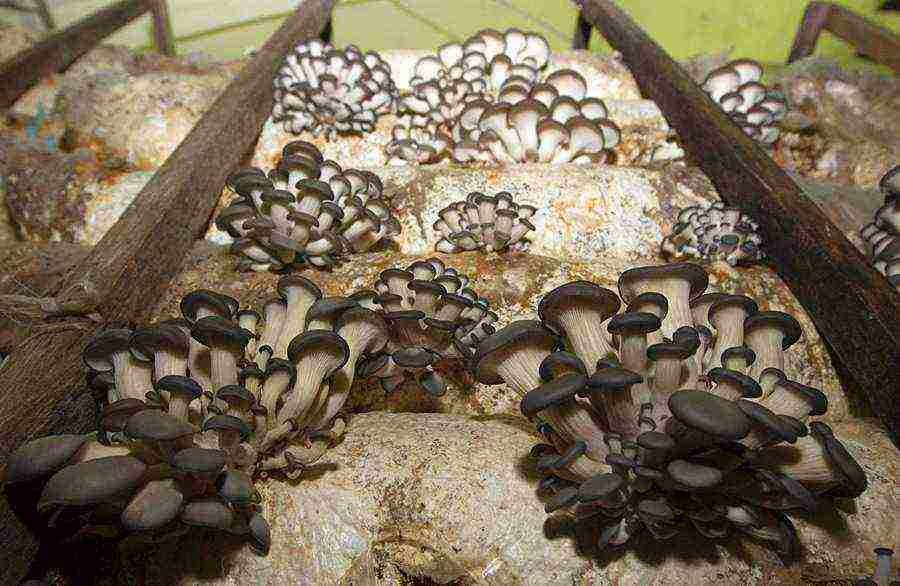
Growing mushrooms
After the caps form, the mushrooms require daily irrigation. Spray water on top 1–2 times a day so that it runs down the oyster mushroom caps. During this period, pay particular attention to the ventilation of the room: due to moisture, the mushrooms can rot.
Harvesting
After 1.5 months, the mycelium will delight you with fruits. After removing the first mushrooms, new ones will appear in 2-3 weeks. The mycelium can bear fruit up to 4 times, but 75% of the harvest will fall on the first 2 waves.
The first crop can be harvested
To prevent the mycelium from rotting, the sprouts of the mushrooms must be twisted without leaving the legs in the substrate. After harvesting, sort out the substrate, remove rotten elements from it and put it back in bags. With proper care, the mycelium bears fruit for up to six months.
In the photo, harvesting oyster mushrooms
After the 4th harvest, discard the substrate or use it as garden fertilizer.
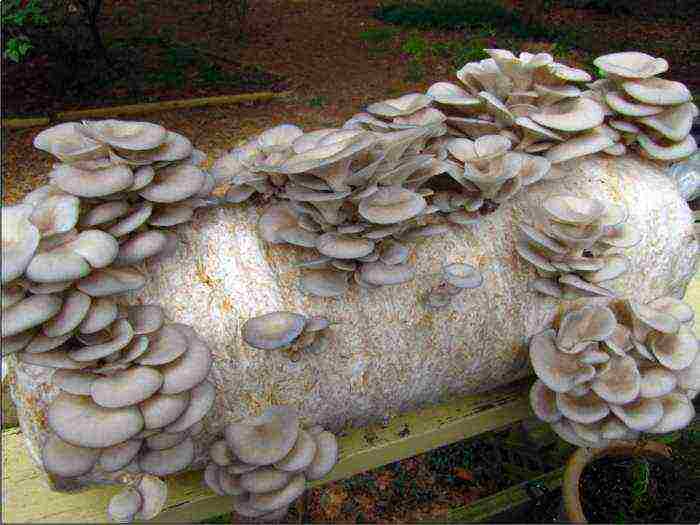
Growing oyster mushrooms extensively
Growing oyster mushrooms extensively
This method involves growing mushrooms in conditions close to natural.
- Prepare the stumps or logs that the mushrooms will grow on. Oyster mushrooms love the wood of willow, poplar and linden, however, a good harvest can be obtained from aspen hemp.
Logs for growing oyster mushrooms
Mycelium laying scheme
- Wet the logs, make several deep cuts on their surface with a knife and add the mycelium purchased in advance into them. Cover the holes with tree bark or moss.
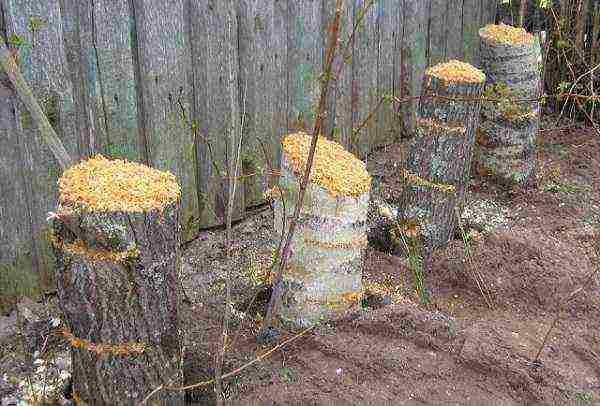
- Place the finished logs in the garden. Choose a shady but well-ventilated area. The main thing is that the stumps do not fall under the direct rays of the sun, otherwise the mycelium will die. Place the logs in small recesses and dig in with earth for stability. You can put leaves or sawdust in the holes.
- Water the logs thoroughly and cover with foil. If the weather is dry, then oyster mushrooms require daily watering.
- After 1.5–2 months, the first crop can be harvested. In one season, the logs bear fruit up to 3-4 times.
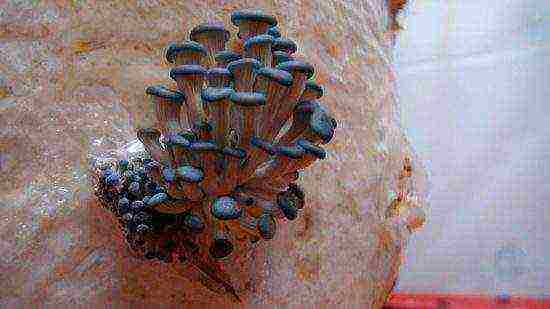
Oyster mushroom harvest
The next year, the logs will bear fruit again, if you do not forget to water them. The mycelium will retain fertility for 3-5 years.
Crop can be harvested within 3-5 years
Both cultivation options have their own advantages and disadvantages. To make it easier for you to choose a method of growing oyster mushrooms, pay attention to the table.
| The essence of the method | Cultivation takes place in natural conditions | Mushrooms are grown under artificial conditions |
| Tools and materials | Mycelium, tree stumps, moss, film | Mycelium, substrate, bags, air humidifier, fan |
| Premises | Garden | Two rooms: for incubation and for cultivation |
| Target | Grow mushrooms for yourself | Grow mushrooms for sale |
| Dignity | Low costs | High yield, regardless of the season and weather; mushrooms ripen quickly |
| disadvantages | The yield depends on the weather; fruiting occurs only in the warm season | The need for additional costs and two rooms |
Video - Oyster mushroom on stumps, An extensive way of growing mushrooms
Video - Oyster mushroom, waste blocks, good harvest
 Growing an oyster mushroom in a home basement is a trend that came from the 90s. Craftsmen mastered this business from scratch, planted entire plantations in such conditions and built a business on them. It is not difficult to grow oyster mushrooms - it is important to adhere to the step-by-step algorithm and instructions. This article contains the recommendations of experts on where to start the process and how best to carry it out. Photo and video tips are provided to help beginners.
Step 1: preparing the room
To organize home cultivation of oyster mushrooms, you need a properly equipped room, high-quality mycelium (mycelium), and a suitable substrate. In the basement, mushrooms are grown in two ways:
- Natural.Minimum equipment costs, but no more than one harvest per year.
- Intensive. Requires investment in order to create and maintain the microclimate necessary for oyster mushrooms in the basement. But it allows you to collect several crops per season, regardless of weather conditions.
Advice. Mushroom pickers often choose the second option. This technology will allow the family to feed and sell some of the mushrooms.
You should not count on a safe and healthy harvest if you cannot create and maintain such conditions in the basement:
- purity;
- air temperature in the range of + 10 ... + 20 ° C;
Oyster mushroom is easy to grow on your own
- humidity - 85-90%;
- constant air circulation, well-functioning ventilation;
- no pests and mold.
A deep cleaning in the first step will help detect problems in the basement. You may need a total rearrangement or re-equipment of the premises. To grow mushrooms in winter, take care of the tightness and insulation of the basement. Then, to maintain the microclimate in the cold, one heater will be enough for you, which will turn on for 2-3 hours.
Cover the ventilation openings with mosquito nets. Mold can be removed by hand using special products or vinegar solution. As a preventive measure, a normal balance of temperature and humidity is sufficient. Remove pests using pest control: smoke bombs or chemicals. Further work in the basement can be started no earlier than in a week.
Step 2: preparing the substrate
When using the intensive growing method, the substrate acts as a comfortable, moist and breathable environment. It protects oyster mushrooms from mold damage. Experienced mushroom pickers use hardwood shavings. It is easier for beginners to work with buckwheat or sunflower husks, barley or wheat straw, dry corn stalks.
An important task is to properly prepare the substrate for growing.
Prepare the material before use:
- Make sure it is free of fungal microorganisms.
- Heat the raw materials: steam a dry or moistened substrate, boil in water. In the latter case, let the liquid drain for a few days. Such saturation with moisture is considered optimal when, when squeezed by hand, the substrate springs, but does not ooze with water.
- Cool and grind the material.
- Place the substrate in plastic bags with small holes. Transfer them to a separate, disinfected, warm room to place the mycelium.
- Use bleach for surface treatment. The same sterilization is needed in the basement.
Step 3: buy quality mycelium
In order not to make a mistake in choosing a basis for the reproduction of mushrooms, follow these recommendations:
- If you are not sure about the quality of the myceliums you are purchasing, take several small batches from different suppliers.
- When buying, examine the data on the variety and strain, productivity, mold resistance, crop savings terms.
- The optimum temperature for mycelium is about +20 ° C. Make sure no overheated material is sold to you.
- The mycelium should not exude an ammoniacal odor and be covered with black or green spots. A healthy color is bright orange.
Oyster mushroom mycelium
After harvesting, the seed mycelium is stored in the refrigerator at a temperature of + 3 ... + 4 ° C. Under such conditions, normal mycelium will retain productivity up to 3 months, substrate mycelium - up to 9 months. Check with sellers for compliance with these conditions. After purchasing mycelium:
- place the bags separately in a well-ventilated room;
- leave for a couple of hours at room temperature;
- before laying, grind the mushroom base without opening the bag.
Attention! It is necessary to open the package and carry out all subsequent operations only with gloves, in a sterile environment. After opening, treat the mycelium with a disinfectant solution.
Step 4: laying the mycelium
You will need a sterile table.The bags also need to be treated with a disinfectant solution, and then with water. Turn off ventilation, close windows and doors during work. Mix the substrate and mycelium directly on the work surface. Correct proportions for mycelium:
- domestic raw materials - 3-5% of the total volume of the substrate;
- foreign product - 1.6-2.5%.
Put the mixture back into bags and tamp. The optimal weight of one bale should be 5-15 kg. Flatten the bags lightly and using a sharp knife, cut openings on both wide sides. The length of one is 0.5 cm. This technique will lead to the fact that the mushrooms will break through in bunches.
Carry out mycelium placement under sterile conditions.
Place the bags on props or shelves in the same room. The bags should be at least 5 cm away from walls and each other and should be well blown from all sides. The most favorable air temperature is around +25 ° C. In the block with the substrate, it may be slightly higher. Sowing maintenance is simple:
- do not ventilate the room;
- Wipe floors and surfaces with chlorine and water every day.
Attention! Do not overheat the mycelium at + 30 ° C or higher.
Step 5: growing oyster mushrooms in the basement
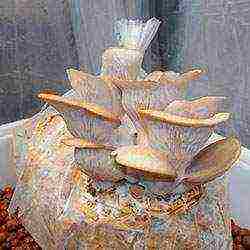
In a warm room, the bags should lie for 18-25 days. After that, they should be transferred to the basement. There the blocks are placed vertically. They can be placed on top of each other, however, a gap of at least 0.5 m is required between the columns. The first mushrooms can be collected after 1.5 months. after laying the mycelium.
Growing oyster mushrooms in the basement
In the basement, you need to maintain optimal conditions for growing oyster mushrooms. The desired lighting intensity is 5 W / sq. m. In order for the body of the fungus to mature dense, and not watery, use a humidifier or sprayer for irrigation. Water with a temperature of + 10 ... + 25 ° C should flow from top to bottom no more than twice a day. Ventilate the area after watering.
Attention! Oyster mushrooms form a lot of controversy. To prevent them from causing allergies, the basement must be isolated from the living rooms.
Subsequent waves of fruiting in oyster mushrooms occur at intervals of 2-3 weeks. Remnants of the mushroom legs should be removed between these periods. Go through the bags. If you notice mold, remove it from the room. Such a substrate will fit on the site as an organic fertilizer. It is easy to grow oyster mushrooms in the basement, especially if you are well prepared for the process.
Growing oyster mushrooms at home: video
Growing mushrooms in a private household, in dachas and even in apartments is becoming fashionable today. Firstly, mushroom products in the store are not sold at a low price. Secondly, the homemade mushroom, grown without the use of unknown chemicals, is environmentally friendly and safe for consumption. Thirdly, mushroom growing can be made a profitable business, or at least a good source of additional income. Fourthly, it is a very interesting and exciting hobby. Take a substrate, put mycelium in it, create conditions. And it starts to grow like mushrooms.
Growing champignons at home for beginners
Before you start growing mushrooms
You need to think well and weigh your desire and capabilities on two scales. If they are at about the same level, it is worth the risk. Information for beginners: growing mushrooms at home is a more laborious process than growing oyster mushrooms. But less long-term and more effective than growing porcini mushrooms.
It will take certain costs for the purchase of materials, arrangement of the premises, as well as patience and certain skills. Provided that you already have a suitable room and you only need to create favorable conditions in it.
Premises
It should be moderately cool, such as a cellar or basement. If neither one nor the other is not present, it is difficult to advise anything. Perhaps a garage or greenhouse will do (during the cold season).In spring and early summer, before the onset of extreme heat, mushrooms can be grown without a room at all. The main thing is that the air temperature is not higher than + 20 ° С. Indoors, in the case of year-round cultivation, the temperature should be constantly maintained in the range of + 12 ° C ... 18 ° C, and the humidity should be in the range of 65-85%.
Premises for growing mushrooms
Substrate
The most important item on the list of prerequisites for the successful cultivation of mushrooms is the substrate (or, as it is also called for its composition, compost). The following composition is generally recognized as a fruitful compost option.
- Horse or cow dung (or pork or bird droppings, which can be taken, but not desirable).
- Straw.
- Urea.
- Superphosphate.
- Gypsum.
- Chalk.
- Alabaster flour.
Substrate for growing mushrooms
Table. The proportions of the components for making compost from mullein or horse manure.
Table. The proportions of the components for the composting of poultry manure.
By the way! To cover an area of one square meter with mushroom compost, you need compost made from 40 kg of straw base (the rest of the components, according to the proportions).
Video - How to disinfect mushroom substrate
How to prepare compost
It is better to carry out this procedure in the air or, in extreme cases, in a regularly ventilated area. As the compost matures in a heap, where the straw is layered with manure and watered with water, the heat can rise to + 70˚C. There is an intensive release of carbon dioxide, water and ammonia vapors into the atmosphere. Of course, a person should not breathe this mixture for a long time.
It is good to place the compost place in the sun (the higher the temperature inside this "puff cake", the faster and better the compost will ripen). But it is worth providing shelter from rains, since heavy rain can wash out all the useful components necessary for the growth of future mushrooms from the compost.
Compost pit for preparing the substrate
Advice! If it is not possible to protect the compost heap with a canopy from atmospheric precipitation, cover it with roofing material or a thick film before the rain. Be sure to lift the film from the sides, leaving the sides open.
The straw for the substrate must be fresh, dry, free from mold and other defects. Before starting laying, the straw is soaked in a large tank of water for a day. If there is no such reservoir, spread the straw on polyethylene and water it abundantly several times a day, preventing it from drying out.
Laying the compost heap
Straw and manure prepared in this way begin to be laid in layers.
The first layer is straw. Then - manure or droppings.
Each layer of straw is sprinkled with ammonium nitrate, urea in the proportions indicated in the table.
Each layer of straw is watered abundantly with water.
In total, there should be at least 3-4 layers of straw and, accordingly, the same amount of manure.
You need to finish the laying with straw.
Water once again to keep the moisture content of the compost heap constant.
The heap must be at least one meter high. The length and width are arbitrary.
Preparing compost for cultivation
champignons
For a week, the multi-layered structure is basking in the sun. Then comes the moment of the first shaking up. The procedure is carried out with a pitchfork. Shaking up a compost heap is not easy. But they cannot be neglected, since for the speedy composting inside it is necessary to provide oxygen access.
During the first shaking, plaster of Paris is added. It will improve the structure of the compost.
The second shaking is carried out without waiting for the next week, 3-4 days after the first. This time superphosphate and chalk are added.
Important! If the pile is slightly dry in the sun, it is watered abundantly with water. It is impossible to dry out the compost, its formation will stop.
The third and fourth shaking is carried out in four consecutive days.After three weeks, the compost heap will lose its strong ammonia smell and will turn into a pleasant chocolate color. The straw in the compost will become soft and tear with your fingers.
Ready-made compost for growing mushrooms
High-quality compost substrate, completely ready to use, does not stick to the palm, bounces in the fist when squeezed, leaves a wet, but not dirty mark on the skin.
Advice! If you overmoisten the pile, and moisture literally flows out of the compost during compression, it should be decomposed to dry (but not dry, but only reduce the humidity to 60%), adding half the rate of chalk.
The finished substrate is filled in racks, boxes or other containers where mushrooms will be grown. The temperature of the substrate must be lowered before the introduction of the mycelium.
Germination composting process
Preparation of the substrate for further planting of the mycelium
If you plan to grow mushrooms in a room specially designated for this enterprise, for example, on the earthen floor of the cellar, the compost is poured directly onto the floor, in a layer of 70 cm, forming beds with an area of ½ m² or 75x75 cm.
- If in the basement you have equipped racks on which future mushroom crops will grow neatly, they must be equipped with bumpers, and then you can put the compost directly on the racks, with a layer of 45 cm.
- If cultivation is supposed to be in boxes that can be stacked in the same basement or cellar (no more than two meters stack height), because the mushrooms do not need light for development, the compost is poured into boxes. Backfill layer - 25 centimeters
- If you grow mushrooms in an open or greenhouse ground, the compost is rammed directly onto the surface of the ground, 25-30 cm high. The beginning of the laying is early spring, when the ground thaws. Sheds are made over the open ridge to protect from precipitation and sunlight that is too intense for shade-loving mushrooms.
- The compost is well compacted by hand, the surface is carefully leveled.
Racks for champignons
Mycelium
After the preparatory work, the most important moment comes - planting the mycelium. Mushroom mycelium can be planted at a soil temperature of no higher than + 28 ° C at a depth of 5 cm.Check the temperature with a thermometer. This is important because exceeding even two degrees will kill the mycelium.
The planting material for growing champignons, like other cultivated mushrooms, is a sterile mycelium, which is grown in special laboratories. Champignons for cultivation in culture are selected in two varieties:
- double-sided white;
- double-cornered brown.
Champignon mycelium
There are no significant differences in their taste and nutritional value. The only difference is in the color of the mushroom, according to the name, white or brown. Sell mycelium or mycelium in bags or jars. Packing is usually 1-2 kg. The mycelium of both varieties is grown in two ways - on manure and on cereals.
The first, dung mycelium, will be needed for planting 500 g per m² of area. Grain - not less than 100 g.
Planting mycelium
The dung mycelium is a fairly monolithic lump, which, before planting, must be divided by hand into small pieces, half a matchbox in size.
- The mycelium prepared in this way is laid out on a large tray in one layer. In the ground, a part of the upper layer is lifted with a wedge-shaped peg so that a piece of mycelium can be laid there.
- Planting is staggered with a cell distance of 20 cm.
- Part of the mycelium is covered with a substrate, no more than 3 cm thick.
Compost overgrown with mushroom mycelium
Grain mycelium is an ordinary grain on which the spores of the fungus are planted. It is sown in the same way as you would sow any cereal.
- The top layer of compost, 3 cm wide, is removed from the ridge or box.
- "Mushroom grains" are randomly scattered over the surface.
- The compost is poured back and slightly pressed down so that there is no void between it and the grains.
Grain mushroom mycelium
By the way! Wild mushroom mycelium is also suitable for growing homemade champignons. If you find a place where mushrooms grow, take a closer look at the soil. A land riddled with a web of whitish-gray mushroom spores is a good starting point for your mushroom plantation.
Champignon plantation care
After you have landed, the room temperature is kept high. This is a prerequisite - the germination of mycelium will not begin at below + 24 ° C and above + 26 ° C. At this time, at the initial phase of mycelium growth, do not expect immediate "shoots". Champignons are not vegetables. They grow deeper into the soil, gaining ground and forming the future harvest. At low temperatures, growth is insufficient, at high temperatures - weak formation of the fruiting body.
Rules for harvesting champignons at home
The moisture content of the compost must be constantly maintained in the range of 55-60%. As soon as it dries up, the mycelium "freezes" and stops growing. The compost is moistened superficially, from a sprayer, so that the water does not flood the mycelium, otherwise it will become moldy and die
It will take 12 days to grow deep into the mycelium. After that, the temperature in the room will definitely decrease. Either the heating is turned off, or the transoms and ventilation openings are opened - all methods are good to reduce the temperature to + 18 ° С… 20 ° С.
By this time, it is necessary to prepare the soil for backfill. Up the mycelium will no longer grow on compost, but from nutrient soil of the following composition:
- sod land;
- loam;
- sandy loam;
- fine-structured peat soil.
Any of the listed structural types will work. The main thing is that the soil is not heavy. To add "airiness" and ensure the penetration of air to the spores of the fungus, the soil is sieved on a coarse sieve.
Agricultural practices and terms of their implementation when growing mushrooms
Before backfilling, the soil is moderately moistened. And cover them with a layer of compost 3-4 cm.
Further, caring for the mushrooms is simple.
Maintaining the temperature within the specified limits. - + 16 ° С ... 18 ° С, plus - minus two more permissible degrees.
Maintaining humidity in the range of 65-85% (air) and not higher than 60% - of the earth layer.
Daily intensive ventilation of the room to remove accumulated carbon dioxide.
You can collect the first homemade mushrooms from your own plantation already on the 35-40th day. One fruiting cycle lasts about two months.
Agricultural practices and terms of their implementation when growing mushrooms (continued)
Despite all the seeming difficulties and conventions, the cultivation process, starting from the moment the compost is prepared, takes no more than four months. For two months of fruiting, the crop can be harvested 6-7 times. From 5 to 10 kg of mushrooms are collected from a meter of a square ridge. The next crop ripens after 5 days.
Harvesting champignons
Important! Mushrooms must be collected at a stage when the film between the stem and the cap is not damaged and connects them tightly. Opened mushrooms with darkened (for white varieties) plates and a damaged film, the remnants of which can only be seen on the stem, it is better not to eat
The champignons are not cut with a knife during collection. The mushrooms are twisted with a gentle movement of the hand. The holes formed after collection are sprinkled with soil and slightly moistened.
Video - Growing champignons at home (part 1)
Video - Growing champignons at home (part 2)
Video - Harvesting champignons
When my father retired, at first he was happy: how much freedom! But simultaneously with freedom, a dangerous diagnosis came to him, which had been dormant in his body for a long time: diabetes mellitus. The doctor warned: to live, you need to move, plus a strict diet. Dad did not think long and decided to lay out a garden.
This is where the traffic for the whole summer is! And in the winter he grows mushrooms.He started with stumps, now he found customers for the purchase and filled the entire basement with bags, evicting mom with her seams from there (anyway, they are now forbidden to him because of the high sugar content). And stewed mushrooms are just what you need!
What is needed for successful mushroom cultivation
- Mycelium (it is bought in shops like "Everything for the gardener" or ordered on the Internet). For the first time, a kilogram is enough for you. If you pick it up, look at the package: black and green spots are bad, this is rot. The ammonia smell is also considered a bad sign. If ordering online, read the seller's reviews.
- The substrate, as well as the container in which the mushrooms will germinate. Most often these are synthetic bags, but some people manage to use what they have on the farm. For example, plastic boxes. And here's the result:
- Premises that can be equipped for "mycelium": one for incubation (closed and not cold - say, a pantry or a former garage), the second for the ripening of mushrooms (preferably a basement, which has lighting and you can slightly adjust the temperature). It is better not to plant mushrooms in the house - everyone will be expelled by a specific smell + constant excess moisture. And spores, which are considered a strong allergen! Children are strictly forbidden to inhale them, and they can harm adults.
Bag cultivation technology
The most popular. Even if your entire basement is full of potatoes and other vegetables, you can cover them, hang a bag or two of mushrooms. And none of the neighbors will look at your mini-production and sarcastically ask how the harvest is there.
Cooking mycelium
- After purchase, it is kept in the refrigerator at 3-4 degrees, for a maximum of 3 months. If the package arrived by mail, it slowly cools down and is put in the same refrigerator.
- The mycelium also warms up slowly before use. If you drop it cold into the substrate, the unfortunate mycelium can die from thermal shock!
- Carefully disassemble the mycelium bar into small pieces.
- It is better not just to wash the table on which you will work, but to disinfect it, and put rubber gloves on your hands.
Cooking sawdust (substrate)
For 1 kg of mycelium, take 10 kg of sawdust.
Although, of course, it can also be:
- straw (barley or wheat is fine for you),
- dry corn (cobs, leaves and stalks, dried and cut into pieces no more than 5 cm),
- husk from seeds (sunflower) or buckwheat.
The main thing: the substrate should not rot!
For insurance, it is also disinfected. You can simply boil your sawdust in boiling water, or you can douse them with steam (both dry and wet).
In order for the mushrooms to "hatch", the sawdust must be moistened. It is difficult to say the exact amount of water, look at their appearance: sawdust compressed in a fist should not drip, only spring. If you have poured in too much, let the water drain, and only then use the substrate.
Bag packing
- The room for work (in which the bags will hang) must be thoroughly whitewashed with lime, this will disinfect the room. The tools also need to be processed.
- To begin with, take small bags - say, 5 kg each. They can be of any color, not necessarily white or transparent.
- The mycelium and substrate can be mixed on the table and then loaded into bags. Or do it differently: fill the bag with layers. 5 cm of sawdust - 0.5 cm of substrate, then again 5 cm of sawdust ...
- Carefully cut holes in the walls of the bags up to 2 cm in length - from here your oyster mushrooms will look out. The larger the hole, the larger the "families" will be. Leave 10-13 cm between the slots.
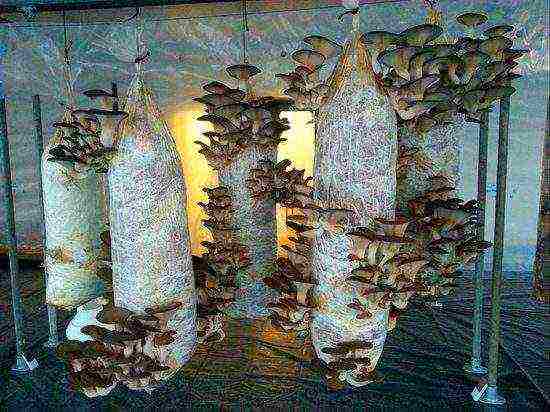
- Air must flow to the bags from all sides, so it is better to hang them by the "tail" to the hooks attached to the ceiling. Racks are also considered a good option.
Germination of oyster mushrooms (incubation)
The first signs of fungi will appear in 10-20 days. But if the bag is transparent, you will see the threads of the revived mycelium creeping inside after 4 days.
But this is only on condition:
- not too hot temperature (maximum 25 degrees),
- high humidity (70 to 80%).
To cool the room and bags (they should not overheat), you can put a fan. But airing is prohibited.
Also, mushrooms need wet cleaning - do it daily.
Ripening of the crop
From the pantry, the bags are transferred to the basement. This is where the mushrooms grow and are cut.
The conditions that oyster mushrooms need now:
- Low temperature (15 to 10 degrees).
- Even higher humidity (up to 95%). A commercially available humidifier will help to achieve these percentages, as well as regular spraying of walls and floors with water. The main thing is not to get on the bags.
- 10, or even better - 12 hours of lighting (for this it is better to take fluorescent lamps, but some people also use ordinary "Ilyich bulbs" and are also happy with the result).
- Regular ventilation (2-3 times a day).
- Spraying of "families" of mushrooms. Gently pour water on the caps, but so that all of it flows down and does not stagnate in the mushrooms, otherwise they will begin to rot. Repeat the procedure every day.
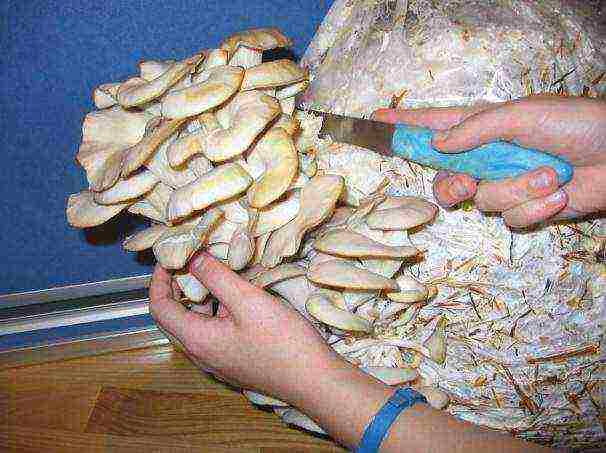
The first crop can be harvested 1.5 months later (do not cut the mushrooms, but twist them - this will protect the mycelium from rotting). Moreover, the next harvest needs to wait much less - it will arrive in time in 15-20 days.
In general, one mycelium can give 4 crops, but the largest are the first two.
Discard the used sawdust. However, if you have a garden, the old substrate can be used as fertilizer for trees and shrubs.
Growing oyster mushrooms on chocks (i.e. stumps)
If businessmen call the previous method intensive (since everything grows quickly and in large quantities), but this one is extensive: slowly but surely.
Of course, this is not an option for earning money, but rather for yourself. On several fresh pieces of wood, you can grow mushrooms for the whole winter, and distribute 2-3 baskets to the godfathers.
Suitable for you: linden, poplar, willow or aspen.
It's simple: water the stumps well, make deep cuts in the bark, place the mycelium there, put the stumps in the shade and wait for the mushrooms to start peeking out. And then decide whether to let them grow to the size of chops or cut them off by babies who are convenient for canning.
Just do not keep these stumps in a remote garden, otherwise the neighbors will still think that "it has grown by itself," and they will secretly trim your mushrooms.
This video will tell you more about this method:
Folk tricks: DIY mycelium
Not everyone knows, but you don't have to buy mycelium.
You can make it at home. For example, using these tips:
And you can make it even easier if you have a basket of mushrooms collected from somewhere. Use cleaners from them (cut off the lower parts with the ground). Mix them with a few pounds of wet straw and grow as described above. Of course, the harvest will not be for sale, but it will be enough for your family.
Growing mushrooms in the countryside or in your garden is simple and profitable. Having created with his own hands a suitable soil for the growth of the mushroom, the farmer will be able to sell and eat honey mushrooms, porcini mushrooms, chanterelles, shiitake and oyster mushrooms at a high price, without significant financial costs.
The content of the article:
- Growing champignons
- Growing honey agarics at home
- Growing oyster mushrooms at home
- Cultivation of porcini mushrooms in a personal plot
- Growing chanterelles at home
- Growing shiitake mushrooms at home
- And in conclusion
Growing champignons
Today, mushroom cultivation has become a fairly profitable and widespread agricultural activity. Growing champignons at home is certainly not an easy task, but it fully justifies itself when making real profits and fresh homemade products. Growing mushrooms, especially those that are popular for food, can be a real business for you if you pay enough attention to growing and caring for them. In the warm season, as well as in latitudes with a mild climate, mushrooms can be grown annually both in the open field and in greenhouse conditions.
All mushrooms are quite capricious about light and temperature. Therefore, the optimal growing conditions will be a temperature not lower than +12 degrees. With high humidity of about 80% and complete shade.A huge advantage of mushrooms such as champignons and oyster mushrooms is that they can be grown in a multi-tiered way, thereby saving space, the basement can be an ideal place.
For mushrooms, it is necessary to prepare a special nutrient mixture from the soil. A mixture of manure, straw, or sawdust is fine. This mixture is prepared about a few weeks before the mycelium is added to the substrate. The growth and productivity of mushrooms will directly depend on the quality of the soil. At enterprises growing mushrooms on an industrial scale, about 200 kilograms of straw or finely chopped sawdust is taken for half a ton of manure. To improve the soil and saturation, it is enriched with ammonium sulfate, and the substrate is stored in a cool dark place, avoiding direct sunlight on the mixture. The prepared mixture must be mixed every week, with the addition of 20 kilograms of gypsum once and stirring well.
After three to four weeks, the mushroom growing mix will be ready.

It will be very convenient to place wooden flooring or pallets in a basement or greenhouse; you can pour the soil directly onto the prepared surface, not forgetting to water the substrate from time to time.
If you are new to growing mushrooms, then the material in the form of myceliums is best purchased in a specialized store. Spore myceliums are sold in special containers, they are dung and grain. The dung mycelium is divided into equal pieces and placed in the substrate to a depth of about 5 centimeters, it is better to place them in a checkerboard pattern so that the distance between the seedlings does not exceed half a meter. In order to save space. Grain mushrooms are sown in a slightly different way, grains are laid out on the substrate layer, and then covered with a layer of soil about 5 centimeters. The optimal temperature for the development and growth of myceliums is considered to be +25 degrees, then after ten days, the temperature should be reduced to 20 degrees, and the surface of the substrate should be covered with an even layer of soil of 3 centimeters. After a week, the temperature is lowered to +16 degrees, after a month you can wait for the first mushrooms.

Growing honey agarics at home
An equally important mushroom variety, which is grown by mushroom pickers at home, is considered to be honey mushroom. Its unpretentiousness and simple care for mycelium makes honey mushrooms very popular mushrooms. The most common way to grow honey agaric is to breed it in wooden tubs. This cultivation method is common because it can be used both on a personal plot and on specially prepared forest lands. The main advantage in growing honey mushrooms is their low financial cost, as well as the ease of reproduction of myceliums. Cultivation of honey agarics in wooden tubs is carried out mainly by amateur mushroom pickers.

Practically any varieties of honey agarics are suitable for breeding honey mushrooms at home. Wooden decks, tubs, troughs made of deciduous wood can serve as a seat. But coniferous trees are not used in mushroom cultivation, as they can cause bitterness of the grown product, due to the high resin content. Growing honey mushrooms is a fairly simple procedure, and differs little from the cultivation of other myceliums. The very procedure for cultivating honey agaric consists in infecting a wood platform with mycelium or planting raw materials. It is necessary to make cuts in the thickness of wooden containers for planting or drill holes, and then fill the grooves with mycelium or planting material. After the procedure of filling with mycelium, the holes are covered with a prepared substrate. The most simplified option for growing honey agaric is filling the rotten stump with mycelium, by infecting the bark and crevices, and then sprinkling with rotted manure mixed with straw in proportions 1: 1.
Monitor the quality of your planting material, since it is difficult to acquire high-quality mycelium or mycelium. For home growing honey mushrooms, grain mycelium, which is purchased in specialized stores, is perfect. Pieces of spore-infested wood are also a fairly common option. Infected wood can be found in the forest itself and recognized by a white bloom, as well as a specific mushroom smell. Such myceliums are carefully removed with a knife or file, divided into pieces, and introduced into the prepared slots in the prepared stumps. Before removing forest mycelium, make sure the mushrooms are edible.

After the performed procedure with the introduction of mycelium, for the accelerated development of the mycelium, the mushroom plantation can be isolated with cellophane, and with proper care, honey agarics can be harvested by autumn. Climatic and other factors (such as the quality of mycelium, moisture and wood) directly affect the growth rate and development of honey agaric. The mushroom harvest will not immediately please you with its abundance. When growing mushrooms on your site, take into account the fact that myceliums and fungal spores can adversely affect the roots of trees, as well as wooden structures. Therefore, exclude the possibility of contamination of fruit trees with fungal spores. After the mycelium has been introduced into the soil, the fruiting of the mycelium will last about 6 years. Mushroom plantations are quite aggressive, so it is better to fence them off with grooves filled with sand so as not to harm the garden plants.
With the development of the popularity of mushroom farms, mushroom sticks began to be widely used. Special wooden sticks infected with fungal spores. The simplicity of working with such raw materials is good news, the sticks are simply inserted into the bark or holes, and then covered with wet sawdust or small straw. This method of growing mushrooms is suitable for a garden plot, but in industrial enterprises, only grain mycelium is used for growing mushrooms.
Growing oyster mushrooms at home
Another common mushroom with excellent taste is the oyster mushroom. There are quite a few ways to grow oyster mushrooms. This article will describe a method that is suitable for both hobbyists who grow mushrooms in small batches and for large-scale production. In the wild, oyster mushrooms grow on stumps and deciduous trees. The optimal temperature for the development of mycelium is +25 degrees. Then, at a temperature of + 14-16 degrees, fruiting begins, for up to 5 weeks. The sizes of oyster mushrooms range from 5 centimeters to 30, the color of the mushroom is gray, with a brown tint. Oyster mushroom is a rather aromatic mushroom with good taste. These mushrooms are also suitable for pickling and pickling, as well as frying and cooking soups.

So, the substrate for growing oyster mushrooms must be prepared in advance. A mixture of sawdust, small straw and sunflower husks will serve for him. The substrate should be clean, without the presence of foreign objects, it is better to boil the sawdust before preparing the soil to destroy the harmful microflora. After the substrate is dried on a film, spread out in a thin layer.
Temperature and humidity are important for growing mushrooms, so the room should be equipped with everything you need, clean and well ventilated. Oyster mushroom grows well in basements equipped with heating appliances, hoods and lighting.
You can start planting mycelium after all the necessary conditions are met for growing mushrooms, namely after preparing the substrate and premises. Oyster mushroom mycelium can be purchased at specialized factories and farms, as well as in gardening stores.You can start sowing after the substrate has been placed at the bottom of ordinary plastic bags or bags, then on a layer of 8 centimeters, the mycelium is laid out in 3 centimeters, broken into pieces, and covered with substrate on top and so on alternately to the top. The bag is tied, the contents are compacted, then incisions are made on the bag at a distance of 2-3 centimeters, for further growth of mushrooms and the removal of excess moisture.
The bags filled with mycelium are placed vertically, about half a meter apart, to allow the oyster mushrooms to grow. It will be easier if the bags are formed in such a way that the location of your mushroom "bed" does not bring you any inconvenience later. You must move freely between the bags for ease of watering and harvesting. You can arrange the bags in tiers if the room is high enough, which will increase the cultivation area. Optimum indoor temperatures are 19-25 degrees, when the mycelium begins to develop, the contents of the bags will turn white, as the spores will penetrate deeper into the substrate. Watering bags with mycelium is done once a day. If you follow all the requirements for the cultivation of myceliums, then after three weeks, your mushroom garden will delight you with the first fruits.

In order for the fruiting of mushrooms to develop actively, some mushroom gardeners resort to tricks. To do this, the substrate sprouted with mycelium is stimulated with a low temperature from +3 to +6 degrees, this temperature is maintained for about two or three days, then you need to leave the substrate in bags, making wide enough holes there, or remove the substrate and leave it without bags and do not water for a week. After a week of lack of moisture, the substrate is watered abundantly, with water at room temperature, and then once a day, ventilate the room, with myceliums, the air temperature in the room should be +15 degrees.
For the first week, your myceliums do not need lighting, but then it is necessary to organize sufficient bright artificial lighting over the bags with mycelium. After the mycelium begins to bear fruit, a new crop of mushrooms can be obtained every three weeks, however, over time, productivity will decrease, which will serve as a signal to replace the substrate and introduce a new batch of mycelium, that is, to resume the cycle. For every 100 kilograms of substrate, experienced mushroom pickers get about 50 kilograms of fresh mushrooms. It is very important, before starting a new fruiting cycle of myceliums, the room should be disinfected in order to get rid of the pathogenic environment of the predecessors. The approximate number of cycles per year will be 4-7, depending on the care and growing conditions.
Cultivation of porcini mushrooms in a personal plot
Cultivation of porcini mushrooms, in personal plots, the procedure is not painstaking and quite simple. Therefore, it is becoming increasingly popular. If you do not want to spend money on the purchase of mycelium, then you can do without it, you just need to find the mycelium and the place where the porcini mushrooms grow. You can collect mature mushrooms and prepare a mixture with porcini mushroom spores with your own hands. For this, mature porcini mushrooms are crushed and poured with clean water, left in a dark place for a day. Thus, you get a solution containing numerous white fungus spores. Next, you need to act according to the scheme, choose a place that is darkened, it is better under deciduous trees and organize something like a garden bed. To do this, we fertilize the ground with rotted manure, mixed with chopped straw or sawdust, mix everything thoroughly with the soil, level and water the prepared soil with the prepared mixture. It should be borne in mind that porcini mushrooms enter symbiosis only with deciduous trees, and do not like the scorching sun.

Another way to grow porcini mushrooms is to remove the mycelium from the old place and move it to your personal plot. The main thing is to properly organize the place for planting mycelium. Pay attention to the trees under which the mycelium grew in the forest or glade, to the structure of the soil, this will help to establish fruiting in the future on your site. So, after removing the mycelium, collect enough soil from this place so that it would be enough to add it to the soil on the site after the mycelium was laid. We loosen the earth, fertilize it with manure, pour out the brought soil, loosen it again. Then we make depressions in the prepared soil and lay out the pieces of mycelium, sprinkling on top with a mixture of sawdust, straw, sunflower husks or forest soil, then slightly moisten. Mushrooms must not be filled with water, and the soil must not be allowed to dry out, that is, the place where porcini mushrooms grow must be constantly moistened.

Mature parts of porcini mushrooms can also be used as seeds. Porcini mushrooms must be crushed, loosened the soil, fertilized with compost and chopped hardwood sawdust. Planting is done, as in the previous version, only the chopped mushroom is introduced. Then the soil is moistened and sprinkled with chopped straw on top. Both fresh mushrooms and slightly dried mushrooms are suitable, such mushrooms are laid out in a dense layer on the prepared soil and watered every day, after the soil is infected with spores, the mushrooms can be removed. With proper selection of the site for planting porcini mushrooms and adherence to fertilization and planting technologies, the harvest will appear next year. Reproduction will take place incrementally, from several mushrooms to whole mushroom families, and in another year from your mushroom plantation it will be possible to get about two kilograms of porcini mushrooms.
These methods of cultivation and cultivation of porcini mushroom are suitable only for amateur mushroom growers. The described cultivation methods are widely used in the area where the necessary mushrooms grow in sufficient quantities. Industrial production of porcini mushroom is established to a greater extent in Poland. But our domestic producer does not stand aside, increasing the volume of mushroom production.
Unfortunately, in our time, mushroom growing technologies lag behind world producers, although earlier in Russia mushrooms were grown on an industrial scale. Today mushroom cultivation is rather an amateur activity, undoubtedly profitable. The price coefficient on supermarket shelves is quite high, but mushroom cultivation on an industrial scale is not yet practiced at the proper level in our country, preferring to import foreign mushrooms.

If you want to grow porcini mushrooms, it is worth considering the fact that their mycelium differs from other varieties in that it grows together with the roots of trees, forming a kind of symbiotic relationship, and without it, the development of mycelium is not possible. Therefore, the cultivation of porcini mushrooms should take place near the trees growing on your site. Better yet, organize your mushroom farm in the adjacent forest belt.
Growing chanterelles at home
Cultivation of chanterelles, like other mushrooms, is based on the basic rules of mushroom cultivation. Planting a mushroom next to a tree is carried out with the help of a spore infusion, pieces of mycelium or seed material, with the assistance of a layer of forest soil. The composition of the forest soil is saturated and nutritious, and the upper humus layer is responsible for the development of the mycelium. The bulk of the soil is rich in trace elements and organic compounds, it also contains spores of fungi, from which fruits then grow. Therefore, when growing chanterelles on your site and preparing mycelium for planting, choose a place where their main population is concentrated, cut off the mushrooms, and carefully remove the mycelium and transfer it to your site together with the soil.

The removal of forest soil should be carried out near trees; the beginning of autumn, or early spring is considered the optimal harvesting time. Layers of soil are dug, at least 20 centimeters thick. At the site for contamination of the soil with chanterelles, the lower layer of forest soil is used. The organization of a mini-mushroom farm should take place in a cool, shaded place, among the trees.We bury the mycelium in the ground and sprinkle with chopped straw. Maintain the required humidity.
If you previously noticed a place where there are a lot of chanterelles, take note of this place. However, the absence of mushrooms cannot guarantee that the mycelium is dead, it is just possible that the season was less fruitful, the main criterion should be that the mushrooms were noticed earlier in this place. Spores of fungi in the soil layer remain for a long time and they are not afraid of bad weather and oppression of fruiting. They continue their existence remarkably, using a minimum of nutrients, taking advantage of their protection.
In order for the forest soil to serve as a good soil for a future mushroom farm, it must go through a certain stage of preliminary preparation. This preparation method will improve the quality of forest soil. To properly prepare the forest soil, it is packed in plastic bags and dried in a cold room, the main thing is to leave oxygen to the soil. The soil can be stored in such conditions for up to a year, and without harming the spores of fungi, but pathogenic microorganisms will die without moisture. As a result of this kind of training, mushroom spores will become accustomed to drought conditions and become more resilient.

It is better to plant chanterelles on the site in early spring, high humidity and warm weather will contribute to better implantation of the mycelium into the ground and its further development. The previously harvested forest soil must be mixed with garden soil in a 1: 1 ratio, pour the mixture from the soil into the prepared grooves, add mycelium or a prepared solution of chanterelles there, and cover it with fine straw or matted foliage on top to protect the mushroom bed from drying out. Watering must be organized in such a way as not to harm the mycelium, it is better to water in small portions slightly moistening the soil, because water stagnation must not be allowed. The mycelium can simply die from an excess of moisture, as a result of decay.
Chanterelle, has not yet received its distribution, although it has an excellent taste and contains quite a few useful substances. Only a few mushroom growers grow chanterelles in their plots. However, it is quite possible that soon chanterelles will establish themselves and the industrial production of mushrooms will turn its gaze on these mushrooms. And we can all be content with tasty and healthy mushrooms that can treat even gastrointestinal diseases.
Growing shiitake mushrooms at home
Unpretentious, easy to grow and very useful shiitake mushroom, is very popular in foreign countries. Foreign industrial companies grow this mushroom in huge quantities. And for good reason. In terms of useful properties, the mushroom is not inferior to its relatives, it strengthens the nervous system, has a tonic effect. It contains the optimal amount of amino acids for humans.

Shiitake mushrooms are traditionally grown on tree hemp and logs. In the countries of the rising sun, this mushroom is very popular. In our country, the shiitake mushroom is grown on sawdust of deciduous trees. The largest yields can be obtained if these mushrooms are grown on an enriched specially prepared substrate, which is formed into blocks and becomes infected with myceliums.
The main constituent of the substrate for cultivating shiitake is beech, birch, oak, ash sawdust, enriched with special fertilizers. Coniferous sawdust is not suitable for cultivation. The content of esters and resin substances in them will have a disinfecting effect, and only hinder the development of mycelium. The size of the sawdust also plays an important role in mushroom cultivation. Since too small ones will get lost in a lump, and disrupt aeration, slowing down the growth of mycelium. Sawdust can be mixed with wood chips for better gas exchange.In order for the shiitake mushrooms to please you with the harvest, the soil must be sterilized before settling the mycelium. The fact is that the shiitake mycelium, like all other mushrooms, develops more slowly than pathogenic microorganisms, which can harm the mycelium in the future and leave you without a mushroom harvest.

The substrate infected with mycelium should not be too wet and dense, in such a soil a bacterial infection develops. The substrate for industrial production of shiitake is stored in bags, then sterilized and used for its intended purpose. However, there are other methods of preparing the substrate with your own hands. It is not difficult to prepare the substrate, the sawdust is sterilized by heat treatment, cooled, dried, then sown with mycelium, and then packaged in plastic bags. Thus, the mycelium develops in a warm temperature, the mycelium grows for a month and a half, and after the contents of the bags are taken out and mushroom beds are formed already in the basement or other room intended for growing mushrooms.
The entire process of packing and contamination of the soil with mycelium must be carried out in compliance with sanitary standards. Fruiting on open formed blocks lasts about six months.
The cultivation time for shiitake mushrooms in compliance with the thermal treatment of the soil, whether it be sawdust or other substrates intended for this purpose, has a shorter period than real street cultivation. This method of growing mushrooms is called intensive, harvesting, subject to all the requirements of this method, takes place year-round, in specially designated places indoors. To increase the development time of the mycelium, special fertilizers and enriching additives are introduced into the soil. Sources can be elements of organic origin and nitrogen-containing. You can freely purchase ready-made supplements for growing mycelium and increasing the fruiting of shiitake in specialized stores, or you can use compost or rotted manure. In order to increase the level of acidity, as well as for the purpose of enrichment, in addition to organic matter, a dose of mineral fertilizers is also introduced into the substrate, in the form of crushed chalk, bone meal, gypsum or ready-made ones purchased in a store.

And in conclusion
Any varieties of mushrooms are suitable for home cultivation. With proper care and adherence to all the rules for growing mushrooms, even on your personal plot, you can organize a fruit-bearing mushroom farm, inferior to an industrial one only in terms of production, but undoubtedly winning in terms of the safe characteristics of the product obtained. Growing mushrooms can also be an excellent business for your family, at a minimum cost, you will get maximum profit and provide yourself with the freshest mushrooms all year round.