Content
- 1 History
- 2 Types and varieties
- 3 Gloxinia: basic requirements for growing
- 4 Work on bugs
- 5 Breeding features
- 6 Pests, diseases and treatments
- 7 Gloxinia. Appearance
- 8 Gloxinia. Home care
- 9 Gloxinia. Reproduction
- 10 Problems in growing synningia
- 11 Problems with growing gloxinia and their solution
- 12 Ways to propagate a plant
- 13 Preparation
- 14 Step-by-step instructions on how to reproduce correctly?
- 15 How to grow a leaf from a fragment?
- 16 When will the sprouts appear?
- 17 Home care
- 18 Watering
- 19 Lighting and temperature control
- 20 Watering and fertilizing frequency
- 21 Landing features
- 22 Reproduction methods
Gloxinia is one of the most popular and beautiful indoor plants in the world. Gloxinia, which does not cause great difficulties in home care, is so widespread thanks to decorative flowers of various colors and shapes. Surely every enthusiastic florist at least once thought about purchasing this miracle. How to grow gloxinia at home? How to properly care for her? What kind of soil does Sinningia like? We will answer these and many other questions in this review.
History
The species is named after the German botanist Benjamin Peter Gloxin, who was the first to cultivate this outlandish plant from the other end of the world in Europe. The second father of gloxinia was another German botanist Wilhelm Sinning, who was seriously engaged in its selection and hybridization. As a result, gloxinia became a houseplant.
Types and varieties
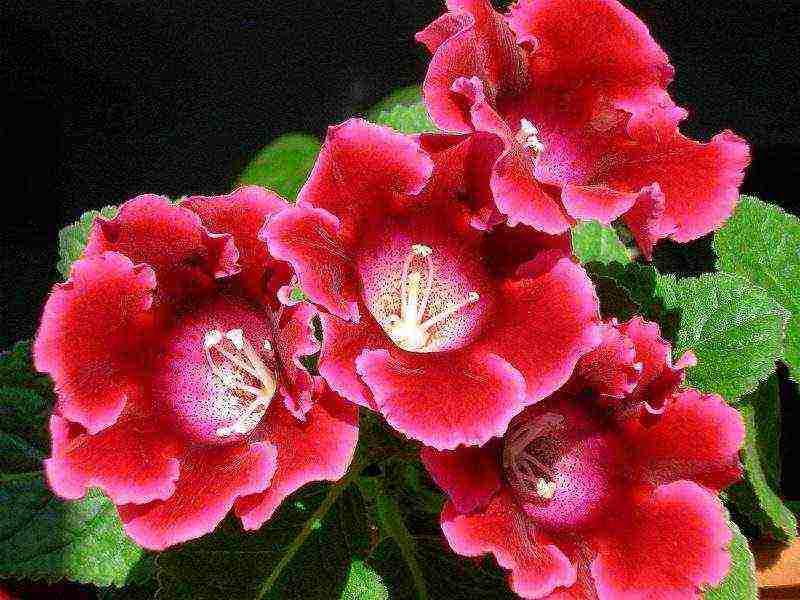
Gloxinia is a tropical perennial herb. The flower grows wild in Mexico and South America, from where European colonialists brought it to the Old World in the second half of the 19th century. The peculiarity of its root system is the presence of a pronounced tuber, which during the wintering period can even be dug up and kept cool until spring, like a potato. Leaves growing from the root in the form of a rosette, soft, fleshy, covered with fine hairs. The stem is short but thick. Gloxinia flowers differ depending on the cultivar.
The most common types of gloxinia are:
- Royal (purple flowers);
- Avante (white petals);
- Tigrina Red (bright red);
- Hollywood (dark purple);
- Yesenia (pink velvet flowers);
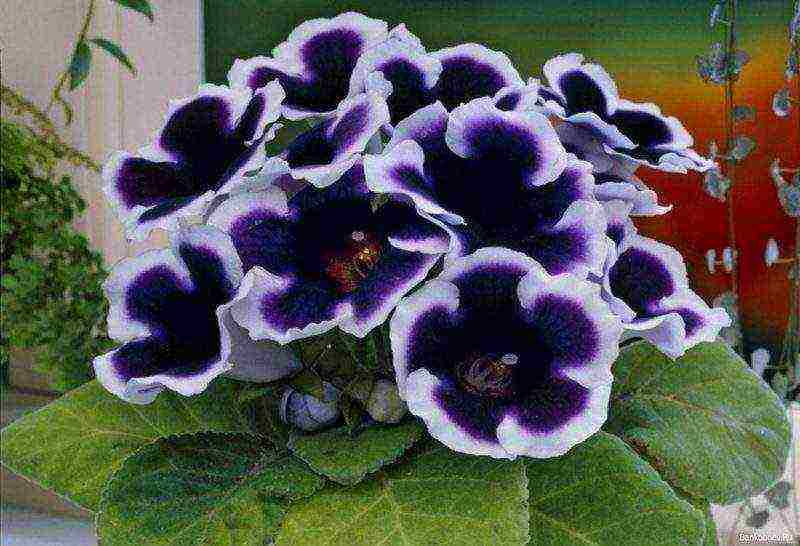
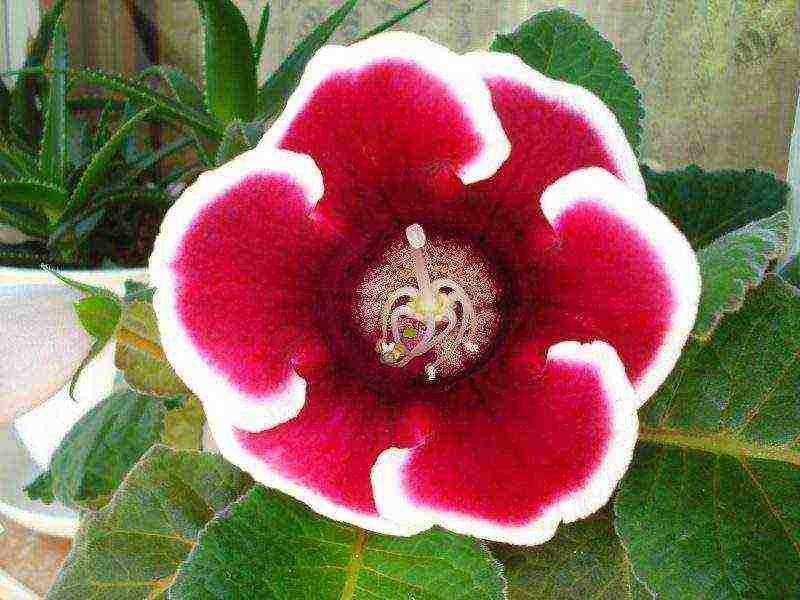
- Kaiser Wilhelm (black and purple flowers with a white border);
- Blanche de Meroux (elongated pink flowers);
- Shagane (domestic variety with bright purple small flowers);
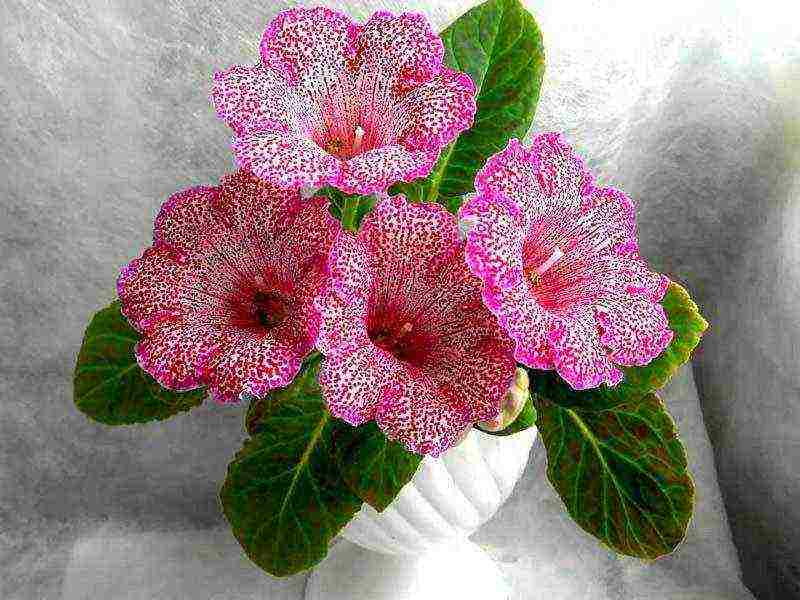
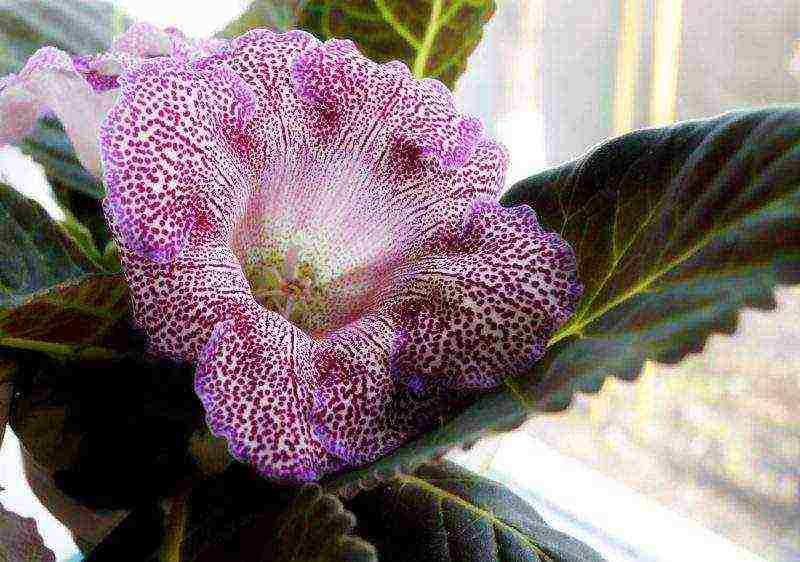
- Anfisa (pink petals with white spots).
Gloxinia: basic requirements for growing
Gloxinia care is not as difficult as some other green pets. She loves properly selected soil, moderate watering and sunlight.
Requirements for soil and pot
A flower is planted in soil composed of 1 part of sod land, 1 part of leaf humus, 1 part of simple garden soil and 1 part of sand, preferably coarse-grained river. If it is not possible to provide such a variety of substrates, then soil taken from a meadow, from under a linden or birch, is suitable, as well as a purchased composition, which is better to dilute with ordinary soil in a one-to-one ratio. Sometimes it is justified to add a small amount of sawdust or perlite to the mixture.The decision to introduce baking powder is made based on the consistency of the resulting soil. It should be lightweight, breathable and crumbly.
An important condition is to ensure good drainage. There must be a hole in the bottom of the pot. At 15-25% of the height, the pot should be filled with pebbles, rubble, fragments of earthenware, or at least small stones.
Ideally, the water should wet the soil well, be easily absorbed and flow out of the drainage hole without hindrance.
Watering, feeding and fertilizing
Gloxinia is not very demanding in terms of fertilization. Theoretically, you can not fertilize it at all, but then it is unlikely to please the owners with abundant flowering. During spring and summer, it is possible from time to time, but not more than twice a month, to apply universal complex fertilizers for indoor plants. Top dressing should be stopped in mid-August, due to the approaching cold season.
As for watering, it is important to observe the measure. Young plants, the root system of which has not yet completely covered the earthen lump, are prone to root rot and fungal diseases. However, even adult specimens often suffer from the gulf. The best way to avoid this is to lay drainage on the bottom of the pot and correctly form an earthen mixture, which will be discussed below. If possible, it is better to water the flower with warm water.
Optimal conditions of detention
Another feature of gloxinia: unlike many other indoor plants, it does not need to be sprayed, although moist air loves and grows somewhat faster if there are many sources of moisture evaporation around it. Unfortunately, the benefits of a few bowls of water are almost imperceptible. It is better to place gloxinia on a windowsill, where other indoor plants are already placed: green leaves release moisture well. You can add moss to some large pots if you like.

Gloxinia's light prefers not direct, but diffused, but rather intense and long-lasting. A great option is to place the pot on a south, east or west window behind a very thin or mesh curtain. Prolonged exposure to direct sunlight, especially in combination with careless watering, can leave sunburn on the leaves. For this reason, try to water at the root rather than sprinkle.
Do not place the plant where drafts are possible. With hypothermia, the leaves become drooping, as if lethargic. If at the same time they lose their saturated green color, then this may indicate either hypothermia of the root system, or about the processes of decay that began in the soil.
If the buds do not bloom, drafts and cold water may be the cause.
If possible, it is better to keep gloxinia in the winter months in a cool, bright room with a temperature of + 10 ... +17 degrees. This will allow the tuber to rest, gain strength and "shoot" in the spring, which increases the chances of abundant and beautiful flowering. Just do not be afraid of the leaves falling off when the plant is moved into the cool: with the retreat of winter, new shoots will grow from the tuber.
Pruning and replanting
Contrary to erroneous statements, you should not cut off almost all the leaves - it just doesn't make sense. It is argued that after radical pruning, stepchildren begin to grow from the tuber, which in the future should bloom profusely. This is not entirely true. The stepsons, of course, will grow up, but you can do without these sacrifices. But the excessive removal of leaves is fraught with decay of the roots, which will have nothing to feed. By the way, towards the end of summer, it is often possible to achieve a second wave of flowering, which, however, turns out to be not as intense as the first.
When transplanting, the size of the dishes is selected according to the volume of the root system. Freshly rooted leaves are planted in the smallest pots. For older plants, a container is selected, the volume of which is equal to or slightly greater than the volume occupied by the straightened roots.Intensively growing specimens are transferred to a slightly larger container every year at the beginning of the growing season.
Remember: too large a pot is a risk factor in terms of flooding and rotting of the root system!
Gloxinia has faded, what should I do next?
Blooms from March to August. The gloxinia flower holds for about a month, after which the shrunken pedicel can be safely cut off. When gloxinia faded, not everyone knows what to do next. The first thing to do when the flowering is over is to remove the remaining flowers, weak and too “oily” leaves. The latter, by the way, can be used for reproduction.
Work on bugs
What to do if mistakes are made in the care of gloxinia? With progressive signs of bay and root rot, the flower needs to be transplanted. You need to get it out of the pot, clear it from the soil, remove rotten roots and too weak leaves and plant in new light soil. The "reanimation" soil composition should contain more coarse sand and baking powder than the standard one. After that, the plant is moderately watered, hermetically covered with a transparent plastic bag and stored in partial shade until it grows. You can air the mini-greenhouse 1-2 times a week. If the outcome is favorable, it can be gradually removed.

How to find rotten roots? They are diagnosed on several grounds, and let's start with the most obvious ones. If the root comes off easily from the taproot, then it is 100% rotten. If it does not come off completely, but as if it exfoliates, then this is also a sure sign of its death. Such a root is trimmed either to the healthy part or to the branch point. Less obvious signs are black or dark brown root color and putrid odor. Healthy parts are light brown or even white. In advanced cases, the root system is so rotten that nothing remains of it. The only option in this case is to take the remaining leaves and try to root them.
Breeding features
Reproduction of gloxinia in practice is most easily carried out by leaf cuttings. Less commonly, they resort to sowing seeds and dividing the tuber.
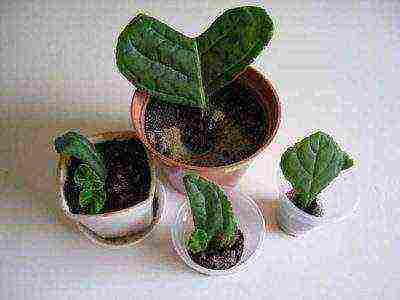
Reproduction of gloxinia leaf
For this purpose, a large ripe leaf is cut from the plant. It is recommended to shorten the petiole to a length of 1.5-2 cm to avoid decay. After that, the leaf is planted in moist coarse sand and placed in a sealed mini-greenhouse. Instead of coarse sand, fine quarry sand can also be used, but it is slightly less preferable. In this form, the leaf takes about 1 month to put down small roots. When they are 1 to 2 cm long, you can move the plant to a small pot of soil. At first, you should still keep the sheet under cover, only not sealed, but with a small hole. As the sheet gets used to dry room air, the gap can be increased, and after 2 weeks the film can be removed. Around this time, a rosette of small leaves should shoot from the base of the petiole. This means that gloxinia breeding was successful! In the future, it is important to ensure that you do not flood a young plant, which at this age is especially sensitive to waterlogging.
Seed reproduction
Gloxinia can be grown from seeds, but it is important to know that they germinate for a very long time: from 4 to 9 months. Small shoots develop slowly. To achieve success in this business, it is recommended to plant the seeds in light sandy soil and seal them with plastic wrap. It should be removed gradually, as soon as most of the seeds have sprout.
Tuber division
This method is the most difficult and risky, since there is a danger of causing rotting of the tuber after it is cut. It is recommended to divide dormant large tubers that do not have rot and damage. It is best to cut them into no more than two pieces. Places of cuts are sprinkled with coal.
Stem cuttings
Gloxinia can be propagated by stem cuttings, only this method is complicated by the fact that their length is very small. Therefore, it is rarely used. The technology is the same as when rooting leaves: the cutting is placed in coarse-grained wet sand and hermetically covered with a mini-wig. The appearance of the first roots can be expected in a month.
Pests, diseases and treatments
Gloxinia is rarely affected by pests. Sometimes it is attacked by a red spider mite. These insects look like small red dots on the surface of the leaf blade. In no case should they be allowed to breed! First, you can try to remove the tick with Fitoverm, but if there is too much of it, you will have to resort to more powerful means: Omayt, Oberon, Sunmight.
Of the diseases, gloxinia often suffers from root rot. This is treated by replacing the earthen coma and watering the plant with a weak solution of Fitosporin.
In general, growing gloxinia on a windowsill is not a big hassle. It is an excellent ornamental plant with beautiful flowers that, with proper care, have a richer color. Gloxinia is always glad to repay for a good attitude towards itself with abundant and lush flowering.
 Gloxinia is an elegantly flowering indoor plant that is popular among flower growers. It won love with its amazing beauty, which gracefully fits into every interior. This flower conquers everyone with its amazing and unique brightness and sophistication.
Gloxinia. Appearance
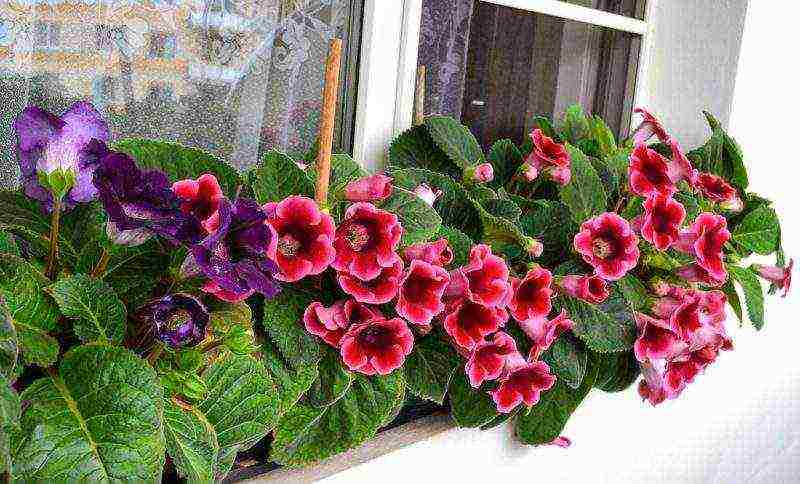
 An indoor plant is a perennial plant that has tuberous rhizome... Gloxinia stem is short with large juicy oval-shaped leaves and juicy green color. The flowers are bell-shaped, large enough, arranged on long stalks. Their structure can be double, semi-double and even with wavy petals. The flowers have a different uniform color, as well as with different color transitions. Gloxinia, or, as it is called in another way, synningia, has a fairly large variety of varieties that differ in the size of the flowers and their color, in the height of the stem, in the color of the leaves. The most popular varieties of a home flower:
- Gloxinia Avanti differs from other varieties with its large flowers of bright colors, blooming together. The leaves of this synningia are dense and relatively small.
- Gloxinia Hollywood is widely known for its large, uniformly purple flowers.
- Gloxinia Brocada is just the perfect gift for a florist. Sinningia of this variety has a low stem and beautiful double flowers. In order for the plant to delight the grower after its acquisition with its lush flowering, you need to know how to care for gloxinia at home.
How does flower care take place?
Gloxinia. Home care
Like all indoor plants, sinningia has certain care requirements that growers follow.
Lighting and temperature
 Gloxinia, a photo of which you can admire below, loves space and diffused, but bright light, which should last for at least 14 hours (for this, you can additionally turn on the fluorescent lamp at night). To find out if there is enough light for our beauty, you need to pay attention to her leaves: if they are located horizontally, then there is enough, and if they stretch upward (towards the light), then there is a lack of it. But we must remember that the direct rays of the sun falling on a houseplant can destroy it.
Gloxinia is afraid of drafts, therefore, when placing a home flower on the windowsill, you cannot open the windows often. Sinningia does not need to be sprayed, because this home flower will not tolerate moisture on the leaves. But at the same time, a houseplant needs high humidity, this can be achieved by leaving a container of water on the windowsill next to a pot with gloxinia.
During the growth and flowering period for sinnengia room temperature is needed, only in winter, when the house plant is at rest, it is necessary to provide a temperature of about 10 ° C. If you look at the leaves, you can identify the plant's problems (if any). Signs with which gloxinia show their temperature preference:
- if the leaves are omitted, then the houseplant is cold;
- if the leaves are raised up, then this is overheating of the home flower.
Therefore, if you find a problem, you need to fix it.
Sinningia blooms in May-June. When this period ends in a houseplant, it is necessary to remove the stems, leaves, leaving only the lower 2 or 4. Then stepchildren will appear in the bosoms of this domestic pet, it will be necessary to leave only a couple of persistent ones, and the rest should be removed.
Watering gloxinia
It is necessary to moisturize the synning with water slightly warmer than room temperature. During the growing season of the plant, watering should be carried out in a saucer or from above, but at the same time, so that drops of water did not fall on the leaves and flowers... Water only when the topsoil is dry. By the end of summer, it is required to water less often so that by the middle of autumn the sinningia enters a state of dormancy.
Feeding Gloxinia
The main rule for growing this plant is that an excess of fertilizers will do more harm than a lack of them. Gloxinia is fertilized once every 10 days with a specialized complex.
In preparing a home flower for a state of dormancy, the plant should not be fed. If you do not carry out top dressing at all, then the flowering will be short and shallow, and the colors will take on a pale appearance.
After a dormant period, a houseplant can be fertilized with special mixtures for rapid growth, during the flowering period, synningia fertilized to improve the quality of flowers.
Gloxinia transplant
 Care should be taken more carefully after a period of rest, usually at the end of winter. An indoor plant must be transplanted once a year. It is better to purchase soil in special stores or prepare it yourself from leafy soil, humus, in a ratio of 2: 1, respectively. When transplanting, you need to take a container for a home flower larger than the previous one, lay drainage there, as well as a layer of soil mixture, and then shift the earthen ball with gloxinia, sprinkle with soil, tamp. It is necessary to transplant the synningia carefully so that the tubers are only half in the ground.
Gloxinia. Reproduction
An indoor plant can be propagated in various ways, of which there are quite a few. But the choice of method primarily depends on the type of sinningia. Therefore, when purchasing a houseplant, it is necessary to recognize its variety, so that later you can reproduce it qualitatively. Breeding methods for indoor gloxinia:
Seed propagation.
In special stalls you can buy any kind of room gloxinia. It is better to choose seeds in granules for self-planting. The packaging will indicate the timing of their germination, but, as a rule, it is from 4 to 6 months. And if sowing is carried out in winter, then even more - up to 10 months.
For sowing gloxinia seeds, you can use ready-made greenhouses or make them yourself. To do this, you need to take a deep container with a lid, you need to put there and wet the peat tablets, distributing the granules over them. To ensure ventilation of the seeds, you need to make a couple of holes in the lid. Then put the finished greenhouse in a warm, well-lit room. The temperature of this room should be approximately 23 ° C. Moisten the soil only as needed. After the emergence of seedlings, you need to wait until they get stronger so that they can be planted in a permanent container.
Leaf propagation.
For self-propagation of gloxinia with a leaf, you need to take the smallest leaf and cut it along the thickest veins, cut the petiole, leaving no more than 2 cm.For these manipulations, it is better to take a tool with a sharp blade so that the leaf does not rot.This prepared material should be planted in a container with moist soil, covered with foil until the first leaves appear.
Tuber propagation.
This type of reproduction is quite painful for the plant, so it is extremely rare. A healthy tuber is chosen; if rot is found on the tuber, it must be cut off. Then cut them up and treat them with charcoal for disinfection. Each of the pieces of tubers should have a shoot. Then these tubers are planted in a container with moist soil.
Reproduction by peduncles.
After completing the flowering period, the flower stalk must be cut off from the plant and placed in a container with water for the roots to appear. Then plant it in moistened soil too and cover with foil.
Reproduction by stepchildren.
Place the scion in water for roots to emerge, then plant in the ground.
Propagation by cuttings
This is the most elementary and fairly popular breeding method for home synningia. During the period of bud formation, you need to take a leafy cutting, about 4 cm no more. If the leaf is withered, then to restore it, it must be dipped into water, then put into boiled water with a temperature of up to 25 ° C. Then, as in the previous methods, place it in loose, moist soil. A month later, the appearance of a tuber is already possible.
Problems in growing synningia
Having considered the home care of gloxinia, reproduction, it must be remembered that, like any houseplant, it can kill various diseases.
Diseases and pests of synningia
 Gray rot is the most famous disease that occurs on synningia due to inadequate care. Signs of its appearance are brown spots on the leaves of a houseplant. During treatment, it is necessary to remove damaged leaf fragments and treat with a fungicide.
Root rot... It is also quite common in indoor sinning. Symptoms of this disease appear on the roots of a house flower, they turn brown and the stem can rot at its base. The reason for the appearance on gloxinia is excessive watering or the water that moistened the soil was cold enough.
Powdery mildew, black leg, late blight - these diseases are also detrimental to synningia. To do this, as a prophylaxis for a houseplant, phytosporin should be treated with drugs. If the disease has already manifested itself, then the home flower should be treated with a drug - foundationol.
Cyclamen pliers... Unfortunately, these mites are difficult to detect on gloxinia. But, if there is deformation and thickening of the leaves turned down, dried tops of the shoots, wilted buds, then these are all clear signs of their presence on a houseplant.
Thrips. They can be found on gloxinia by light dots, spots that have appeared on its leaves. If not removed, they will dry out. In order not to destroy the houseplant, it is necessary to transplant, replacing the soil and treating the home flower with insecticides.
To avoid damage or death of gloxinia as a result of damage by pests or diseases, it is necessary to carefully examine the flower for damage and timely recognize the cause of their appearance.
Problems with growing gloxinia and their solution
The following phenomena also happen:
-
 If the leaves turn yellow and fall off, then too frequent watering or a lack of nitrogen may be possible.
 - If the leaves curl up, there is a lack of humidity in the room. This problem can be solved by placing a container of water next to the house plant.
- If the leaves curl up and small pedicels form and the flowers hide under the leaves, then the room humidity is very high.
- When deep notches appear on the edge of the leaves, you need to fertilize with 2% boric solution.
- If during the growing season the leaves begin to darken and become lethargic, it means that the tuberous rhizome begins to rot from excessively abundant watering.
- If the leaves of the plant begin to wither in the fall, this is just preparation for the dormant period, you should not worry about this.
- If gloxinia does not bloom, then the reason for this may be a lack of light, a low room temperature, an excess of nitrogen.
Sinningia can be safely called a rather unpretentious home flower. Caring for gloxinia at home is quite simple, but there are some features that flower growers need to observe. And with due attention, flowering gloxinia will scent on the windowsill of any living space.
Gloxinia care at home
Rate the article:
(19 votes, average: 3.8 out of 5)
How to water young seedlings?
Ways to propagate a plant
The most recognized ways:
- Reproduction by leaf petioles.
- Reproduction by Samenas.
- Reproduction by dividing the tuber.
- Reproduction by peduncles.
Attention: An ordinary way of reproduction is the rooting of the leaf petiole.
Preparation
 Reproduction of synnengia with a leaf is best done in early summer, because fresh leaves, in a given period of time, have more strength. Besides, a young plant has more opportunity to form a tuber.
Preparing for breeding and growing at home:
- From a healthy adult plant, cut off a leaf taken at the base. (The length of the petiole is up to 5 centimeters.)
- Cut the petiole exactly across with a sterile blade or a sharp knife so as not to introduce microbes and damage the plant itself, dip the tip in a phytohormone solution.
- Before planting, disinfect the soil with a solution of potassium permanganate or spill it with boiling water.
Pot selection
The pot in which the plant will be placed should be 4-5 centimeters wider than the tuber itself. Both clay and plastic pots are suitable for growing. The form can be absolutely any. It is best not to plant tubers in a pot that is too wide or too narrow.... If the container is too narrow, the plant will often dry out, since there is little soil in it. If on the contrary - too wide - the plant will increase the leaf and root mass, postponing flowering for a long time.
Soil selection
The soil must be loose and have a liquid carrying capacity. Many growers prefer soil for violets. You should not use ordinary peat with a high degree of acidity, because gloxinia will grow poorly and will not give flowers. Optimally:
- 1 piece of leafy land;
- 0.5 parts of river sand;
- 1 part deoxidized peat.
Step-by-step instructions on how to reproduce correctly?
- We make drainage holes in a plastic cup, fill up the soil.
- We moisten the substrate and make indentations there at an angle of 45 º using a pencil or an ice cream stick. (You can simply place the leaf in the soil at a 45º angle).
- We press down the earth around. Place the sheet so that the bottom surface is facing the wall of the pot, and the base of the plate does not touch the soil.
- Cover the top of the glass with a bag without damaging the sheet.
- We place the mini-greenhouse in a bright, warm place without the risk of direct sunlight. Soil temperature should not drop below 16 ° C.
- We ventilate the greenhouse once a day and water it when the soil dries up.
We recommend watching a video about the reproduction of gloxinia using leaves:
How to grow a leaf from a fragment?
Gloxinia can be propagated even with a piece of leaf.:
- Cut a healthy green leaf into 2 equal parts in the form of a tick (if necessary, the number of parts can be increased).
- We shorten the petiole, leaving 2 centimeters.
- Further, using the same algorithm, we plant leaf fragments in the ground, arrange a greenhouse.
We recommend watching a video about the reproduction of gloxinia with a fragment of a leaf:
When will the sprouts appear?
A new baby appears on average within a month. As soon as the shoots appear, you need to remove the bag to prevent decay. After that, young plants should be planted separately.
Home care
 In the first 1.5 - 2 months, the plant does not need to be fed. In the future, you can feed it once every 10 days, but the concentration of the solution should be weaker.
The plant is fed in cloudy weather or in the evening. An hour after watering, we apply top dressing, trying not to get on the leaves and at the point of growth. Make sure that after fertilization, the plant is not exposed to the sun.
Before the buds appear, organic fertilizers alternate with nitrogen (ammonium nitrate), after the buds appear, organic fertilizers alternate with phosphoric (phosphoric acid potassium, superphosphate).
- Nitrogen fertilizers cause vegetative growth, but excess nitrogen can cause root rot. Therefore, such fertilizers are given only at the beginning of growth.
- Phosphoric - increase flowering, however, excess phosphorus leads to plant chlorosis.
- Trace elements - affect the color and number of buds, the size of flowers.
Organic fertilizers - bird droppings.
After the third or fourth pair of leaves, young buds appear. The amount depends on the conditions and the mass of the tuber.
If the first flowering was early, gloxinia can bloom again... In such a case, the aerial part (flowers, leaves) is cut off, leaving a shoot 2 centimeters long. Repeated flowering is not common for all plant species and varieties.
In autumn, when it is clear that the soil does not dry out for a long time, we gradually reduce watering, and when yellowness appears on the leaves, we stop watering altogether. When the ground part of the tuber dies off, the plant goes into a dormant period, which lasts 3-4 months.
Advice: Place the pot of tuber in a cool place (+10 - +15 ºС). During the winter, the soil is moistened several times, if the storage temperature is higher, moisten it more often.
Watering
During active growth, gloxinia is watered with settled water at room temperature, but you need to be careful, because the plant does not tolerate moisture due to susceptibility to fungal diseases. Depending on the storage location, during the dormant period, watering is reduced or not moistened at all.
How to water young seedlings?
Young shoots should be watered with soft water (melt, rain, partially boiled). When watering, make sure that no water gets on the leaves and in the center of the tuber. Water is 2-3 ° C warmer than the ambient temperature. We reduce watering in cloudy, cold, rainy weather, as well as during dormancy.
Thus, now you know how to propagate gloxinia from a leaf at home. When breeding sinningia, it is very important to be patient and take good care of the grown flower. Then, with careful care, creating suitable conditions and timely feeding, the plant will delight with delicate and velvety flowers, as well as multiply successfully.
Growing gloxinia from seeds at home will take a significant amount of time and require a lot of attention and diligence. Although caring for the southern beauty, which is also called synningia, cannot be called elementary, its popularity among lovers of indoor flowers is enormous. In order for the plant to please from year to year with a beautiful bush shape, juicy velvety foliage and bright bell buds, it is important to follow the rules for its breeding.

Lighting and temperature control
Gloxinia require a lot of bright light, but it must be diffused. It is better to place pots with them on spacious windowsills located on the west or east side. Being in direct sunlight will have a bad effect on the delicate leaves of the plant, burns will appear on them, and the flower itself may die. Therefore, caring for gloxinia on the south window requires shading. The optimal daylight hours for synningia are 12-14 hours. In the autumn-winter period, when it gets dark early and the nights last longer, it is necessary to provide the flower with artificial lighting.
If these rules are not followed, the decorativeness of the plant suffers, and its development slows down.It is not difficult to understand whether there is enough lighting for Gloxinia. If the surface of its leaf is dark green, the leaf blades are parallel to the windowsill, and the stem is not high, there is no need to rearrange the pot. With a lack of light, all parts of the plant stretch upward, and their color fades. With its excess, the leaves go down, turn yellow, can curl from the edges, the flower-bearing stems are shortened.
Drafts and strong temperature fluctuations of gloxinia are contraindicated, therefore, it is better to forget about regular ventilation. The native land of the plant is the tropical forests of Brazil, so caring for it includes constant monitoring of air humidity. To increase it, saucers filled with water are placed near the pot. Spraying gloxinia is not recommended, their leaves and buds do not tolerate moisture.
During the growing period, the optimal temperature for a flower is in the range of 16-20 ° C. When overheated, its leaves rise up, and if the plant freezes or needs watering, they go down. With the transition of synningia to the resting stage, the temperature will have to be lowered to 10-12 ° C.

Watering and fertilizing frequency
Gloxinia care at home is based on observing the correct watering and feeding regime. During the growing season, the soil in the pot is moistened regularly, preventing it from drying out. But excess water is also harmful to plants: in constant dampness, their tubers can rot. The time for the next procedure comes when the top layer of the soil dries up. For irrigation, use pre-settled or filtered water, the temperature of which is 1-2 ° C higher than room temperature. The roots of the plant absorb the warm liquid faster, this care reduces the risk of rot.
You can carefully pour water along the edge of the pot, making sure that it does not fall on the leaves and buds, but it is easier to fill the pan with it, remembering to drain the excess after the soil is saturated. When the gloxinia buds begin to actively bloom, it will need more intense hydration.
Advice
To facilitate the transition of the plant to the dormant stage, which occurs at the end of October, in the second half of August, watering is gradually reduced, increasing the interval between procedures.
Proper care will allow you to get profusely blooming gloxinia. Up to 20 buds can bloom on it at the same time. To achieve this splendor, the plant needs to be fed. Until mid-August, they do this often, every 10 days, using complex fertilizers developed for decorative flowering representatives of the flora. Before the resting phase, they should be replaced with preparations that do not contain nitrogen, but are enriched with phosphorus and potassium. When the period of active growth ends, the need for feeding passes.
Lack of nutrients impairs the appearance of gloxinia. It grows more slowly, the buds become smaller, the color of the leaves and petals loses its intensity, the duration of flowering is reduced. When feeding, it is important not to overdo it with the dosage of the drug, strictly observing the instructions of its manufacturer, and the frequency of procedures. Excess fertilizer can severely harm gloxinia and even kill it.

Landing features
Caring for the plant makes it difficult to transplant it annually. It is carried out when the resting stage comes to an end - in February. Gloxinia are close to begonias and violets in terms of soil requirements. You can buy ready-made substrate for them in the store or mix at home in a 2: 1: 1 ratio
- leafy ground;
- humus earth or peat;
- river sand.
A lump of earth with a flower tuber must be removed from an old pot and planted in a larger container using the transshipment method. It is better to choose a container that is wide (at least 15 cm in diameter), but not too deep. The plant needs good drainage, so a thick layer of expanded clay, pebbles, rubble or broken brick is laid on the bottom of the flowerpot. A little prepared soil is placed on top, on which a lump with a transplanted flower is placed.The soil is gradually poured, tamping it. When properly planted, the gloxinia tuber should be halfway out of the ground.
You can transplant a flower in another way. From the tuber removed from the pot, the old soil is carefully cleaned off, the dried roots are removed and washed under the tap with warm water. He is being examined carefully. Areas with signs of rot are removed with a sharp knife, and crushed coal is used to disinfect the wound. The preparation of the tuber for planting does not end there. It is kept in a weak solution of potassium permanganate for 30 minutes, after which they wait a day until it dries.
The gloxinia placed in the ground is covered with a film. It is left until the first leaf appears, preferably two, not forgetting to open the pot for airing for 20 minutes in the morning and evening hours. After the final removal of the film, soil is added to the flowerpot. The tuber must be completely covered by it.

Reproduction methods
The effective cultivation of gloxinia at home is impossible without knowledge of the characteristics of flower reproduction. It can be done in different ways:
- seeds;
- by rooting a leaf cut from the mother plant;
- dividing the tuber.
The seed method of reproduction of gloxinia cannot be called simple and effective enough. The planting material is small, it germinates poorly, and young shoots develop slowly, which makes caring for them very laborious. There is only one plus here - the possibility of breeding new varieties. The division of the tuber is considered by many growers to be a barbaric method of reproduction, it is used infrequently, mainly because the parts of the mother plant placed in the ground take root slowly and get sick for a long time.
Seeds are planted in January-February. Due to their small size, it is inconvenient to sow them; it is better to mix them with a small amount of sand and scatter them over the soil surface. It is not required to cover them with a layer of earth. The plantings must be thoroughly moistened using a spray bottle, and then covered with a film and placed in a well-lit, warm place. As the soil dries up in a container with seeds, it must be sprayed. Seedlings can be expected in 2-4 weeks.
It is much easier and faster to propagate gloxinia from a cut leaf. It must be healthy and strong, and the length of its petiole must be at least 2 cm. If the leaf is large, it is divided into parts, making a transverse cut. The procedure is best done with a sharp knife to avoid decaying the edges. The leaf or its fragments can be placed in a glass of water and, after waiting for the roots to appear, placed in a pot or immediately buried in a light, slightly moistened soil. In both cases, it takes root well.
After planting the leaf in the soil, the container is covered with a film and taken to a warm, bright place. Another way to create an impromptu greenhouse is to put a plastic bag on the container. It is not necessary to water the soil and remove the shelter to ventilate the rooting leaf. A month after planting, the film begins to open for a short time, gradually increasing the time in order to accustom the plant to indoor conditions. They remove it when the flower releases a couple of new leaves.
Spectacular gloxinia with large dark green leaves and large gramophone flowers make an unforgettable impression. But, deciding to purchase a plant, it is worth remembering that it is quite demanding and will not tolerate neglect in such an important matter as care.
To make the southern beauty a source of pride for the owner, turning into a pearl of an indoor garden and attracting the envious glances of guests, you will have to try. Only compliance with all requirements for lighting, air humidity, temperature, watering, feeding, soil quality and transplanting will allow you to grow a healthy gloxinia, which will delight you with lush and long flowering.