Content
- 0.1 Part 1 Preparation
- 0.2 Part 2 Landing
- 0.3 Part 3 Growing in a container
- 0.4 Part 4 Daily and Long Term Care
- 0.5 Part 5 Harvesting and storage
- 1 Warnings
- 2 What do you need
- 3 Description of beans
- 4 How to choose the right variety of beans for your home?
- 5 Preparation of planting material and land
- 6 Planting stages
- 7 Care and watering
- 8 Harvesting the first harvest
- 9 How to choose beans seeds for planting
- 10 How to plant beans in a good location
- 11 How to soak beans before planting
- 12 Beans planting and care
- 13 Beans: outdoor care
- 14 How to grow beans at home
Part 1 Preparation
-

Use seeds instead of seedlings. Most bean varieties do not survive the transplanting process, so you should plan to sow the seeds directly rather than plant the plants.
-
 Choose a suitable location.
Beans need full sun to grow well, so you should plan to grow them in an area that receives at least six hours of direct sunlight a day, if not more.
- If possible, find a place where the soil is naturally loose. Loose soil drains water more efficiently, and this is critical if you want to grow healthy beans. If you notice water settling or water accumulating in a given area when it rains, consider choosing a different location.
- Practice crop rotation year after year. Do not plant beans in soil where other legumes have been growing in the past three years.
-
 Improve the soil.
The soil should be light and loose enough to allow water to drain. If the soil is too heavy, then you need to change it with enough organic material to equalize the soil. Soil pH should be close to neutral.
- Good soil includes manure and compost. Any of these options will help reduce the overall density of the soil as well as provide many nutrients for the plant as it begins to grow.
- Improve the soil by mixing these additional components with a shovel or small rake a few weeks before planting.
- The pH of the soil should be between 6.0 - 7.0.
- Also, consider mixing a powdered modifier into the soil. It is a naturally occurring, healthy bacterium that facilitates nitrogen absorption in beans during their earliest and most critical growth stages.
-
Install a support if necessary. While many popular bean varieties are bush beans, there are several curly bean varieties. Climbing beans grow vertically, so you will need to secure stakes or supports in the growing area if you want these varieties to produce maximum yield.
Part 2 Landing
-
 Wait for the last frost to pass.
Beans require adequate heat and moisture to grow well. Plant it in the spring as soon as you feel that the last frost has already passed.
- Soil temperature should be 20 -27 ⁰С. If at all possible, do not let the soil temperature drop below 16 ° C.
- Ideally, the air temperature should be between 18 and 27 ° C during most of the growing season.
- If frost does strike unexpectedly after sprouting the beans, cover the seedlings with a little mesh cloth or canvas to help protect them from frost.
-
 Plant the seeds deep enough.
Bean seeds should be planted 2.5 to 4 cm deep.
- Many gardeners prefer to plant seeds 2.5-5 cm apart initially. After the seedlings reach a height of about 8 cm, thin them to a more suitable distance, removing the weakest seedlings if possible and keeping the strongest ones.
-
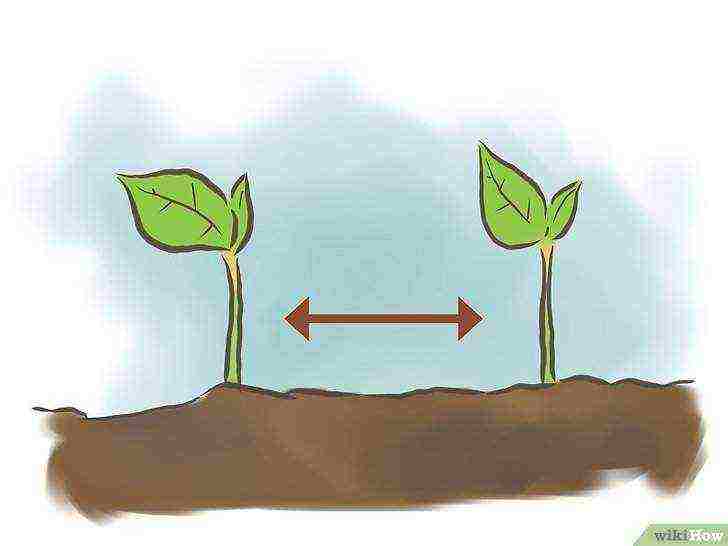 Give the seeds enough room.
For most varieties, you will need to plant individual bean seeds 8 to 10 cm apart.
- In particular, climbing varieties grow well at a distance of 10 cm from each other, while compact bushes grow well if they are located at a distance of 20 cm from each other.
- The seeds should germinate within 10-14 days.
Part 3 Growing in a container
-
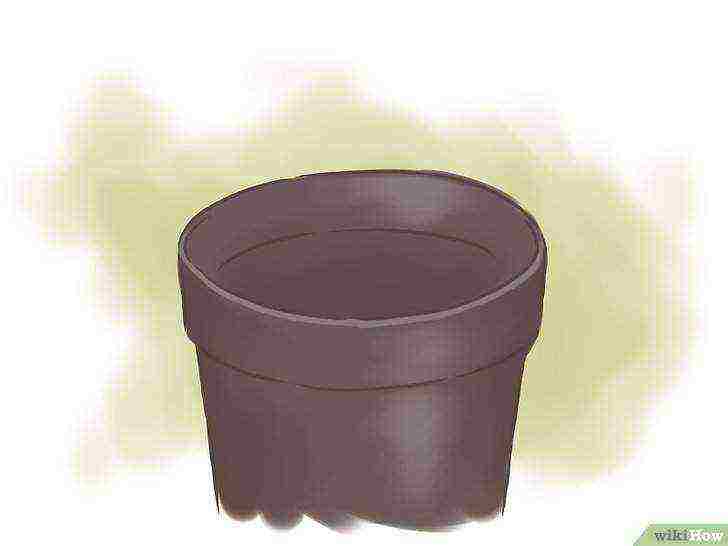 Choose a large pot.
While container gardens do not provide the most beneficial conditions for beans, these plants can grow in containers when properly cared for. For each bean plant, you will need a 30 cm pot.
- If you choose to grow beans in containers, you should choose a bushy variety instead of a climbing variety. The bush variety tends to be better in more confined spaces.
- The main reason why beans are not usually grown in containers is simple - the harvest from one medium plant is not enough for one person. You will typically need to plant six to ten plants if you want to provide yourself with enough beans for regular use. However, you should only plant one beans per pot, so you will need six to ten separate pots if you plan to grow enough beans for yourself.
-
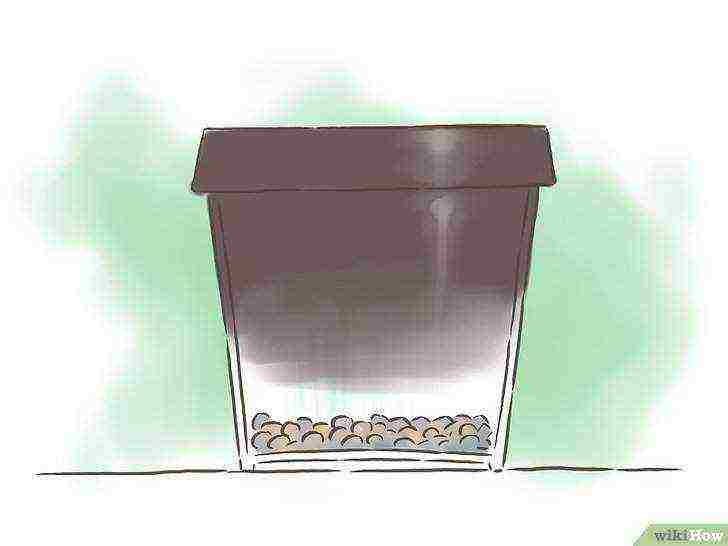
Add gravel to the container. Before adding soil to the container, you will need to spread out a layer of gravel at the bottom to improve drainage. Otherwise, alas, beans can quickly become waterlogged in pots.
-

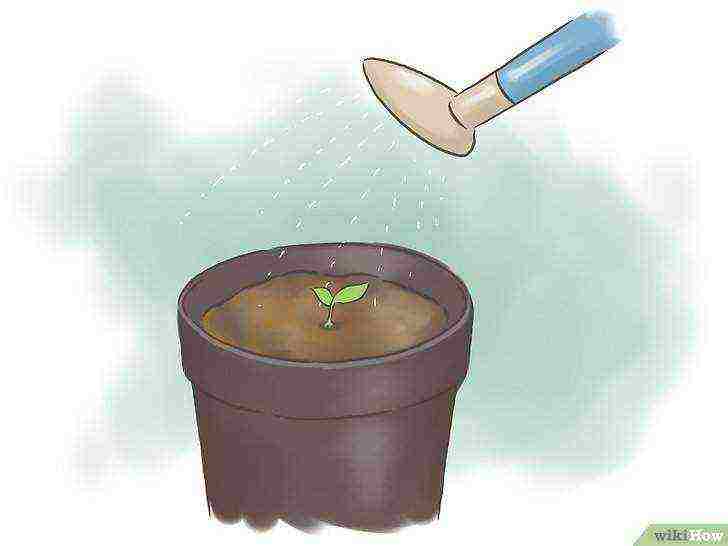
Plant the seeds deep enough. As in the open field, bean seeds should be planted 2.5 to 4 cm deep. Plant the seeds in the middle of the pot.
Part 4 Daily and Long Term Care
-
 Water only when the soil is dry.
The soil should not be too damp, as the roots of the plant are easily damaged by waterlogging. Therefore, you should water the plants if the area is completely dry.
- Instead of watering the soil in an attempt to keep it constantly moist, you should only water it when it is completely dry, at least 3 cm. You can test this by gently pressing your finger into the soil and feeling the moisture.
-
 Avoid high nitrogen fertilizers.
While nitrogen-based fertilizers will make bean plants full of life and leafy, these fertilizers do more harm than good as they encourage the plant to direct its energy to the leaves rather than the fruit. Large doses of nitrogen will produce an impressively leafy plant that has very few beans.
- When the plant begins to grow, the beans actually produce their own nitrogen within the roots. A fertilizer with a high nitrogen level will inevitably feed the plant too much nitrogen.
- If the plants are suffering and need additional nutrition, use a small amount of organic fertilizer that does not contain a lot of nitrogen.
-
 Be careful when removing weeds.
The roots of the plant are quite shallow, so when you pull up the weeds, be careful not to accidentally disturb or damage the roots of the beans.
- Never cut the weeds around the beans with a hoe or shovel. Instead, you must pull out the weeds by hand.
- You can also remove weeds by spreading a 2.5-5 cm layer of mulch around the plant after it has germinated.In addition, mulch has the added benefit of maintaining adequate levels of heat and moisture, and protects the pods from rotting as soon as they touch the ground.
-
 Watch out for pests and diseases.
Some garden pests target beans, and the plant is also vulnerable to several different diseases. If you run into problems, you may need to apply an appropriate pesticide or fungicide.
- Beetles, slugs, scoops and leafhoppers will appear when leaves appear on the plants. They can be easily removed if you check the plants regularly and collect the insects as soon as you see them. Although, if that's not an option, look for a pesticide that targets these insects specifically.
- Aphids can also attack a plant, but they cannot be removed manually. Treat the plant with an appropriate pesticide as soon as you notice aphids, as these pests can spread the bean mosaic virus.
- Legume rust is a reddish-brown fungus that can show up as spots on the leaves of beans and should be treated with a fungicide as soon as you notice the first signs of rust.
- Also, the plant can attack powdery mildew. It looks like a fine white powder. You should treat the plants with the fungicide as soon as possible and reduce the amount of watering. Wet conditions are favorable for mold, so plants should only be watered into the soil and not onto the leaves.
- If squirrels, deer, or rabbits become pests, you can protect the beans with a fence or net.
Part 5 Harvesting and storage
-
 Collect all the beans at the end of the season.
Bush varieties must be harvested once at the end of the growing season. Climbing varieties can be harvested several times during the season, but the highest yield will usually be at the end of the season.
- Depending on the variety you choose, the beans should be ready for harvest in 90-150 days.
- Climbing varieties produce crops on a regular basis for one to two months.
- Sufficiently ripe bean pods will feel dry to the touch and the beans inside the pods will be very tight.
- Check the beans from one pod before harvesting the other pods. You can check if the beans are done by gently biting one. If the teeth leave a dent in the beans, the rest should be allowed to dry for a longer period of time before being harvested and half-licked.
-
 Pull the plants up early if necessary.
If cold temperatures or other unfavorable conditions threaten the crop, you can remove the beans earlier and let them dry afterwards.
- In high humidity, it is difficult to dry the beans on the plant. In this case, you will need to finish drying the beans indoors.
- Pluck the plants and hang them upside down for a few days or weeks, until the pods are dry and the inside of the beans is firm. Most of the foliage must die off before plucking the plants.
- Keep the beans in a warm room with plenty of circulating air when drying them.
-
 Break the pods apart.
After you have plucked the pods from the plant, you will need to open them and pull out the beans hidden inside. If you've allowed the plants to ripen properly, the beans should already be firm and dry.
- You can half-sheathe a small crop by hand, but if you have a large crop, you can batch half-shell the beans. Place the pods in a pillowcase or similar bag. Step carefully on the pods through the pillowcase to open them. When done, sift the pieces to sort the beans and leave the broken pods aside.
-
 Store beans in a dark place.
Place the harvested beans in a jar and store in a dry, dark place until use.
- Dried beans can be stored for up to one year under the right conditions.
- Store beans in airtight jars or bags.
Warnings
- Raw beans and their sprouts are poisonous.Beans should only be eaten after soaking and cooking in boiling water for at least 10 minutes.
What do you need
- Bean seeds
- Manure or compost
- Powdered modifier
- Support (optional)
- Shovel
- 30 cm container (optional)
- Gravel (optional)
- Watering can
- Pesticide or fungicide (if needed)
- Guardrail or mesh (if necessary)
Article Information
This page has been viewed 23,443 times.
Was this helpful?
Beans are known to every inhabitant of our vast country, but not everyone knows about its varieties and growing rules. Cultivating this kind of culture at home is a snap. Beans are rich in various vitamins and microelements by their composition. With all this, in terms of care, it is an unpretentious plant. So, how to plant beans correctly, and what care features are there?
Description of beans
The plant belongs to the legume family, which unites about 97 species. His homeland is considered

Lat. Phaséolus
Latin America and India. Beans are widespread in England, France, Brazil, Germany, etc. It appeared in Russia in the 16th century. An interesting fact - initially this plant was grown only for decorative purposes, and after several centuries, it began to be cultivated as a vegetable crop.
This is a truly unique plant, since its fruits contain a huge amount of useful elements that are so necessary for the human body.
There are a lot of species of this plant: mainly common beans were common in our country. Beans can be:
- curly;
- half-crumpled;
- bush.
In the first case, the length of the plant can reach five meters or more, in the second - up to 1.5 meters, and in the third, the height can vary from 20 - 70 cm. In Russia, bush varieties are more preferred.
During the flowering period, the plant can become a decoration for a vegetable garden, a garden plot or a local area. It has rather large leaves, and the flowers are irregular butterflies, collected in inflorescences of 2 - 6 per brush. The length of the pod depends on the variety, it can vary from 5 - 25 cm.Their color can be different:
- White;
- Red;
- Purple;
- Black.
In addition, beans are subdivided depending on the structure of the valves:
- Sugar or asparagus;
- Semi-sugar;
- Peeling varieties.
An interesting fact: the plant is thermophilic, because its seeds germinate only at a soil temperature of about 10 degrees, in this regard, the culture is sown at the same time as cucumbers.
How to choose the right variety of beans for your home?

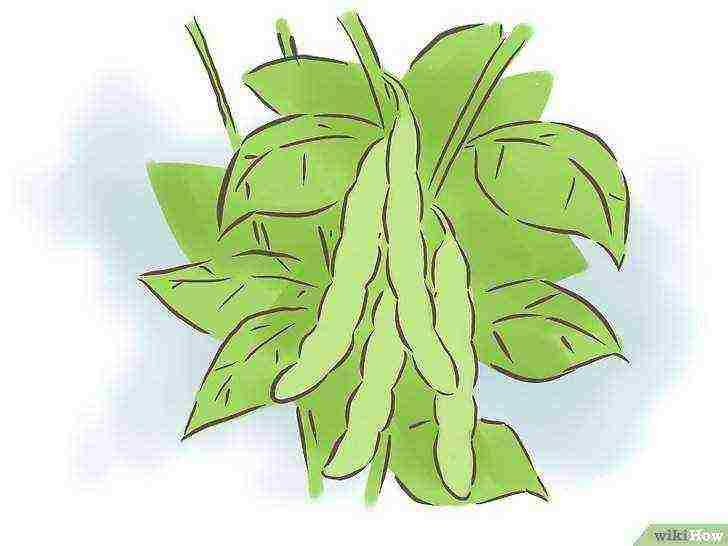
Bean pods
Is there a difference between a greenhouse and a glazed loggia? The answer is no. We choose a place for location along the walls so that our plant does not shade others.
Above, we figured out that there are several types of this plant: climbing, semi-climbing and bush. The latter species is the fastest ripening, which is important for some regions of our country. Curly plants will have to be tied to a trellis (a lattice that serves as a support for plants), and bush plants can be tied to sticks up to 60 cm high and this will be quite enough.
It is better to abandon hulling varieties of beans right away, they are not suitable for growing in greenhouses.
For a loggia, sugar or asparagus beans are ideal. The most popular of these are the following varieties:
- "Caramel";
- The Oil King;
- "Sachs 615".
First grade: in 2 months, the bush can give pods of a pleasant sugar taste. It should be noted that this variety is resistant to all diseases.
The second can be harvested in less than 2 months. The pods are tubular in shape and can reach a length of 25 cm. The taste is delicate. They can be used both fresh and harvested for future use.
The last variety has a length of no more than 40 cm.As in the second case, it has tubular pods up to 12 cm.They contain a huge amount of nutrients and sugar.
Preparation of planting material and land
The fruit of the bean has a hard shell; it grows rather poorly from dry seeds.

Bean seedlings on the windowsill
Immediately before sowing, it is not recommended to soak them, because they will simply rot in the cold soil.
Professionals proceed as follows: the seeds are placed in a small container and poured with a weak solution of potassium permanganate. The temperature of the solution should be at least 70 degrees. After this procedure, the seeds should be sown immediately. Pour the rest of the hot solution into the ground.
Or you can do it differently: dilute a weak pink solution of potassium permanganate in water, its temperature should be approximately 60 degrees. Pour the soil with this solution and sow the beans immediately.
If you are going to grow beans at home, it is important that the balcony or loggia is glazed. As a rule, they begin to sow it in late spring. If you do not have a balcony, but you still want to enjoy delicious fruits, do not despair. Containers or seed boxes can also be placed on the windowsill in the room, but in this case the seeds are sown in mid-March.
The soil for this plant should be loose, fertile and rich in various trace elements.
It does not tolerate acidic soil, it must be slightly alkaline, therefore, a deoxidizer should be added before sowing seeds. For this, you can use chalk, dolomite or ash.
Planting stages
Remember that the planting site must be well lit, otherwise the plant will not grow in the shade. And this means only one thing: if you are going to grow beans in a room, then it will need additional lighting.
Stage 1

First shoots
Seeds can be planted in the ground immediately (as described above) or previously germinated. If you prefer the second method, then the scheme is very simple:
- We take the required amount of seeds and wrap them in cheesecloth;
- We collect a little warm water in a small container and dip the seeds into it;
- As it evaporates, add water to the container.
It is important to know that all specimens must be carefully examined for defects before planting.
Damaged seeds are sifted out immediately. Only in this way will you protect your plant from pests, and they can ruin the harvest even on a loggia or in an apartment.
Stage 2
Particular attention should be paid to the choice of a box or container for planting a plant. For bush varieties, we choose a container with a volume of at least 2 liters, and for climbing varieties - at least 35 liters.
Once you have acquired the correct box, you should tackle the soil. For the selected varieties, we use the following composition: 2 parts of soil and one part of humus.
Stage 3 Disembarkation
There is no difficulty in this. It is enough just to adhere to some rules and recommendations:
Before planting the seeds, even if you have soaked them beforehand, you should dip them in hot water or pour it over the soil.
Seeds are planted at a distance of 10 cm from each other, while two grains can be placed in one hole at once.
The optimal time for planting is late spring. After 5 - 7 days, the beans will give their first shoots, after 6 weeks - the plant will bloom, and in a few weeks it will give the first harvest.
Care and watering

Sprouting beans
In order for our plant to give a good harvest, it is necessary to carry out proper watering.
Absolutely the entire legume family loves water, especially the plant needs it when the pods appear. Watering should be carried out as it dries, it should be moderate.
Water should not get on the leaves, otherwise the plant can get sick with a fungal disease.
Watering is best done in the morning. It is stopped after the appearance of the second pair of leaves, and resumed from the beginning of flowering of the plant.
On cloudy and cold days, beans need extra lighting.After the first sprouts have appeared in the container, you need to stick a stick to which in the future they should be tied.
The plant does not need special fertilizers, but they will not be superfluous either. For this, you should choose a mixture containing potassium and phosphorus. Fertilizer should be applied no more than once every 2 weeks.
Important! Even at home, the plant can be affected by a spider mite or caryopsis.
The latter can fall into the ground during planting, and then settle inside the fruit. If this still happened to your plant, then it is important to treat it with special biological products.
Harvesting the first harvest
The pods, as soon as they are ripe, are immediately removed and used. In this case, several pieces can be left for the next planting, but they must fully mature. Growing this crop at home cannot be called large-scale, but, for example, 8 planted bushes will be enough to harvest after 2 months.
Cool weather can shift the timing of fruiting somewhat. If you decide on climbing varieties, then it will be enough to plant about 5 bushes on the loggia.
While watching the video, you will learn about growing beans.
Beans, of course, are useful, because they are rich in useful vitamins and minerals, and they also contain vegetable protein, which is similar in composition to meat. It is unpretentious in care, the main thing is that you must strictly follow all the rules and recommendations and you will achieve a rich harvest.
Have you noticed a mistake? Select it and press Ctrl + Enter to tell us.
Legumes
Beans are a nourishing vegetable crop that, with due care, can give an excellent harvest on a personal plot, in a vegetable garden, and even in an apartment. Taking into account some capriciousness of the plant, it is important to know how to plant beans by seedling method or by sowing in open ground, and how to properly maintain its growth and fruiting.
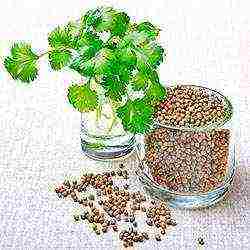
How to choose beans seeds for planting
How to choose beans seeds for planting
The first thing to do before planting beans in the garden is to choose the right variety. The key reference points are the type of fruit obtained and the climatic zone of the cultivation site. According to the first characteristic, the available varieties are divided into three groups:
- Pulses or shell beans. In representatives of this type, after ripening, only dense nutritious beans stored in dried pods are eaten. Popular varieties: Shokoladnitsa, Gribovskaya 92, Dream of the Hostess, Ballad, Zolotistaya, Rubin.
- Asparagus beans are the exact opposite of the previous type. In plants of this group, the fruit part is represented by green pods without large beans inside. Varieties suitable for planting in the garden: Purple Queen (Purple Queen), Melody, Zhuravushka, Saksa 615, Fatima, Deer King, Caramel.
- Semi-sugar crops are a versatile option. In the early stages, their pods can be completely eaten, but in the later stages, a parchment fibrous layer forms inside, which must be removed before cooking. On a personal plot, it is advisable to plant beans of Indiana, Secunda and Rant varieties.
How to plant beans: seed selection criteria
The fundamental factor in the choice is the temperature and climatic characteristics of the landing site. Before choosing beans for planting, you need to think about the length of the warm season so that the cultivated plantations can reach maturity before the onset of cold weather. According to the ripening period, beans are divided into:
- Early ripening: Saksa 615, Melody, Caramel, Butter King (asparagus), Indiana, Secunda, Deer King, Gribovskaya 92. These hybrids were bred for successful cultivation in northern and temperate latitudes.
- Mid-season: Ballad, Mistress's Dream, Ruby, Golden, Winner, Panther (asparagus), Fatima, Purple Queen. In season with good weather conditions, these bean hybrids grow well in any area.
- Late ripening: Gama, Dita, Kentucky Beauty, Tara. Pod harvest of these varieties occurs 60-80 days after planting, and grain harvest - 100-137, therefore, in the latter case, cultivation is advisable only in warm regions.
When choosing a variety for home cultivation, it is advisable to isolate yourself as much as possible from the worries of combating all kinds of infections and pests. Therefore, when choosing between two similar hybrids, it is better to lean in favor of the one that is more resistant to such negative factors.
Naturally, at the time of purchase, the seed must be assessed visually. The beans must be smooth and tough, free from bugs and defects, and the bag must not contain debris. In specialized stores, upon purchase, you can familiarize yourself with the certificate of quality and compliance with the requirements of GOST.
How to plant beans in a good location
Experts and experienced summer residents note that beans, planting and caring for which require close attention, grow well in a short but bright sunny day lasting no more than 12 hours. With such a rhythm of sunlight, plants, oddly enough, begin to bear fruit faster, boasting decent yields.
How to plant beans at home
In the southern regions, in this case, long daylight hours have to be shortened artificially, planting beans in the ground in the second half of the season, or covering the beans after 12 hours of illumination with an opaque film or cloth until morning.
I must say that such serious requirements for the nature of lighting are imposed only at the initial stages of the growing season. Somewhere to the equator of development, plants grow and bear fruit calmly, regardless of the length of the sunny day.
It is worth remembering about the differences in the growth of specific varieties of culture. Shrub bean varieties feel good planted between cabbage and potato rows, and curly ones - wherever there is a support that allows branches to drag upward.
Soil preparation
How to plant beans so that it sprouts faster and pleases with an enviable harvest? Prepare the soil correctly! It should be airy, nutrient-dense and well-drained with an acidity of 6-7 pH. Planting beans in clay soil or with close passage of groundwater significantly complicates care.
The crop yield on dense and clayey soils increases with the pre-planting introduction of compost (4-8 kg / m2), humus (8-12 kg / m2), sand or loosening mulch into the soil. Ammonium nitrate, enriched with a mixture of superphosphate and potassium chloride, also has a decent fertilizing effect. But it is better to avoid an overabundance of nitrogen in the ground - it will provoke an active increase in the leaf mass, which will negatively affect the fruit part. There is no need for nitrogen replenishment - the plant fully receives this element from the air supplied to the root nodules.
How to soak beans before planting
In fact, in order to grow beans efficiently, the beans do not need to undergo any pre-sowing treatment. After immersion in moist soil of suitable composition, they confidently break through and reach ripeness within the expected time frame.
However, pre-soaking of the beans is often practiced to stimulate their germination. How much to soak beans before planting depends on the solution in which the grains are placed: they will have to be kept in melt water for up to 12 hours, and in a mixture of warm water with potassium permanganate - up to 6-8 hours.
How to soak beans before planting
Both dry and sprouted beans should be dipped in a disinfecting aqueous solution of H3BO3 (0.2 g per 1 liter) for 3-5 minutes before being placed in the ground. This will make the grains more resistant to infections and insect pests.
How to plant sprouted beans
Germinating beans before sowing can significantly speed up the emergence time and the quality of emerging seedlings.This method of seed preparation, firstly, makes it possible to exclude "blank" grains even before immersion in the ground, and secondly, it provides the seeds with comfortable conditions for the formation of a strong and healthy seedling. Order of conduct:
- Take a container with a wide flat bottom and holes to leave excess water.
- A damp cloth is placed inside.
- Sorted and washed dry grains are placed in 2-3 even layers.
- From above, the grains are abundantly moistened with water.
- All together is covered with a thin cloth or 4-6 layers of gauze.
- Water the seeds several times throughout the day to keep them moist. But liquid stagnation should not be allowed, otherwise the beans will rot.
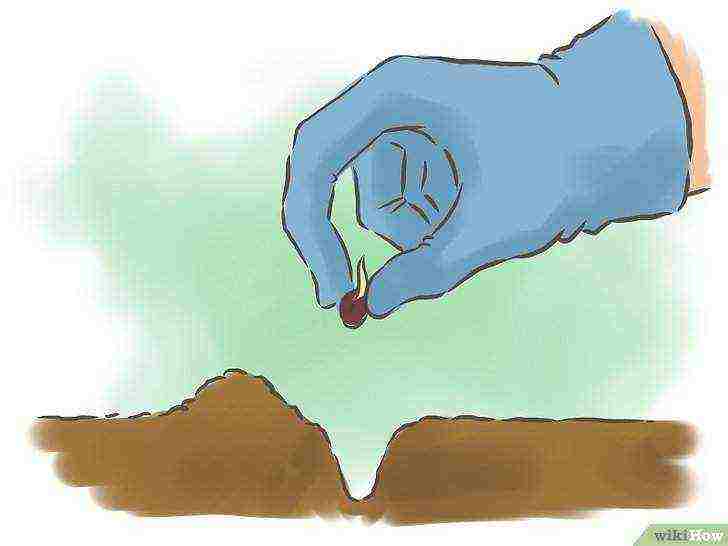
The first roots emerge from the seeds after 24-40 hours from the beginning of germination. Before planting sprouted beans in open ground, you should wait until the seedlings reach a length of 2-3 cm.The planting process itself is no different from how dry non-sprouted grain is sown - in the soil warmed up above + 10˚C to a depth of 5 -6 cm.
How to plant beans with the spine up
If you place the bean sprout with the root up when sowing in a garden or pot, nothing critical will happen. The part that is formed in the seeds after germination grows from the hypocotal ring and should become a root in the future. Even with the wrong arrangement, the seedlings, as a rule, rush to the sun and hatch. If in doubt about the correct placement of the beans, it is better to put them in the holes sideways so that it is easier for the roots to go in the right direction.
Beans planting and care
Photo: How beans grow
How to plant and care for beans outdoors
Suitable temperature conditions for planting crops in different shiroats are established at different times. In cold regions - by the end of spring and early summer, in warm - at the beginning of May. The main indicator that you can start sowing is the temperature of + 12-15˚C at a depth of 10 cm. It also makes sense to navigate through the weather forecast to find out when you can plant grains without danger of damage from a cold snap. Chestnut blossoms are also a good sign that the weather is right. If a drop in temperature occurs after sowing beans, you need to cover it overnight with plastic.
As a rule, climbing hybrids are planted a week later than erect ones. For conveyor harvesting in the fall, you can sow the crop from May to July, taking breaks for 10 days.
How best to plant beans
The most optimal on a personal plot and garden is a planting pattern in rows with each plant being 20-30 cm apart, and rows 35-50 cm apart. The grains themselves should be laid 2-3 pieces in each hole to a depth of 4 to 6 cm. Several seeds are needed so that there are no “blank” holes on the garden bed - one of the seeds will definitely sprout, and if there are several of them, it will be enough to remove the weak ones. Thanks to this, a bed of lush, healthy bushes is obtained.
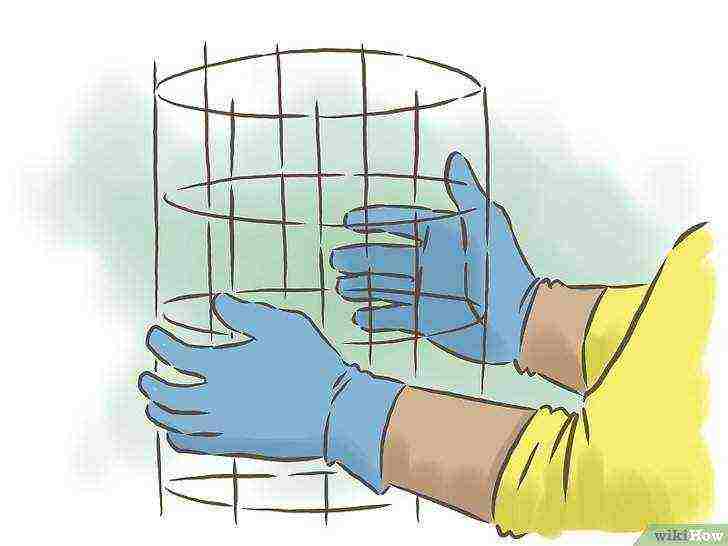
Before planting curly beans at home, it is necessary to construct posts or supports on the site to lift the branches up. A cone-shaped tripod made of wooden slats is well suited for this, since the branches of the plant form and "crawl" onto the support counterclockwise. You can also do with a classic trellis of two posts with a rope or wire stretched between them.
How to plant beans in a pot for seedlings
- Pour a substrate from garden soil mixed with rotted humus into plastic or peat cups.
- A month before transferring the plants to the ground, sow the beans in glasses to a depth of 3-5 cm.
- Sprinkle a small layer of sand on top.
- Seedlings should be provided with sunlight, according to the rules described above, and watered in a timely manner.
- Before planting sprouted beans in the ground, you need to make sure that the air temperature outside is kept above + 5˚C both during the day and at night.
The transfer of seedlings to the ground should be carried out after the ground warms up at the planting level to + 10-15˚C according to a scheme similar to that given above. For bush varieties: 15-25 cm between shoots and 40 cm between rows, and for curly varieties - 20-30 cm and 50 cm, respectively.
Beans: outdoor care
How to plant beans outdoors
One of the main requirements for the confident growth and fertility of beans is an active supply of oxygen. Therefore, it is very important to regularly loosen and irrigate the soil, not to allow a crust to form after irrigation and precipitation. It is also necessary to check the presence of diseases in a timely manner - the degree of possible losses depends on this.
To stimulate pollination, it is recommended to spray the beans with sweetened water. This will attract the attention of the pollinating insects.
Until the sprouts have entered the flowering phase, daily watering is required at the rate of 5-6 l / m2. It is recommended to double the amount of irrigation during the setting and ripening of the pods. With a water deficit in beans, ovaries and inflorescences fall off, and with an excess, the green mass grows too much, negatively affecting fruit formation.
In general, additional dressings for beans are not required, since there is enough of what is introduced before sowing and remains from previous crops. With low fertility, it is allowed to add a little wood ash or rotten bird droppings.
Asparagus beans: planting and care features
- Seedlings of asparagus beans are more sensitive to cold weather, so they are sown 1-1.5 weeks later than grain varieties.
- The best siderates for asparagus varieties are carrots, onions, potatoes, and tomatoes.
- Organic matter for asparagus beans should be applied in autumn, and in spring - rotten compost and wood ash. The soil can be enriched with mineral complexes twice a season.
Tips for the care of leguminous varieties
- These beans are very sensitive to lack of moisture, so moisture must be maintained at all times.
- Loosening the soil regularly allows the roots to extract nitrogen from the air and prevents weeds from developing.
- After the formation of buds, fertilizer can be added to the beds in furrows at a distance of 10 cm from the rows.
- To stop the growth of individual branches, you need to pinch their tops.
- Seedlings 10 cm high need to be spud to improve nutrition and strengthen the root system.
How to grow beans at home
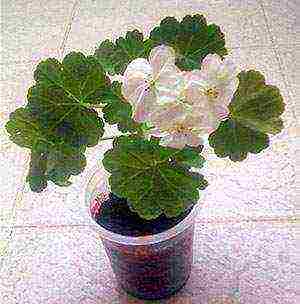
For those who do not have their own personal plot or cultivating legumes is not allowed by too short a summer, an alternative to growing beans at home may be suitable. When equipped with a suitable lighting regime, room regime will allow you to plant and collect beans all year round. In apartments, glazed loggias, which are, in fact, the same greenhouses, are well suited for these purposes.
Growing beans in a greenhouse
For growing at home, bush and undersized varieties of beans are well suited, which will not occupy the entire space of a balcony or window (when cultivated on a windowsill). It should be noted that it is more advisable to grow asparagus rather than shelling beans under indoor conditions. Firstly, it has a shorter vegetative period, and secondly, it is impossible to achieve a serious grain harvest that pays for the efforts in such constrained circumstances. Vigna Chinese or Japanese are quite suitable varieties for cultivation in a loggia.
Sowing is carried out in accordance with the standard procedure, but somewhat denser. You can leave 10 cm between plants in a row, and 20-30 cm between rows.
How to grow beans at home: care
Beans require a rich and light soil for growth, the creation of which has to be taken care of at home. In addition to the peat-sand base, it is necessary to add fertilizers such as Fitosporin, OMU or AVA to the soil. For enrichment with minerals, you can pour into the soil the universal agent Uniflor-micro, diluted with water in a proportion of 1 tsp.3 liters.
Excess moisture can have a negative effect on the health of the beans. Starting from the emergence of seedlings and until the appearance of 4 leaves, you need to water it moderately, but regularly. After that, you need to stop watering until the flowering phase begins.
If during the pre-sowing preparation of the soil, no AVA was applied, during the growing season, small mineral fertilizing from potash and phosphorus fertilizers (1 tsp per 3 l) may be needed. Nitrogen is not needed.
To protect the home garden from pest bugs, it is better to spray with biological products like Fitoverm. The main thing is to consider how many days after spraying the pods can be safely eaten. To prevent fungal and bacterial diseases, the leaves should be rinsed with Fitosporin a couple of times before flowering.